This Snowflake Backdrop is sponsored by bubly. All opinions are ours alone.
This post may contain affiliate links, which help us support this site.
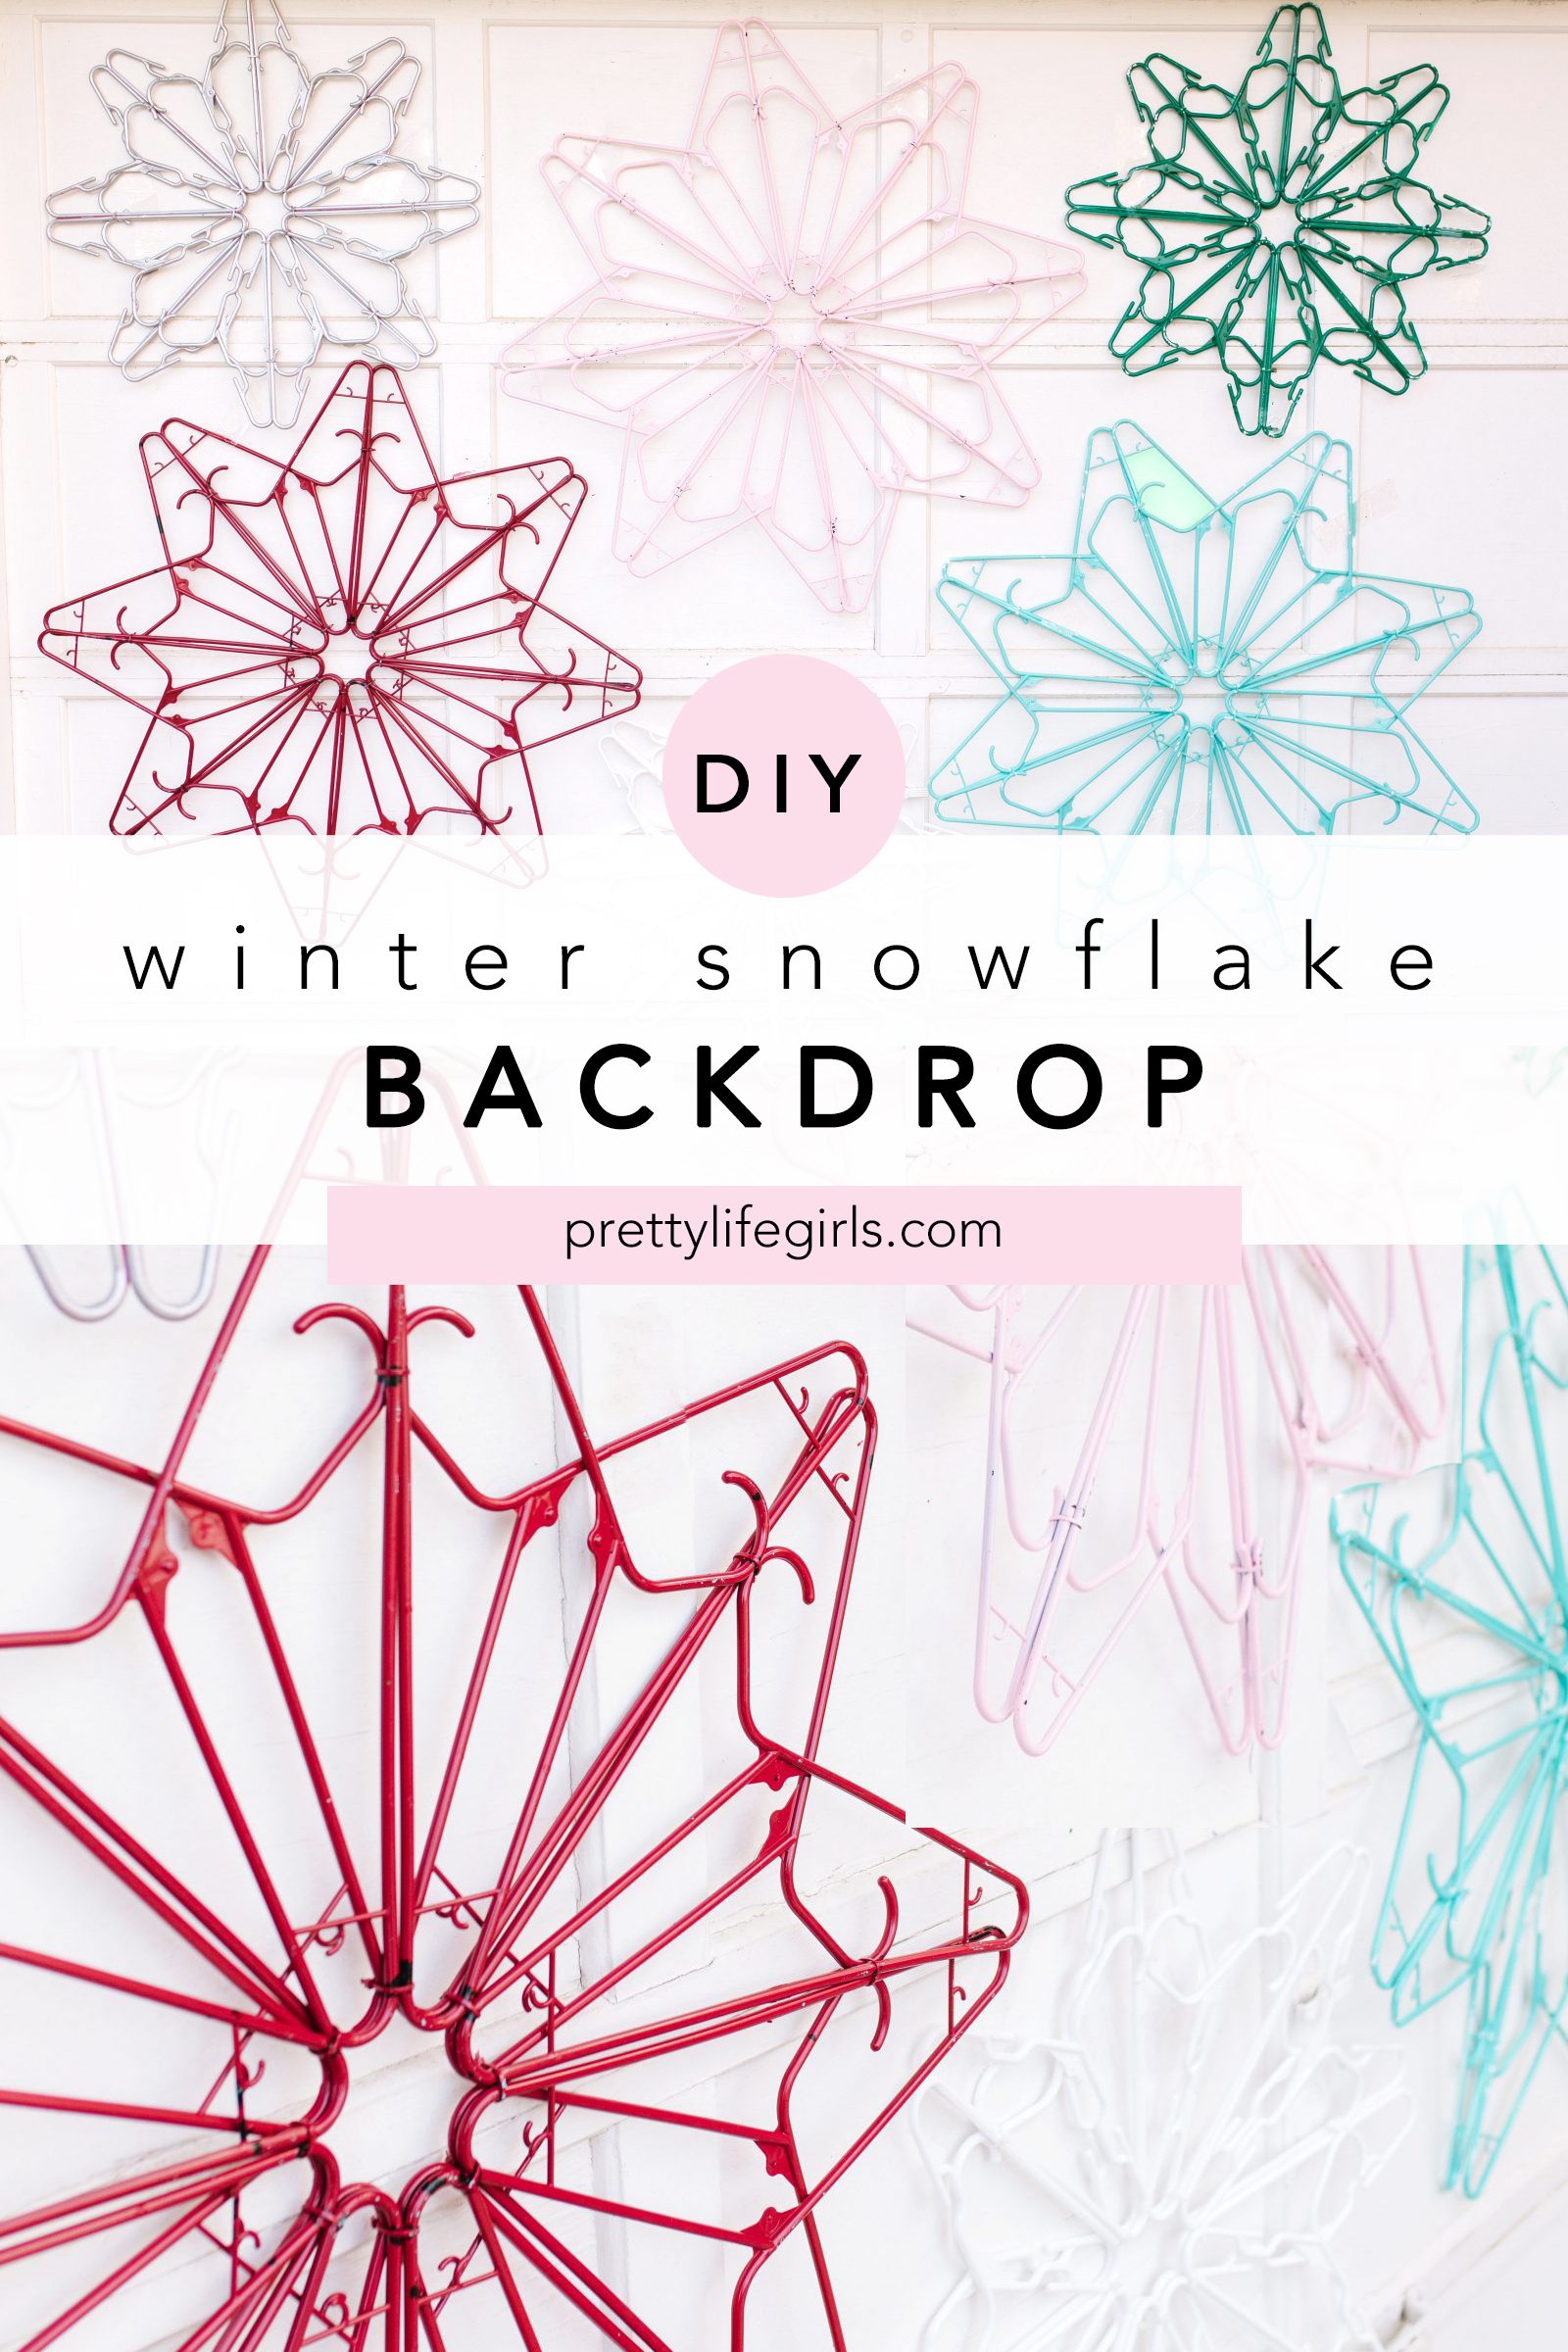
We found a “new normal” over the summer and into back-to-school season, and now it looks as though this holiday season is going to require a bit of adjusting as well. The great part is, whether your gatherings have to go from in-person to masked/social distanced or virtual, Covid can’t stop us from decorating the heck out of our spaces for the holidays. So, today we are teaming up with our friends at bubly to show you how to make this fun, graphic snowflake backdrop from hangers (we learned it here), perfect for snapping pics at a party, or as a fun and festive Zoom background! bubly is our favorite sparkly beverage for making festive holiday mocktails and is the perfect addition to any party, real or virtual! Santa, send bubly!

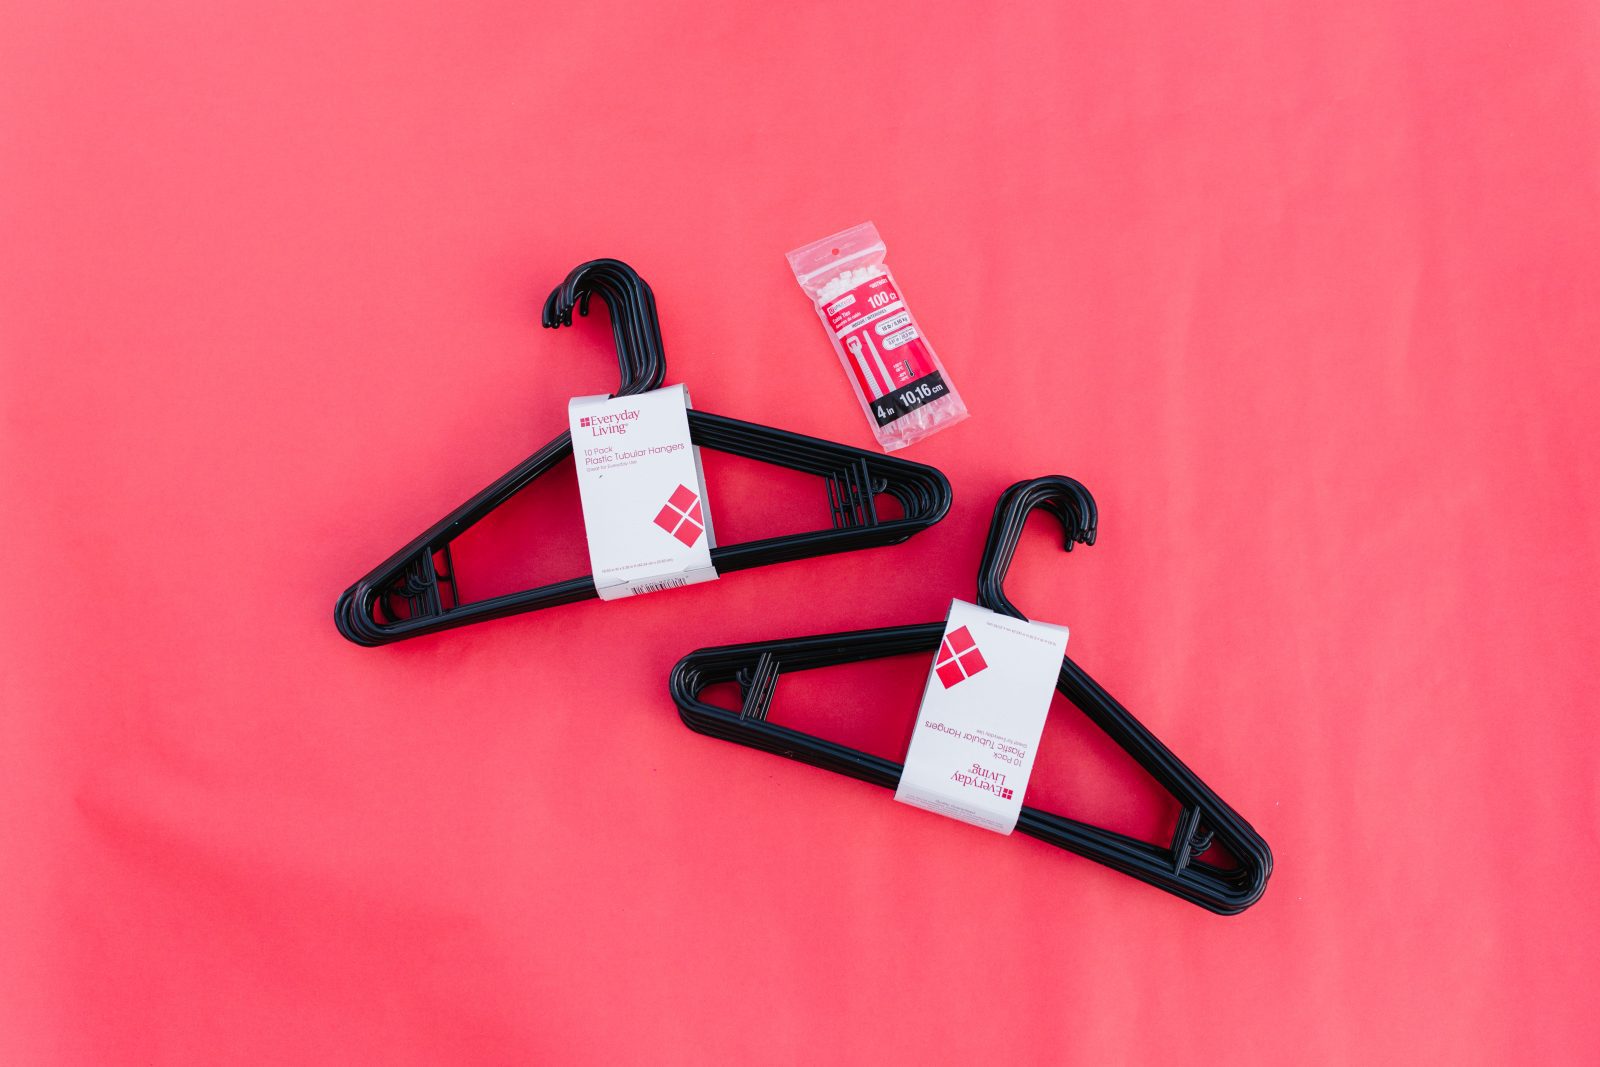
Supplies needed to make a Snowflake Backdrop
Plastic hangers (16 per snowflake)
Zip ties (16 per snowflake)
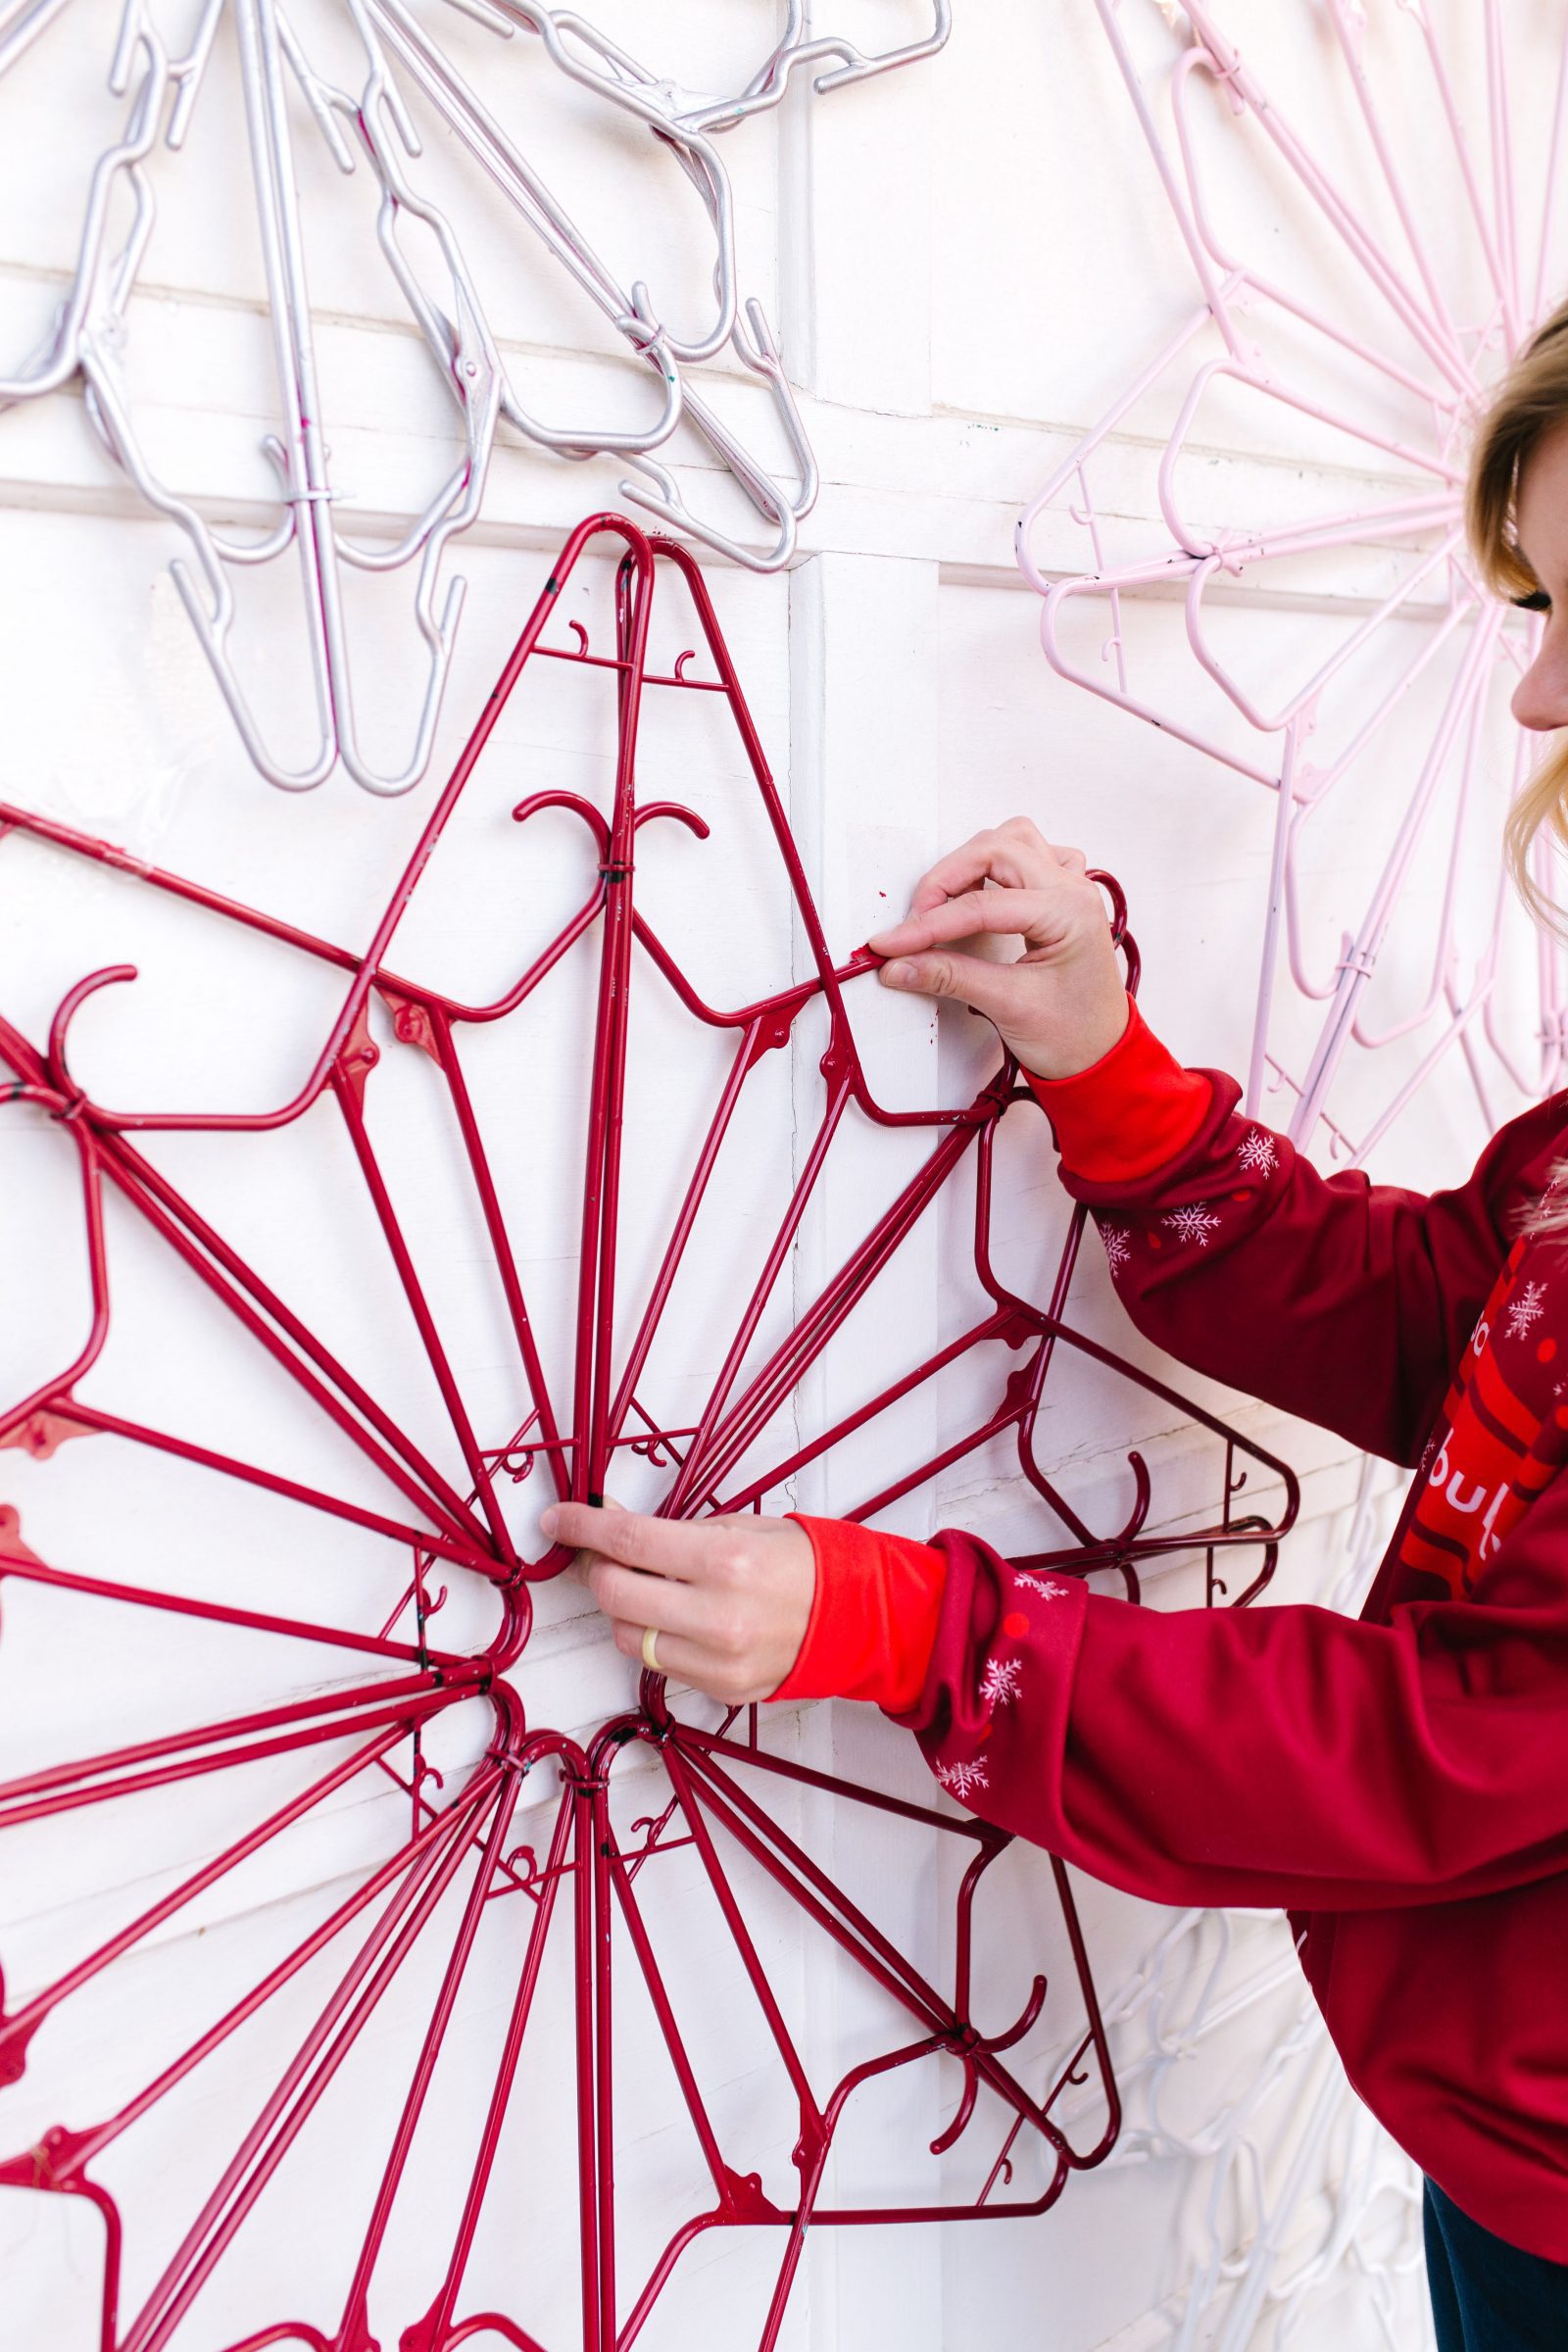
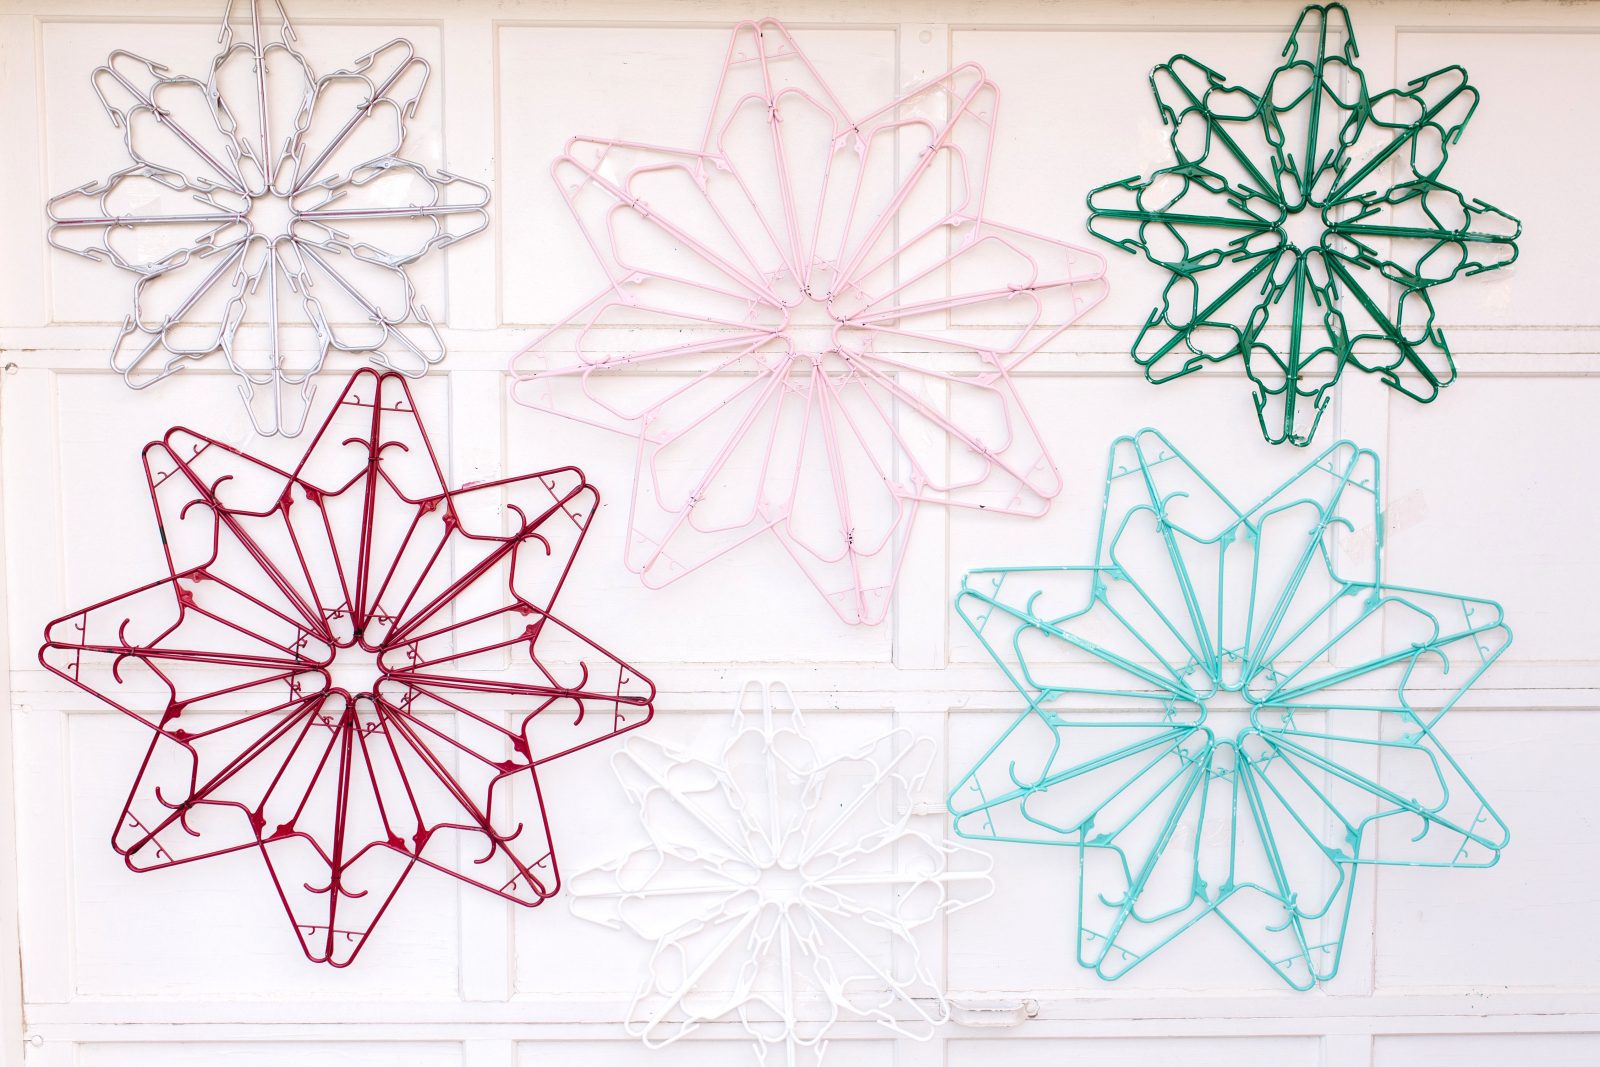
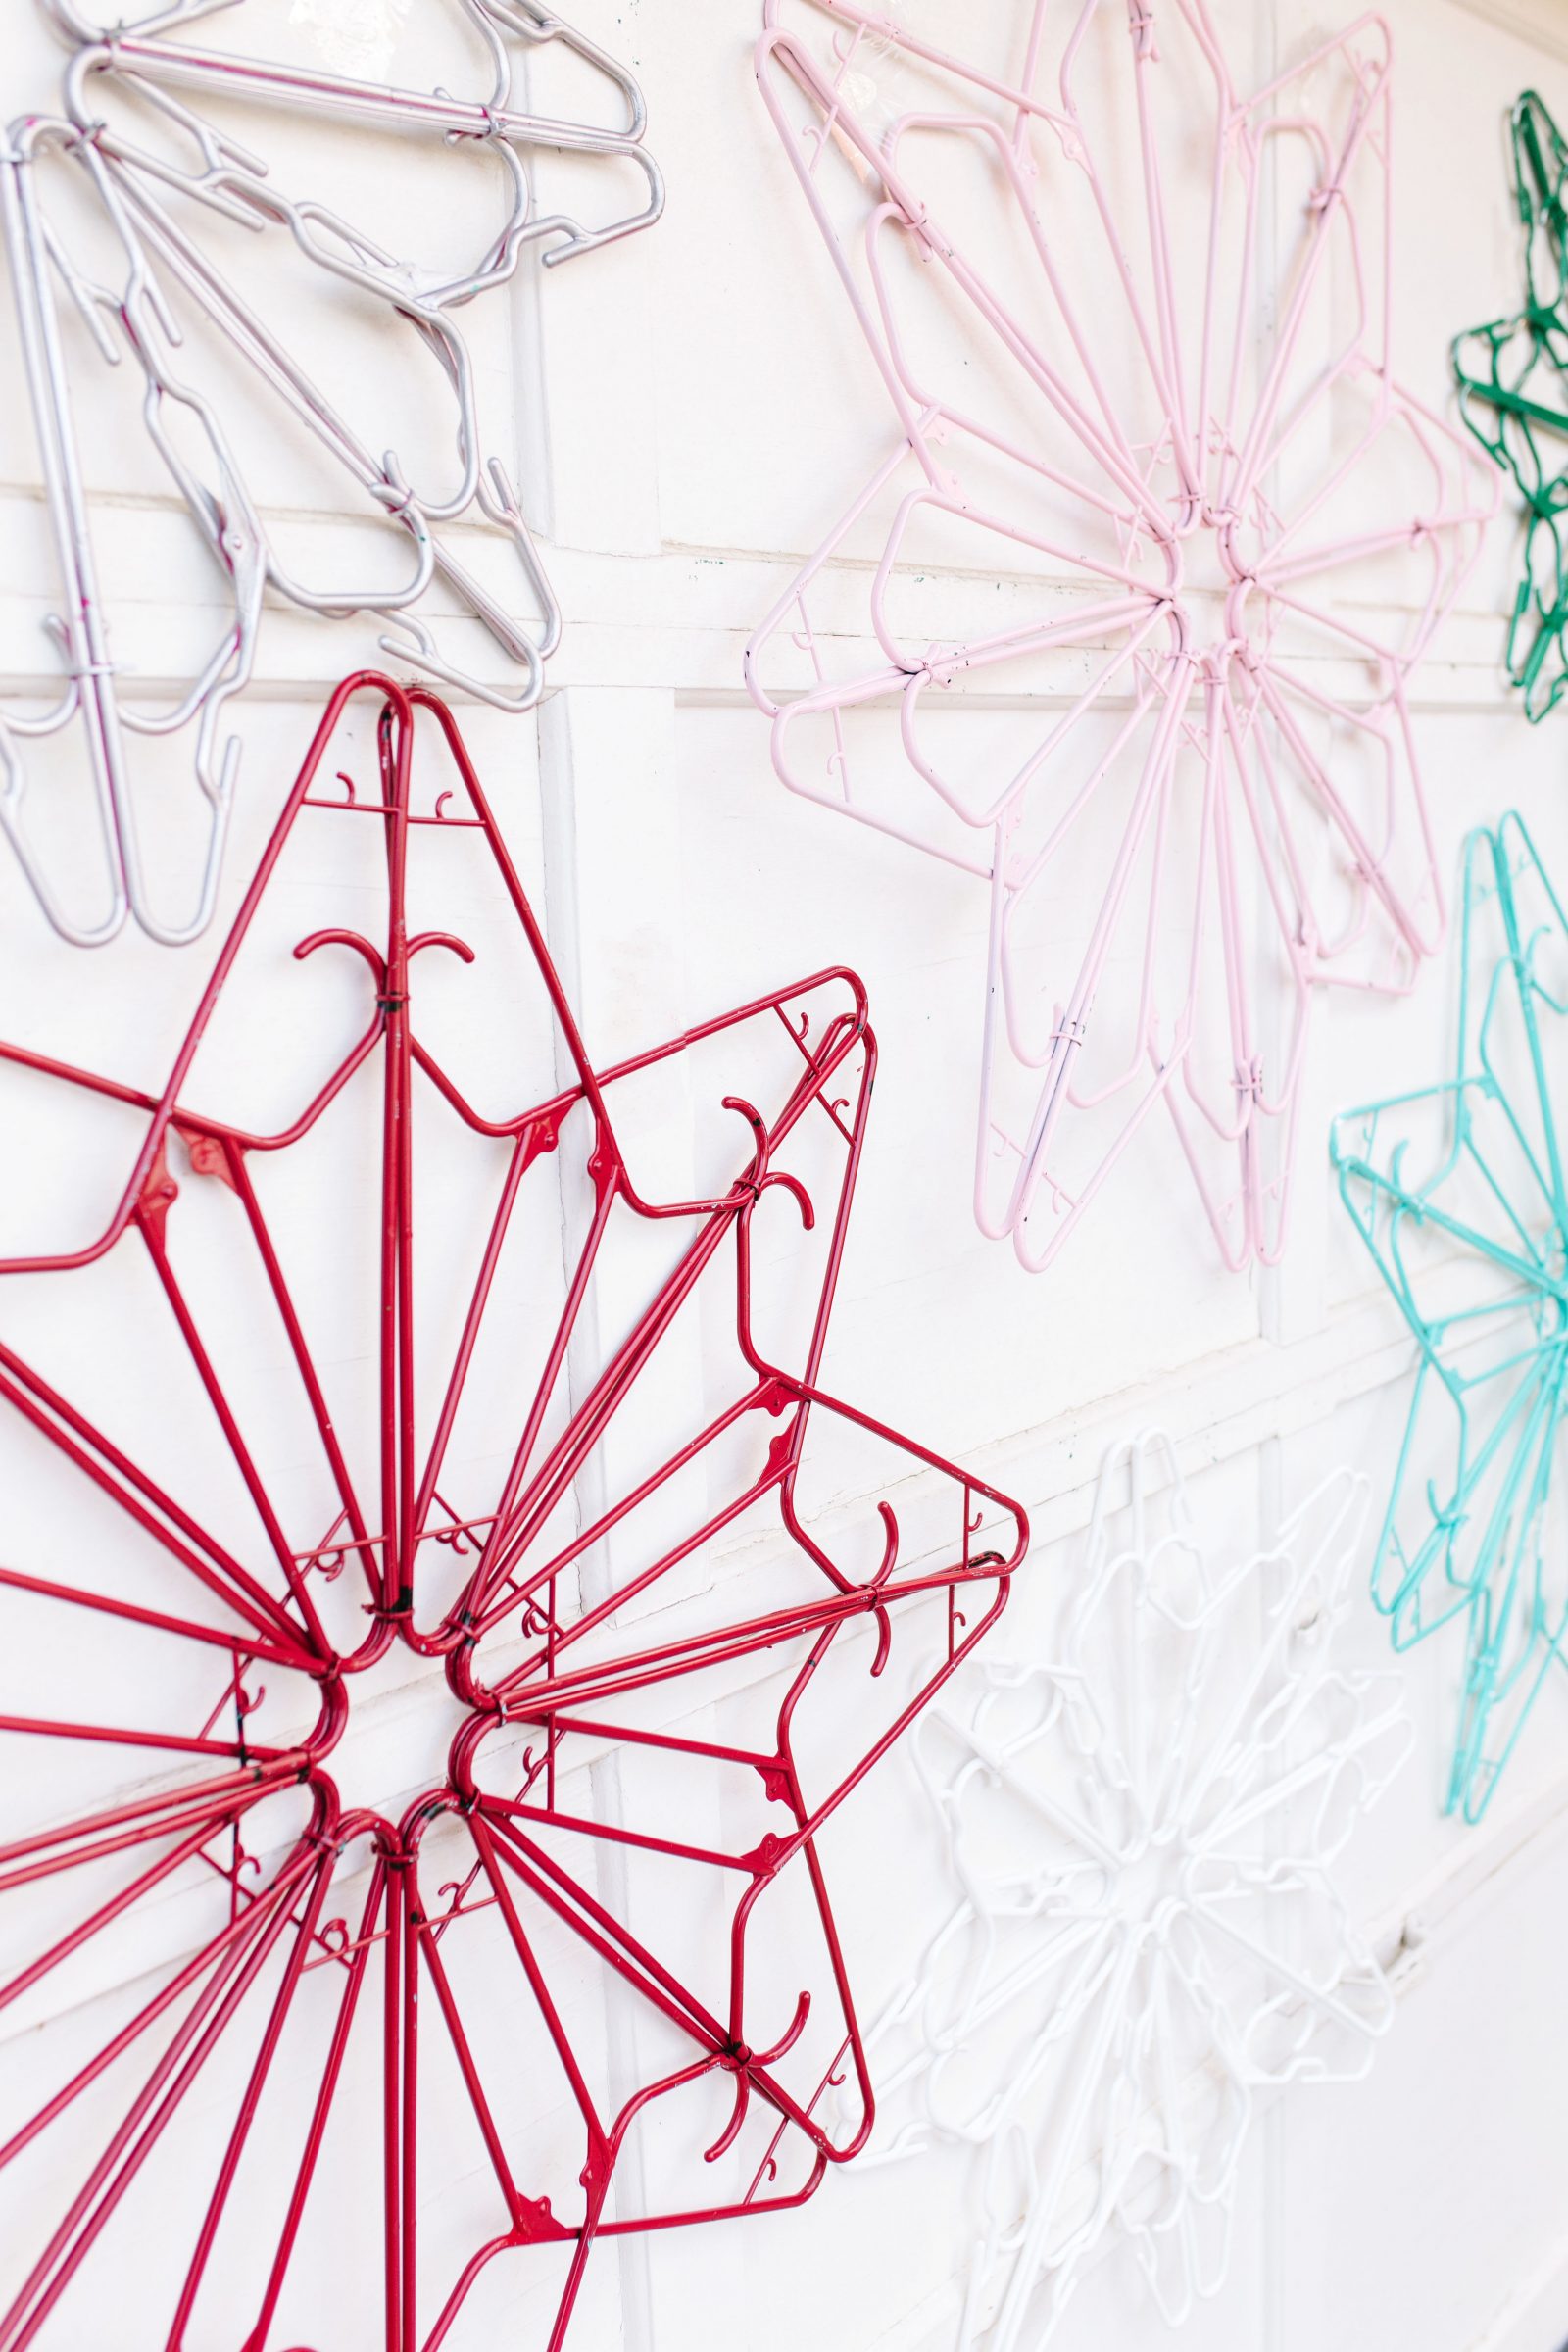
Spray paint, various colors
Wall hooks
How to make a Snowflake Backdrop
Step 1: Lay the straight bottoms of two hangers together, making sure the hooks are facing the same way.
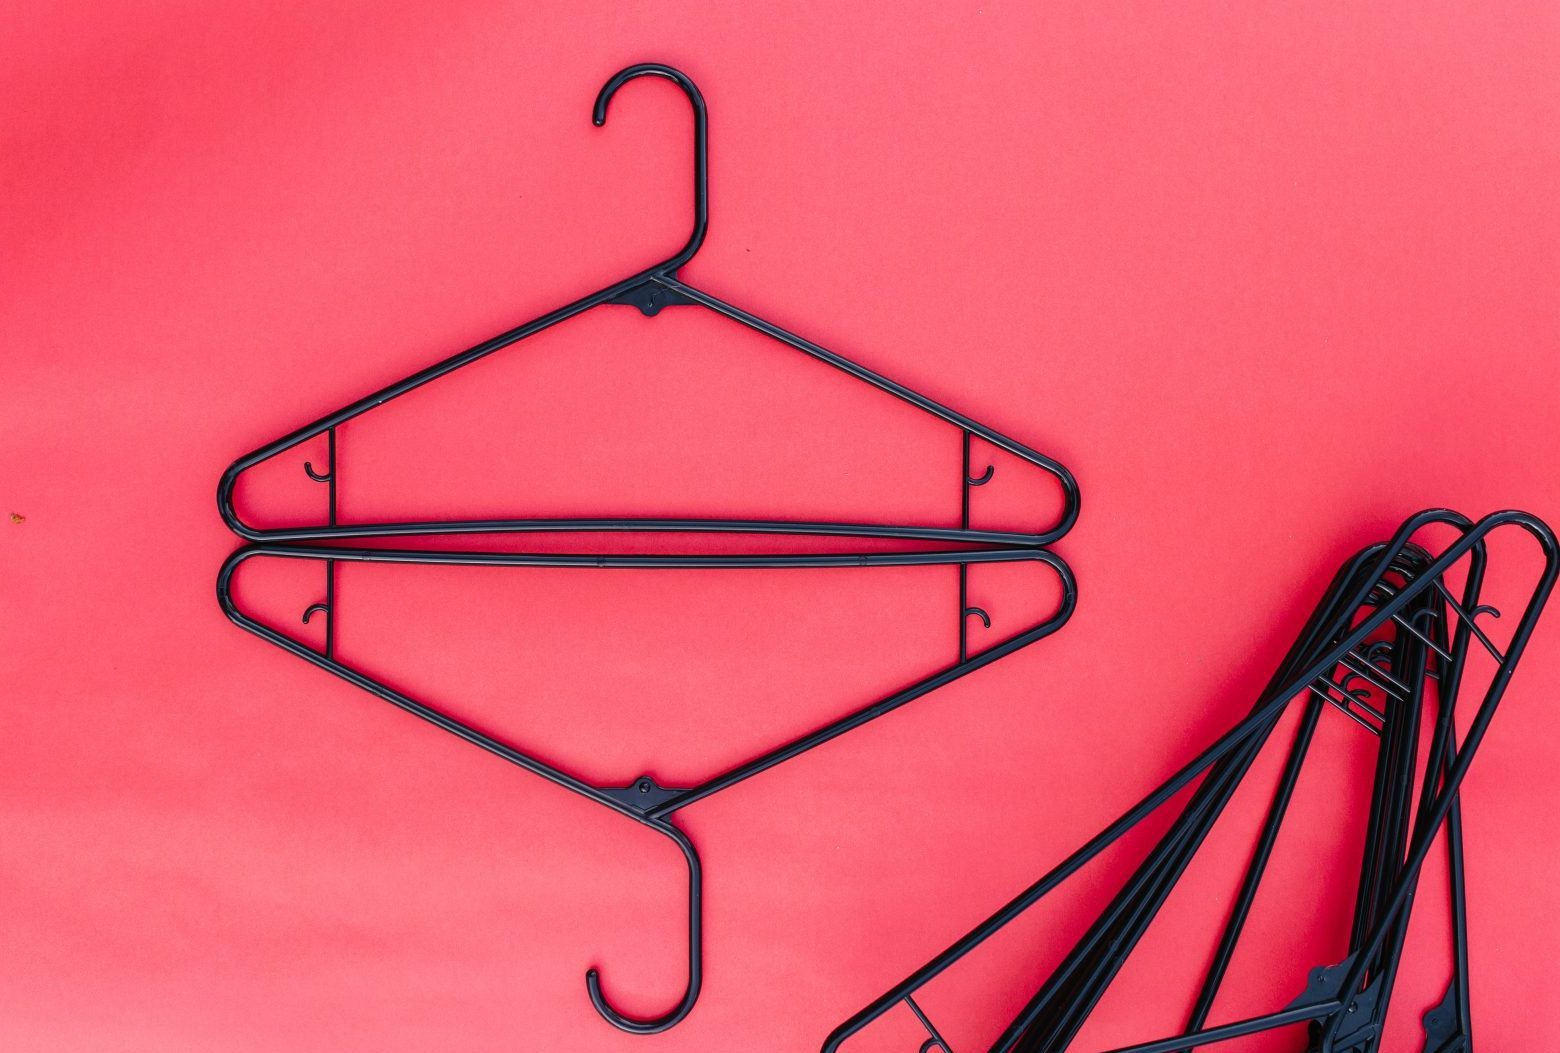
Step 2: Repeat step one with three additional sets of hangers. Then arrange the four total sets, with the hooks and inner sides touching, to create a diamond shape, as pictured.
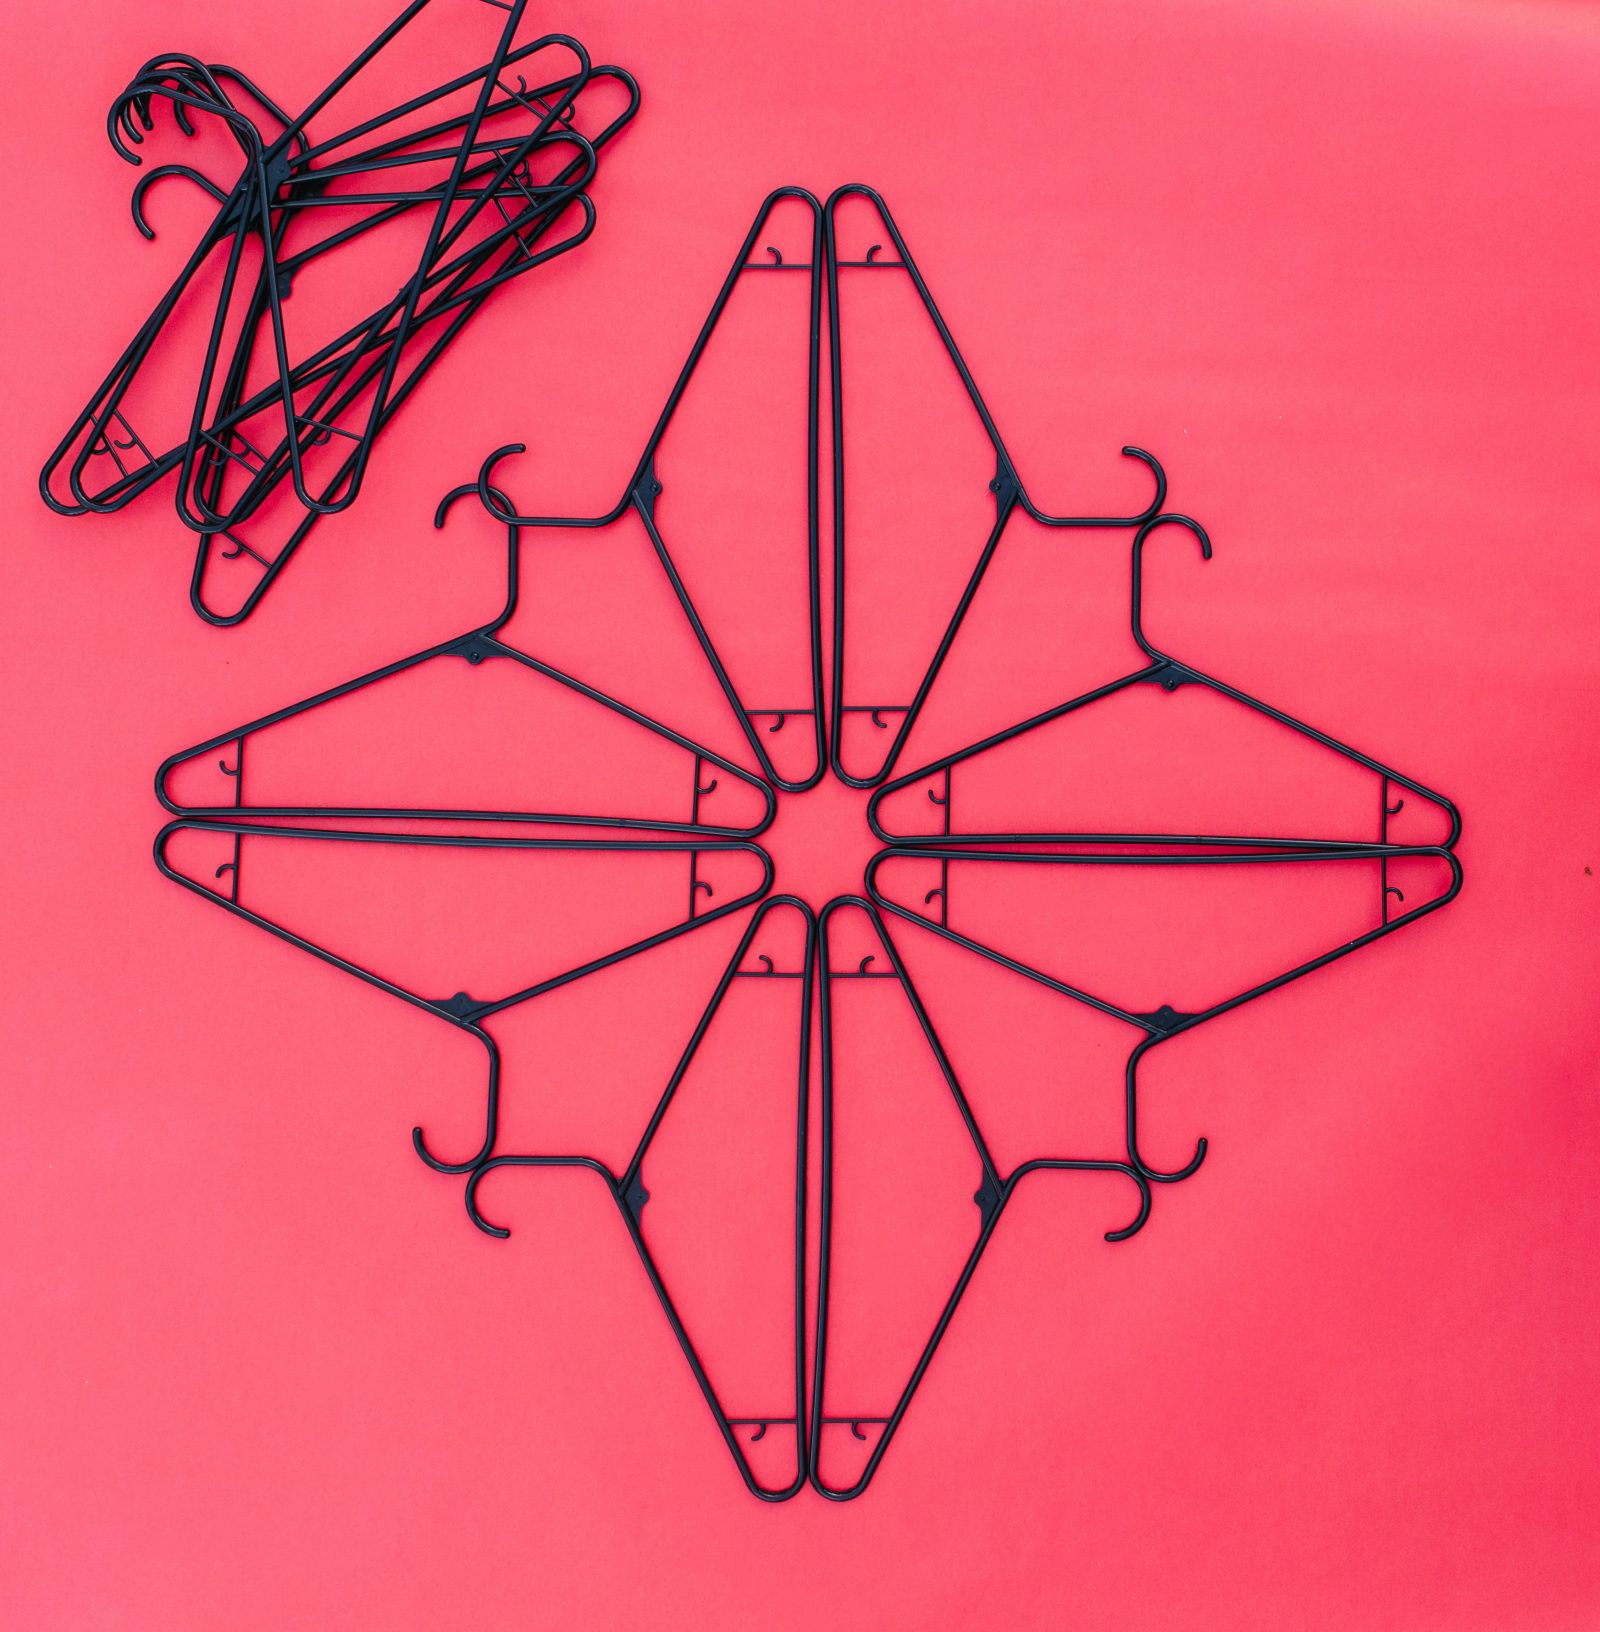
Step 3: With another set of hangers, lay the straight bottoms of the new set over the first layer where the hooks meet and aligning the inner sides of both layers.
Step 4: Repeat step three with the remaining hangers.
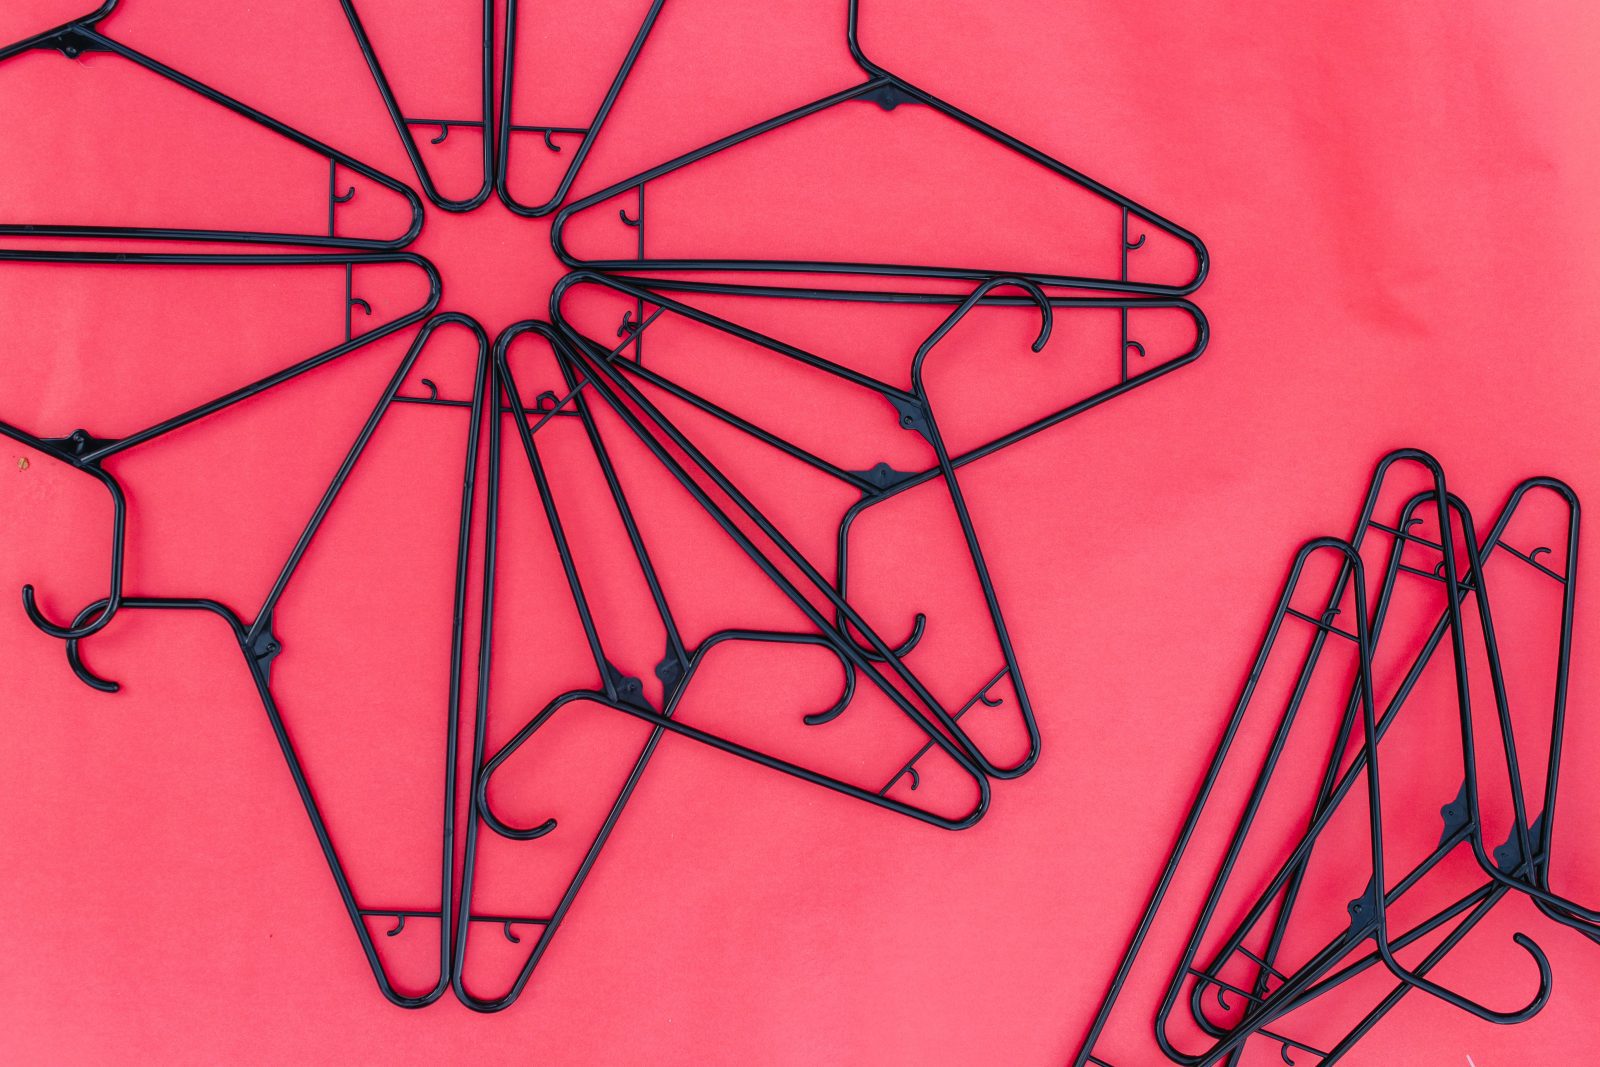
Step 5: Begin securing the hangers by attaching zip ties to every point where hooks and straight bottoms meet. There will be eight of these points that connect four hangers.
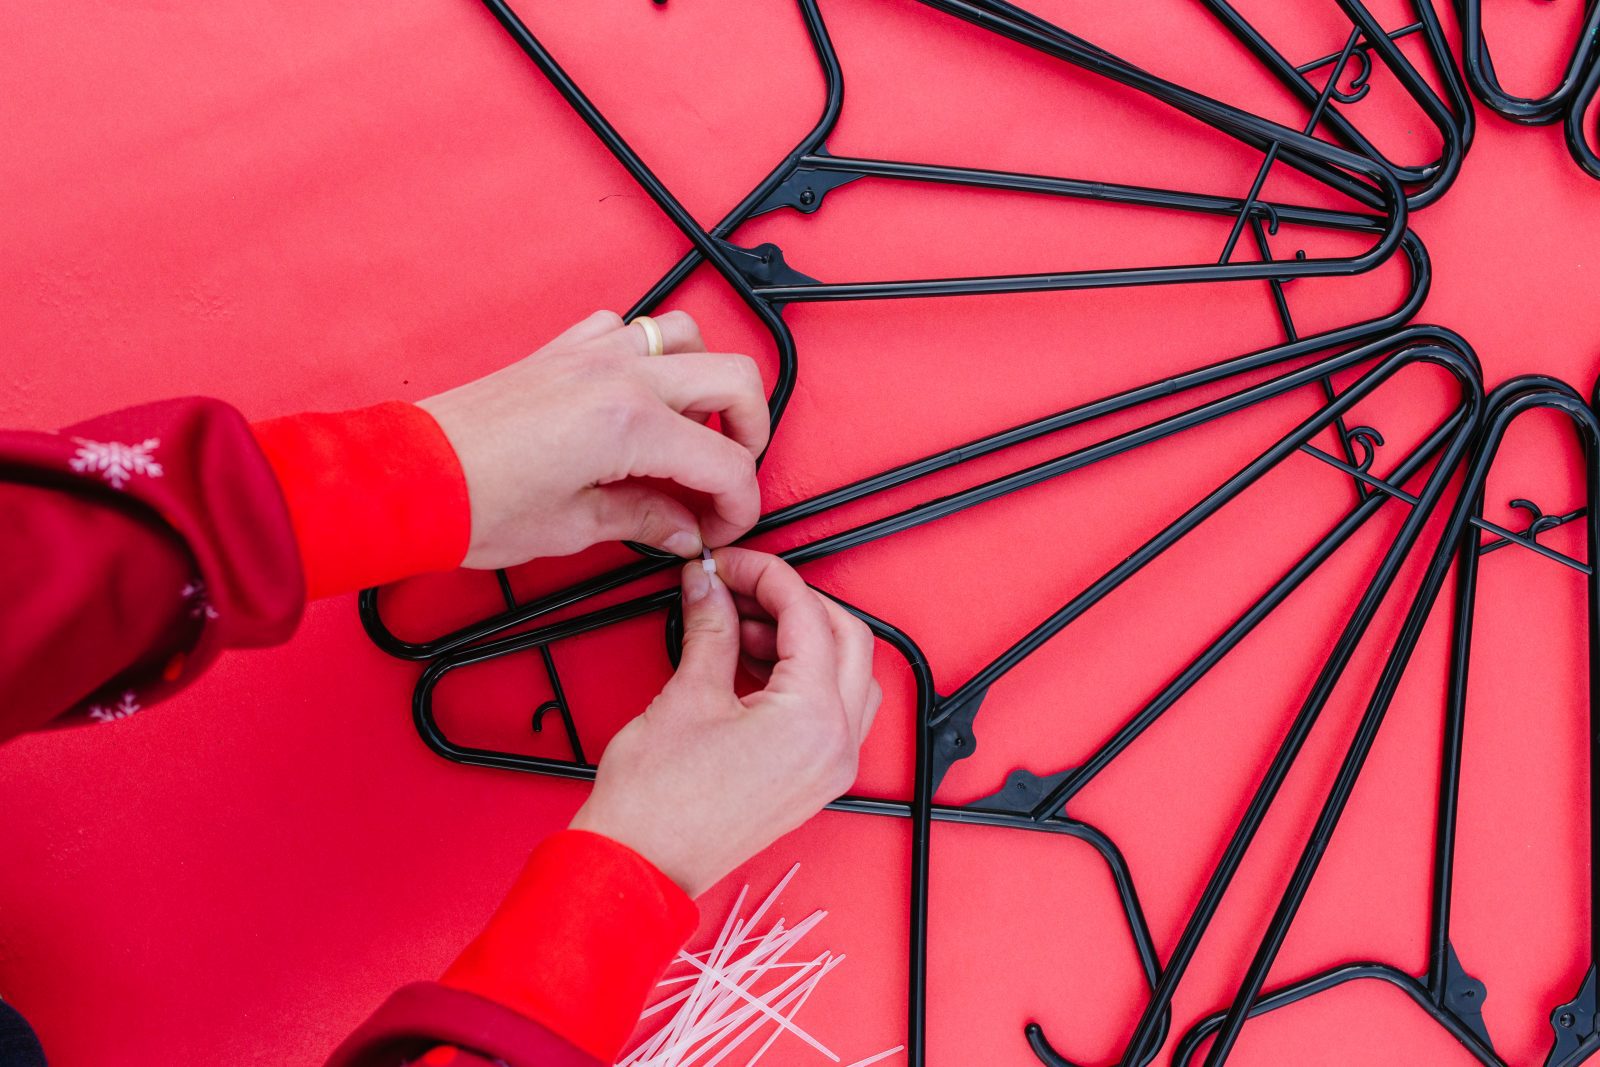
Step 6: Secure the snowflake further by attaching zip ties to the center points – again there will be eight of these points that connect four hangers.

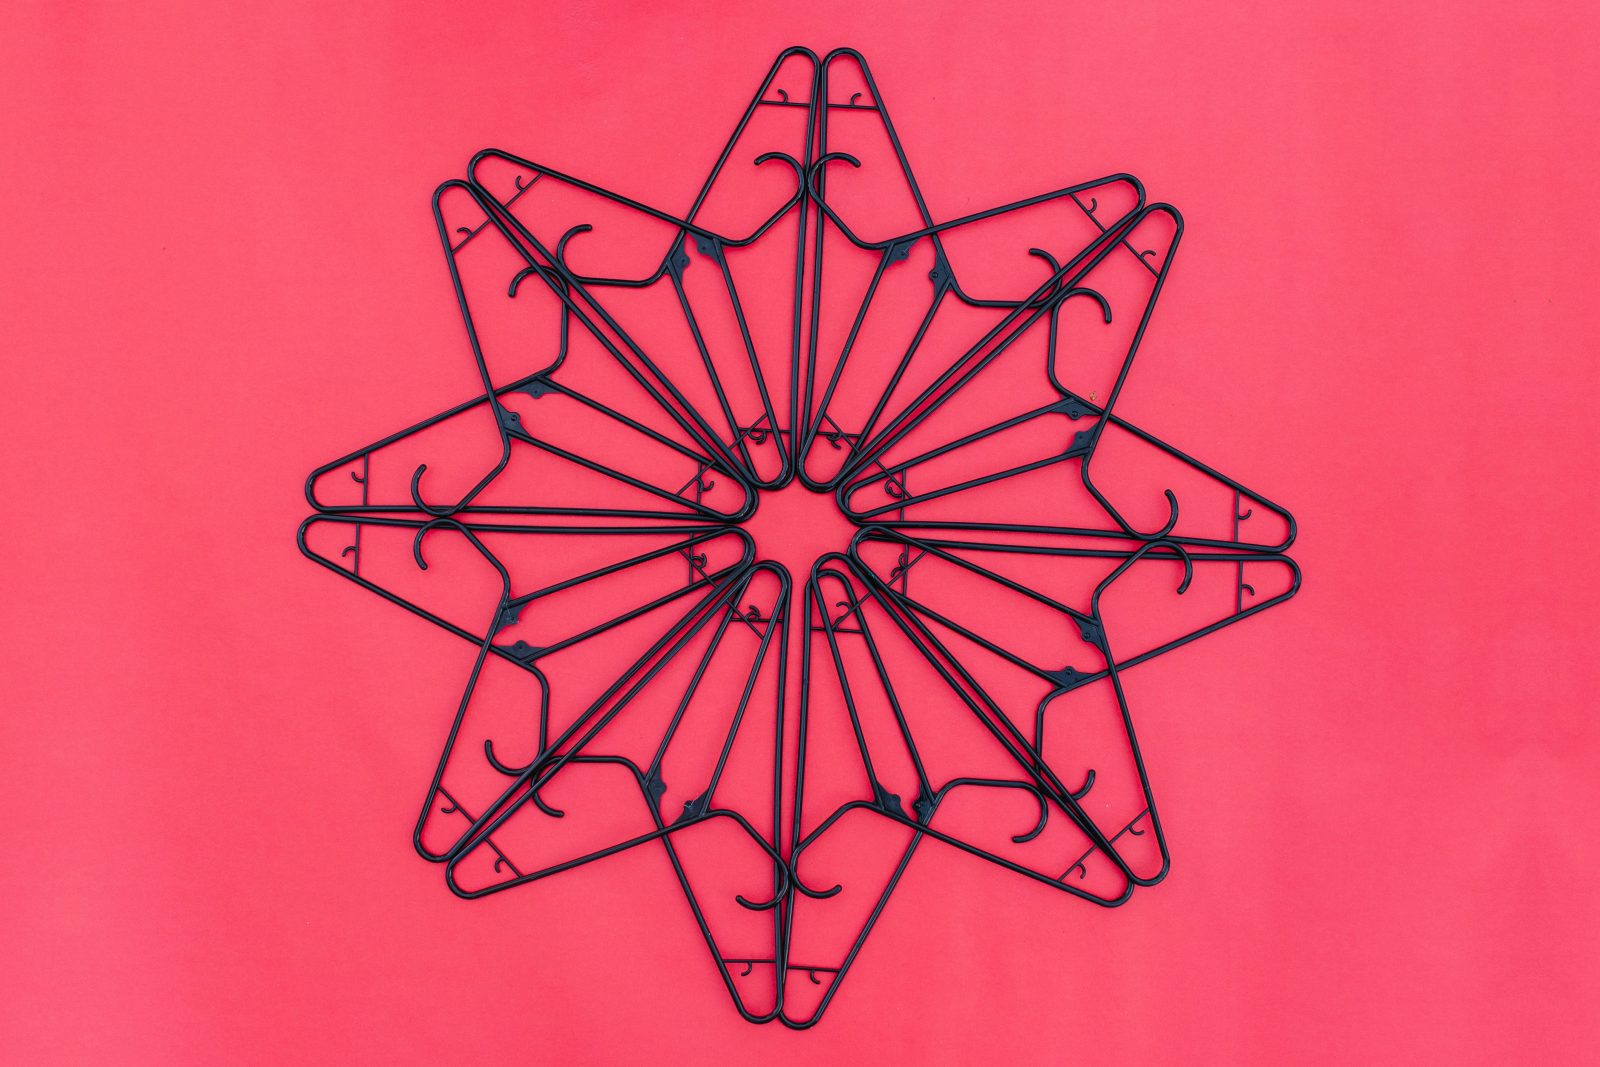
Step 7: Spray paint the snowflakes, if desired, and hang them with wall hooks.


Happy making!
Sam
Be sure to check out these other projects!
 DIY Macrame Christmas Ornaments