This post was originally published in November 2020 and updated as of November 2022.
Follow this simple DIY Christmas Village tutorial to make durable and adorable villages from unfinished wood houses, paint, Mod Podge, and paper!
How to Make a DIY Christmas Village with Modge Podge
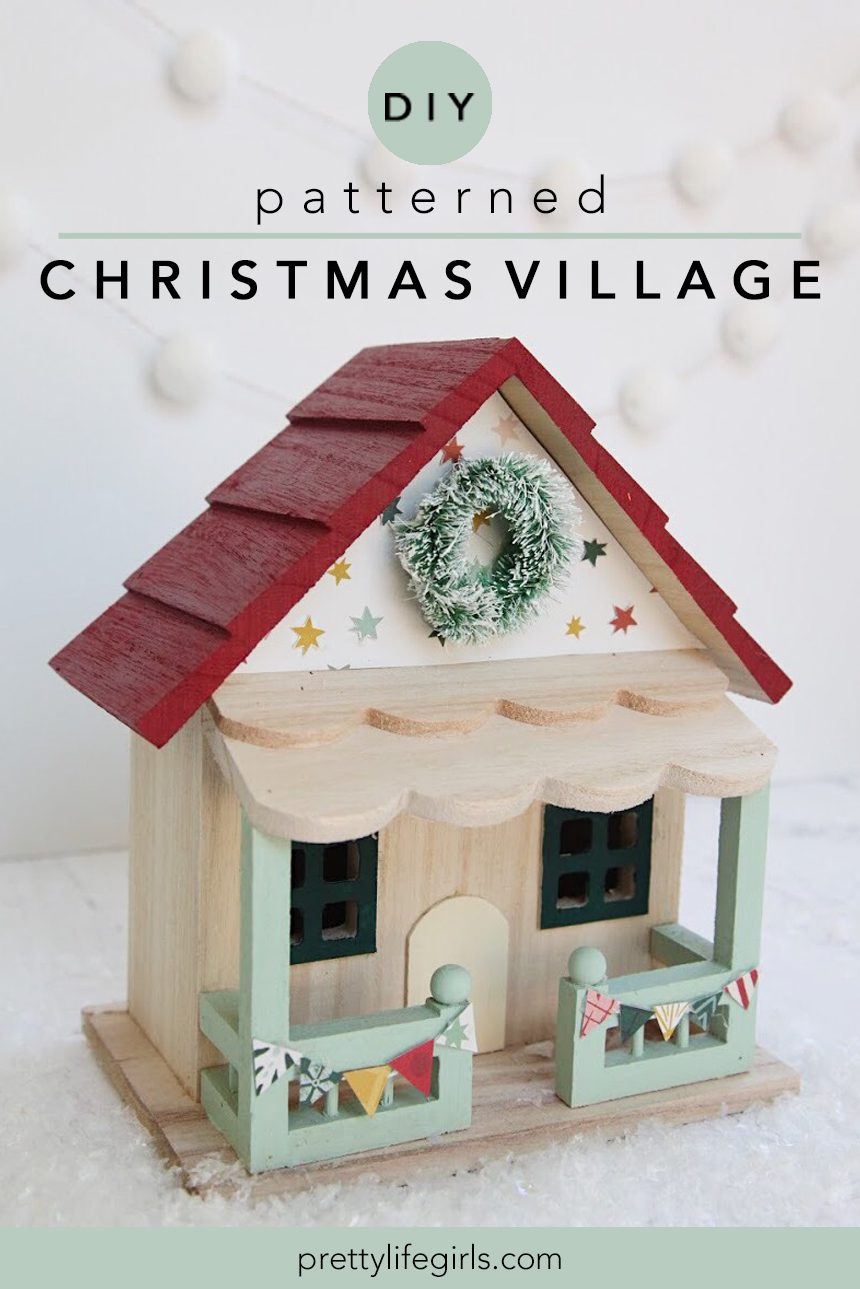
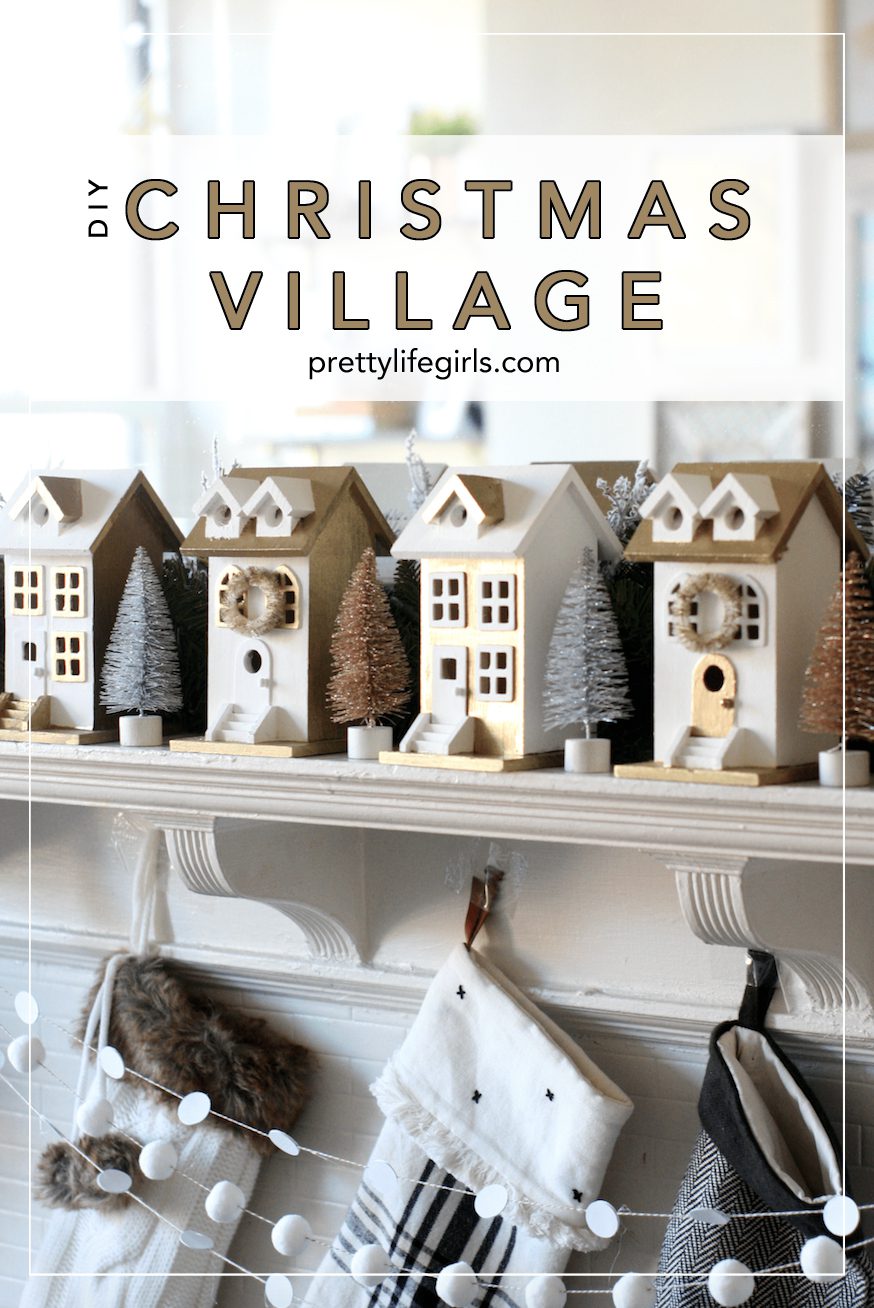
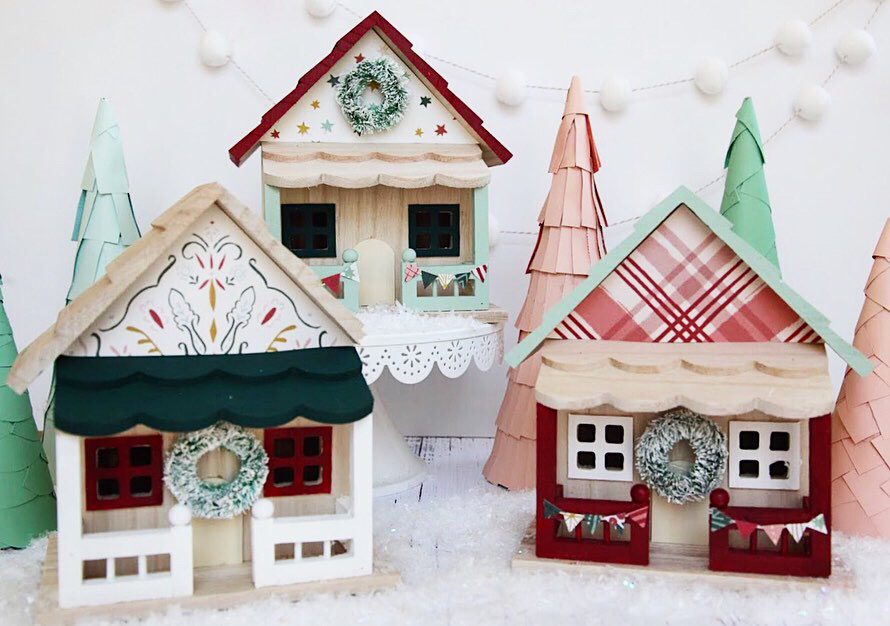
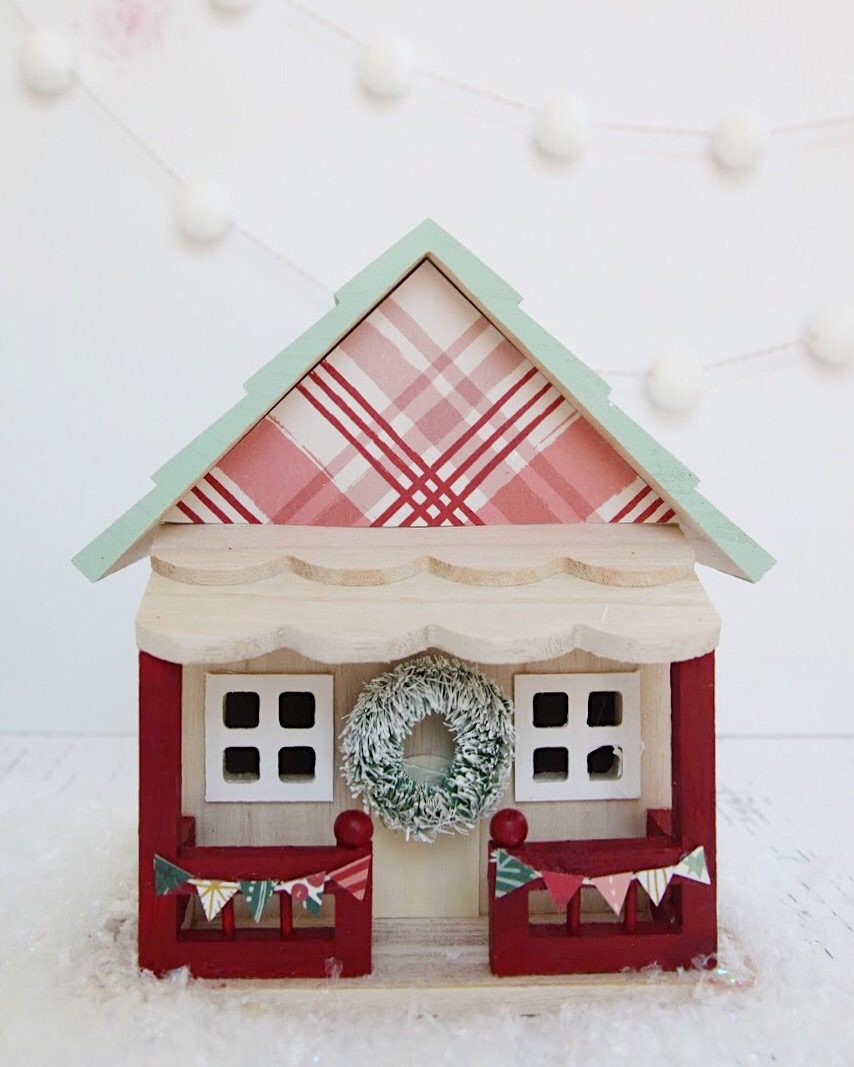
If you were around this blog on Halloween, you know that we have a thing for villages, and the most iconic of them all has to be the DIY Christmas village! There is something so magical about these tiny festive towns, and everyone has a different take on them! When I was younger I remember going to my aunt’s house and tip-toeing at the mantel to take in every detail of her beautiful ceramic village, complete with intricate lamp posts and characters decorating Christmas trees. And while I love those fragile versions, my current phase of life does not allow anything that is particularly breakable to be on display (i.e. the tiny tornadoes I live with). So, we decided to make villages that are a little more durable from unfinished wood houses!
We love these villages because there are so many possibilities for decorating them! We use craft paper and Mod Podge to add pattern and paint to add color, and between the two you can create a village that fits your personal aesthetic perfectly! Here is what you need to make them:
Supplies needed to make a DIY Christmas Village
Unfinished Wood Houses
Patterned Paper
Scissors
Mod Podge + Brush
Multi Surface Paint + Brush
Small Bottle Brush Wreaths
String
How to make a DIY Christmas Village
Step 1. Begin by painting all of your desired surfaces. We left a few surfaces unfinished for a more rustic look, but you can paint as many as you’d like! We applied two coats and then let the paint dry completely.
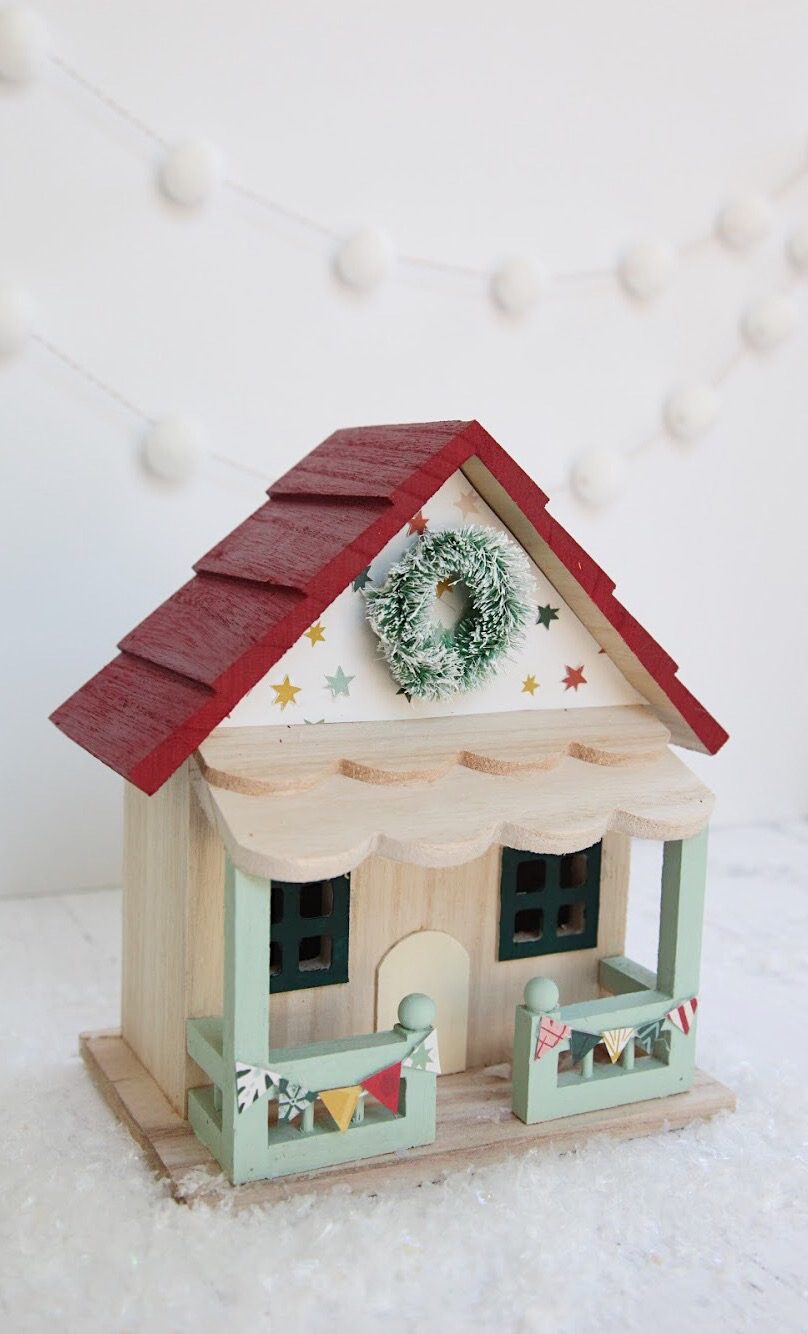
Step 2. Using scissors, cut the paper to a size that will fit inside the triangle area of the house. You can do this by tracing the shape of the house on the paper first, and then trimming a bit at a time until the triangle fits neatly on the house.
Step 3. Apply the paper to the house using Mod Podge and a paint brush. To do this, apply a thin layer to the area of the house where the paper will go as well as a thin layer to the backside of the paper. Then, press the paper onto the house and smooth any bubbles with your fingers. Let dry completely.
Step 4. Decorate your house by attaching a bottle brush wreath with hot glue, or by cutting paper into tiny triangles and glueing it to string to make a tiny bunting banner.
That’s it! Aren’t they so darling? We are ready to move in!
We love this project because it is so adaptable, you can even get kids in on the fun! Now, we want to hear about your holiday villages! Do you have one you pull out each year?

Be sure to join our email list to stay up-to-date on all things Pretty Life Girls!
Happy making!
ox. Liz