


This post may contain affiliate links, which help us support this site.
 This year I bought my kids a little Christmas tree that they could decorate and play with. On the outside, this looks like I am being a nice, fun mom, but really I just want them to keep their hands off my fancy tree. After we set it up we decided that it needed some fun and colorful ornaments, so I decided to go through one of my craft cupboards to see what I could come up with. When I stumbled upon a bag of oven-bake clay and some mini cutters from a project I did months ago, my wheels started turning! That’s how I came up with these clay Christmas ornaments.
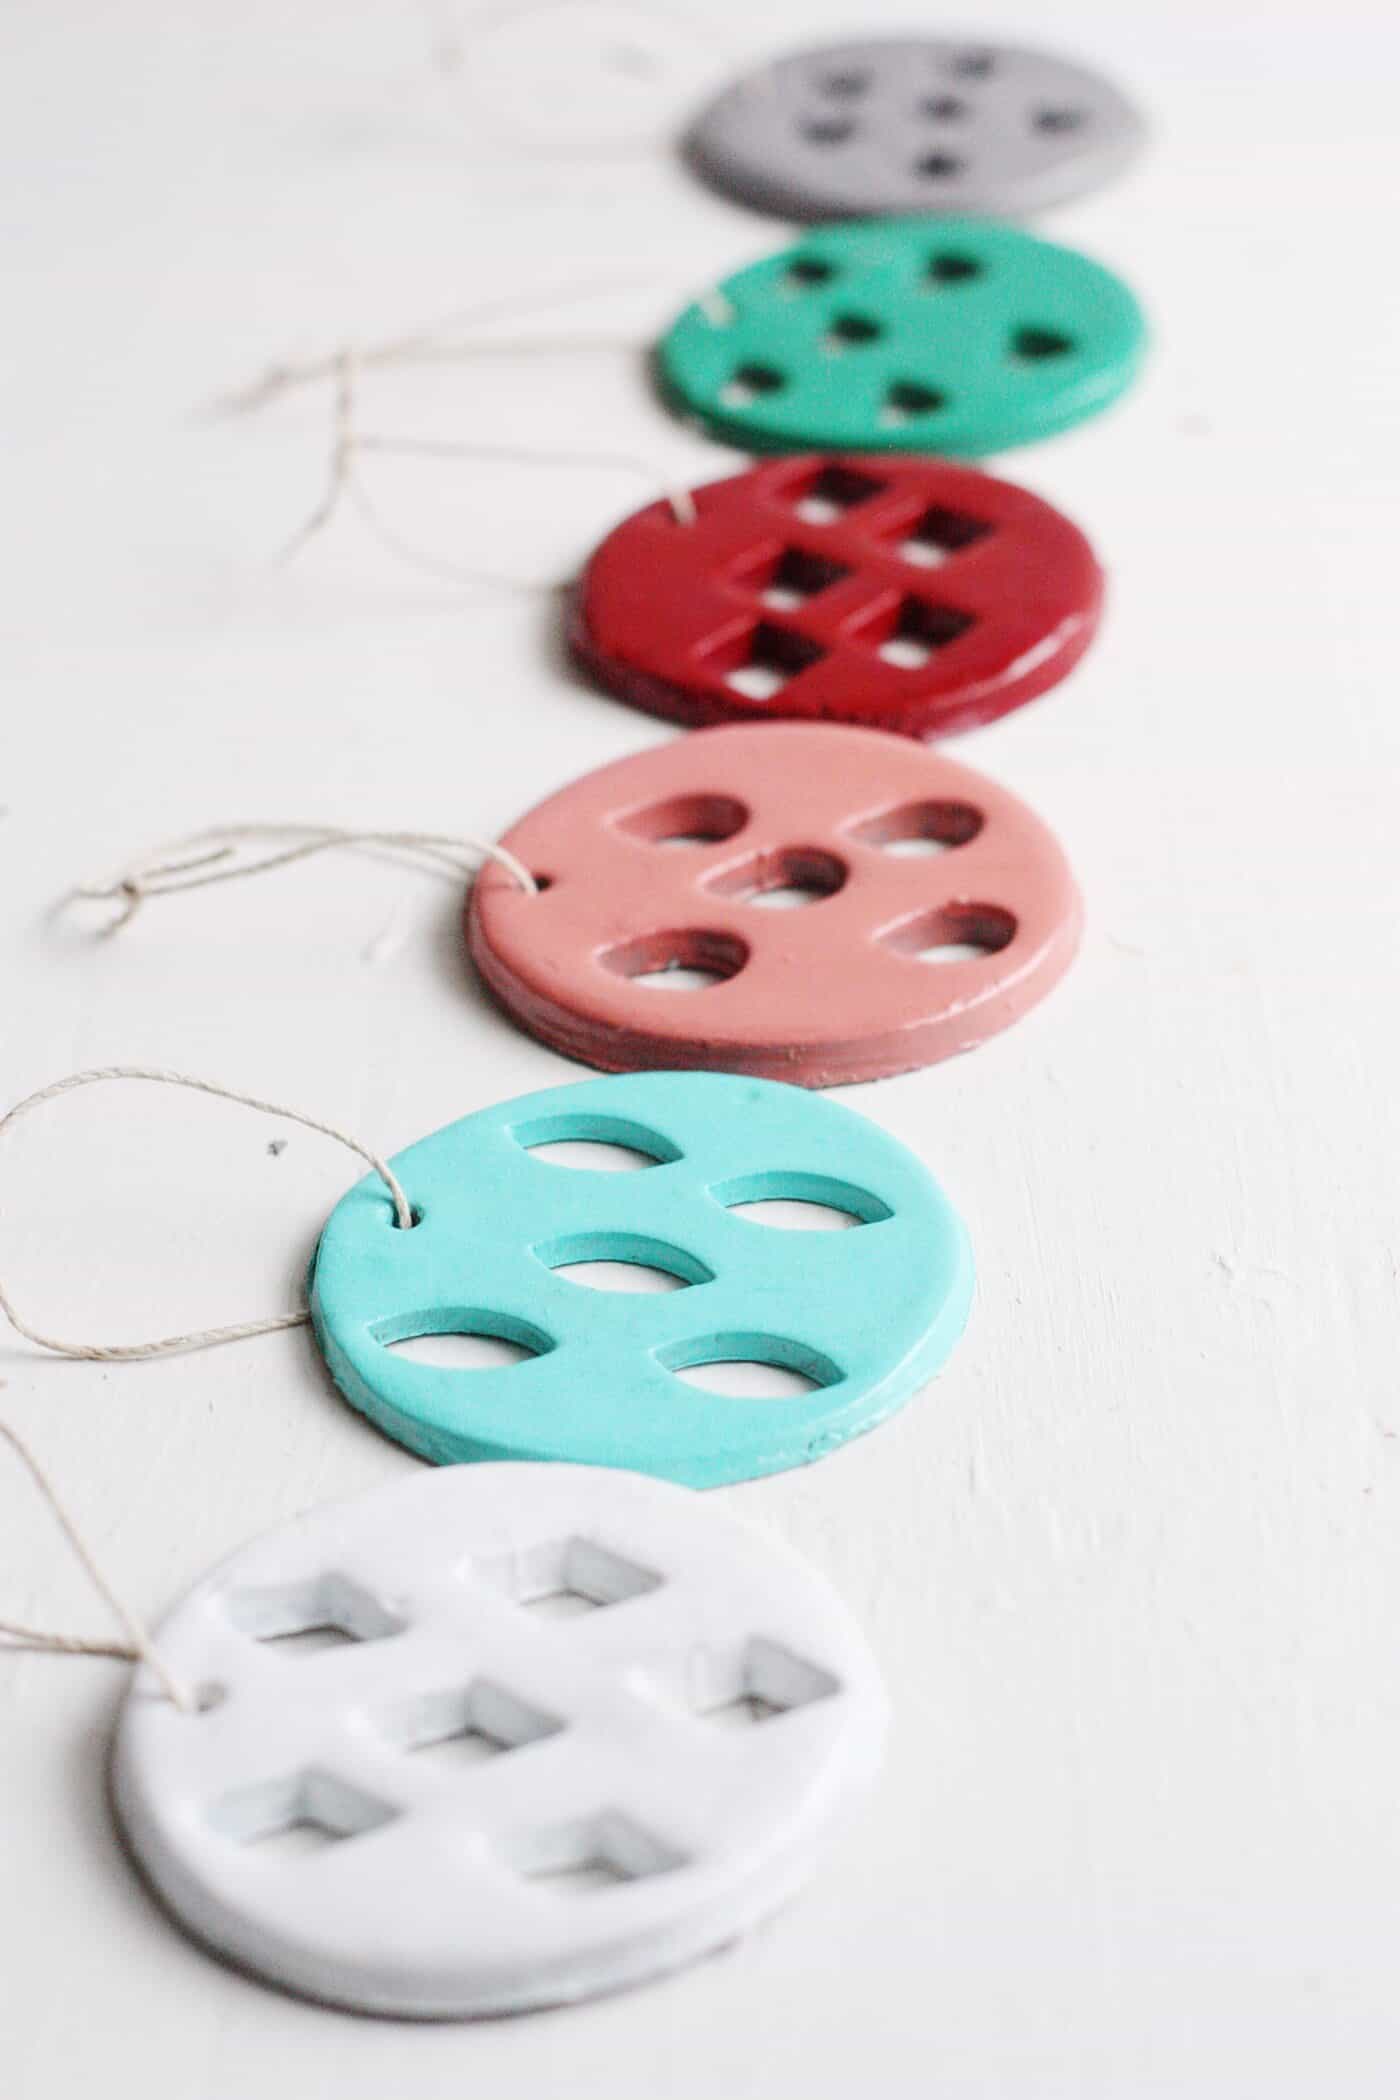
I love using oven-bake clay for projects because it is so easy to use, and it enables you to come up with projects that are truly unique since you create them from just a lump of clay! After rolling out the clay this idea for Stamped Geometric Clay Ornaments was born and I’m in love with them. These ornaments are so fun to make (and totally kid friendly!), and they turned out so cute I stole some right of the kids tree to put on my fancy tree. Don’t tell. Plus, they would be fun to customize with letters to make fun gift tags, too! Here’s how I did it:
 Supplies Needed:
- Oven-Bake Clay
- Mini Metal Cutters (I found mine here)
- Rolling Pin
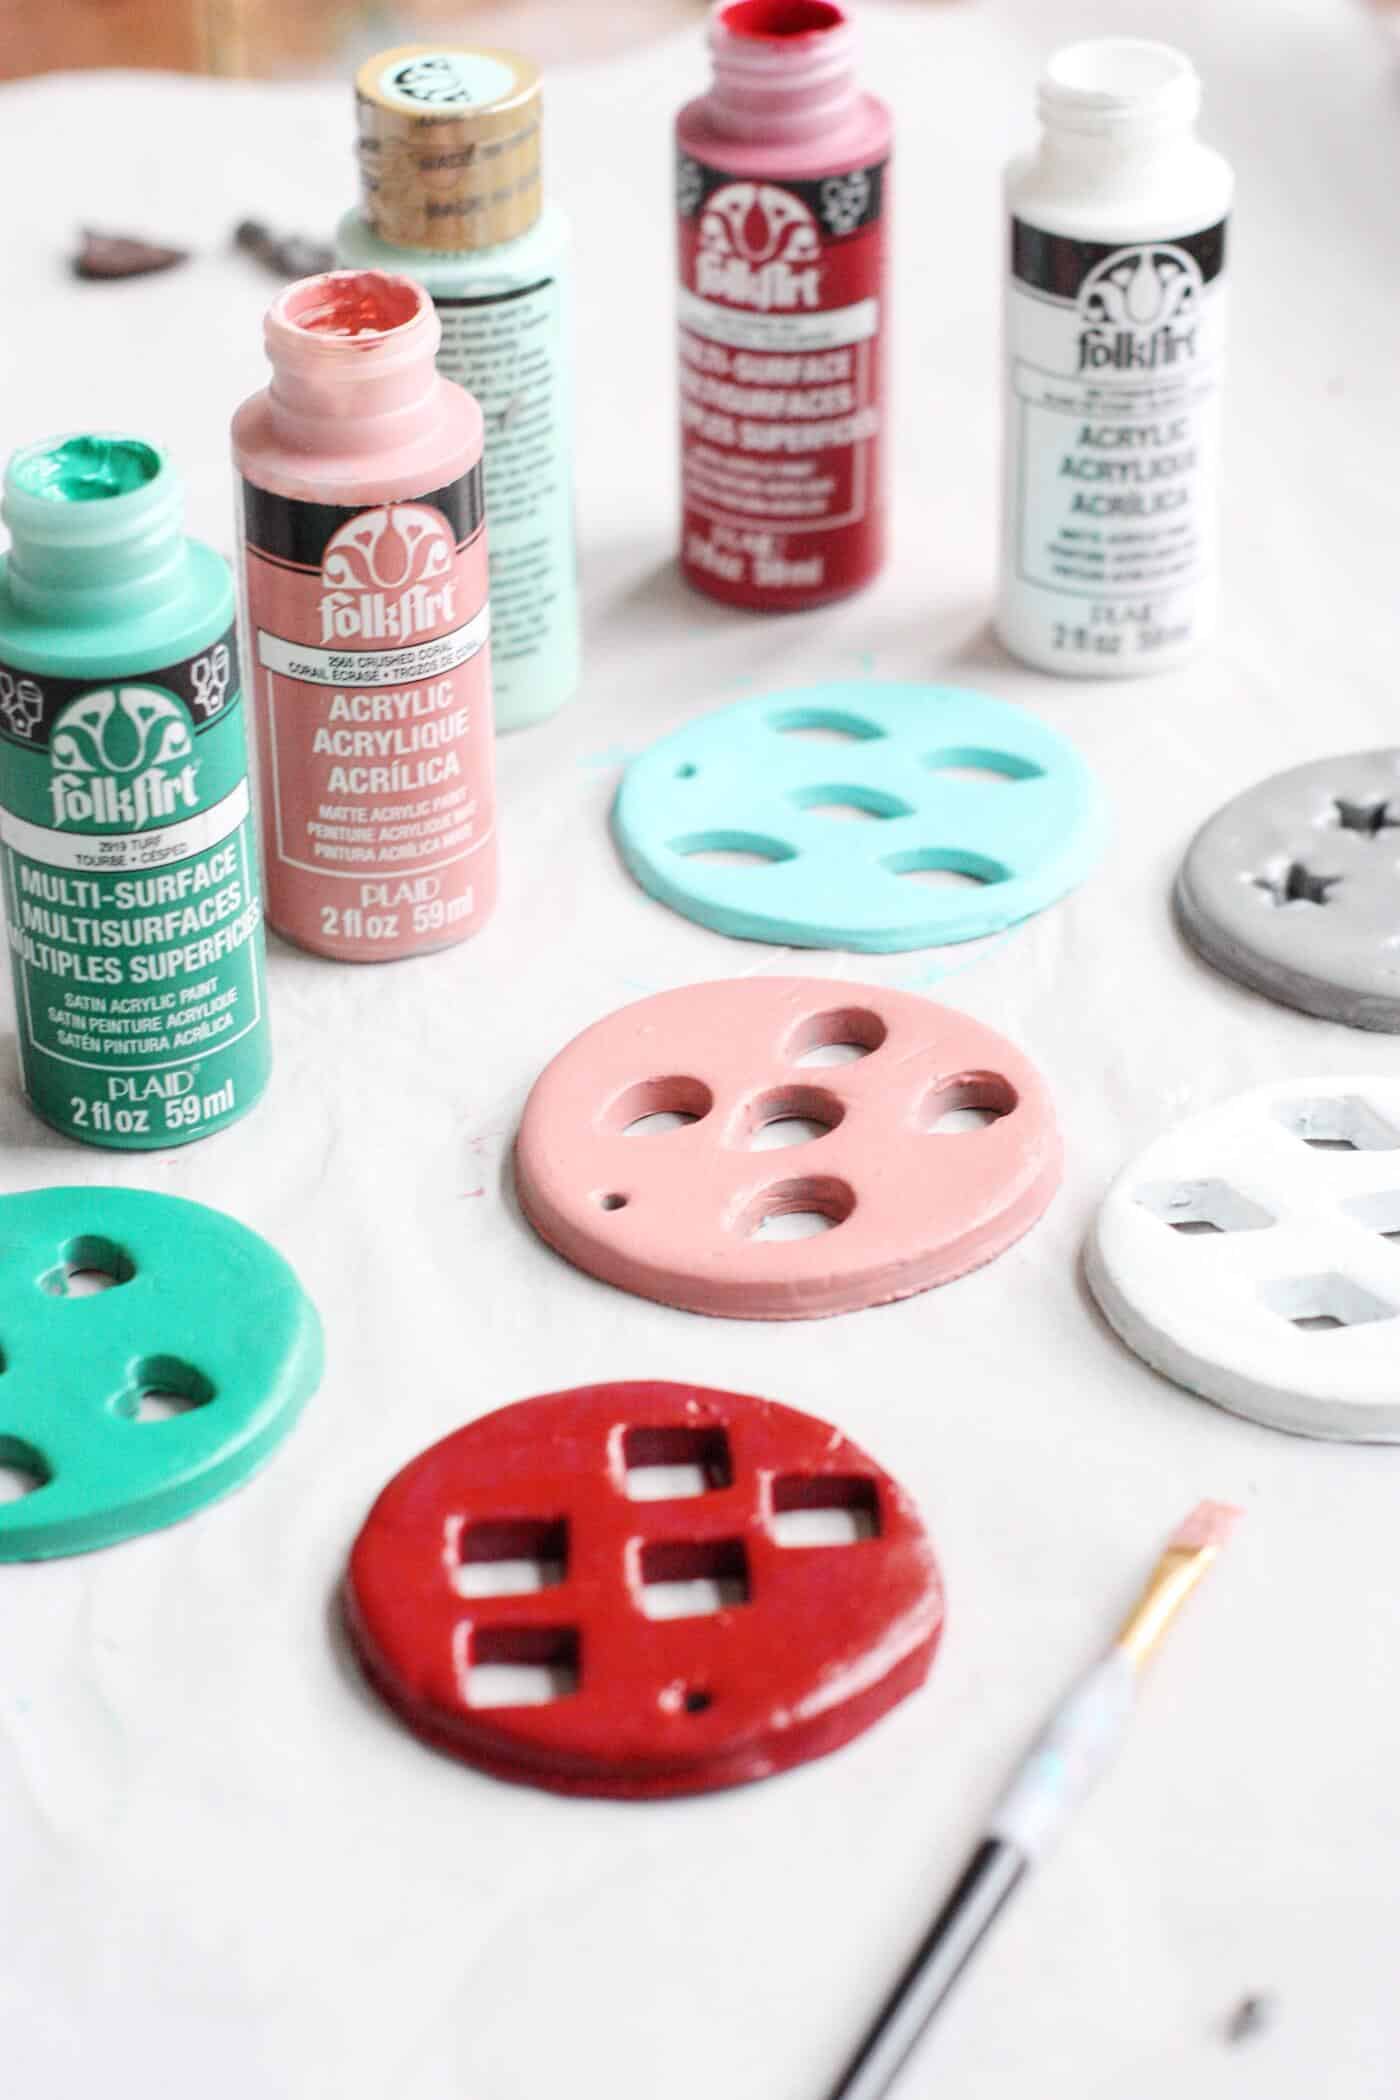
- FolkArt Acrylic Paint
- Paint Brush
- Skewer or Toothpick
- String
Directions:
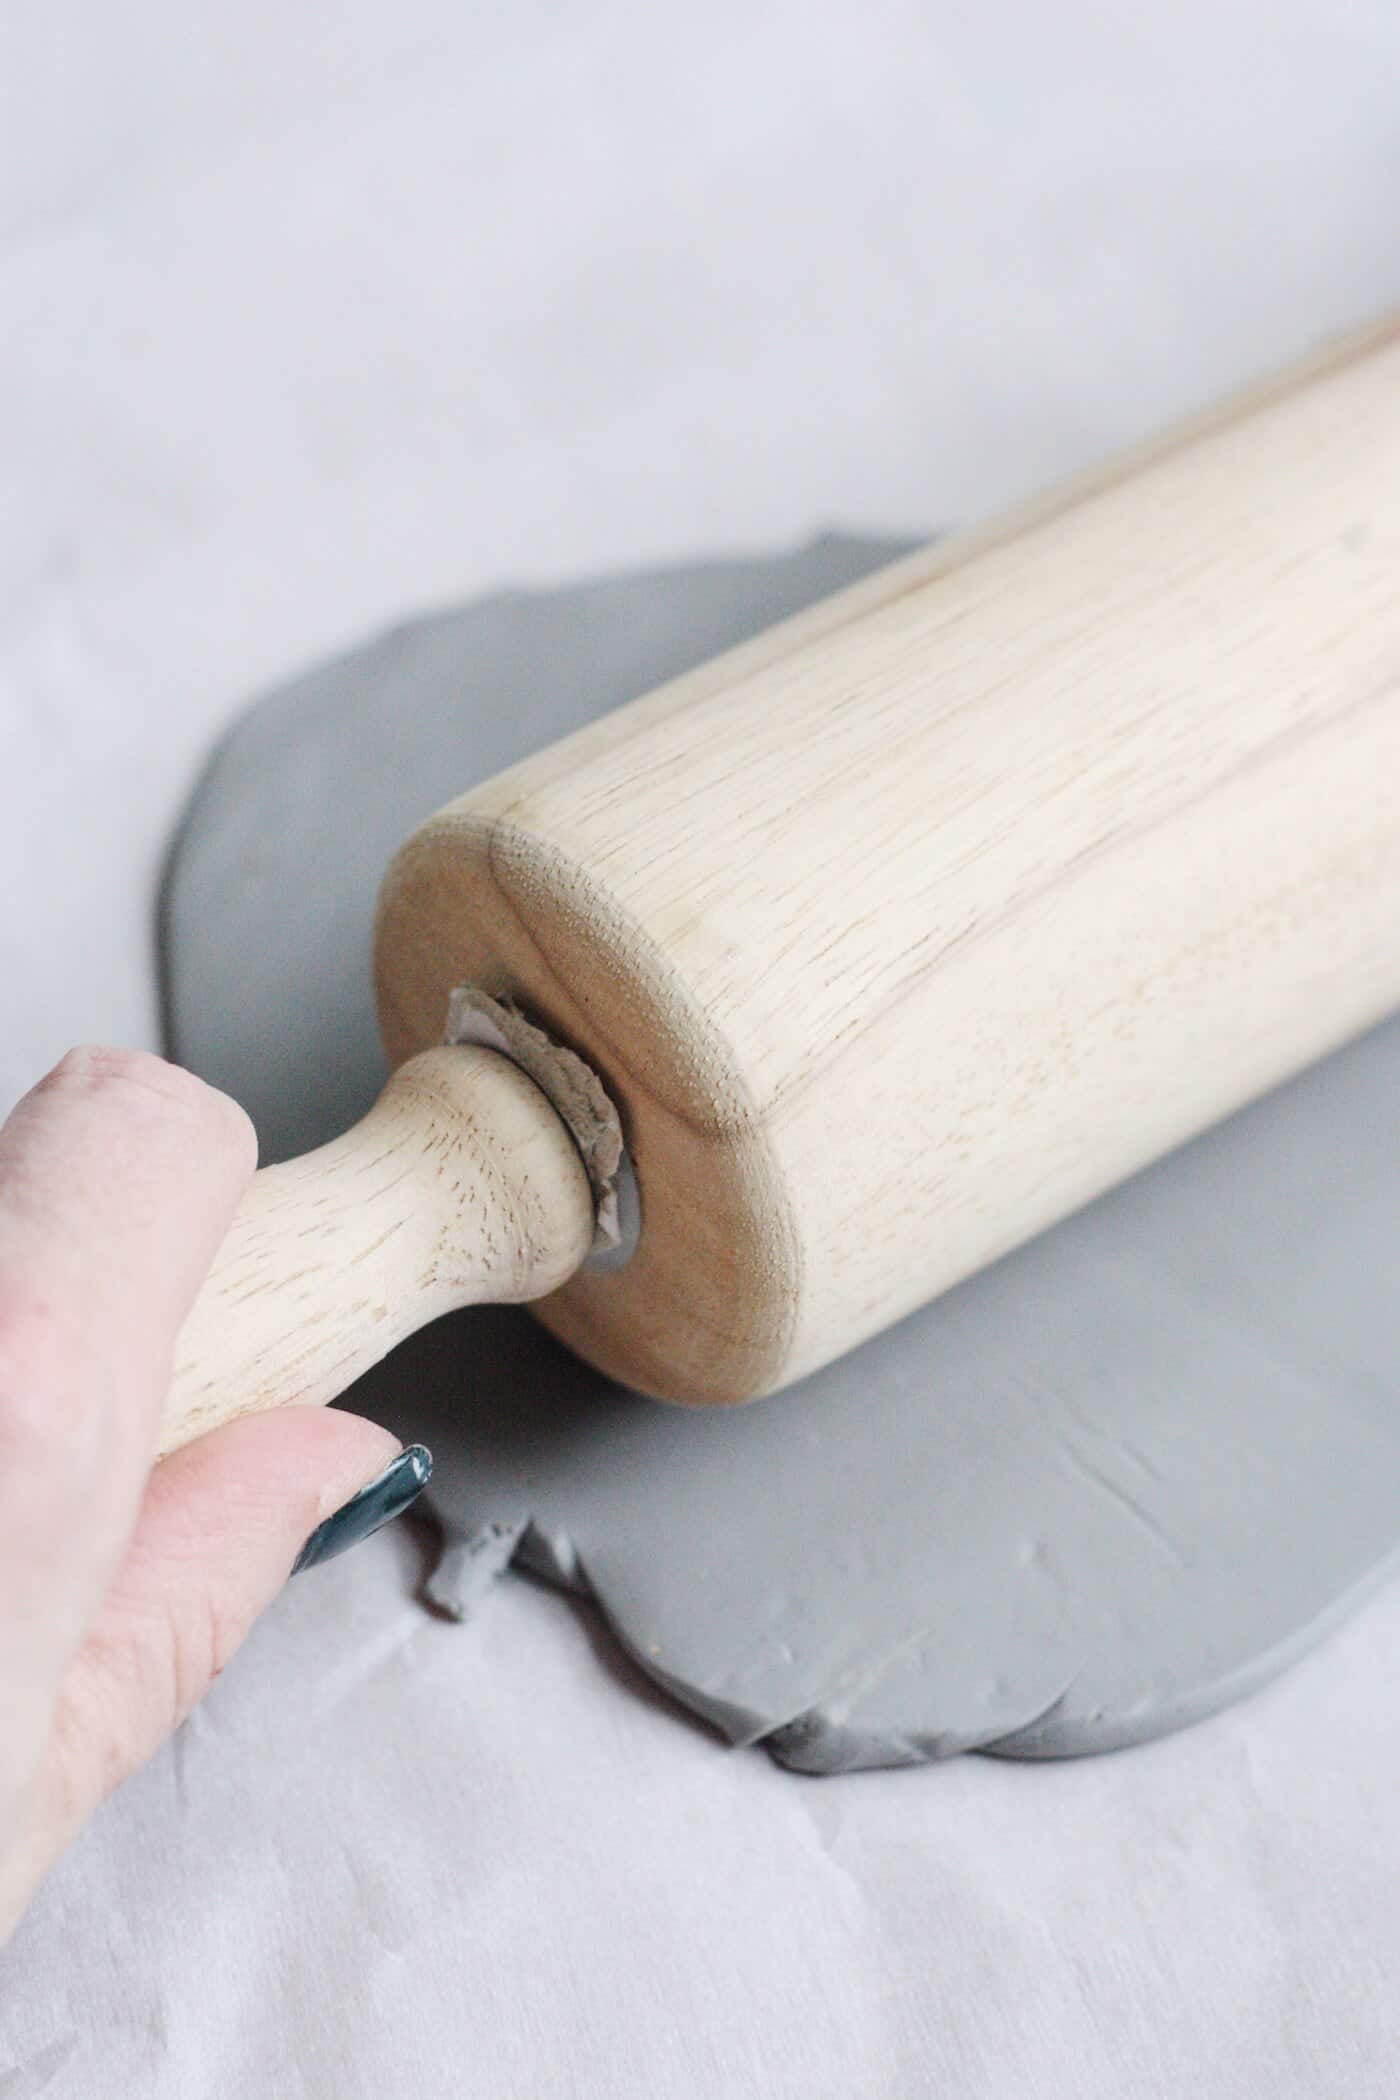
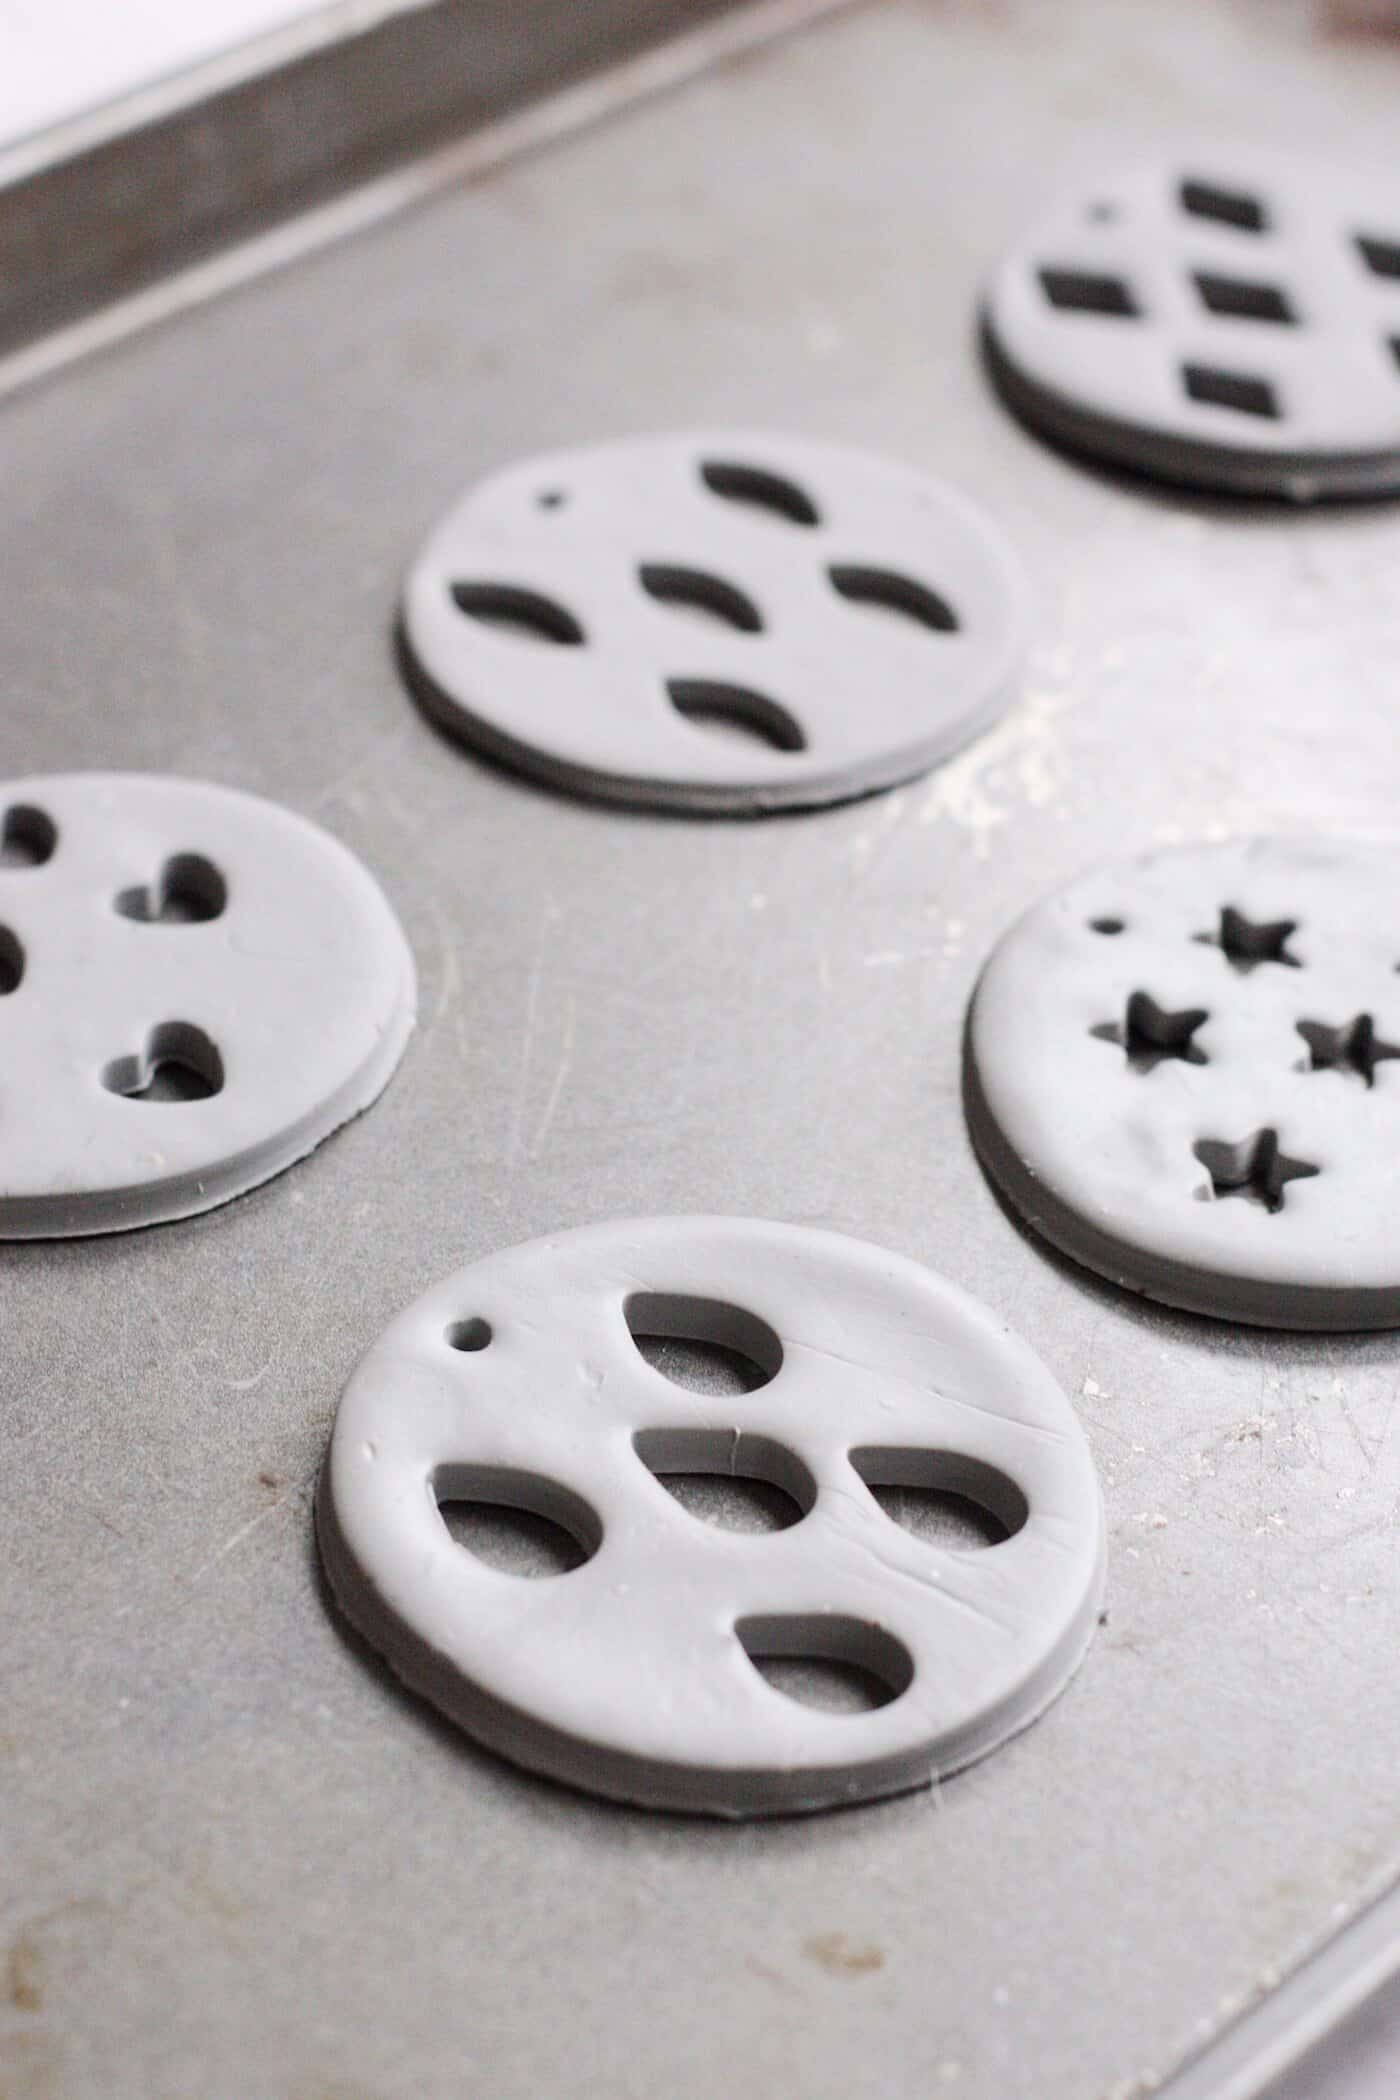
1. Roll out clay with rolling pin until it is about 1/4″ thick.
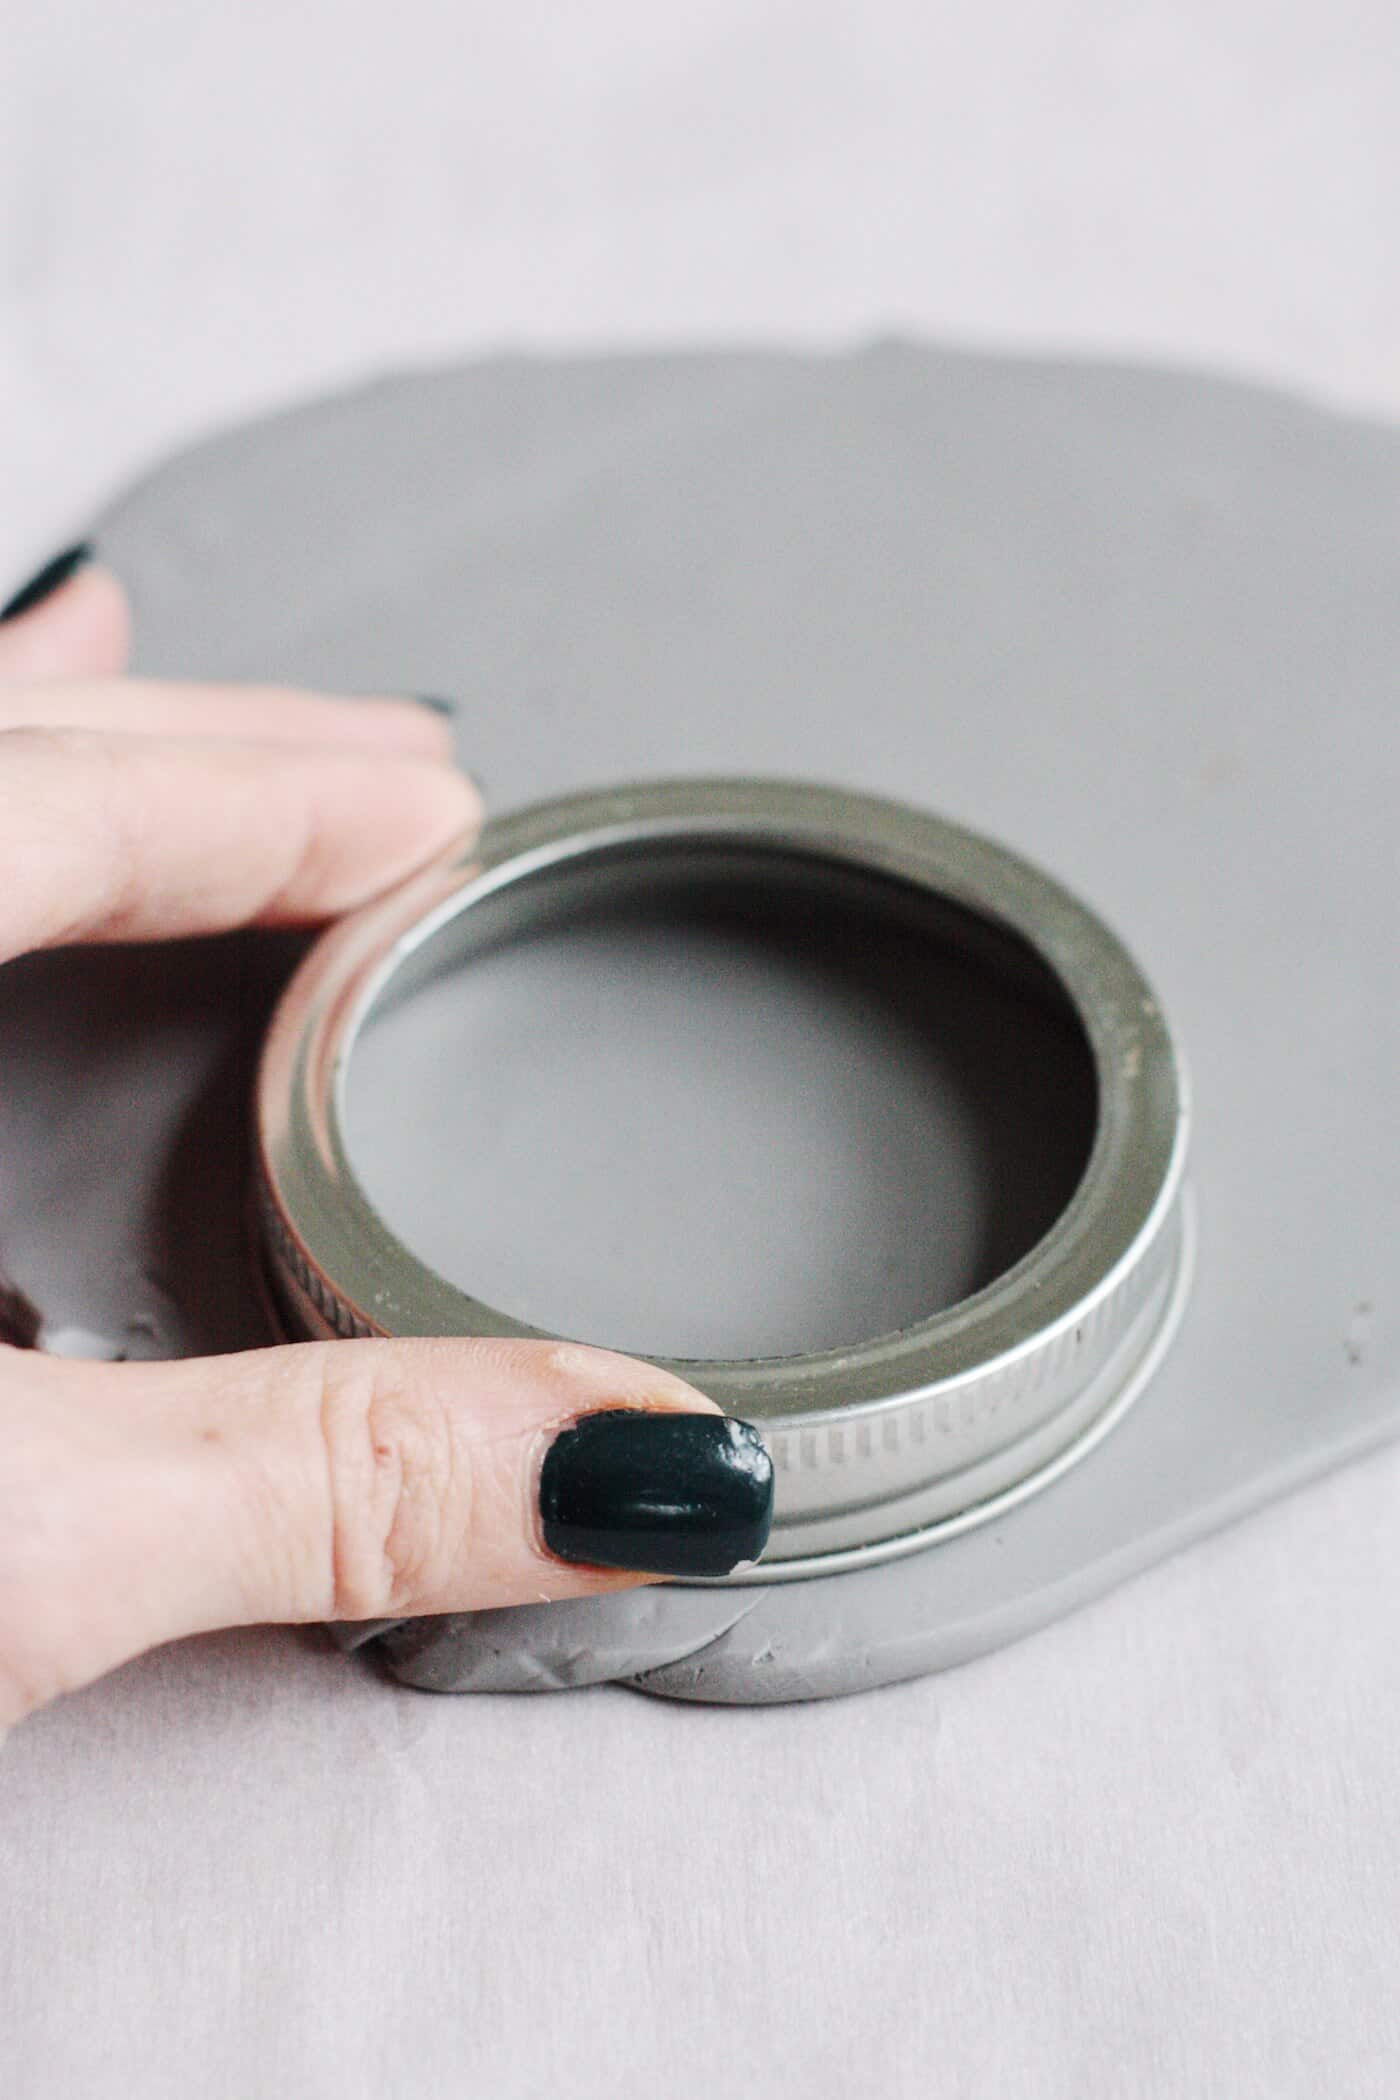 2. Cut out circles from the flat clay. I used the ring from a mason jar.
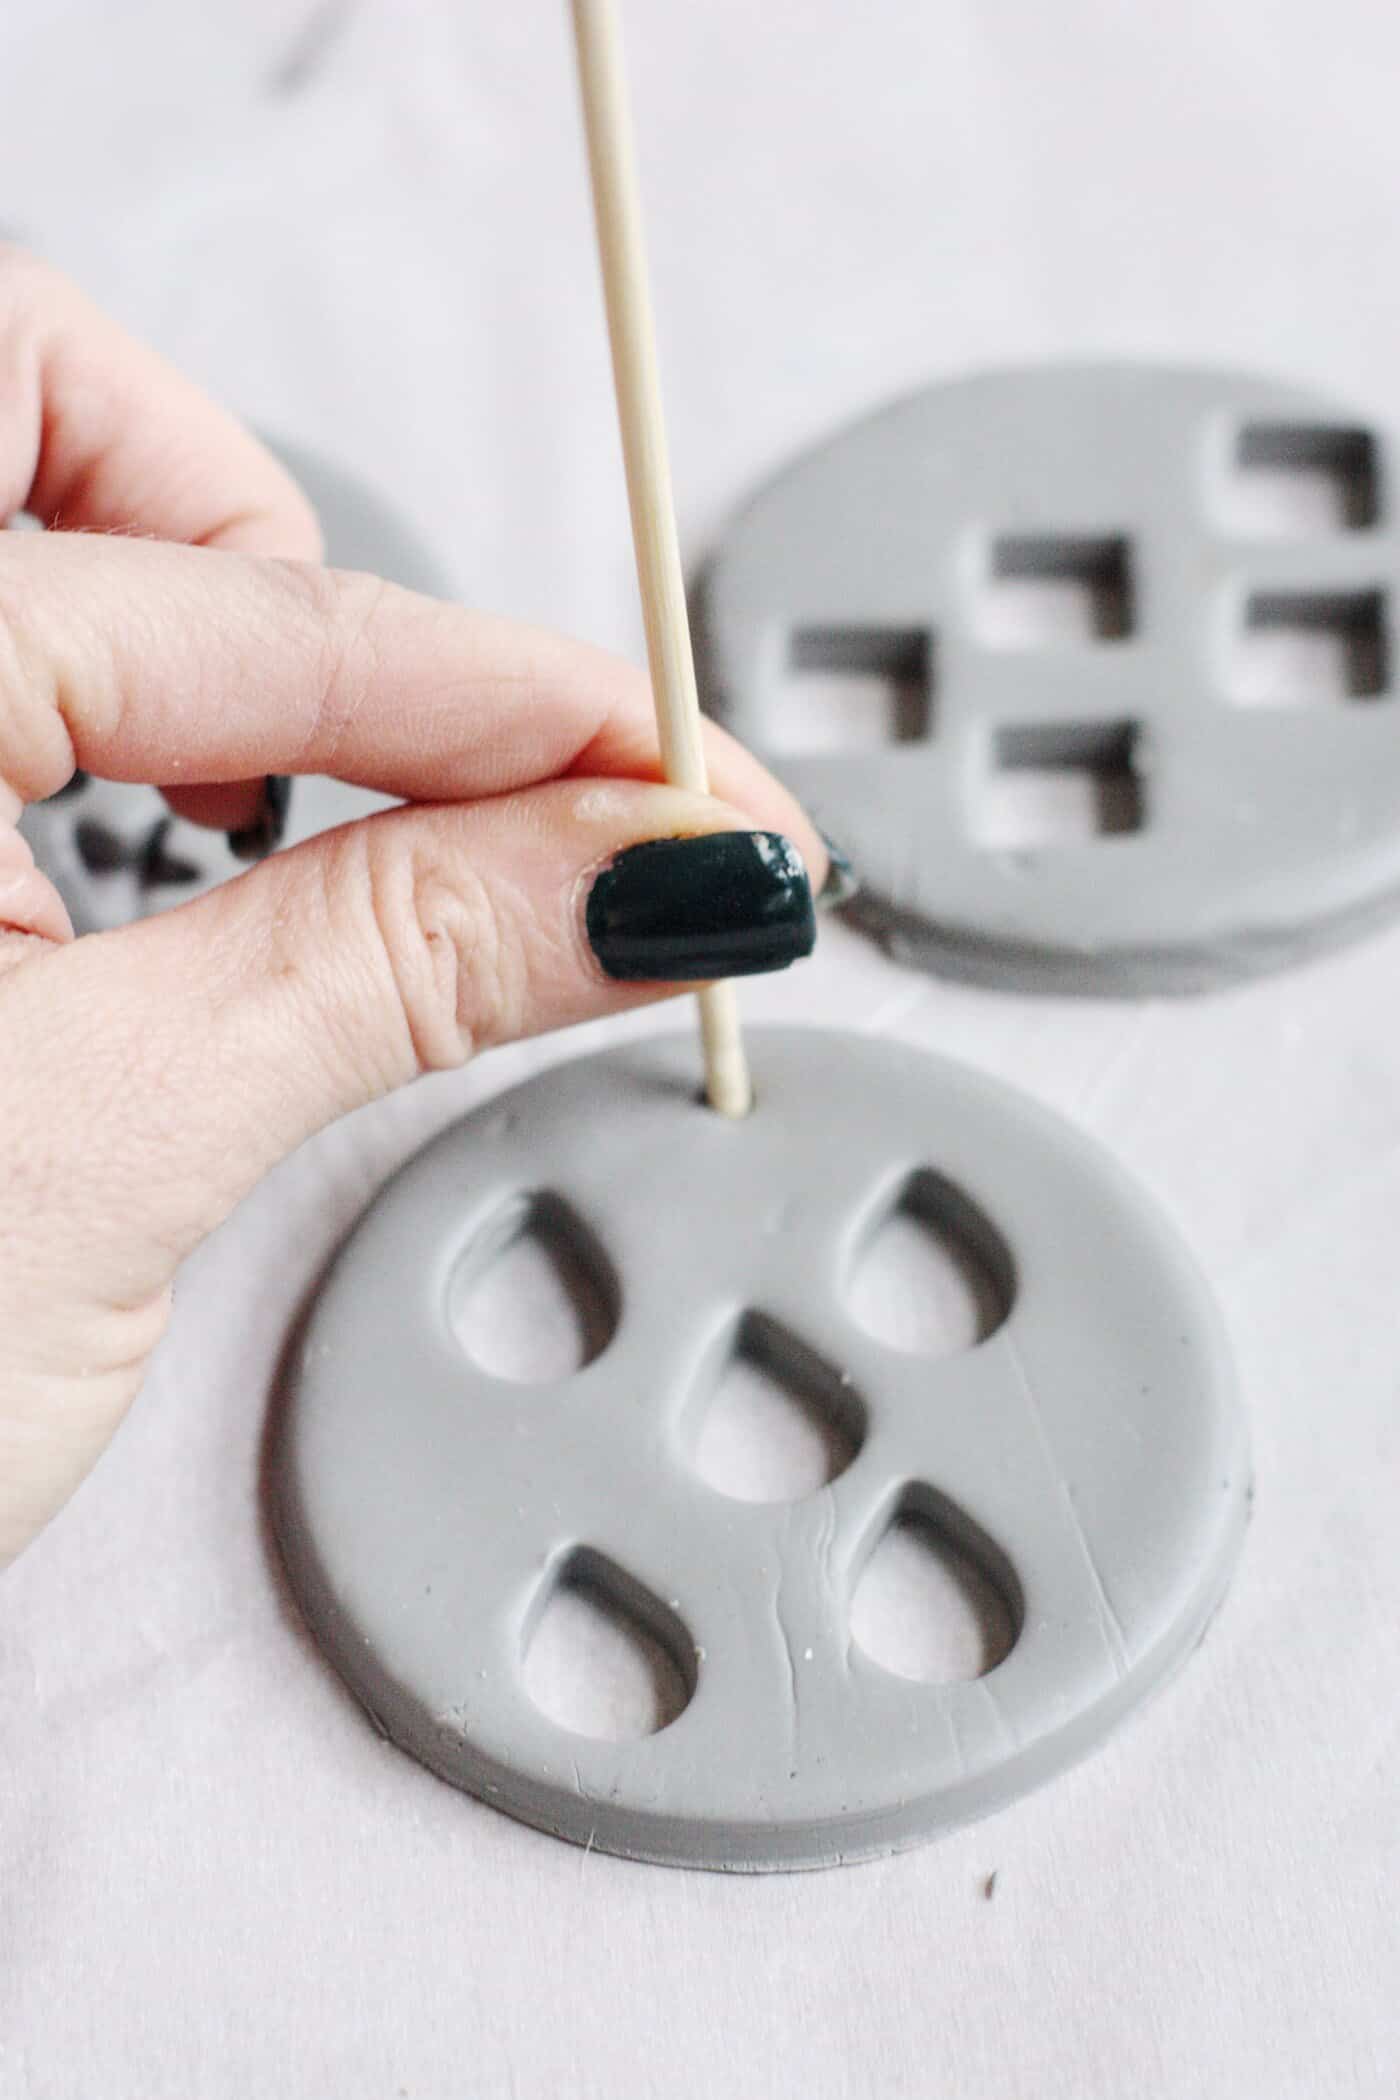
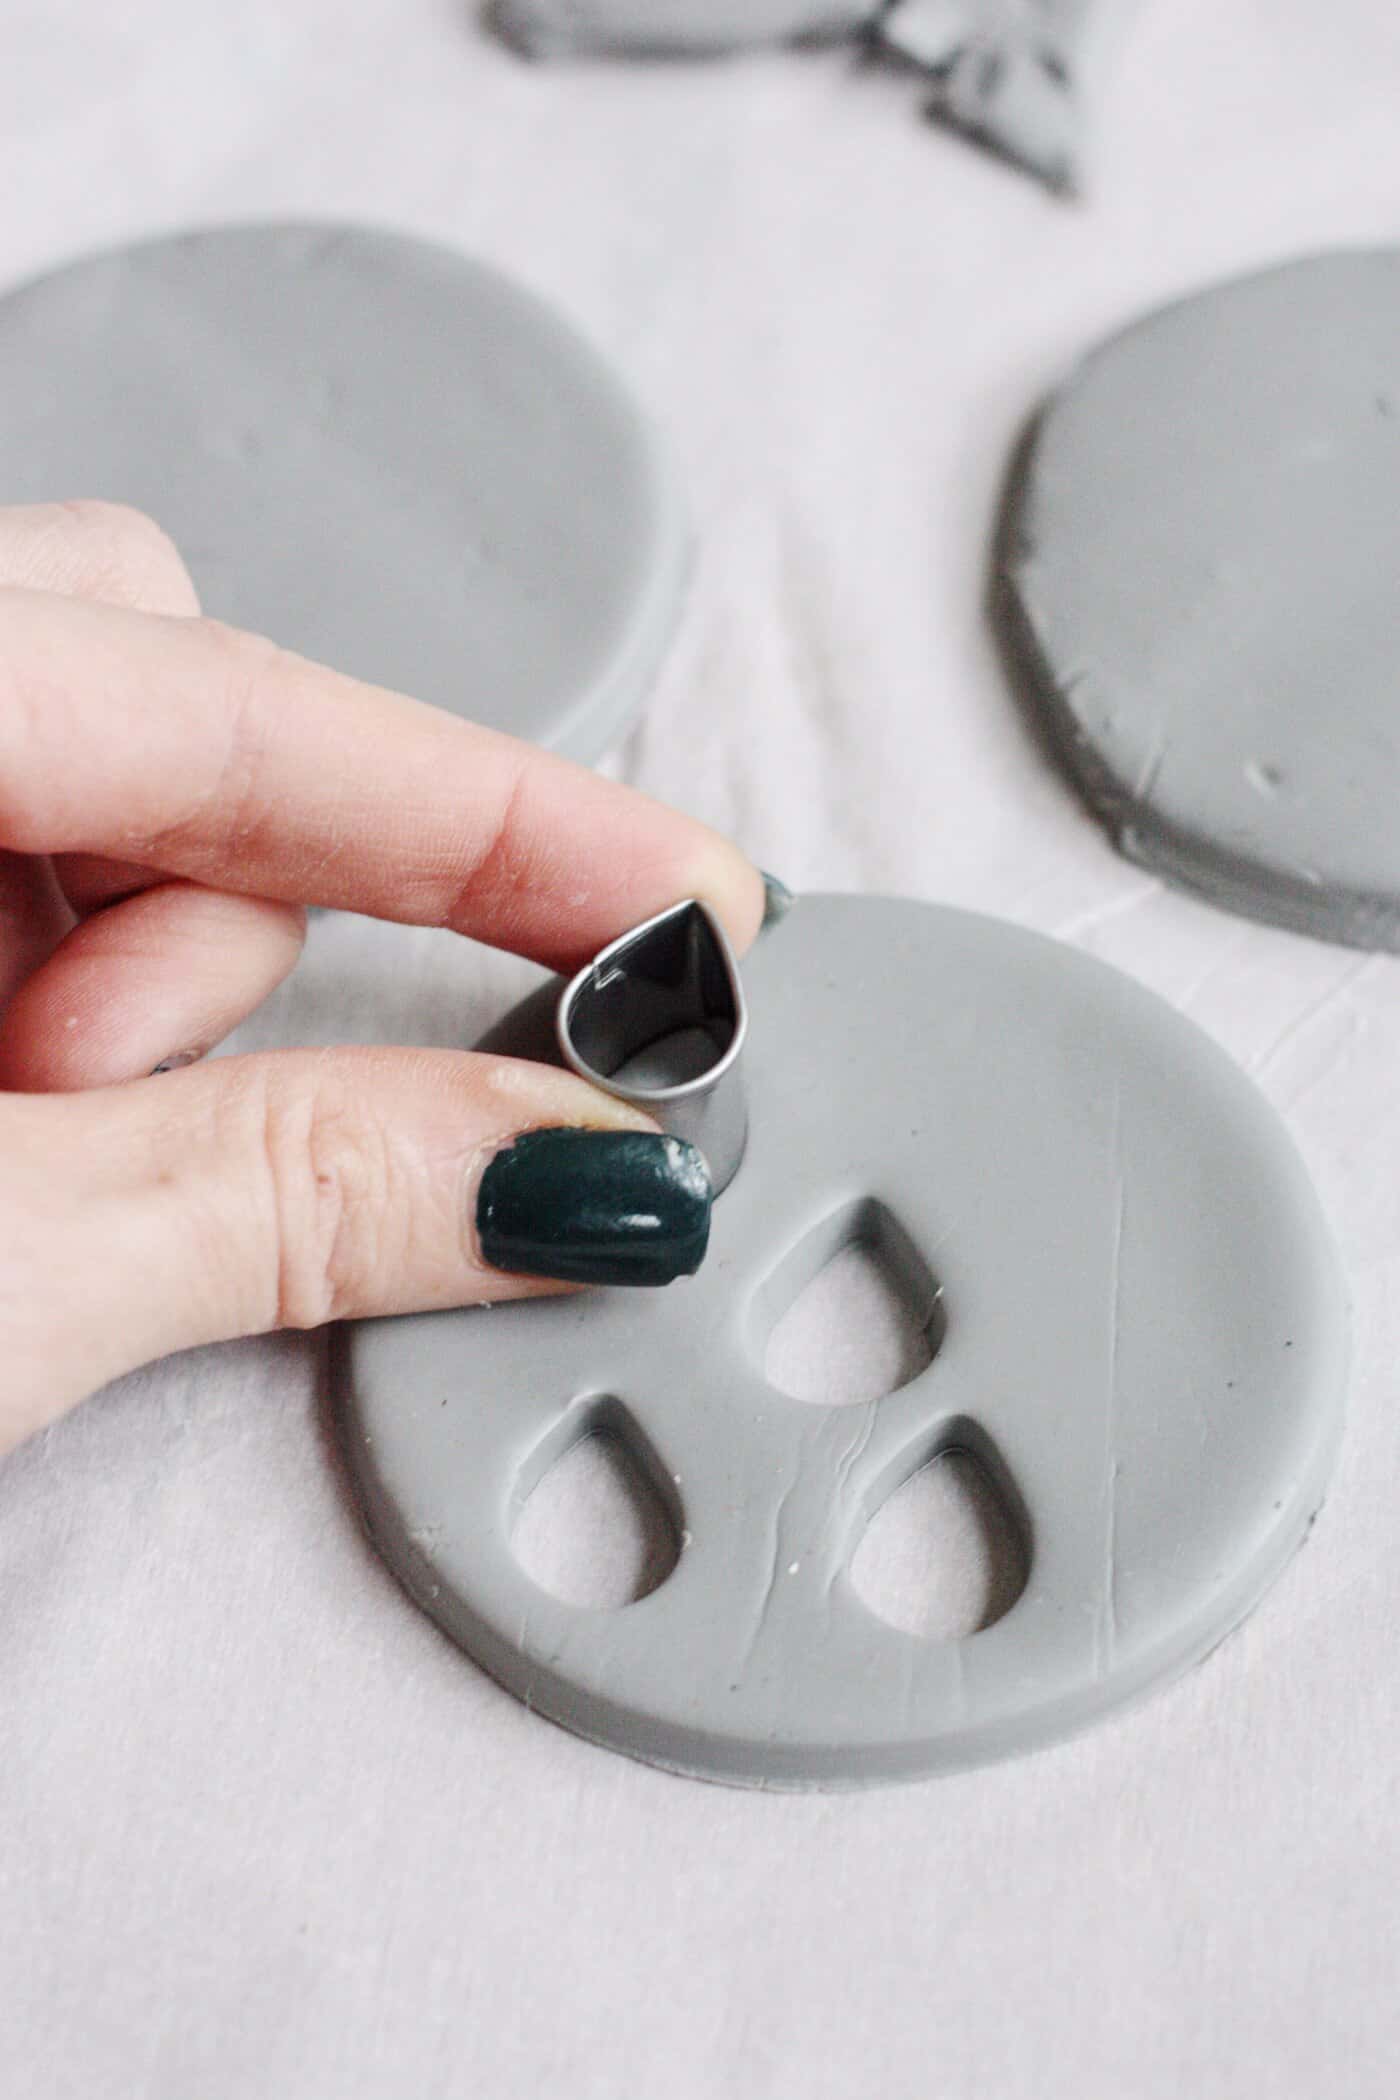 3. Using your mini metal cutters, cut out shapes from your clay circles. Use your skewer or toothpick to make a hole in the top for the string.
 4. Place clay on baking sheet and bake according to package directions. For me this meant baking at 275 degrees F for about 15 minutes.
 5. Remove clay from oven and let cool completely.
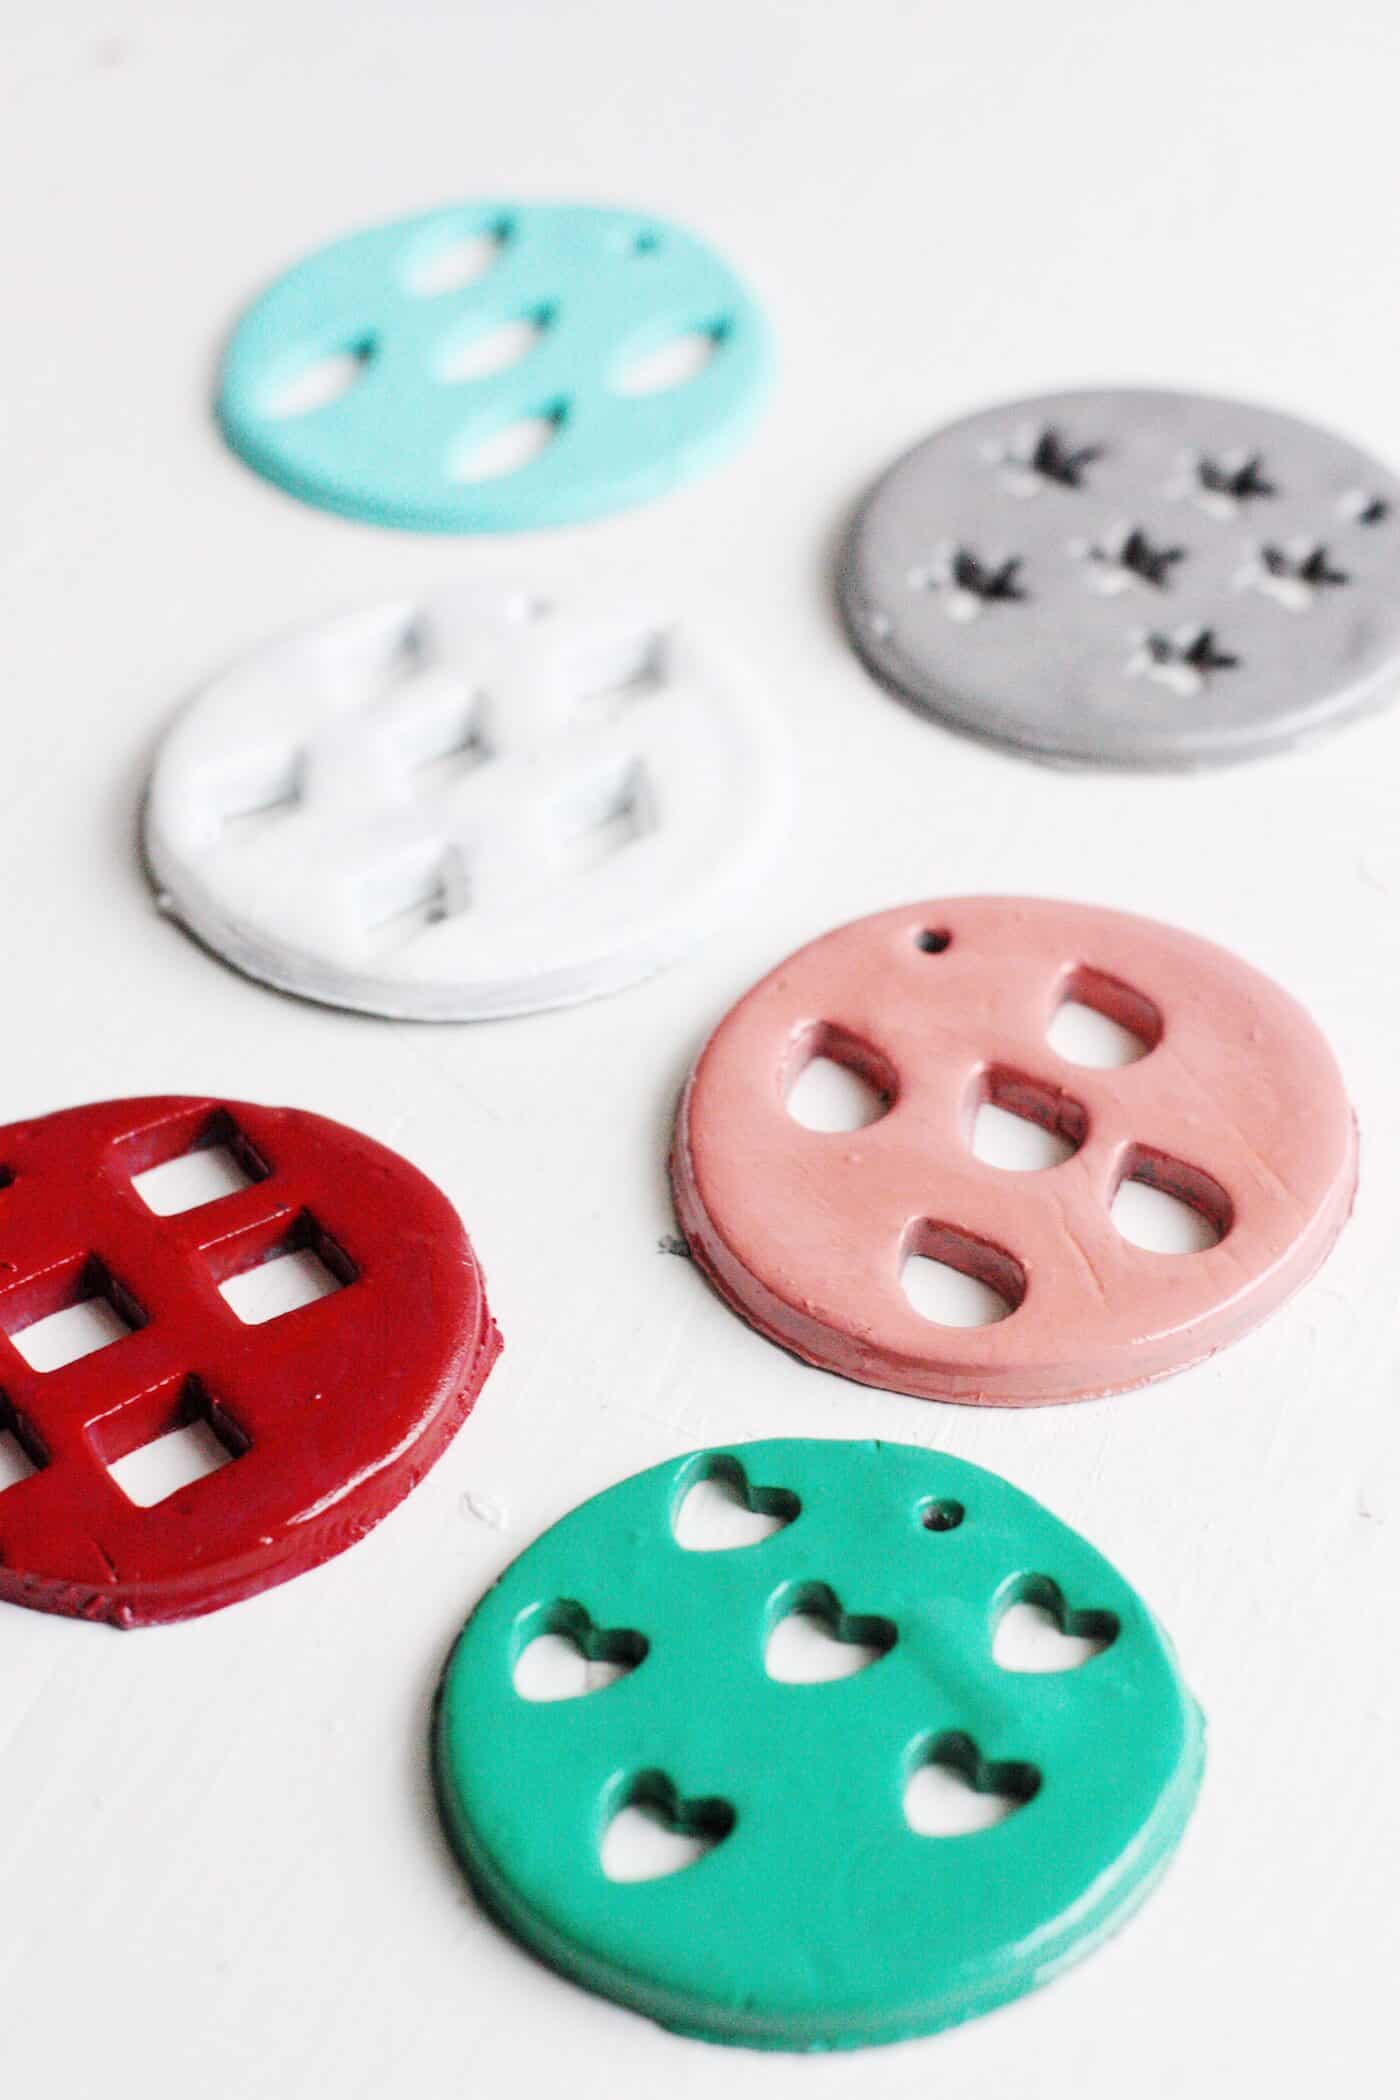
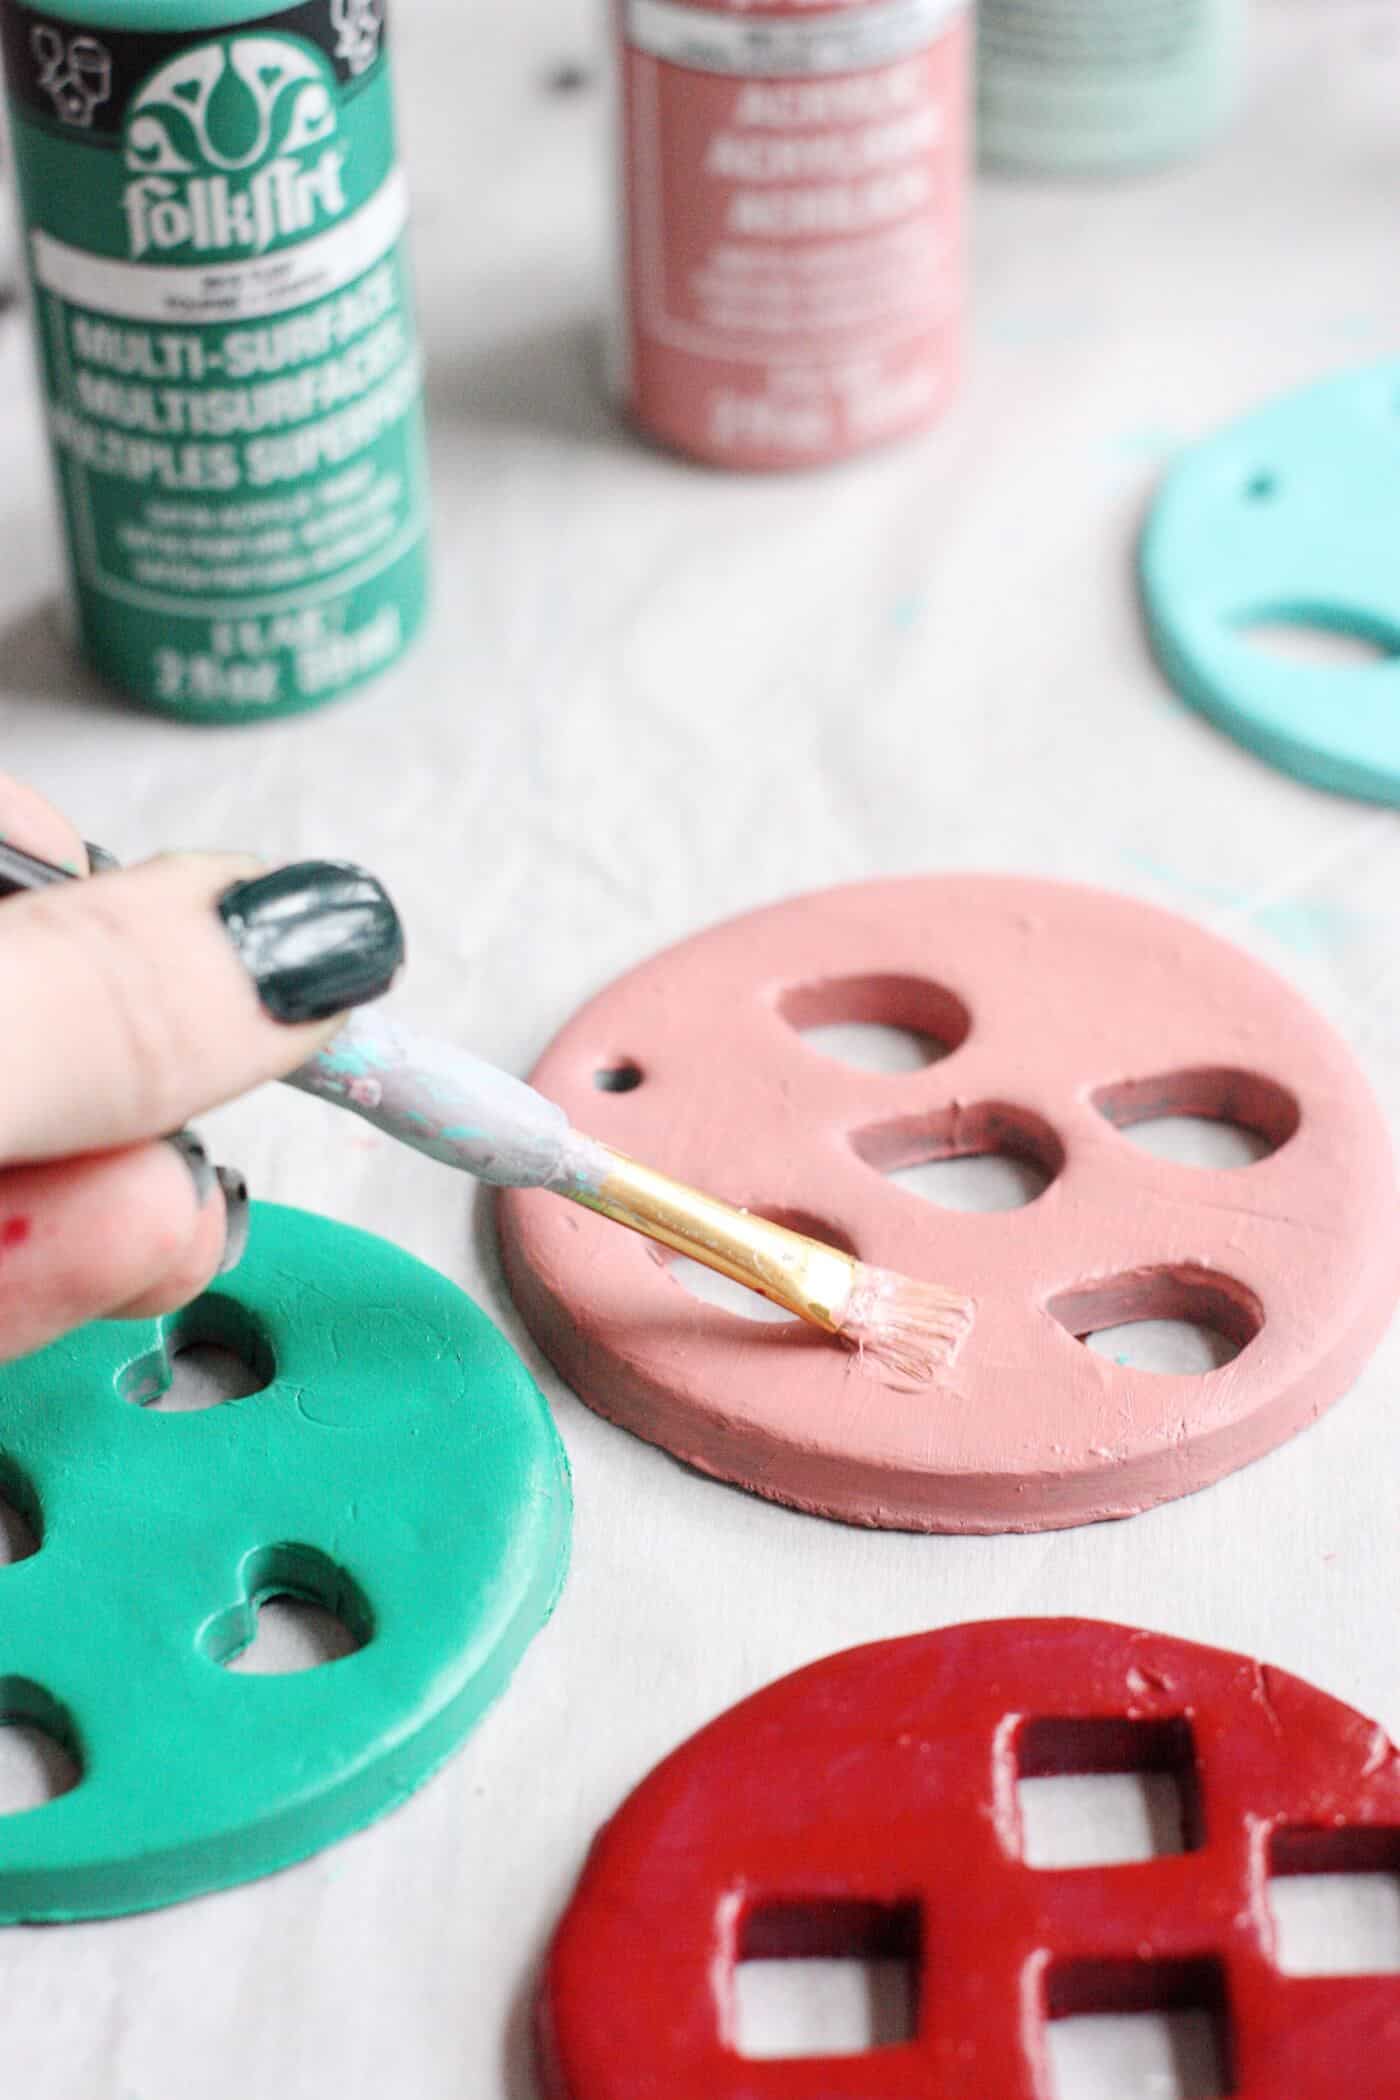 6. Once the clay is cooled, paint each clay ornament. Let dry completely. If desired, spray with a glossy sealant if you would like them to have more of an enamel finish.
 7. Cut string to about 6-8 inch pieces and tie to your clay Christmas ornaments.
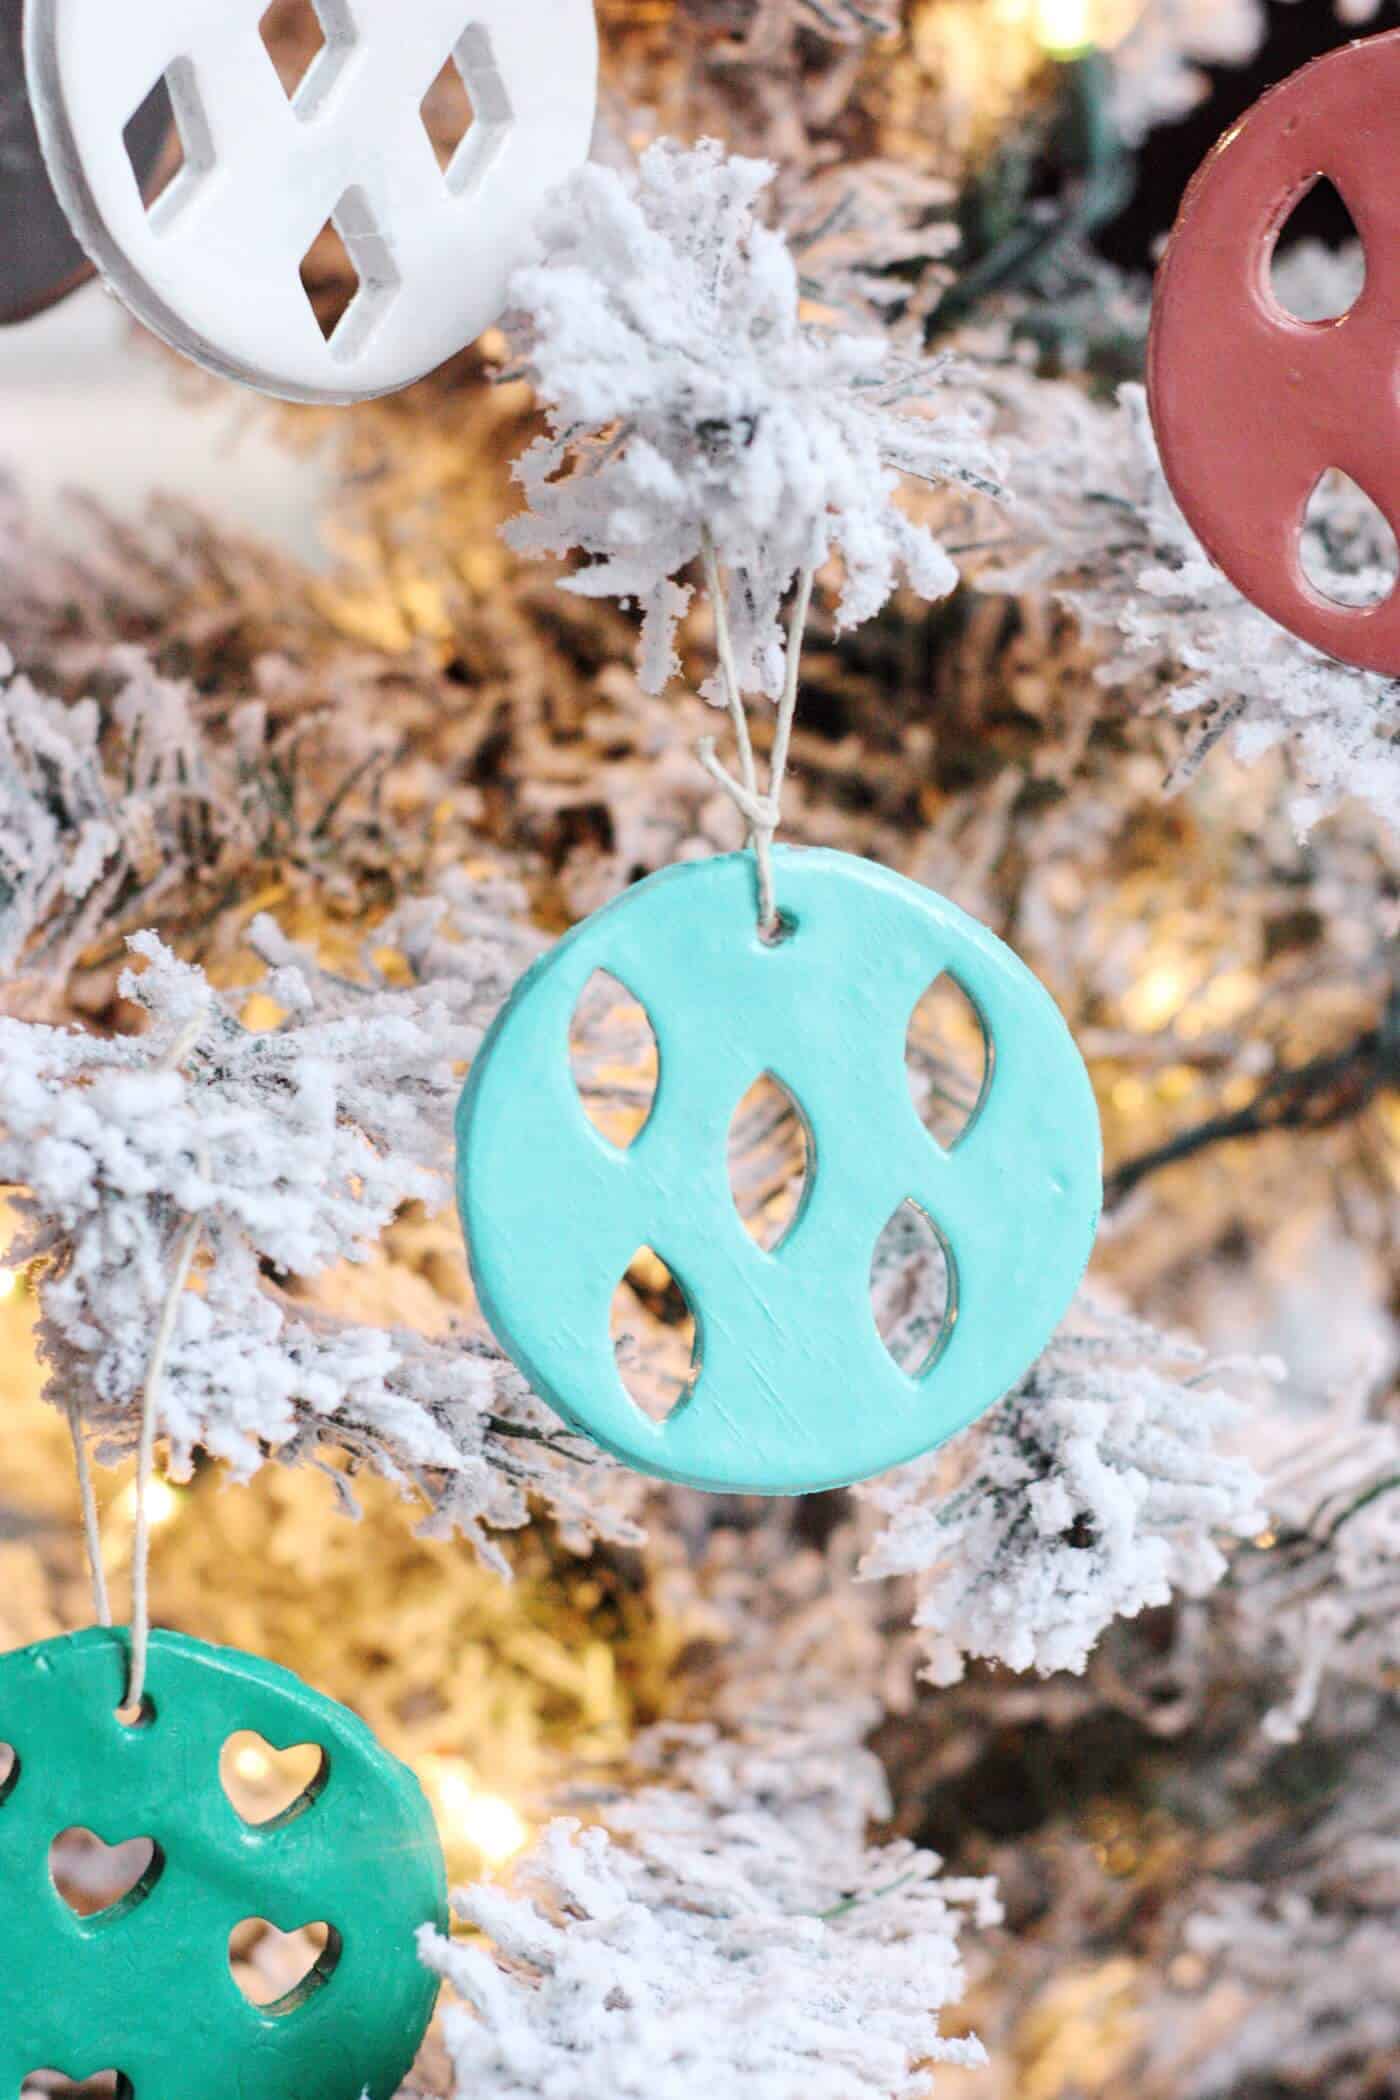
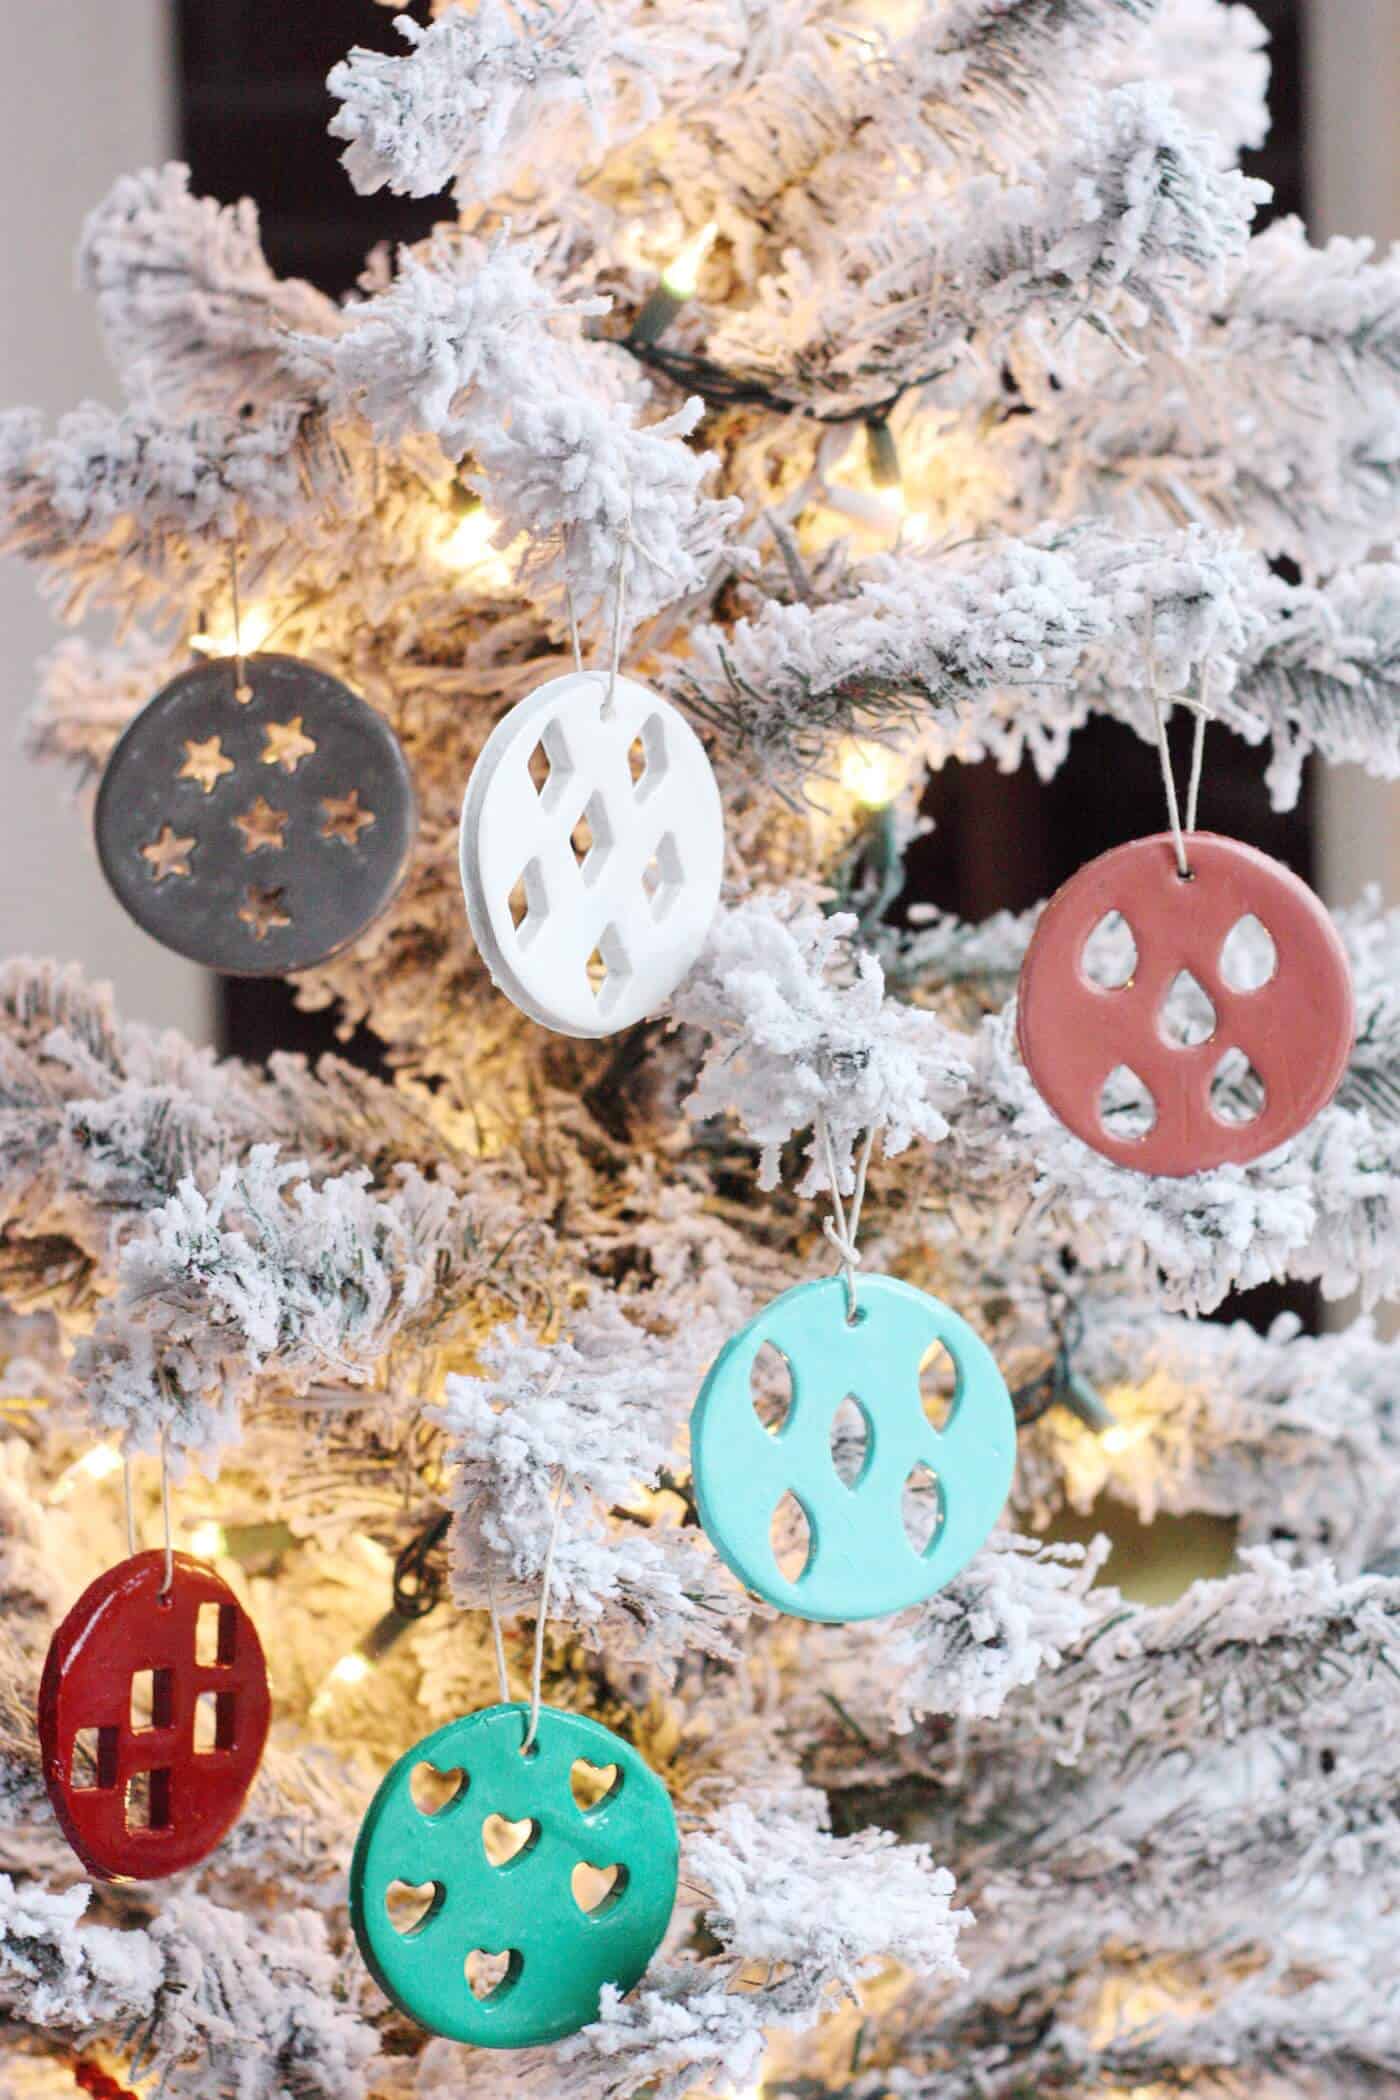
 That’s it! Your clay Christmas ornaments are done. Now you can tie these babies to your tree and sit back and enjoy some Christmas magic. Aren’t they the cutest? I love how the light shines through the cut out shapes!
It’s SO soon, you guys! What DIY Christmas projects do you have up your sleeve this week?
Happy crafting!
ox. Liz


What a fun active to do with the kids. Have a great week.
http://www.amysfashionblog.com/blog-home/
[…] DIY Geometric Clay Ornaments […]
[…] DIY Geometric Clay Ornaments […]