This post was originally published in July 2019 and updated as of May 2024.
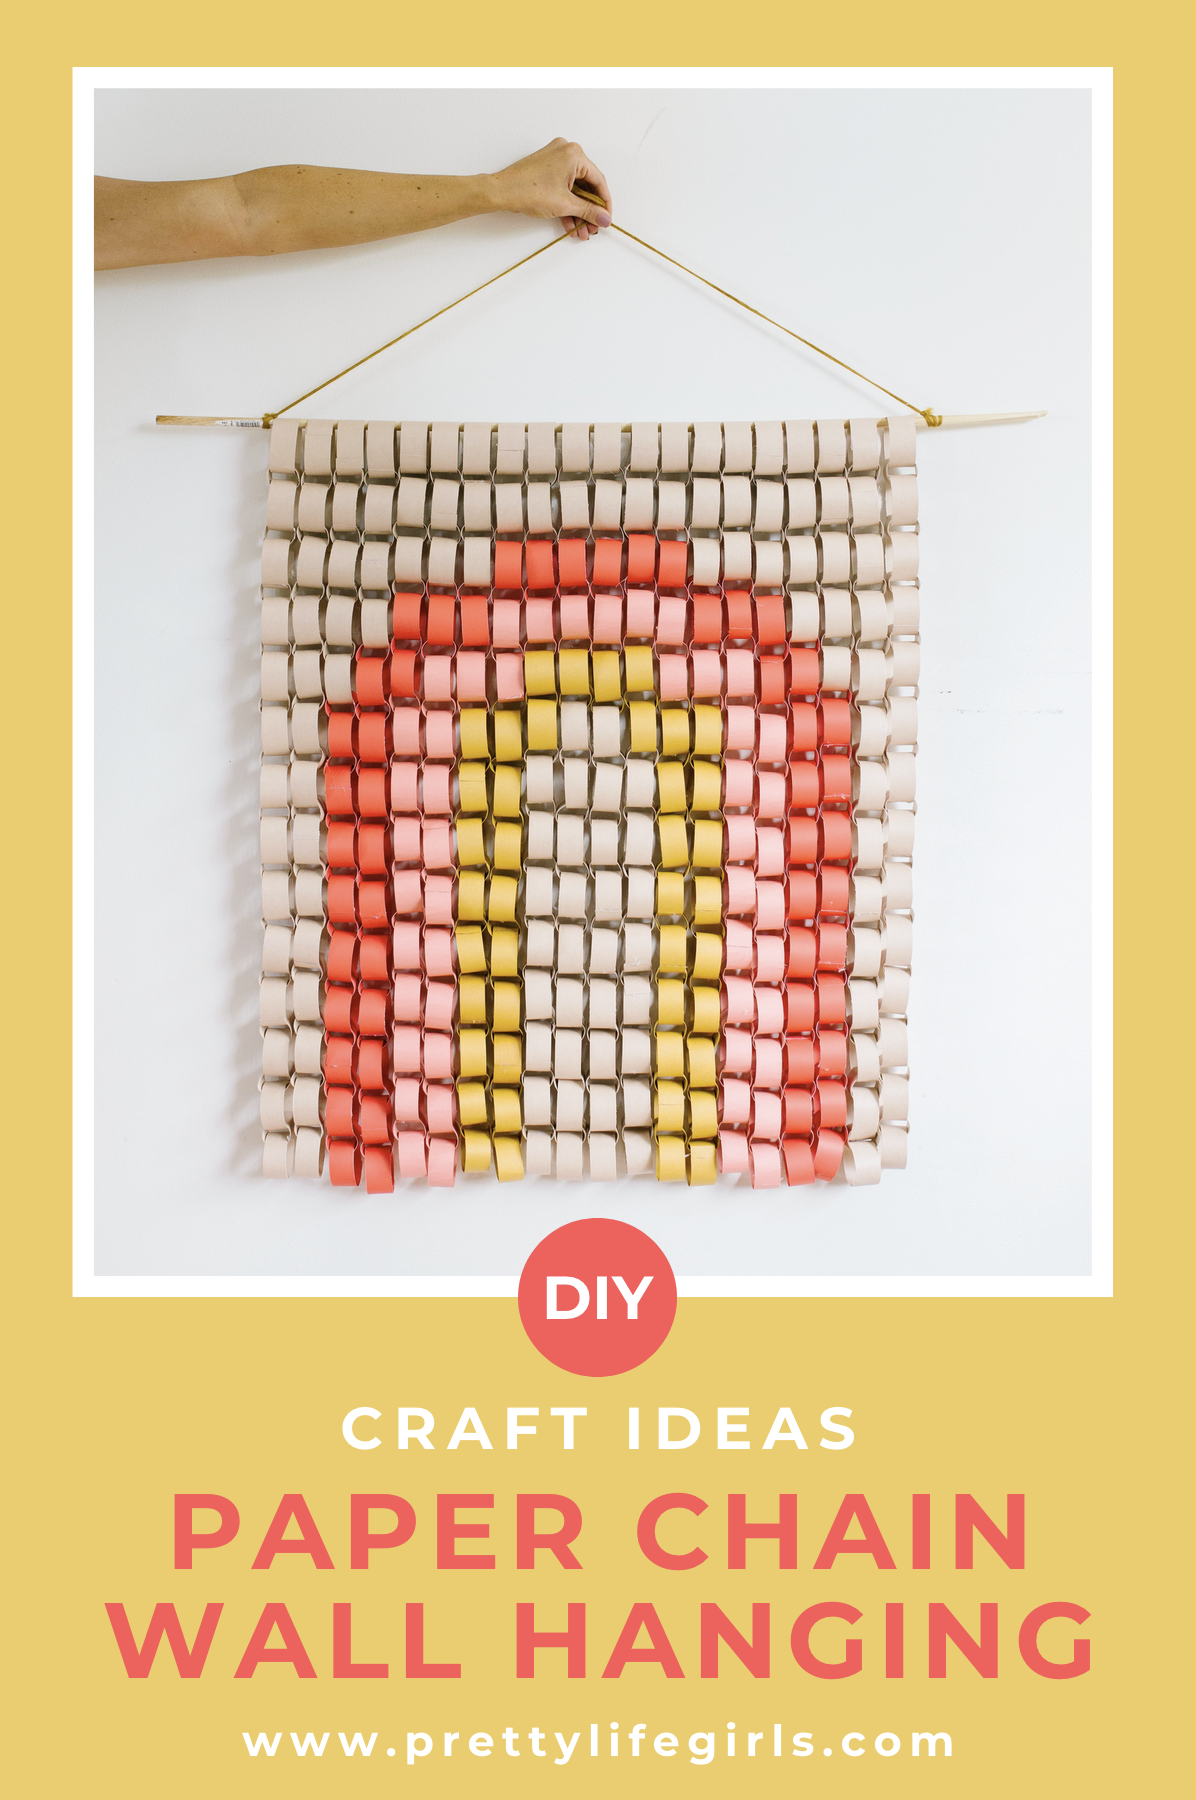
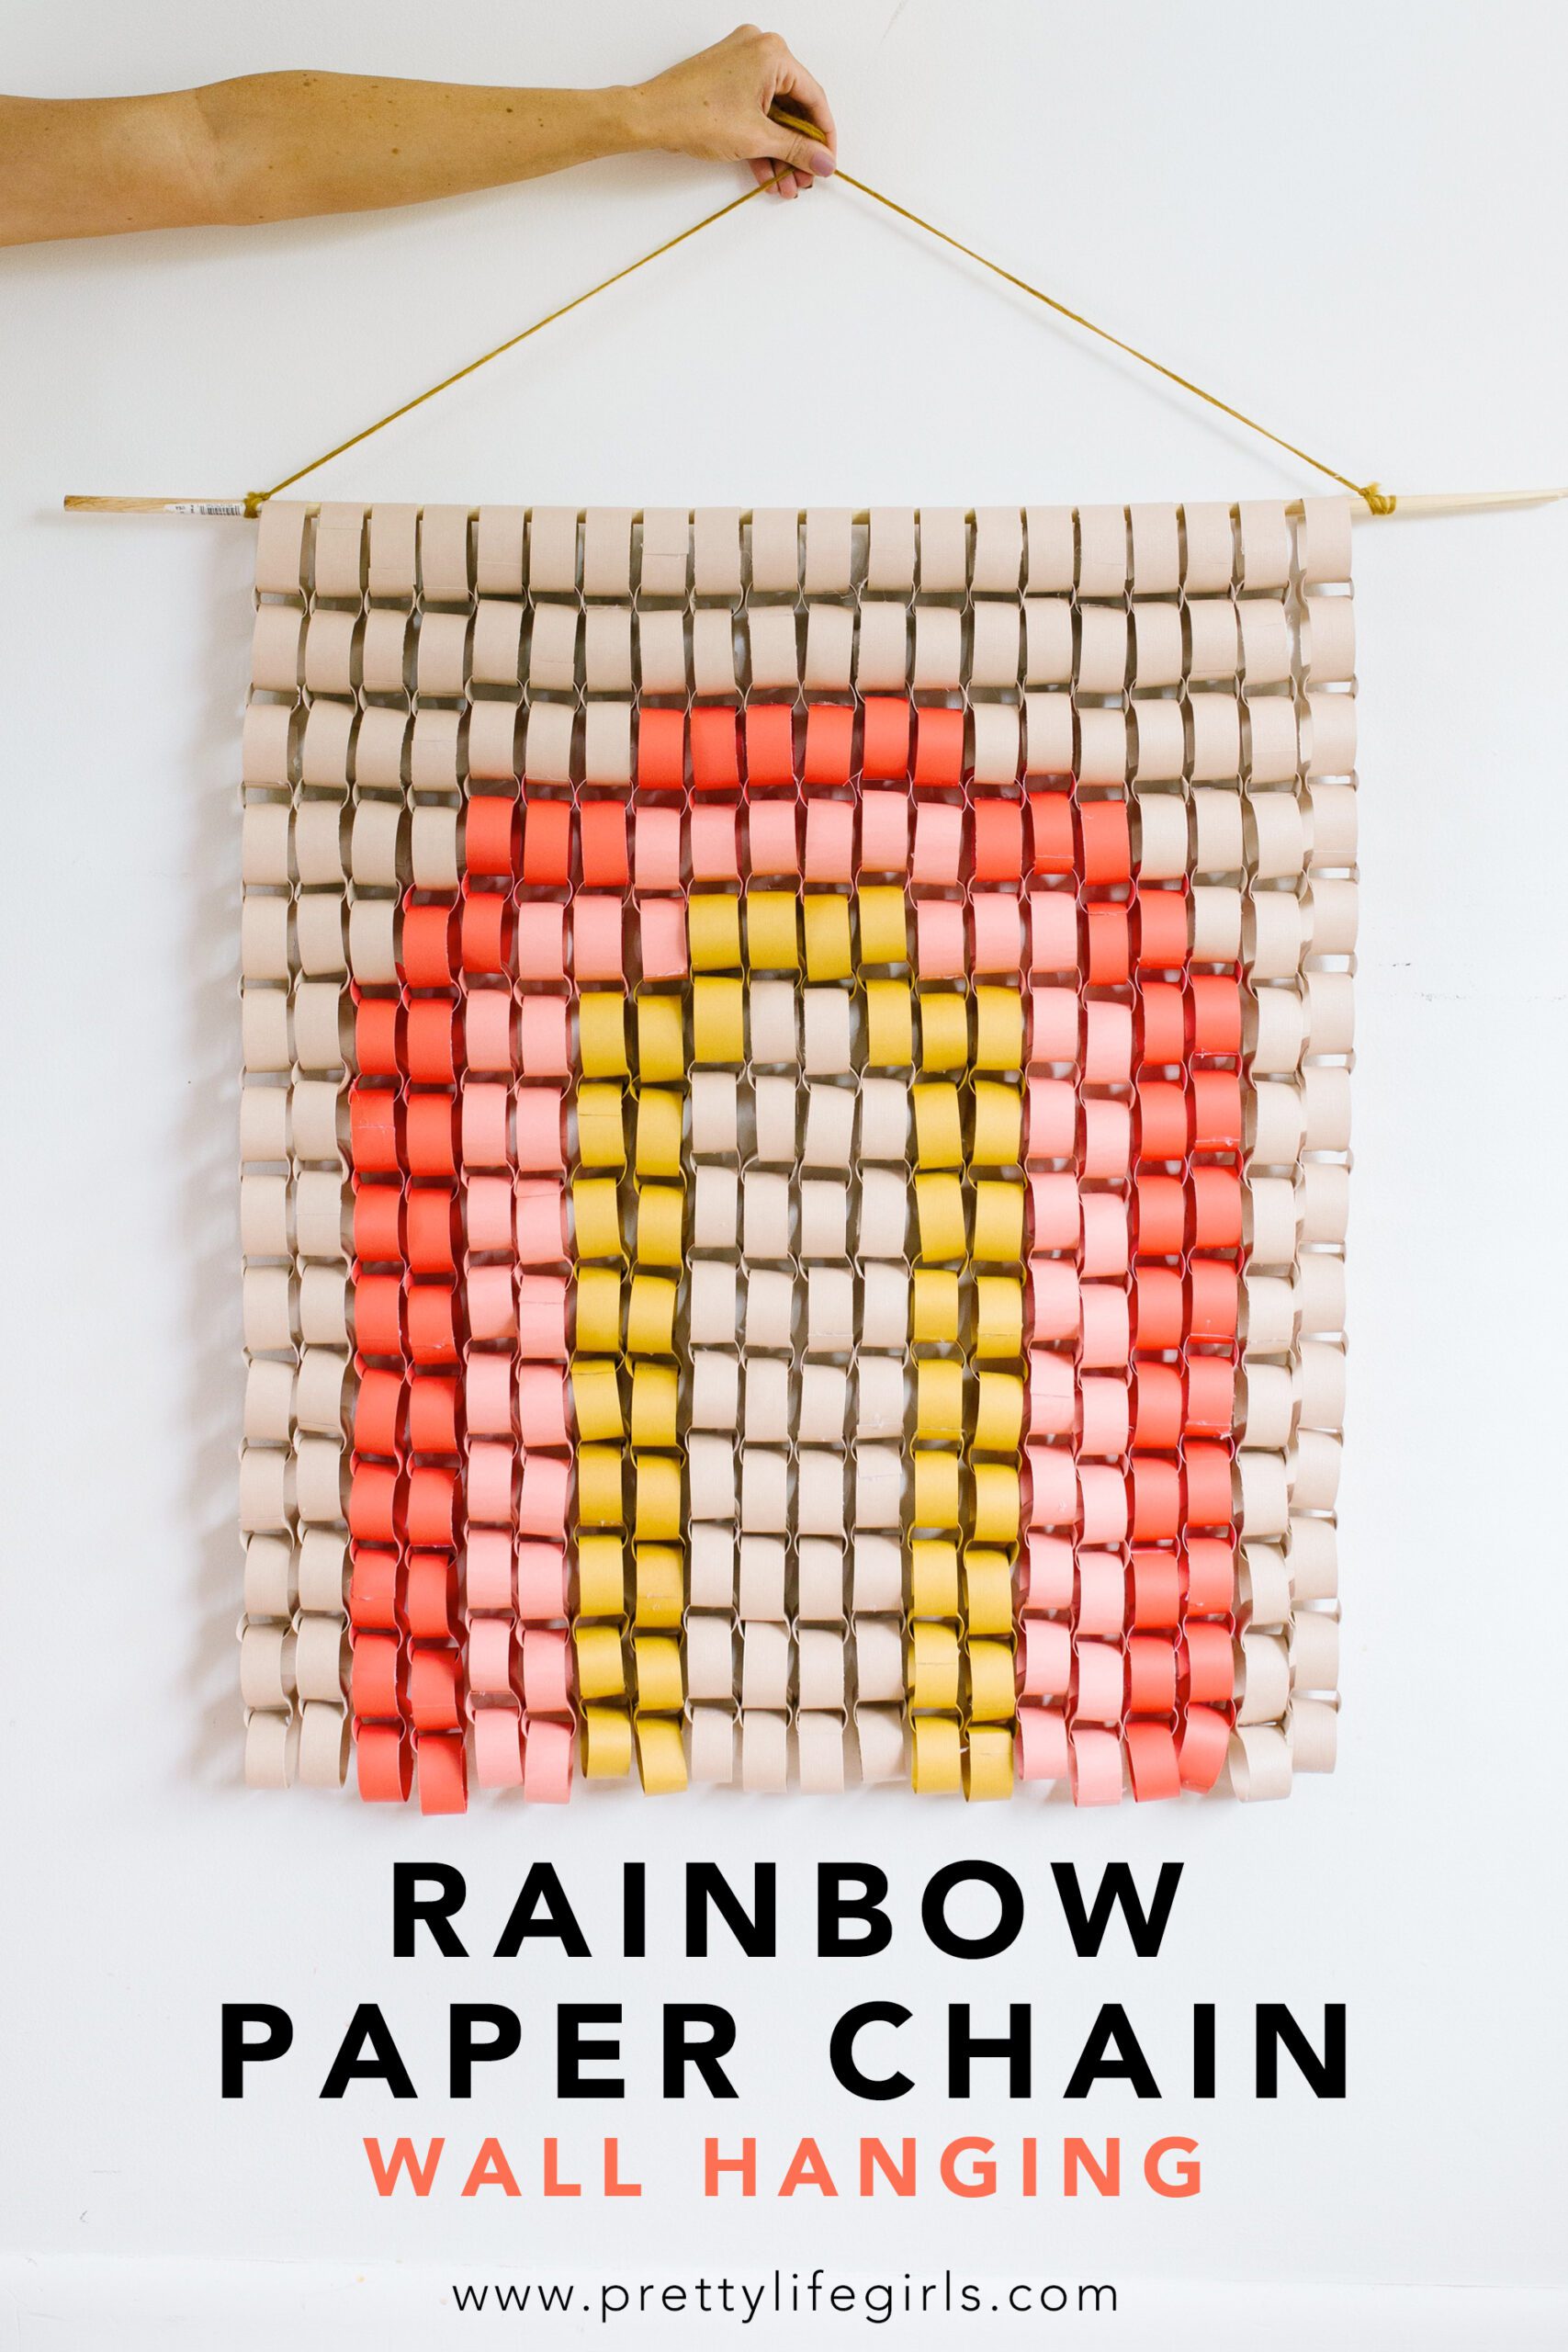
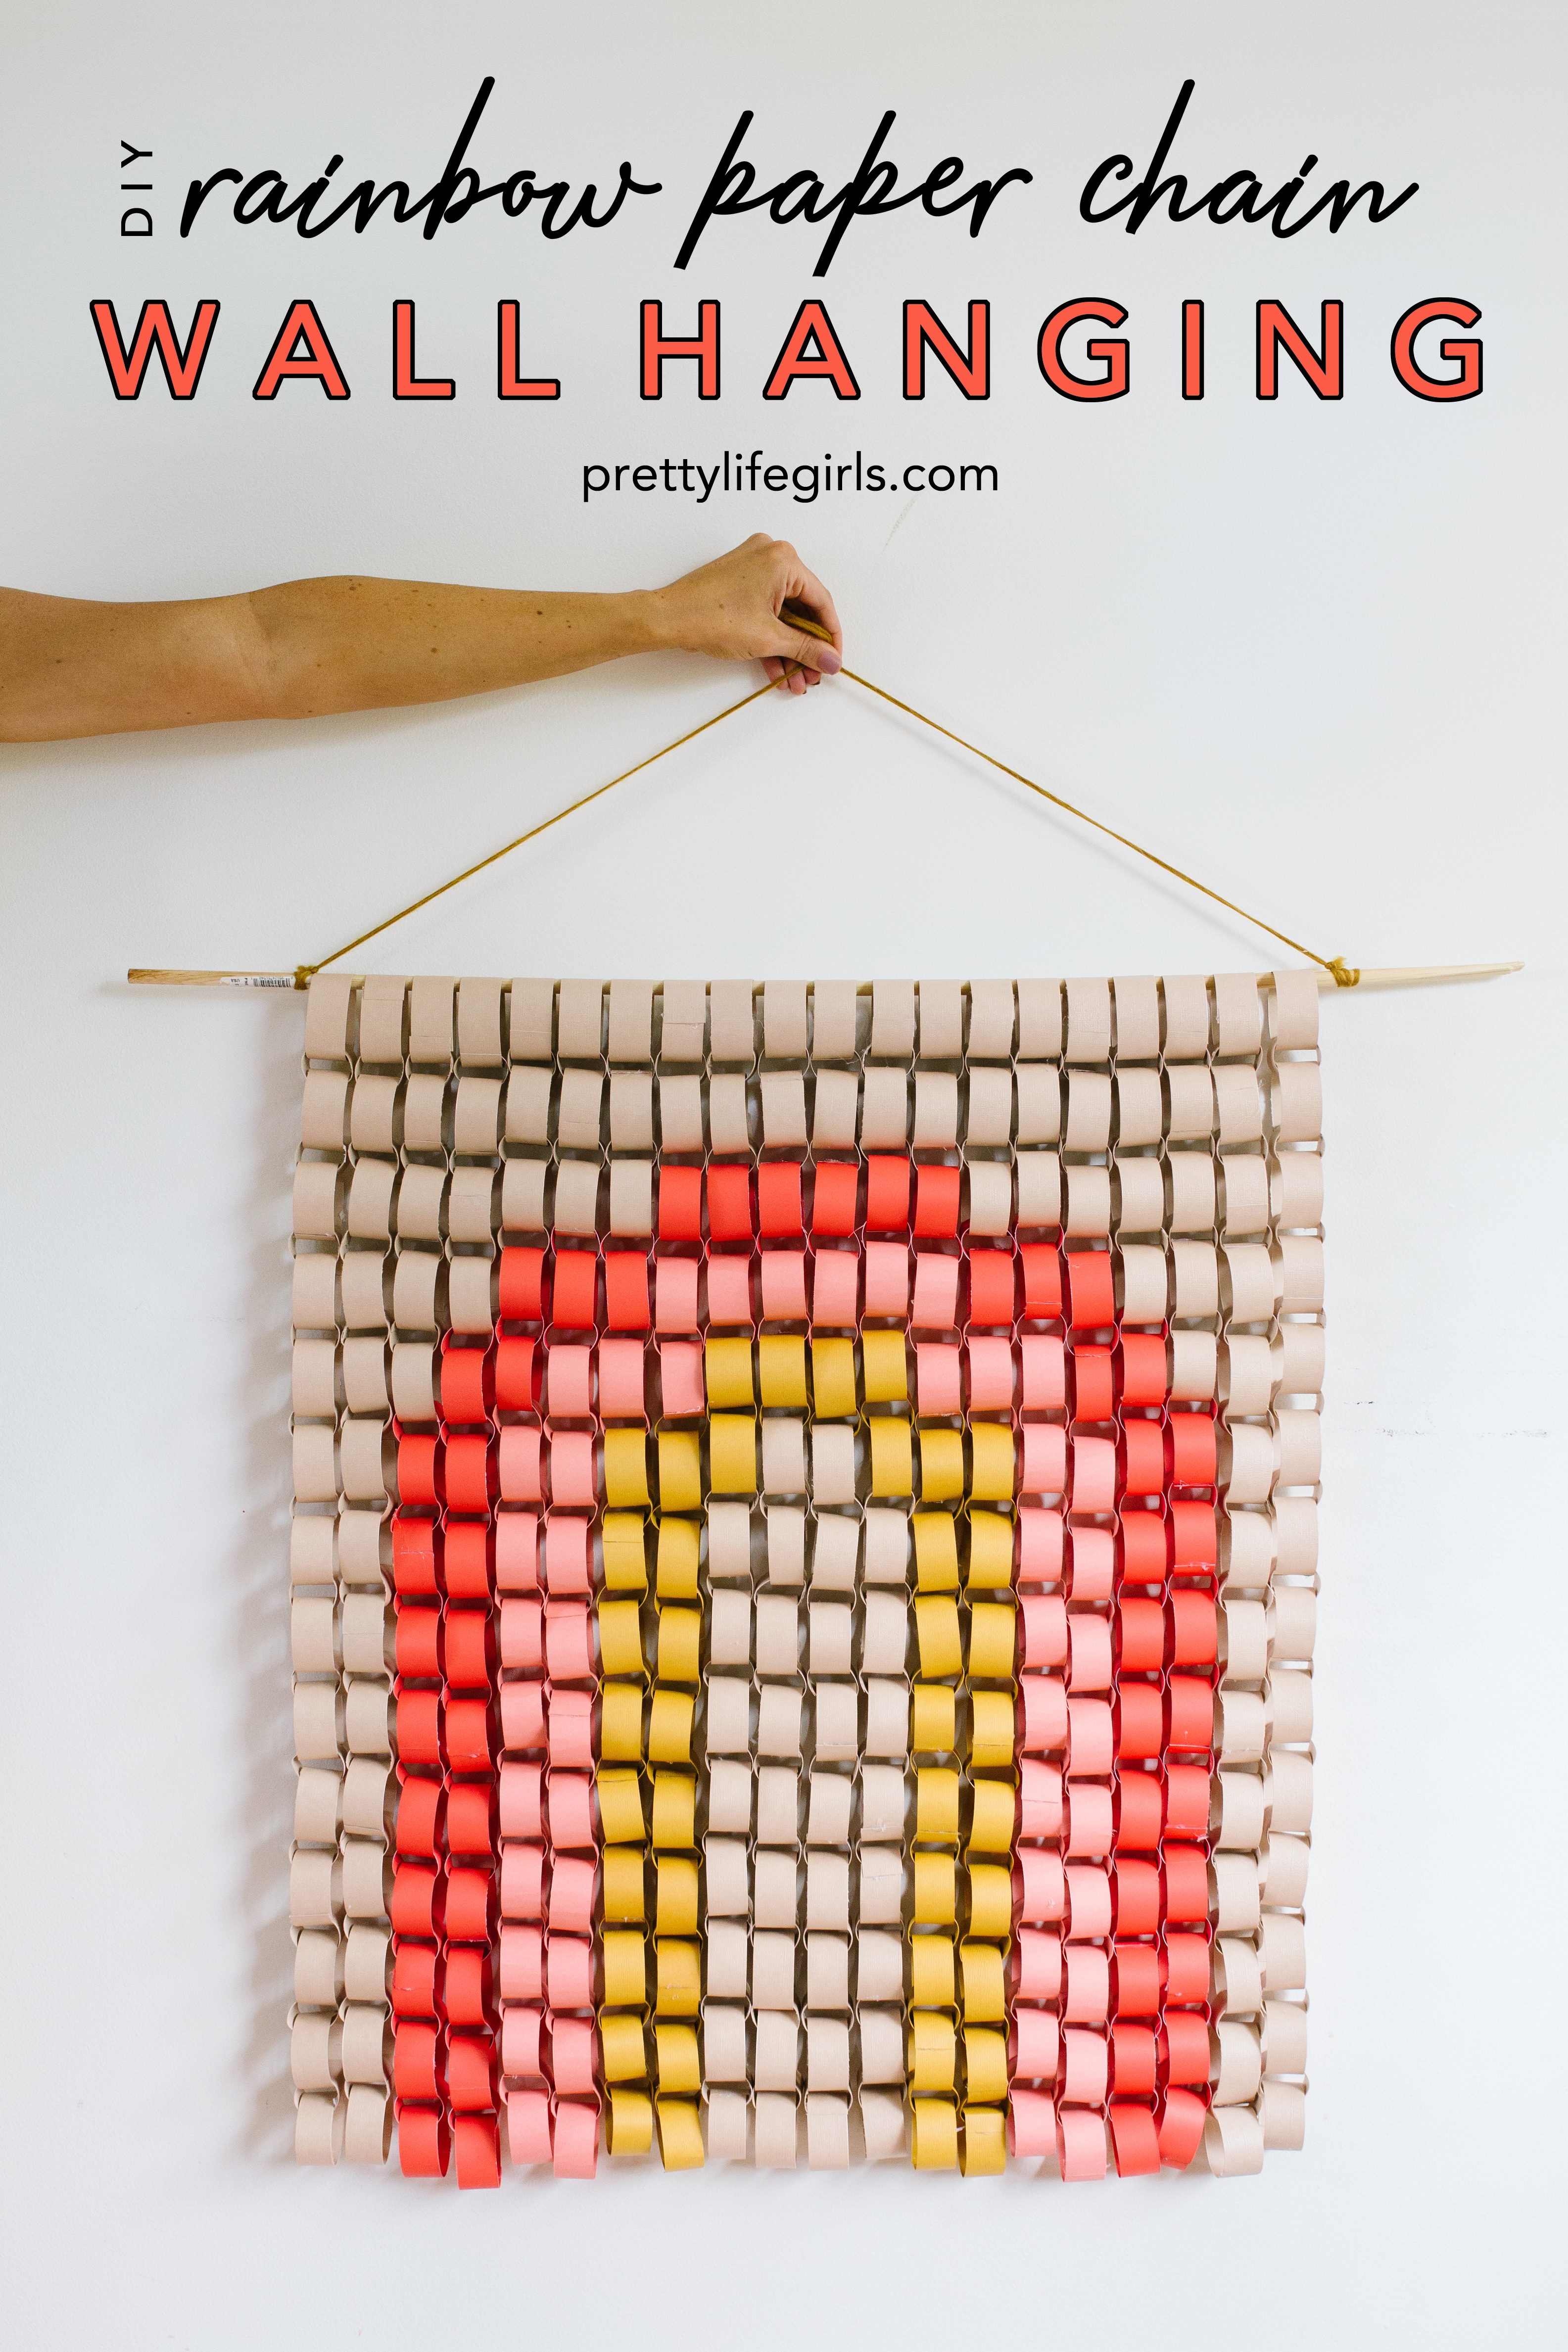
Learn how to make a DIY Paper Chain Rainbow Wall Hanging with this simple tutorial and template! This is the perfect, easy project for bringing some color and joy into your space!
DIY Paper Chain Rainbow Wall Hanging
Making paper chains is such a nostalgic craft. What kid didn’t love making a paper chain to countdown to Christmas or to decorate for the holidays?
And while, sadly, we are no longer making paper chains to countdown to our 10th birthday party, as adults we love how affordable they are while still making a big decor impact!
Plus, all of that folding and glueing and folding and glueing is soooo therapeutic (and pairs wonderfully with a few episodes of The Great British Baking Show).
What can you do with a paper chain?
We all know paper chains are great for countdowns, but there is so much more you can use them for!
You may have seen our oversized paper chain backdrop or this basket weave version. They also make the cutest garlands for parties, using different kinds of papers like paint chips or tickets! We even made a mini garland version for a cake topper.
And last but not least, you can use paper chains for wall hangings!
How to make a paper chain wall hanging
Minimal rainbows in stylish colors have started popping up all over our Pinterest feed, and this was such a fun way to try out the trend. We love this project as wall art for a kids room, party decor, or as decor in a classroom!
All you need is a little paper and glue and you’ll be ready to make this graphic work of art! Keep reading for the tutorial.
Supplies needed to make a Rainbow Wall Hanging
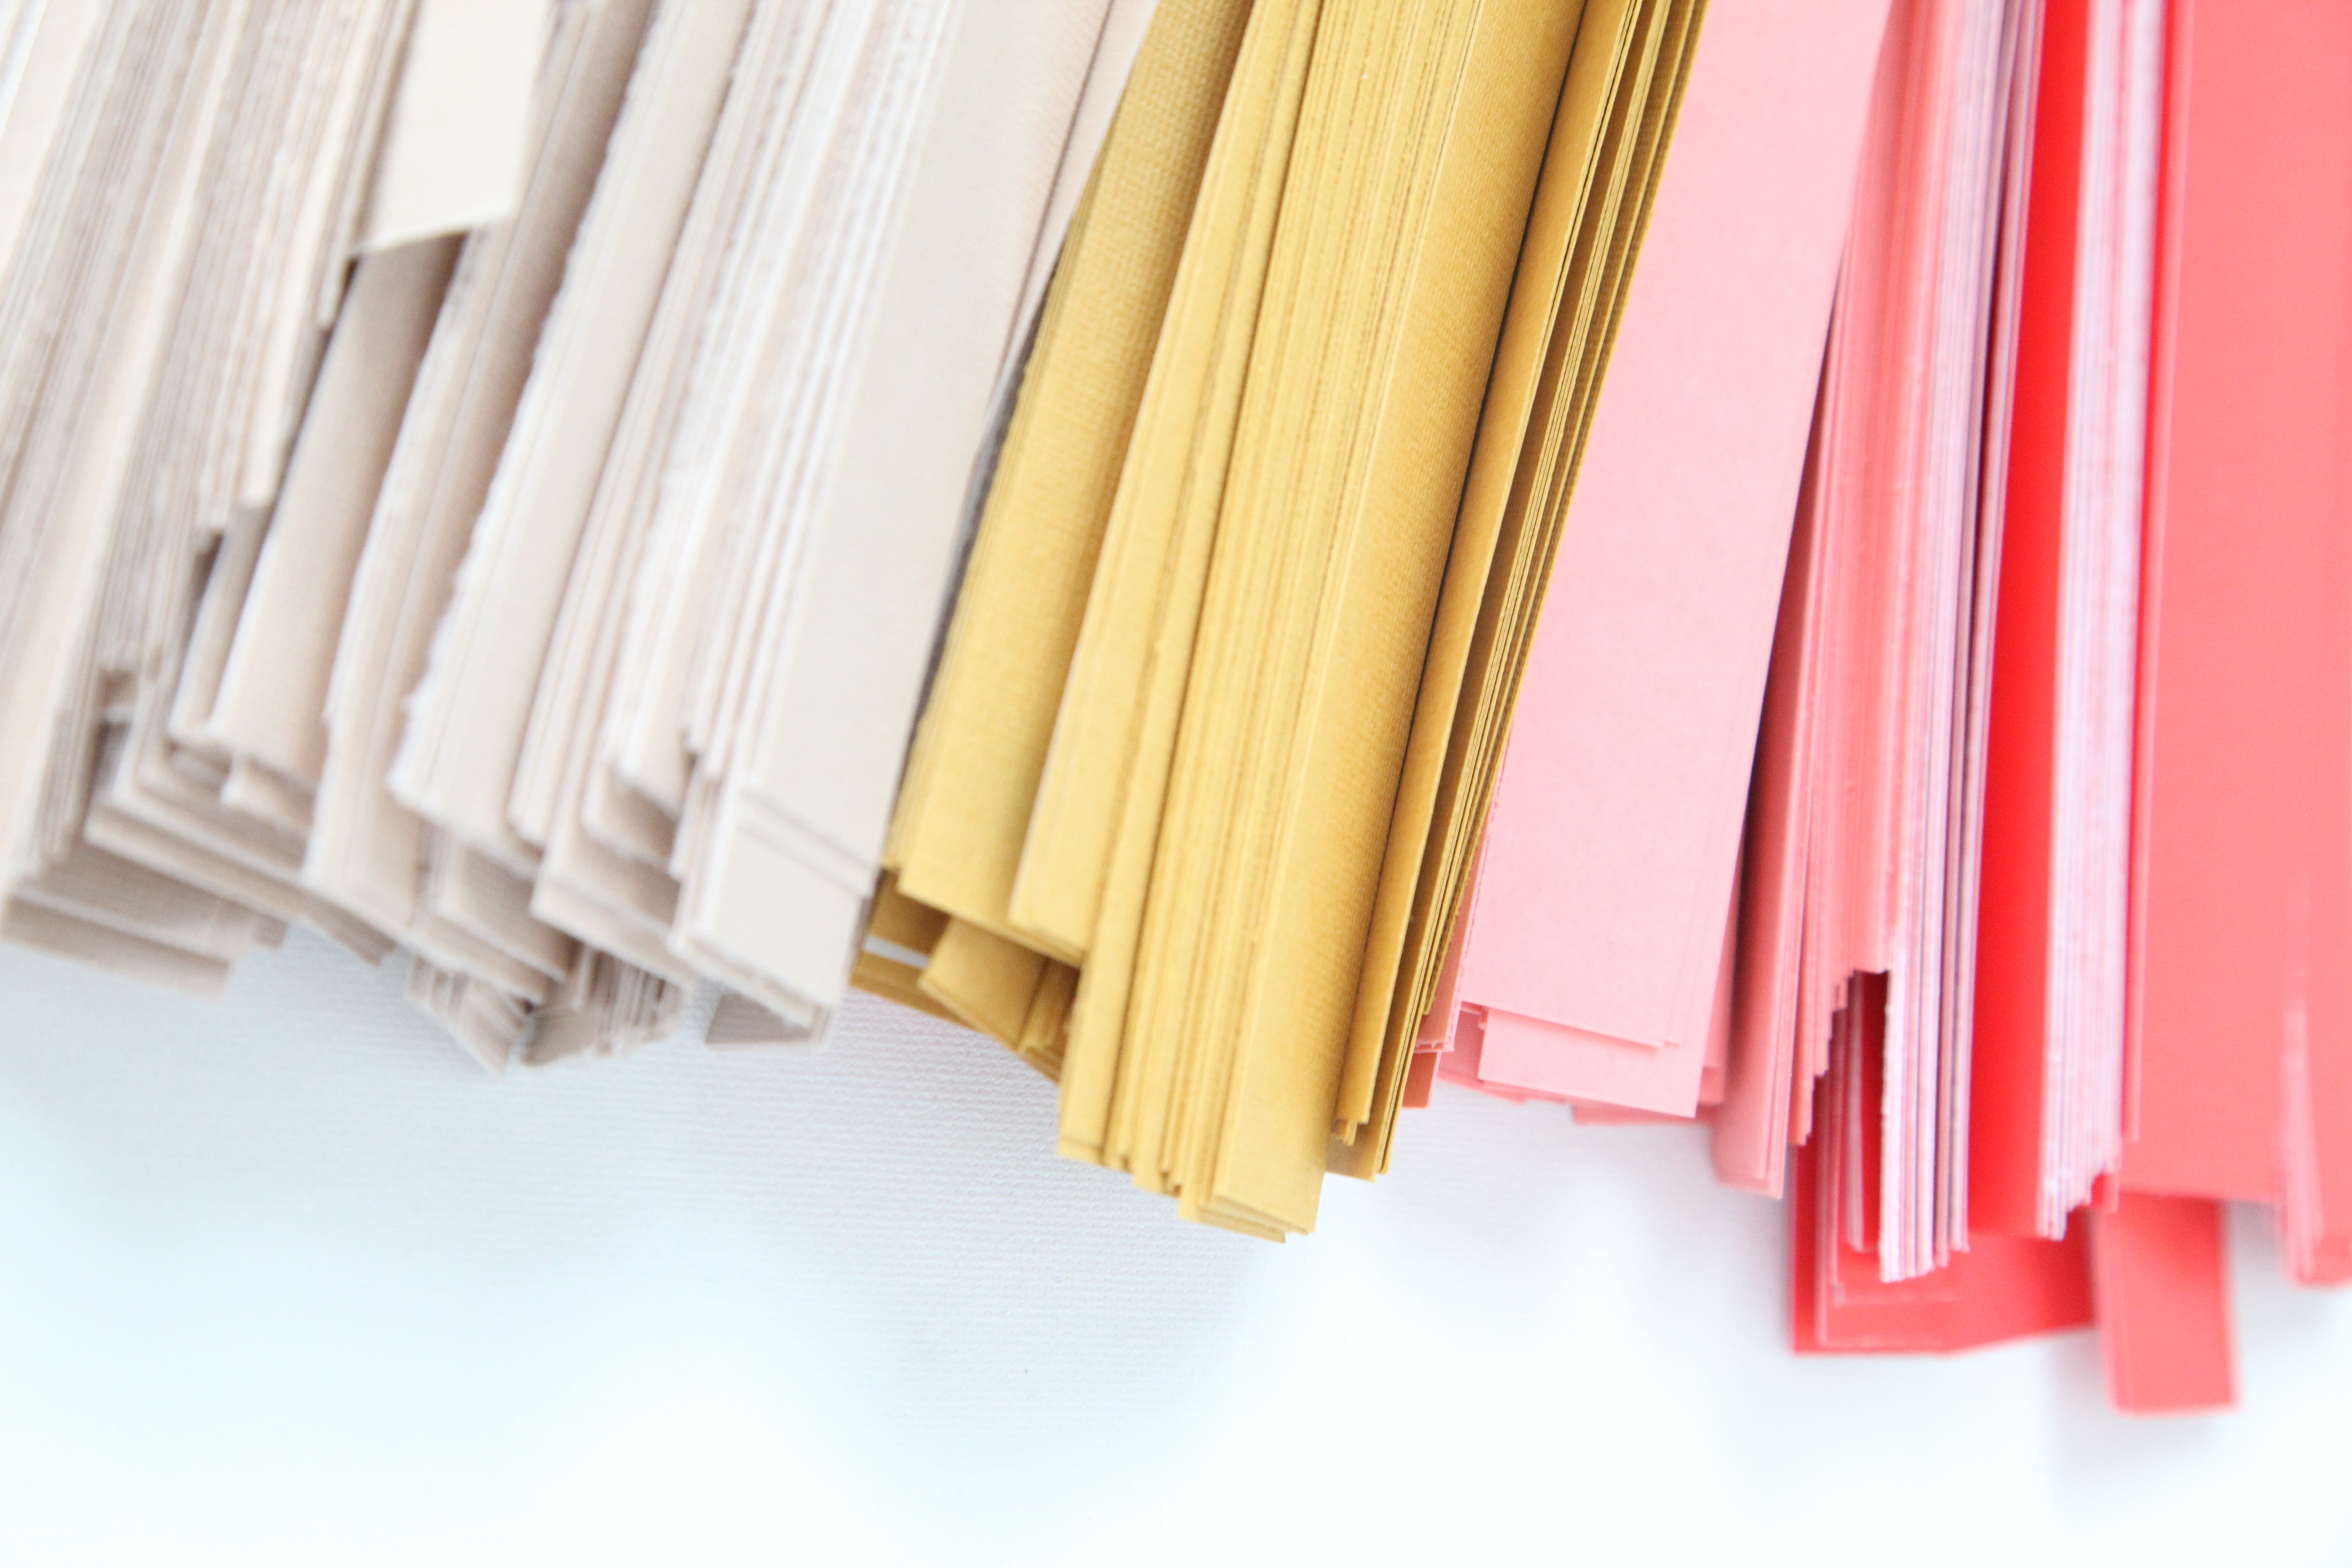
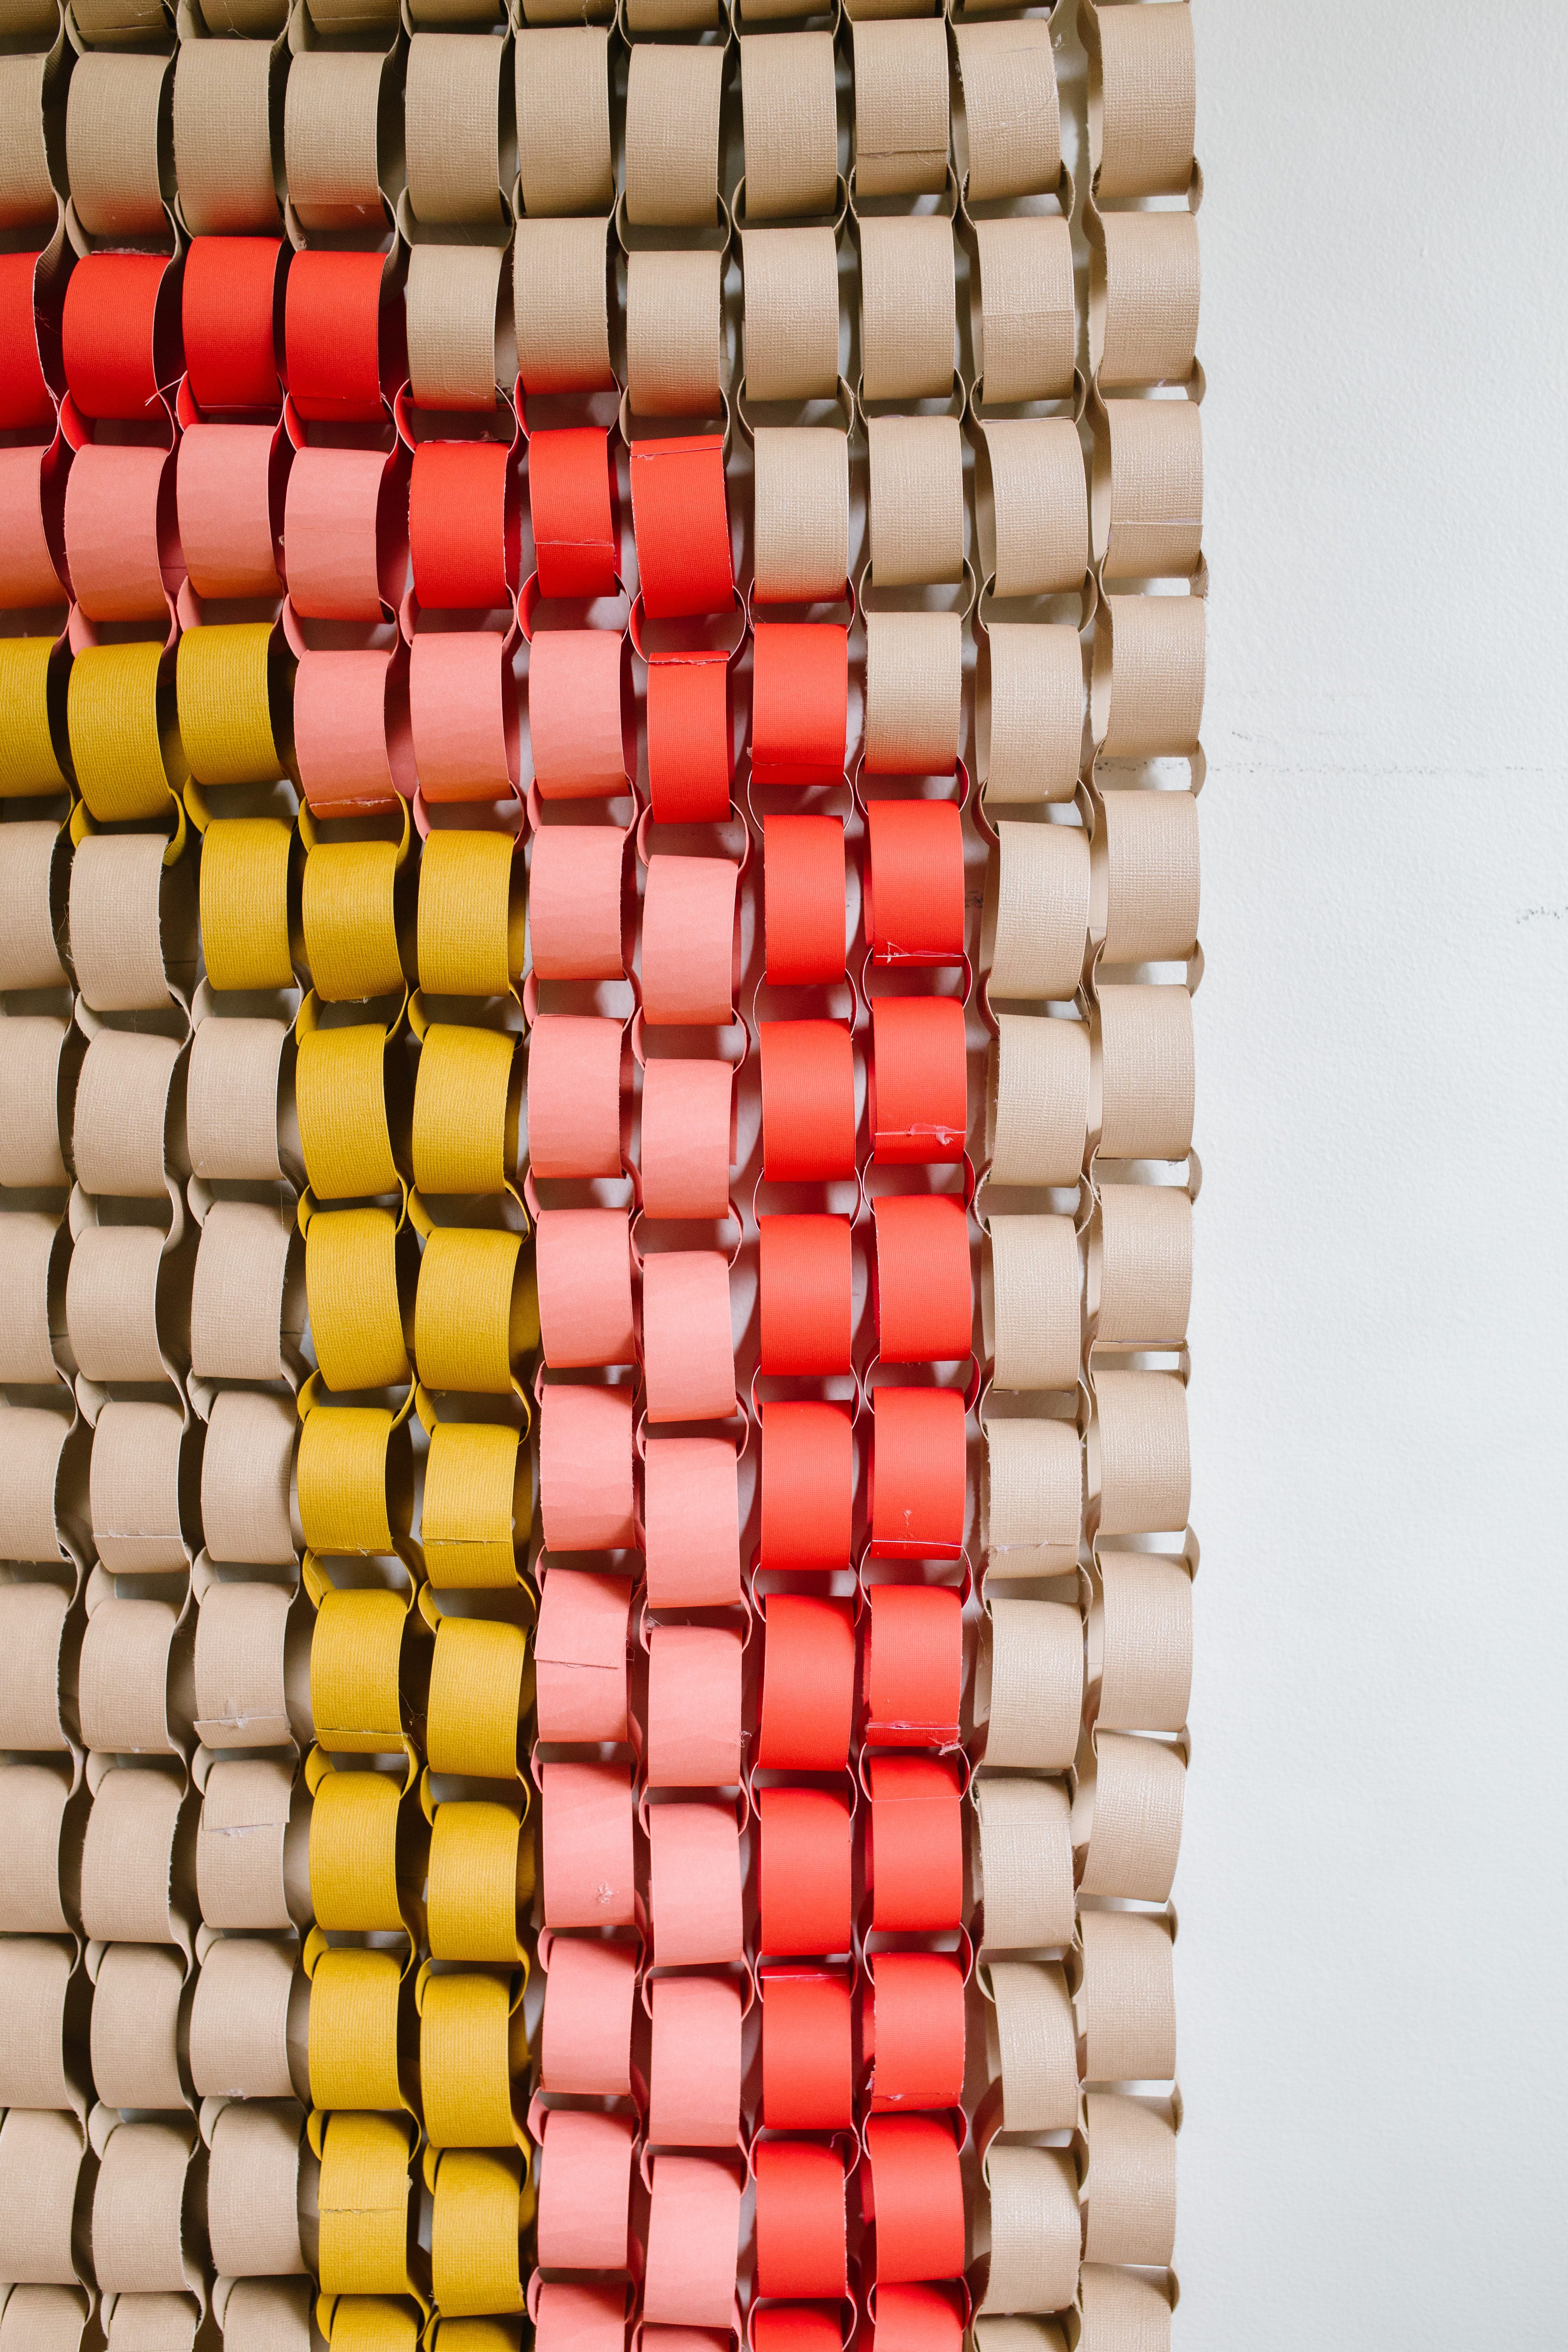
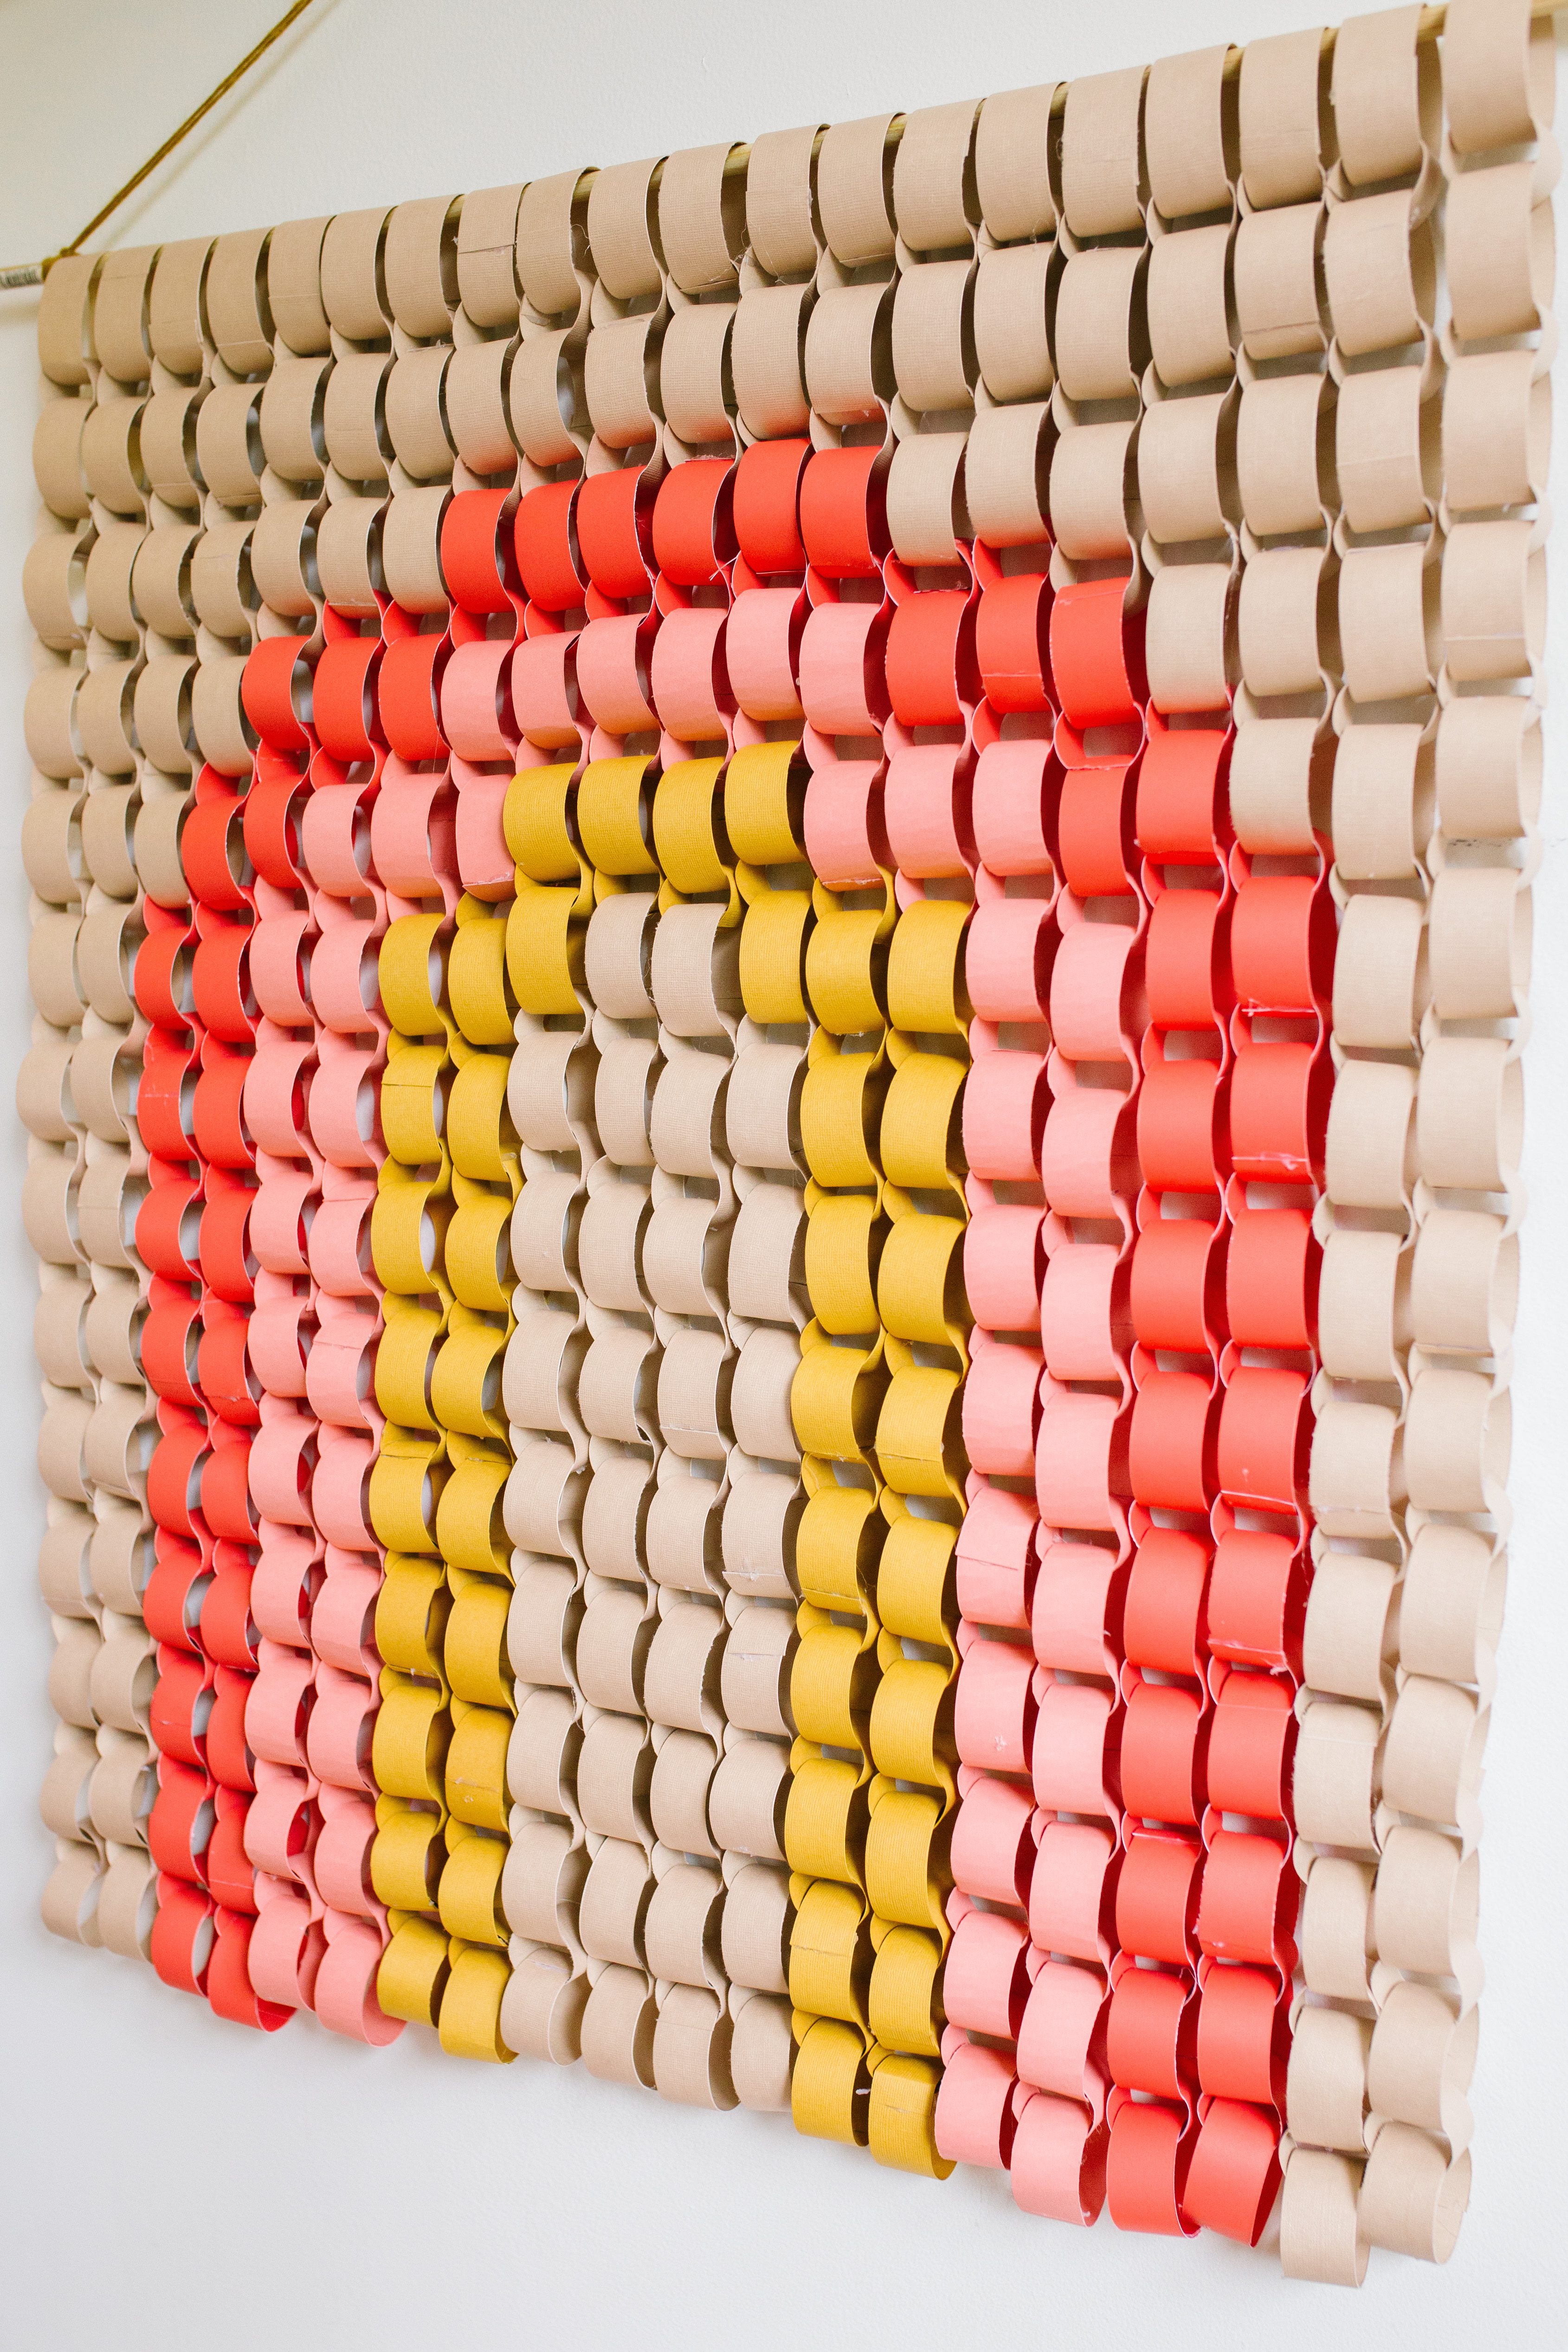
- Cardstock in desired colors (we used tan, mustard, light pink, and coral)
- Paper slicer
- Hot glue gun + sticks
- Dowel
- Twine
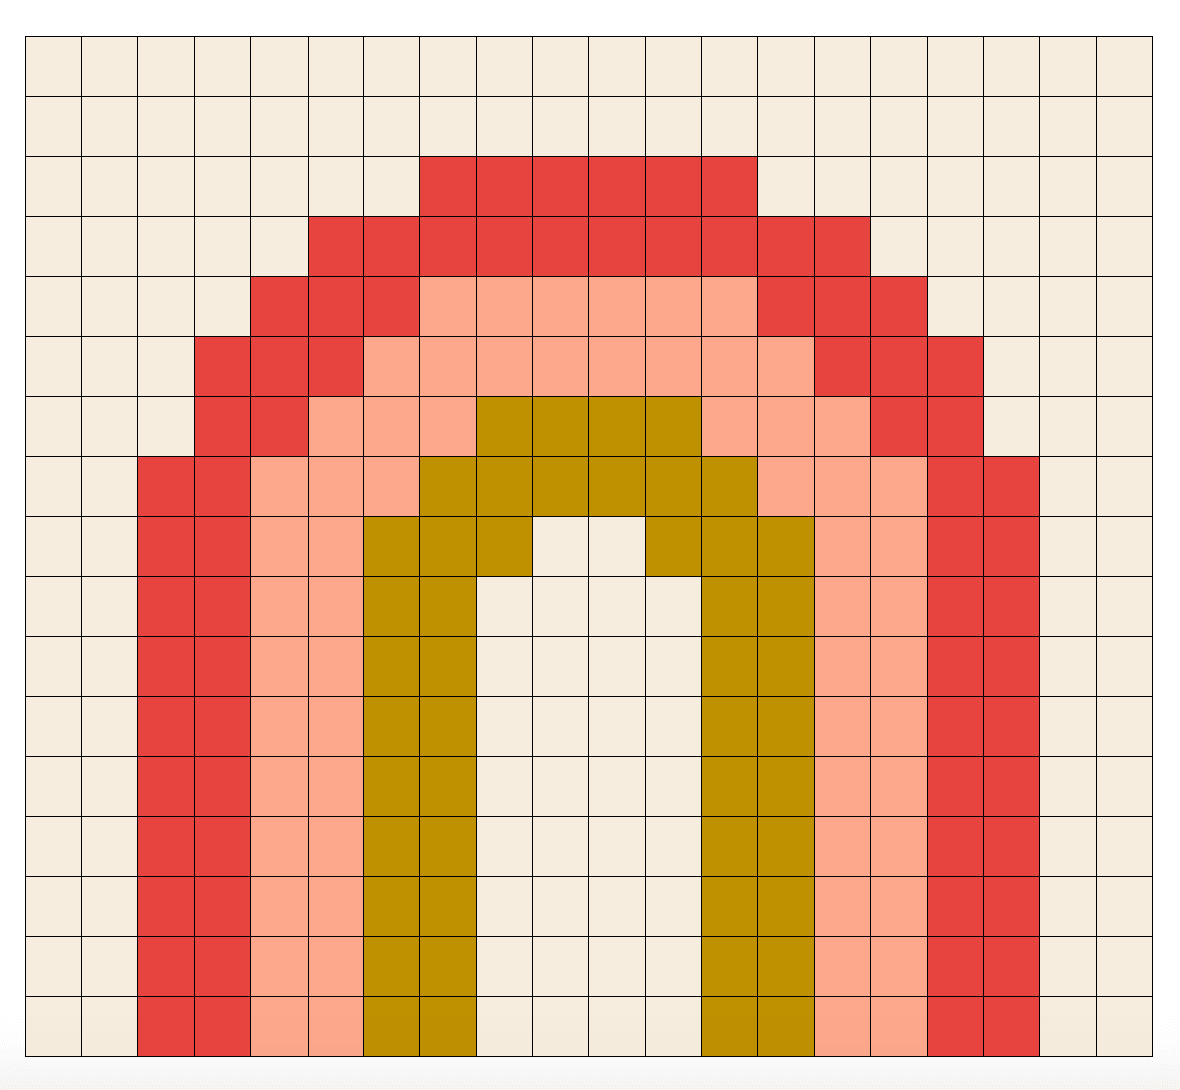
- Rainbow template (below)
How to make a Paper Chain Rainbow Wall Hanging
Step 1: Map your design
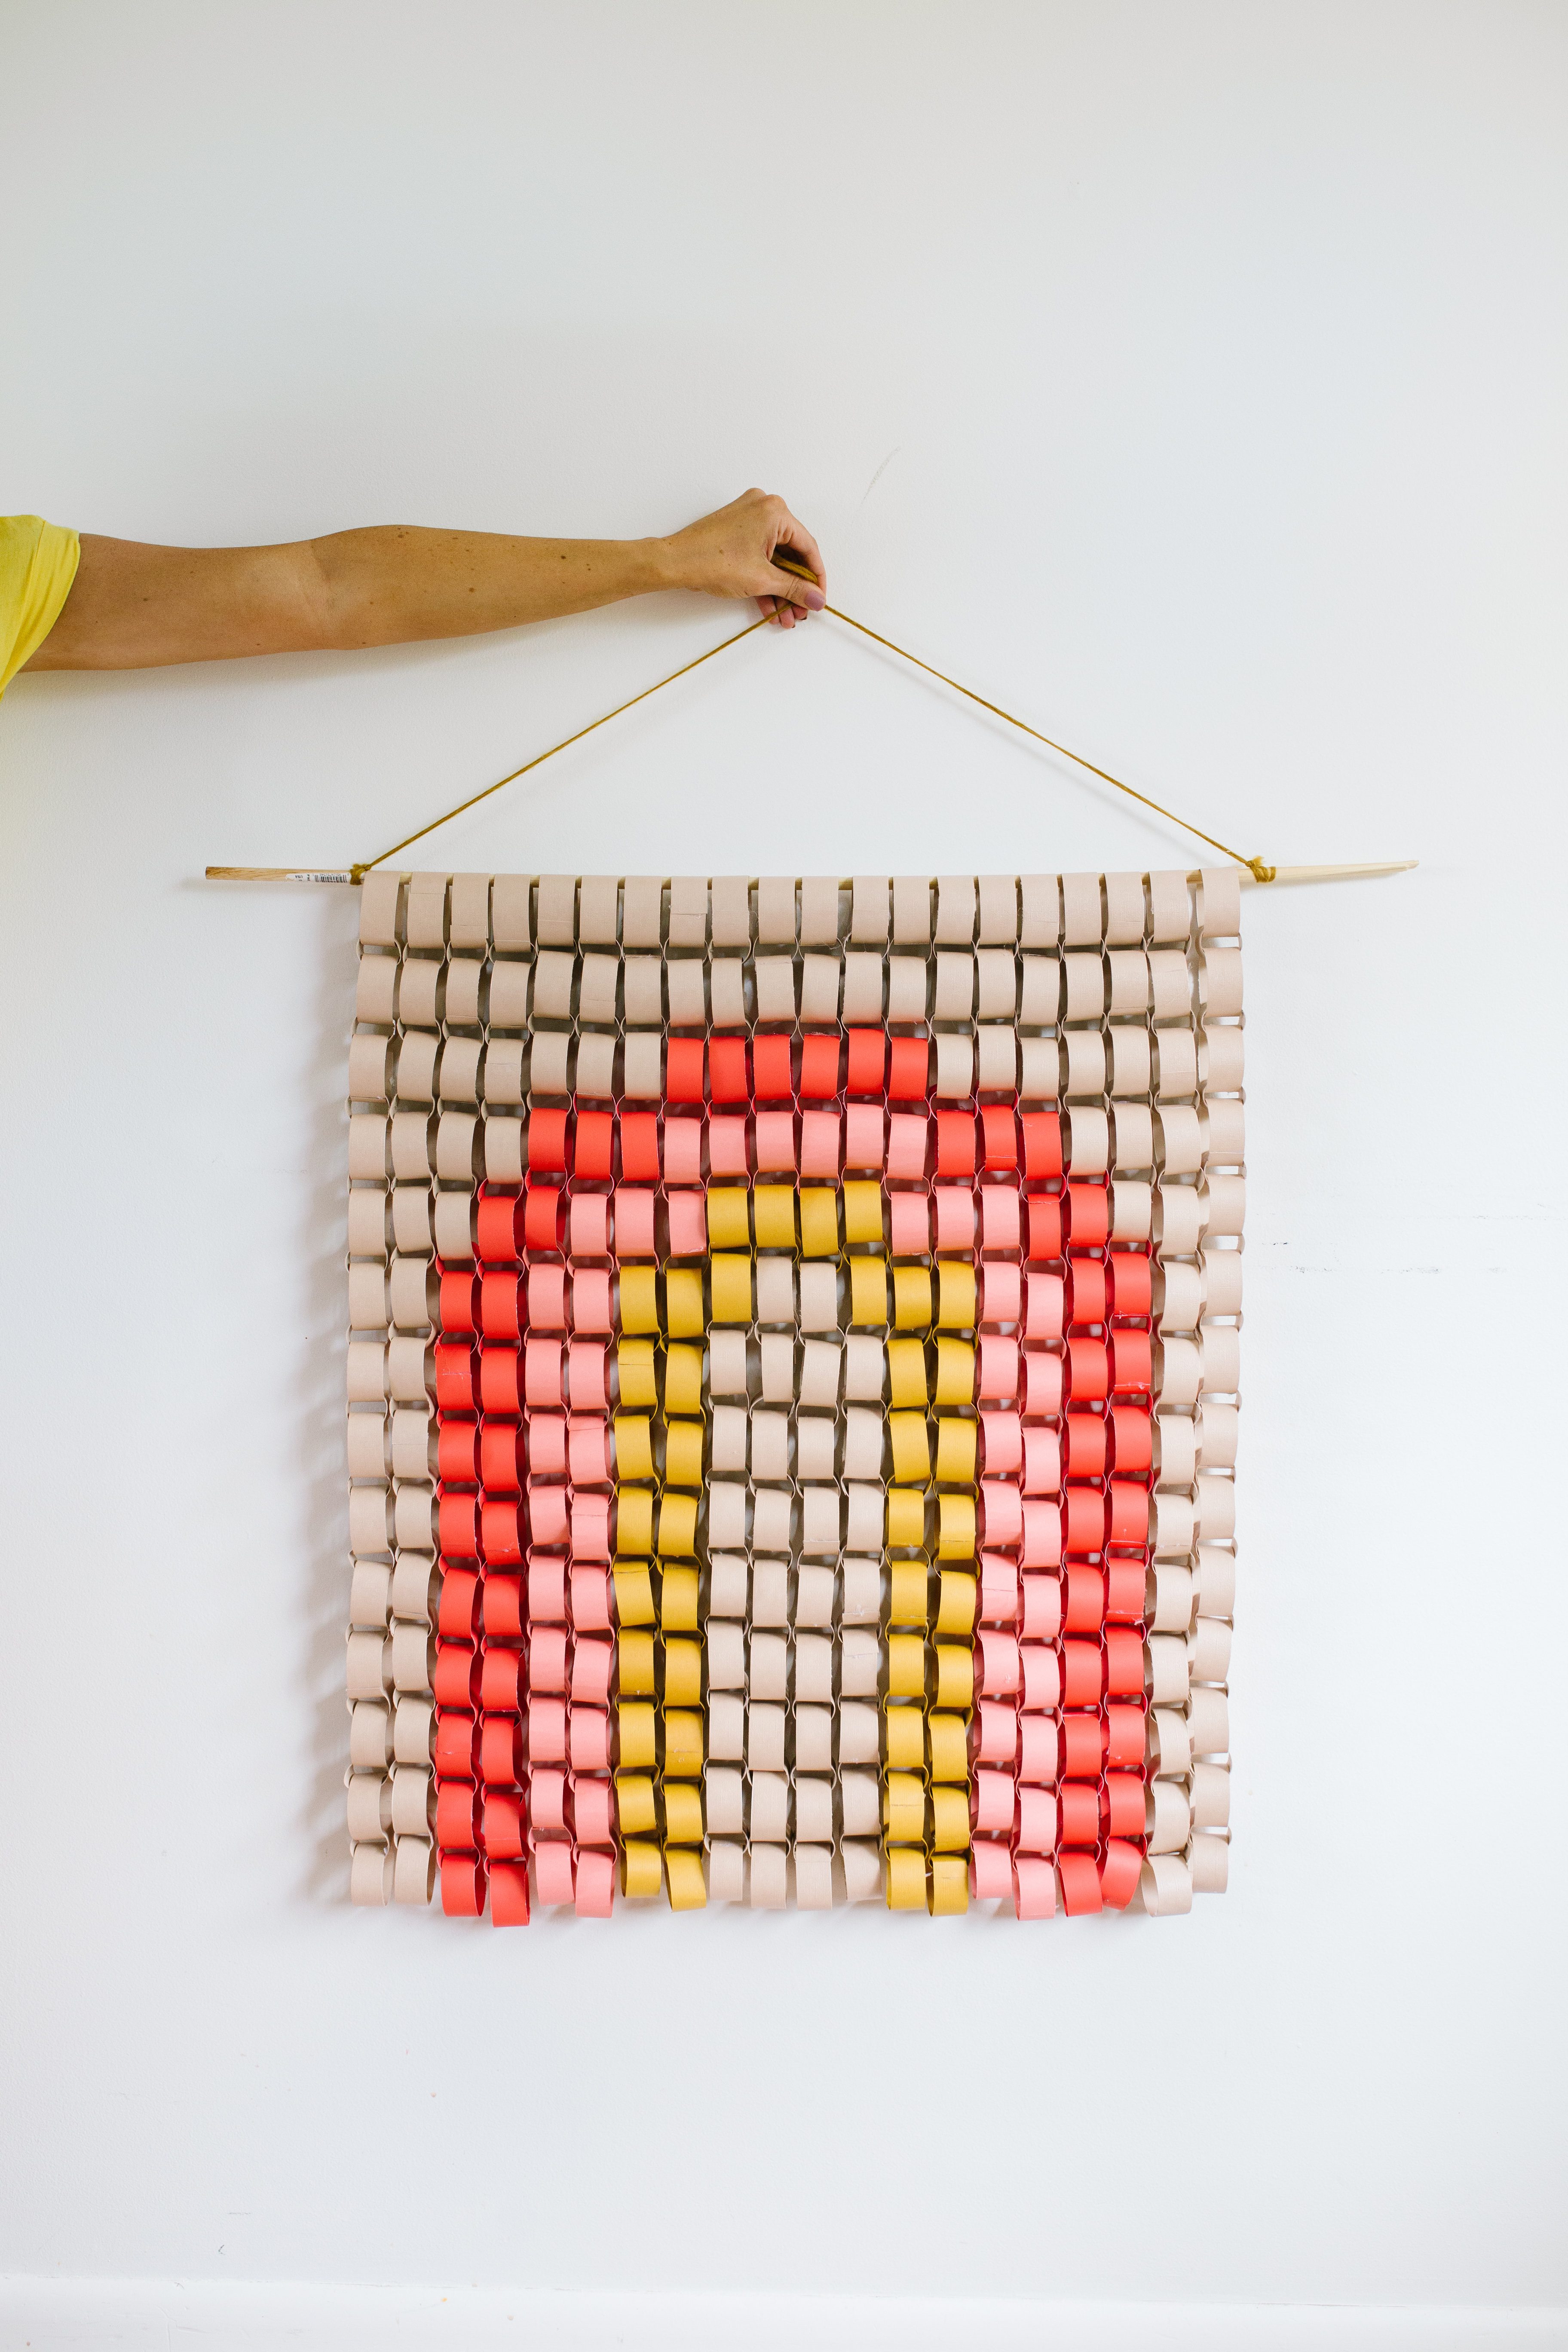
Begin by mapping out your design. If you are using our template, each square represents 2 links, so if you would like to make your wall hanging smaller, you can mark off the squares you will not be using, or, if you’d like to make it larger you can make edits to the template to add more.
Step 2: Cut paper strips
As mentioned in step 1, each square represents two links that you will want to cut out with your paper slicer or scissors. We cut each of our strips at about 6″ x 1″ wide.
Step 3: Assemble the chains
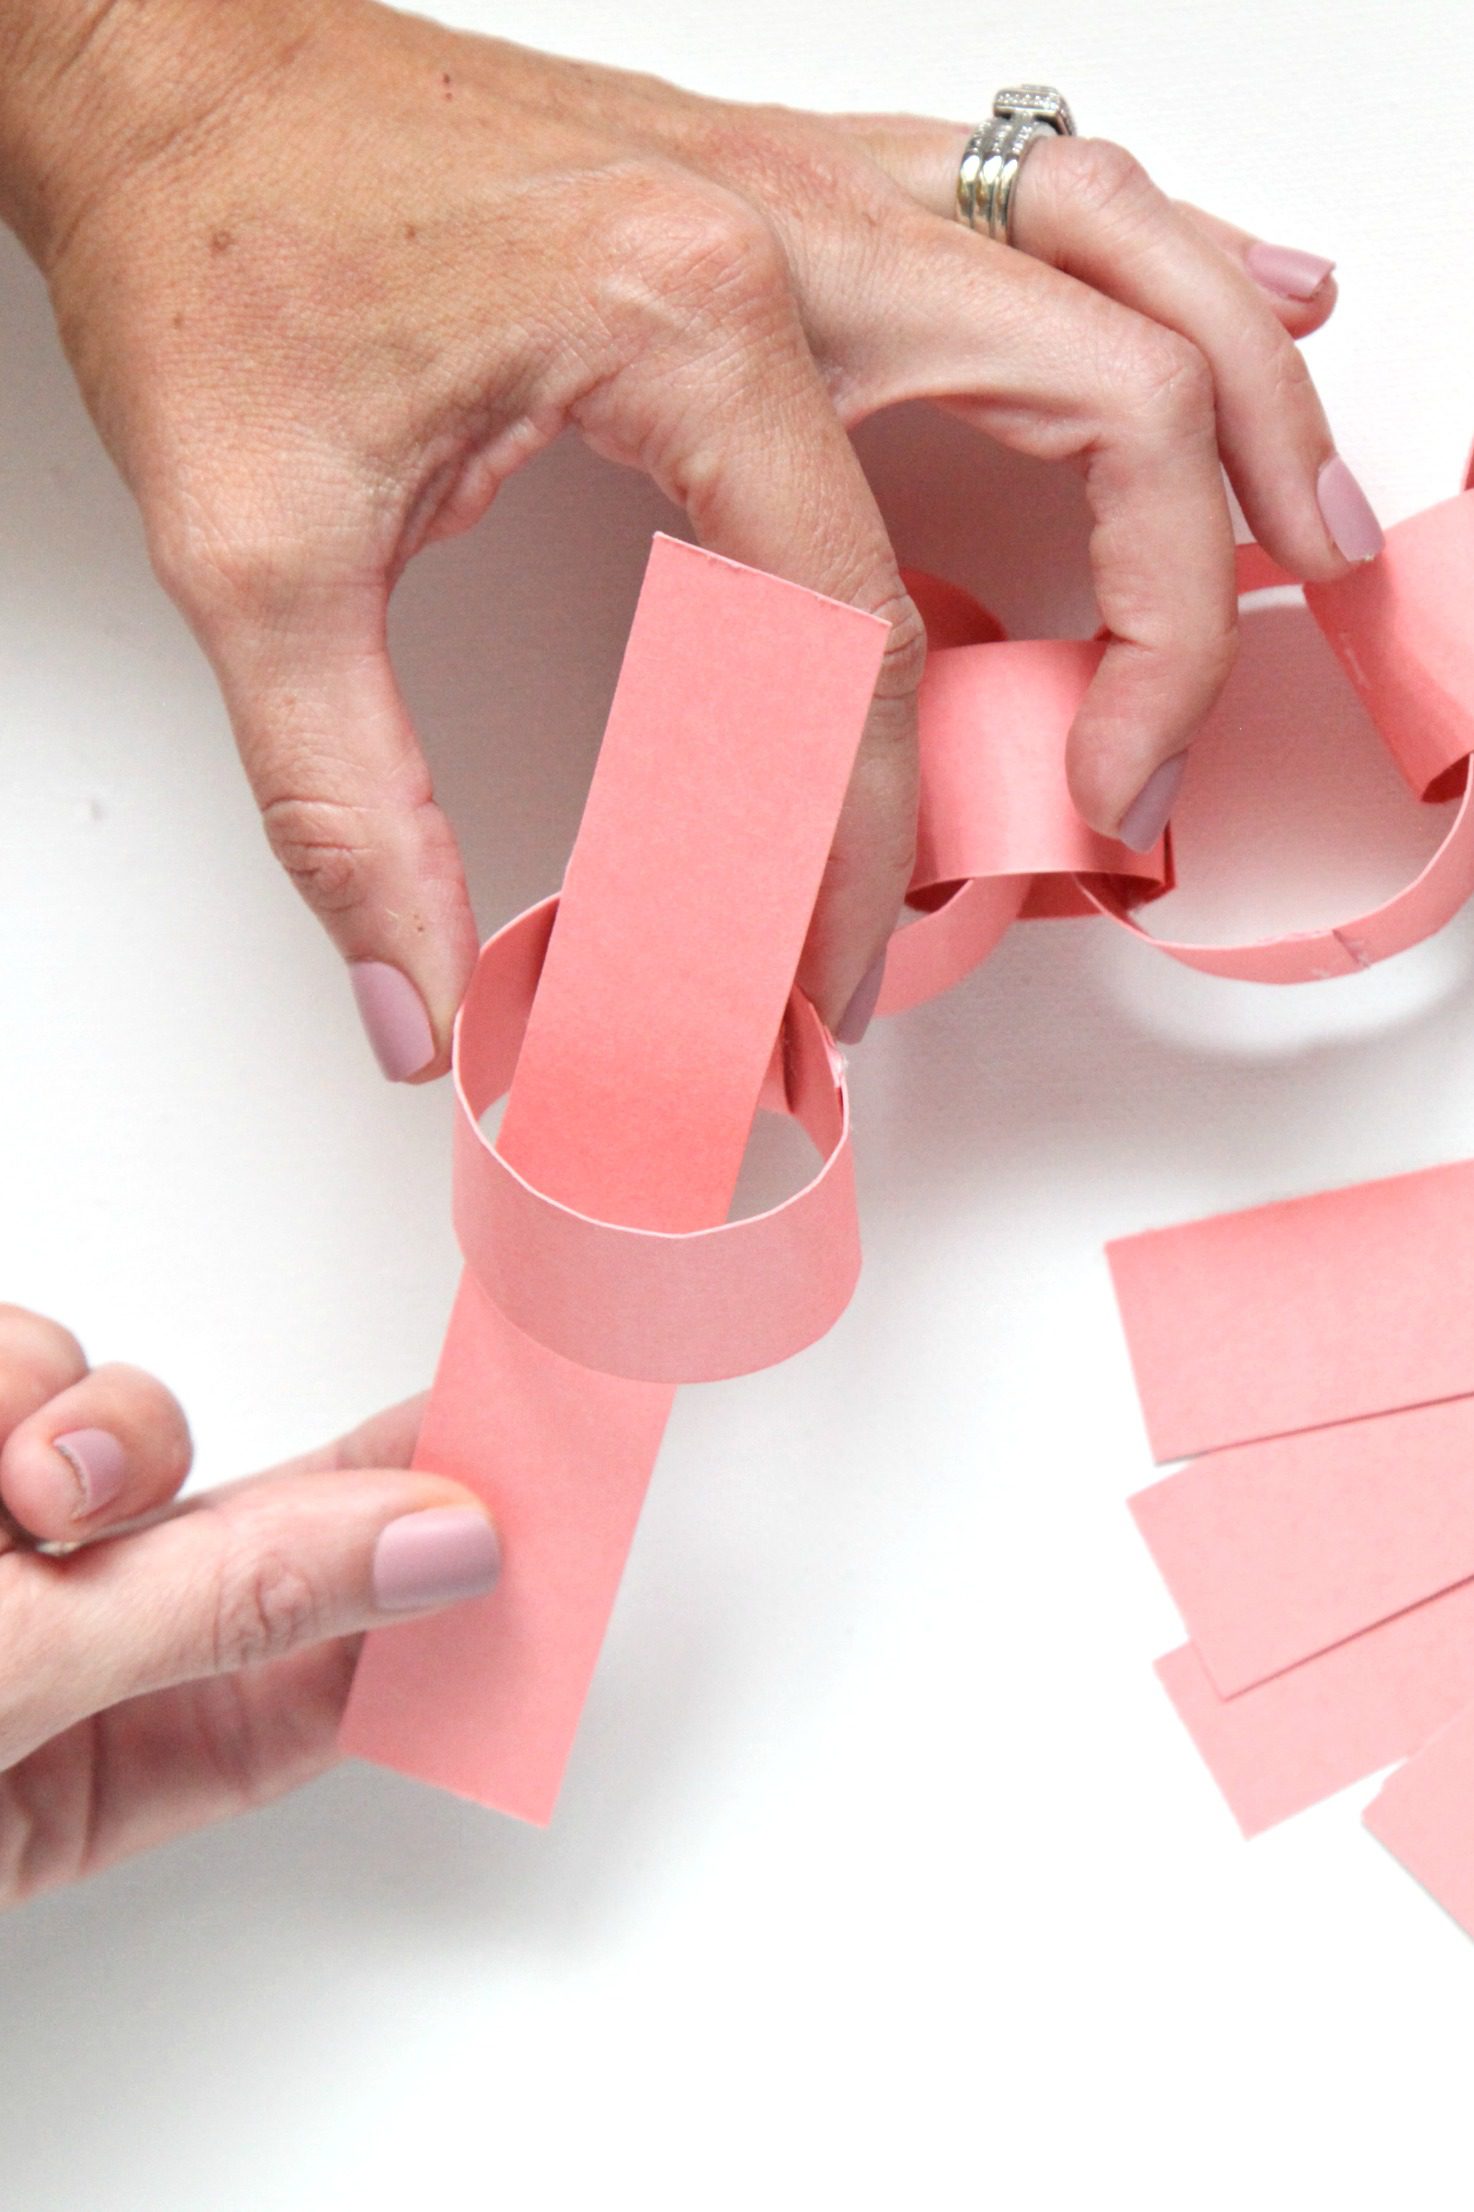
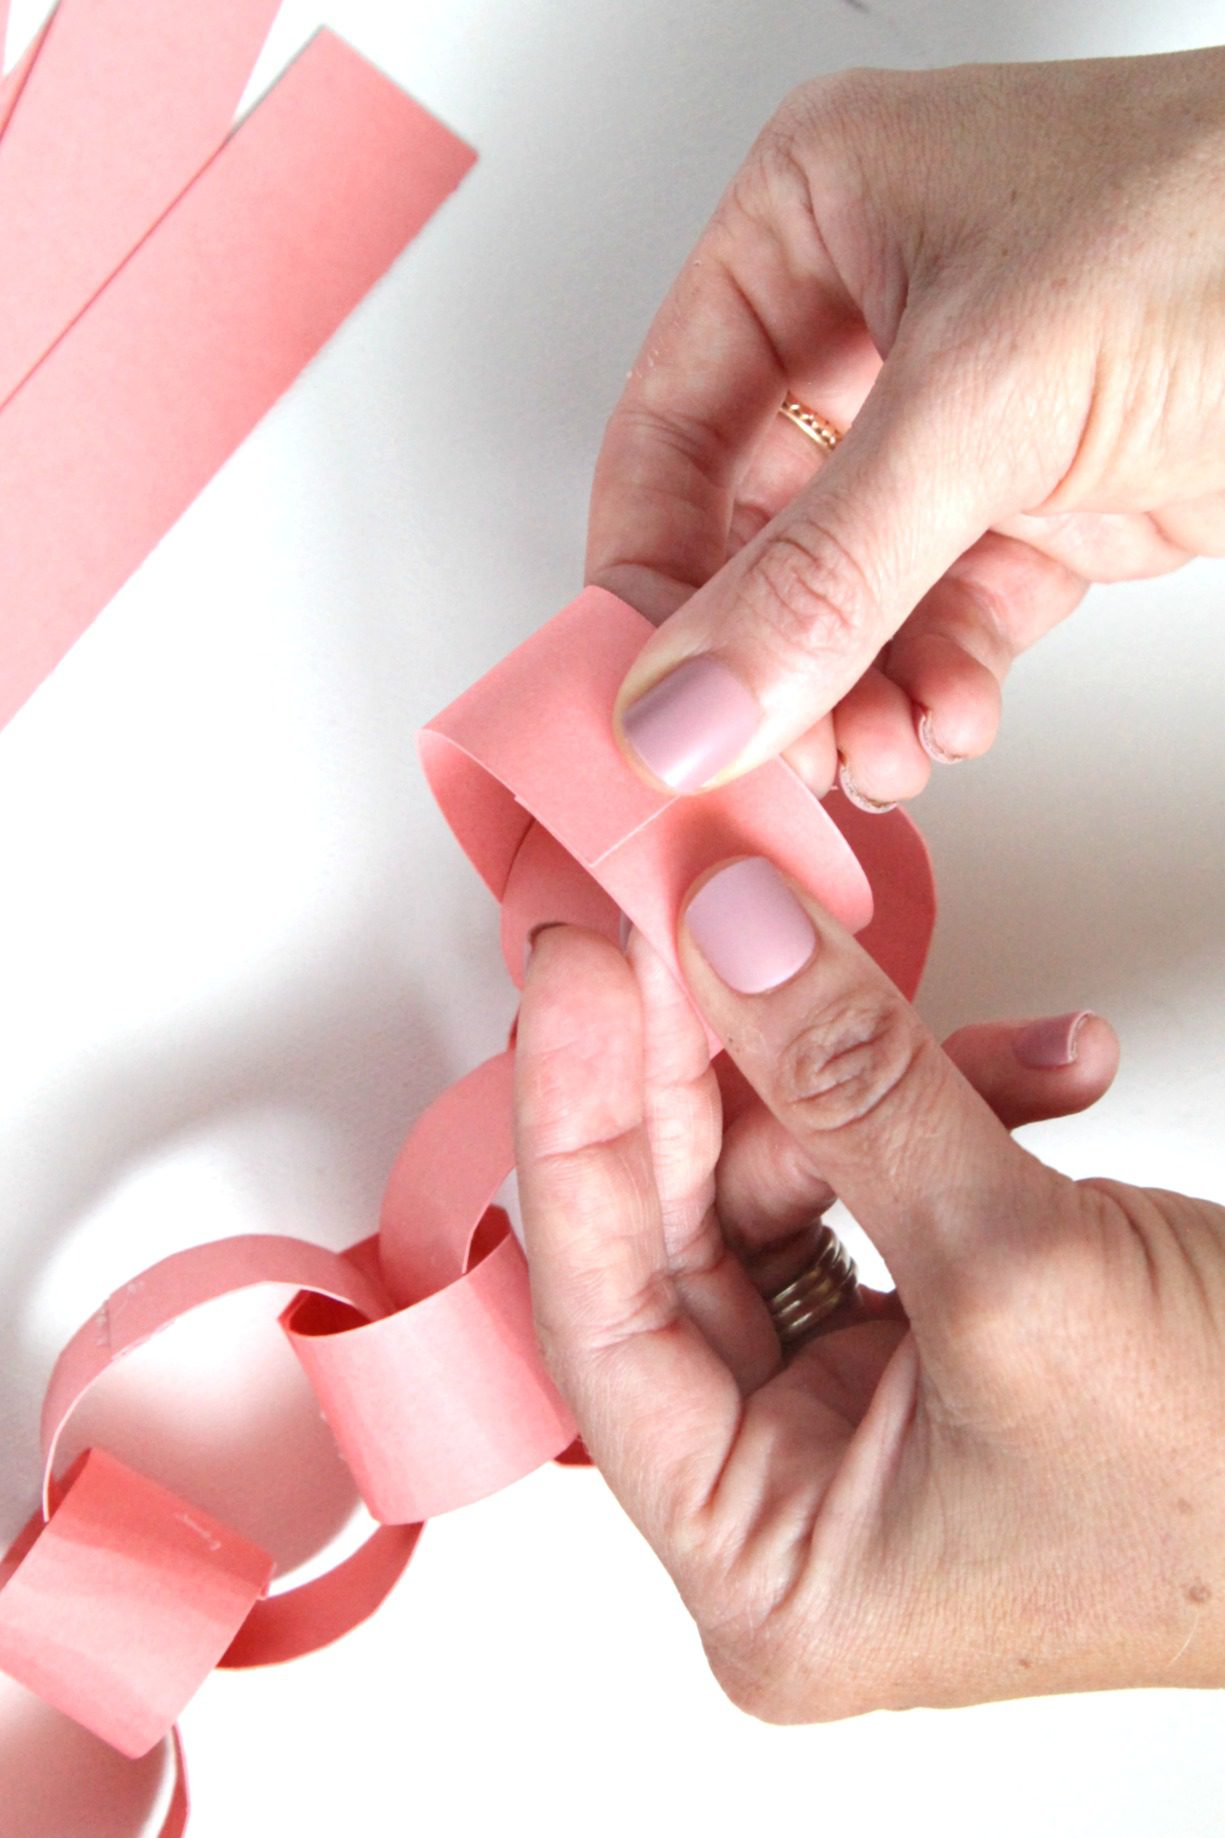
Begin making your chains by creating a loop with one paper strip and secure the ends with a dot of hot glue to make a ring. Slide the next strip inside of the ring, wrap then ends around and secure them with hot glue to make another ring. Repeat this process working on the first vertical chain, from top to bottom, changing colors according to the template.
Tip: We found that the rainbow image is more distinct if the connector chains are tighter. For instance, on the first ring of every row you would glue the strips together right on the edge of the paper, but on the next right you would put your glue about an inch from the edge of the strip to make it tighter. By repeating this pattern with every other ring, there will be less space between the rings and the design will show more clearly.
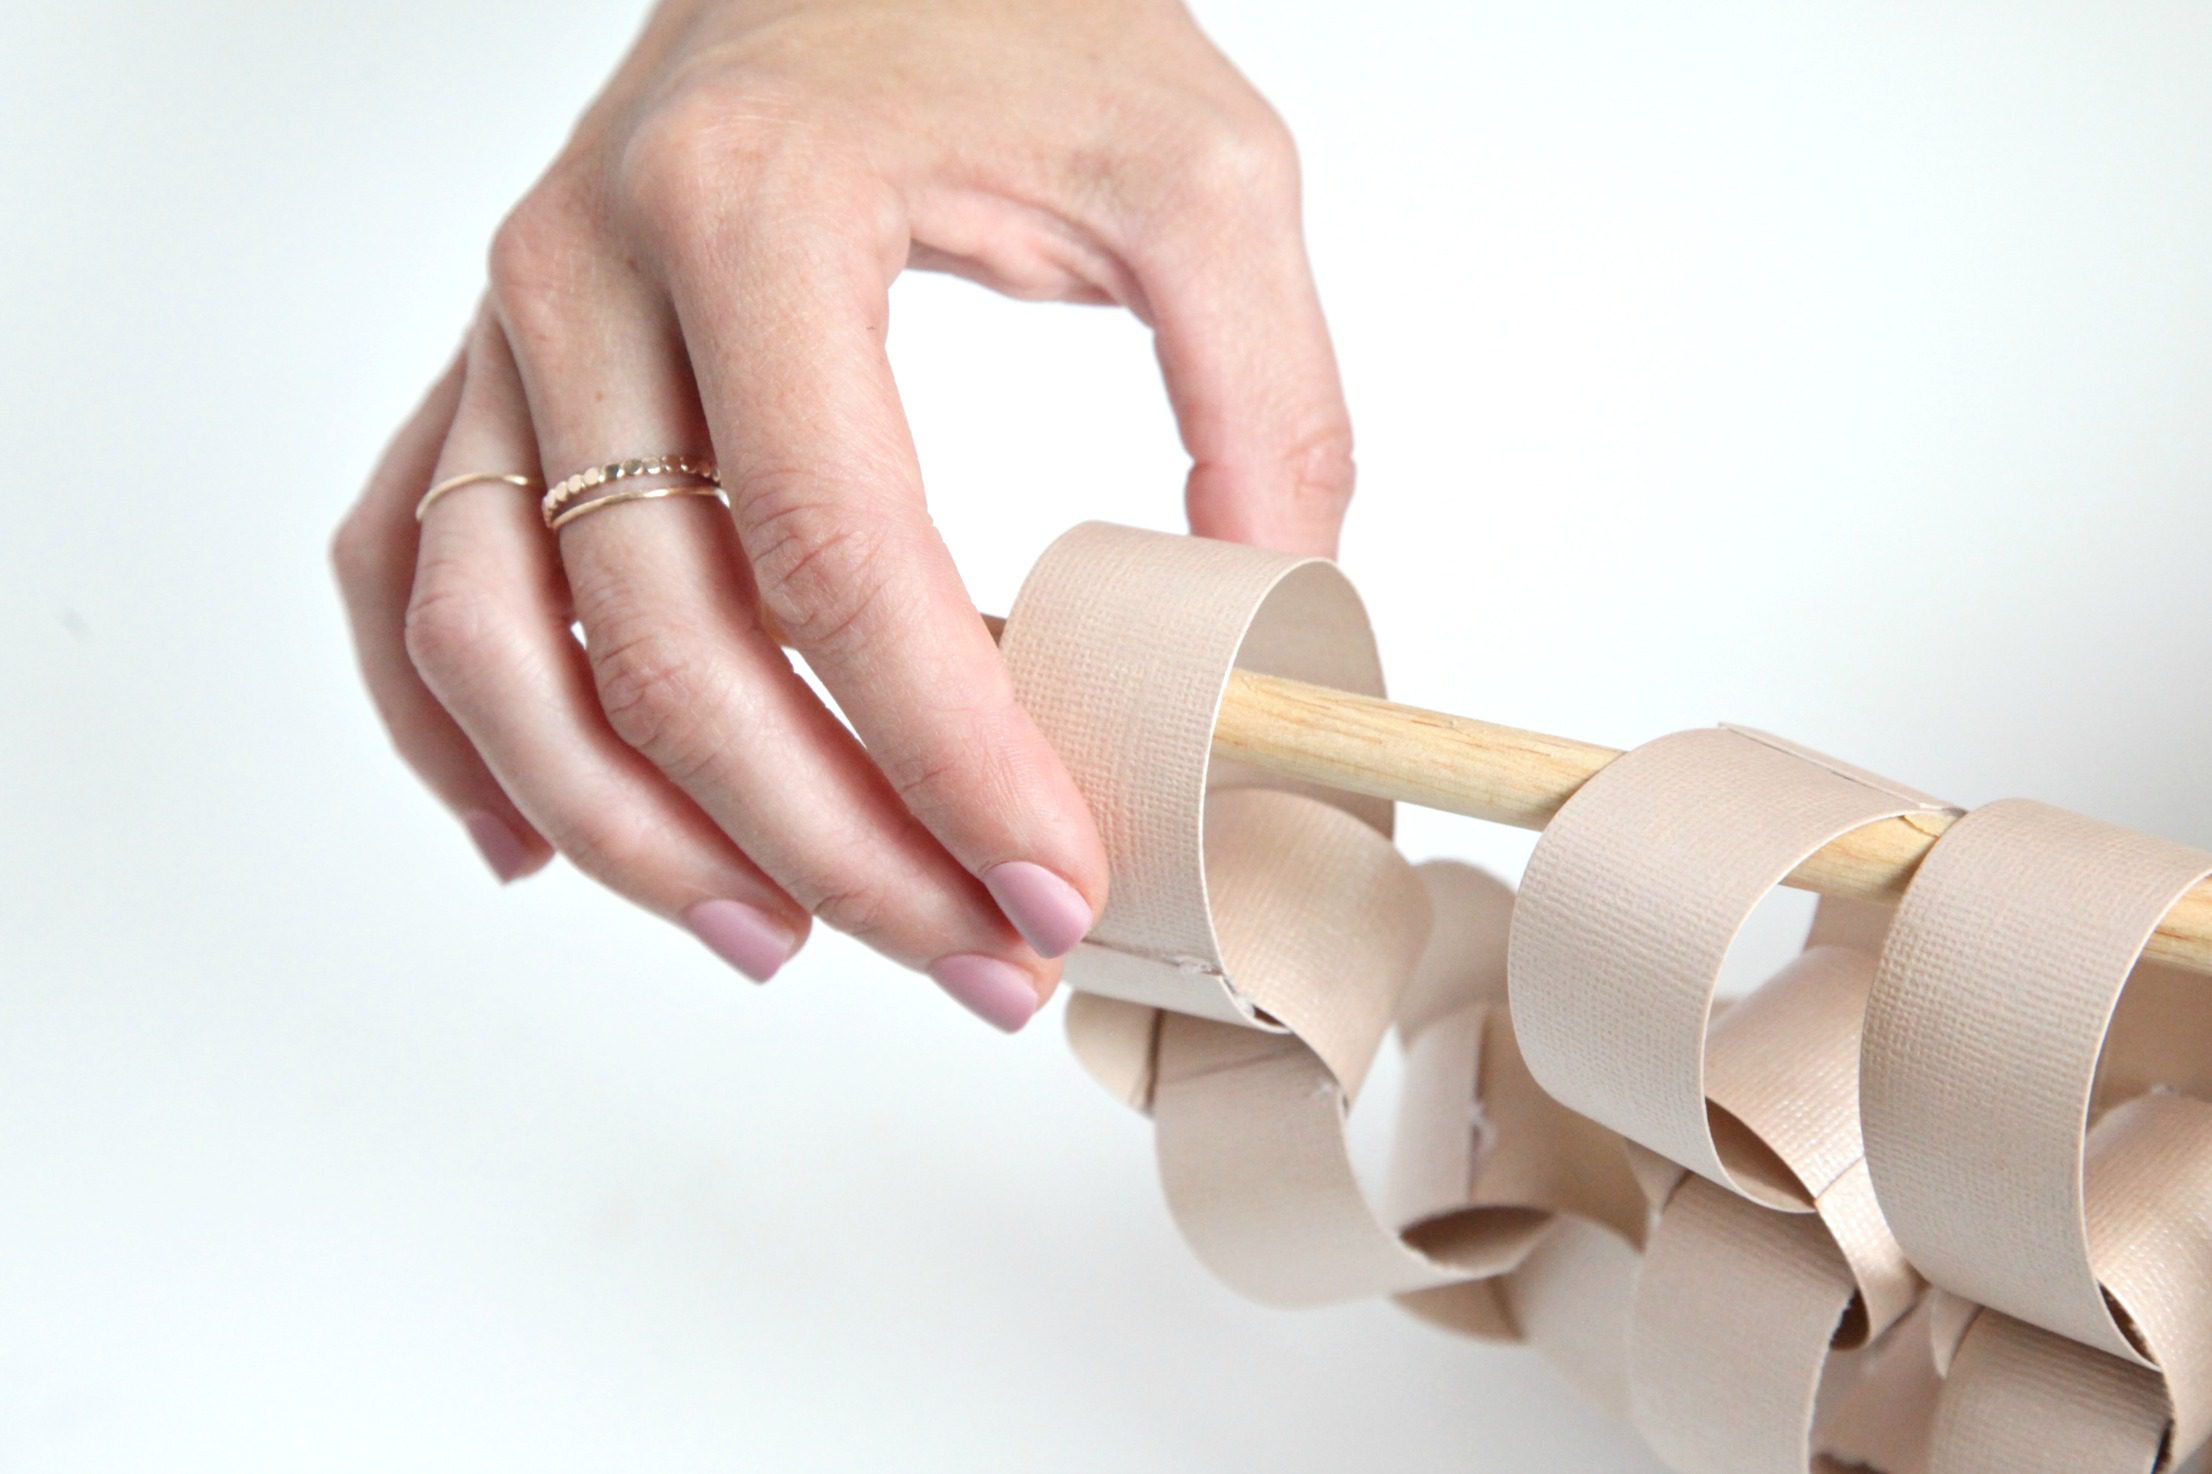
 Step 4: Create the wall hanging
 Step 4: Create the wall hanging
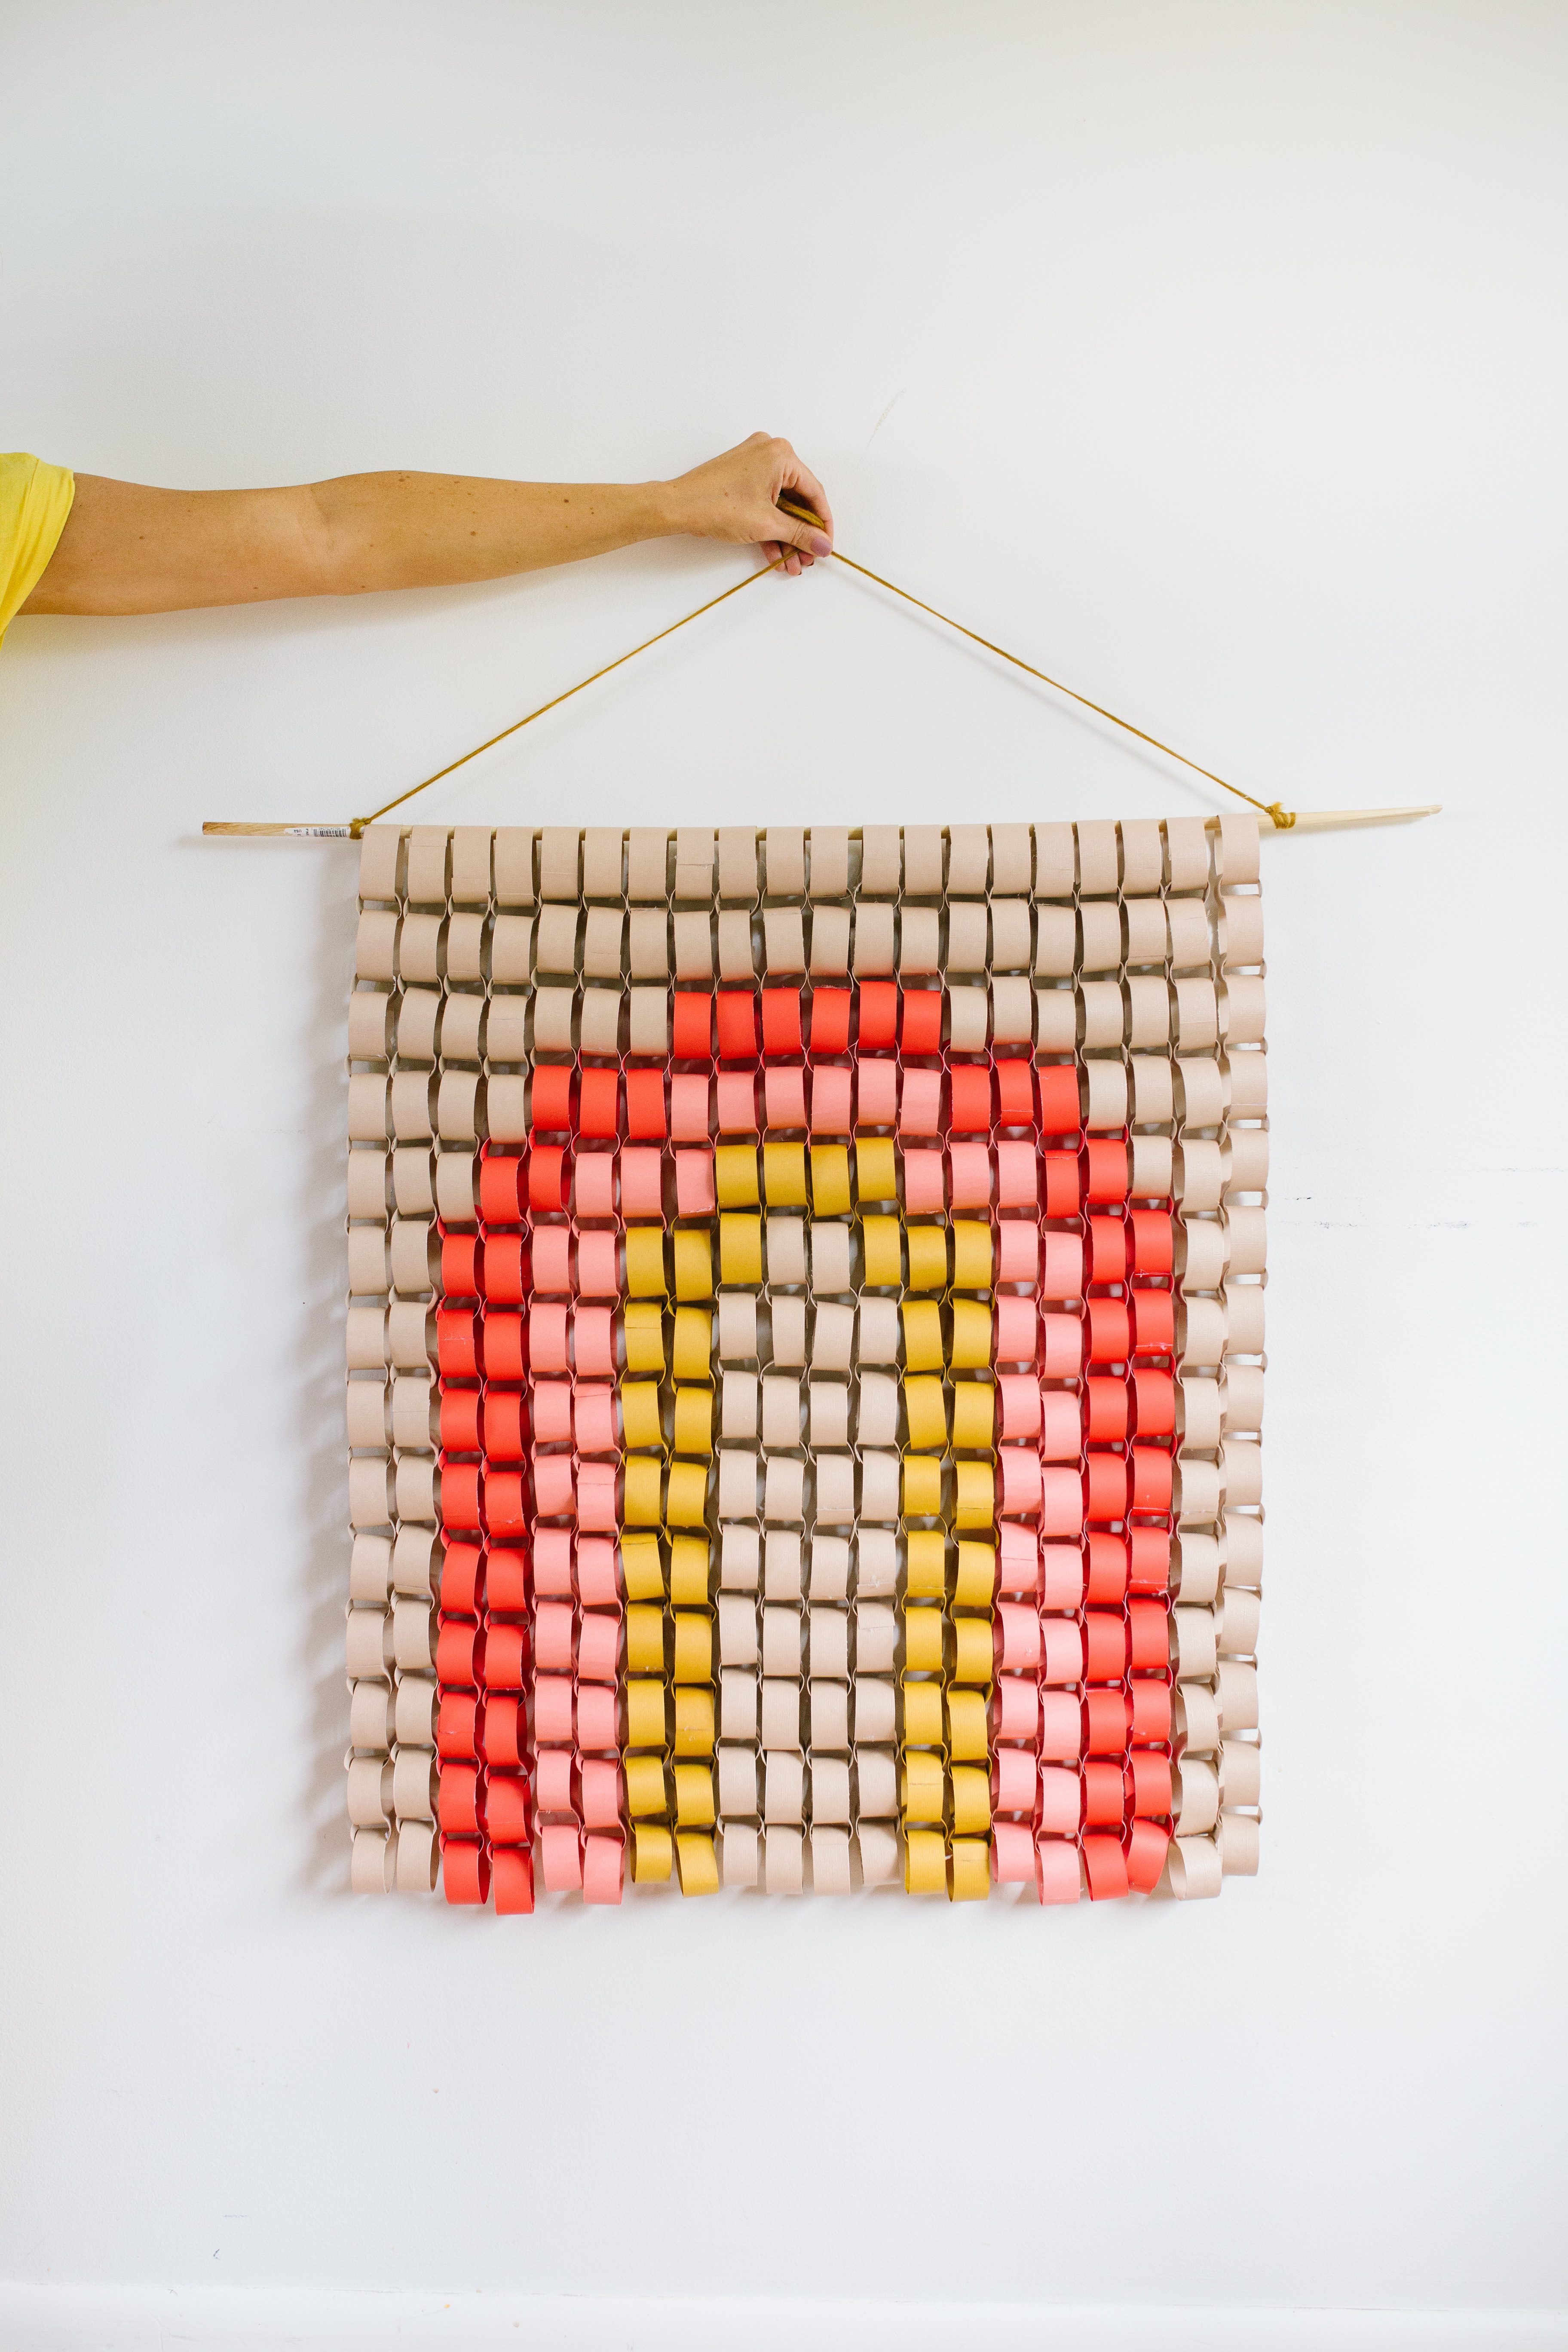
Once all of your rows are made, slide the tops of the paper chains onto a dowel. Attach a piece of string to the dowel and hang.
That’s it! You just made a big, graphic piece of wall art that is sure to make a statement.

There is so much to love about this project! First, it’s so easy to put together but the pay-off is big! Plus, large statement pieces like this can be super expensive, but when you’re working with paper and glue you can make this for a couple of bucks!
We also love to think of the possibilities for variation with this project. Instead of a rainbow you could do geometric shapes, animals, letters, numbers and so much more to customize it for your home decor or for a party! Get out that paper slicer already!
DIY Paper Chain Rainbow Wall Hanging
Learn how to make a DIY Paper Chain Rainbow Wall Hanging with this simple tutorial and template! This is the perfect, easy project for bringing some color and joy into your space!
Materials
- Cardstock in desired colors (we used tan, mustard, light pink, and coral)
- Paper slicer
- Hot glue gun + sticks
- Dowel
- Twine
- Rainbow template (see post)
Instructions
- Begin by mapping out your design. If you are using our template, each square represents 2 links, so if you would like to make your wall hanging smaller, you can mark off the squares you will not be using, or, if you’d like to make it larger you can make edits to the template to add more.
- Cut paper strips. As mentioned in step 1, each square represents two links that you will want to cut out with your paper slicer or scissors. We cut each of our strips at about 6″ x 1″ wide.
- Begin making your chains by creating a loop with one paper strip and secure the ends with a dot of hot glue to make a ring. Slide the next strip inside of the ring, wrap then ends around and secure them with hot glue to make another ring. Repeat this process working on the first vertical chain, from top to bottom, changing colors according to the template.
- Once all of your rows are made, slide the tops of the paper chains onto a dowel. Attach a piece of string to the dowel and hang.
Notes
We found that the rainbow image is more distinct if the connector chains are tighter. For instance, on the first ring of every row you would glue the strips together right on the edge of the paper, but on the next right you would put your glue about an inch from the edge of the strip to make it tighter. By repeating this pattern with every other ring, there will be less space between the rings and the design will show more clearly.
Recommended Products
As an Amazon Associate and member of other affiliate programs, I earn from qualifying purchases.
-
DCWV Cardstock Stack, Value Pack, Assorted Solid Colors, Smooth, 102 Sheets (6 each), 12 x 12 inches
-
Cricut Provo Craft CRICUT Trimmer 13" Basic, Multi
-
Gorilla Dual Temp Mini Hot Glue Gun Kit with 30 Hot Glue Sticks
-
40 PCS Dowel Rod 24 Inch Wooden Dowels 1/4 inch Wood Craft Sticks Wooden Dowels for Crafts Balsa Wood Rod Bamboo Wood Sticks Long Wooden Sticks
-
PerkHomy Cotton Butchers Twine String 500 Feet 2mm Twine for Cooking Food Safe Crafts Bakers Kitchen Butcher Meat Turkey Sausage Roasting Gift Wrapping Gardening Crocheting Knitting


Happy chain-making!
ox. Liz
SAVE THIS POST FOR LATER!