


These Monogram Keychains are sponsored by Staedtler. All opinions are ours alone.
This post may contain affiliate links, which help us support this site.
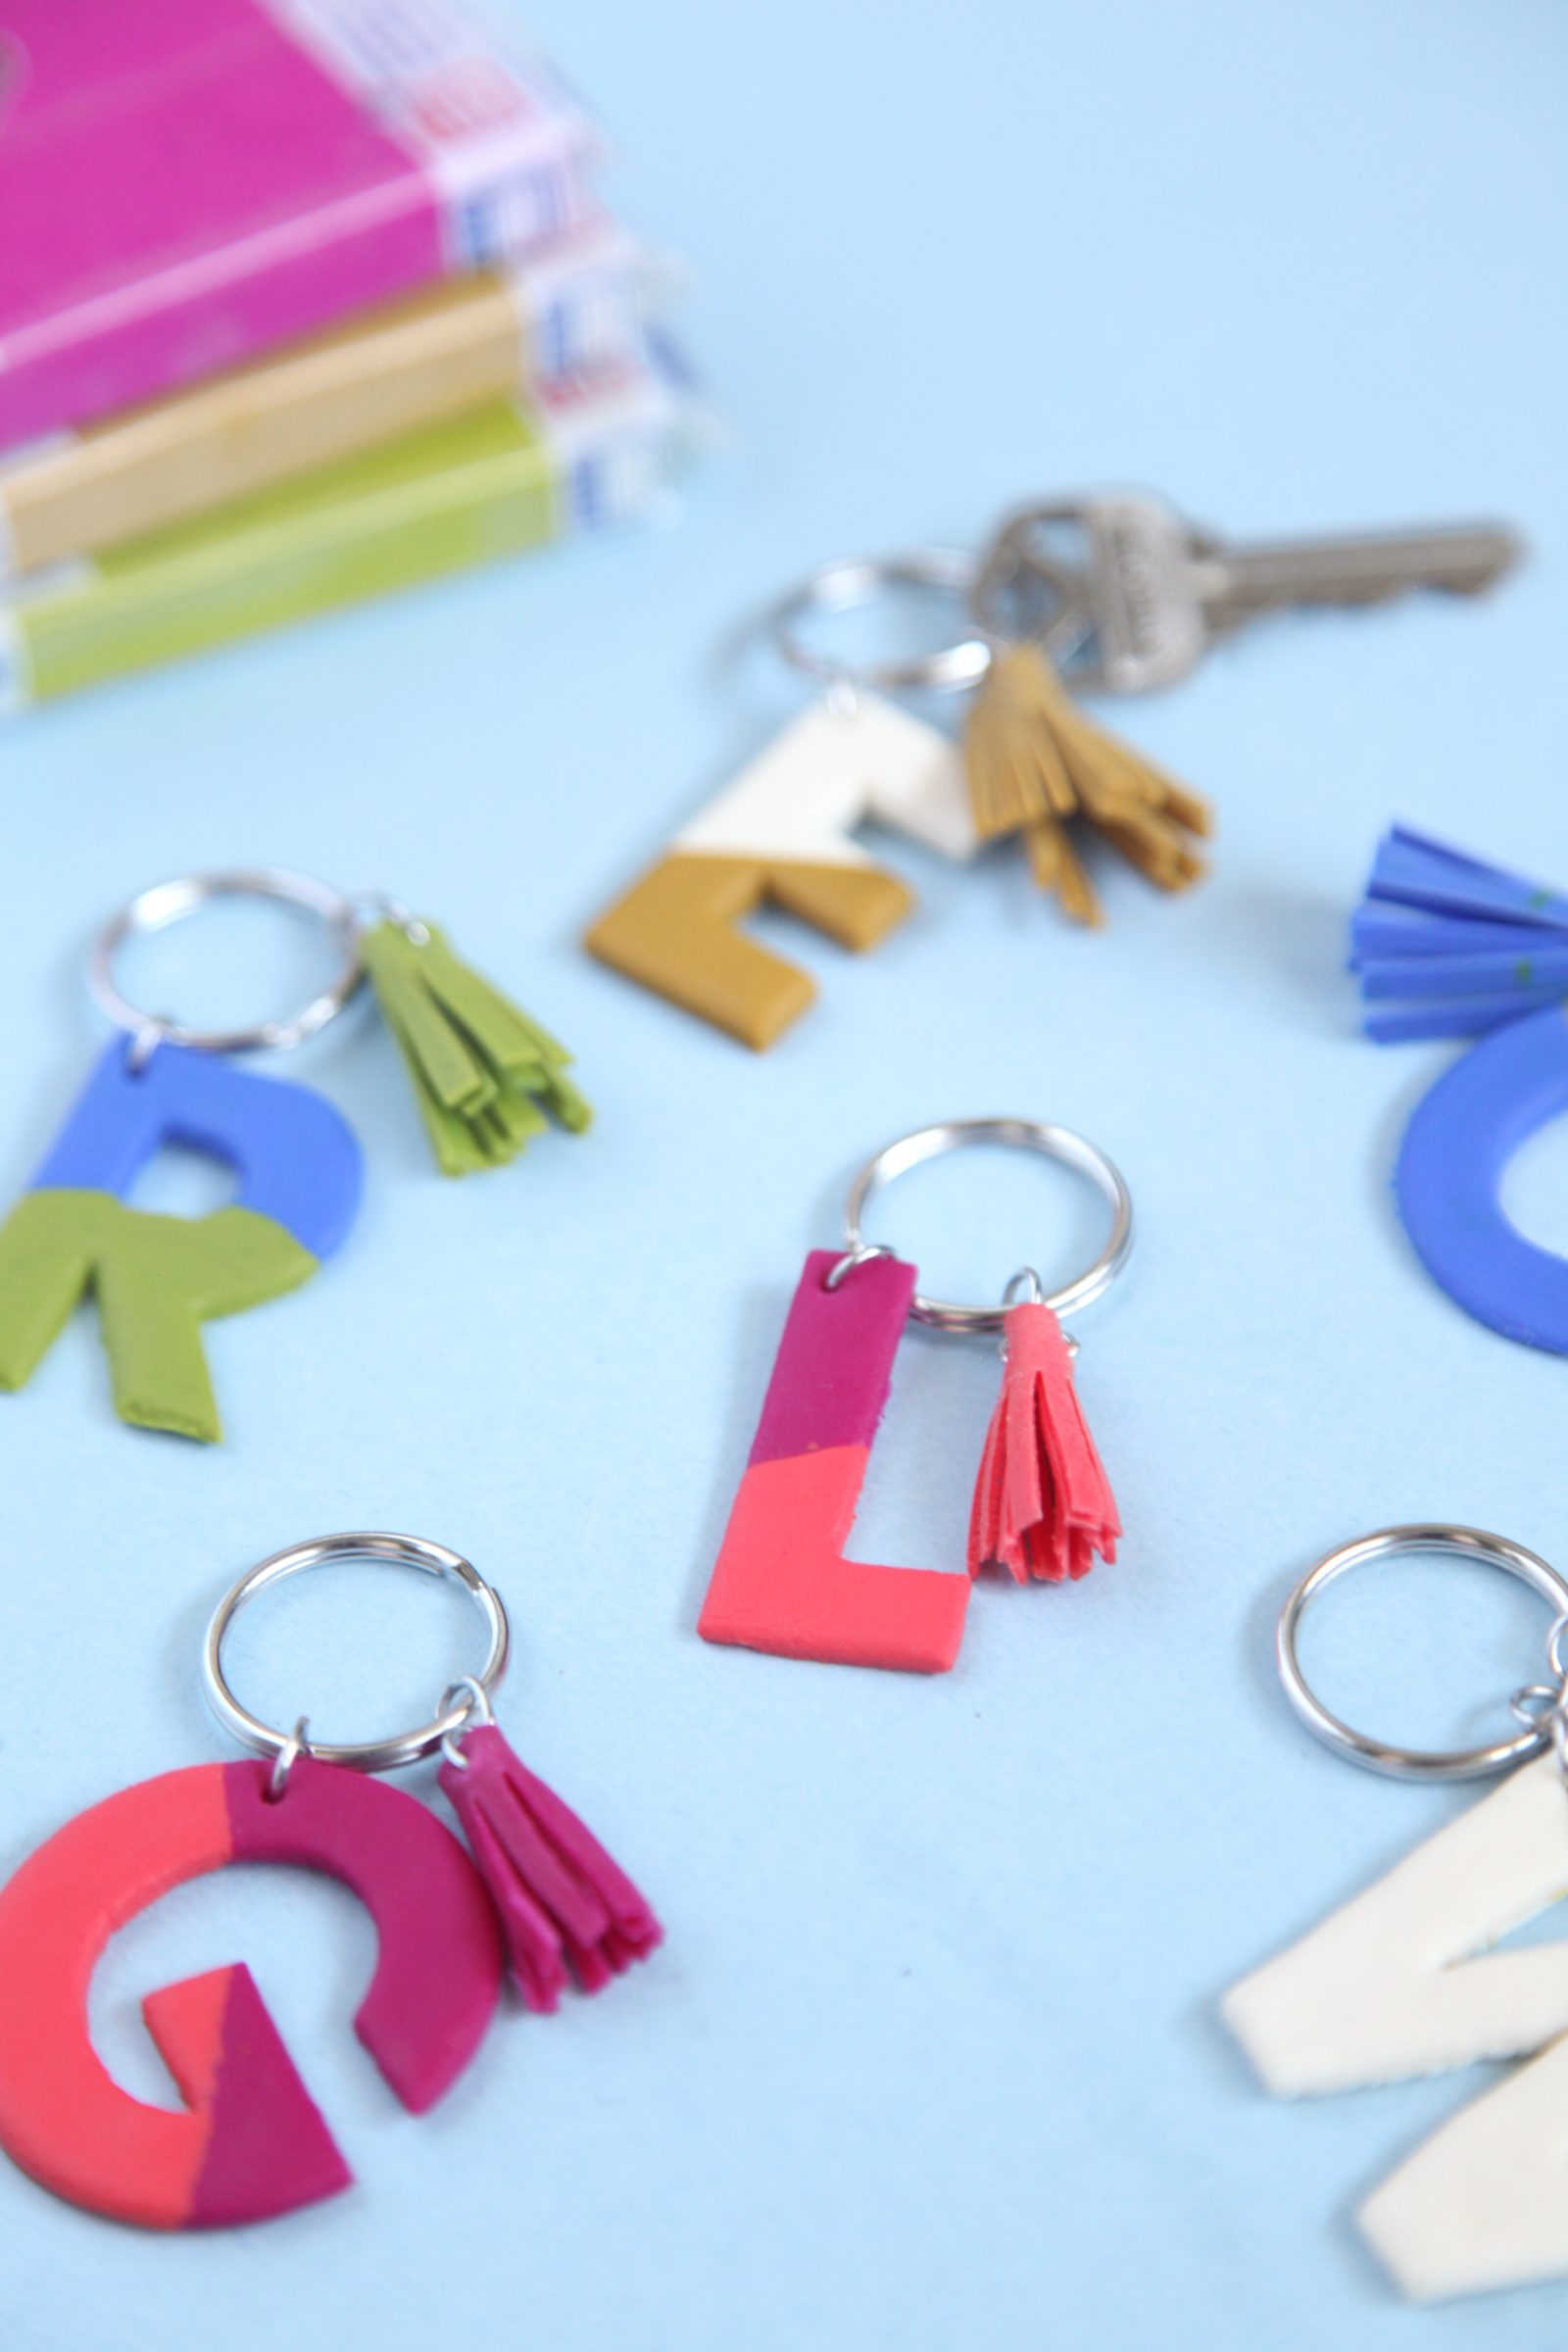
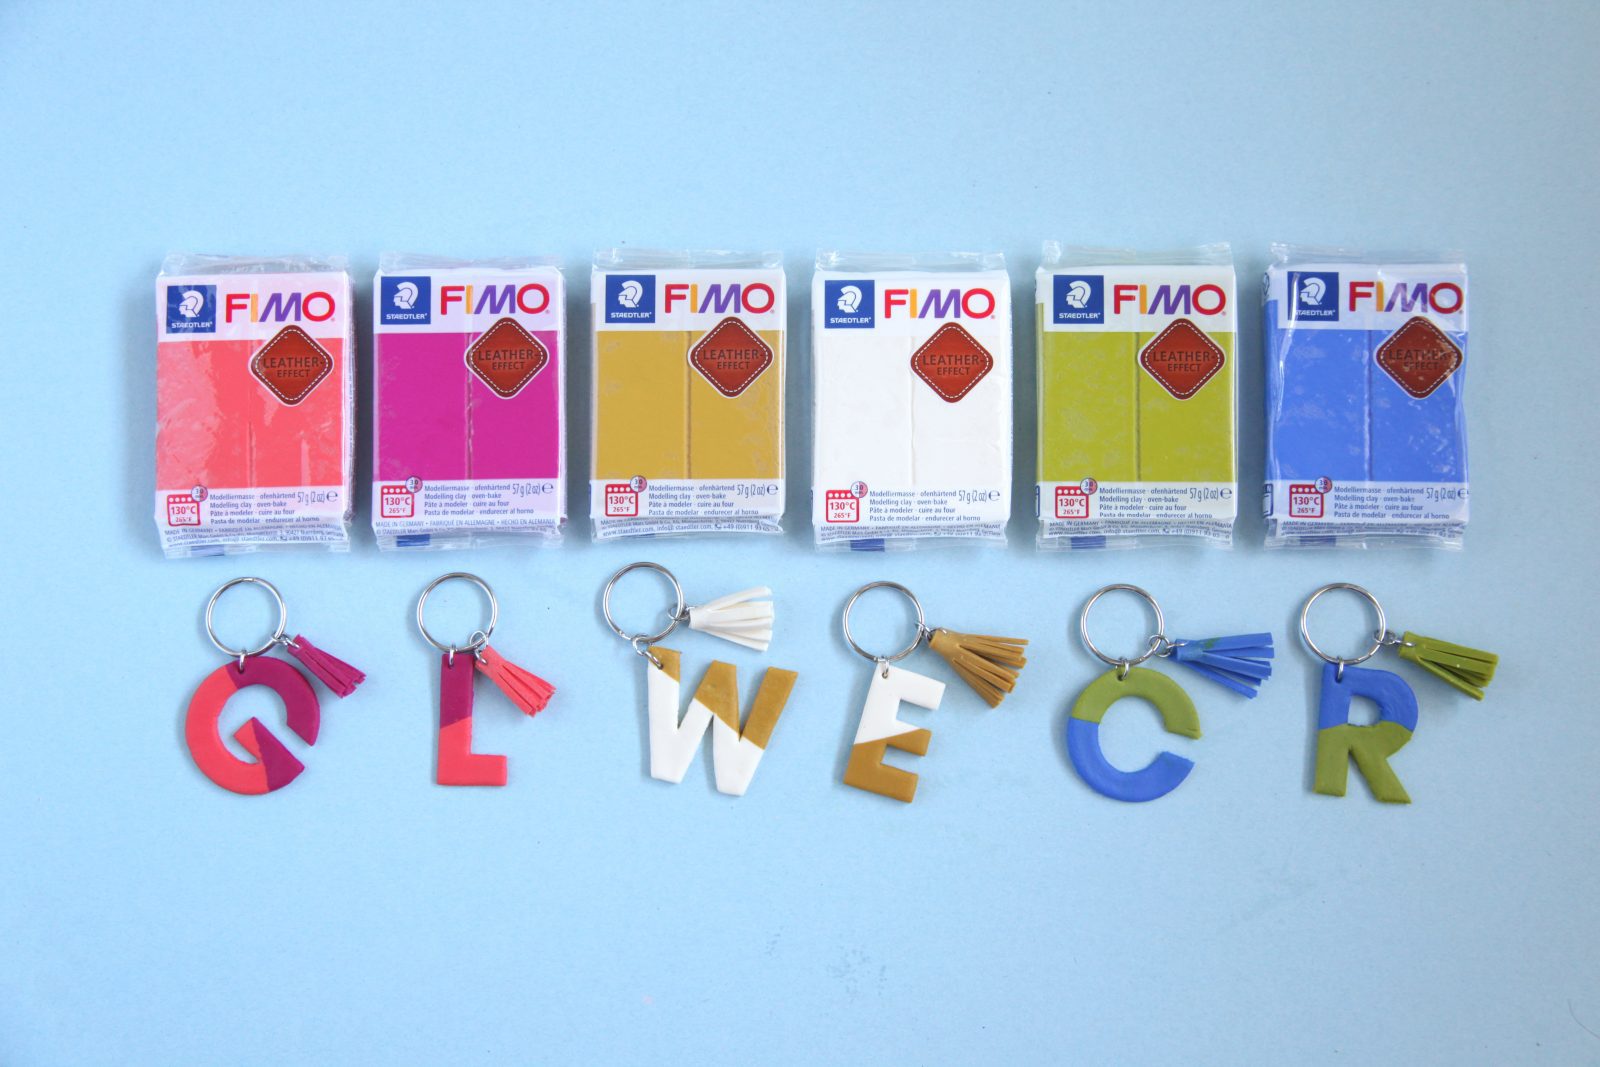
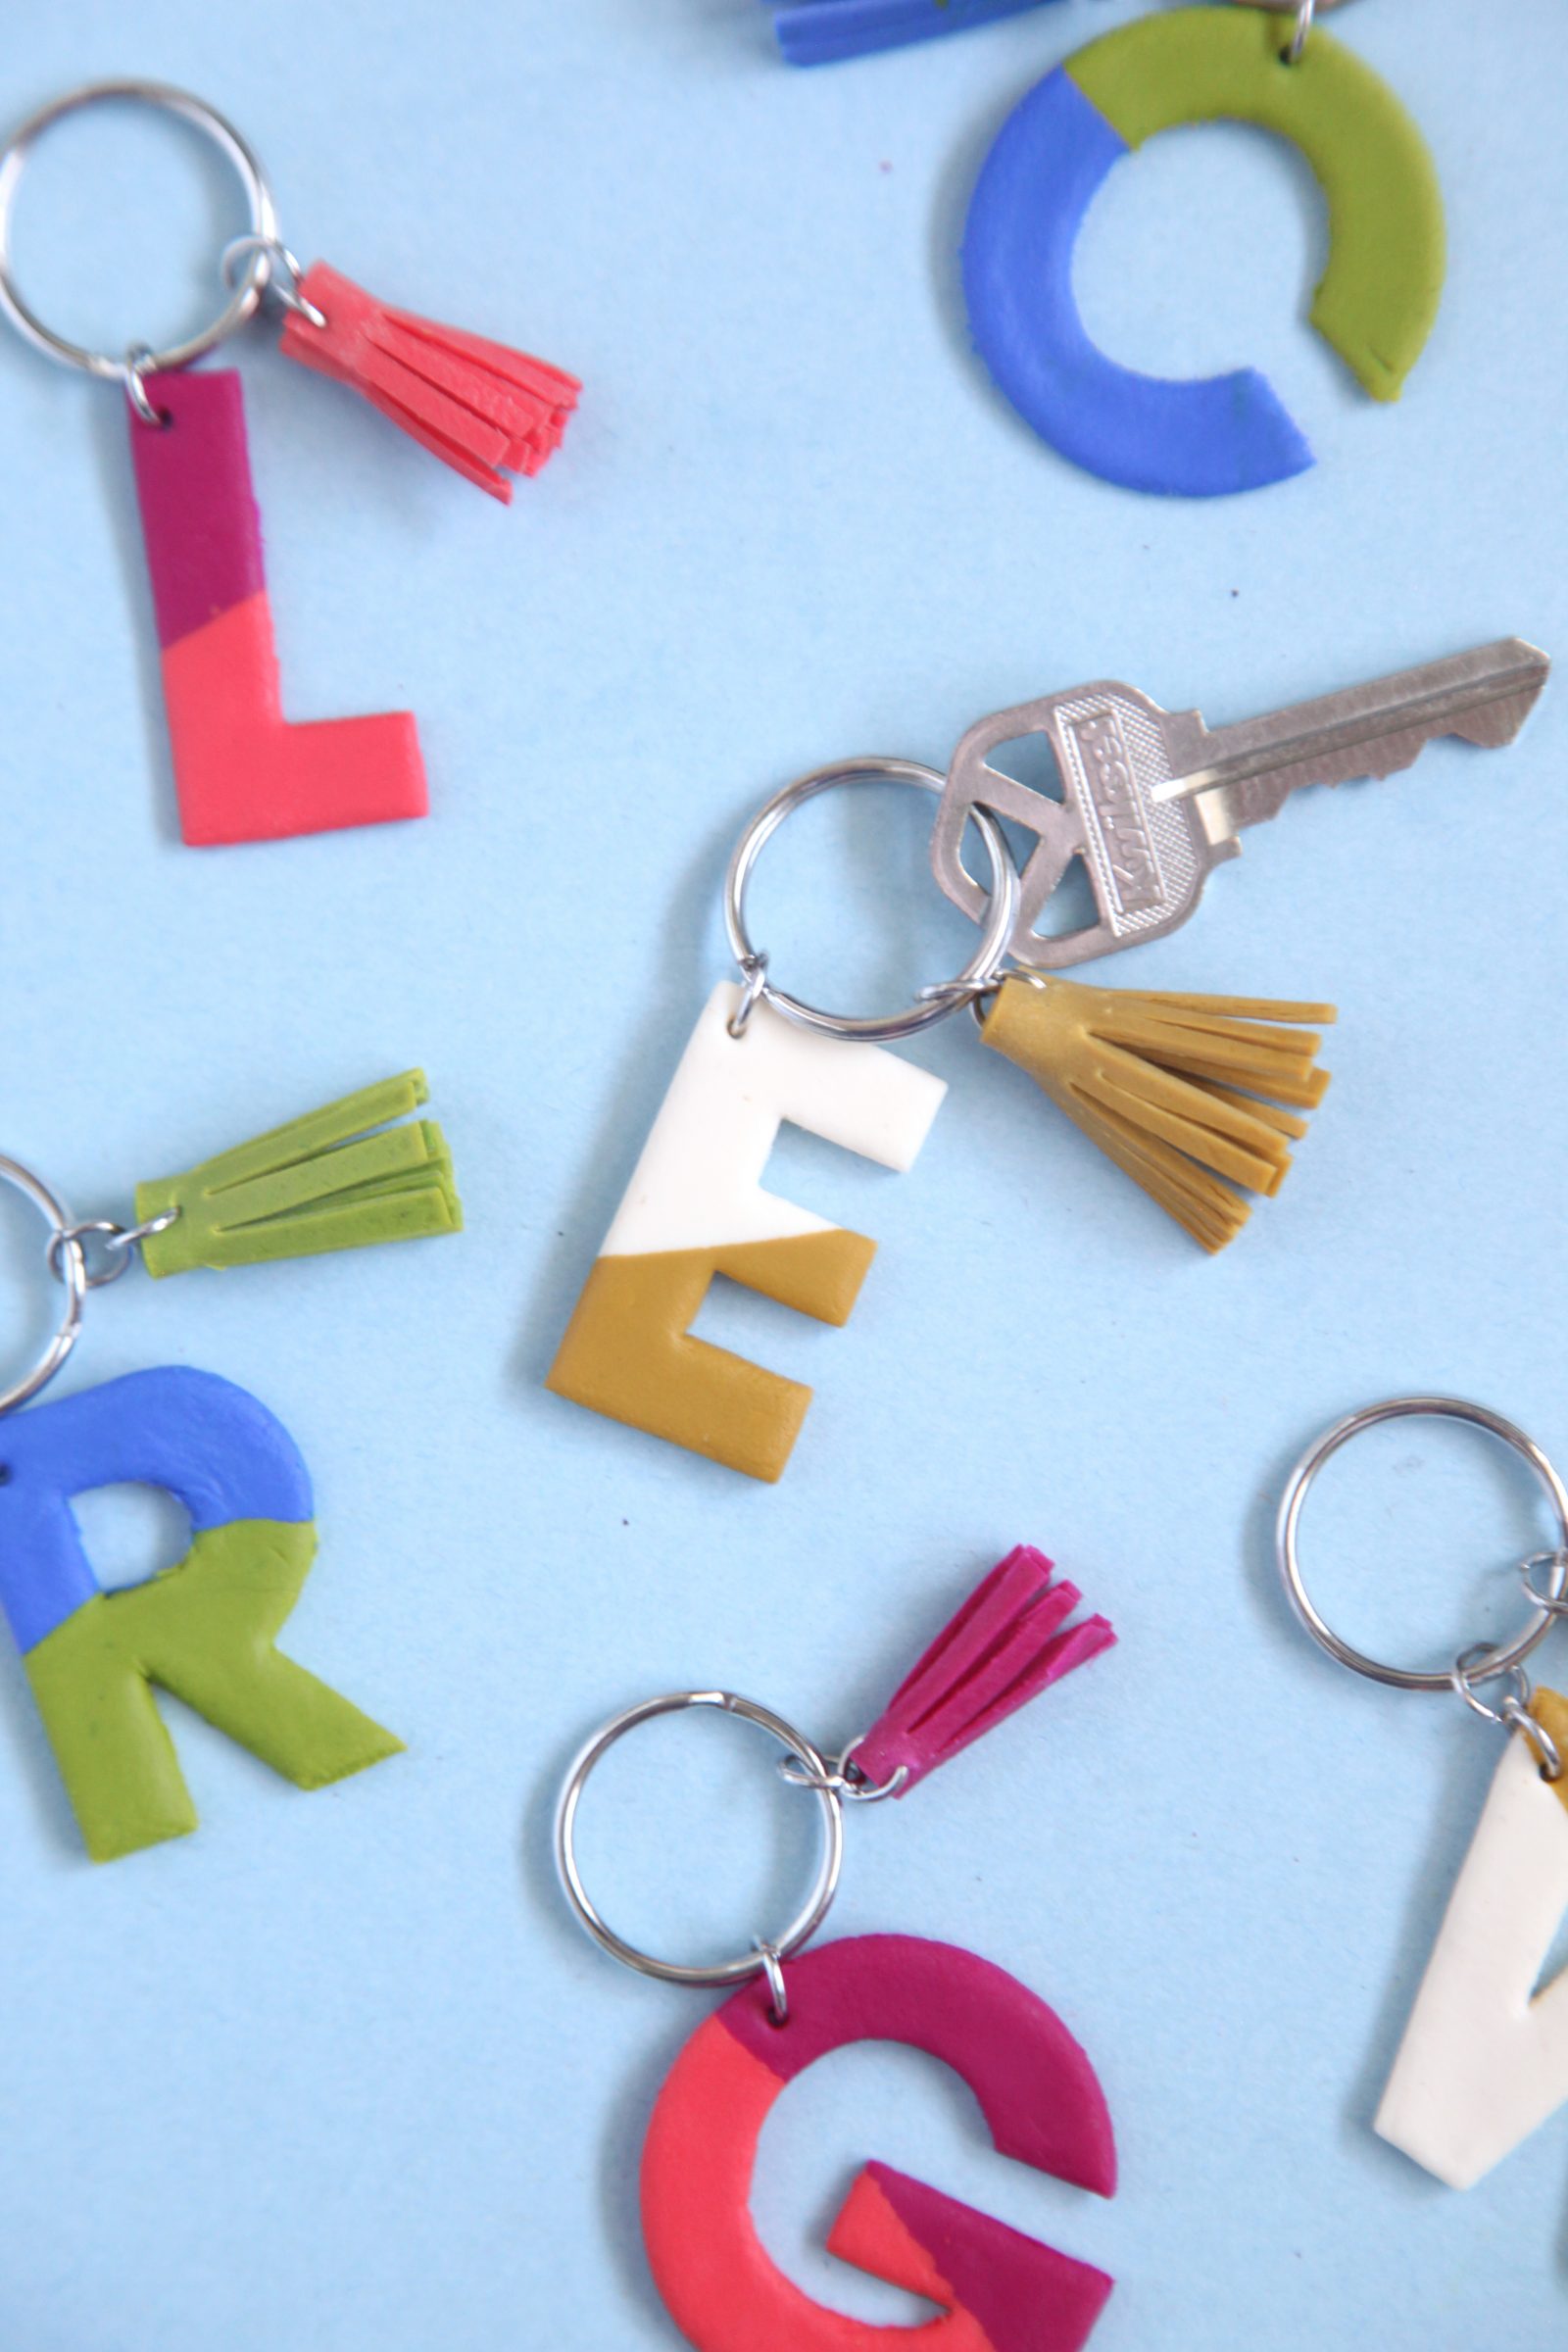
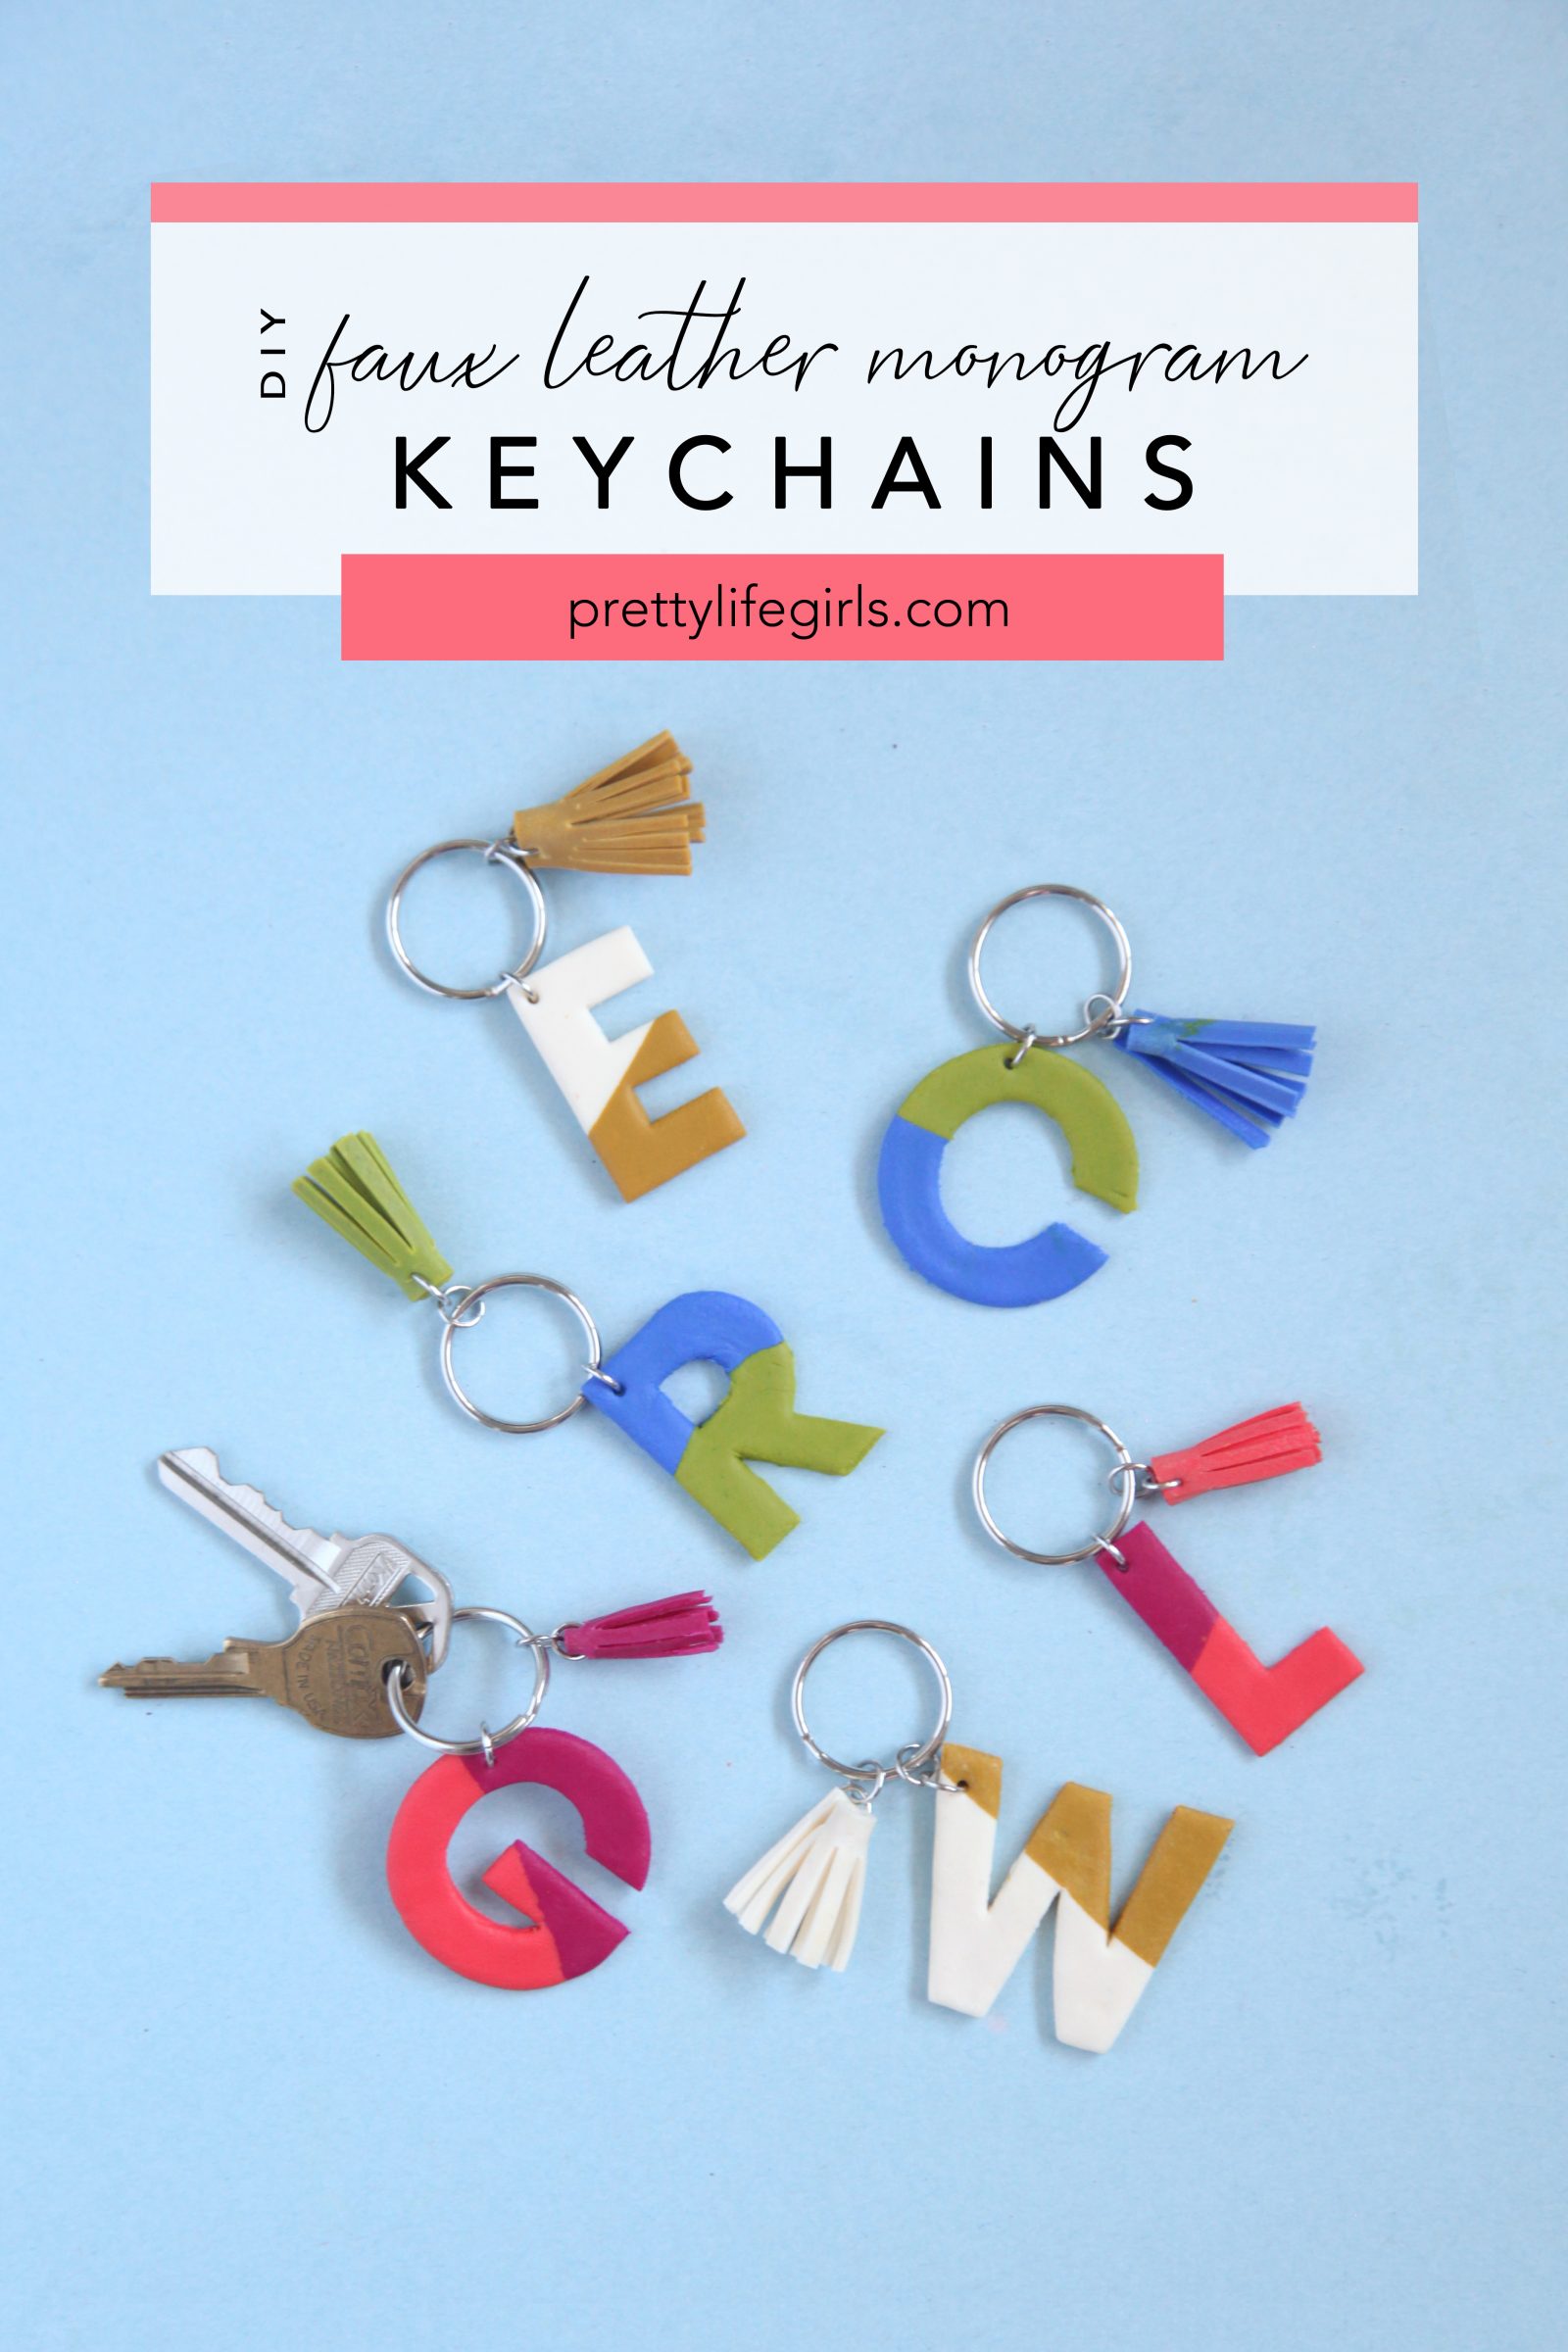
Every once in a while a product comes across our craft table that makes us audibly mutter “this is sooooo cool” while we work with it, and you guys, today THAT product is FIMO Leather-Effect Oven-Bake Clay. This is a brand new product is a modeling clay that looks and feels so much like leather your brain will not be able to compute that it is, in fact, clay! It comes in 12 gorgeous colors and the possibilities for what you can make with it is truly making our heads spin! We made these color-blocked monogram keychains that are going to make my keys so cute! Keep scrolling to see how we made them!

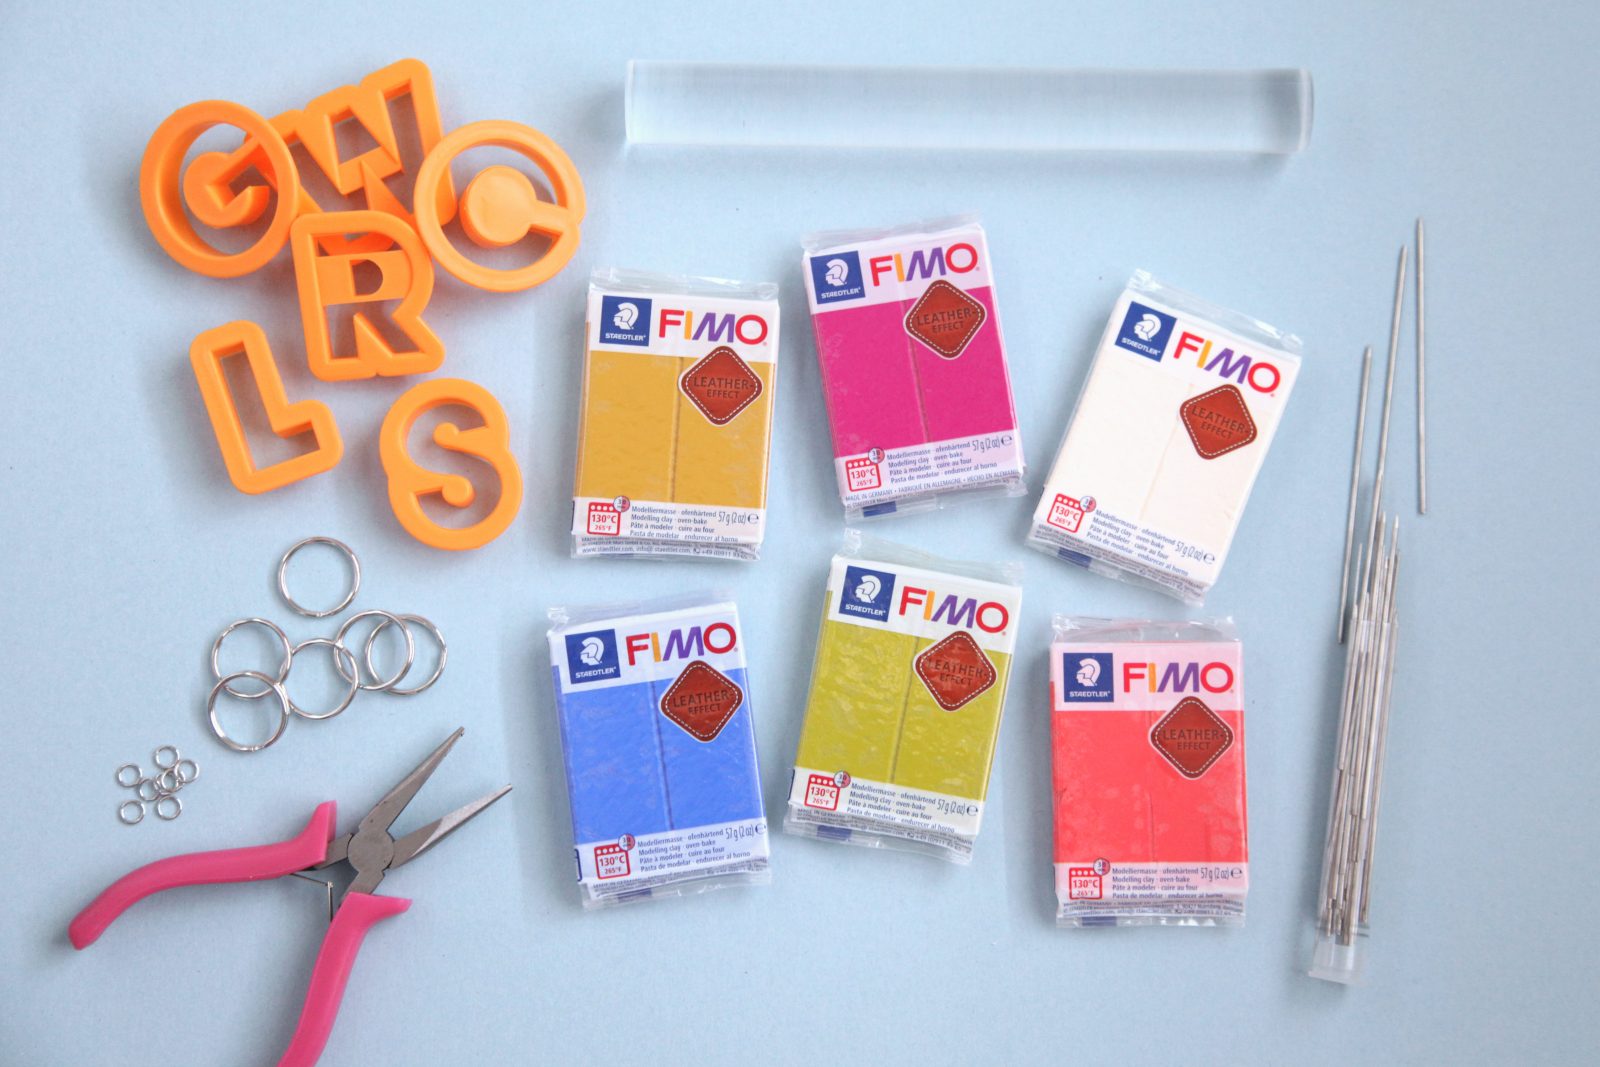
Supplies needed to make Faux Leather Monogram Keychains
FIMO Leather Effect Clay
FIMO piercing pins
Alphabet cookie cutters
Clay roller
Key rings
Jump rings
Jewelry pliers
How to make Faux Leather Monogram Keychains
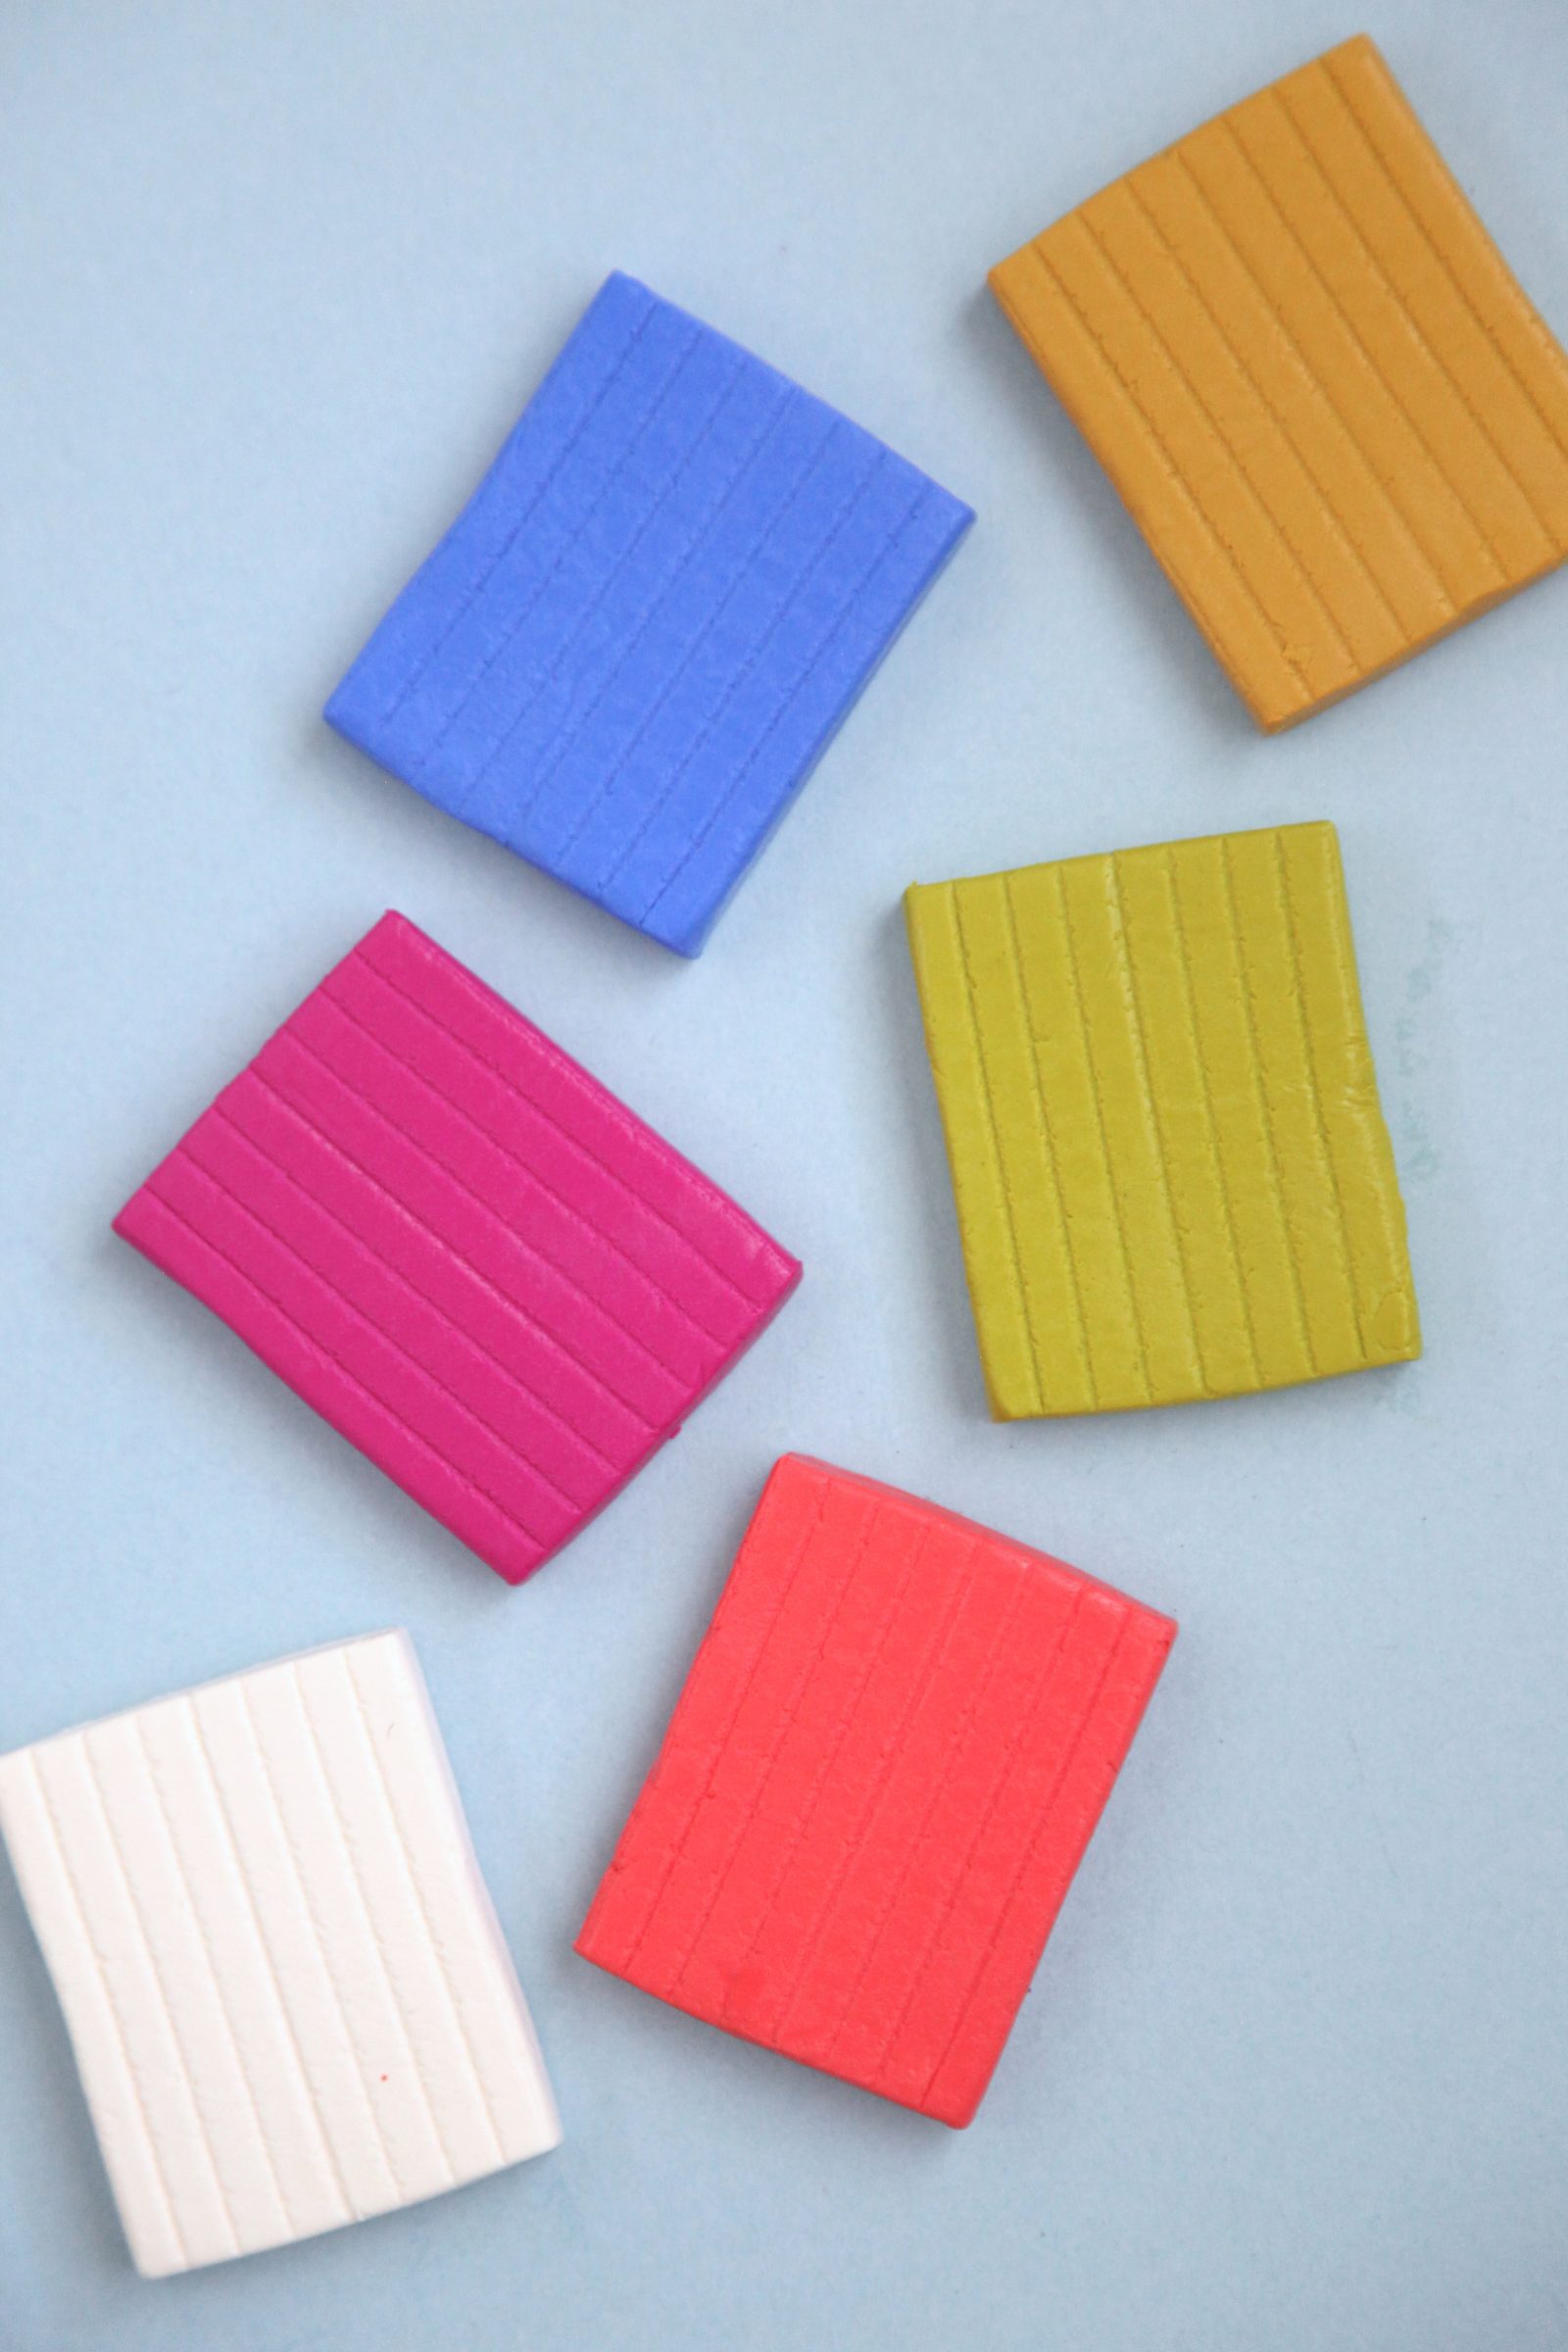
Step 1: Roll out two colors of clay to about 1/8 of an inch thick.
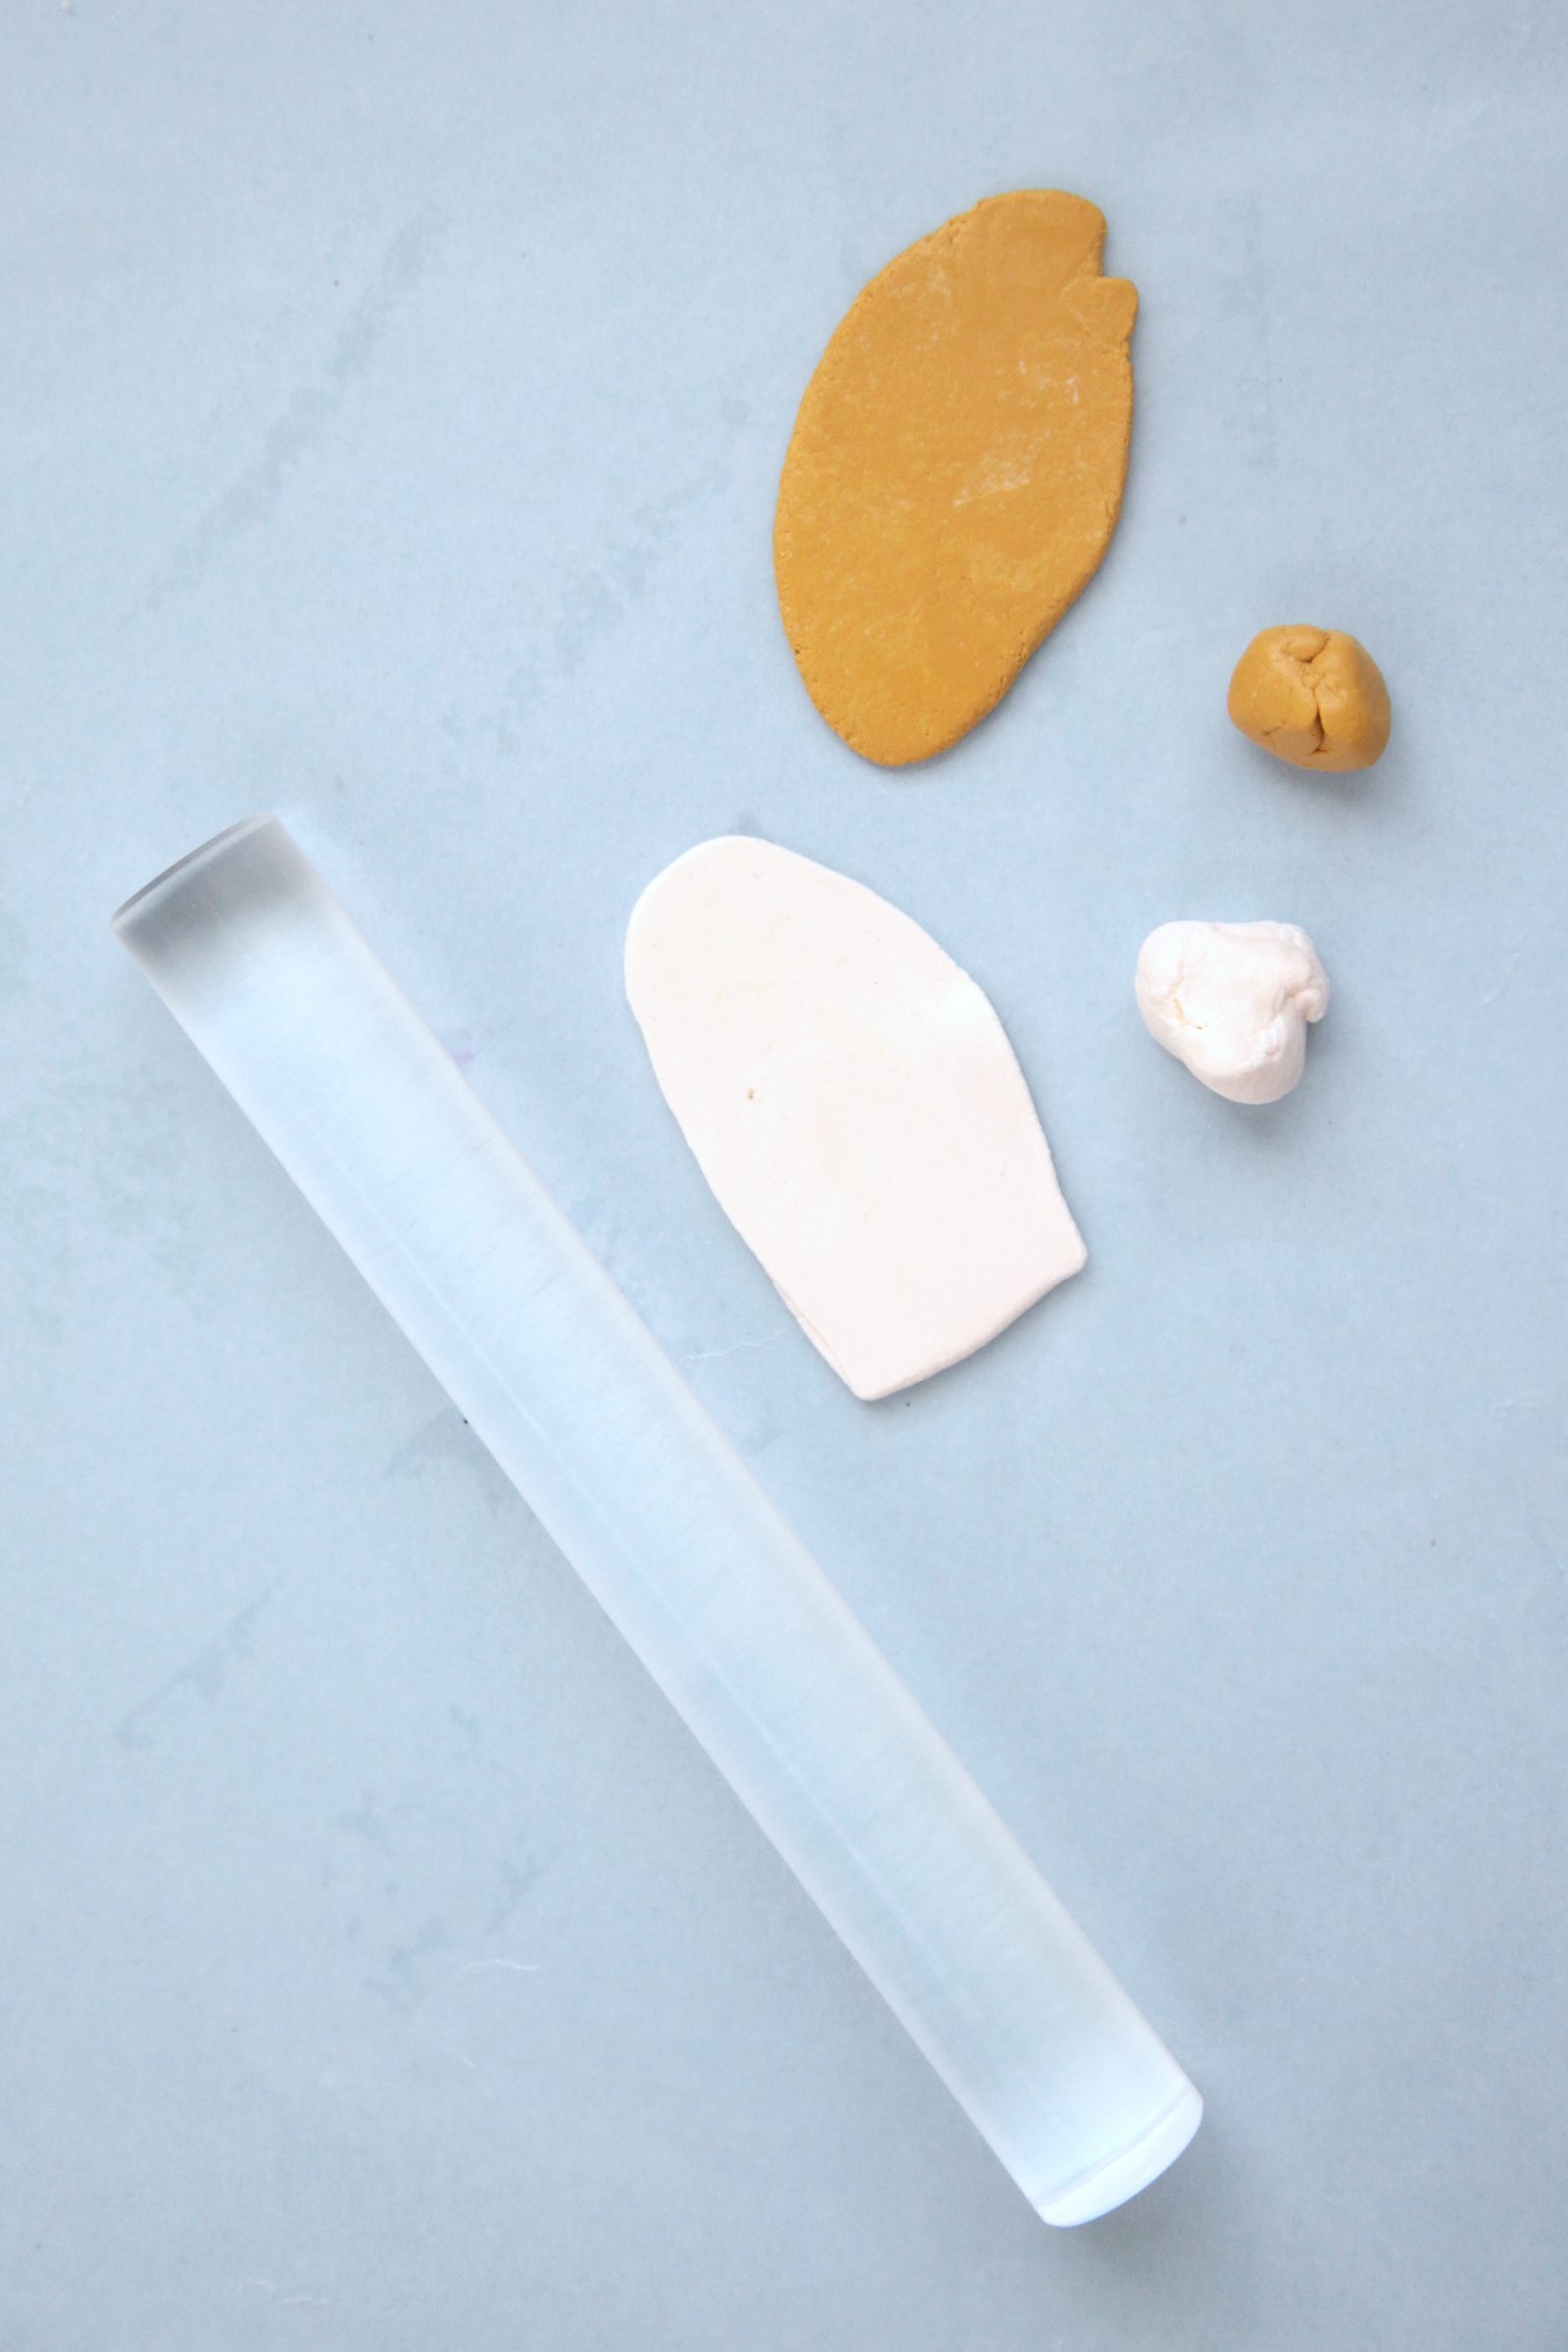
Step 2: Use a ruler to cut a straight edge on each color.

Step 3: Lay the straight edges side by side, then roll the clay more until the two pieces become one.

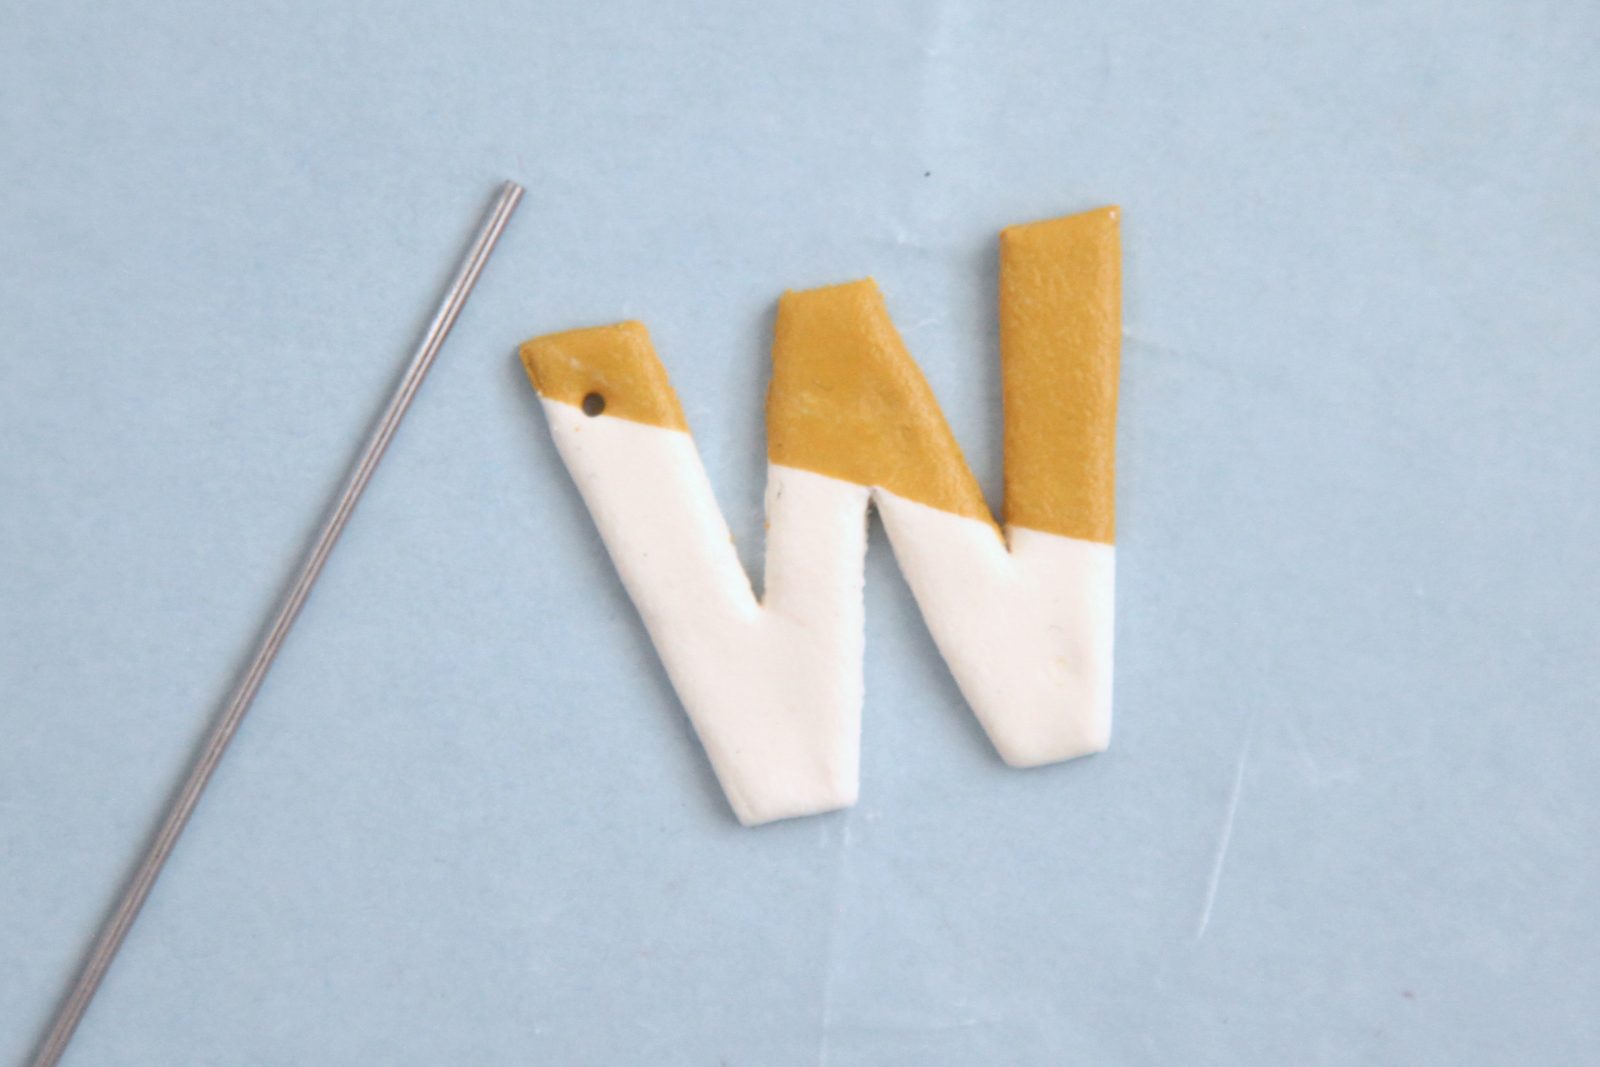
Step 4: Cut the letters out of the clay with a cookie cutter.

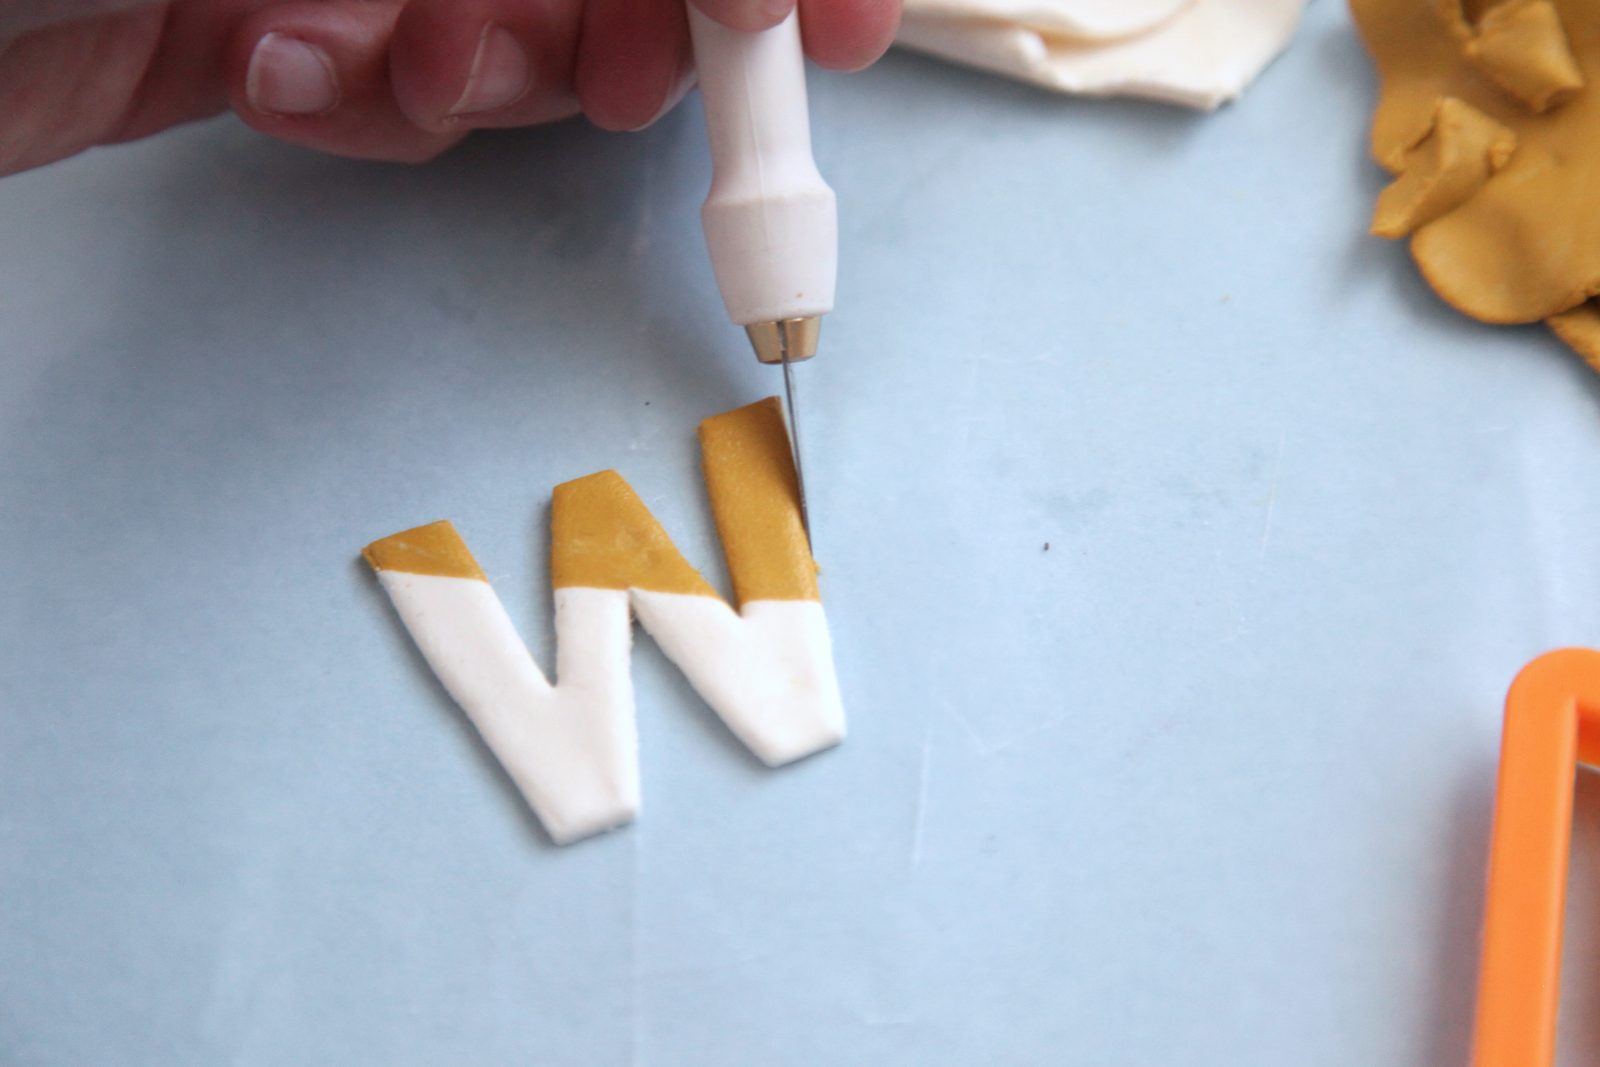
Step 5: Use an X-acto knife to clean up any rough edges.
Step 6: Use a jewelry pin to pierce a hole in the letter.
Step 7: Roll out another piece of clay until it is extra thin.
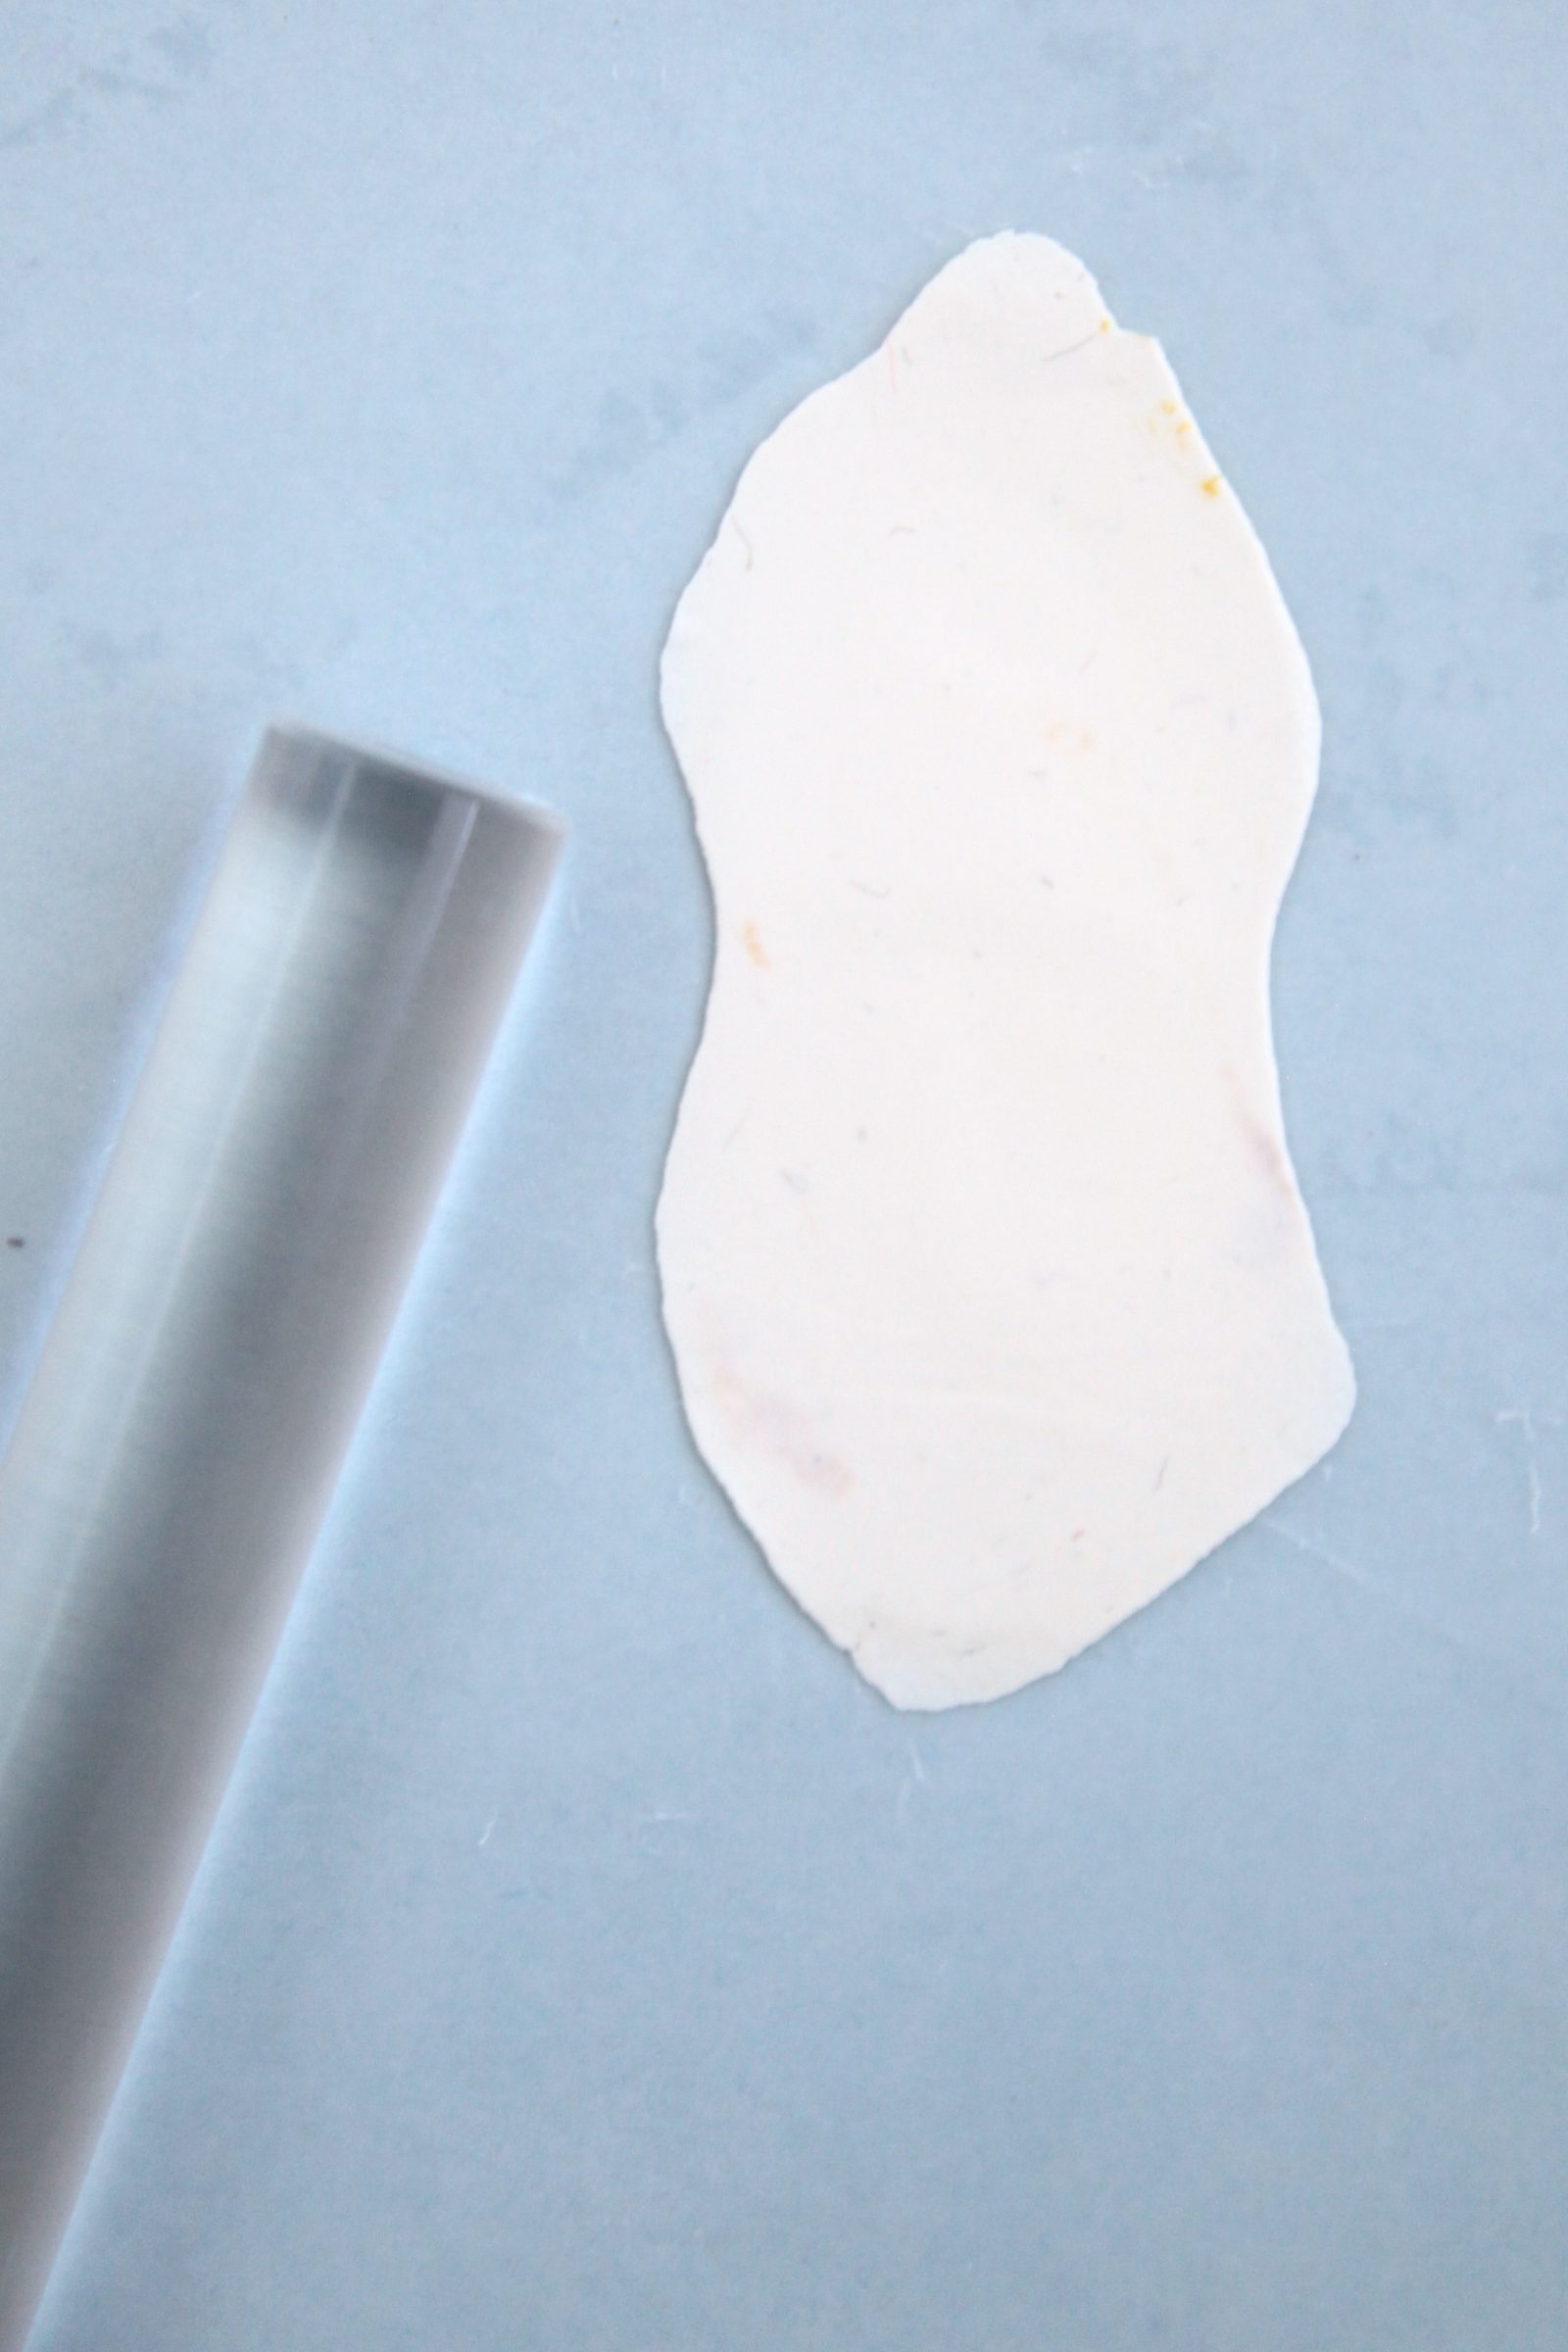
Step 8: Use a ruler to cut the piece into a rectangle about 1 inch by 1.5 inches.

Step 9: Bake the clay pieces according to the instructions. I baked mine at 265 degrees for 20 minutes. Then let the pieces cool completely. Your clay will be flexible, like leather, after cooling.
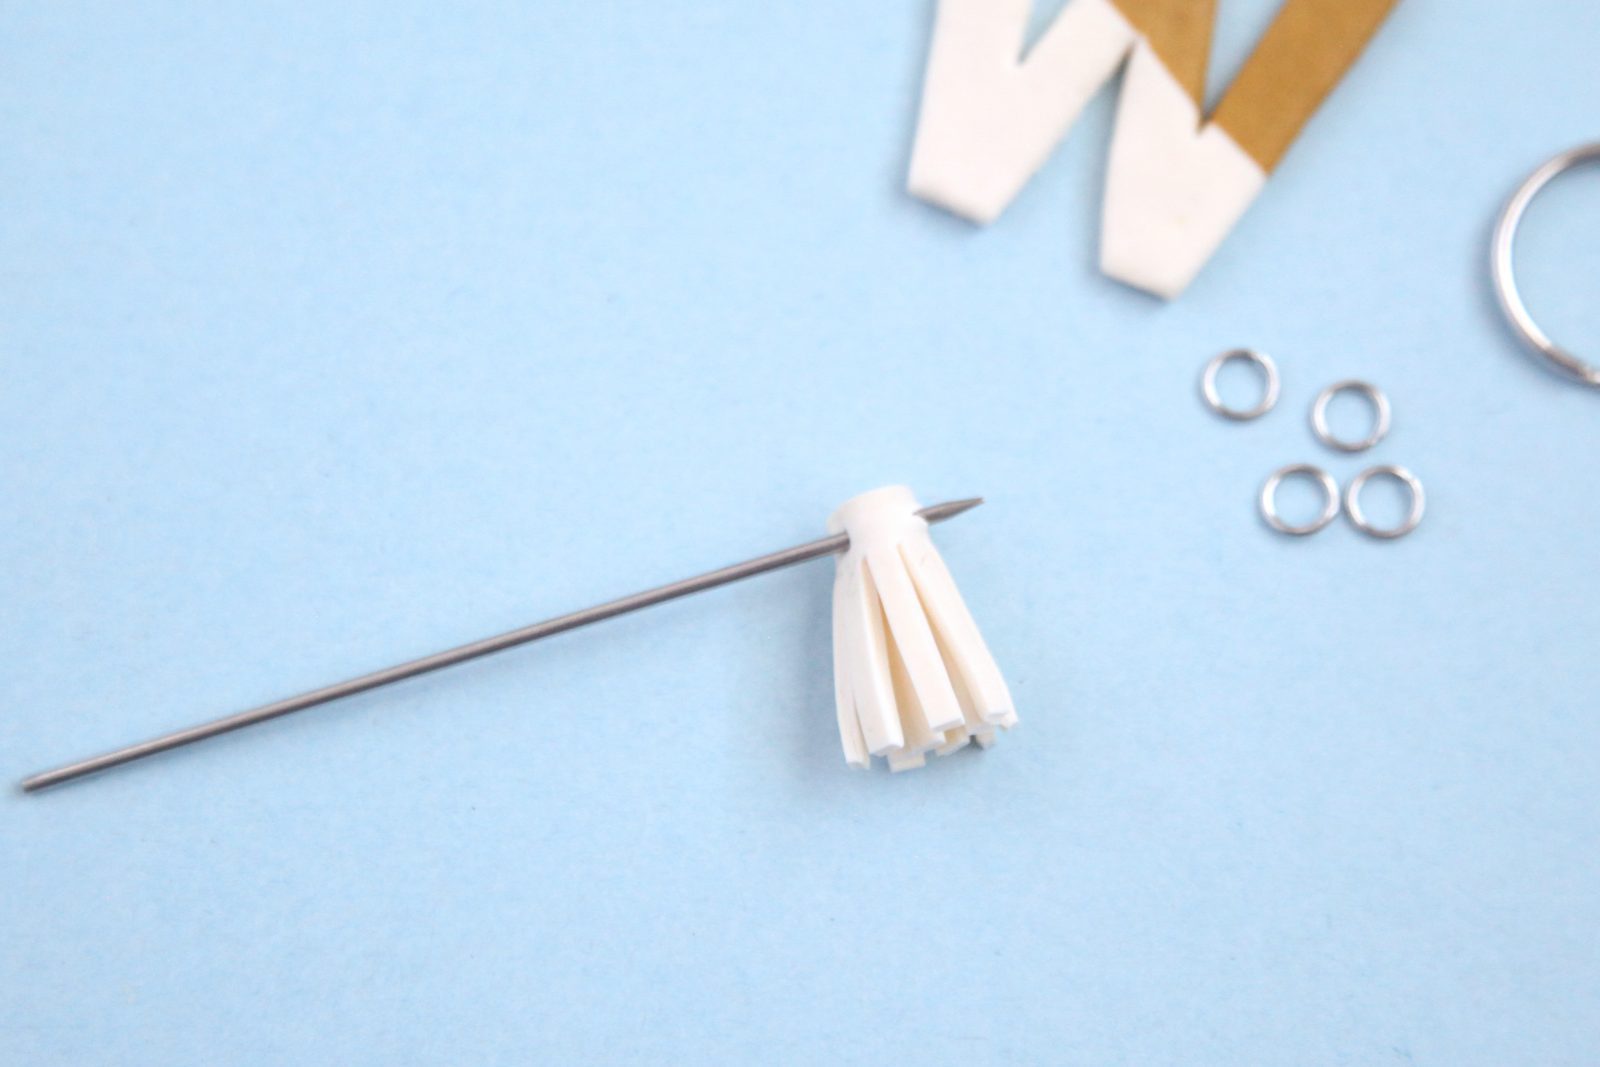
Step 10: Use scissors to cut fringe in the rectangle piece.

Step 11: Roll up the fringed rectangle to make a tassel. Pierce it with the jewelry pin.
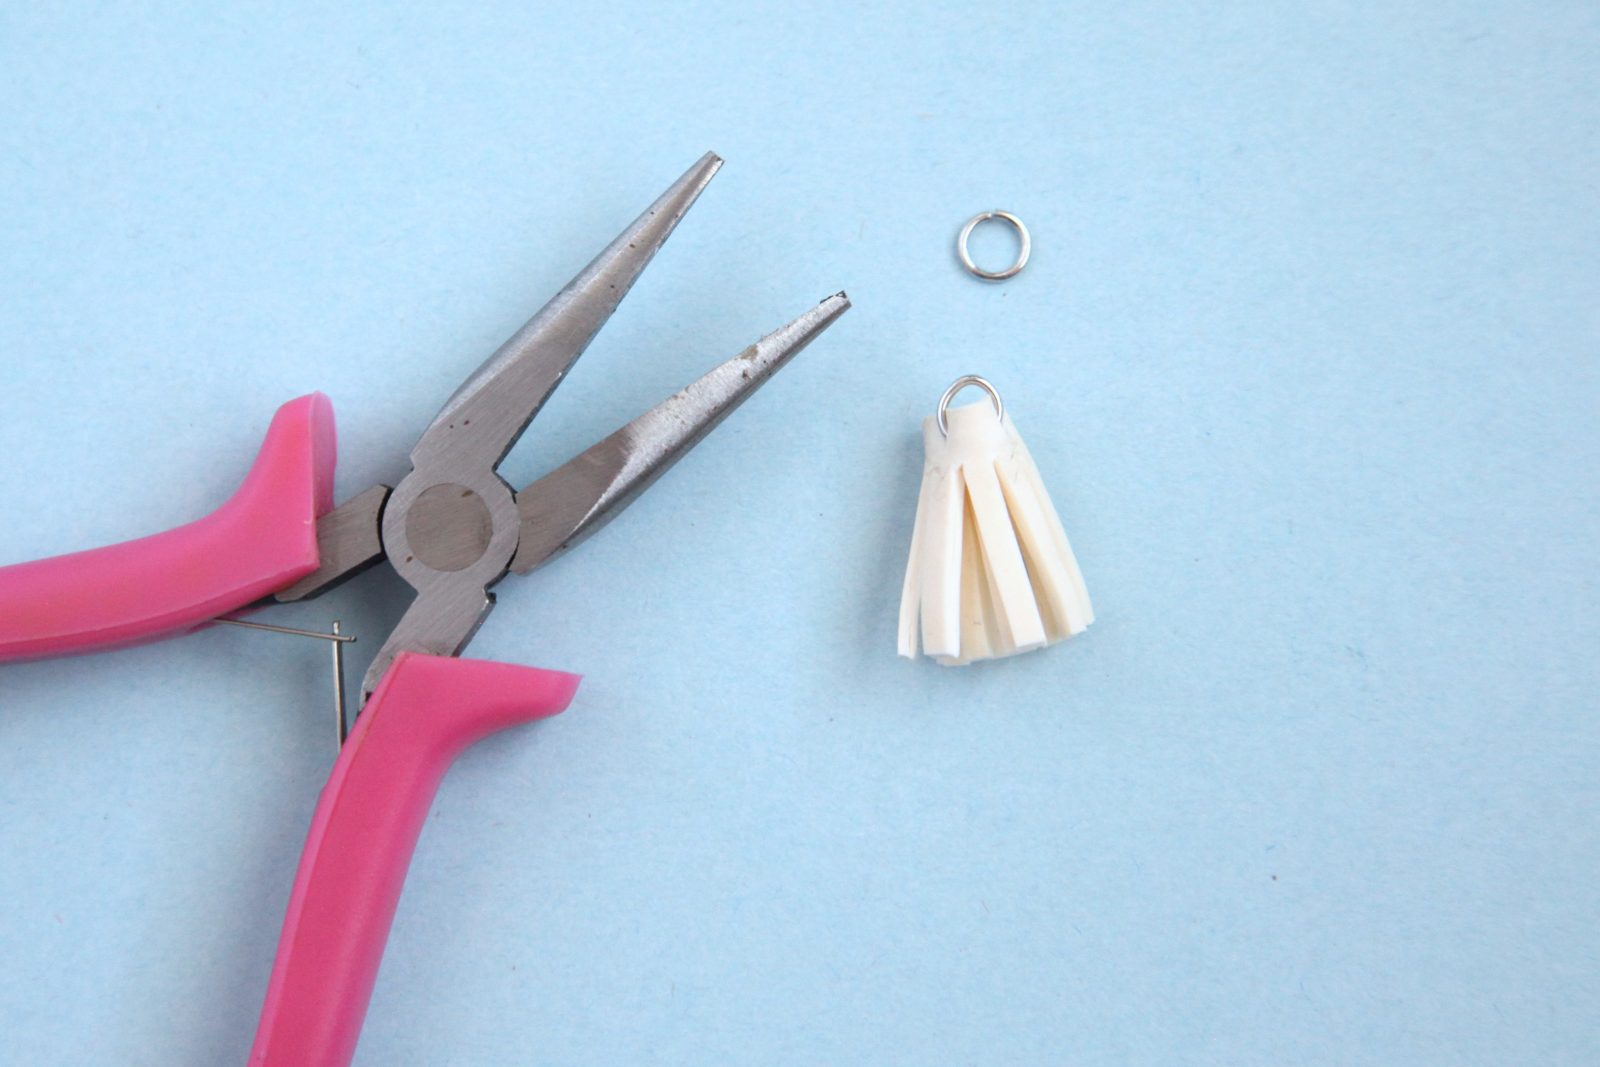
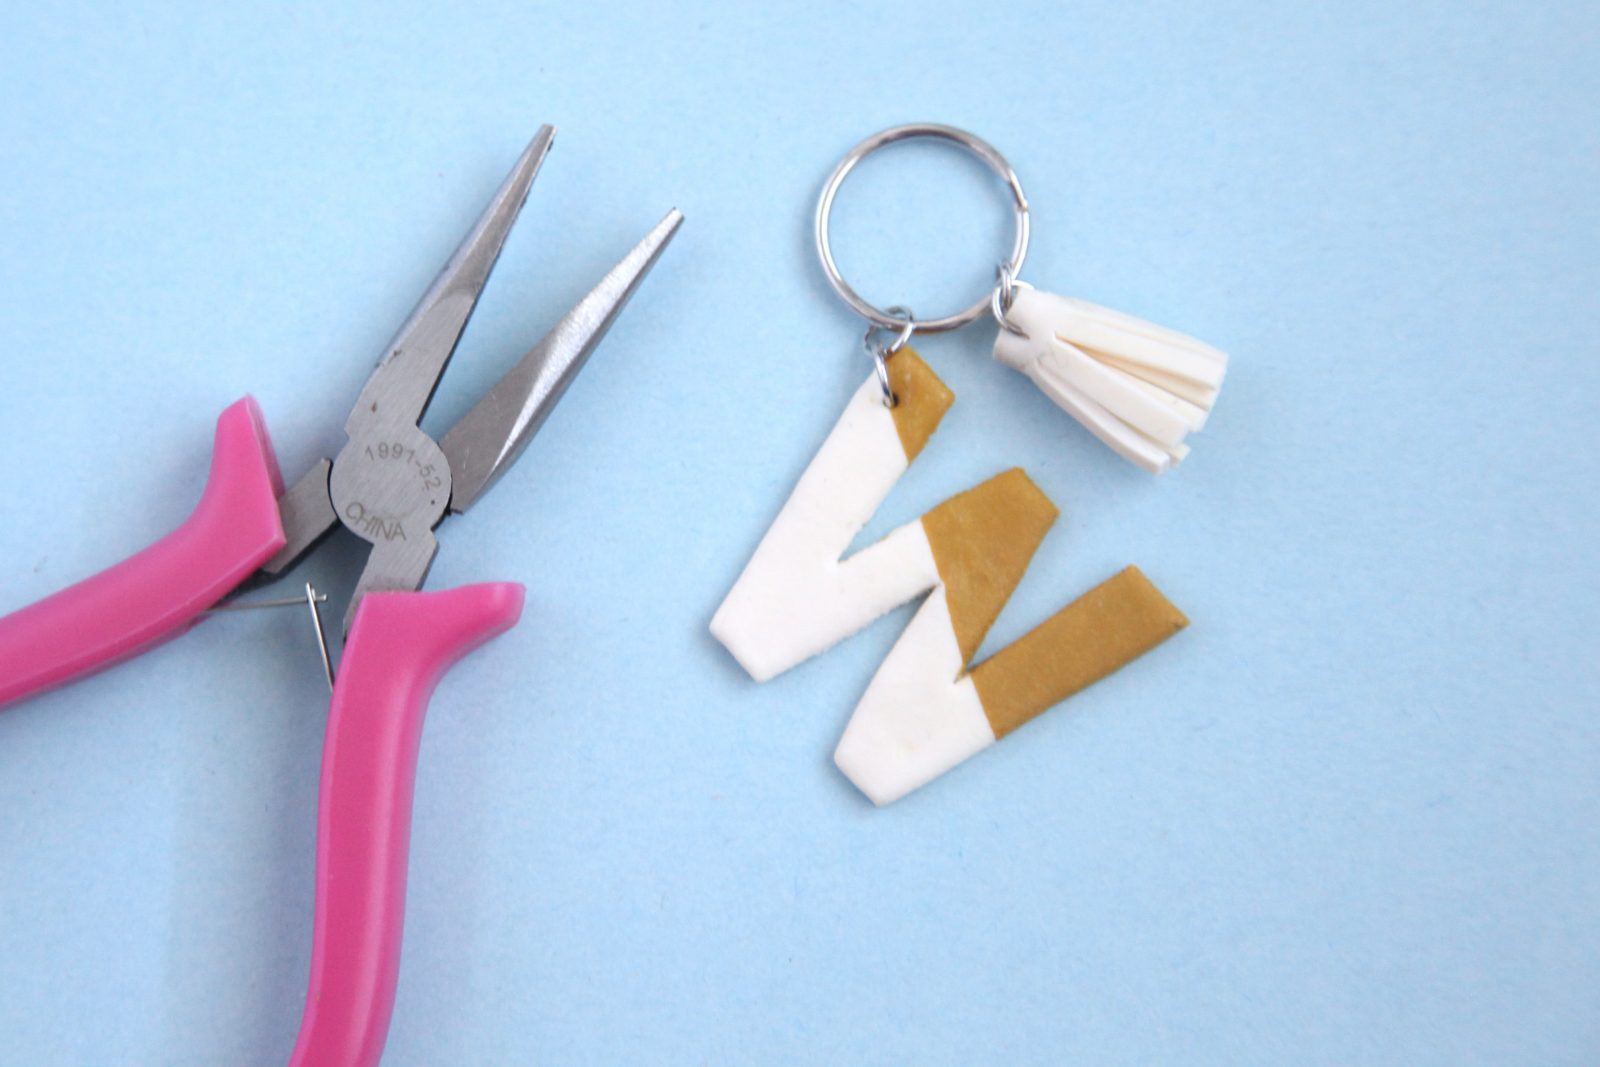
Step 12: Secure a jump ring through the hole using jewelry pliers.
Step 13: Attach a second jump ring to the first, and attach the tassel to a key ring.
Step 14: Attach a jump ring to the monogram.

Step 15: Attach a second jump ring to the first, and attach the monogram to the key ring with the tassel.

Happy crafting!
xo, Sam
Check out these other fun project ideas!
 DIY Hand-Painted Clay Trinket Dishes


I would love to buy the Faux Leather Keychain kit, too bad that their is no way to purchase it. What a shame I read the whole thing and spent time on it but can find no way to purchase it?
Hi Wanda! You can find links to everything we used in the Supplies list toward the top of the post! Thanks so much! -Sam