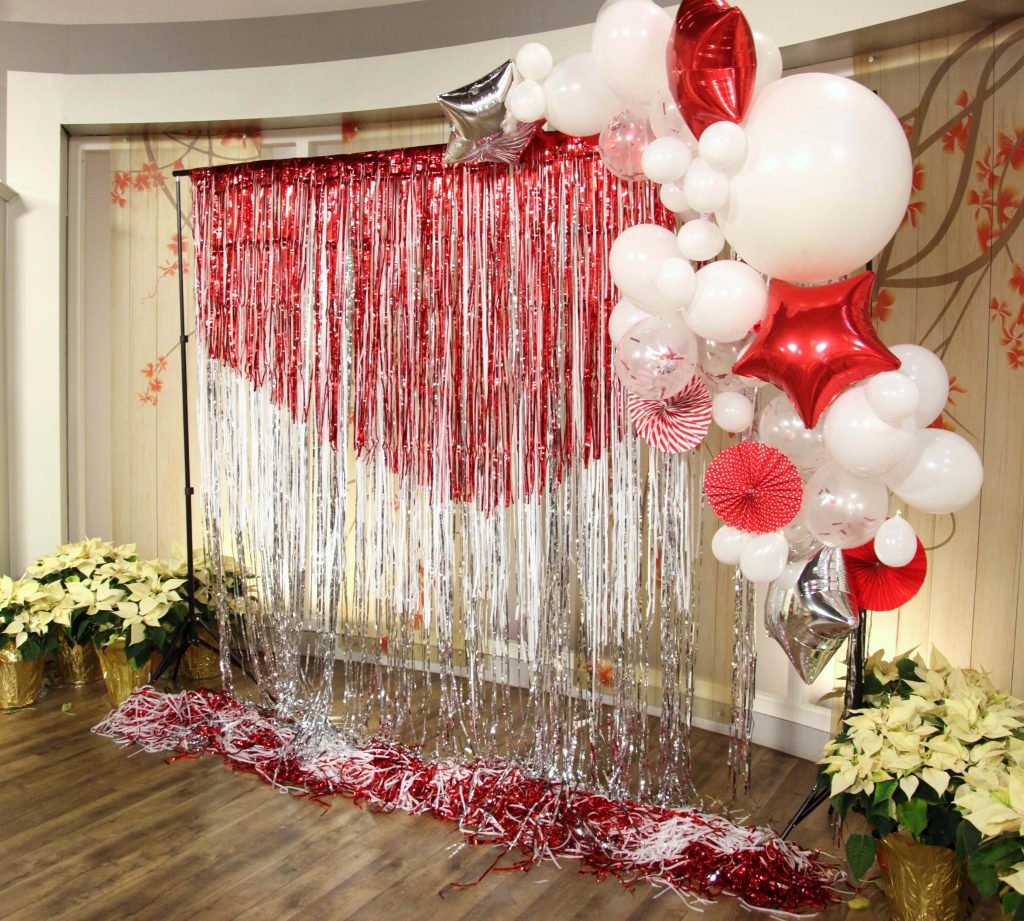
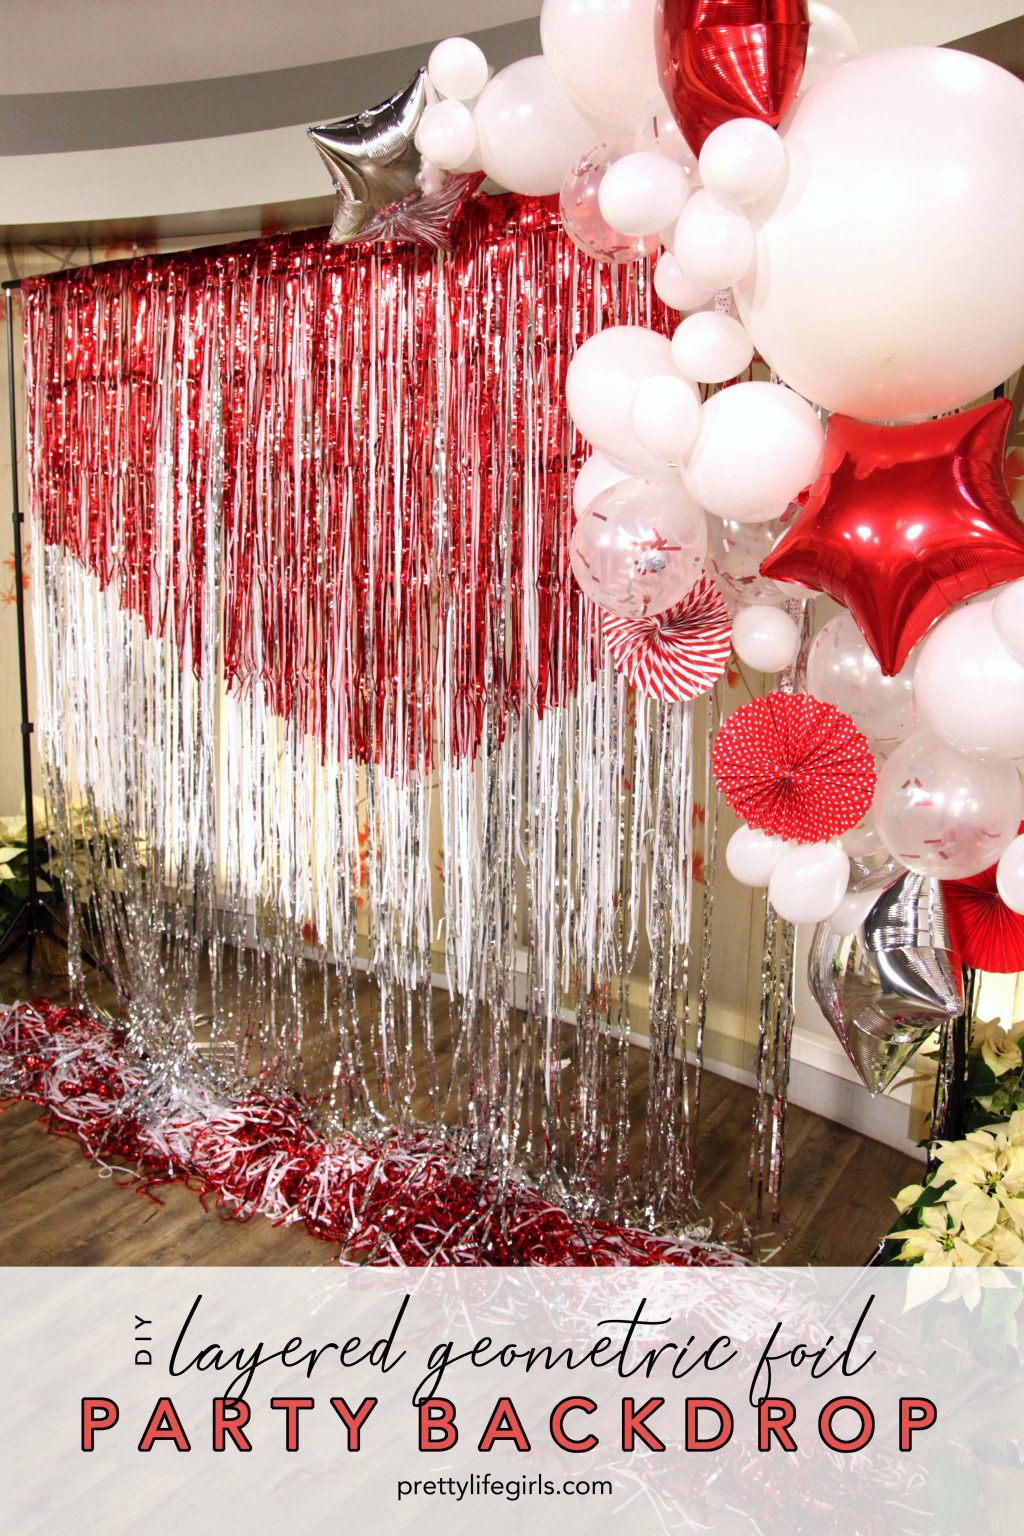
On today’s Studio 5 segment we had a great time sharing some solutions for your typical holiday parties, and one of our favorites was a backdrop idea that can be used as decor and as a fun photo backdrop for your guests! We love putting together a really eye-catching DIY foil photo backdrop that can serve as the focal point of your decor and add a ton of visual interest, but we ESPECIALLY love one that is easy to assemble and today’s idea does just that. This layered geometric foil backdrop requires only a few simple supplies and is a total showstopper. (We found our inspiration for this project from the fab minds behind I Spy DIY if you’d like to take a look at her gorgeous version!)
Plus, we got everything we needed to make it (along with all the supplies to make a festive little balloon arch) from Shindigz, our new favorite party supply store, so it couldn’t have been more slick to put together. We’ll show you how!
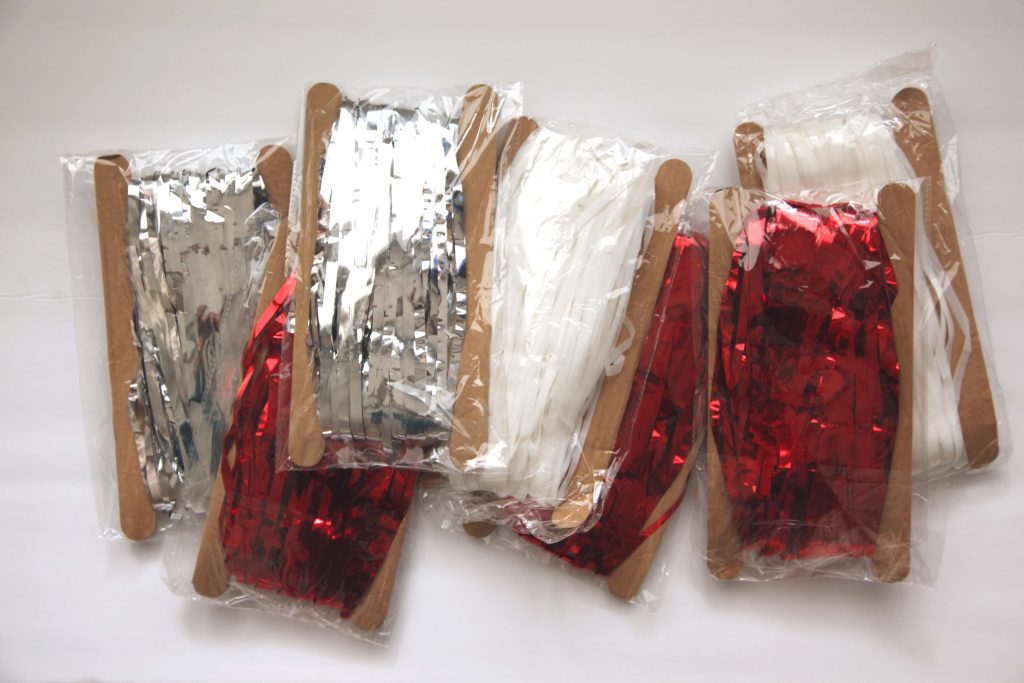
Supplies Needed to Make a DIY Foil Photo Backdrop
3 – 3′ x 8′ Red Foil Curtains
3 – 3′ x 8′ Silver Foil Curtains
3 – 3′ x 8′ White Vinyl Curtains
Clear Packing Tape
Scissors
Tape Measure
Optional Supplies for Balloon Arch:
Giant White Latex Balloon
White 12 in Latex Balloons
White 5 in Latex Balloons
Silver Mylar Star Balloons
Red Holographic Star Shaped Mylar Balloons
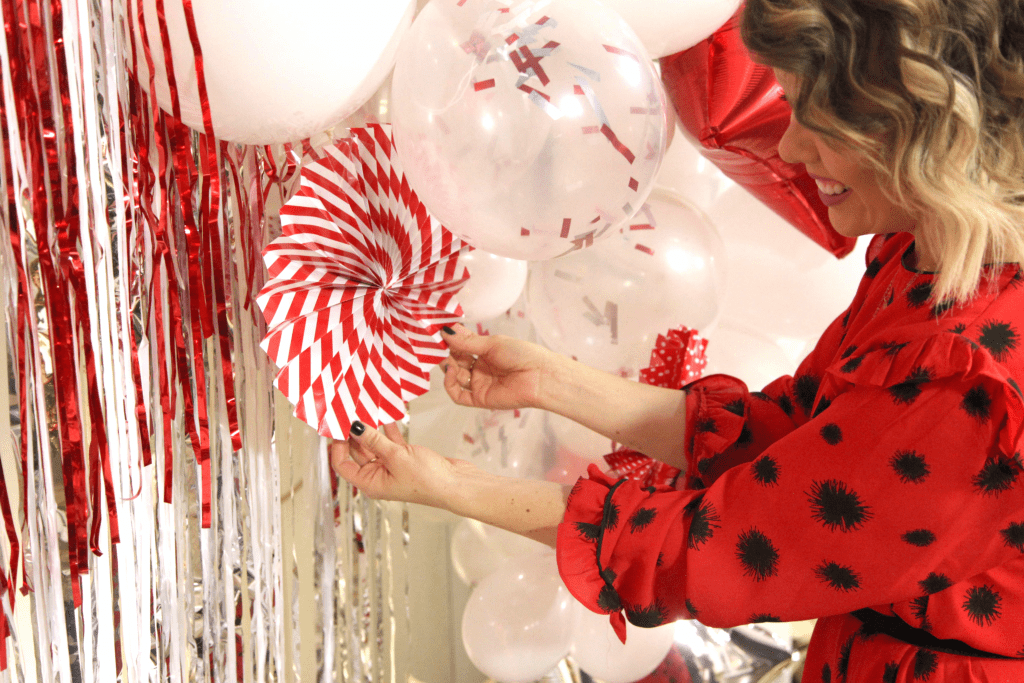
Paper fans, if desired
How to Make a DIY Foil Photo Backdrop
Step 1. Since the curtains we purchased from Shindigz come in widths of 3′, you’ll want to attach the curtains to each other, by color, to make one 9′ red curtain, one silver 9′ curtain and one white 9′ curtain. Attach them together at the top with a piece of packing tape at each seam.
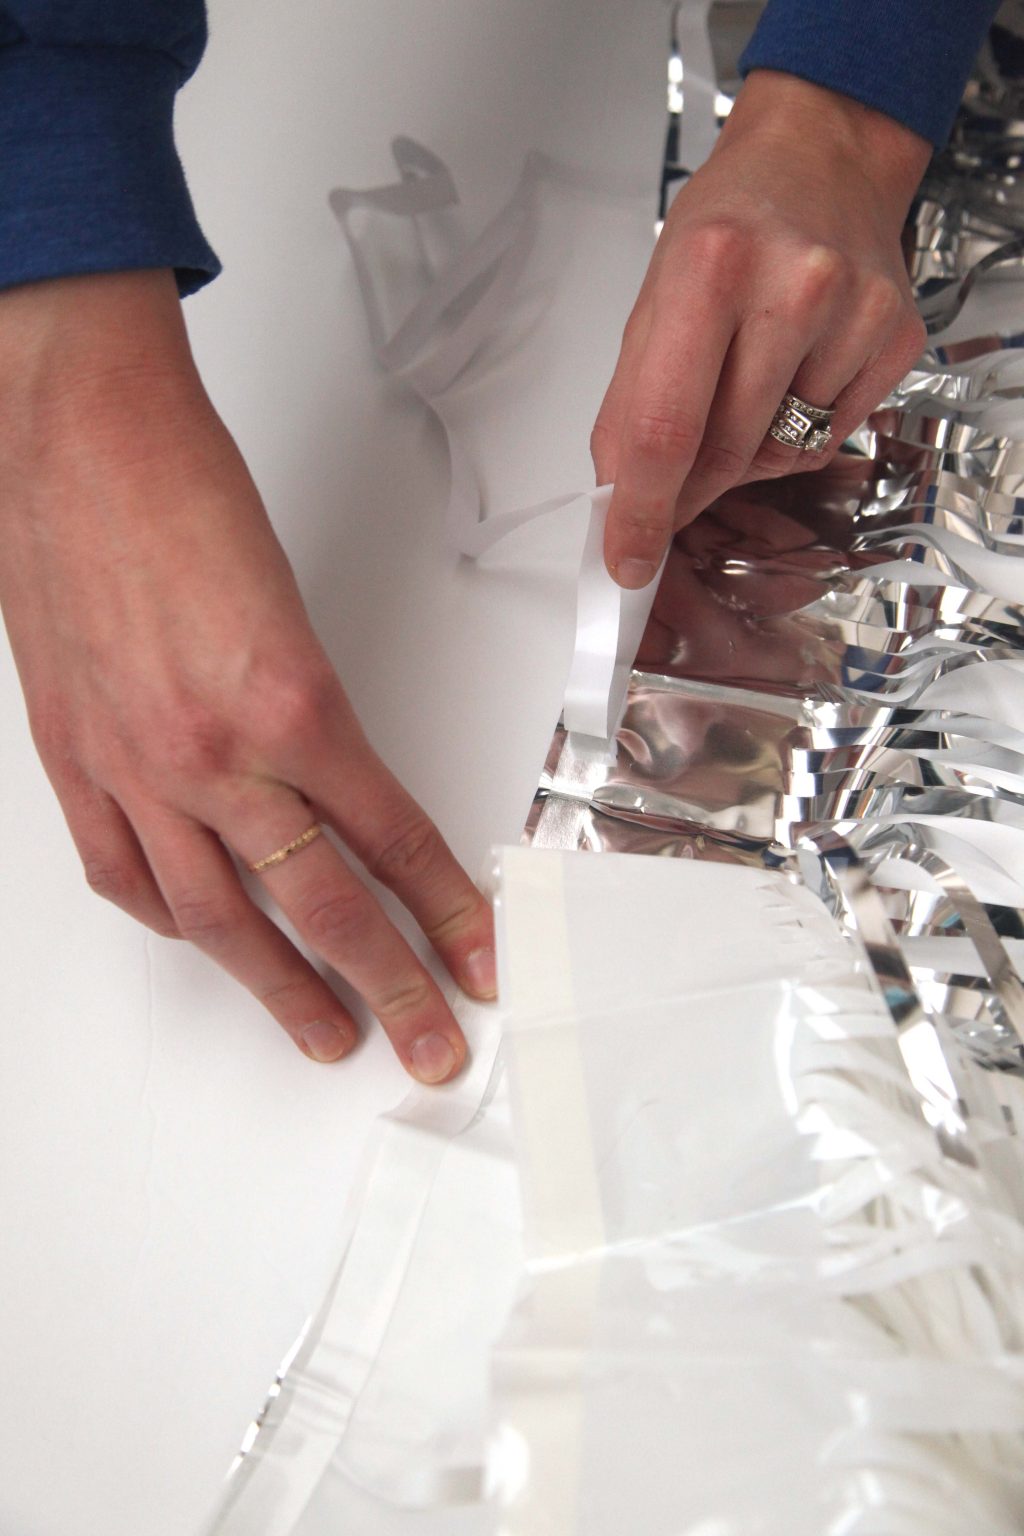
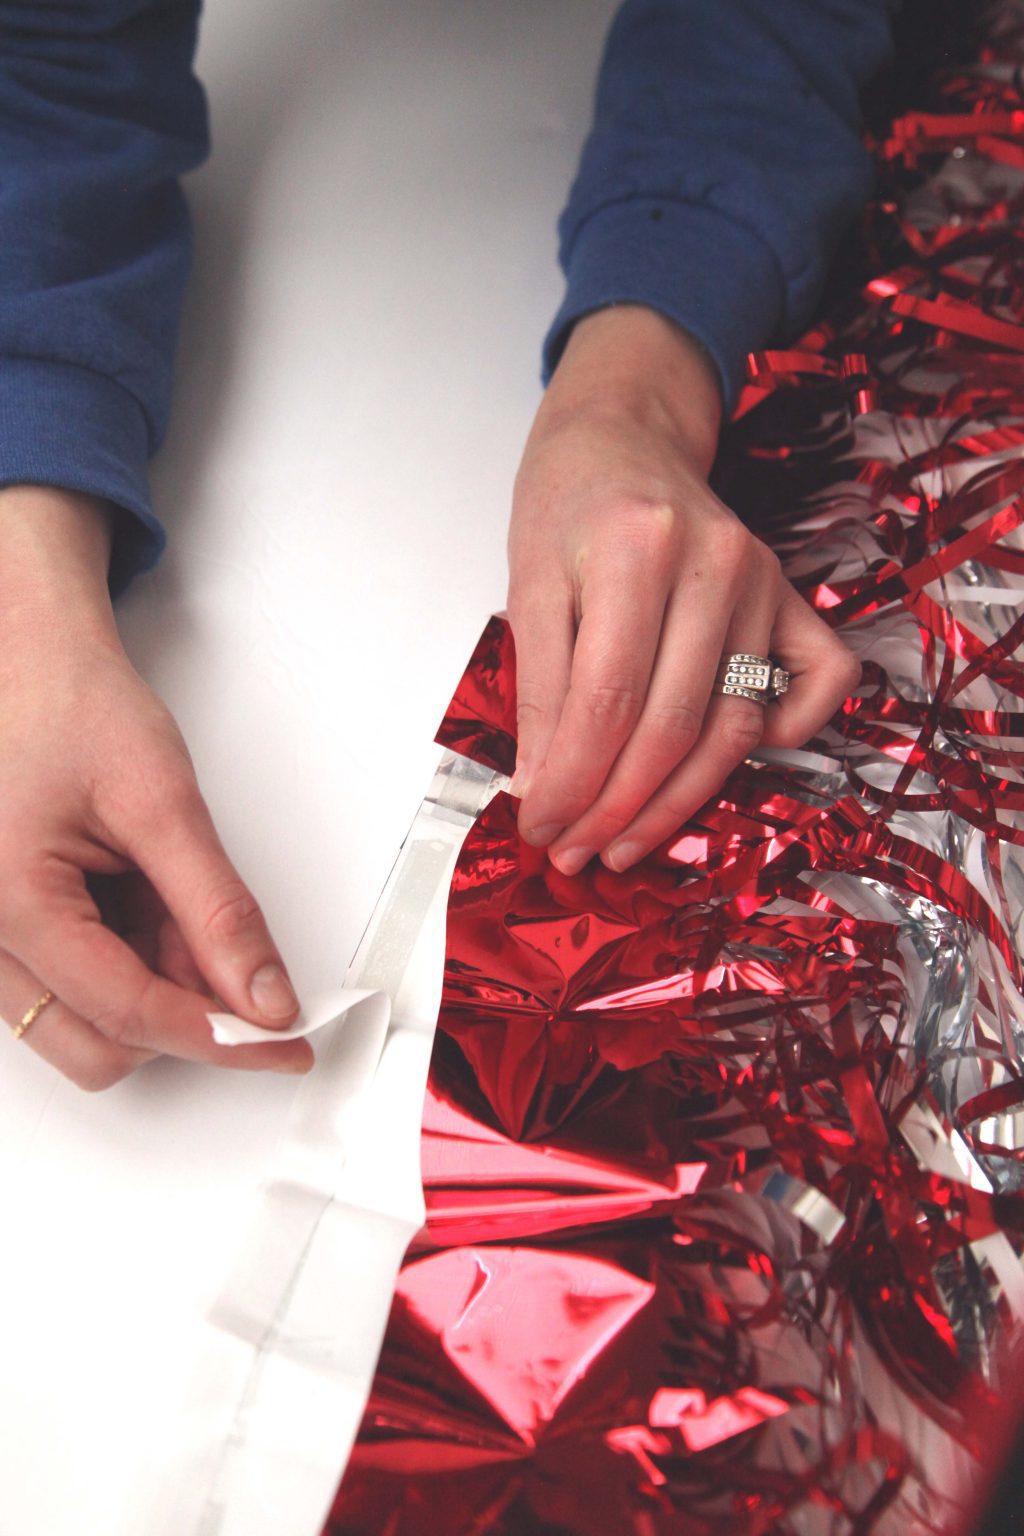
Step 2. Layer the curtains. The great thing about using Shindigz curtains is that they come with a strip of adhesive already attached to the top of the curtain which makes assembly a piece of cake! Start by laying the silver curtain flat, then remove the adhesive backing on the white curtain. Align the curtains at the top and then press the white curtain to the silver curtain, adhesive side down, to connect them. Use your fingers to smooth them together and ensure they are attached. Repeat this process with the red curtain, removing the adhesive backing and pressing it against the white curtain.
Step 3. Hang the curtain. You can do this by simply removing the backing on the adhesive of the silver curtain and sticking the curtains to the wall or a backdrop stand, or by using packing tape to adhere the curtains to the wall or backdrop stand.

Step 4. Cut out your shapes. To do this, find the middle of the backdrop, then, have a partner hold the tape measure at the angle you would like to cut to ensure that it is straight. While your partner is holding the tape measure, cut only the red foil pieces along the line of the tape measure. Repeat on both sides until your red foil pieces are in the shape of an upside down triangle.
Step 5. Repeat step 4 on the white foil to create a triangle that is parallel to the red foil.
Step 6. If desired, leave the foil pieces you cut at the base of the backdrop for some added interest. You can also cut some of the pieces into confetti to put inside clear balloons. Just be sure to rub the outsides of the balloons to create friction so that the confetti sticks to the outside and doesn’t sink to the bottom of the balloons!
Step 7. If desired, make a balloon arch to attach to the backdrop. We love this one from Kailo Chic.


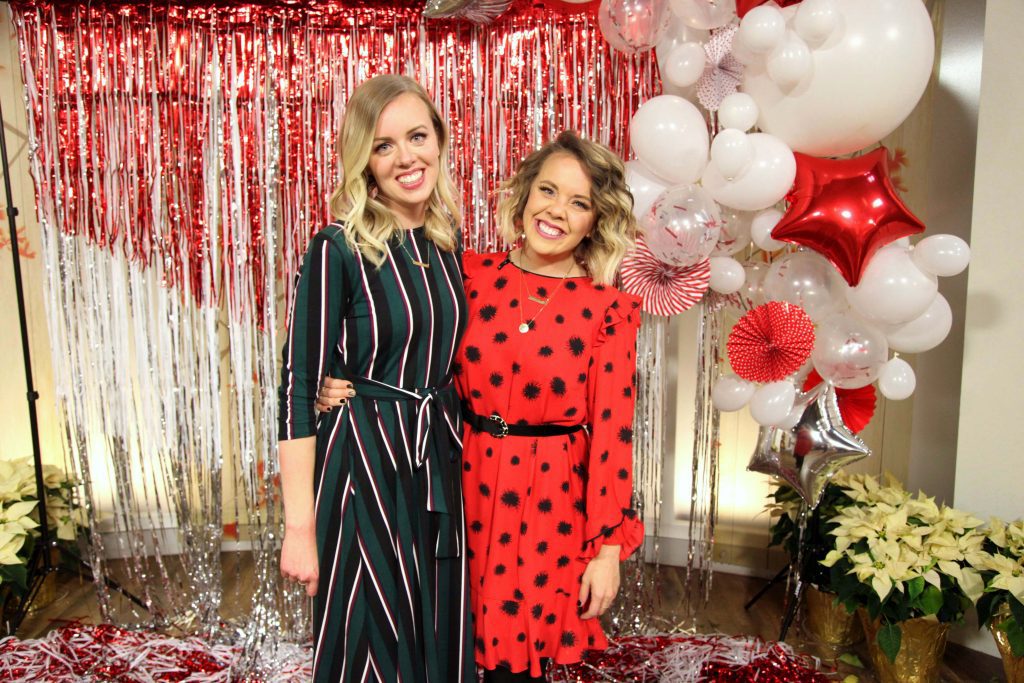
That’s it! You’re ready to PARTY! The sparkle and shine from this backdrop is so magical, you can’t help but want to snap a picture in front of it! Plus, we love the idea of reusing it for your New Year’s Eve soirees!

Happy partying!
OX. Sam & Liz