


This post was sponsored by Expressions Vinyl. All opinions expressed are our own.

When we were packing up to move to our tiny NYC apartment we had to get rid of nearly ALL of our Christmas decorations as a result of our lack of storage space (tears. were. shed.). So, this year is going to be a strange clean-slate kind of year when it comes to decorating for the holidays since we no longer have the decorations we have used for years. In some ways I’m really excited about it since it can mean a new color palette, or a completely different aesthetic than previous years, and in some ways it feels like maybe there are going to be even more tears at any moment.
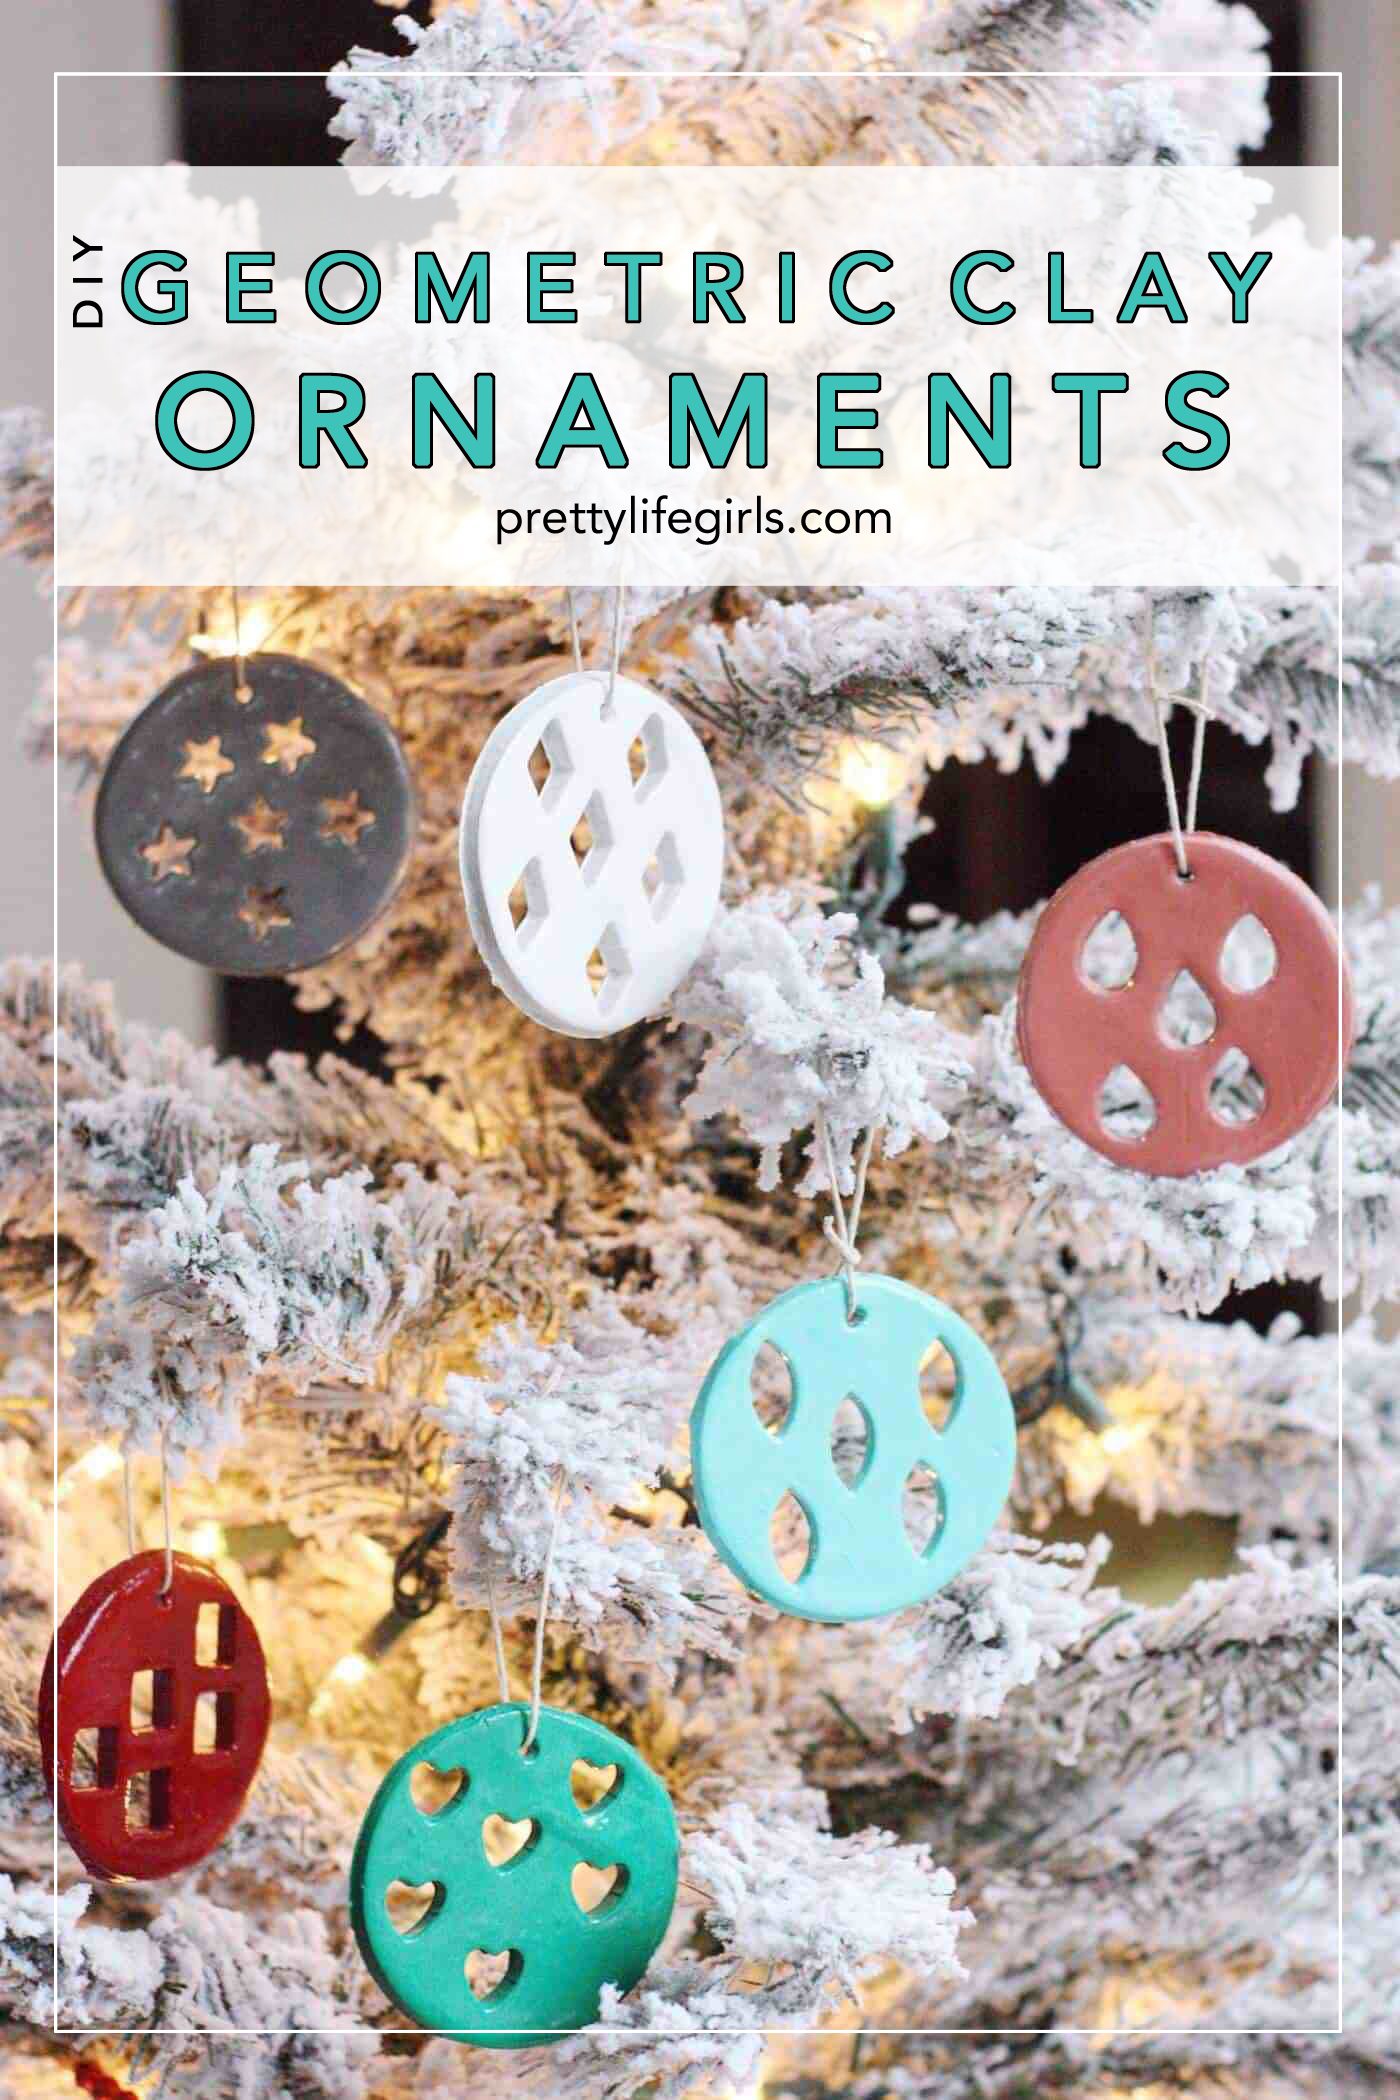
So, since I have to come up with all new Christmas decor clearly I’ve gotta keep my cost-per-ornament low so that I can deck all of my halls. That’s why today I am sharing an adorable and affordable DIY project with these Graphic Salt Dough Star Ornaments! You can make these ornaments in a snap with salt, water, and flour (that’s it!), and cut some vinyl in a pretty color (we use Expressions Vinyl because the quality is the BEST and the selection is outrageous), and you’ve got some gorgeous one-of-a-kind ornaments! Here’s how you make them:
Supplies Needed:
2 cups flour
1 cup salt
1 cup warm water
Star cookie cutter
Expressions Vinyl Adhesive Vinyl
Craft cutter (we used a Silhouette CAMEO 3)
String for hanging
Directions
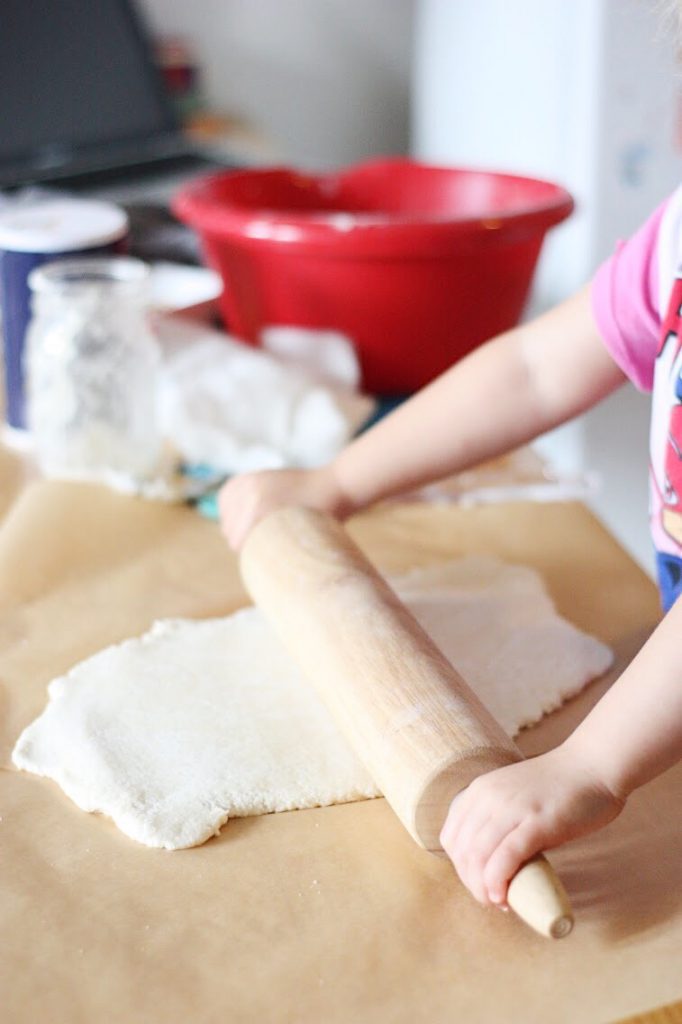
1. Make your dough by combining all ingredients in a large bowl. Work into a ball and roll out on a flat, floured surface.
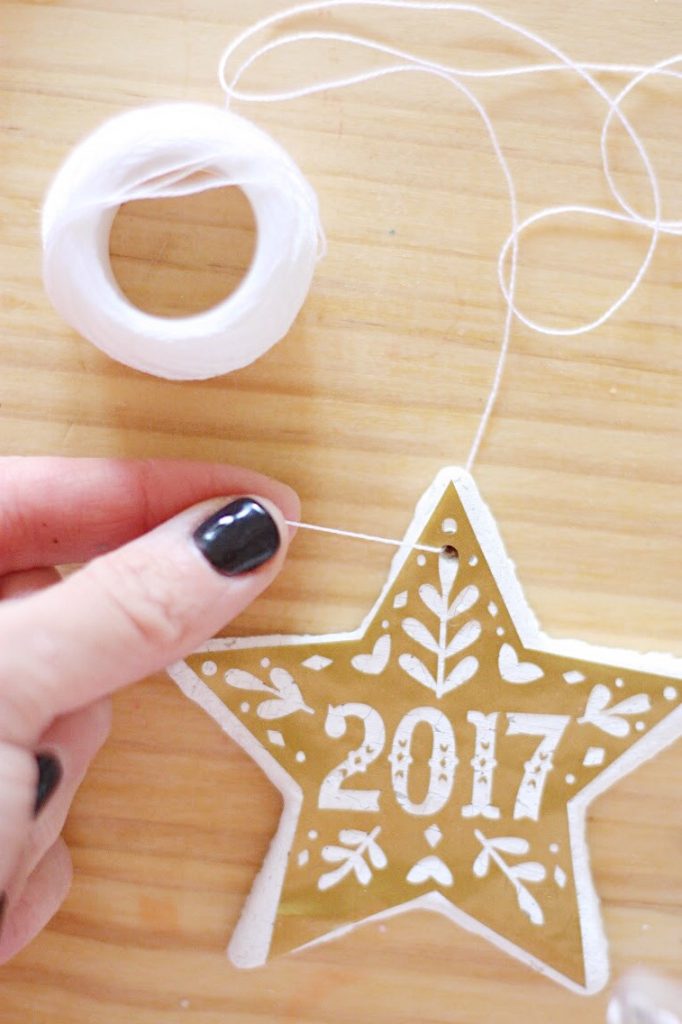
2. Using your cookie cutter, cut out stars. Be sure to also use a tack or pin to make a hole to string them.
3. Let stars air dry for 24 hours until solid or bake on a cookie sheet at 200 degrees F for 2-3 hours (keeping a close eye on them the last hour). Let cool completely.

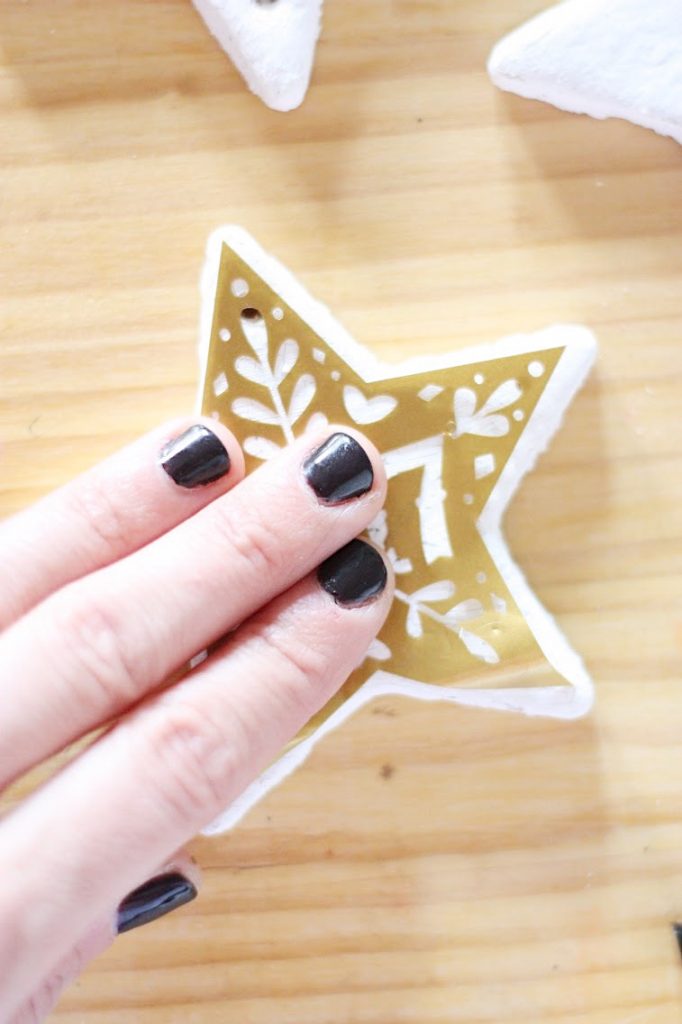
4. Cut out your vinyl design. I used this, this, and this design and scaled it down to fit the dimensions of my stars using my craft cutter software.

We love getting our vinyl at Expressions Vinyl because of all of the varieties of colors, patterns, and finishes they make, plus the quality always means our products will turn out beautifully.

5. Remove your vinyl design from its backing and apply to stars, rubbing with pressure to ensure adhesion.

6. Slide string through the hole, cut off and tie. That’s it! You’re ready to trim that tree!

I love this project so much because it is an affordable way to make really customizable ornaments. You could cut any design out with a cookie cutter and match it with your cutting software and make personalized versions with names, or to mark milestones (baby’s first Christmas, etc.), and you can use Expressions Vinyl’s huge selection of vinyl colors to make sure it matches your decor perfectly!


What projects are you DIY-ing for your holiday decor? I’d love to hear!
ox. Liz


Those are so classy!
What a great idea !
These are so fun and cute! And an easy FHE project to do with the kids!
Does the vinyl stick good?
these are gorgeous!
[…] DIY Salt Dough Ornaments […]