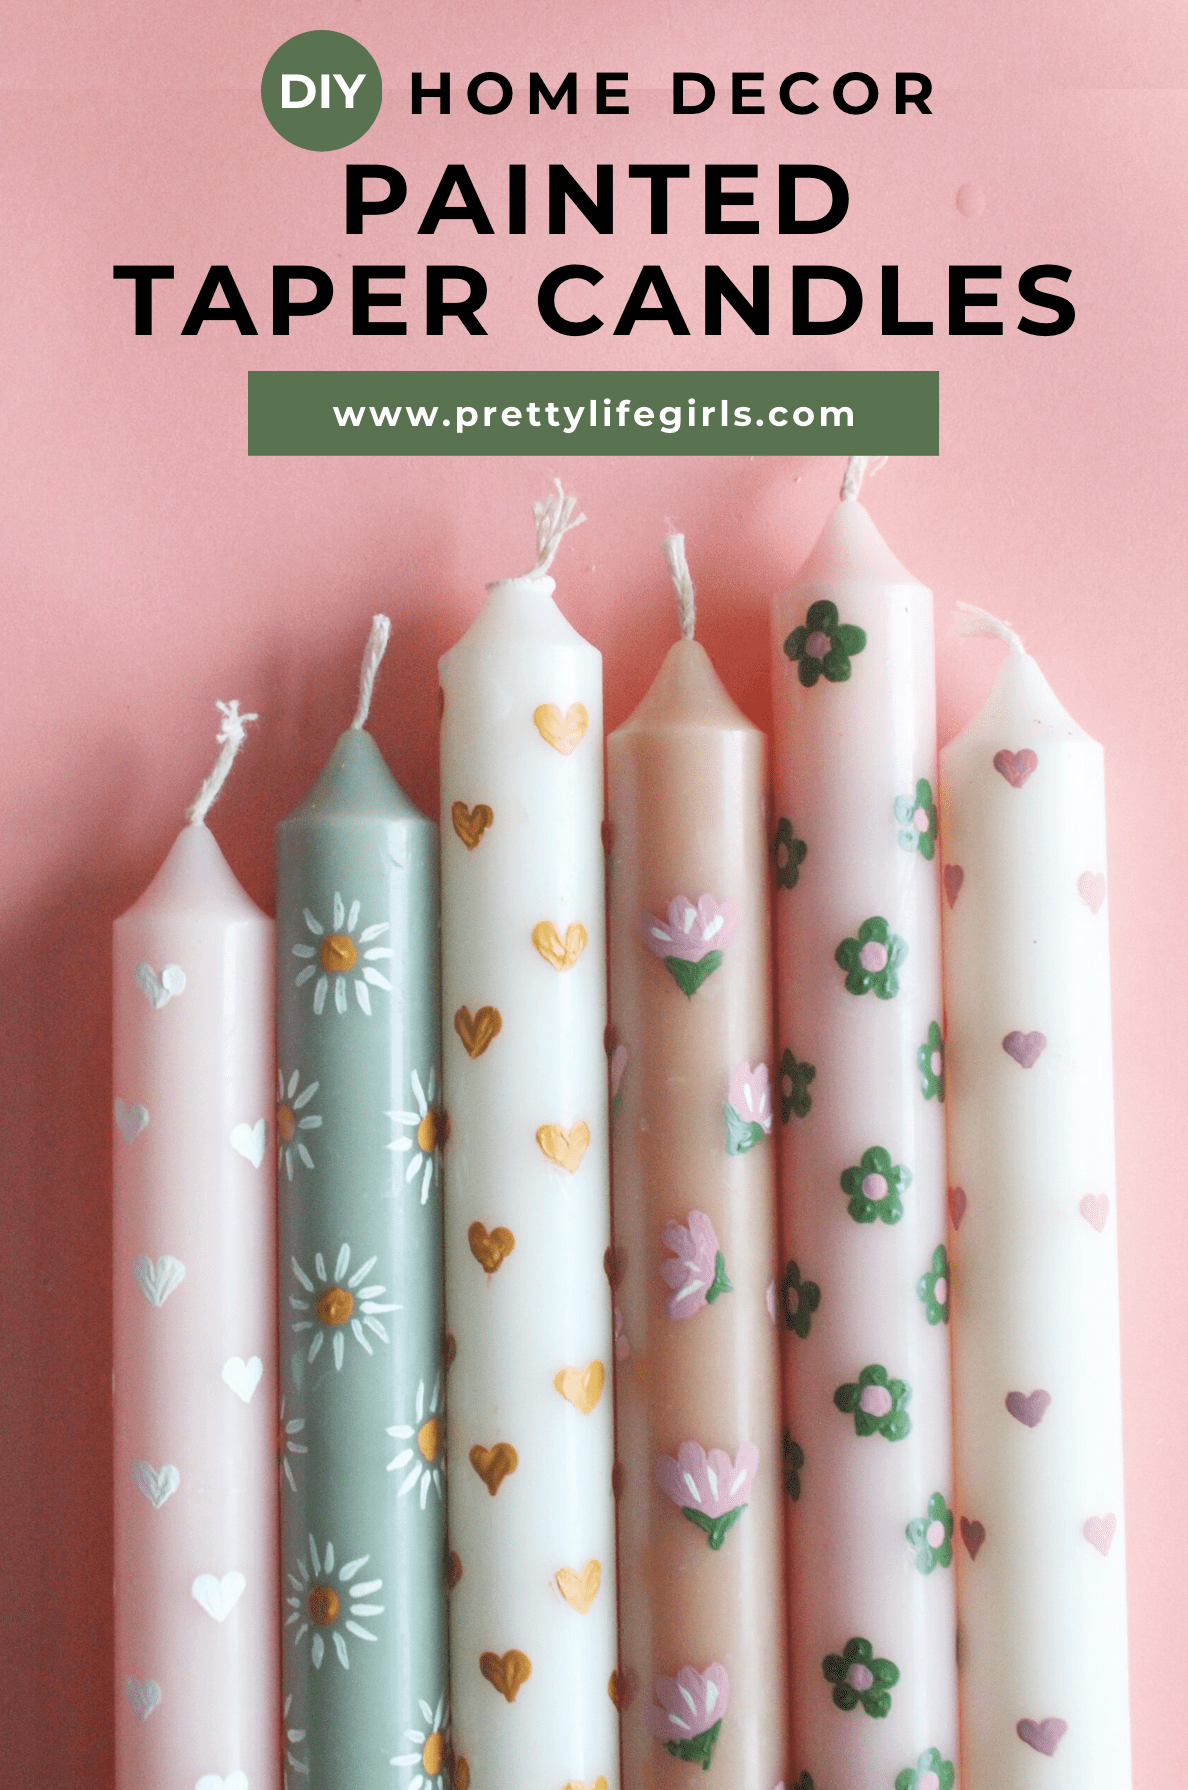
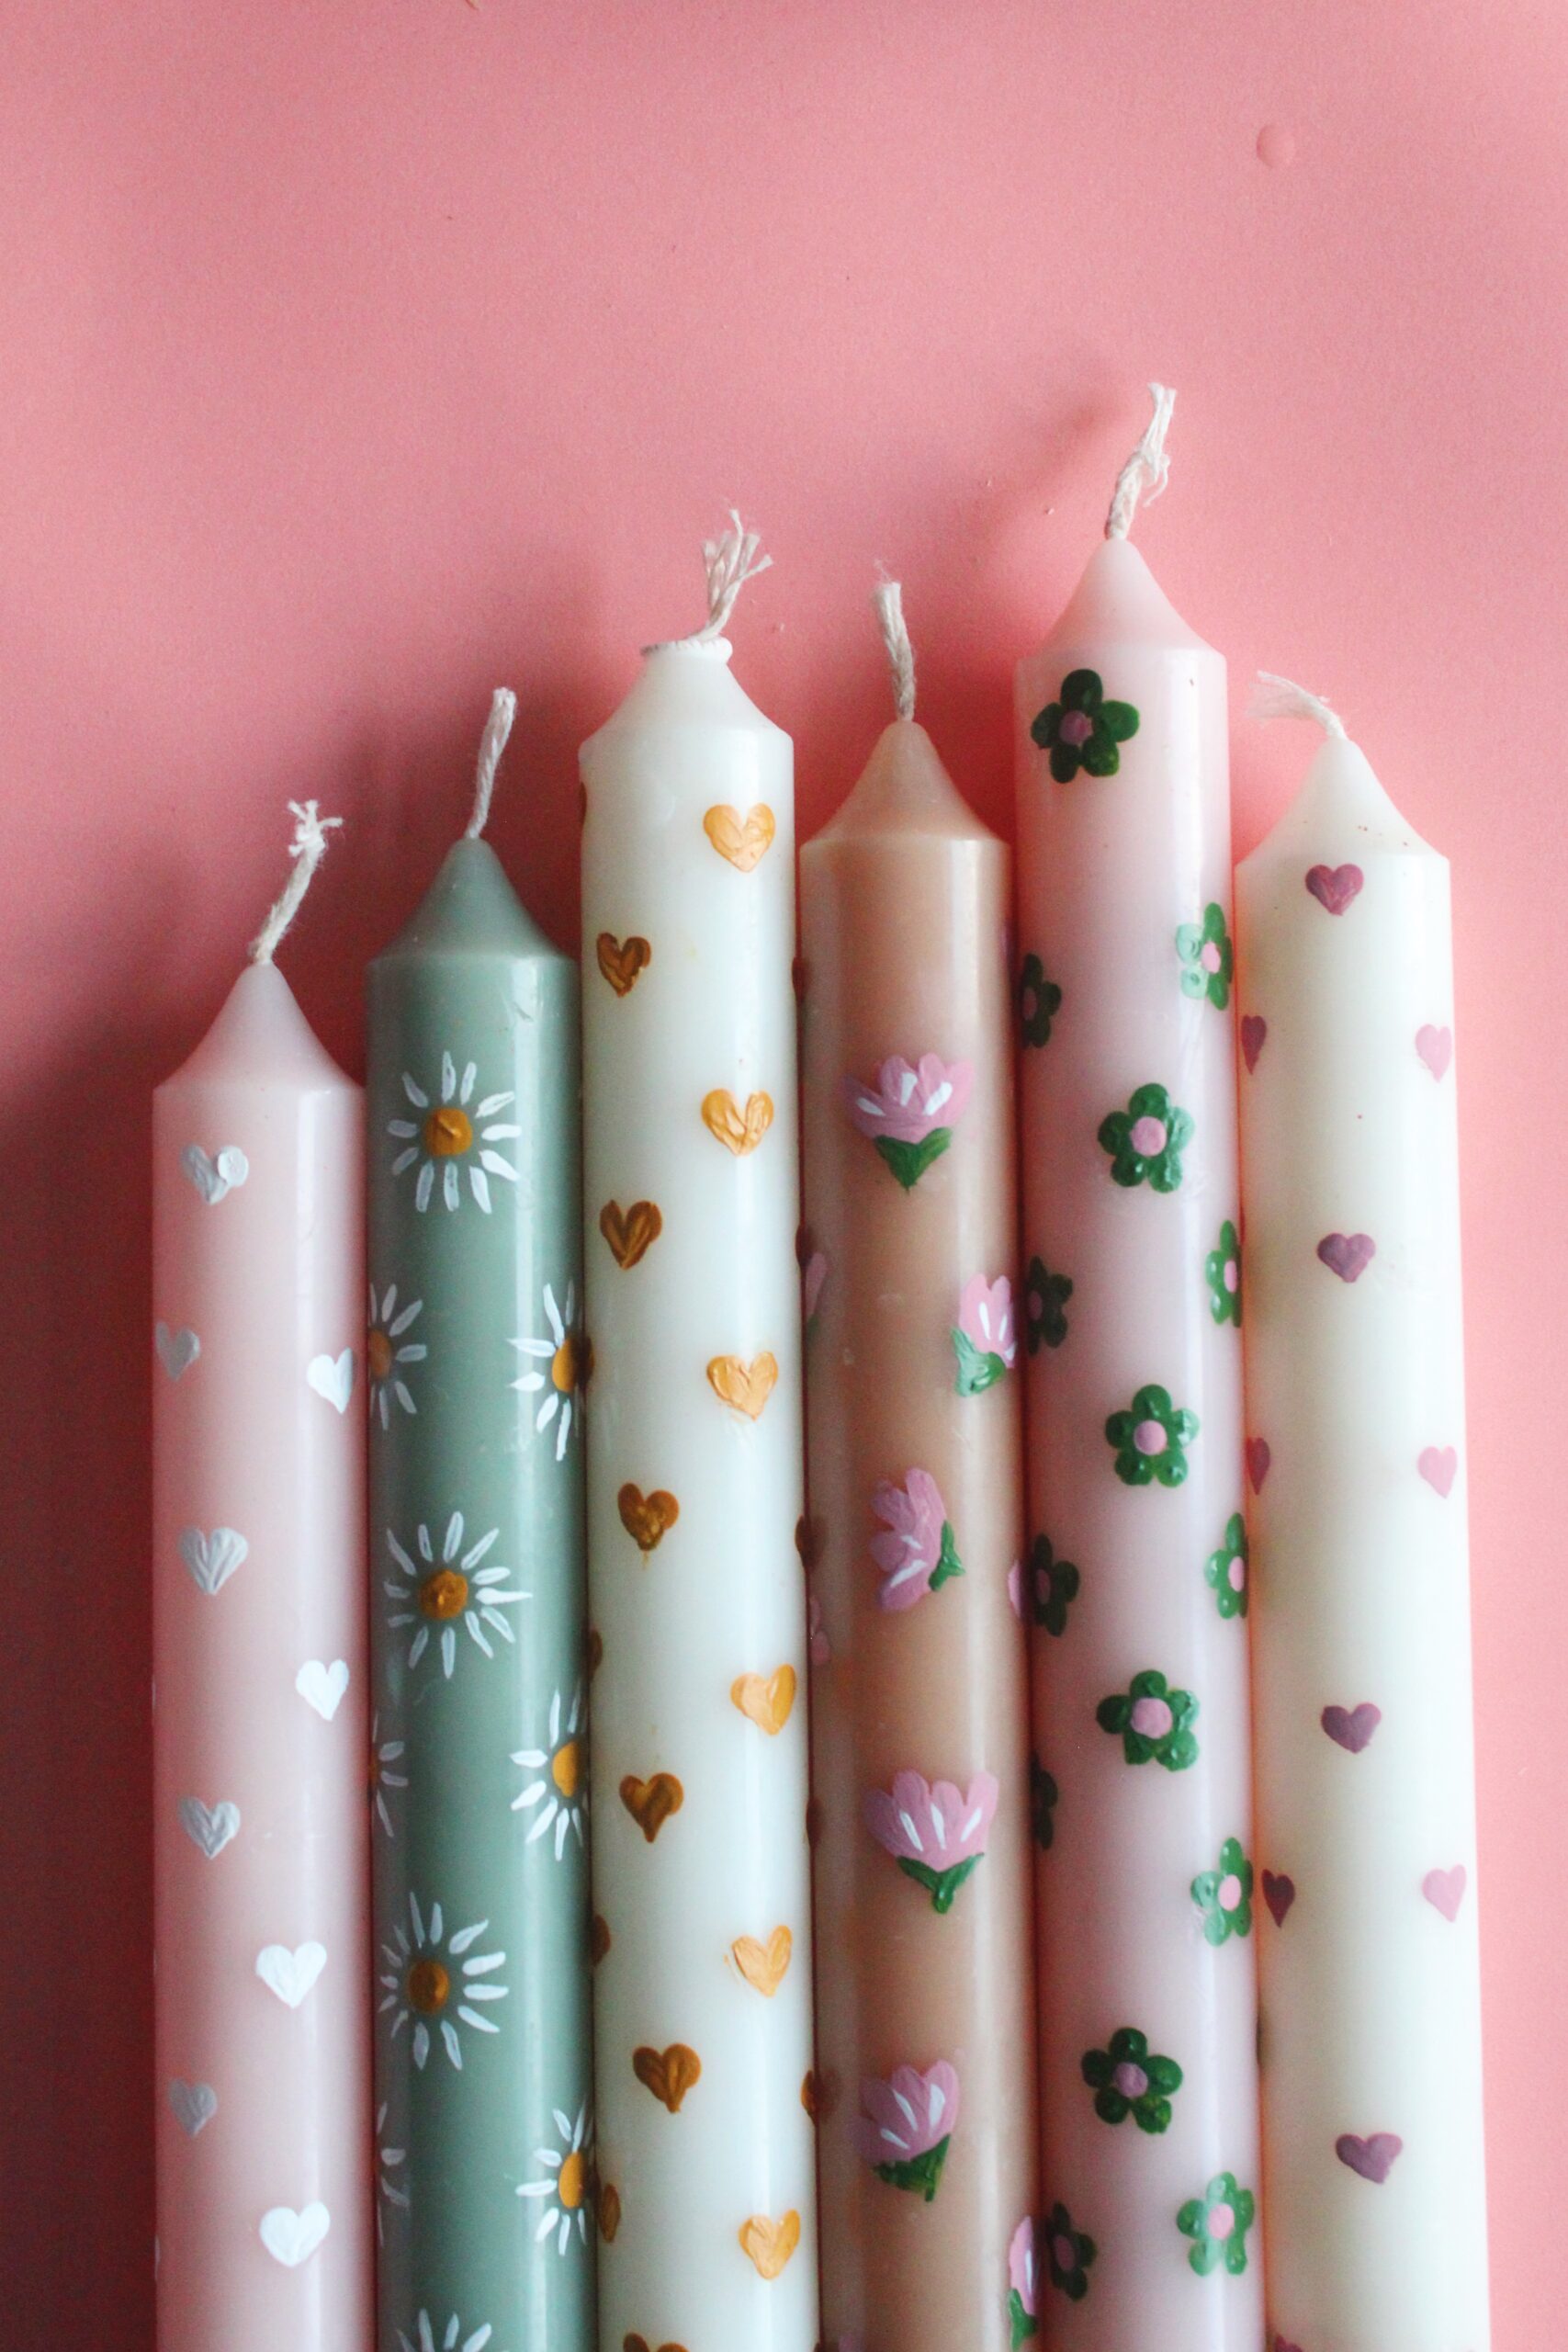
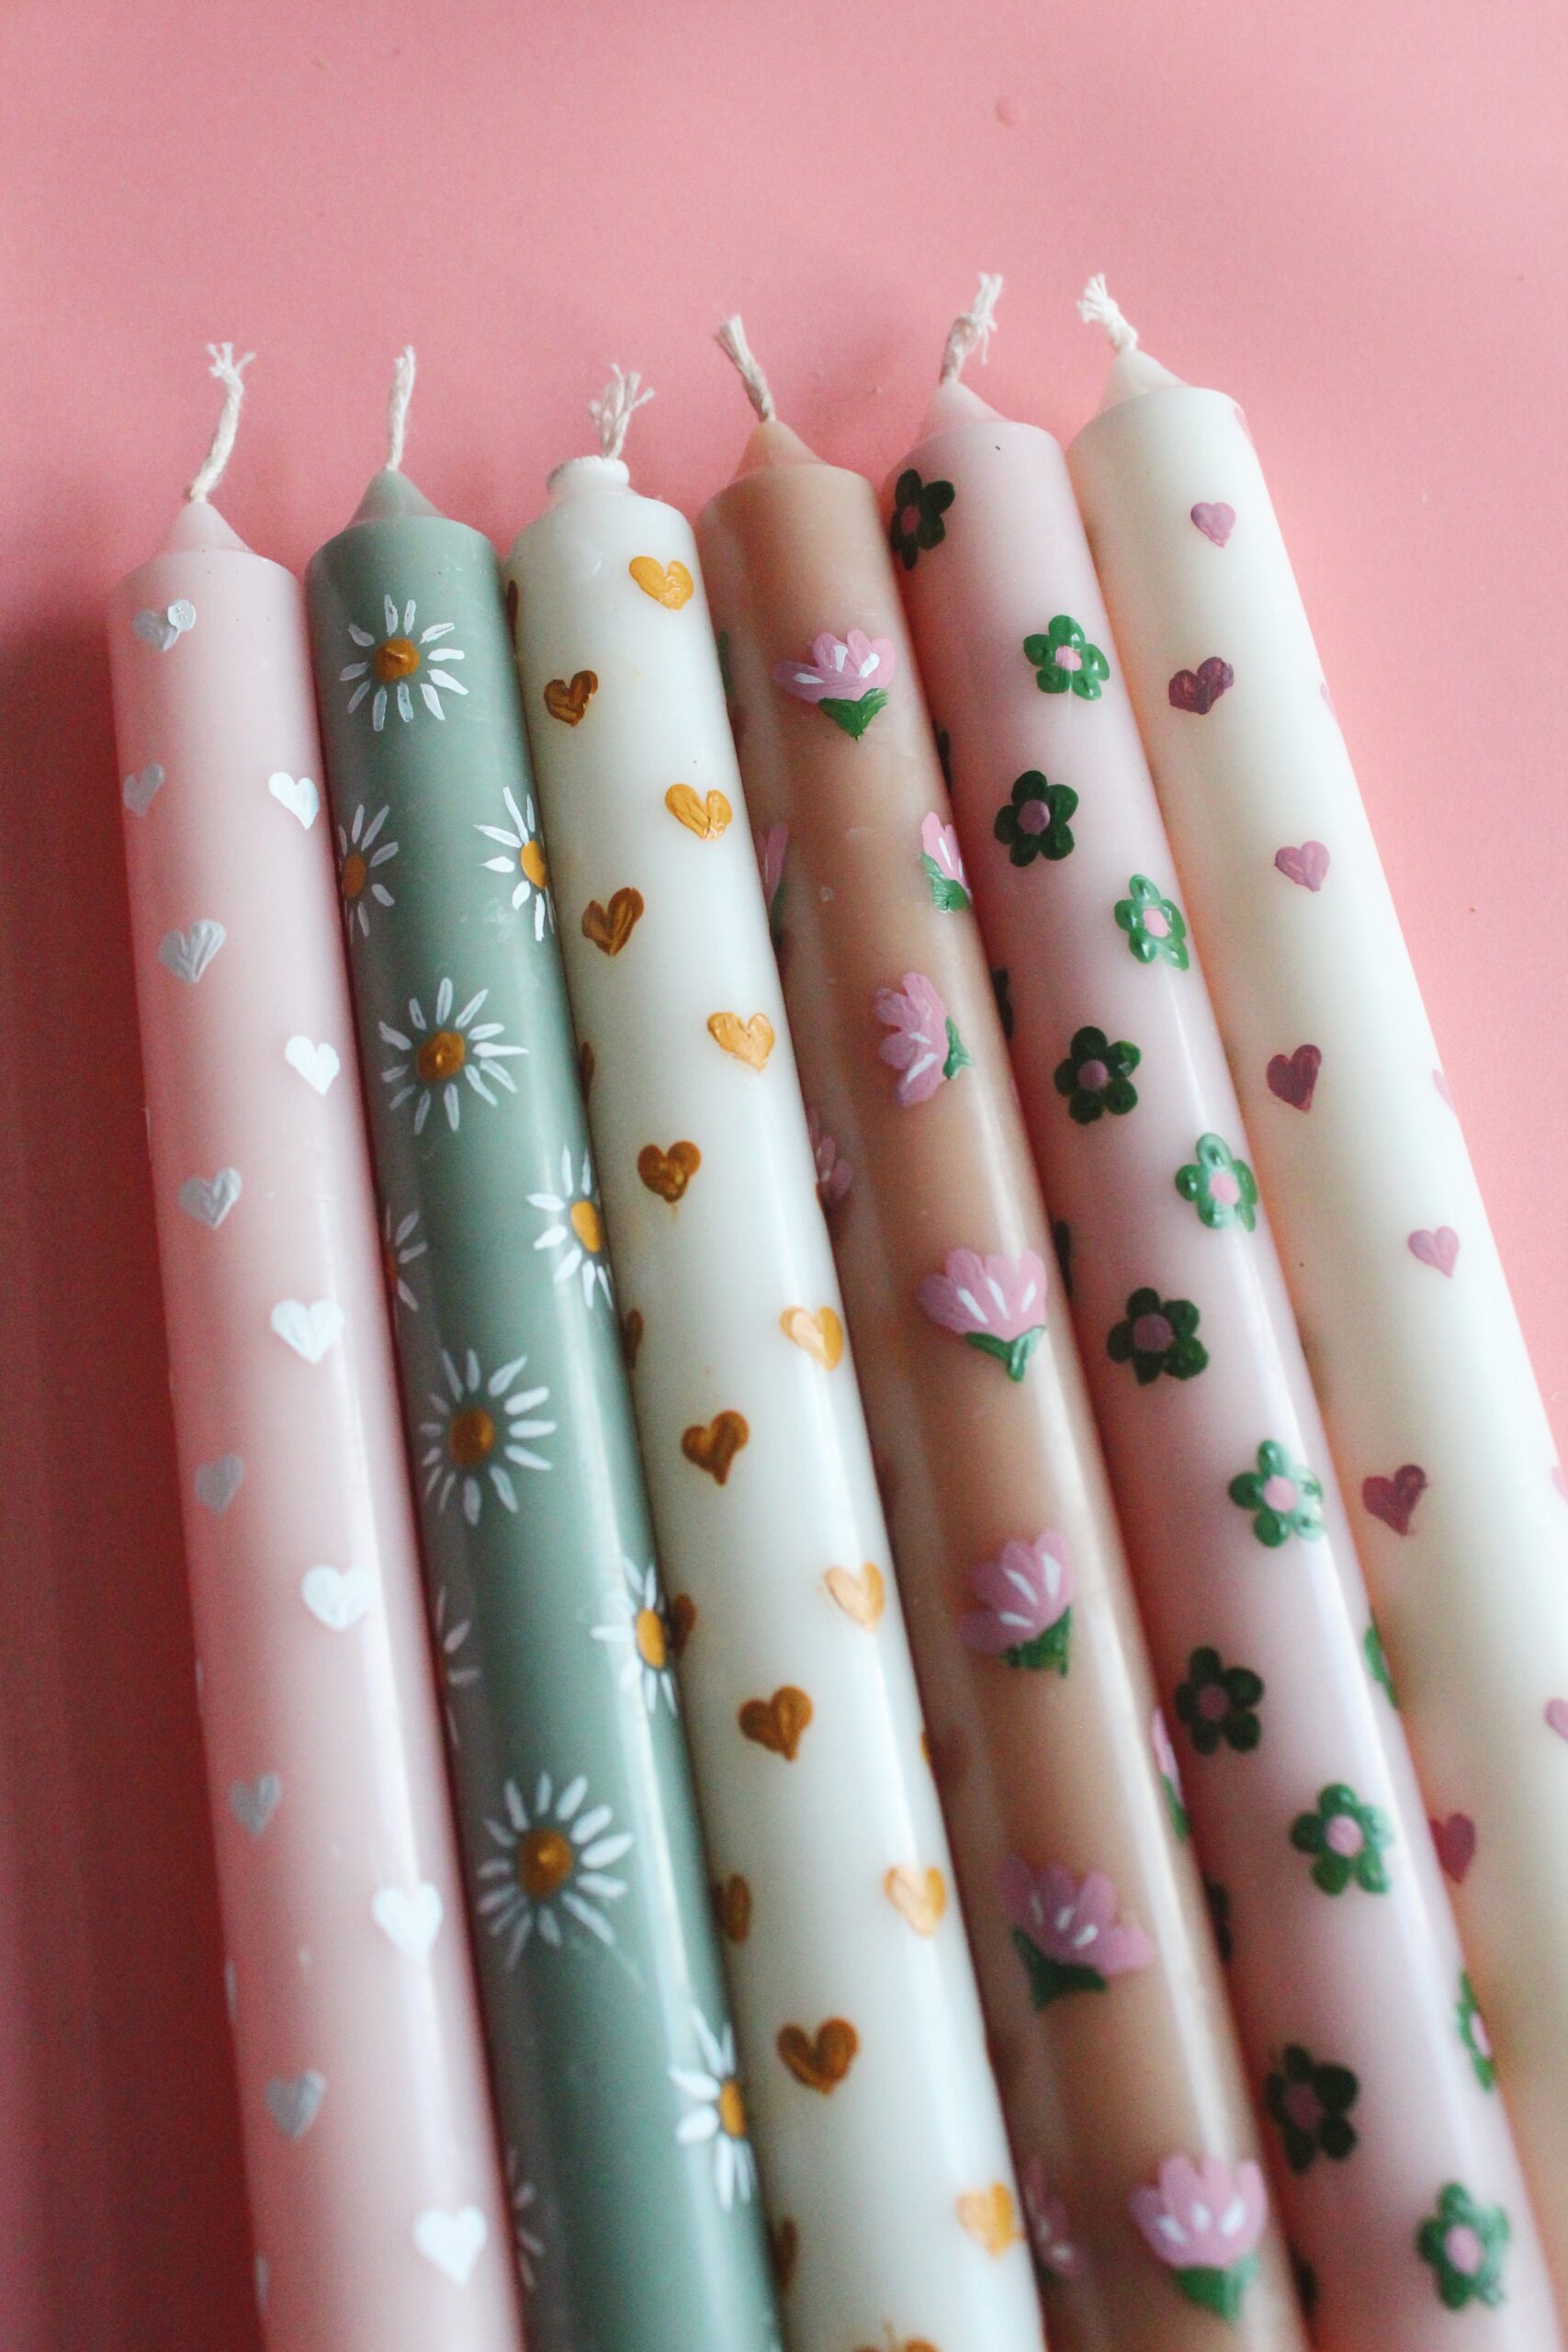
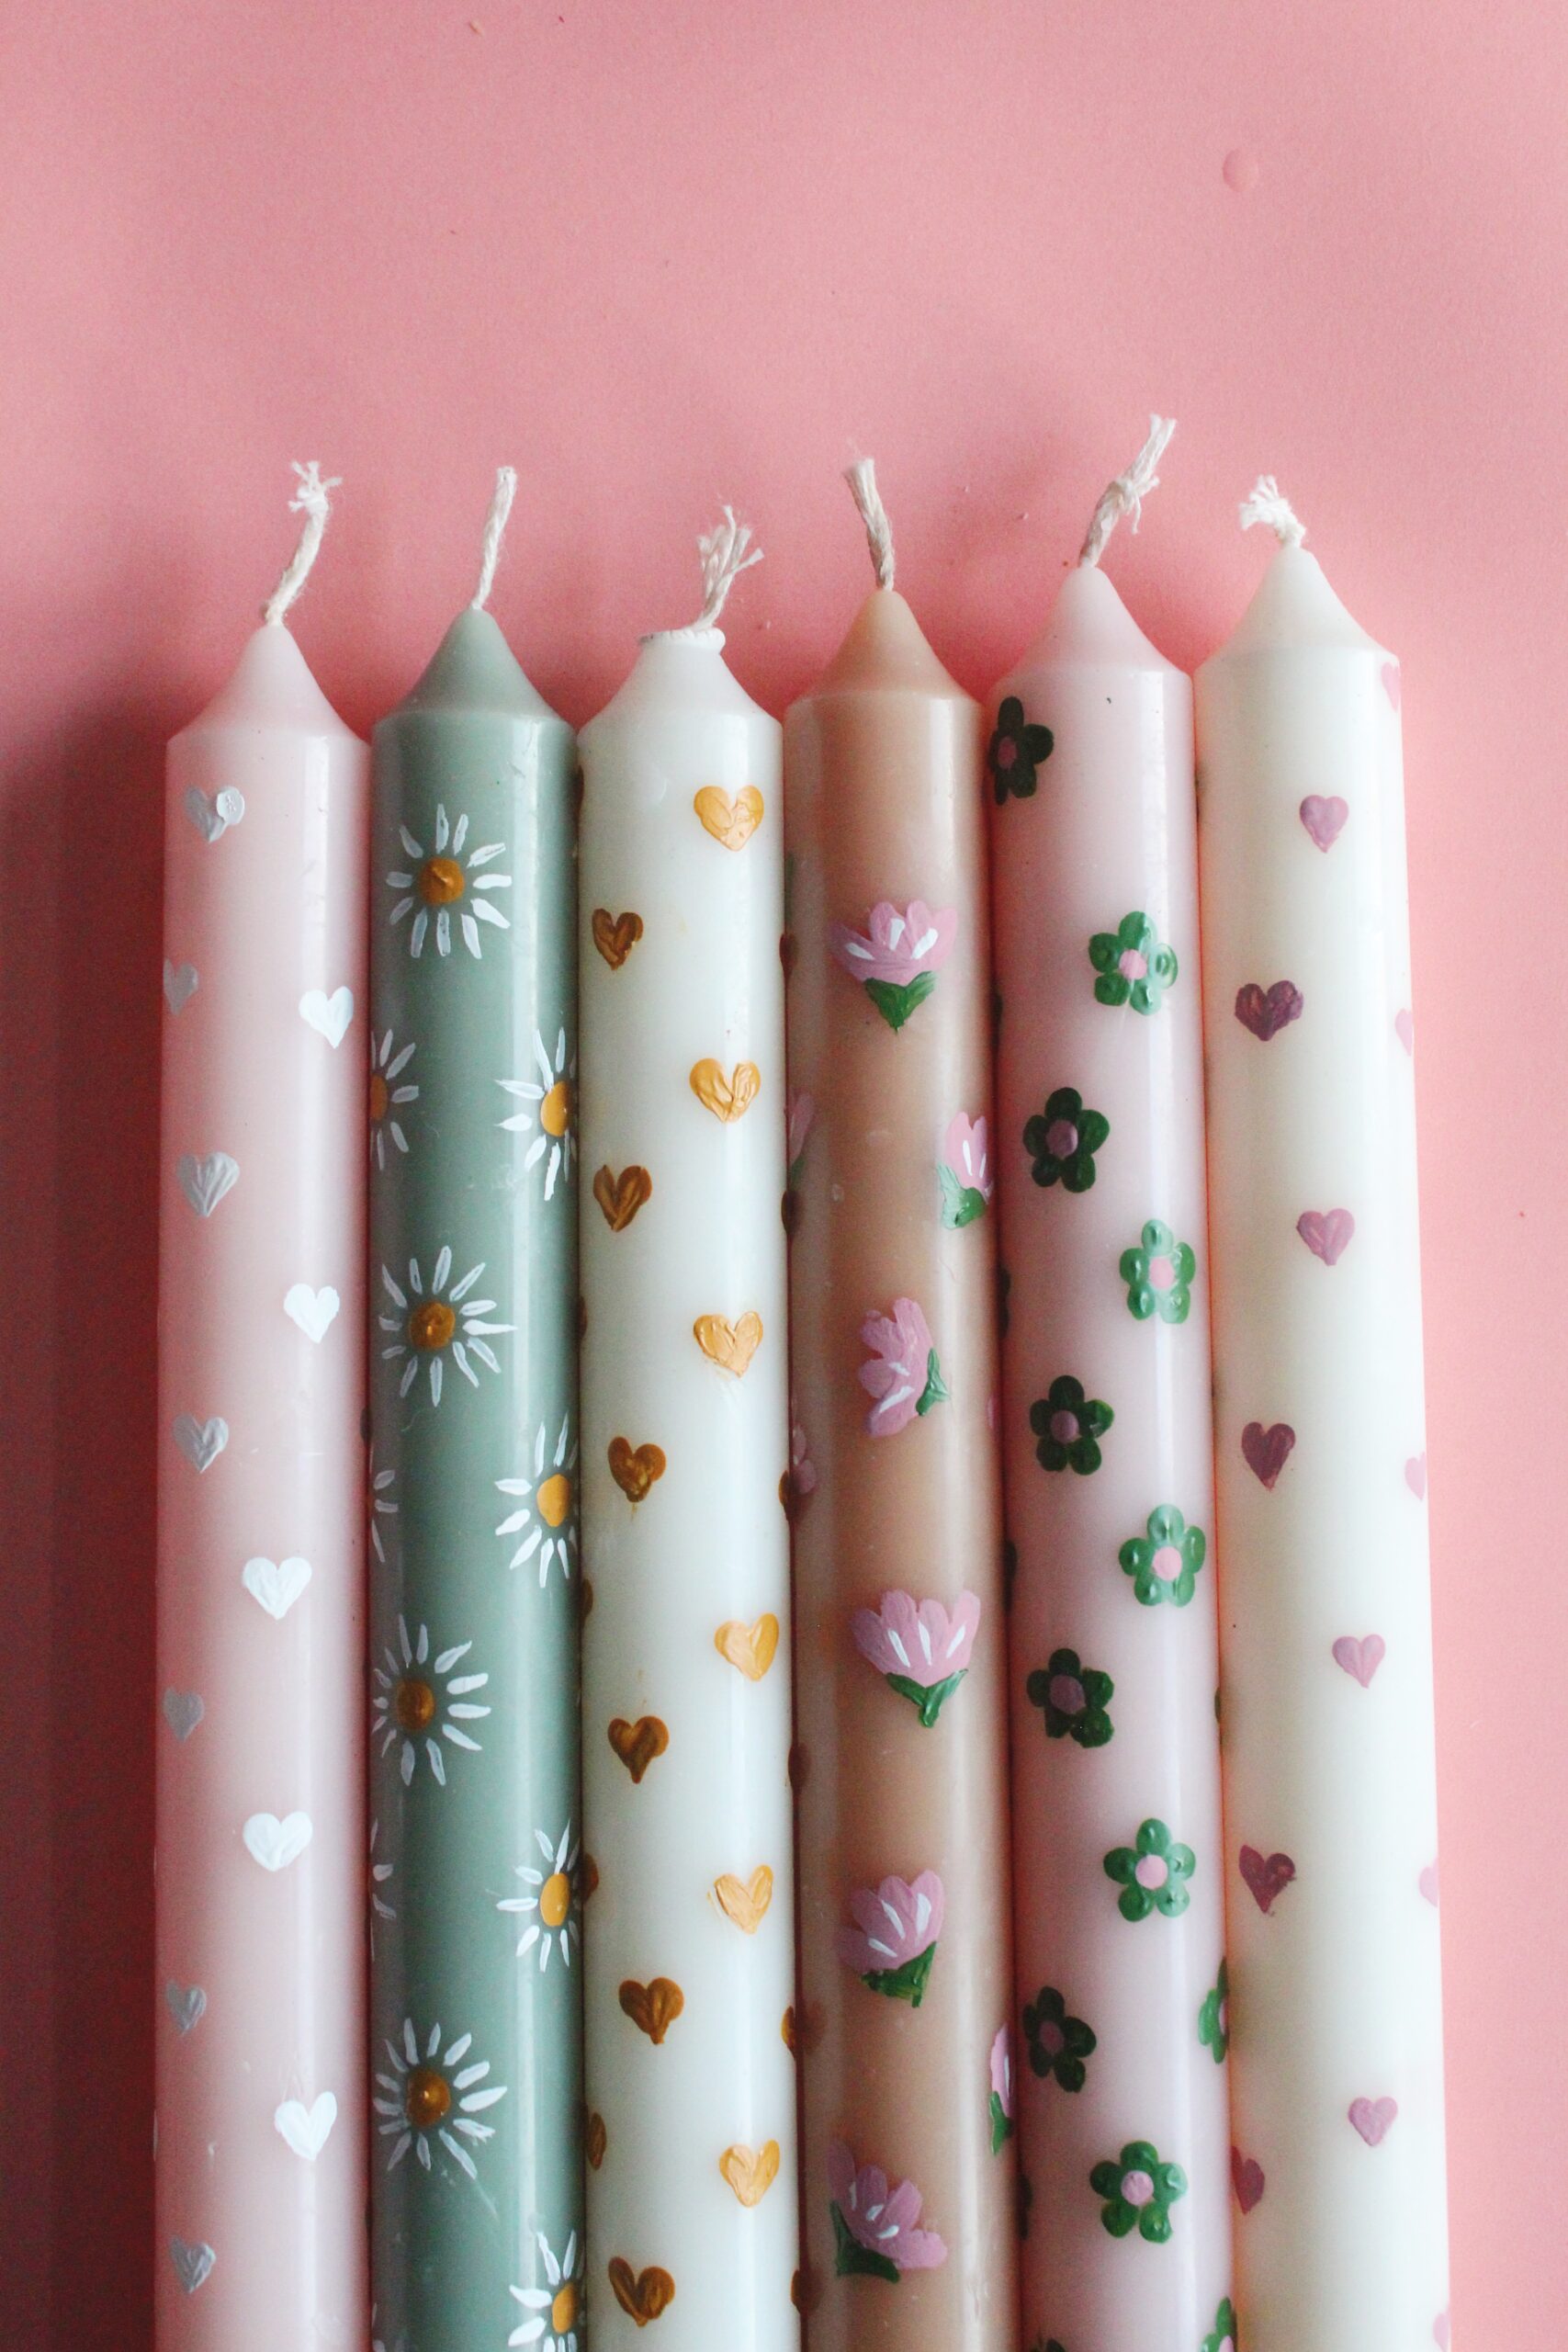
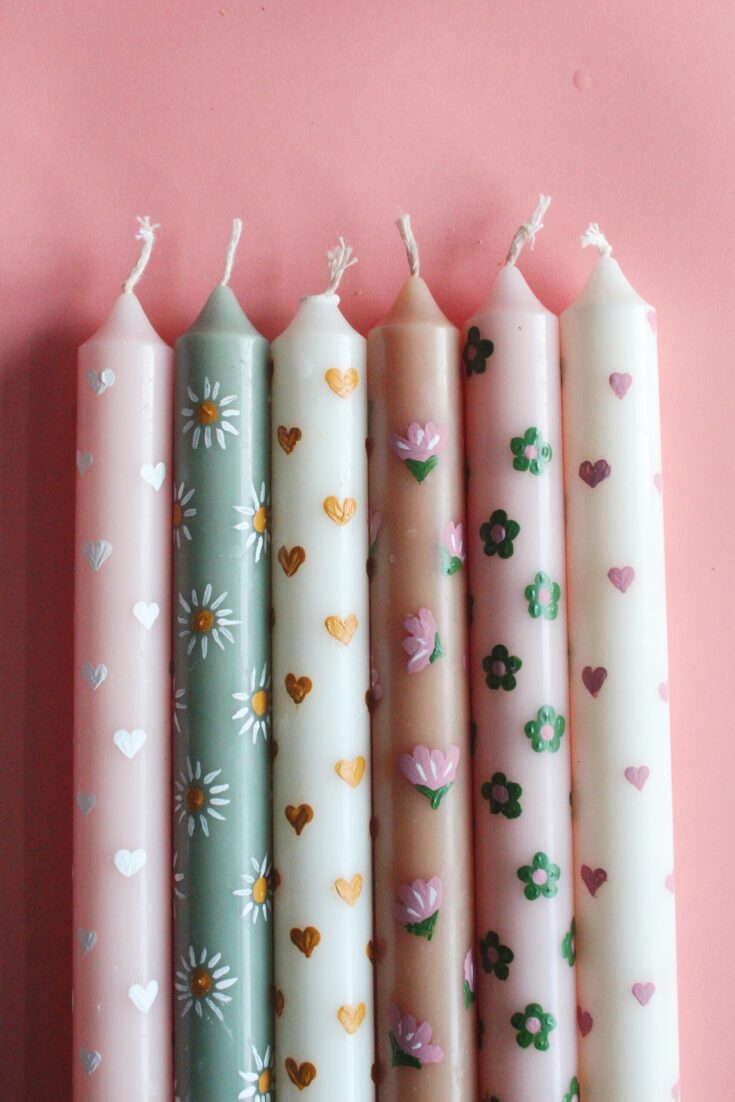
Painted taper candles are an easy and affordable way to add some spring touches to your decor–and you don’t have to be an artist to get great results. Keep reading for our tutorial!
DIY Painted Taper Candles
I used to think taper candles were just for fancy people with gold candlesticks and opulent decor taste, but this decor staple has been given fresh life as of late, with unique and modern shapes, interesting colorways, and fun patterns, making it accessible and fun!
We’ve made twisted candles and dipped candles, but had yet to venture into painting them with any kind of detail (we painted striped candles with the help of painter’s tape and that’s about our skill level!) However, after being inspired by painted candles online and in stores, we had to try it for ourselves!
What kind of paint can you use on candles?
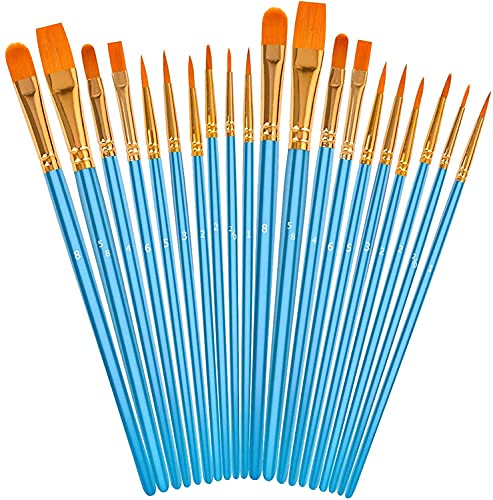
The number one tip I would recommend for success when painting candles is not to skimp on paint quality. If you have to apply more than one coat, there is more room for error so you’ll want to choose a paint with great coverage on the first coat. You’ll also want to have a variety of paint brush sizes to achieve your desired designs.
Is it easy to paint candles?
As a crafter who can paint a block of wood but who lacks any artistic skill, I was nervous to get started. So, before I began painting, I scoured Pinterest for simple painted flower tutorials that I thought I could pull off.
Then I practiced these simple flowers before I applied the designs to my candles. I repeat: I am NOT an artist, but the simple designs I chose are extremely doable to even the most artistically challenged. You can totally do this!

Supplies needed for DIY Painted Taper Candles
How do you make painted candles?
Watch us paint the candles on Instagram here!
1. Plan your designs
Spend some time looking for your desired design/patterns. We chose simple flowers and hearts that can be easily applied with a small brush or the back of a brush. Practice applying them to paper prior to painting the candles.
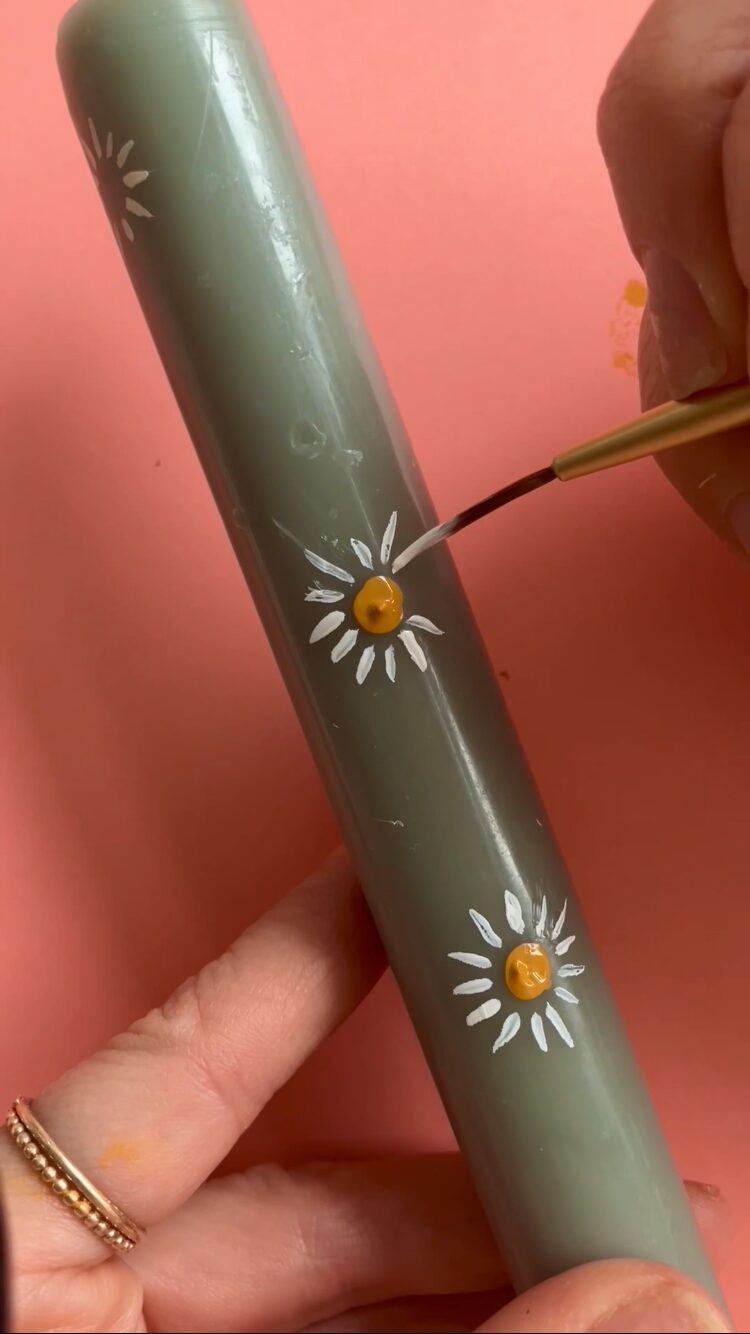
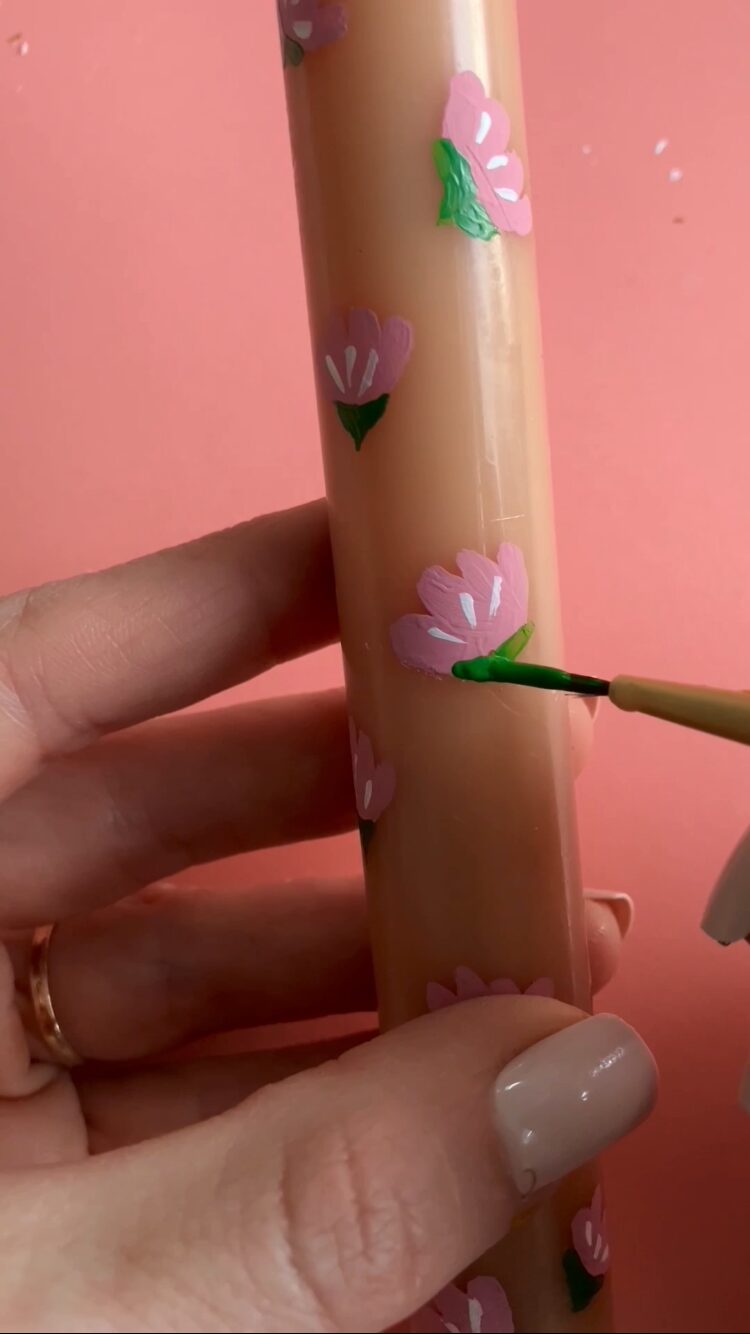
2. Paint the candles
Carefully paint the candles using a high-quality paint that doesn’t require a second coat. Keep a paper towel nearby to wipe off wet designs before they dry, and try again where needed.
3. Finish your candles
Let designs dry completely, and enjoy!
Painted taper candles are an easy and affordable way to add some spring touches to your decor–and you don’t have to be an artist to get great results. As an Amazon Associate and member of other affiliate programs, I earn from qualifying purchases.DIY Painted Taper Candles
Materials
Instructions
Recommended Products


Happy making!
-Liz