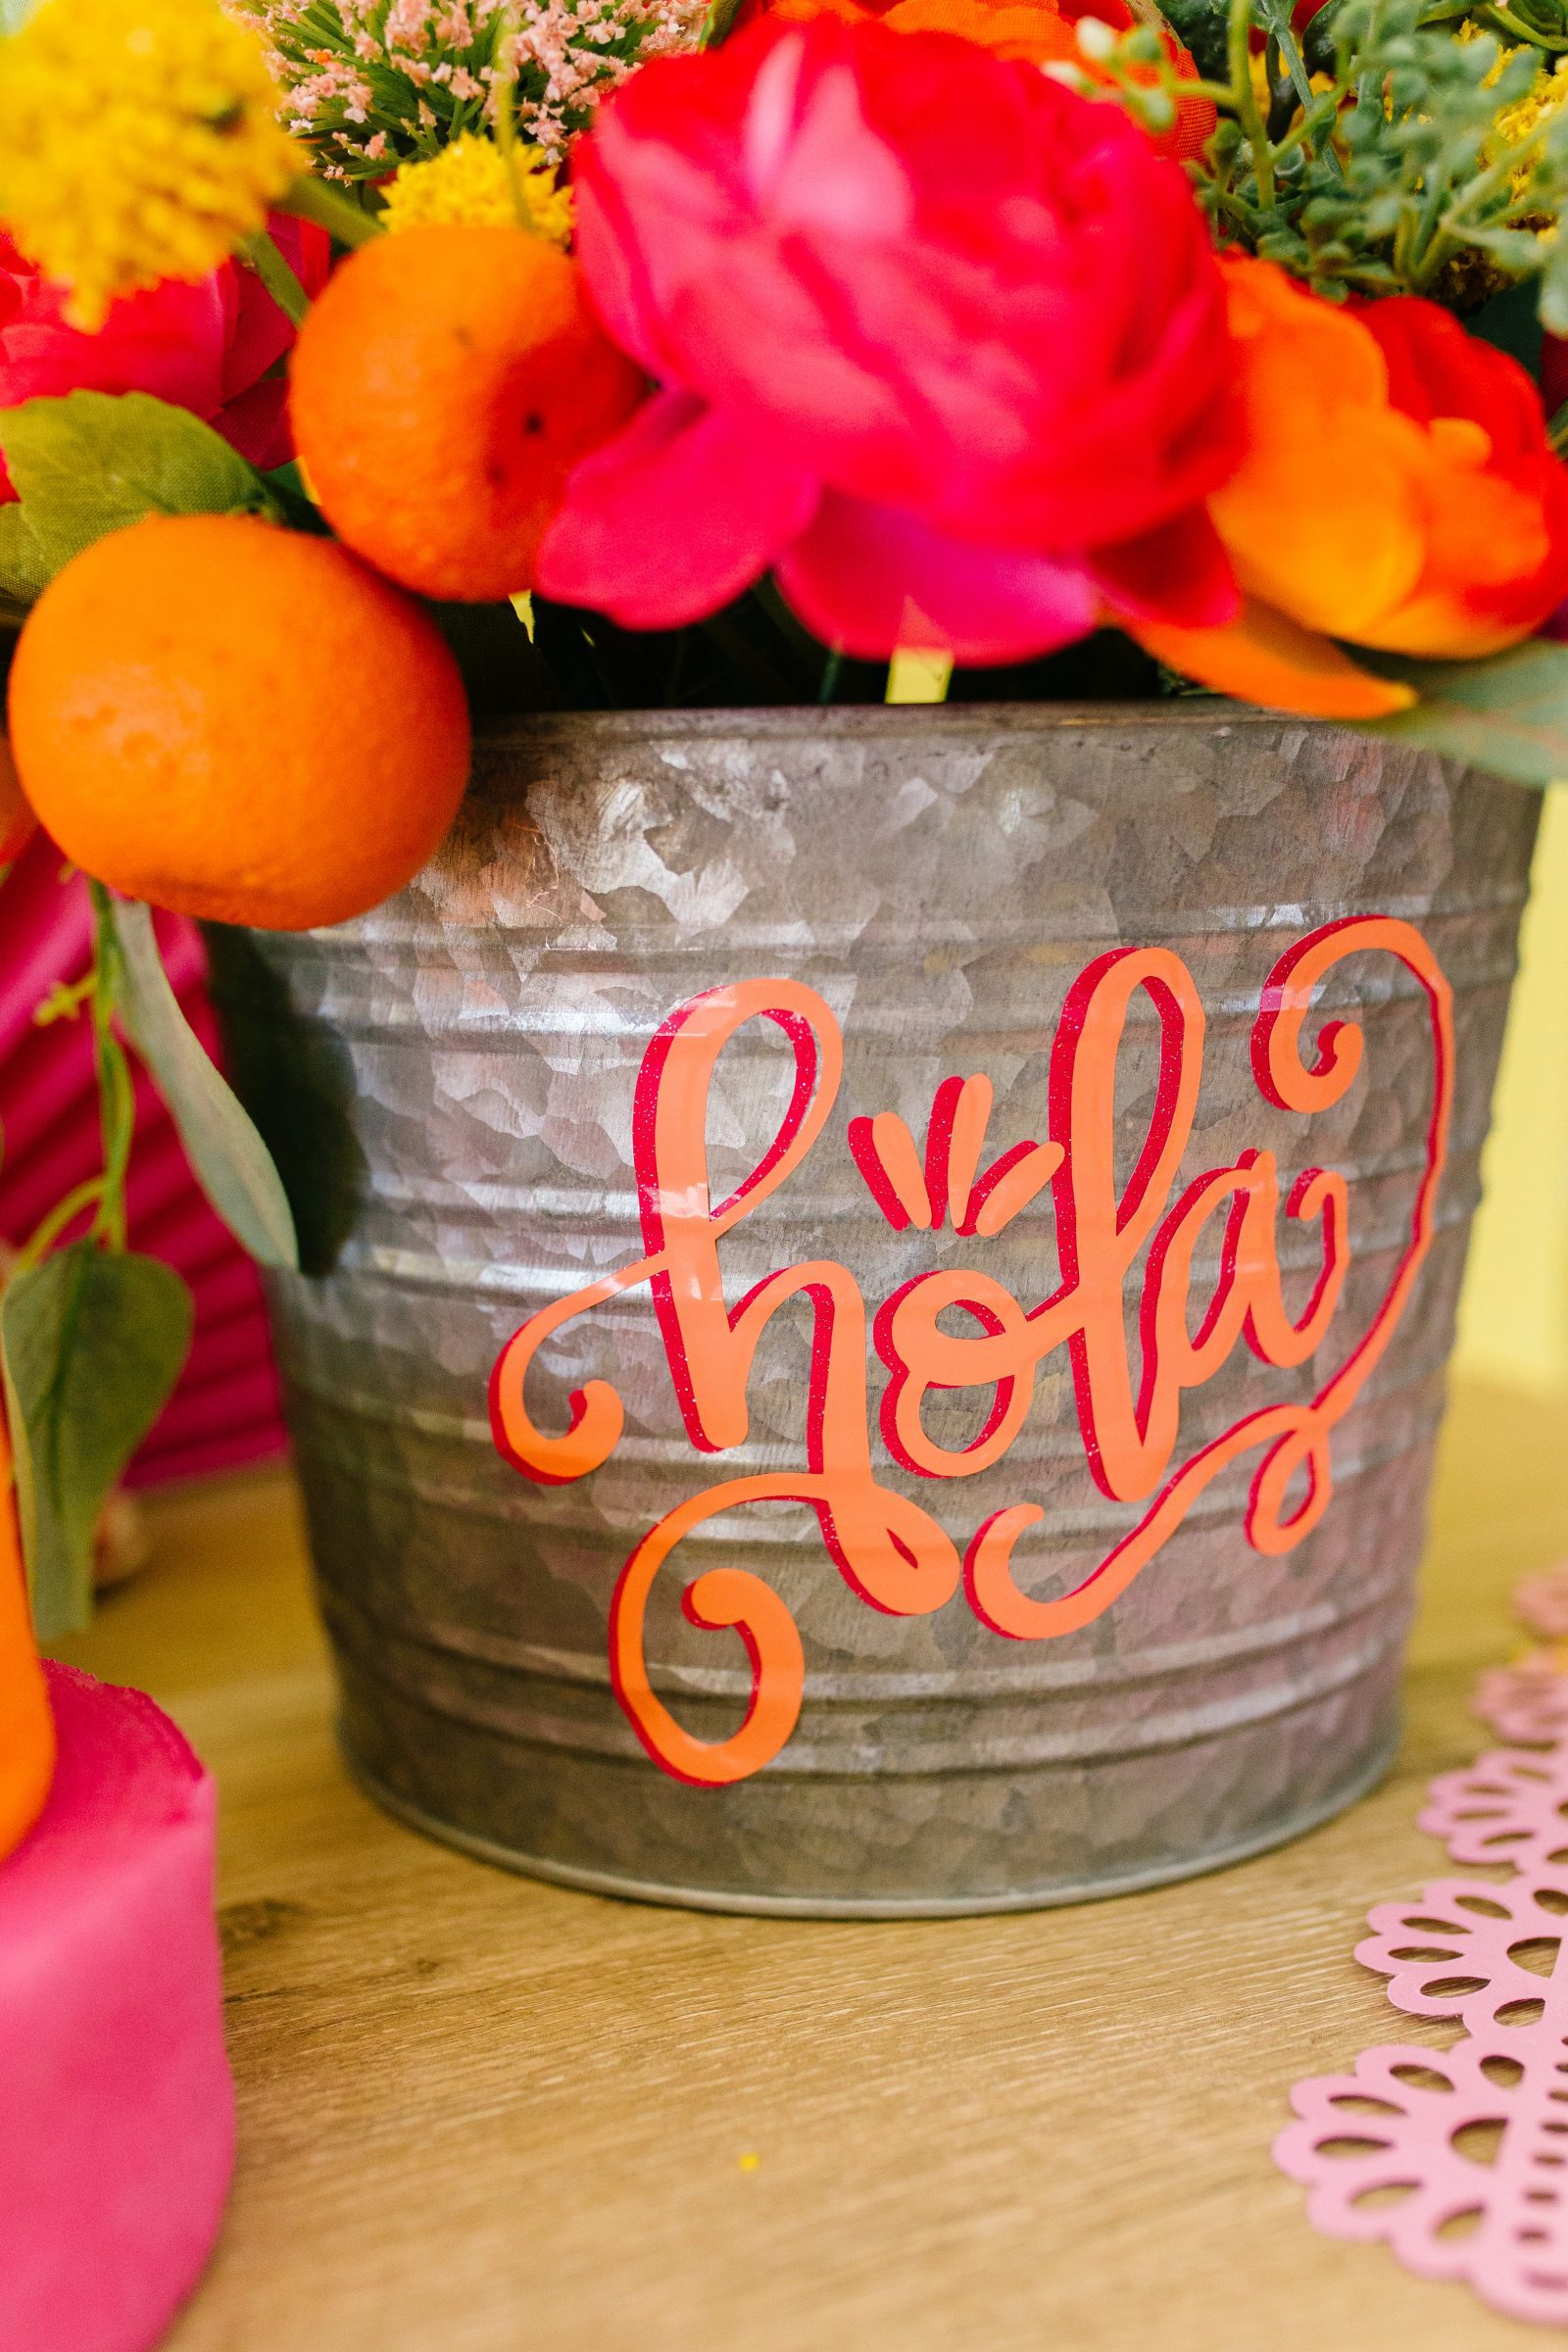
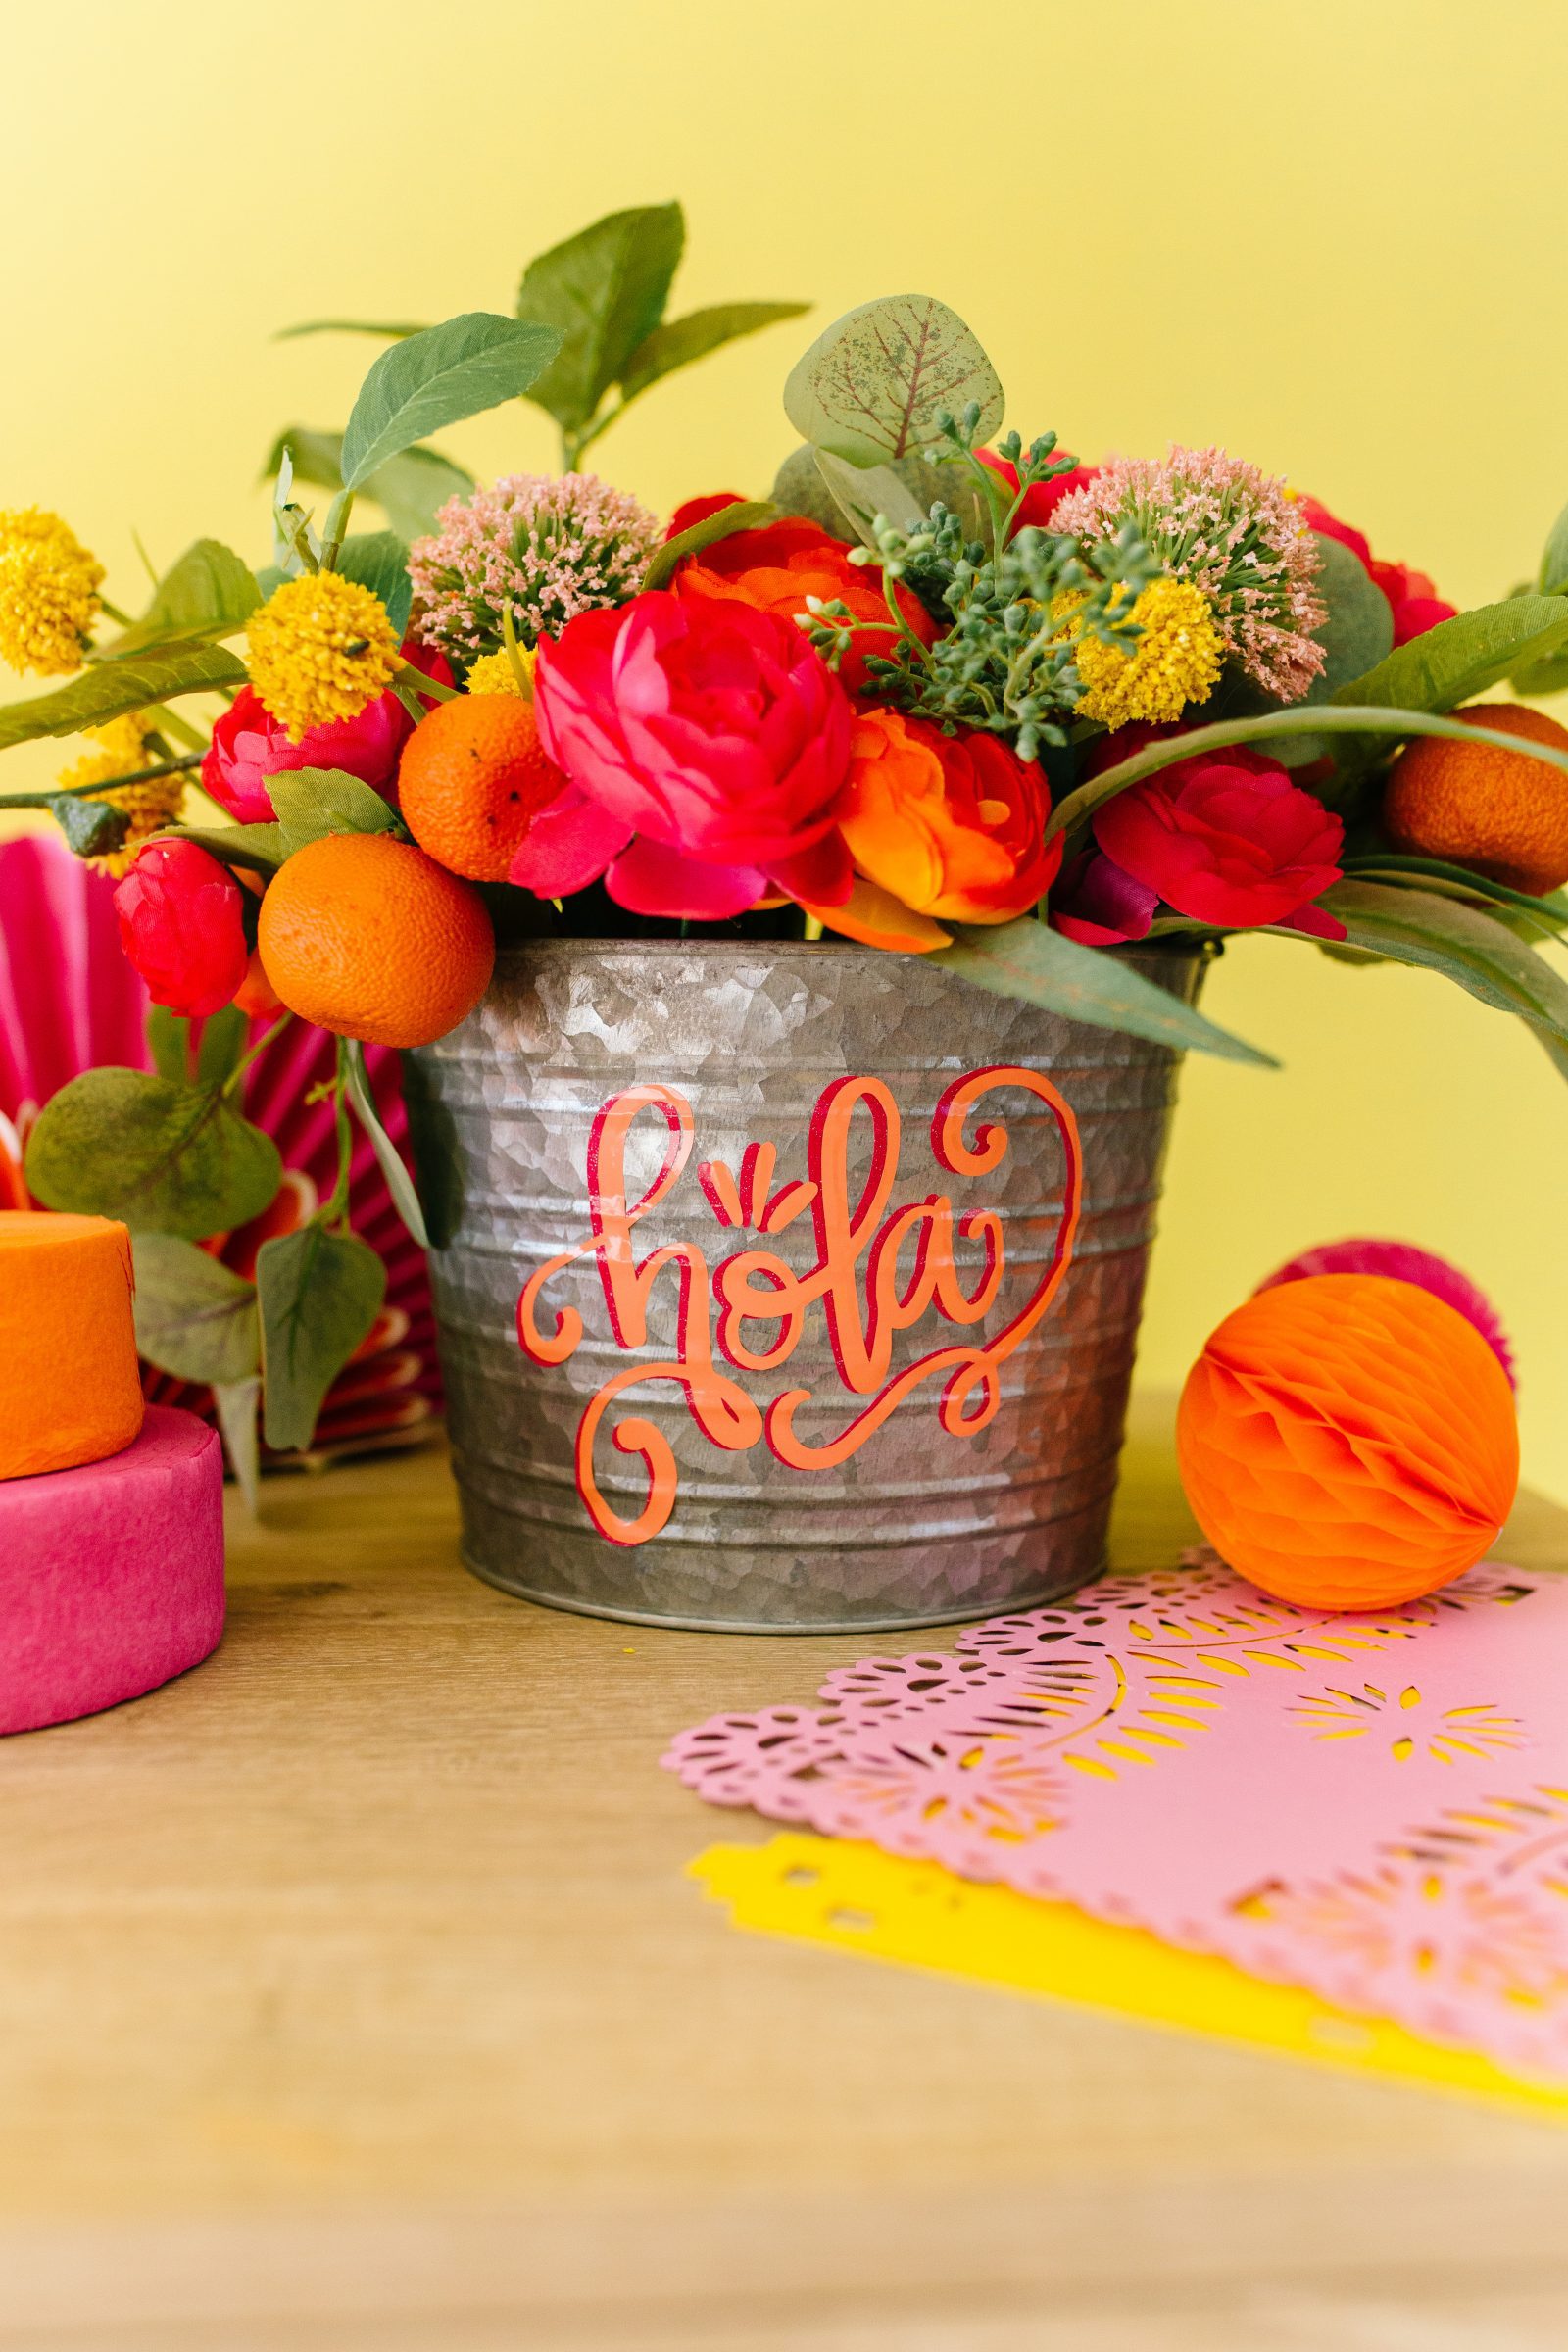
To give your table a special touch for Cinco de Mayo or any summer party, we made this bright and colorful DIY Cinco de Mayo Table Centerpiece! We made an arrangement from faux florals in a metal bucket. Then we used our Silhouette Portrait machine to cut a cute “hola” design (found in the Silhouette Design Store) and used two colors of vinyl that matched the florals to layer the design. The result is a centerpiece that is as gorgeous as it is fun, perfect for any kind of Cinco de Mayo or spring/summer gathering you’ve got planned.
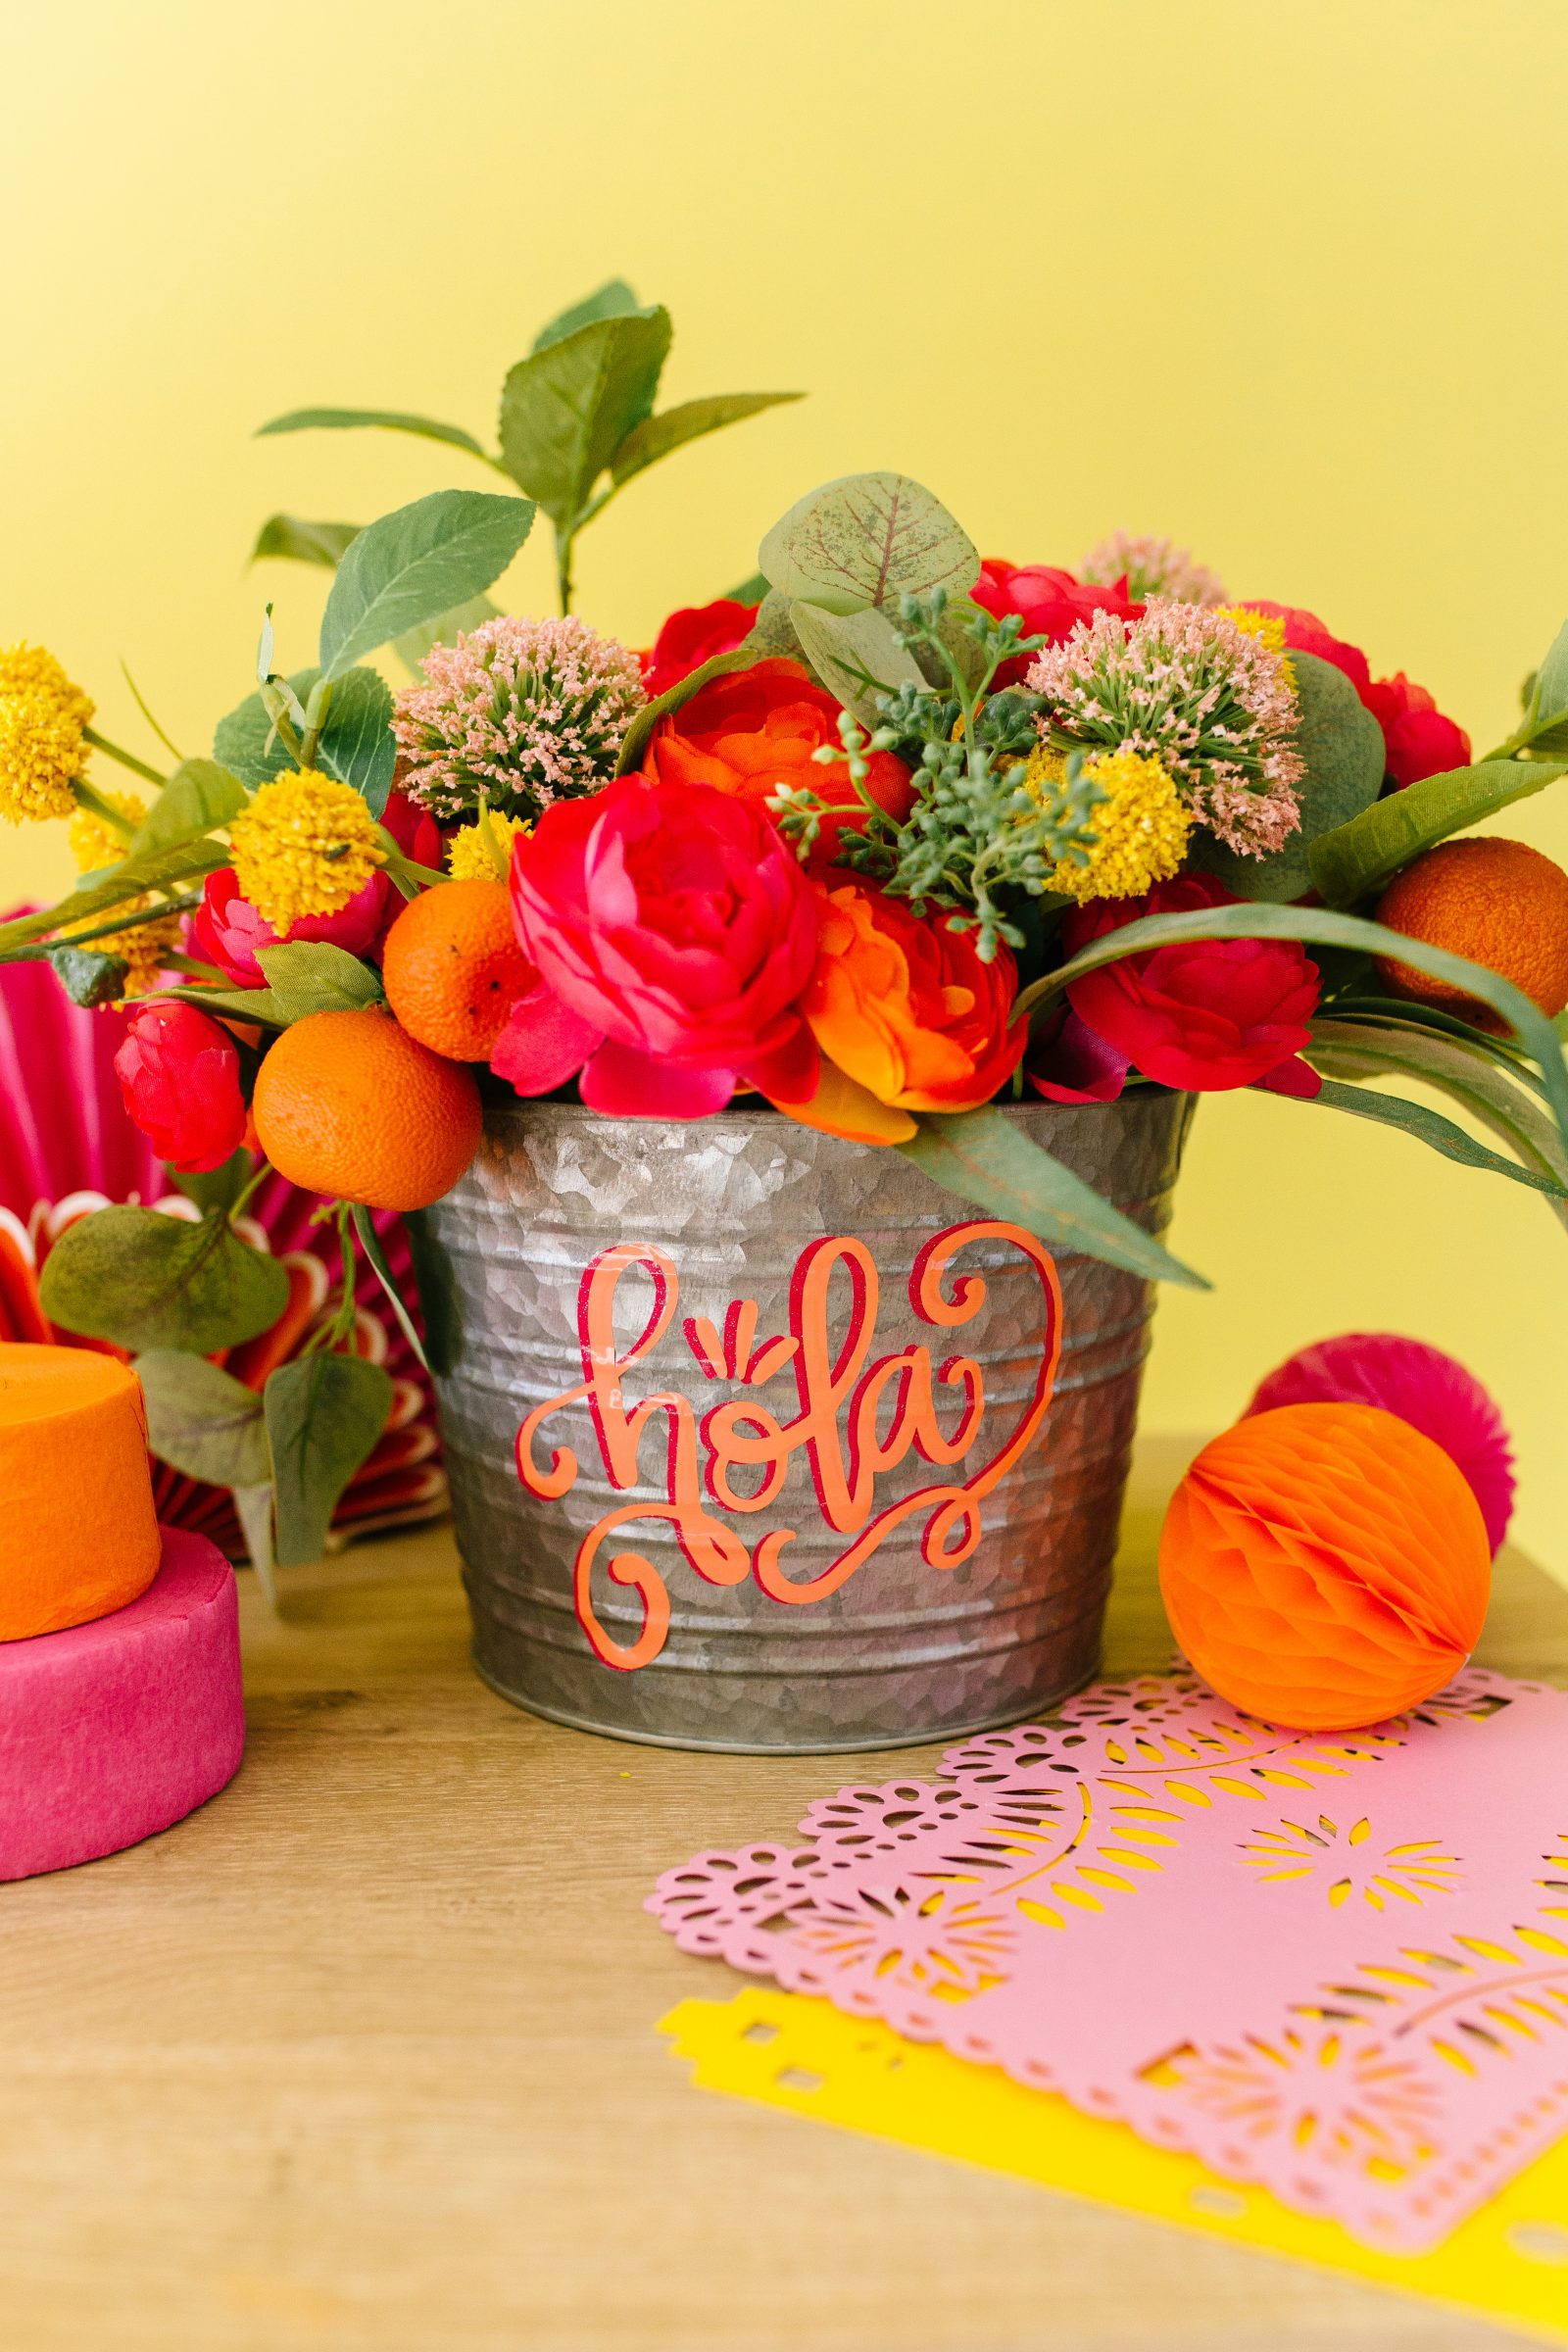
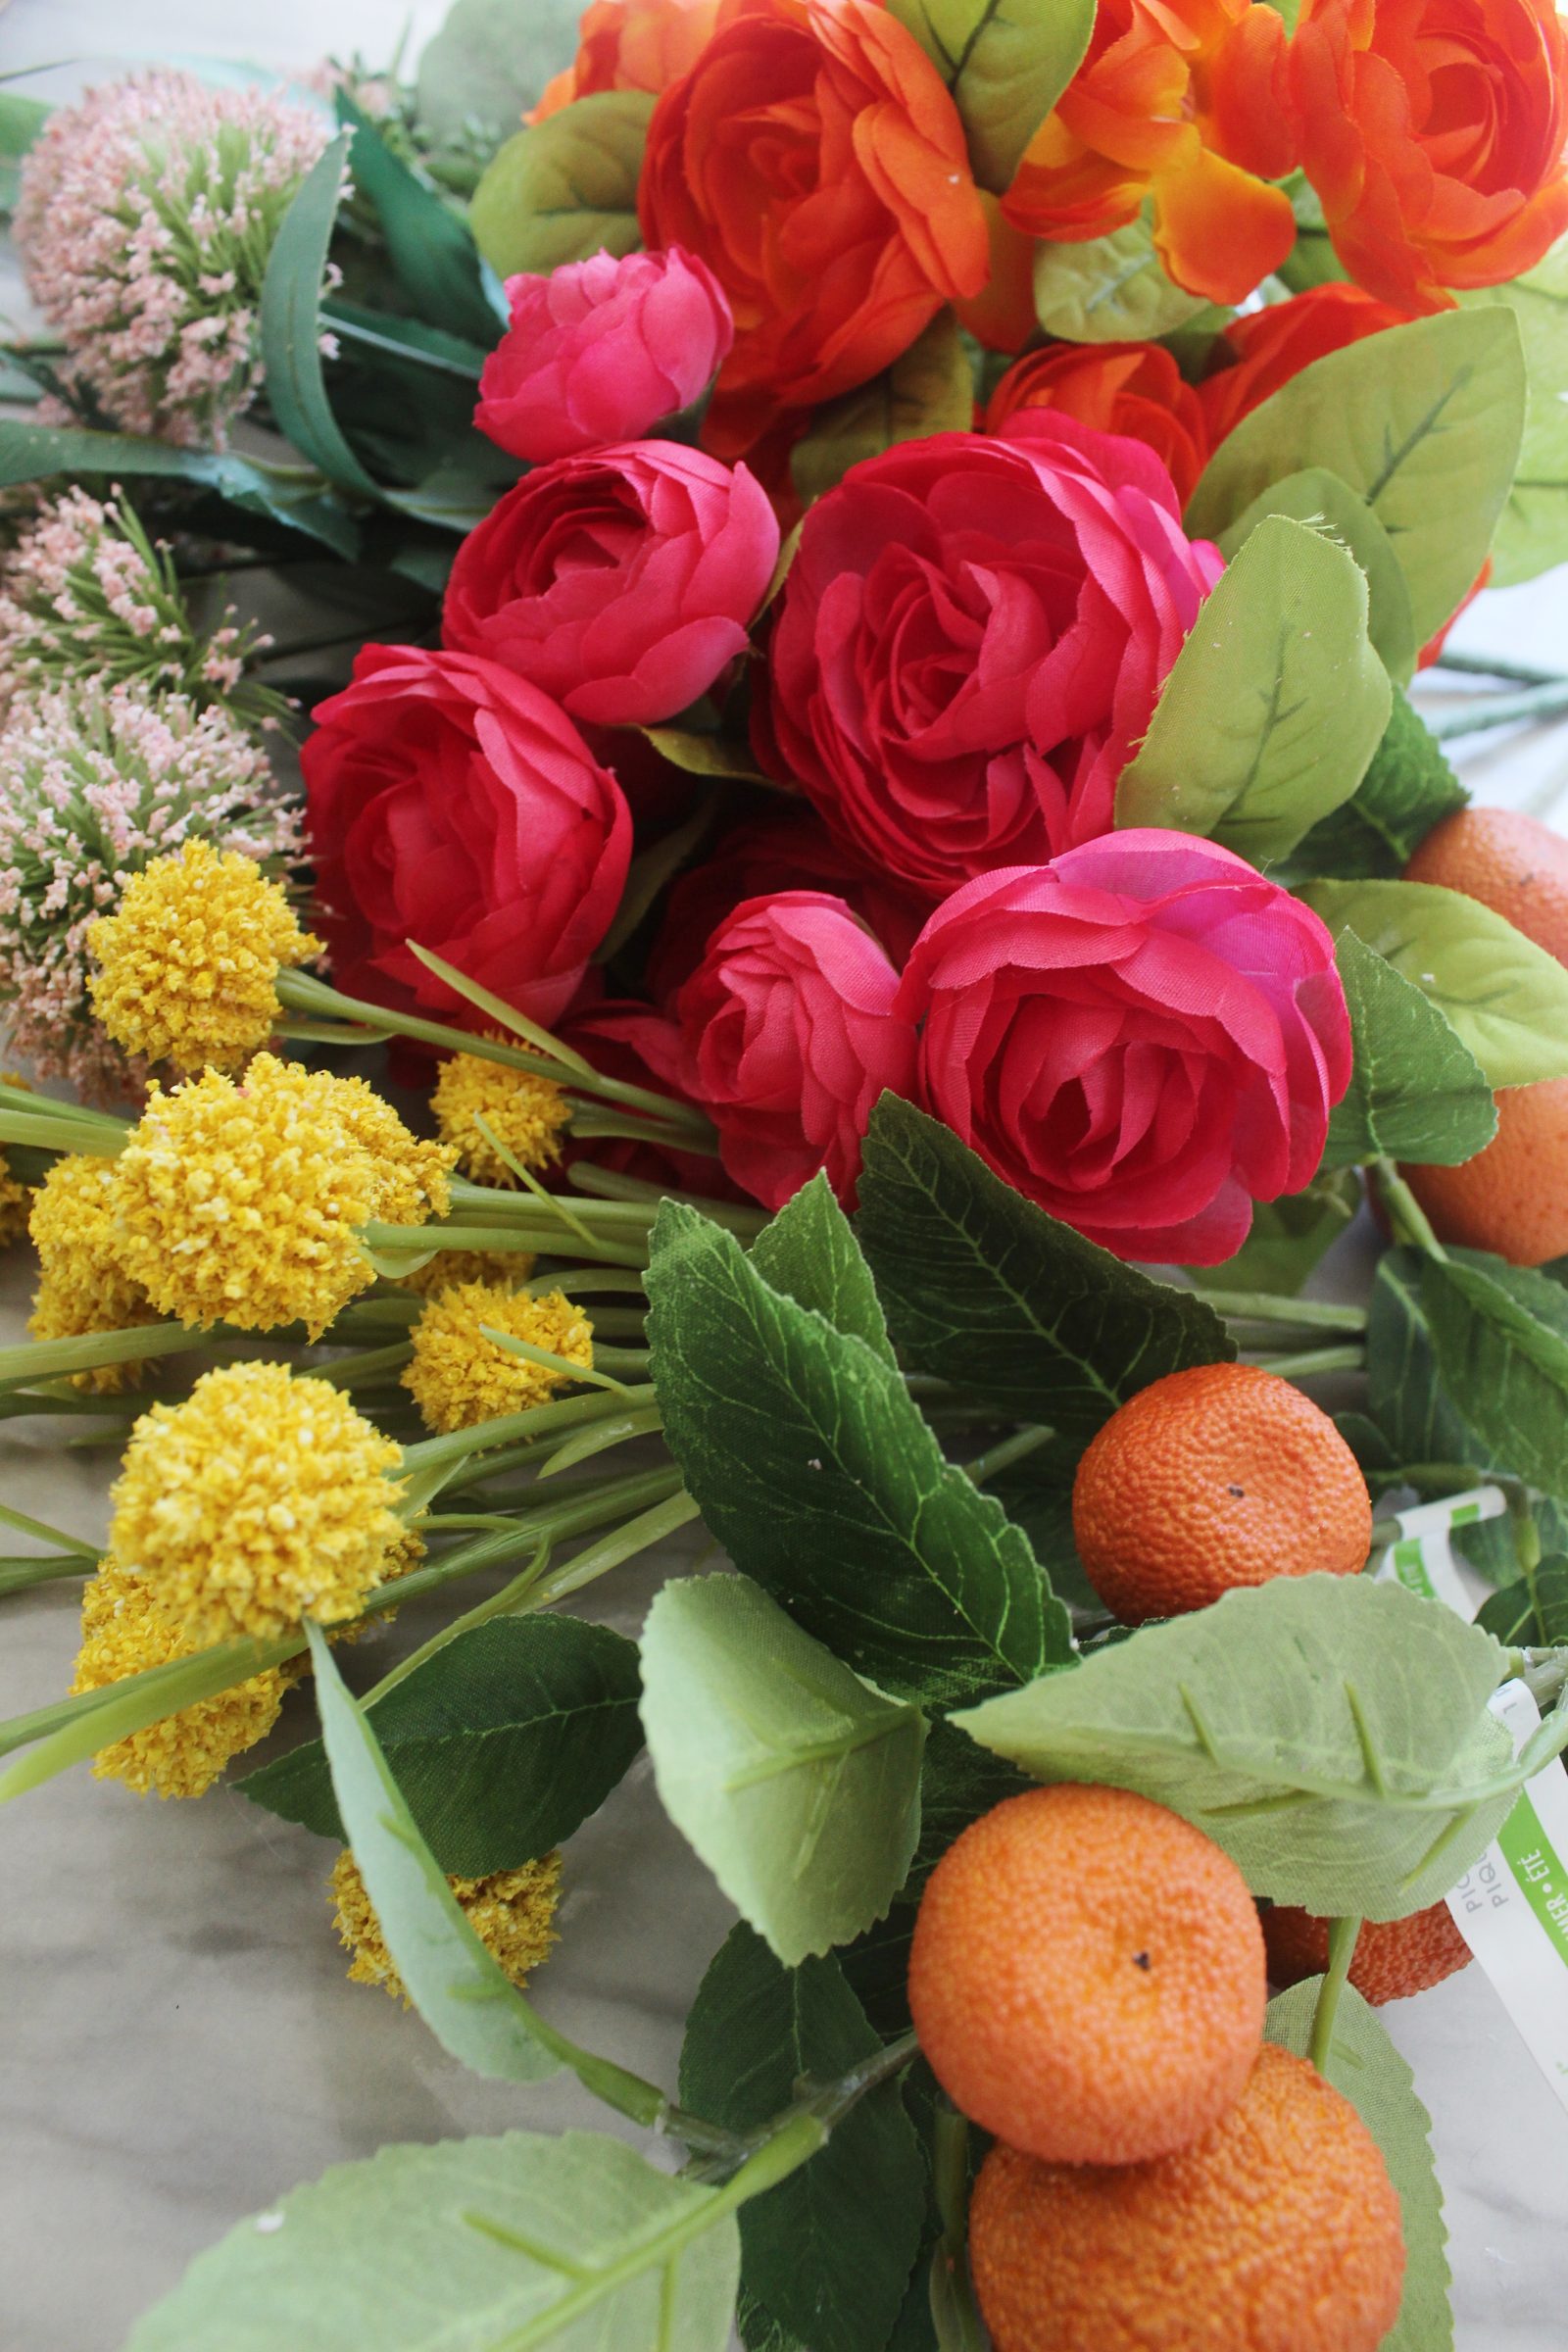
The temperature is going to be in the 80’s this weekend, things are starting to bloom and Cinco de Mayo is days away, so we decided a bright floral centerpiece would be the perfect project to celebrate this vibrant season and holiday! Once spring comes, the faux flowers at Michaels are always right at the front of the store and they are so inviting that we’ve been looking for a reason to use them, and this occasion is perfect! Plus, Michaels has lots of unique containers to make your centerpiece. We ended up choosing a galvanized metal bucket to hold our florals and the contrast of the bright florals with the metal finish of the bucket is my favorite. Here is what you need to make it:
Supplies Needed to Make a DIY Cinco de Mayo Table Centerpiece
Faux flowers in a variety of colors
Galvanized metal bucket
Floral foam
Sharp knife
“Hola” design
Silhouette Portrait
Two colors of adhesive vinyl
Transfer tape
How to Make a DIY Cinco de Mayo Table Centerpiece
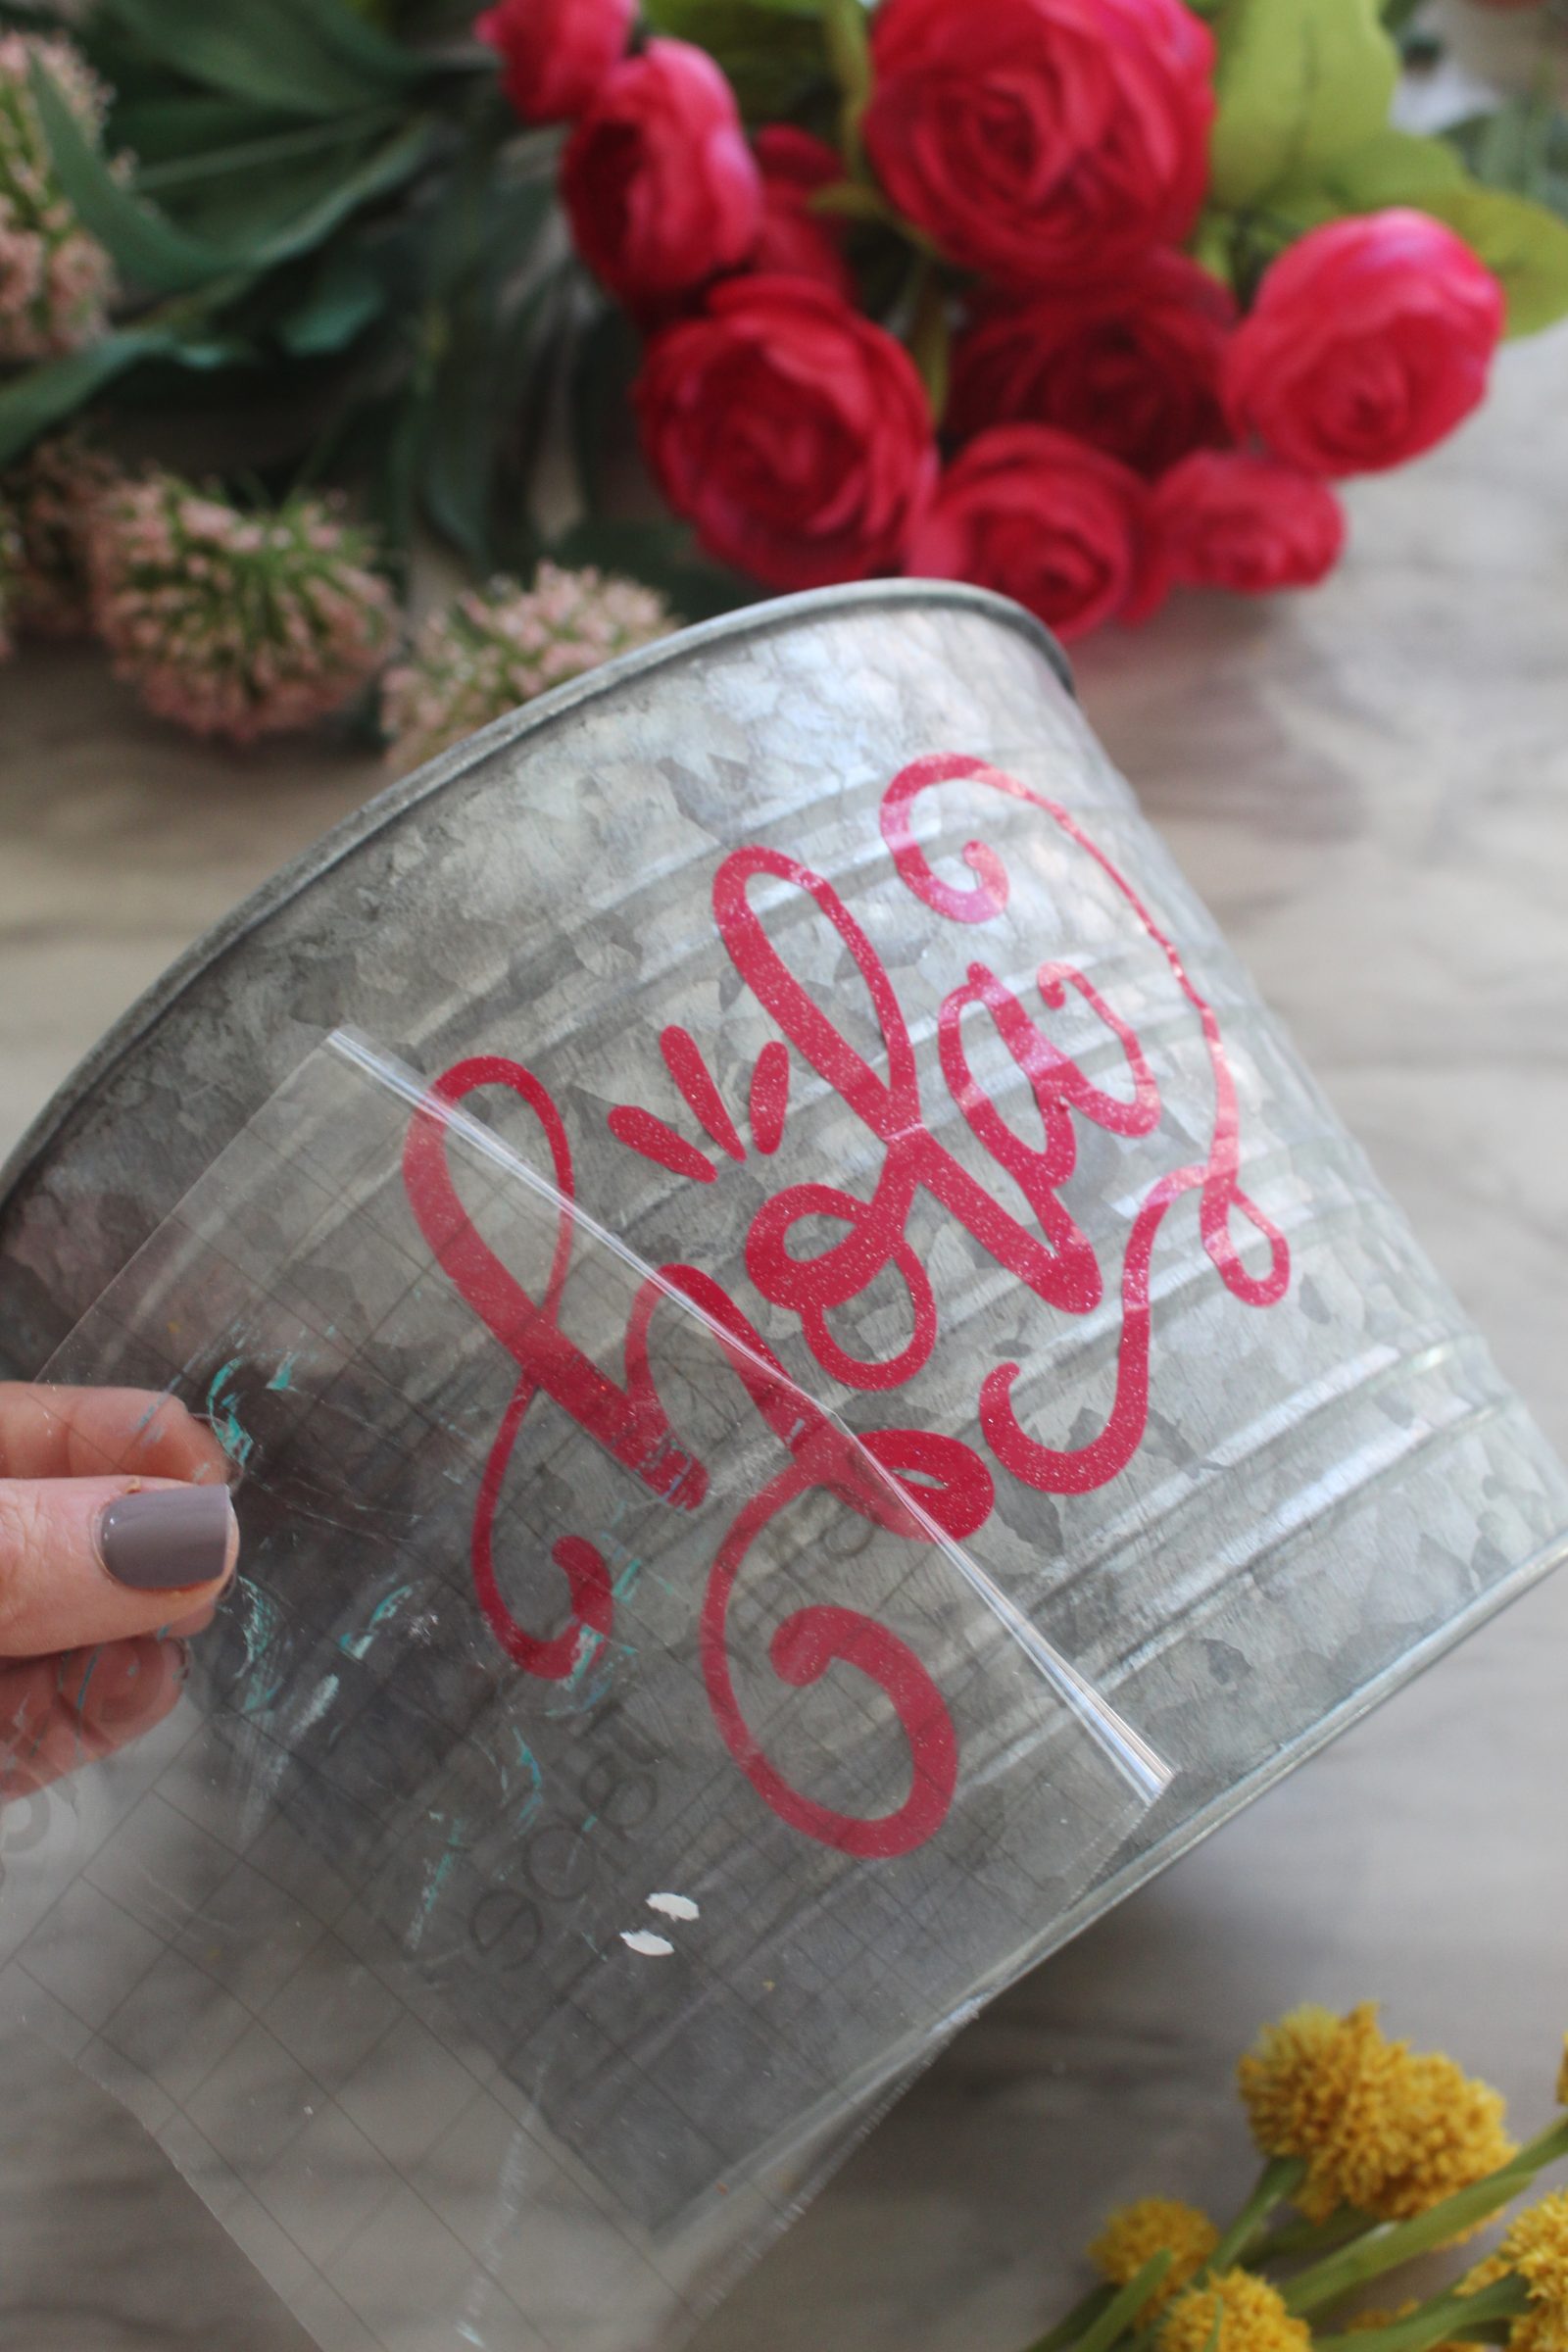
Step 1: Load your design in Silhouette Studio and arrange the design so that it will fit your pot. Then, send to cut. (If you have never cut with a Silhouette machine before, visit our Silhouette beginners post here.) Cut the design on each color of vinyl.
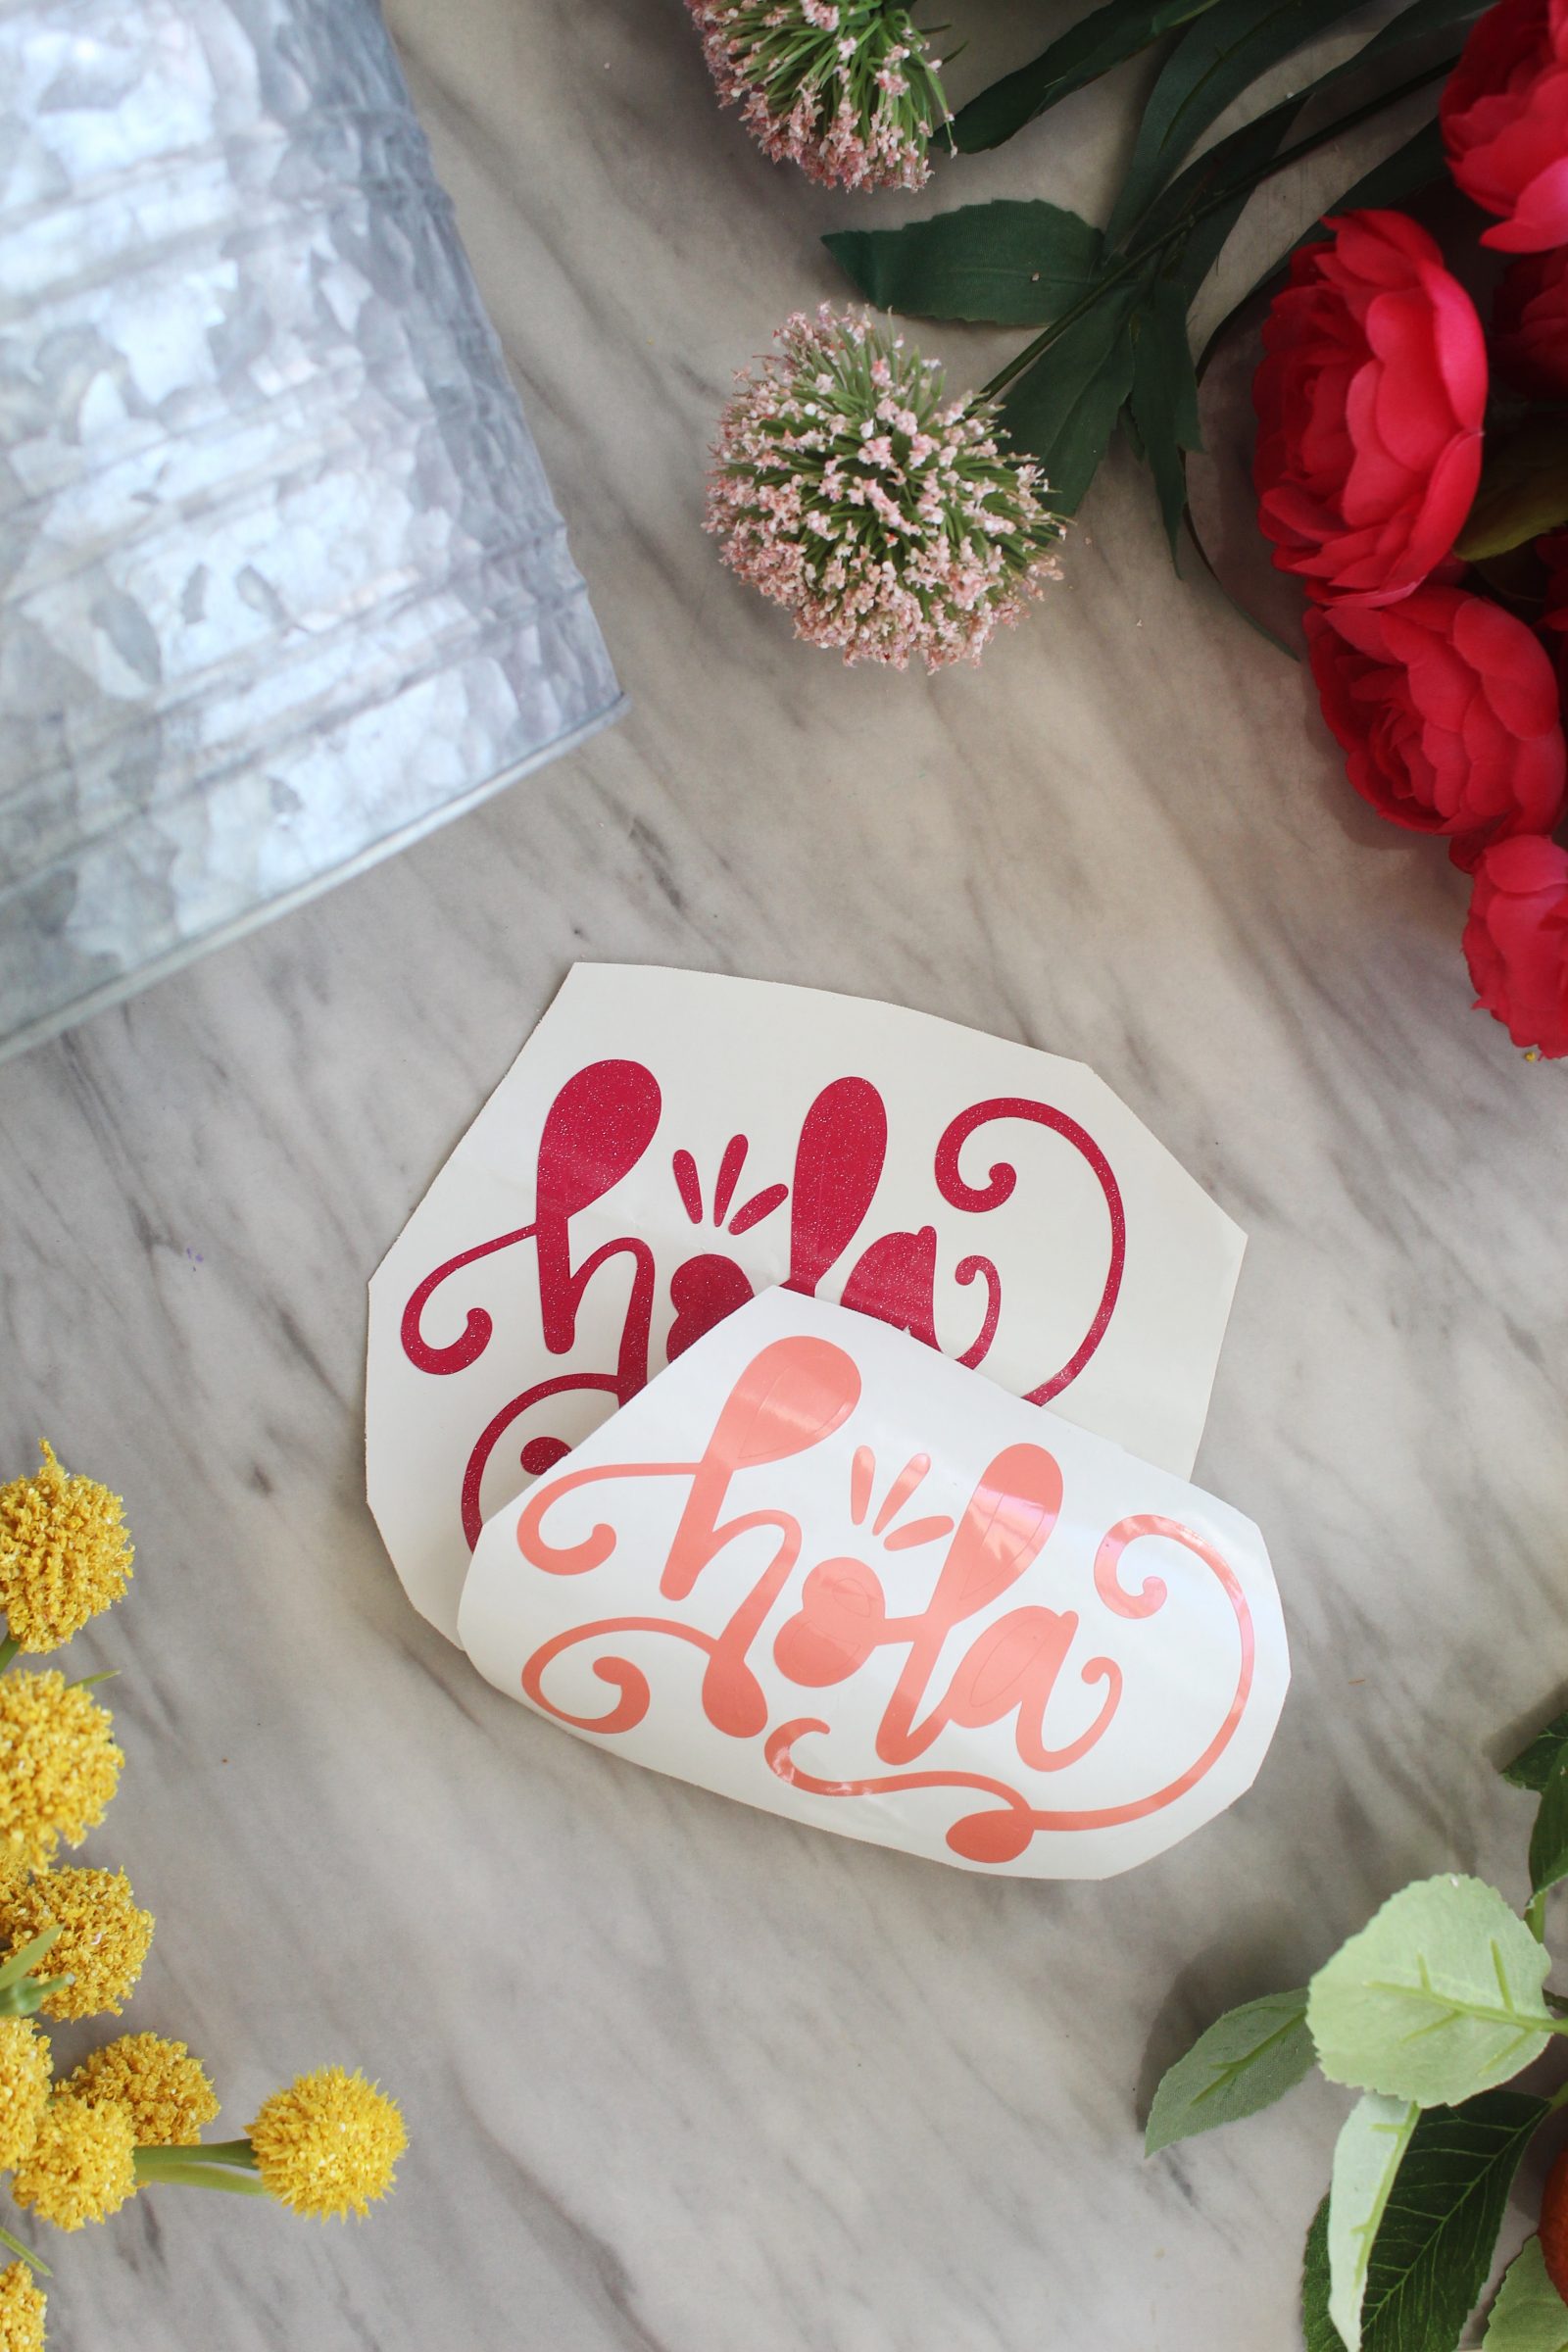
Step 2: Weed and remove the excess vinyl from the backing sheet. Then, place a piece of transfer tape over the first color of vinyl that you wish you apply and smooth with fingers to make sure it adheres to the sheet. Then, peel the design from the vinyl backing sheet.
Step 3: Once the entire design has been applied to your transfer tape, place it vinyl side down where you would like it on your bucket. Then, rub with your fingers again, over the design, until it adheres to the bucket. Next, gently peel back the transfer tape.
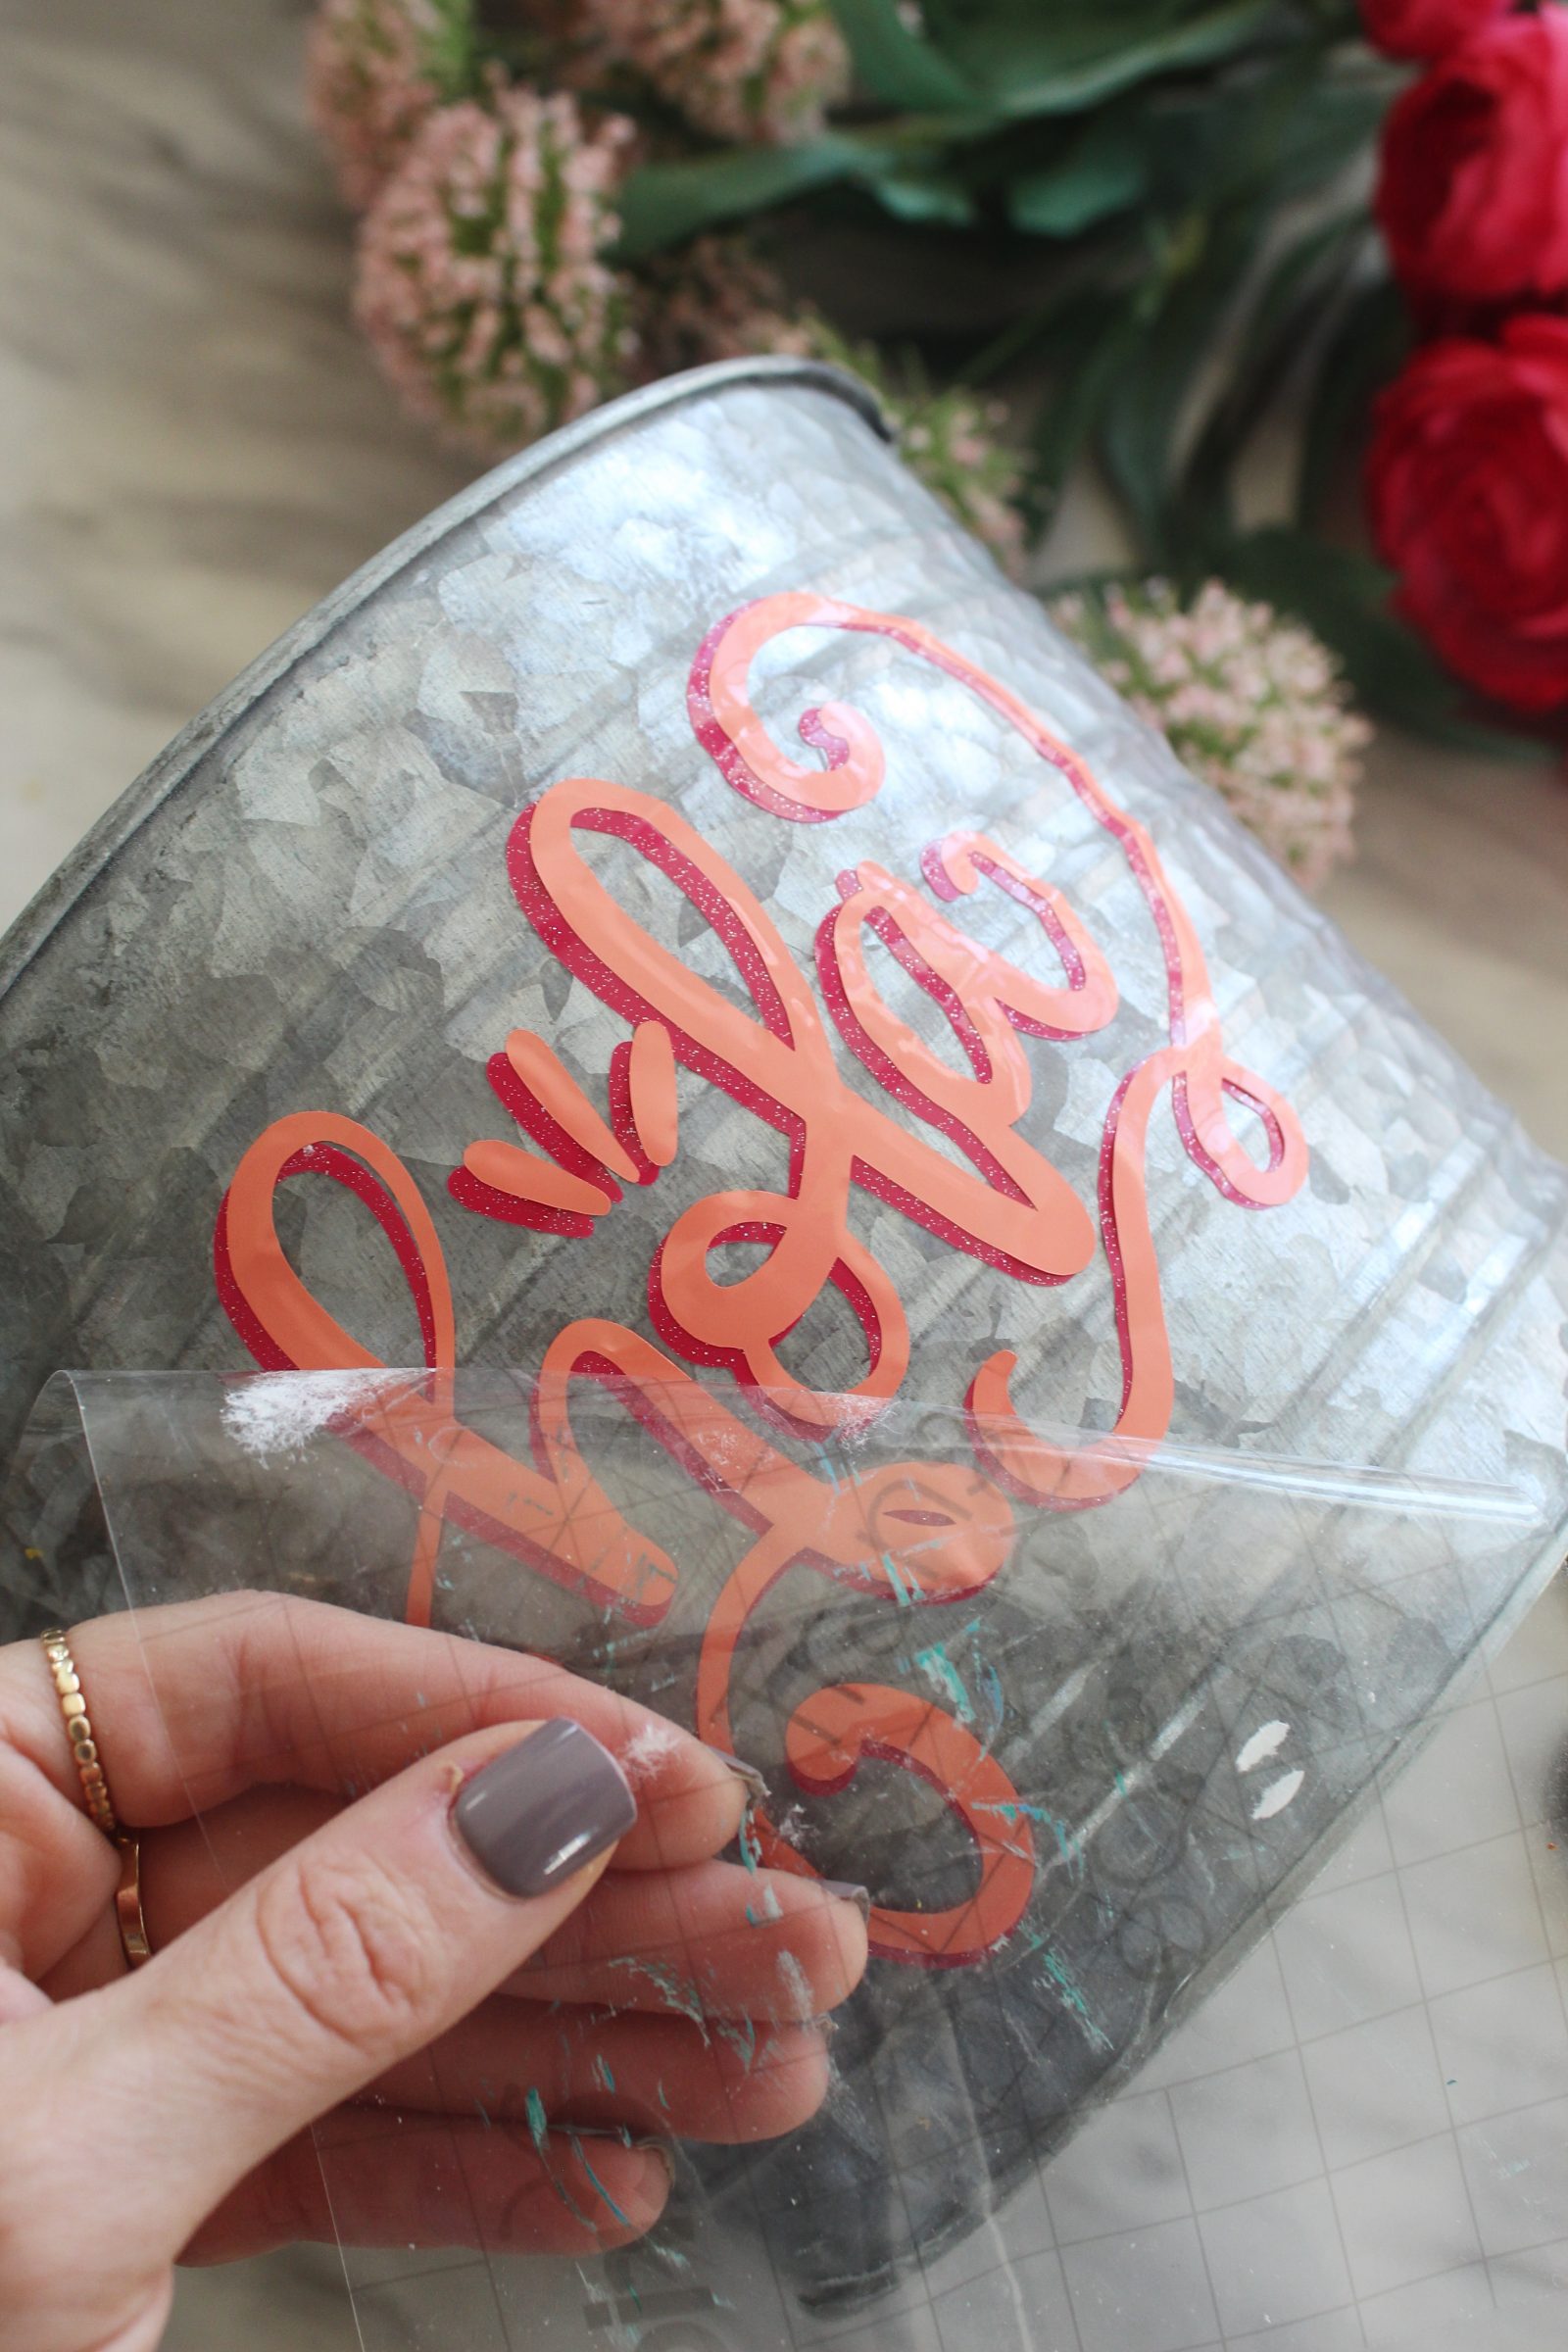
Step 4: Repeat step 2-3 with the second color of vinyl, but apply the second color of vinyl on top of the first color, slightly off to the right or the left, so that some of the first color of vinyl shows to create a shadow. Once you are happy with how much of the second color is showing, apply the second color on top of the first vinyl color by rubbing it onto the bucket. Then, carefully remove the transfer tape.
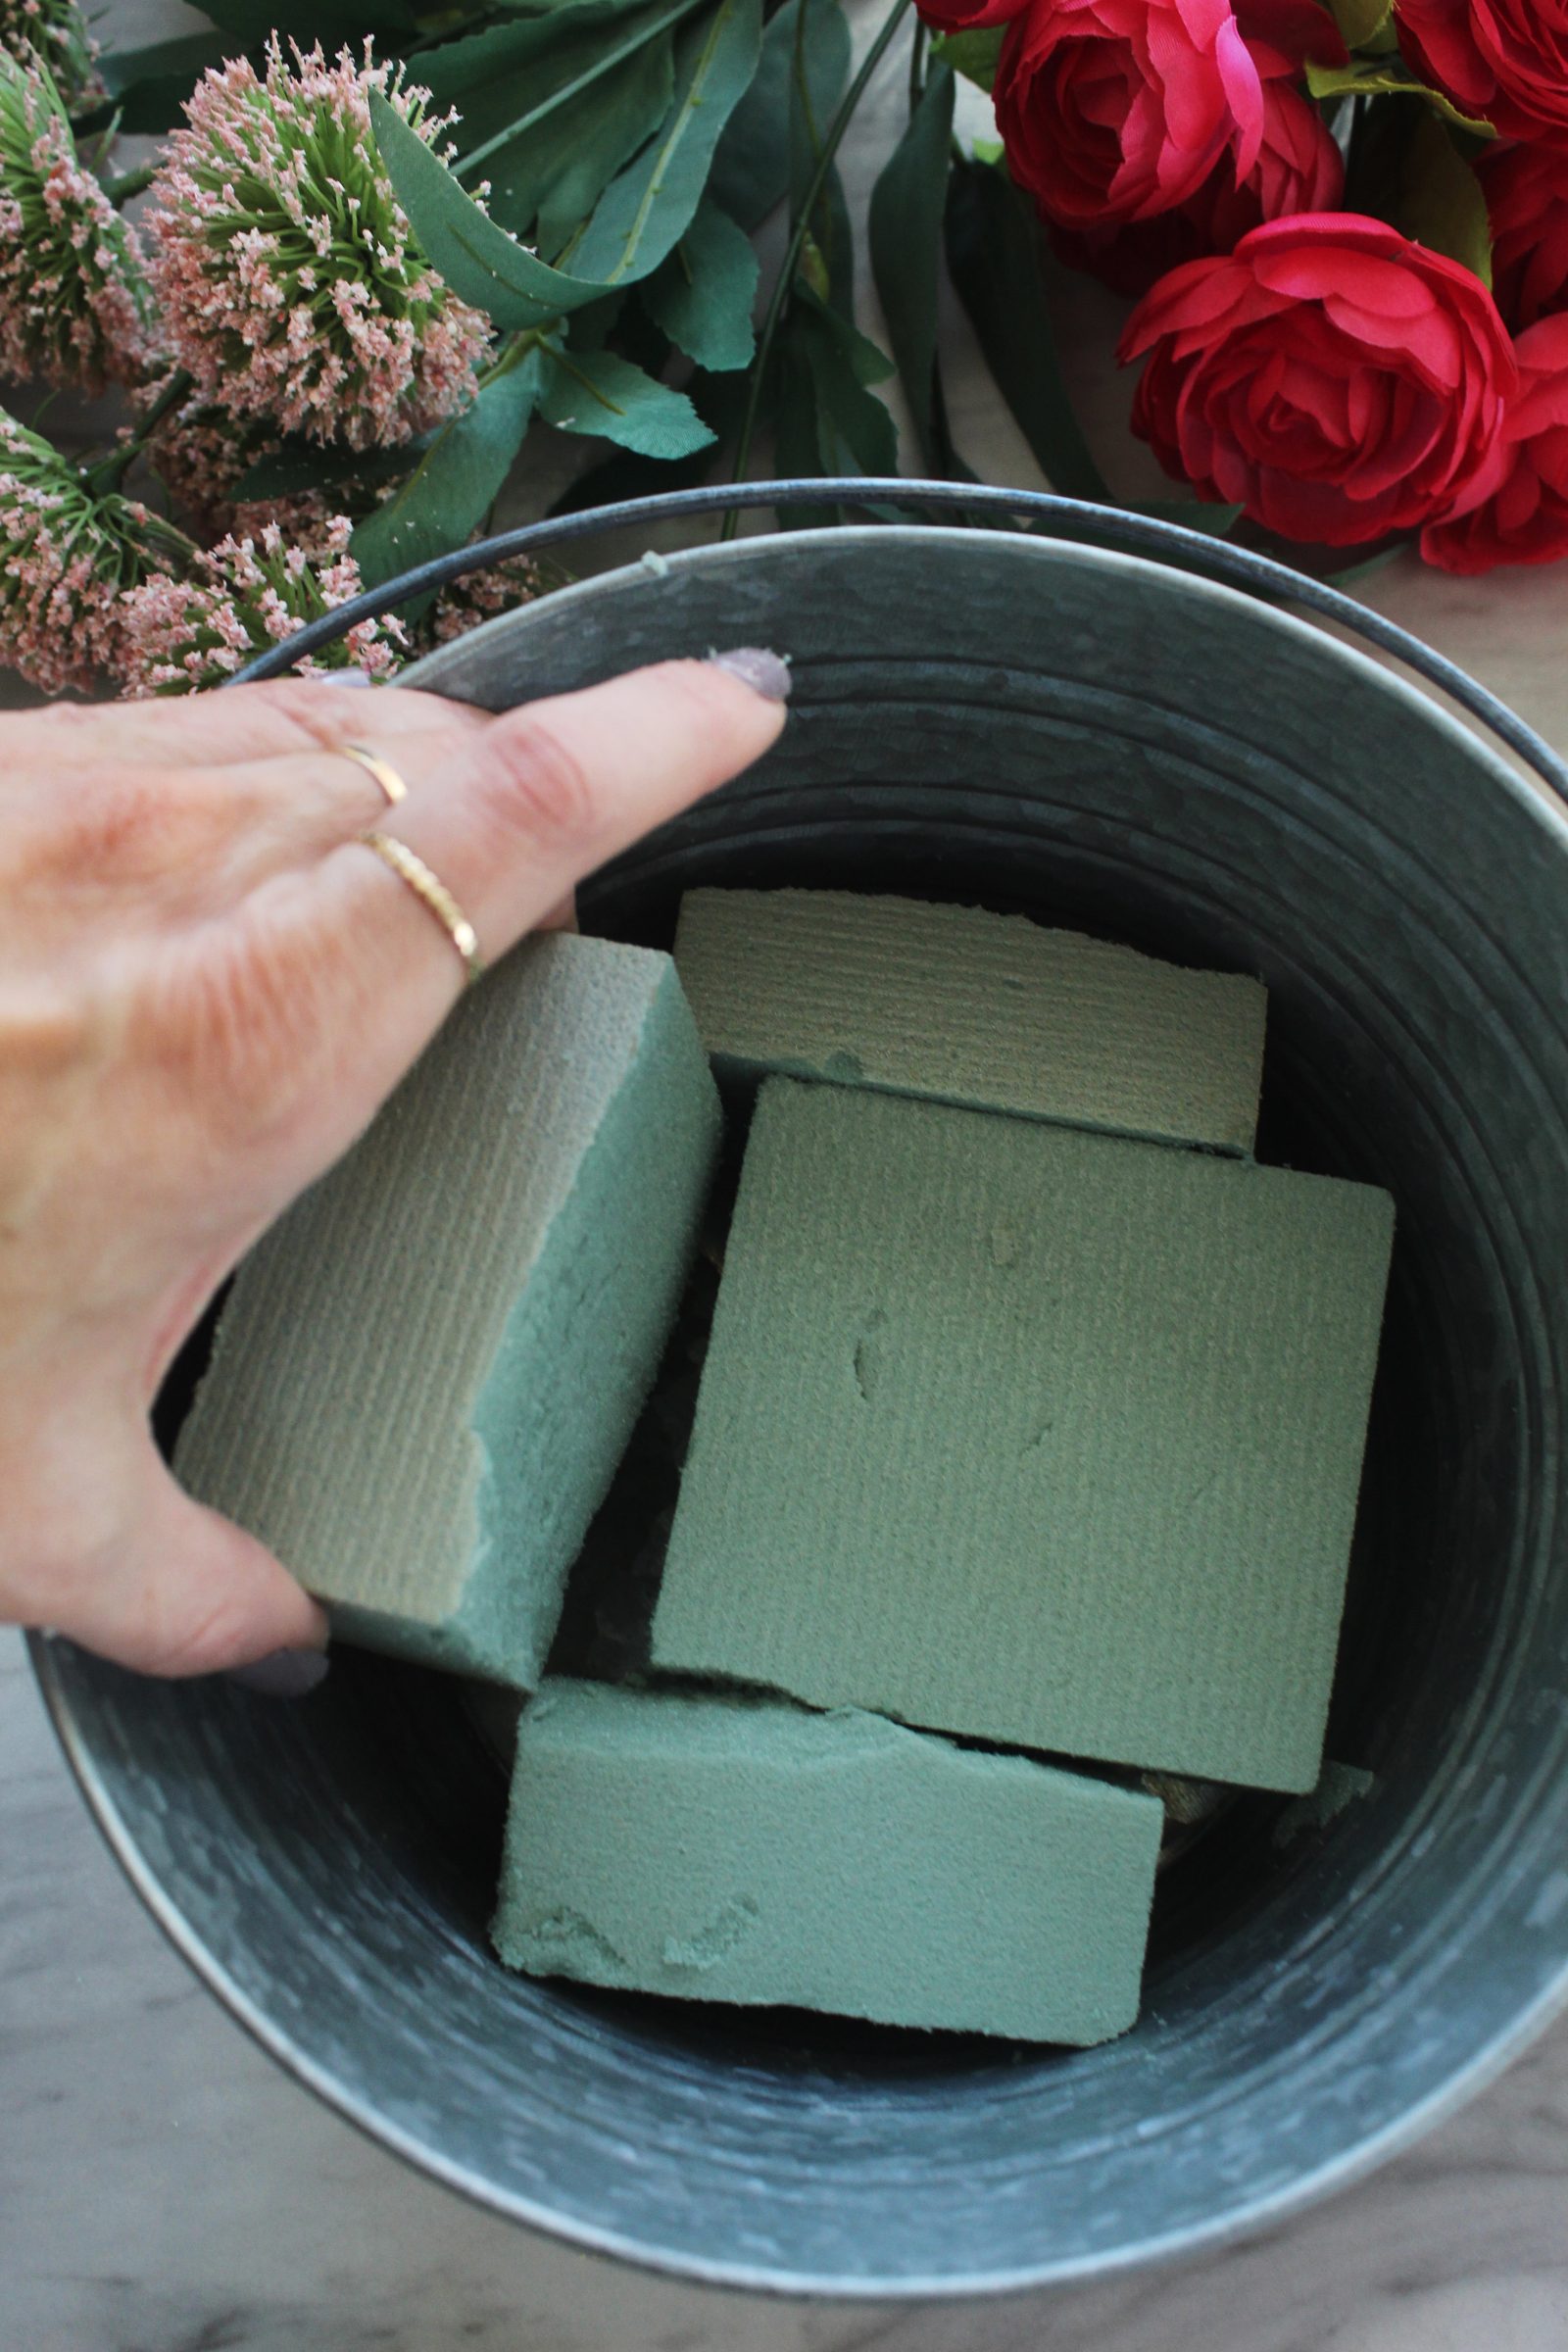
Step 5: Carefully cut the floral foam to fit inside your bucket using a sharp knife.
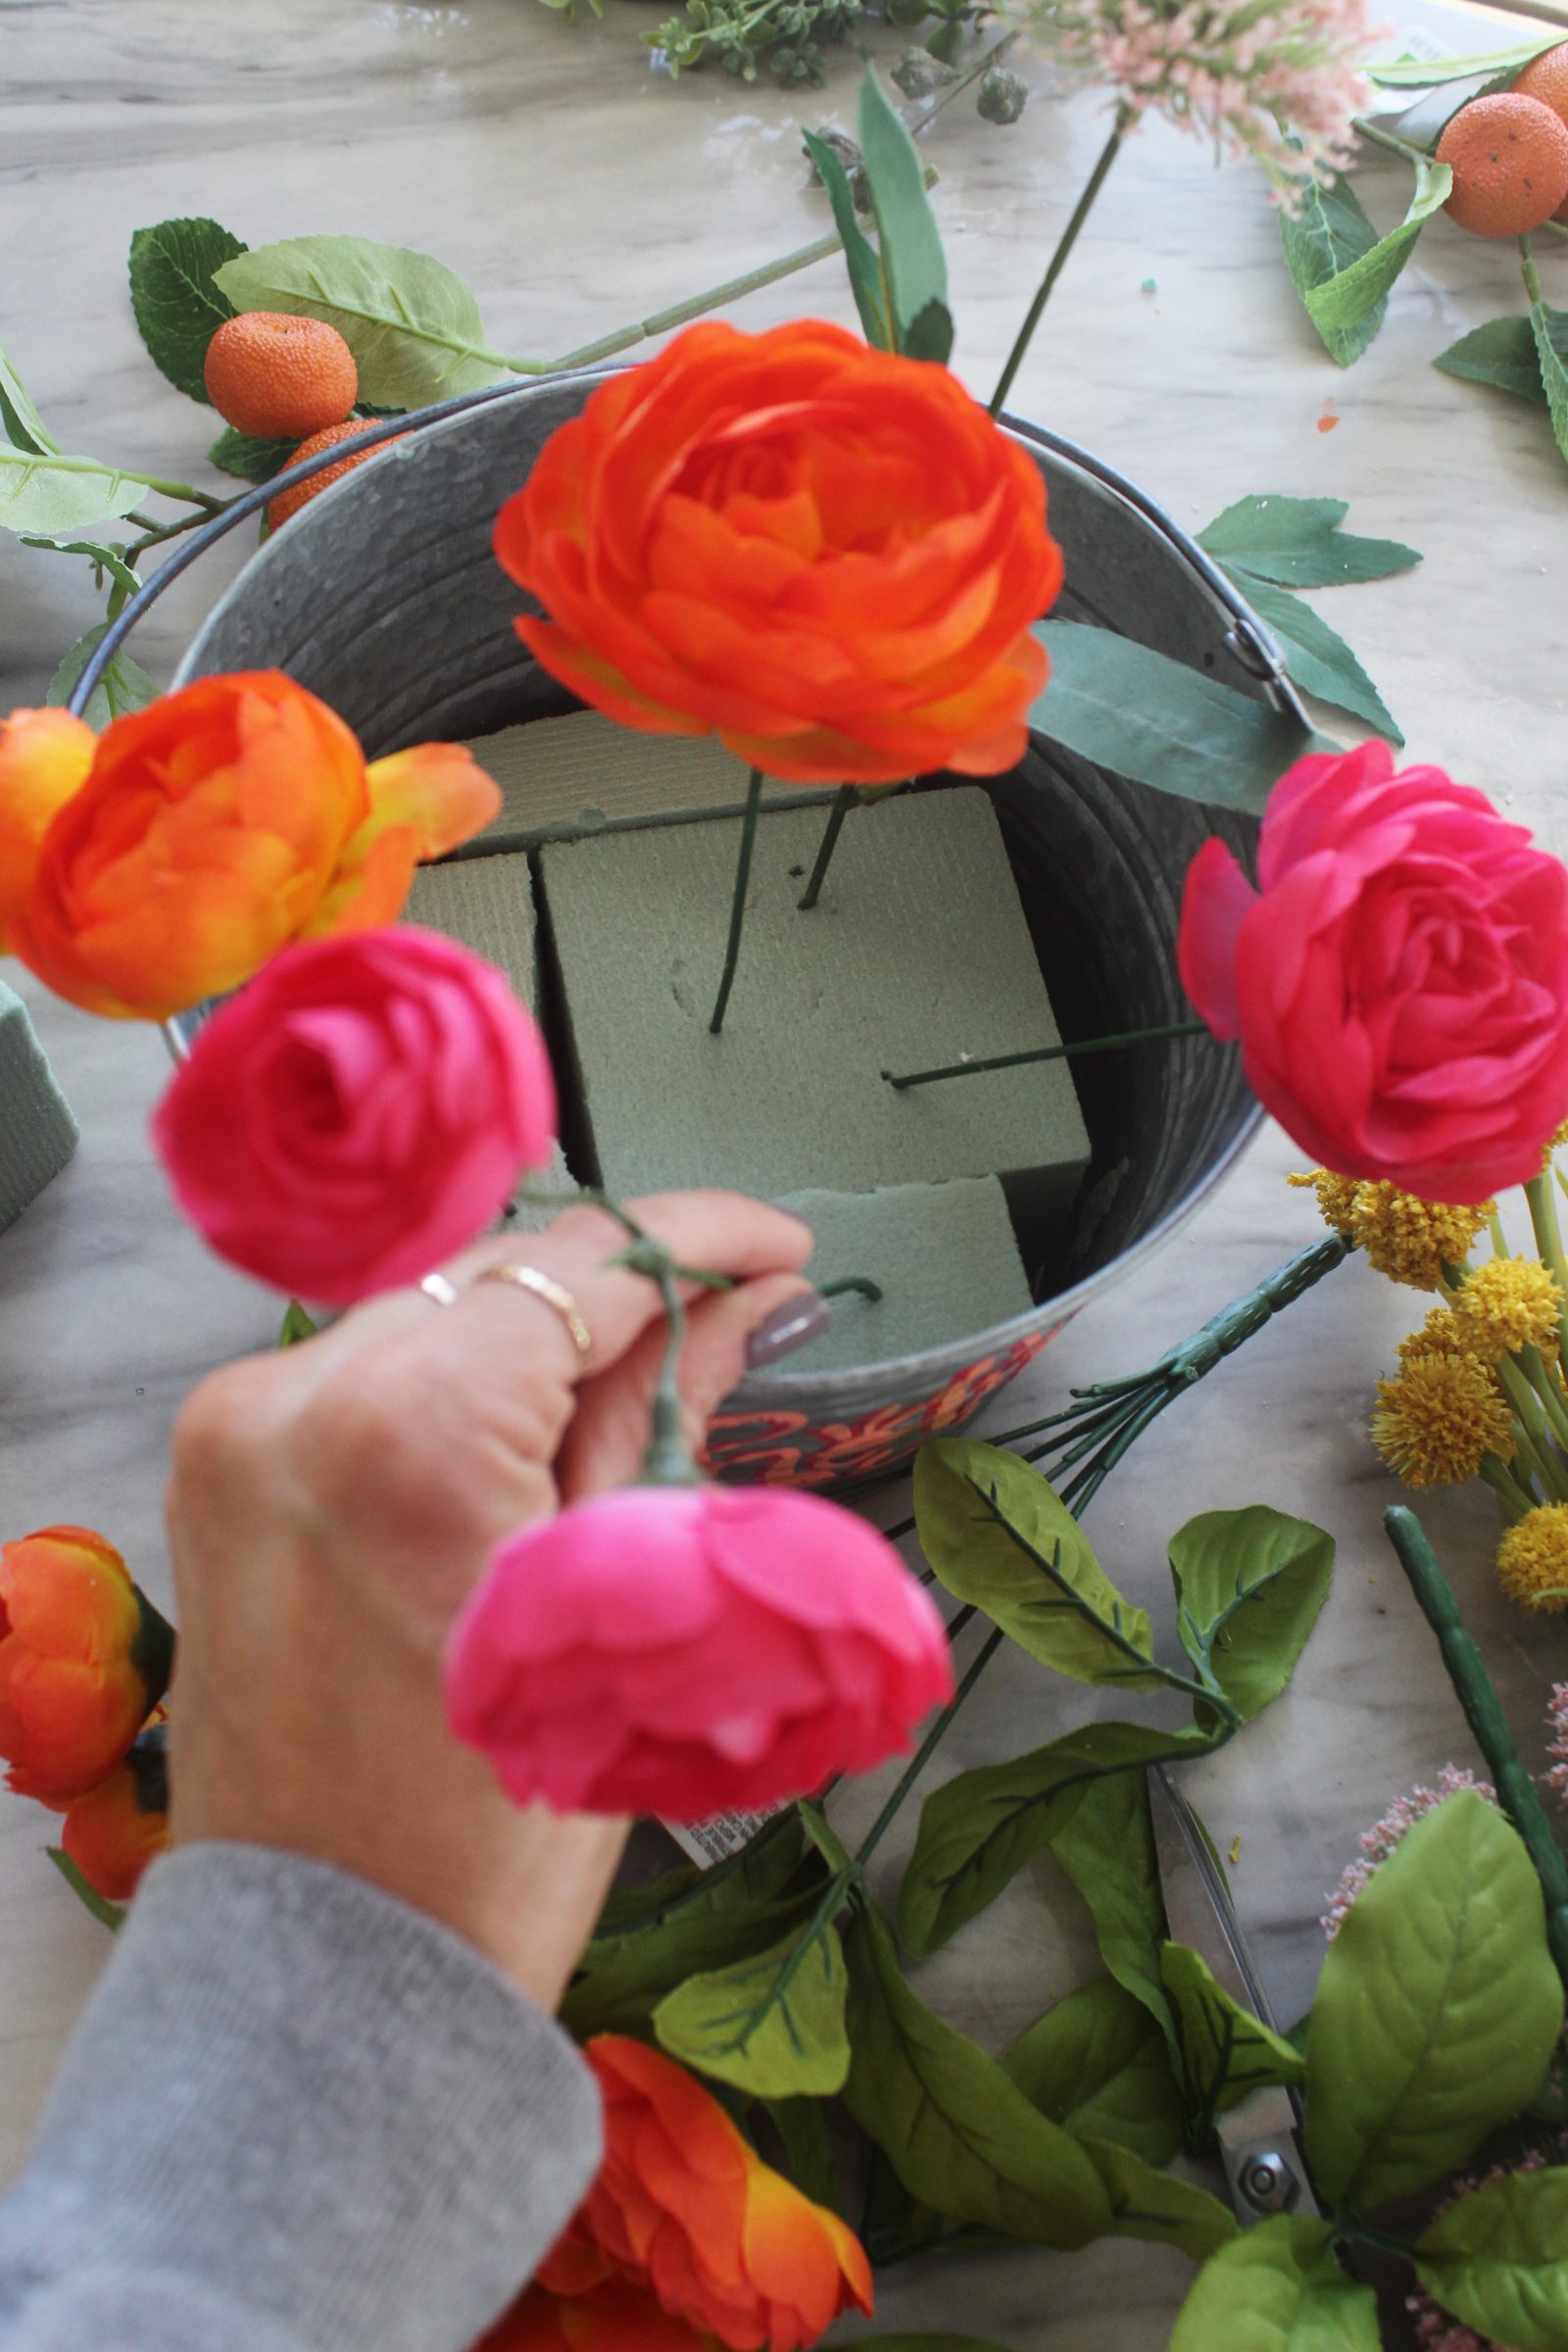
Step 6: Arrange your flowers by sticking them in the foam.
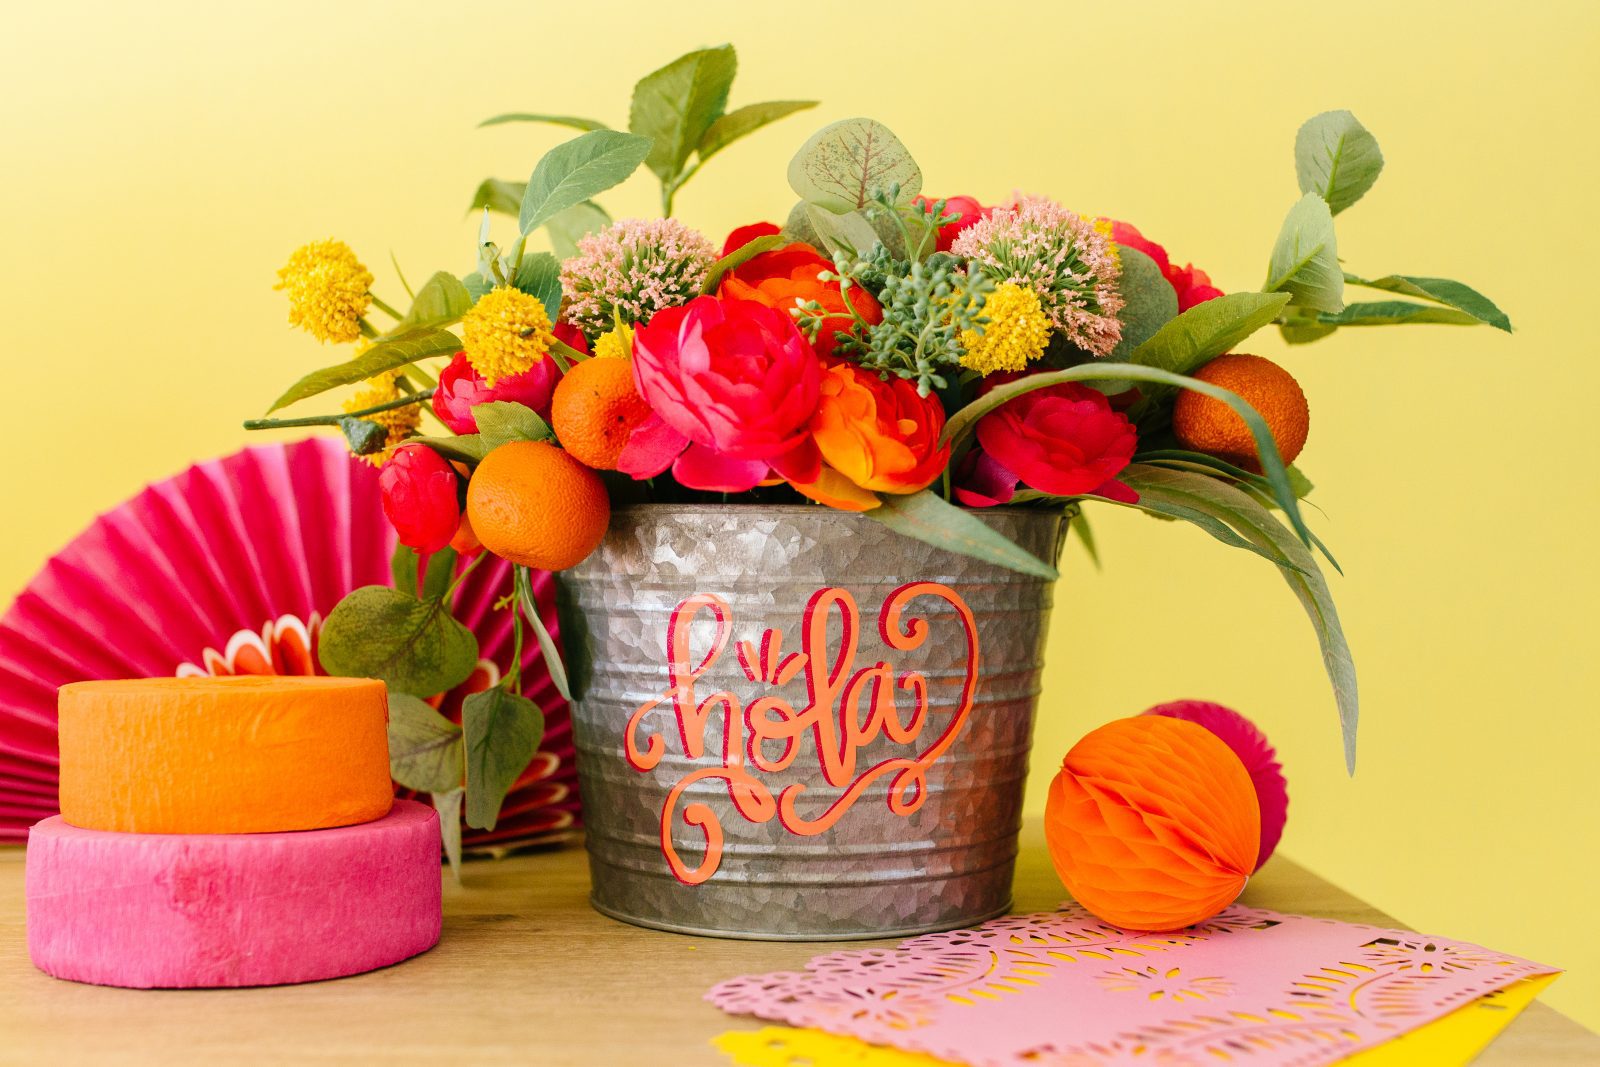
That’s it! You’ve just created a gorgeous centerpiece that you can use year after year! We are so obsessed with the colors, the faux oranges, the graphic interest of the vinyl, and the rustic flavor the galvanized bucket adds. There’s no way this beauty is going unnoticed at your Cinco de Mayo party or summer fiesta!

Happy making + Cinco de Mayo!
ox. Liz and Sam