One unexpected realm of DIY projects that I never thought I would love as much as I do is toy making. I’ve made doll houses and blocks, fishing games and toy cameras, and more! I think I love making toys because they are full of color and fun, plus, I love knowing that what I’m making is going to also make my kiddo’s day.
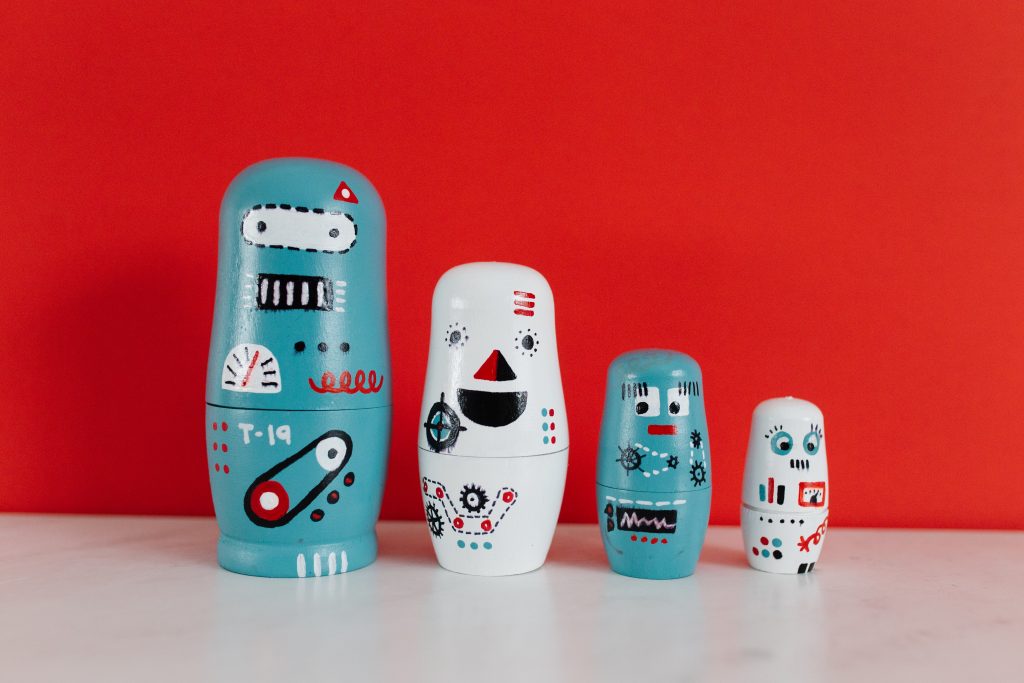
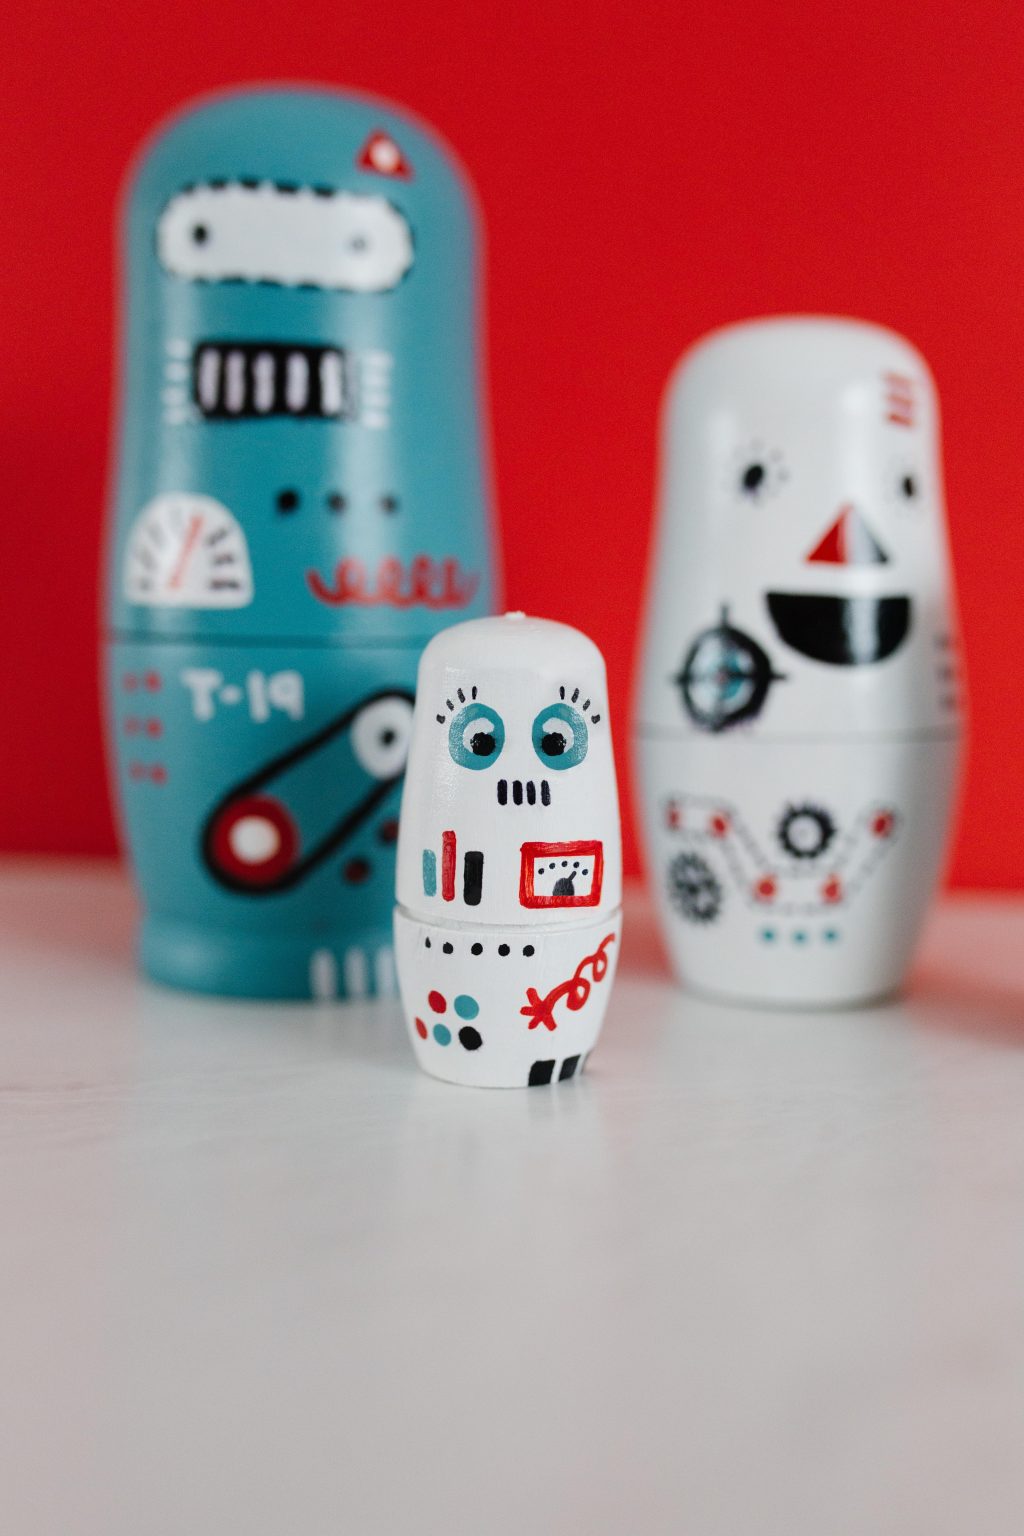
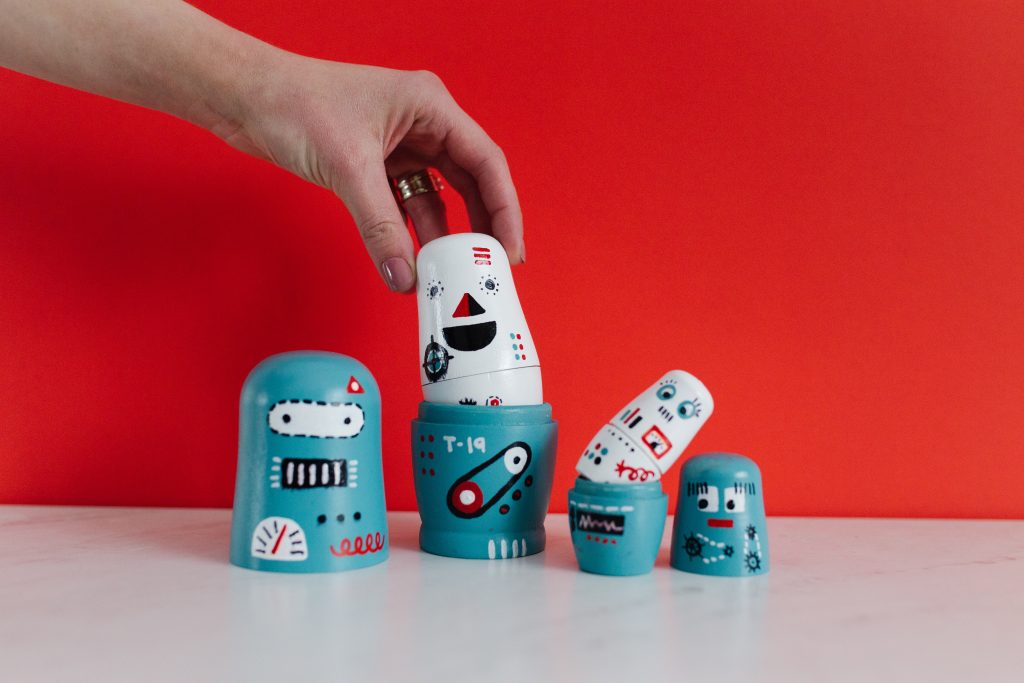
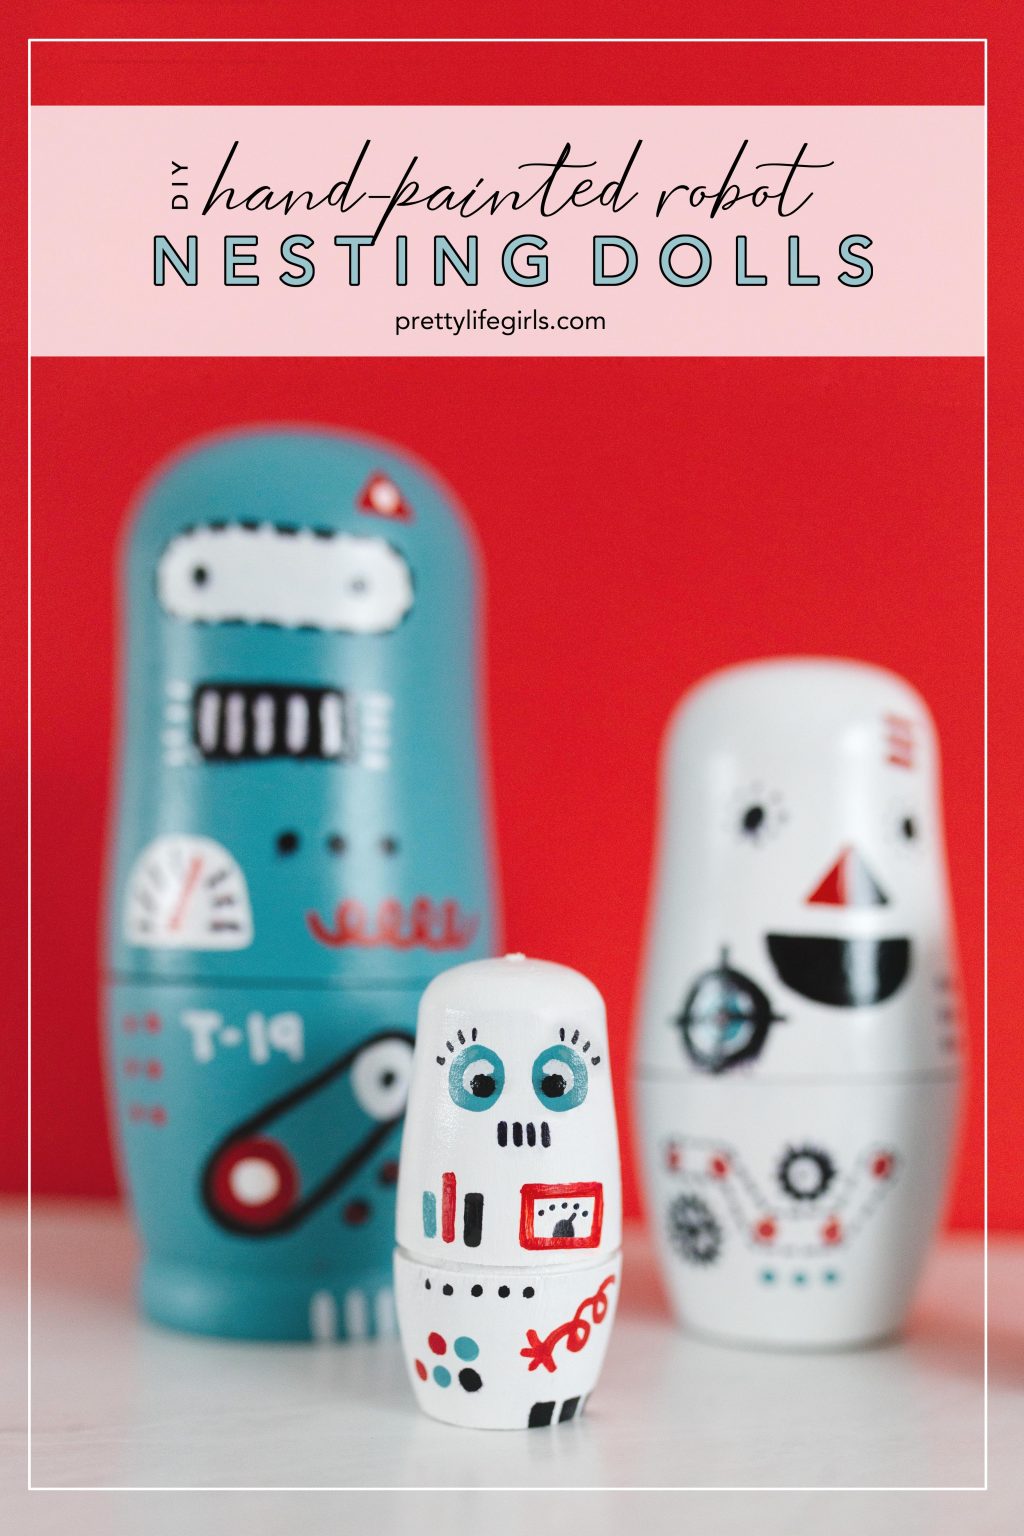
One of our most popular toys on this blog, and one that has been well loved by my daughter, are a set of nesting dolls made with vinyl (Find the post here). Nesting dolls are ridiculously adorable and the possibilities for designing them are endless. So, today we thought we would try out another method for making these darling dolls, using paint pens, and turn them into robots! You are going to love making these, in fact, you might end up being the one who wants to play with them! Here’s what you’ll need:
Supplies needed to make DIY Robot Nesting Dolls
Unfinished Nesting Dolls
Acrylic Paint + Brush
Paint Pens
Clear Sealant
How to make DIY Robot Nesting Dolls
Step 1. Paint your dolls. I chose to paint all of mine blue, but you could paint them all a different color, paint them in a pattern, etc. Apply two coats using a paint brush and let dry completely.
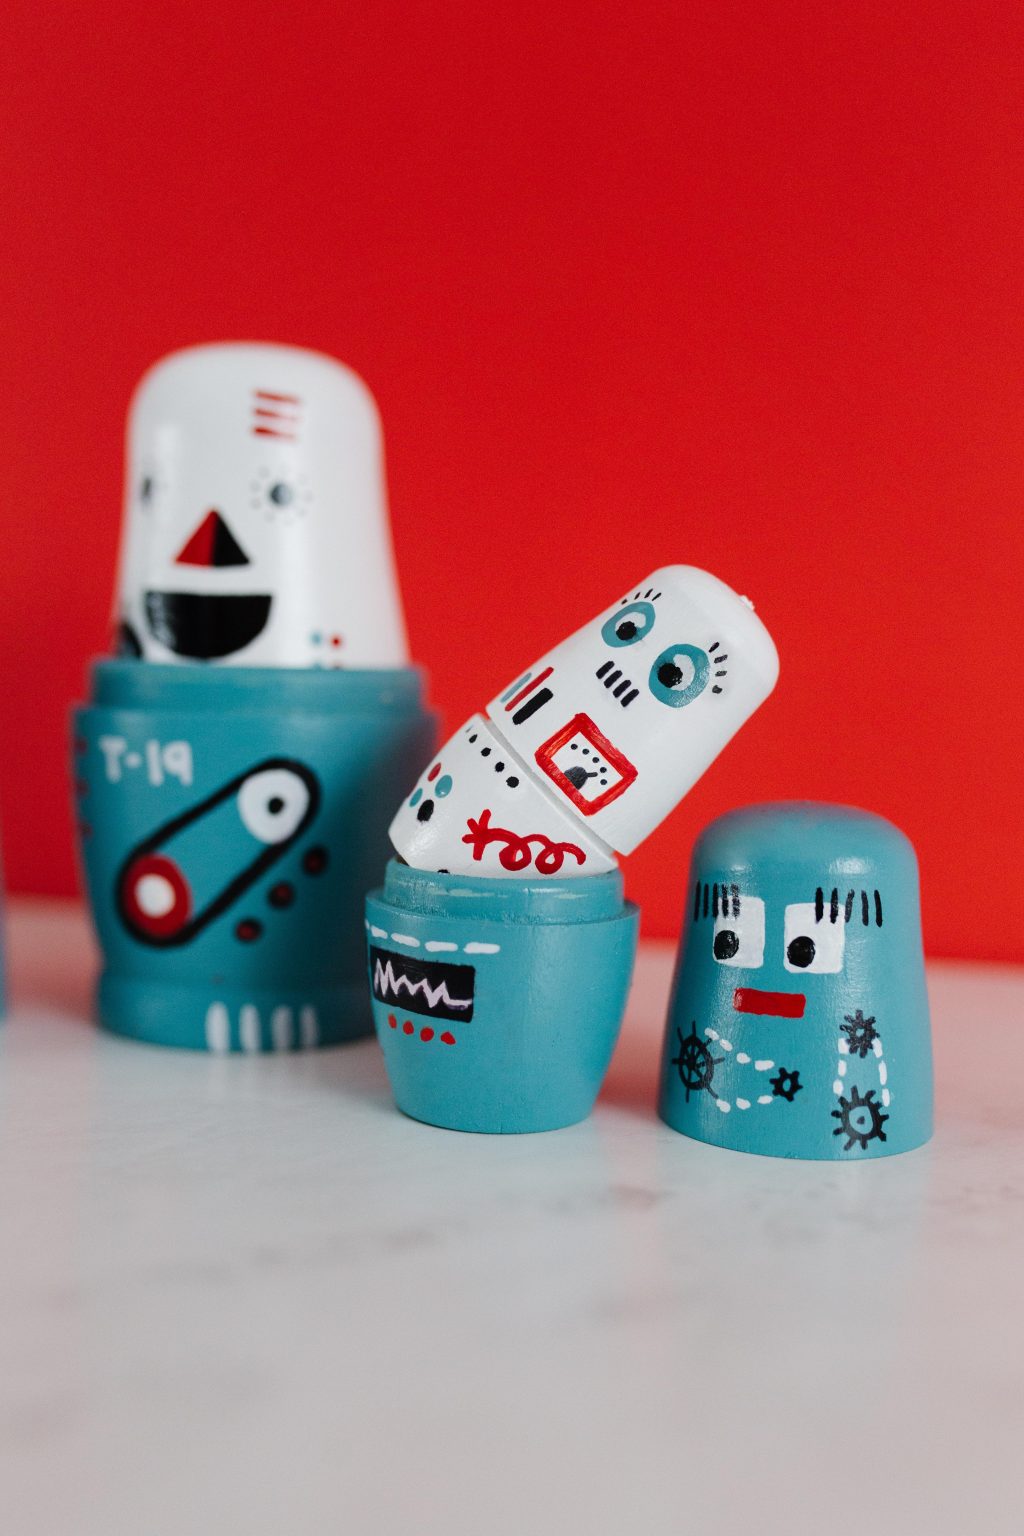
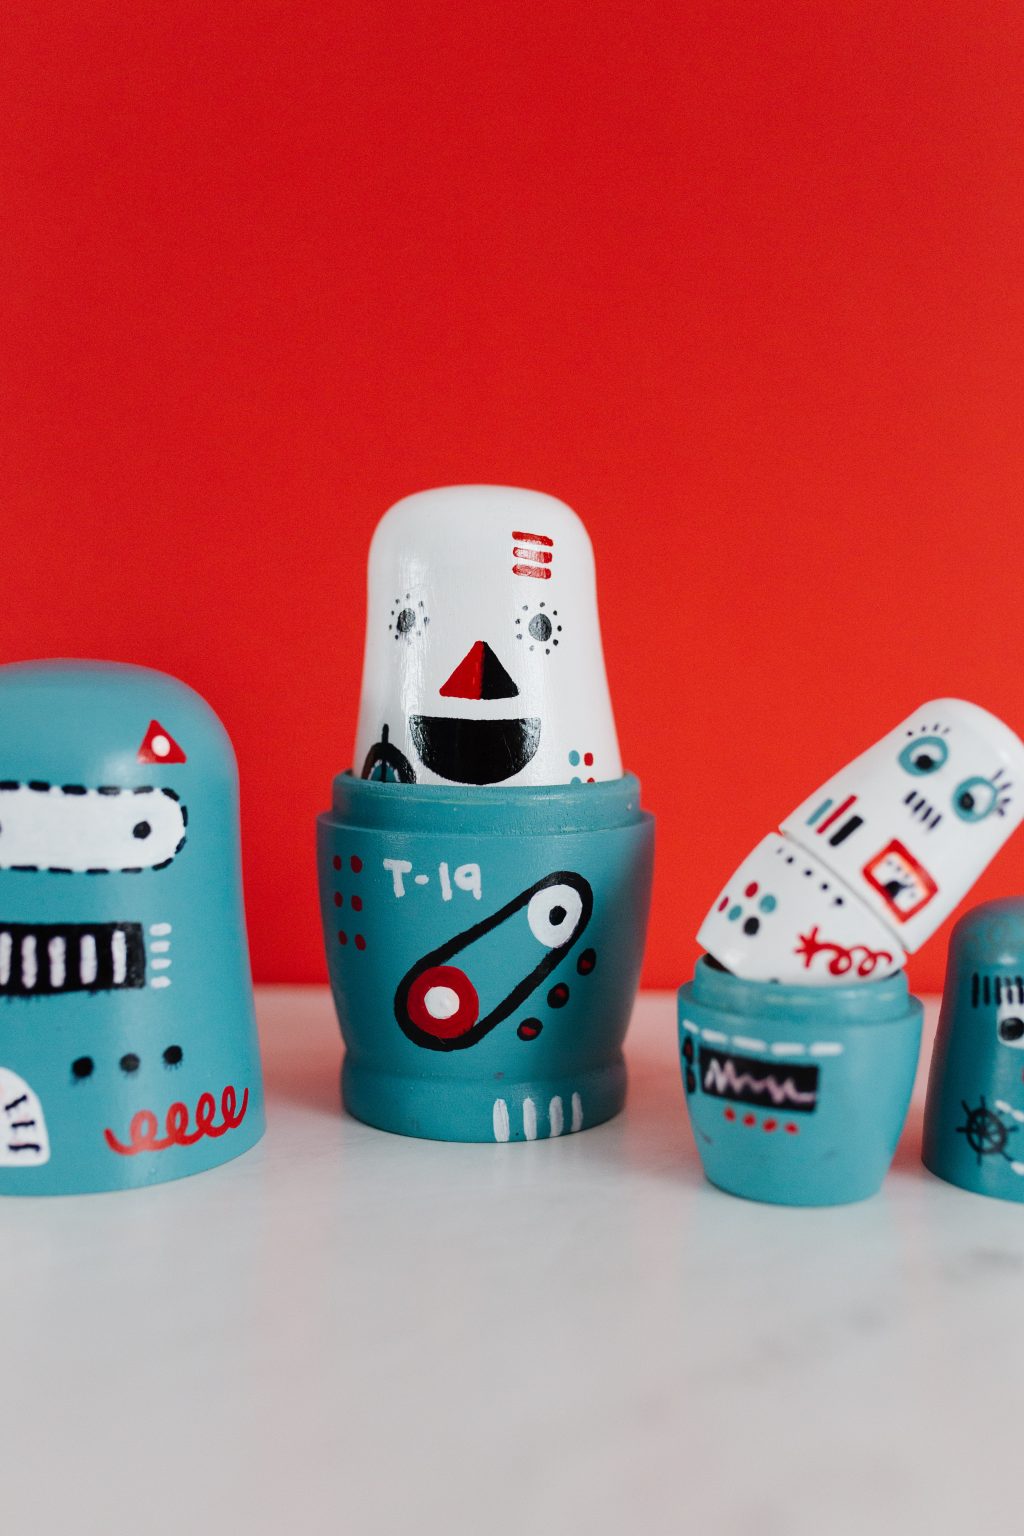
Step 2. Apply your robot details using your paint pens. This was so much fun to do, and I used Pinterest to find inspiration for drawing buttons, levers, and other components to make them look like robots! I am not an artist and am terrible at drawing, but found that you really only need to be able to draw some geometric shapes to make these happen.
Step 3. Once your are happy with the design and everything is completely dry, spray the dolls with a clear sealant to protect them and give them some shine.
Tip: Paint pens can be finicky. Make sure to shake them between drawings and pump them to ensure that there is enough paint in the tip. I also recommend drawing on a scratch paper before drawing on the dolls to make sure that the amount of the paint in the pen’s tip is even. I kept some wet wipes near by if there were any mess ups, and when I wasn’t able to catch those, or I didn’t like how a designed turned out, I simply let the paint dry completely and then painted over it with my base color and brush and started again!

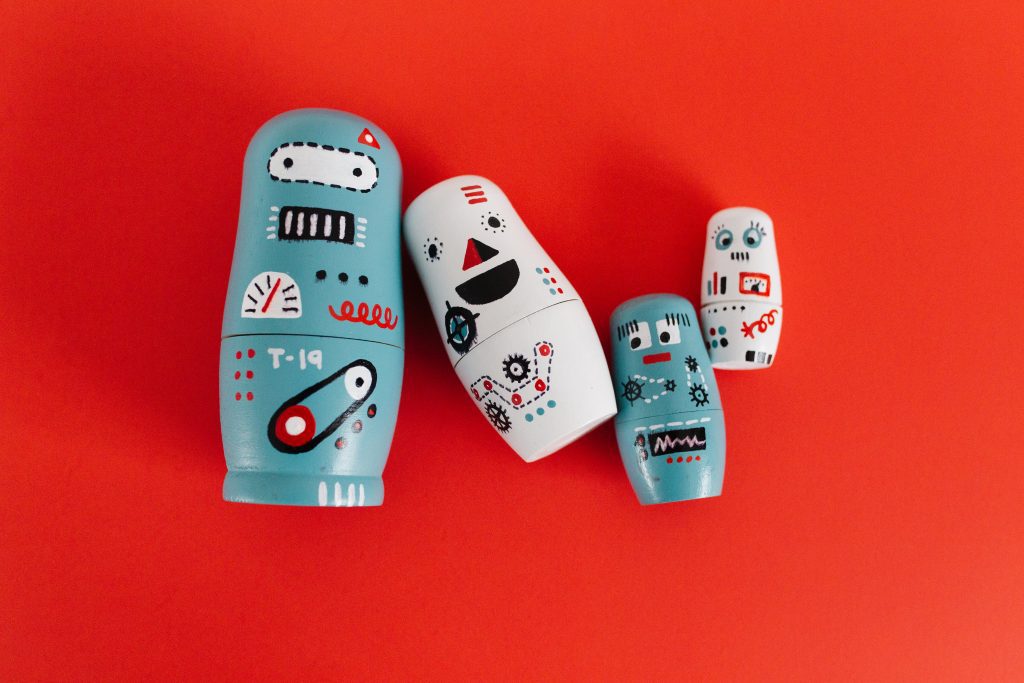
Can you believe that those are all the steps? So easy! And now you’ve created some adorable dolls that are full of character and are ready for lots of imaginative play.
There are so many possibilities for creating once you get a set of unfinished nesting dolls in your hands and turning them into adorable little characters is so much fun. I love the idea of buying a couple sets and making them as a family or with friends and seeing what kind of dolls everyone creates. You’re sure to have adorable results!
Happy making!
ox. Liz