This post was originally published in September 2019 and updated as of July 2022.
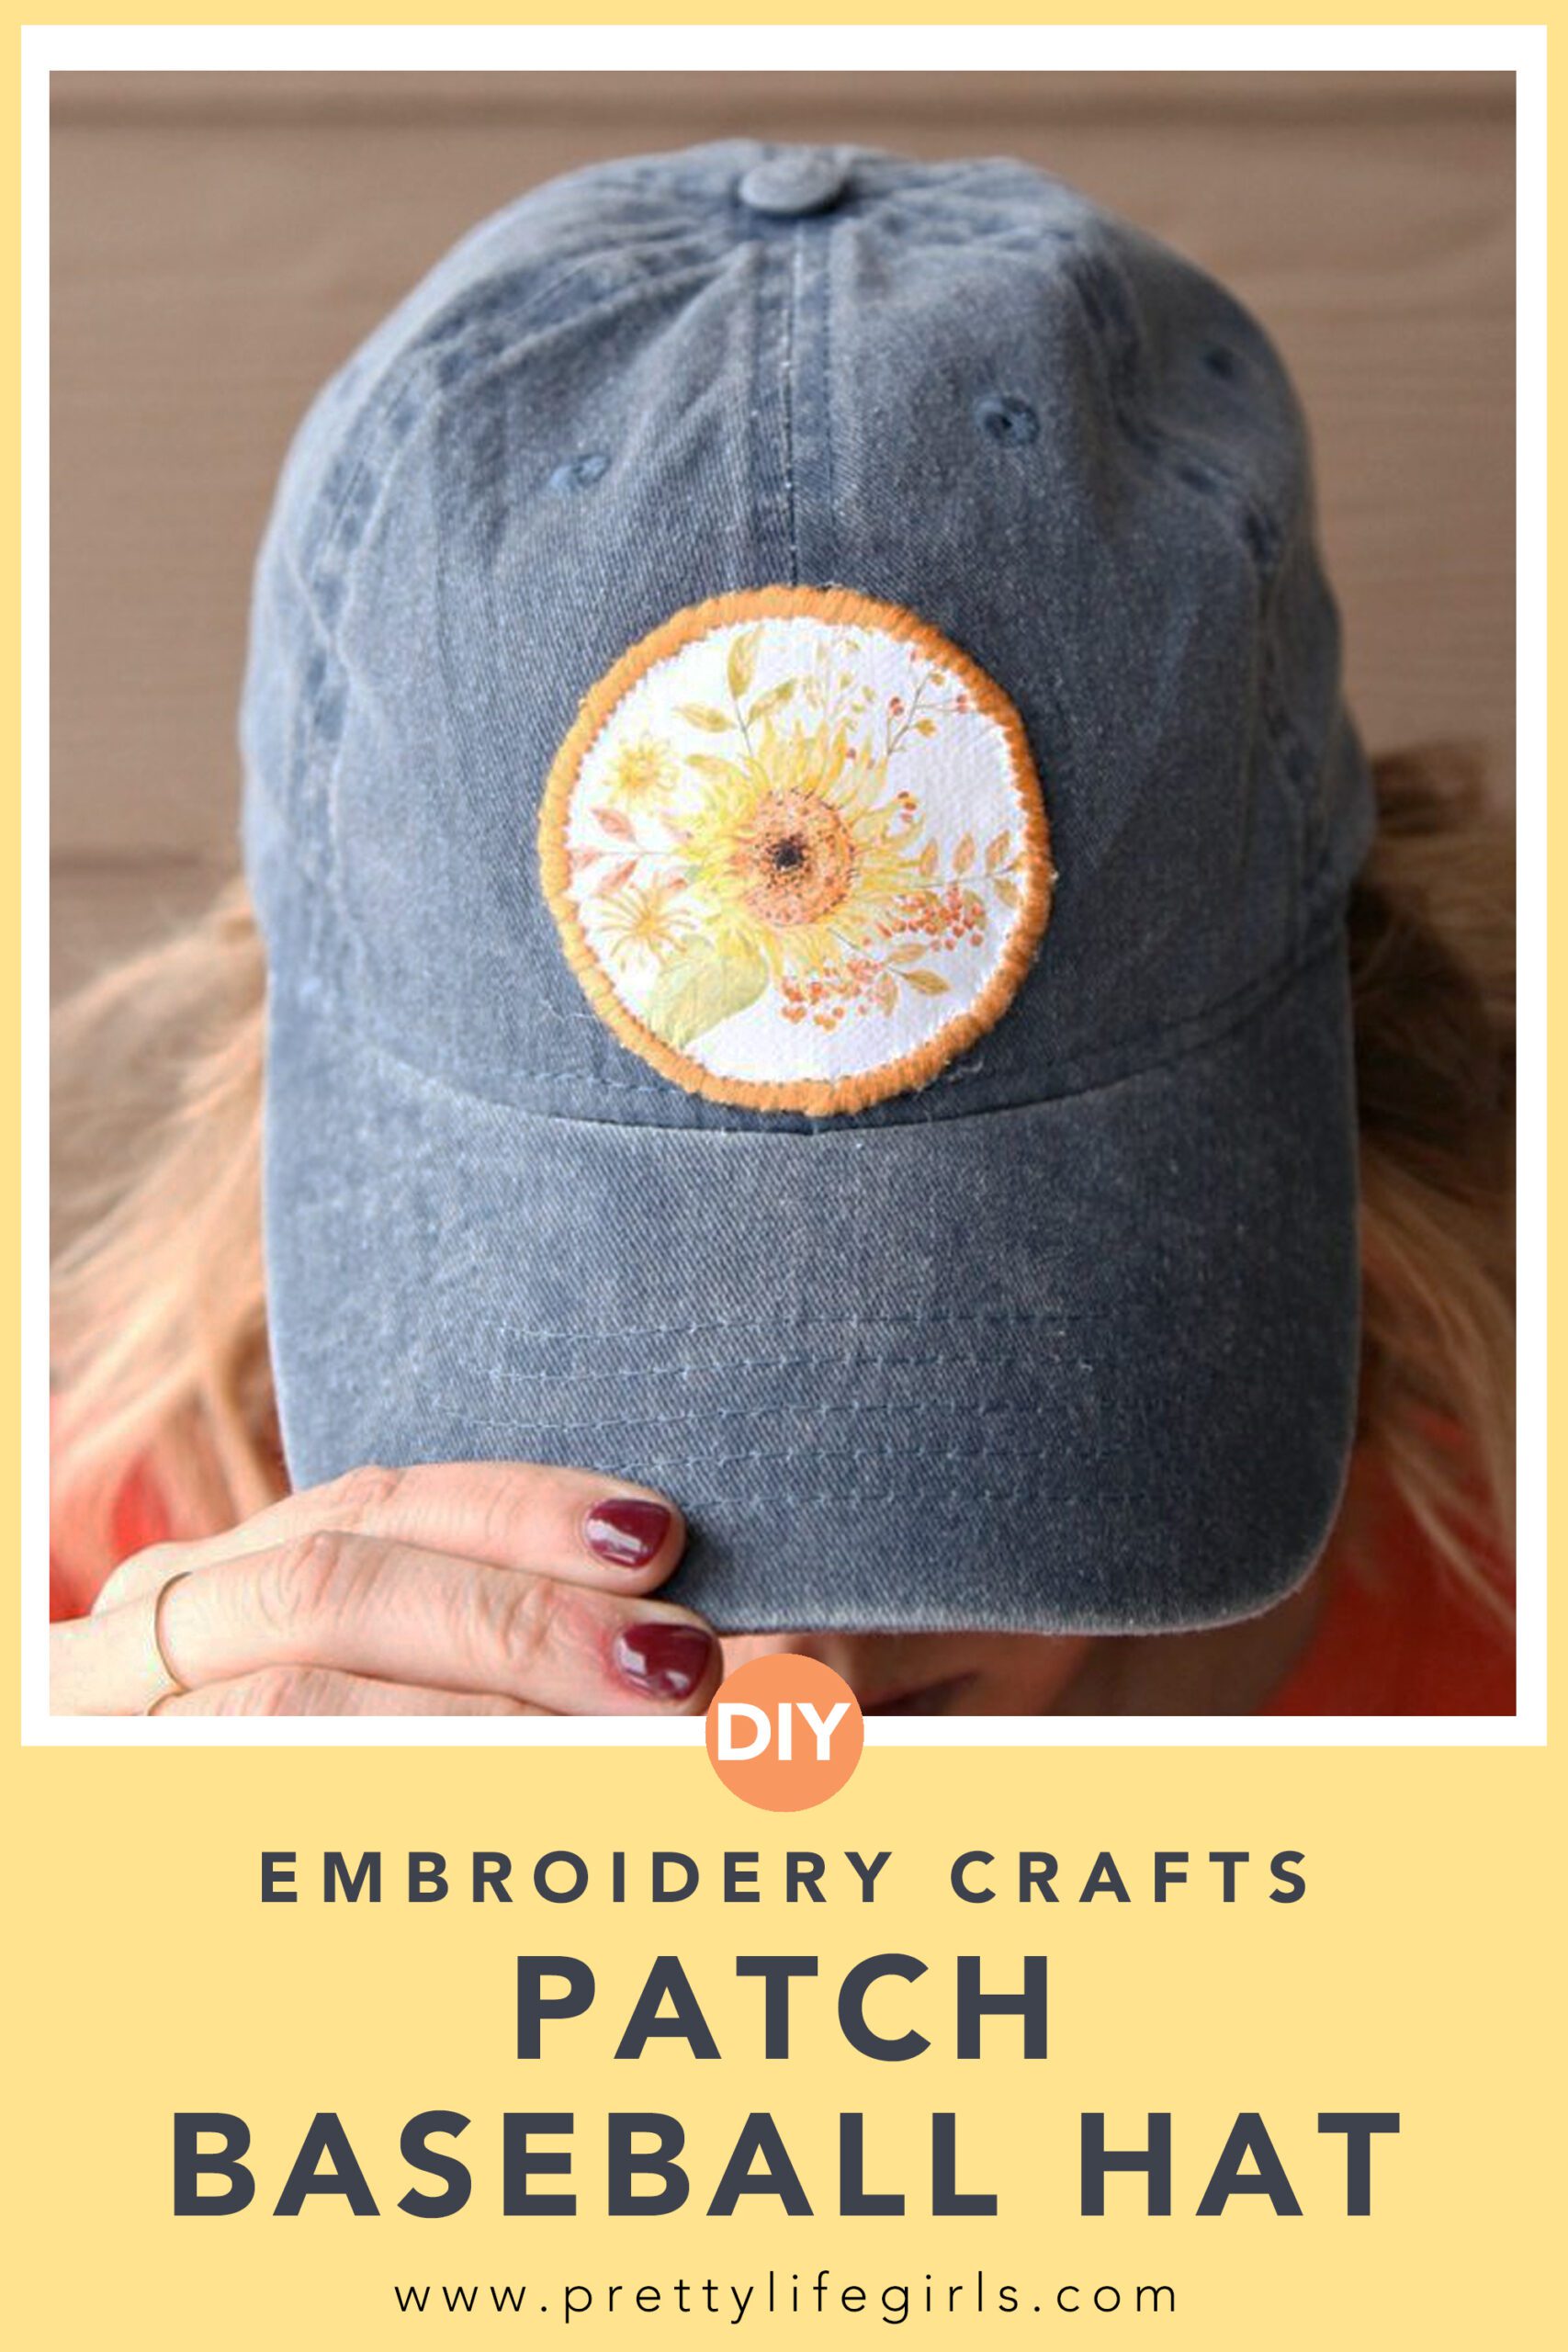
Patches are a timeless way to add some personality to your apparel, and with printable heat transfer vinyl, the tutorial for this DIY patch could not be easier. After you make your own patches, you can easily add them to hats (like we did with this DIY patch baseball hat), jackets, bags – you name it. Keep reading to see the tutorial!

How do I make my own embroidered patches?
What materials do you need to make a patch?
To make your own patch, you’ll transfer an image onto canvas or denim fabric, then hand-embroider around the outside edge. You can attach the patch onto any surface with Heat N Bond or hot glue!
Let’s make one and customize a baseball hat!
Supplies needed to make your own DIY Patch Baseball Hat
Silhouette CAMEO
Cutting mat
Inkjet Printable Heat Transfer Material
Inkjet printer
Teflon sheet
Canvas material
Heat N Bond
Scissors
Embroidery floss & needle
Blank hat
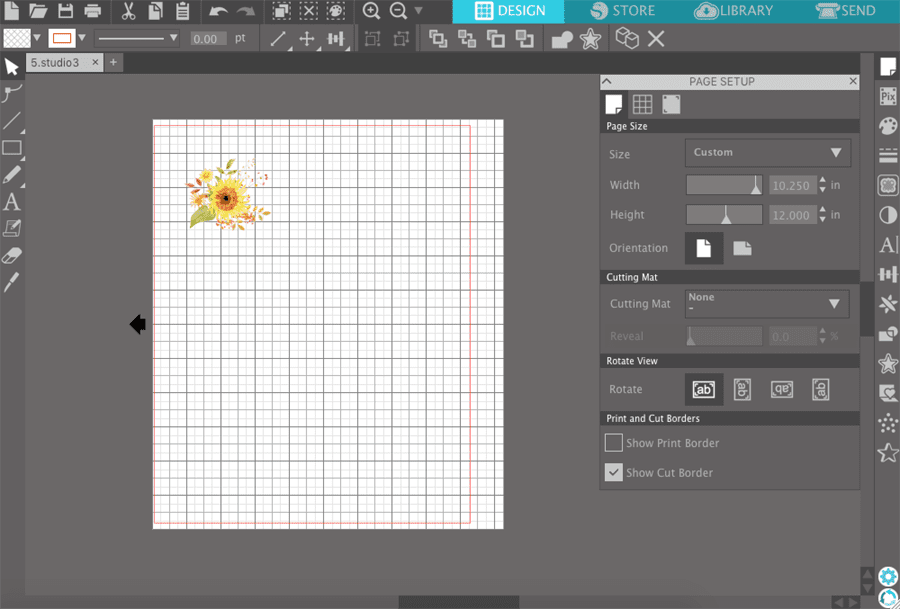
Step 1: Open the image you would like printed on your patch in Silhouette Studio (I used an image from this), and adjust the size to your preference.
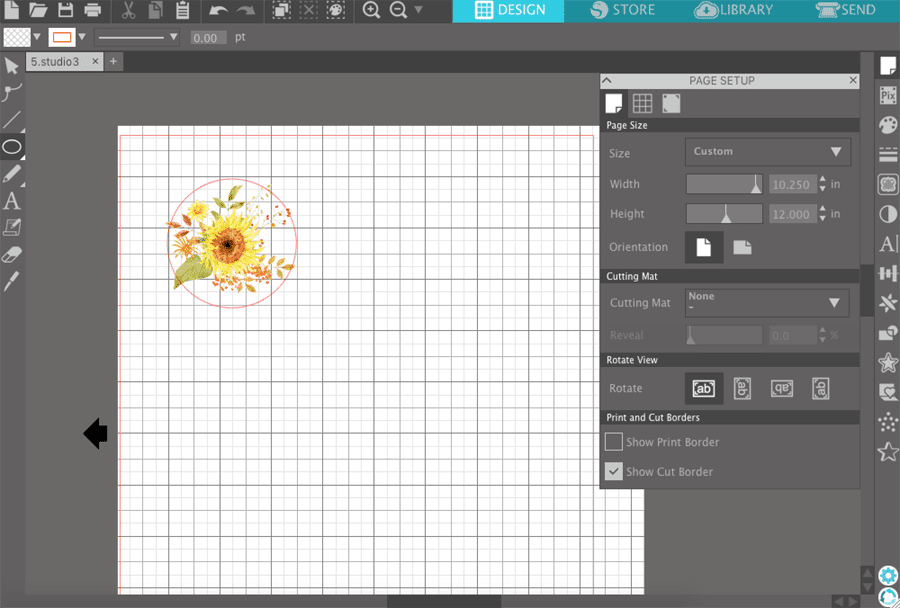
Step 2: Draw a circle (or other shape) around the image where you’d like it cut.
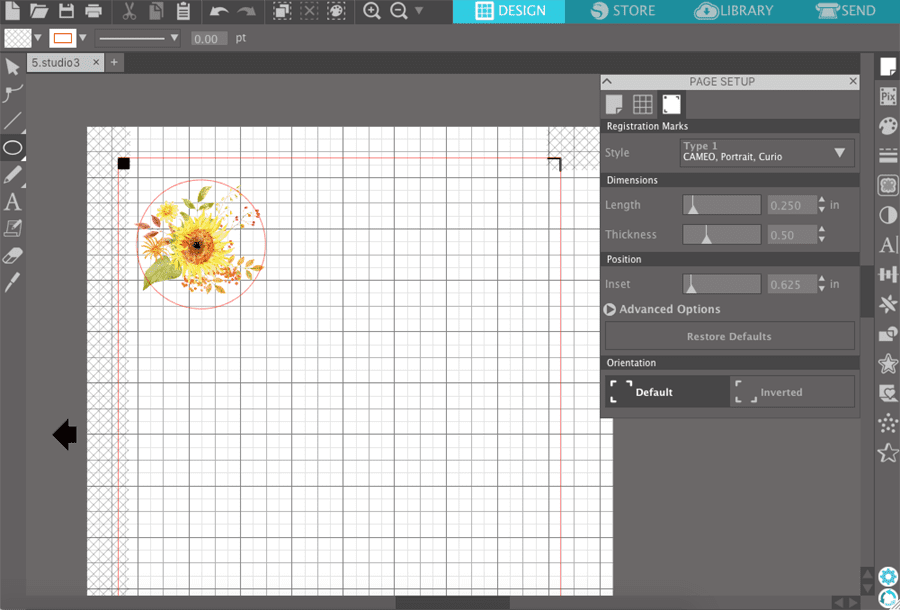
Step 3: Turn on registration marks. Then print on the Printable Heat Transfer Material using your inkjet printer. After printing, load the Printable Heat Transfer Material in your Silhouette CAMEO, and cut.

Step 4: Remove the backing of the Printable Heat Transfer Material.

Step 5: Place the Printable Heat Transfer Material, image side up, on the canvas material (I cut up an old tote bag for my canvas). Cover with teflon sheet, and heat with dry iron.
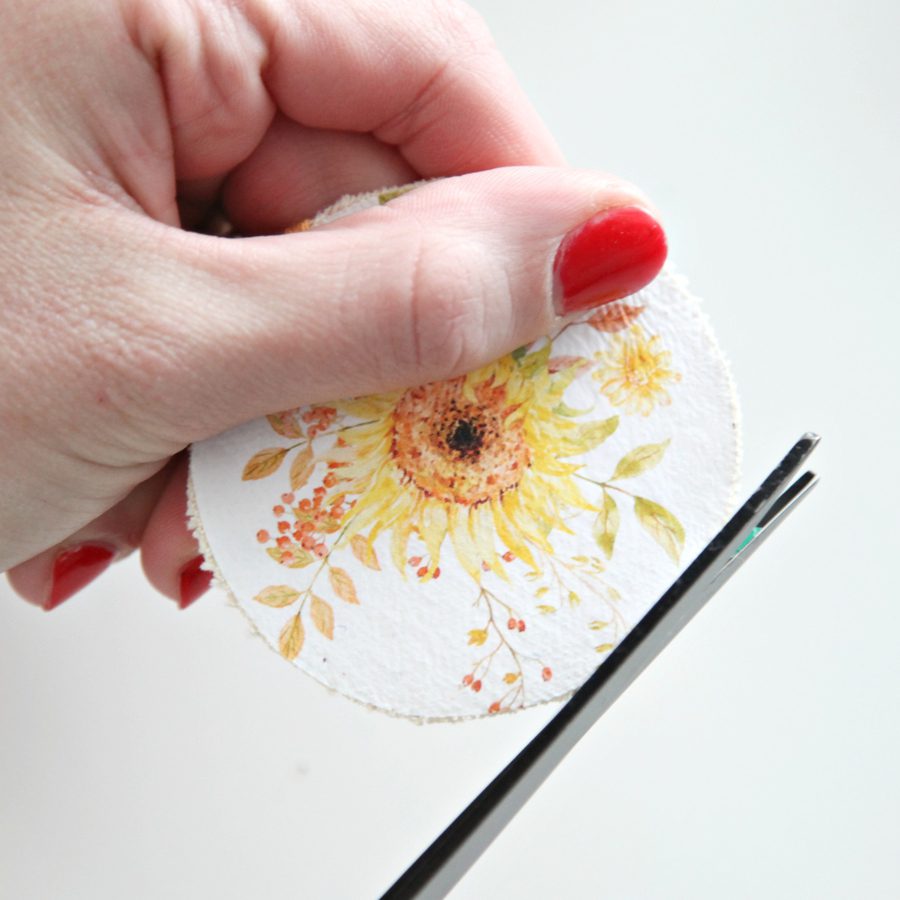
Step 6: Remove the teflon sheet and cut the canvas to the Printable Heat Transfer Material circle.
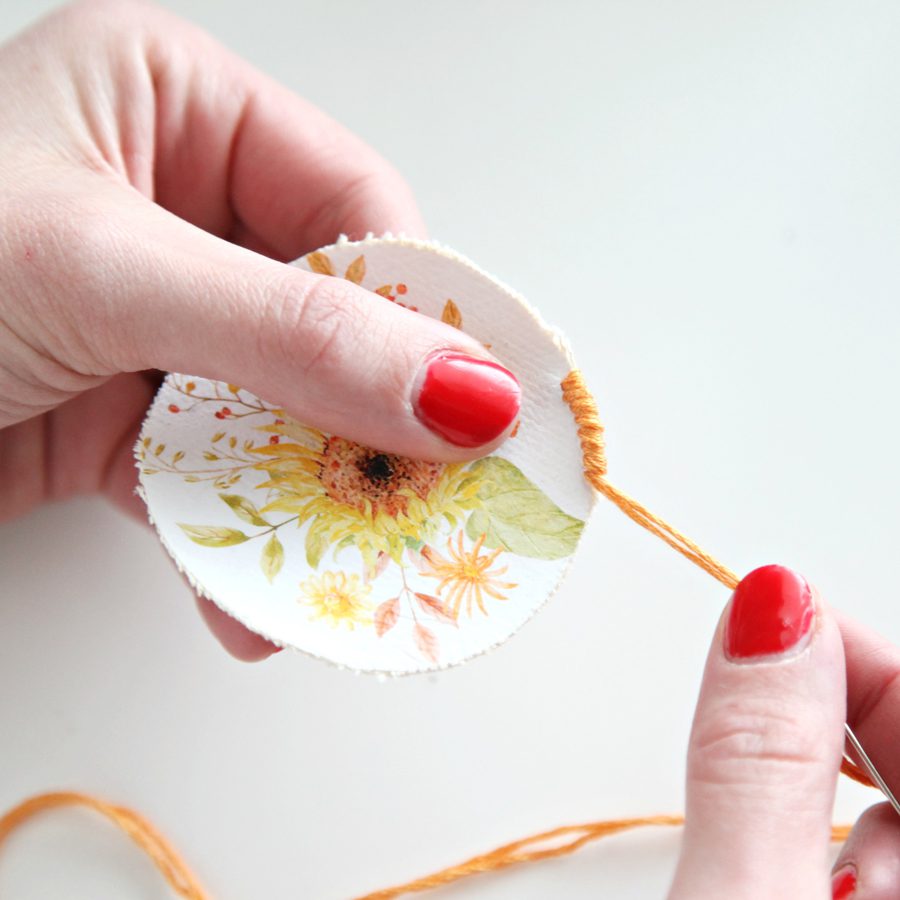
Step 7: Stitch with embroidery floss around the outside edge of the circle.
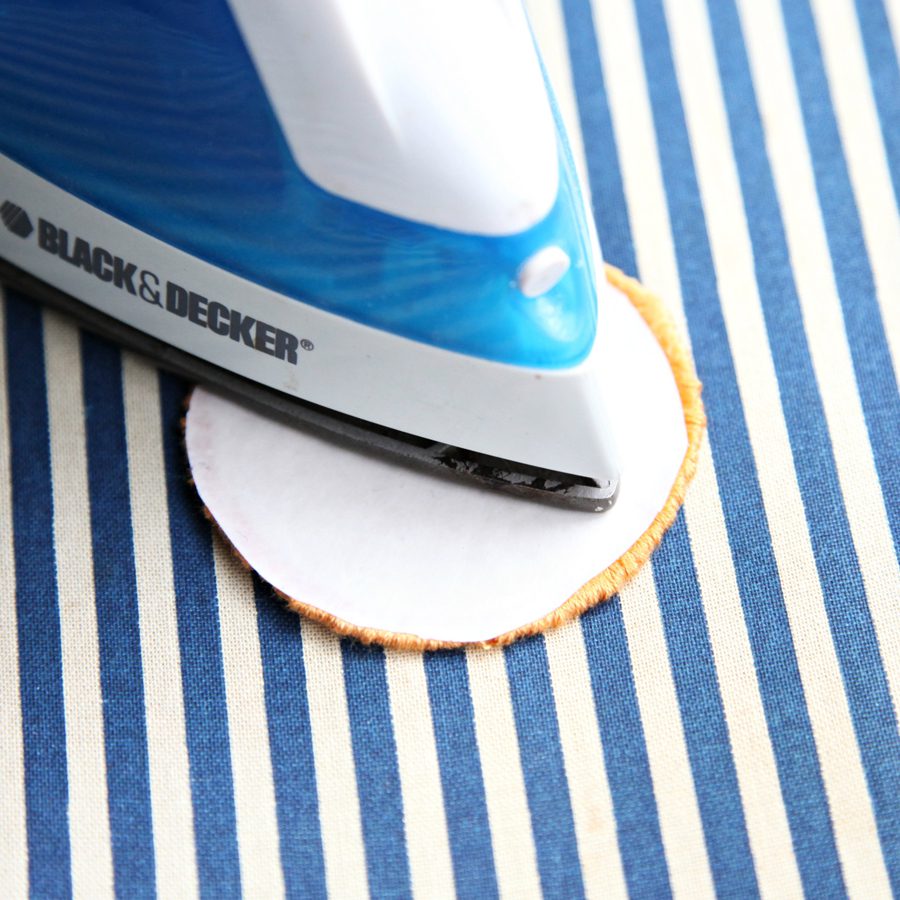
Step 8: Cut Heat N Bond to fit the patch and iron it on the back.

Step 9: Remove the Heat N Bond backing, then apply the patch to the hat. If there are any spots that aren’t sticking well enough with the Heat N Bond, you can use hot glue.

Now you have a seriously cute hat with a seriously cute patch that YOU made! You can put this patch on pretty much anything in your closet. Add it to a jacket, jeans, shorts, a tote bag, t-shirt, you name it!
 Be sure to join our email list to stay up-to-date on all things Pretty Life Girls!
Happy crafting!
xo, Sam

Check out these other printable heat transfer projects!