


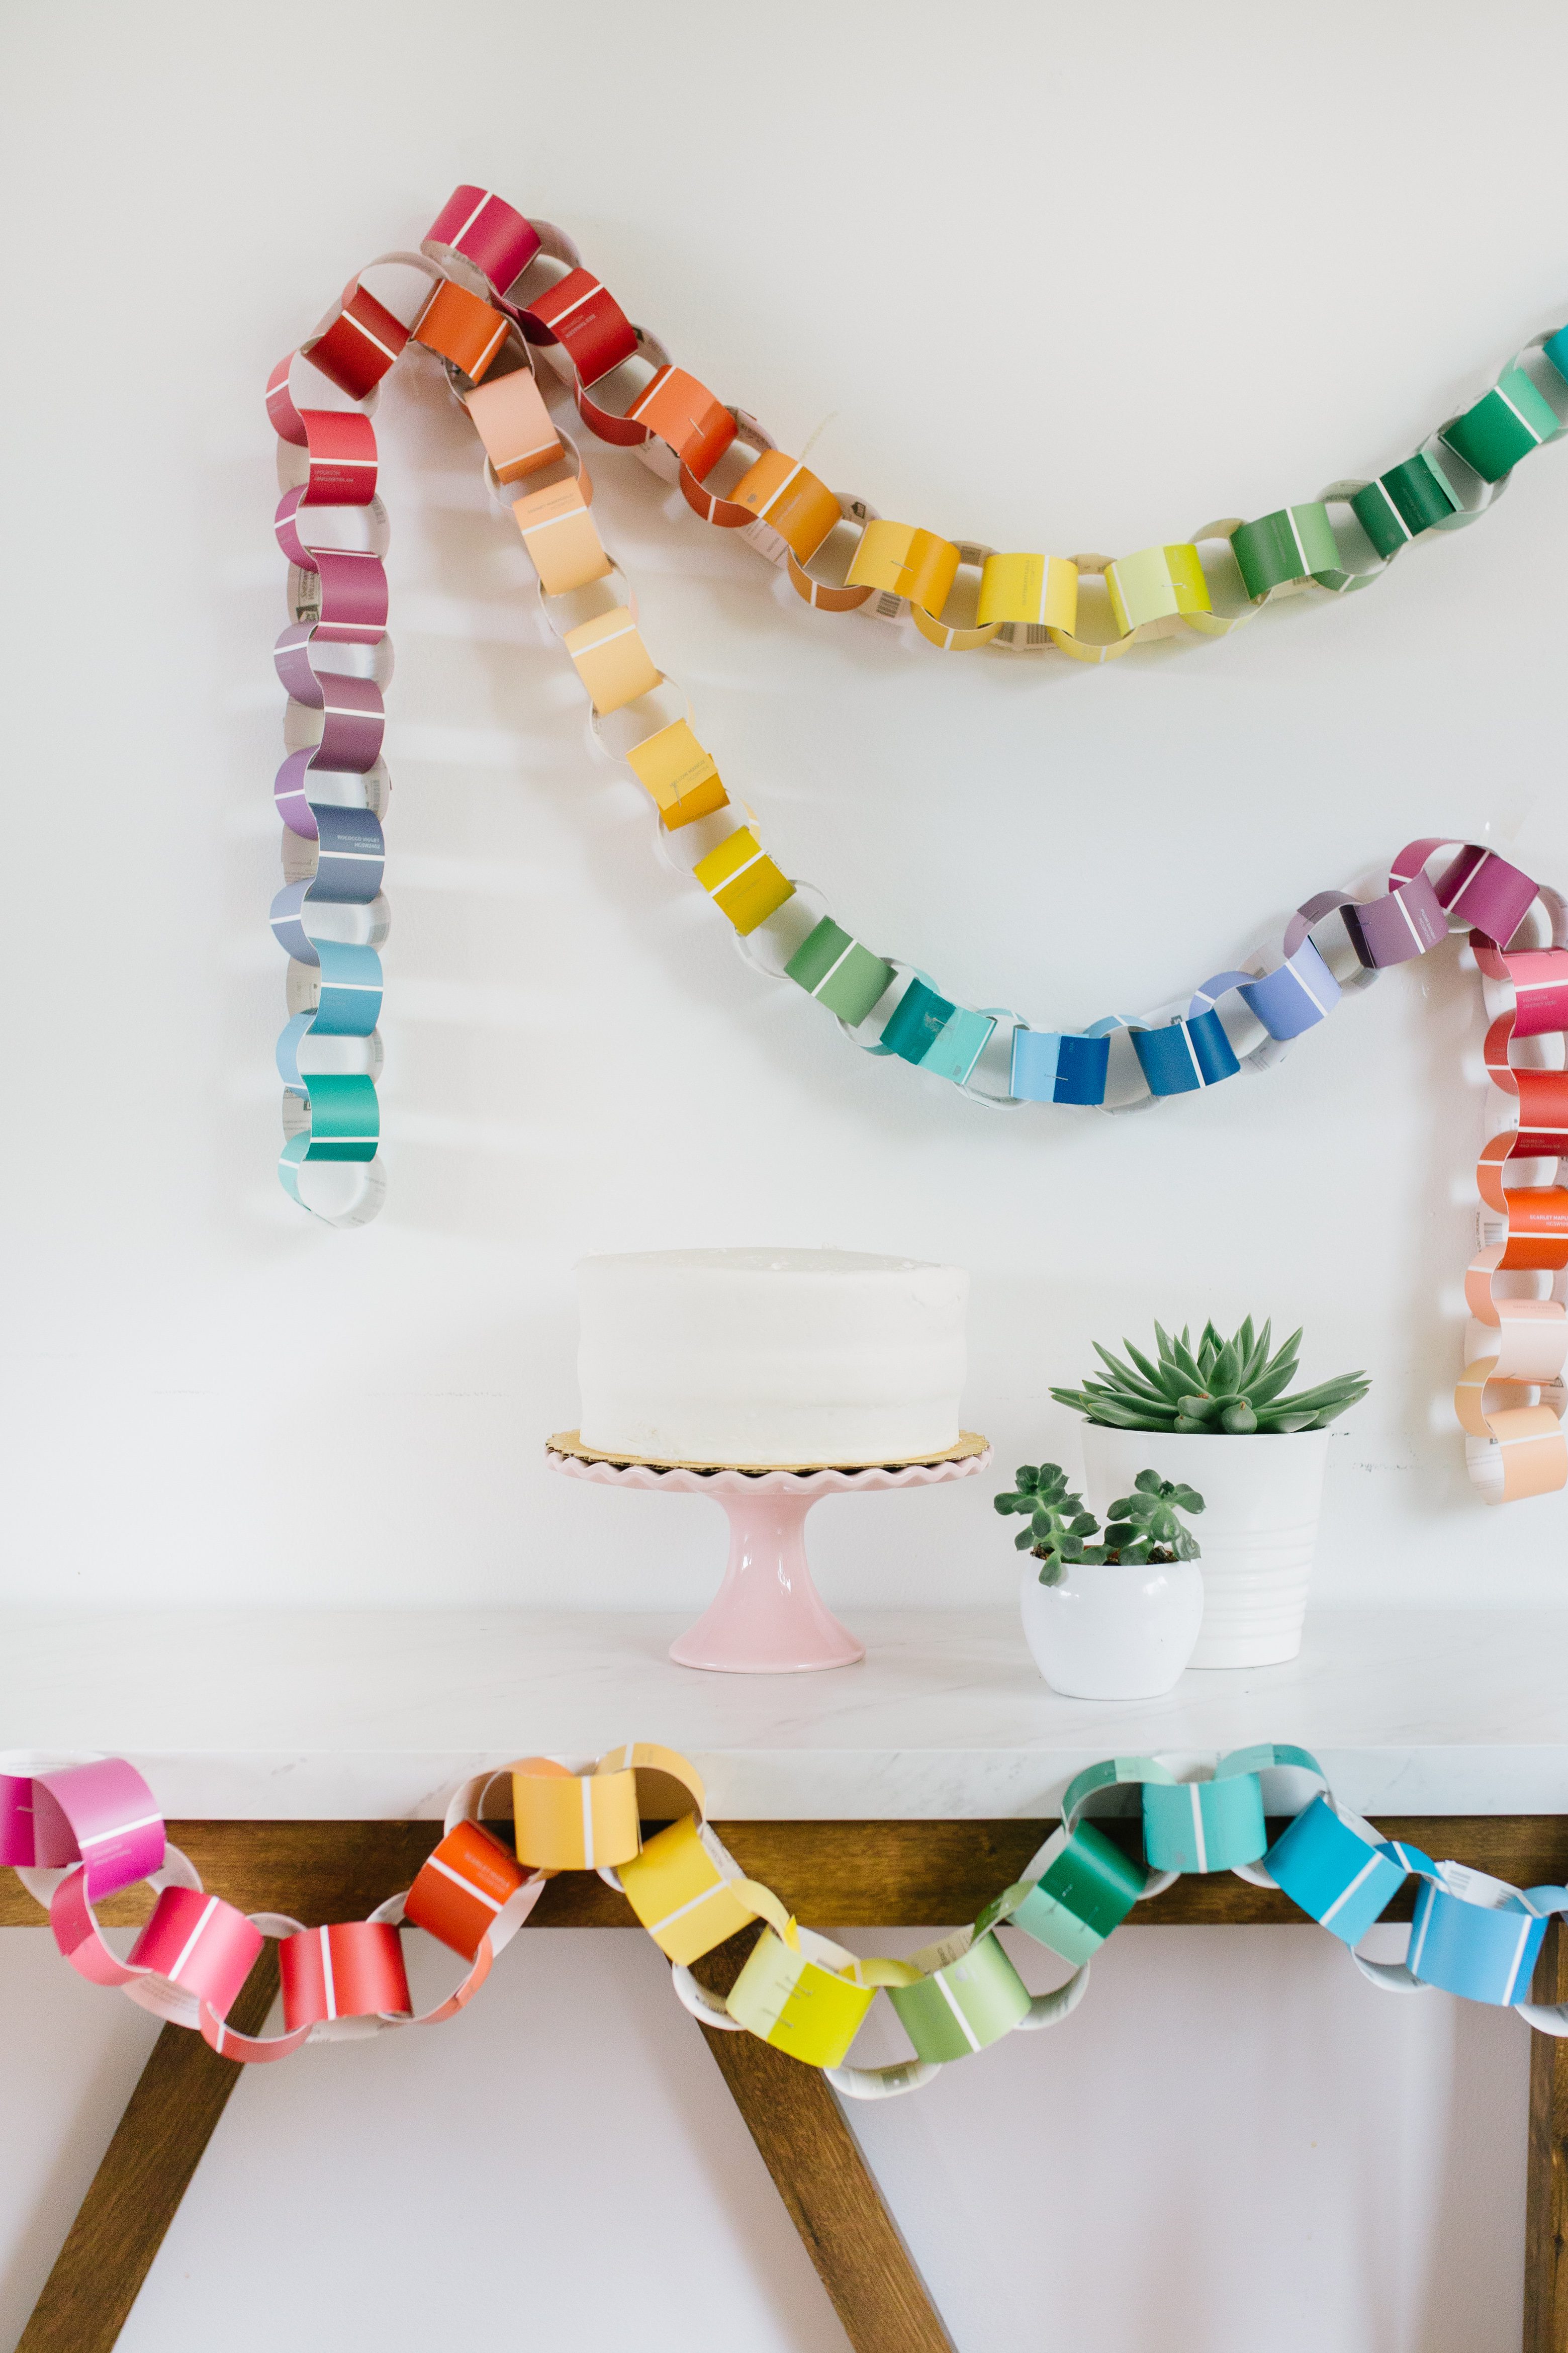
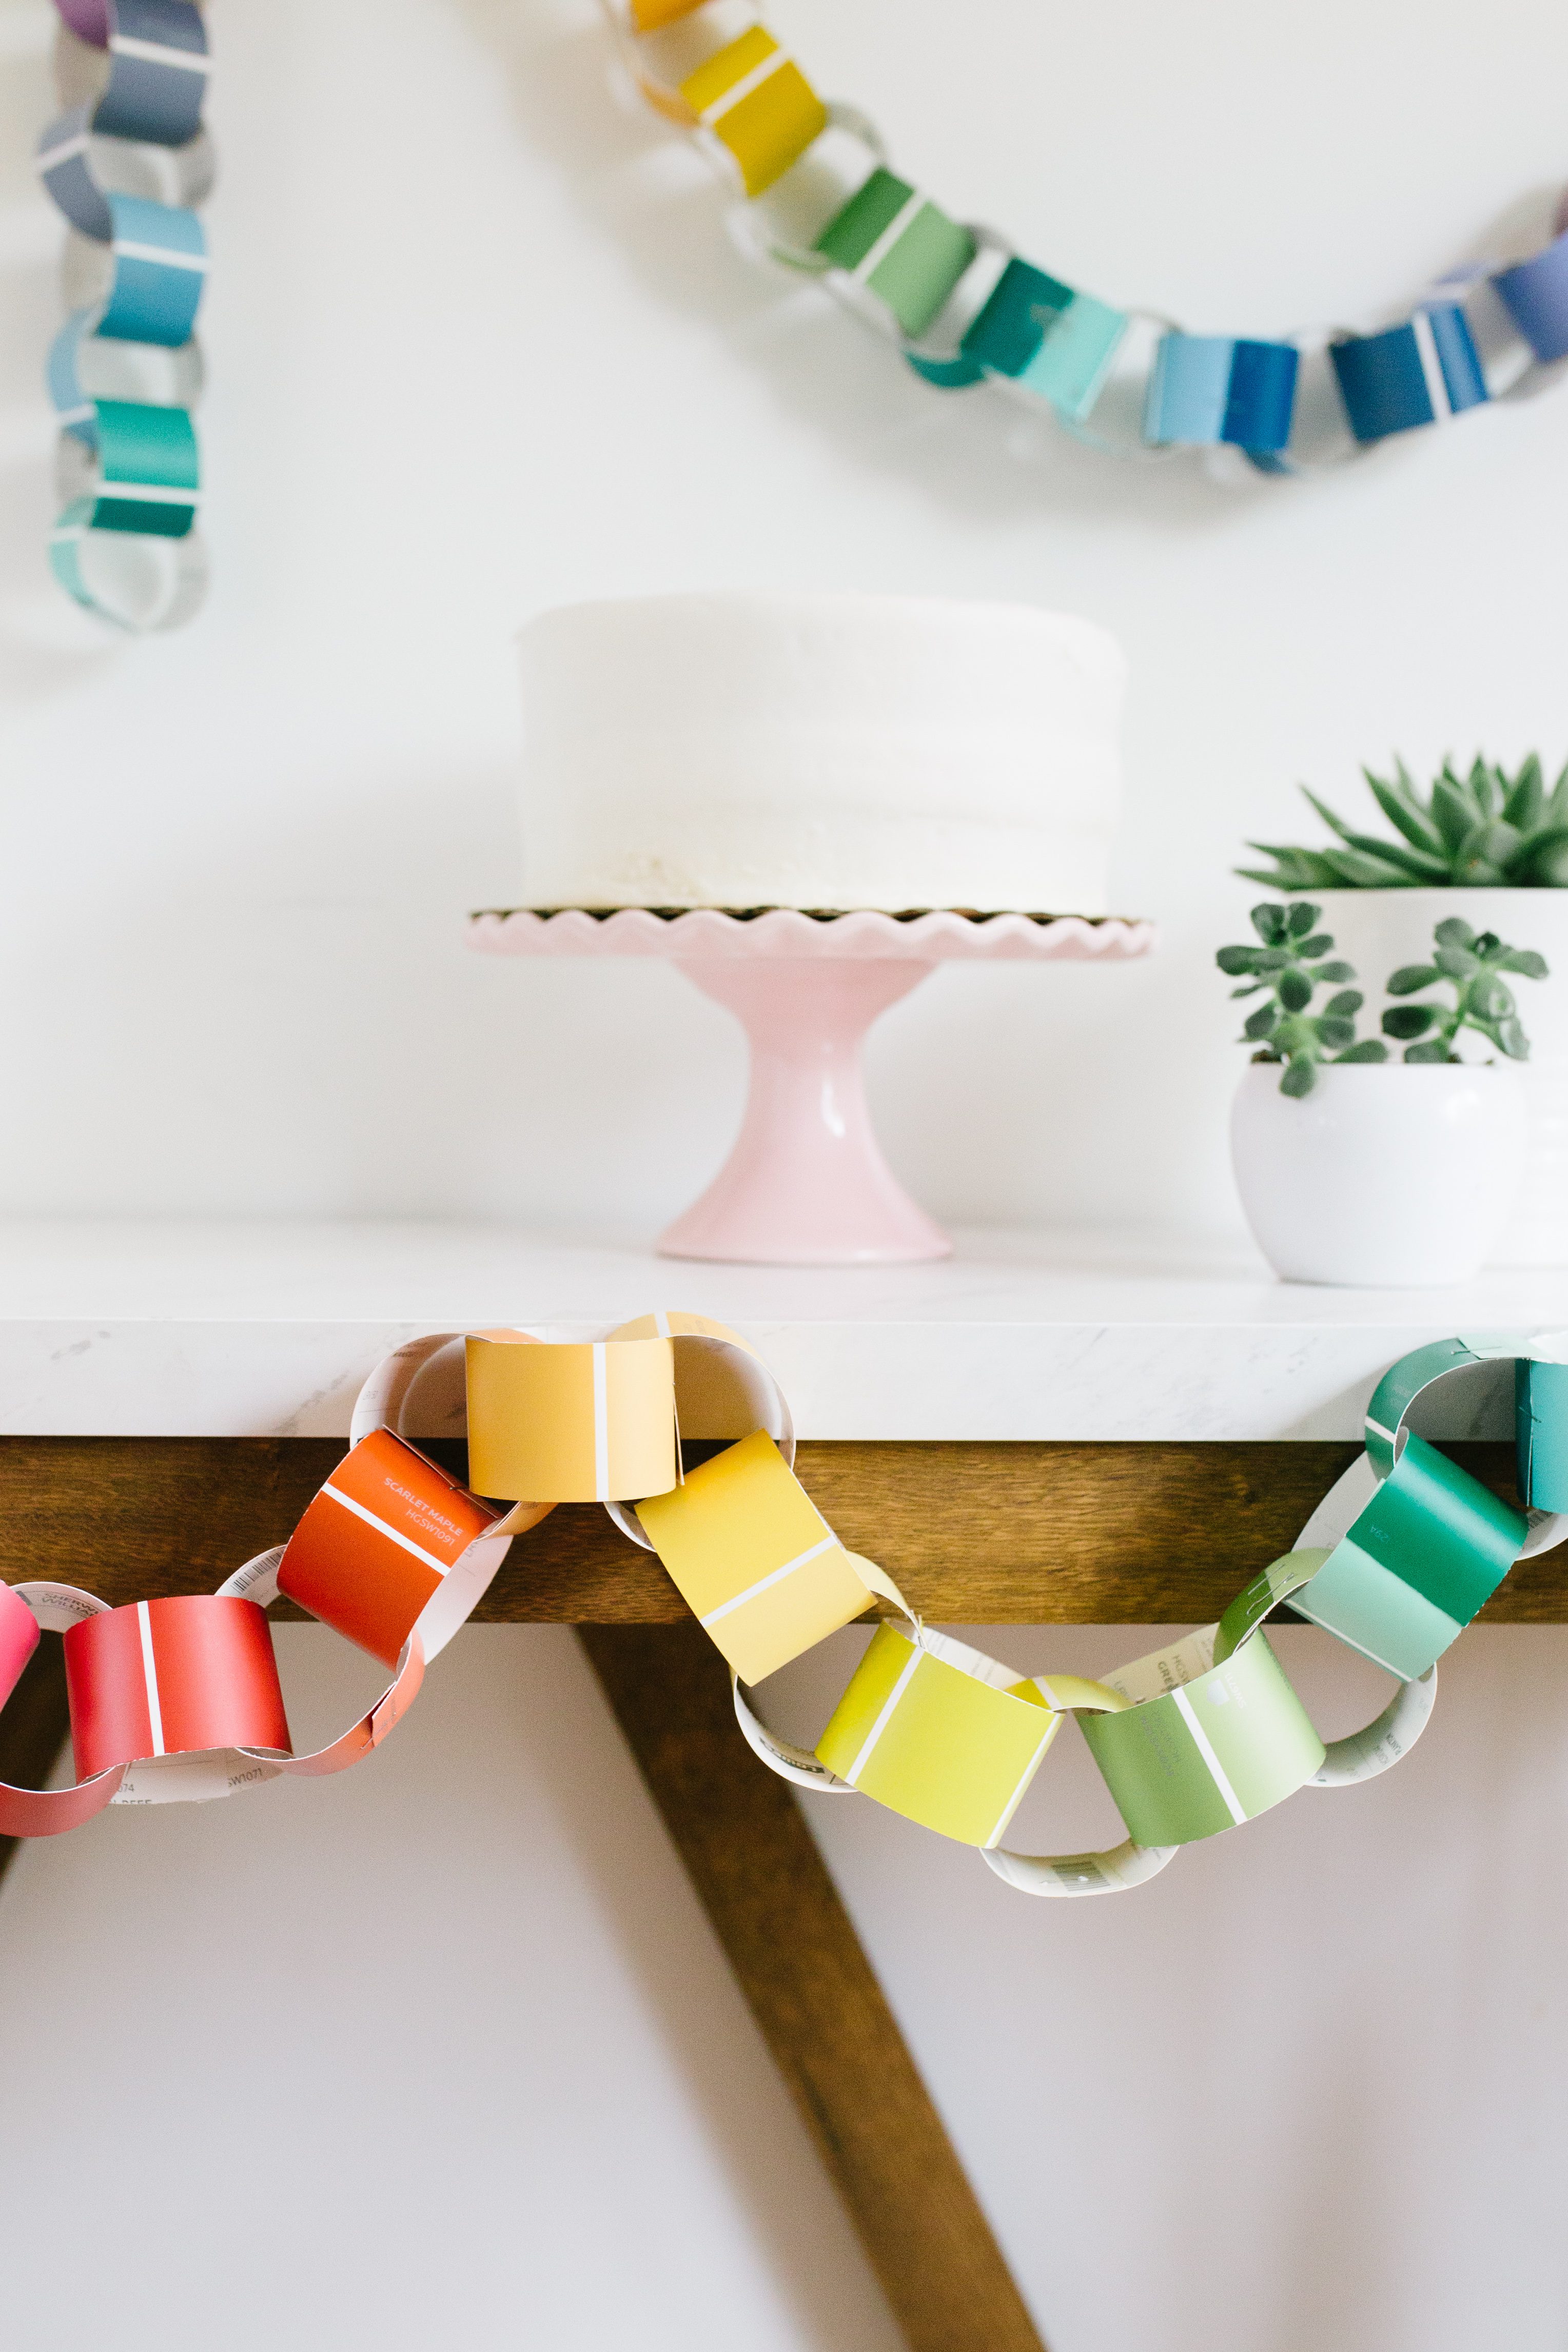
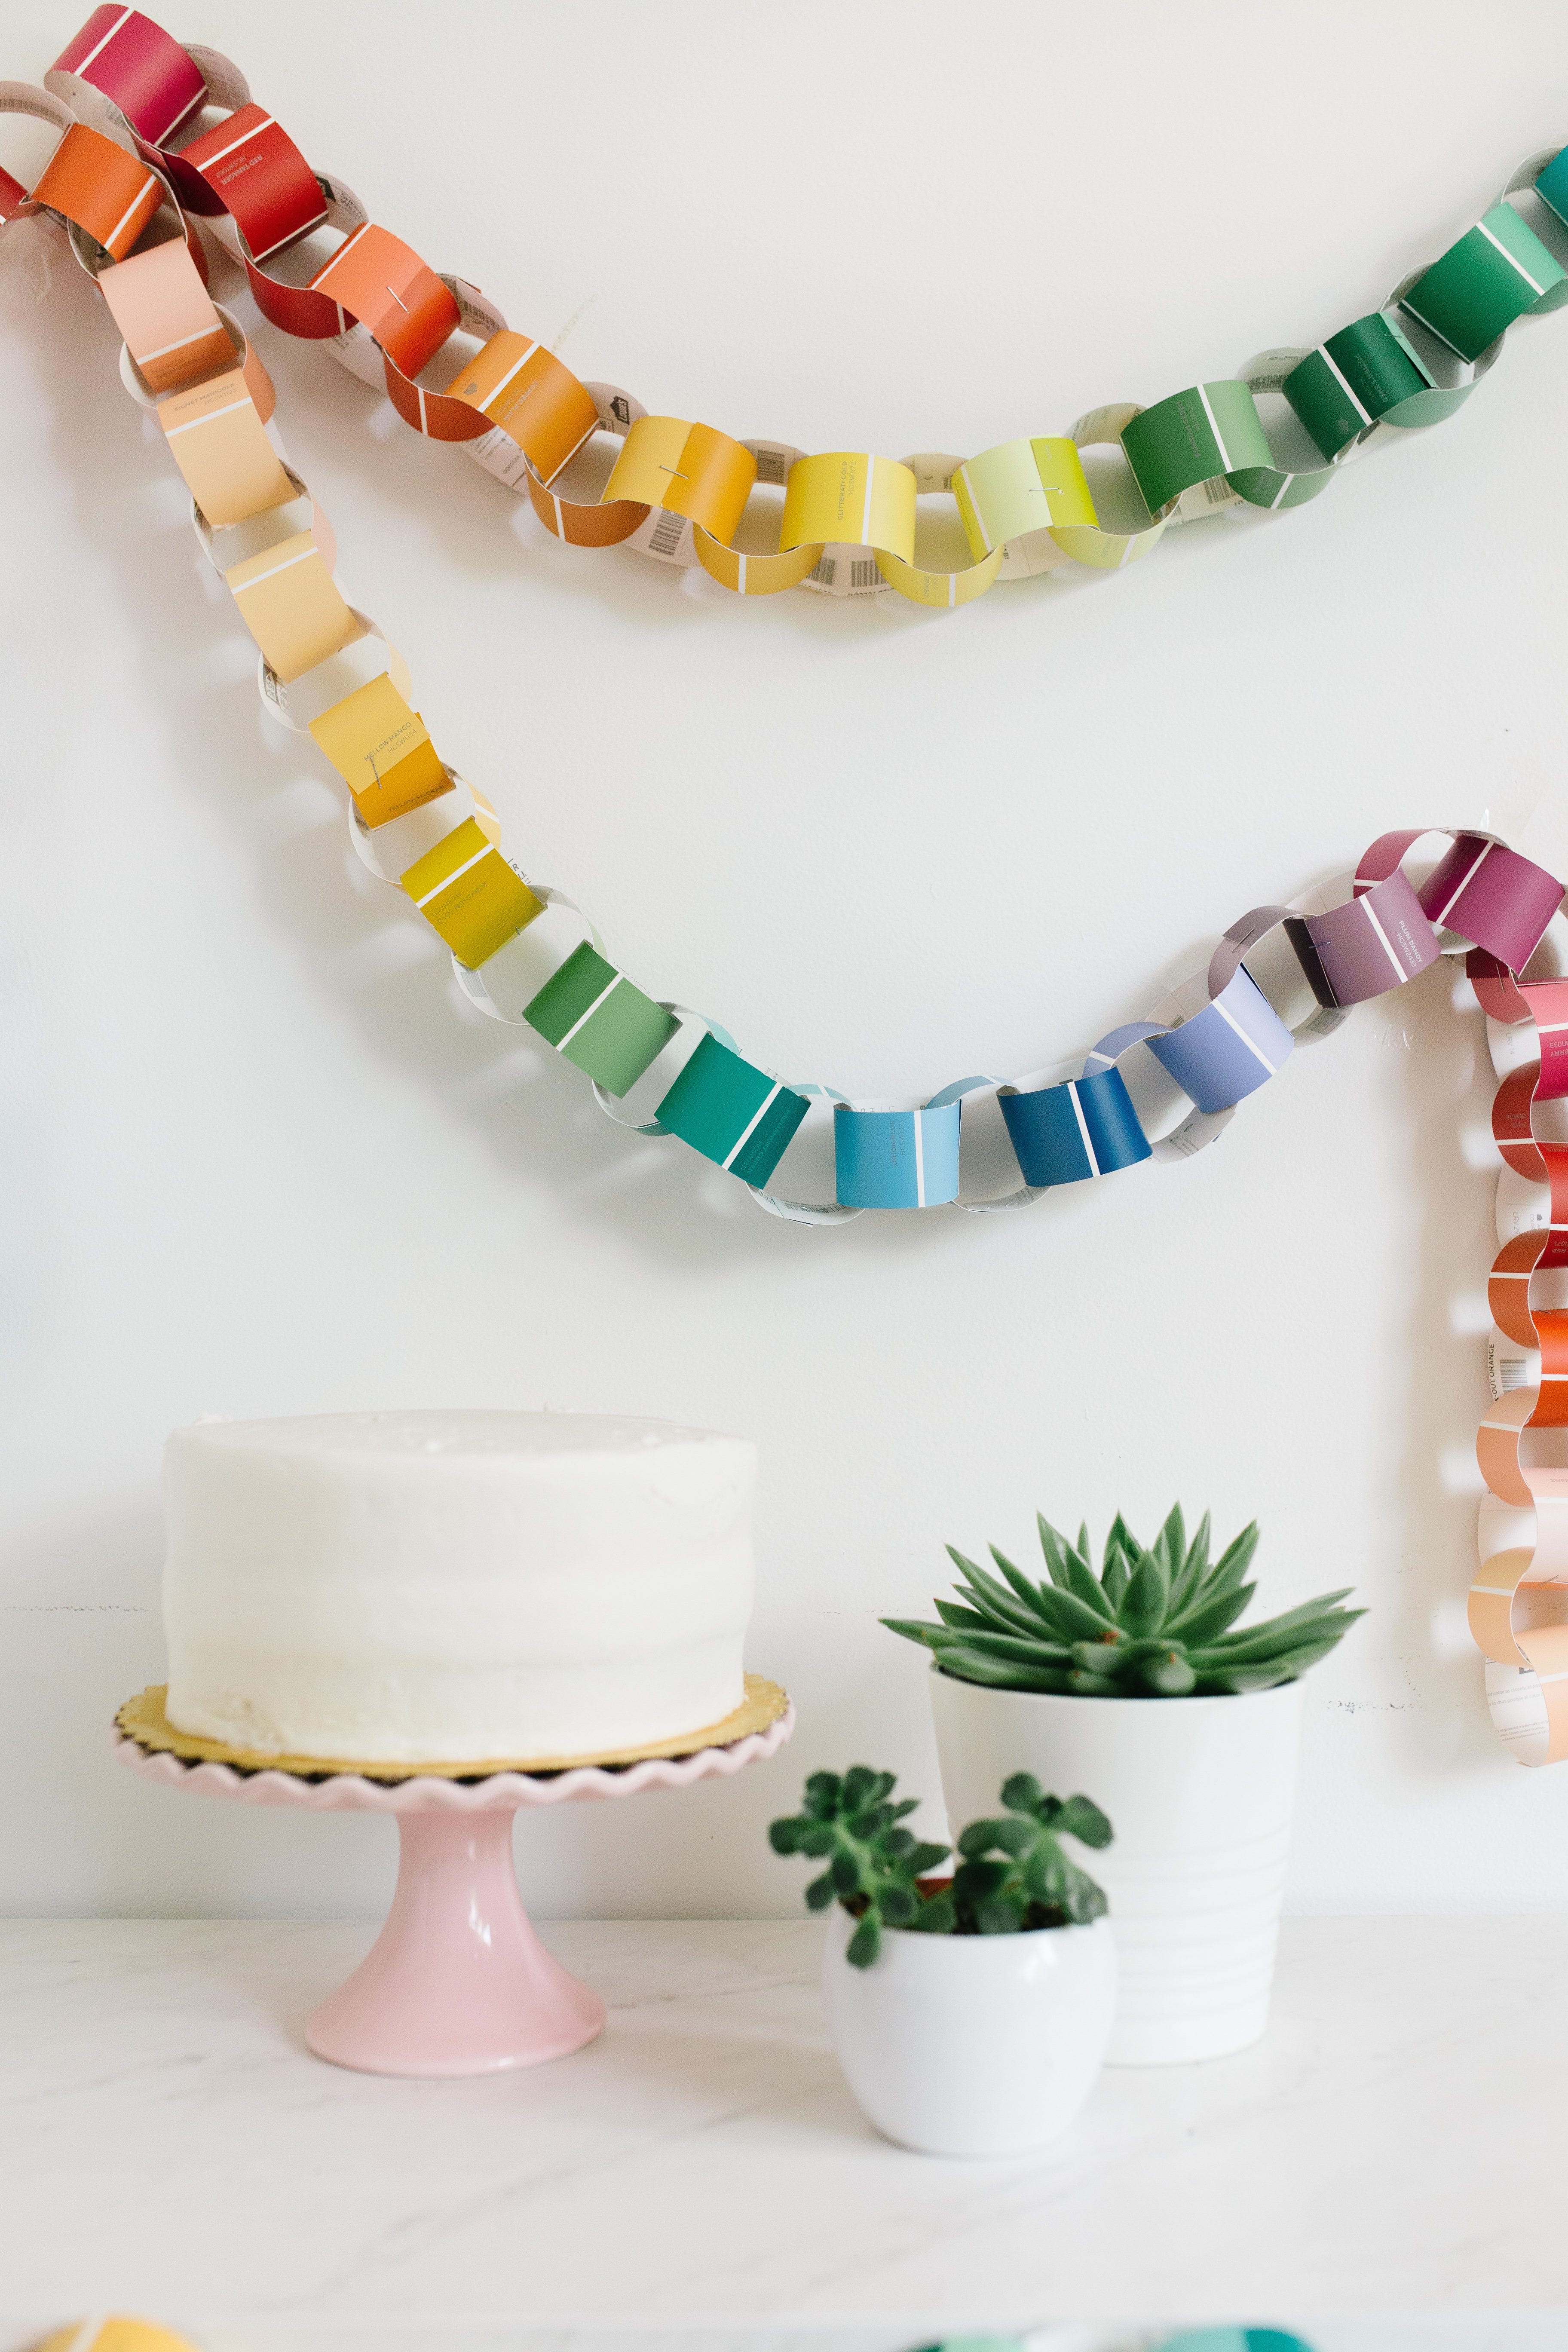
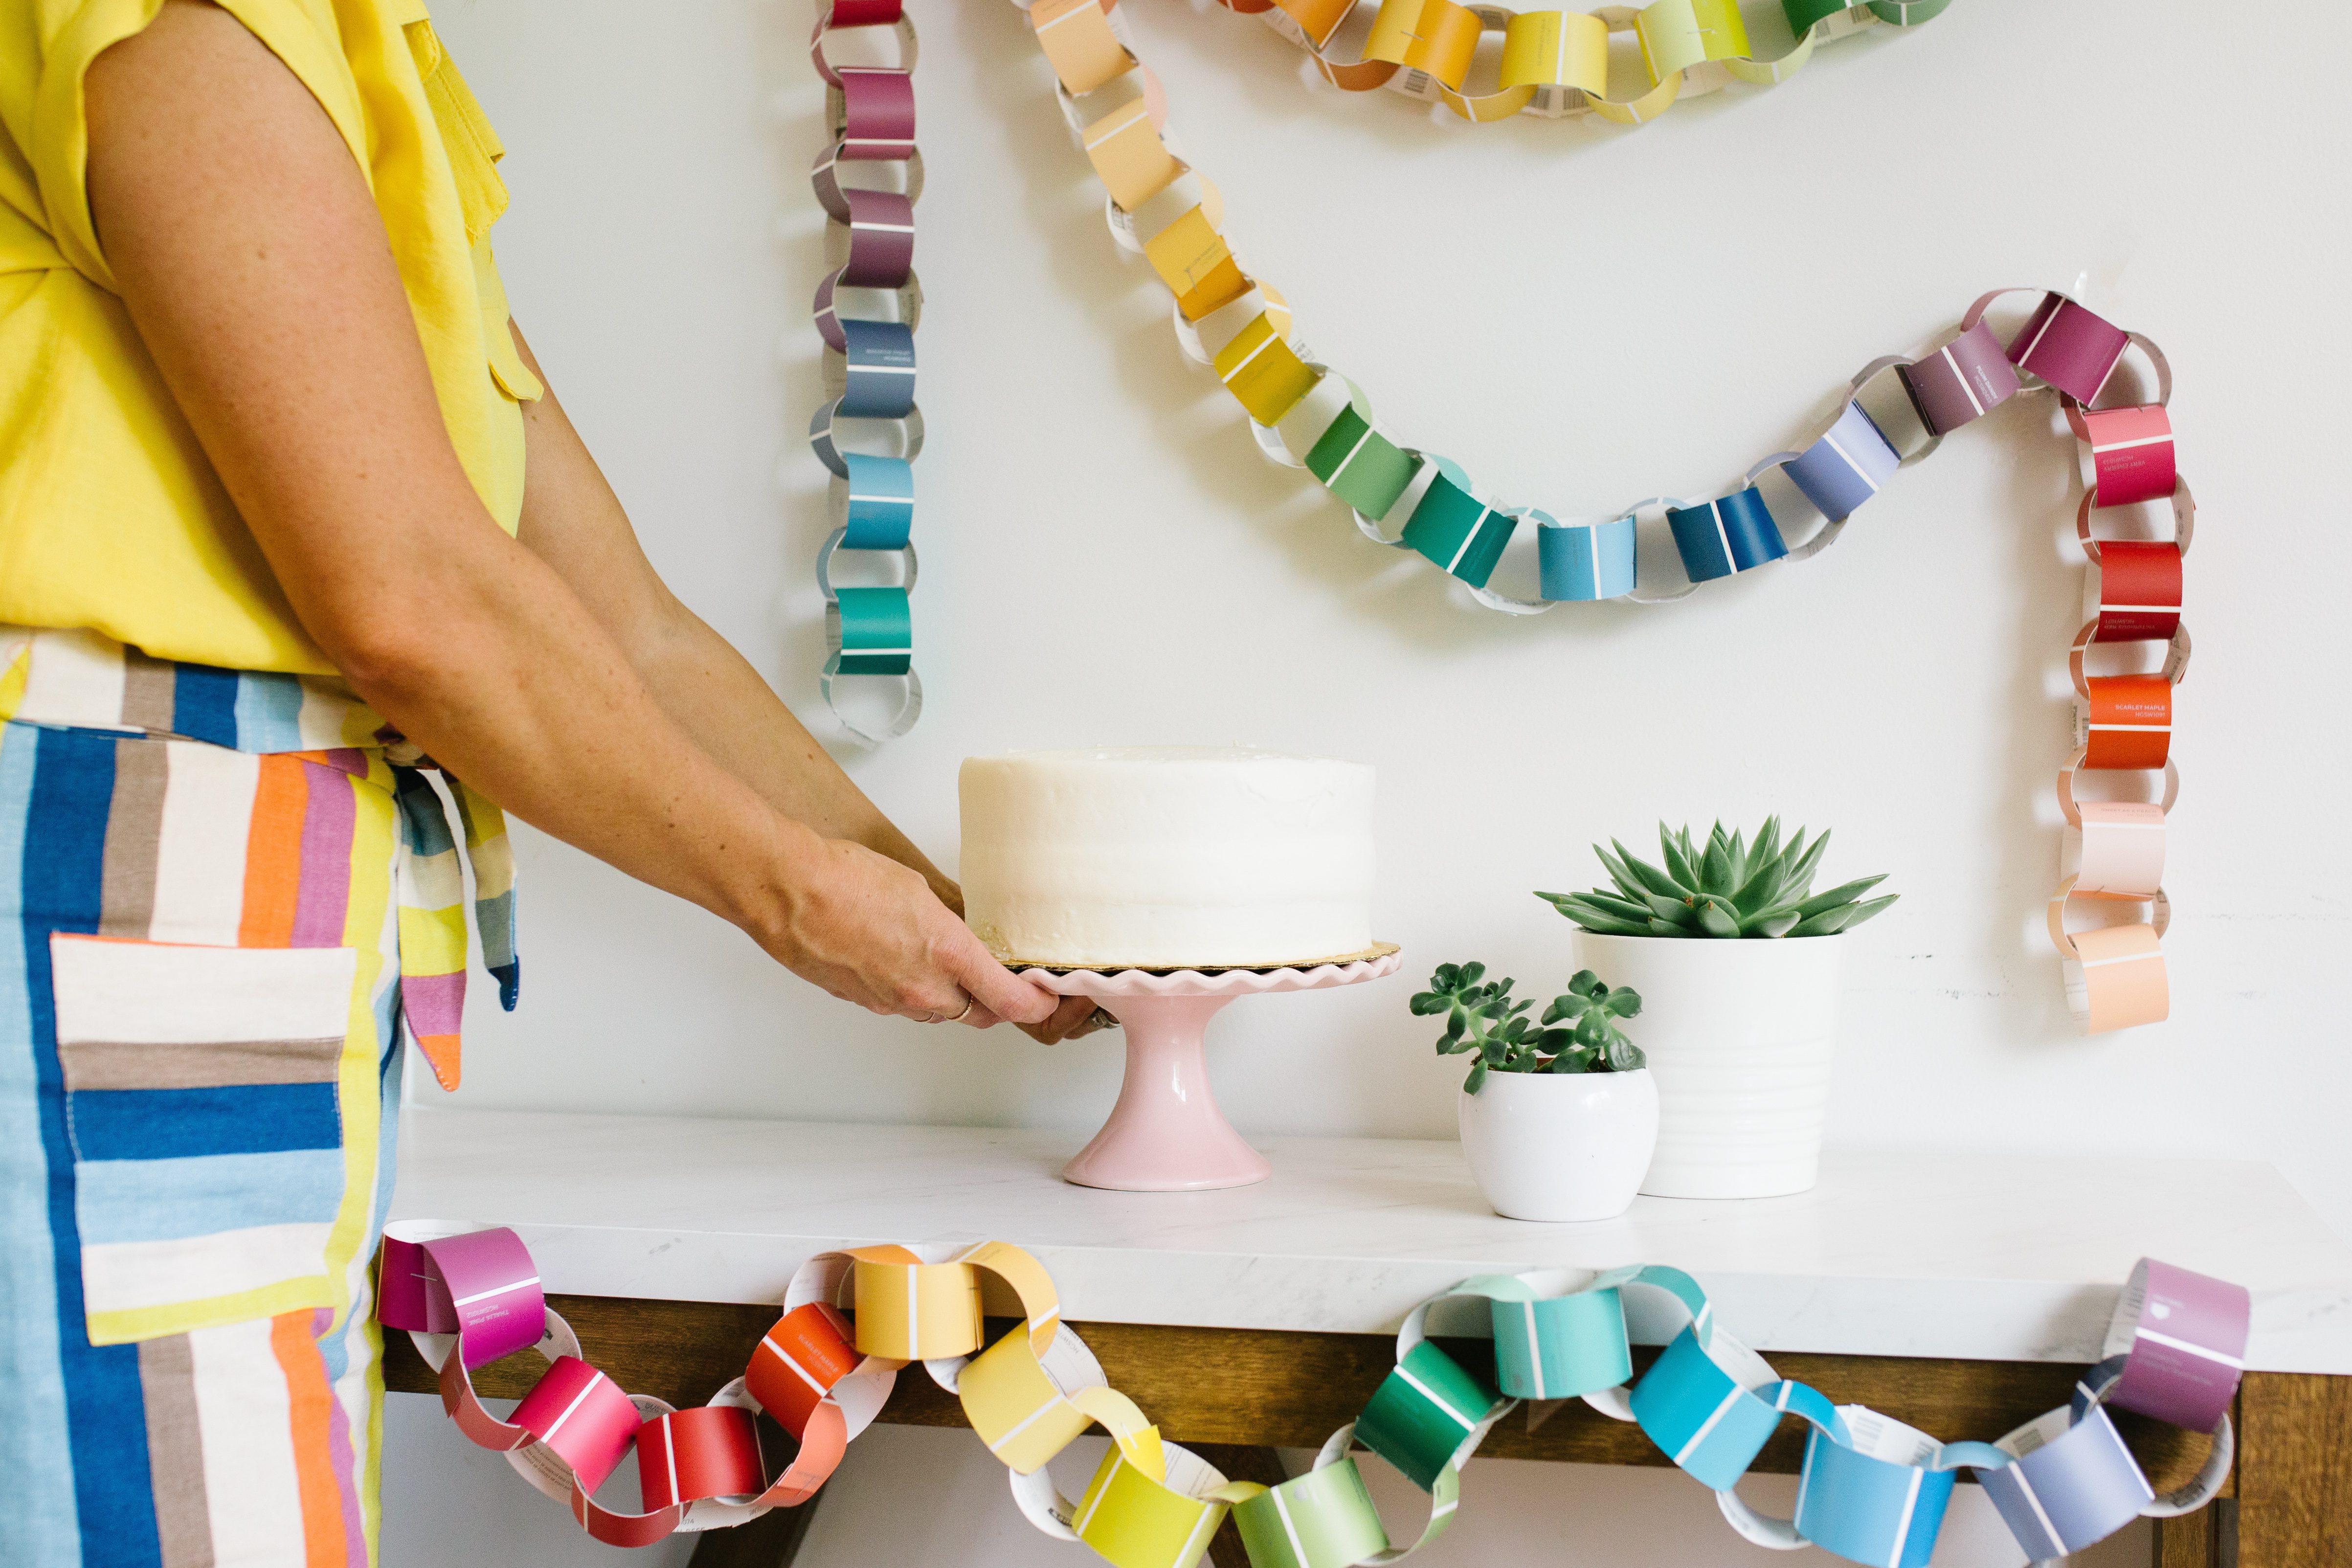
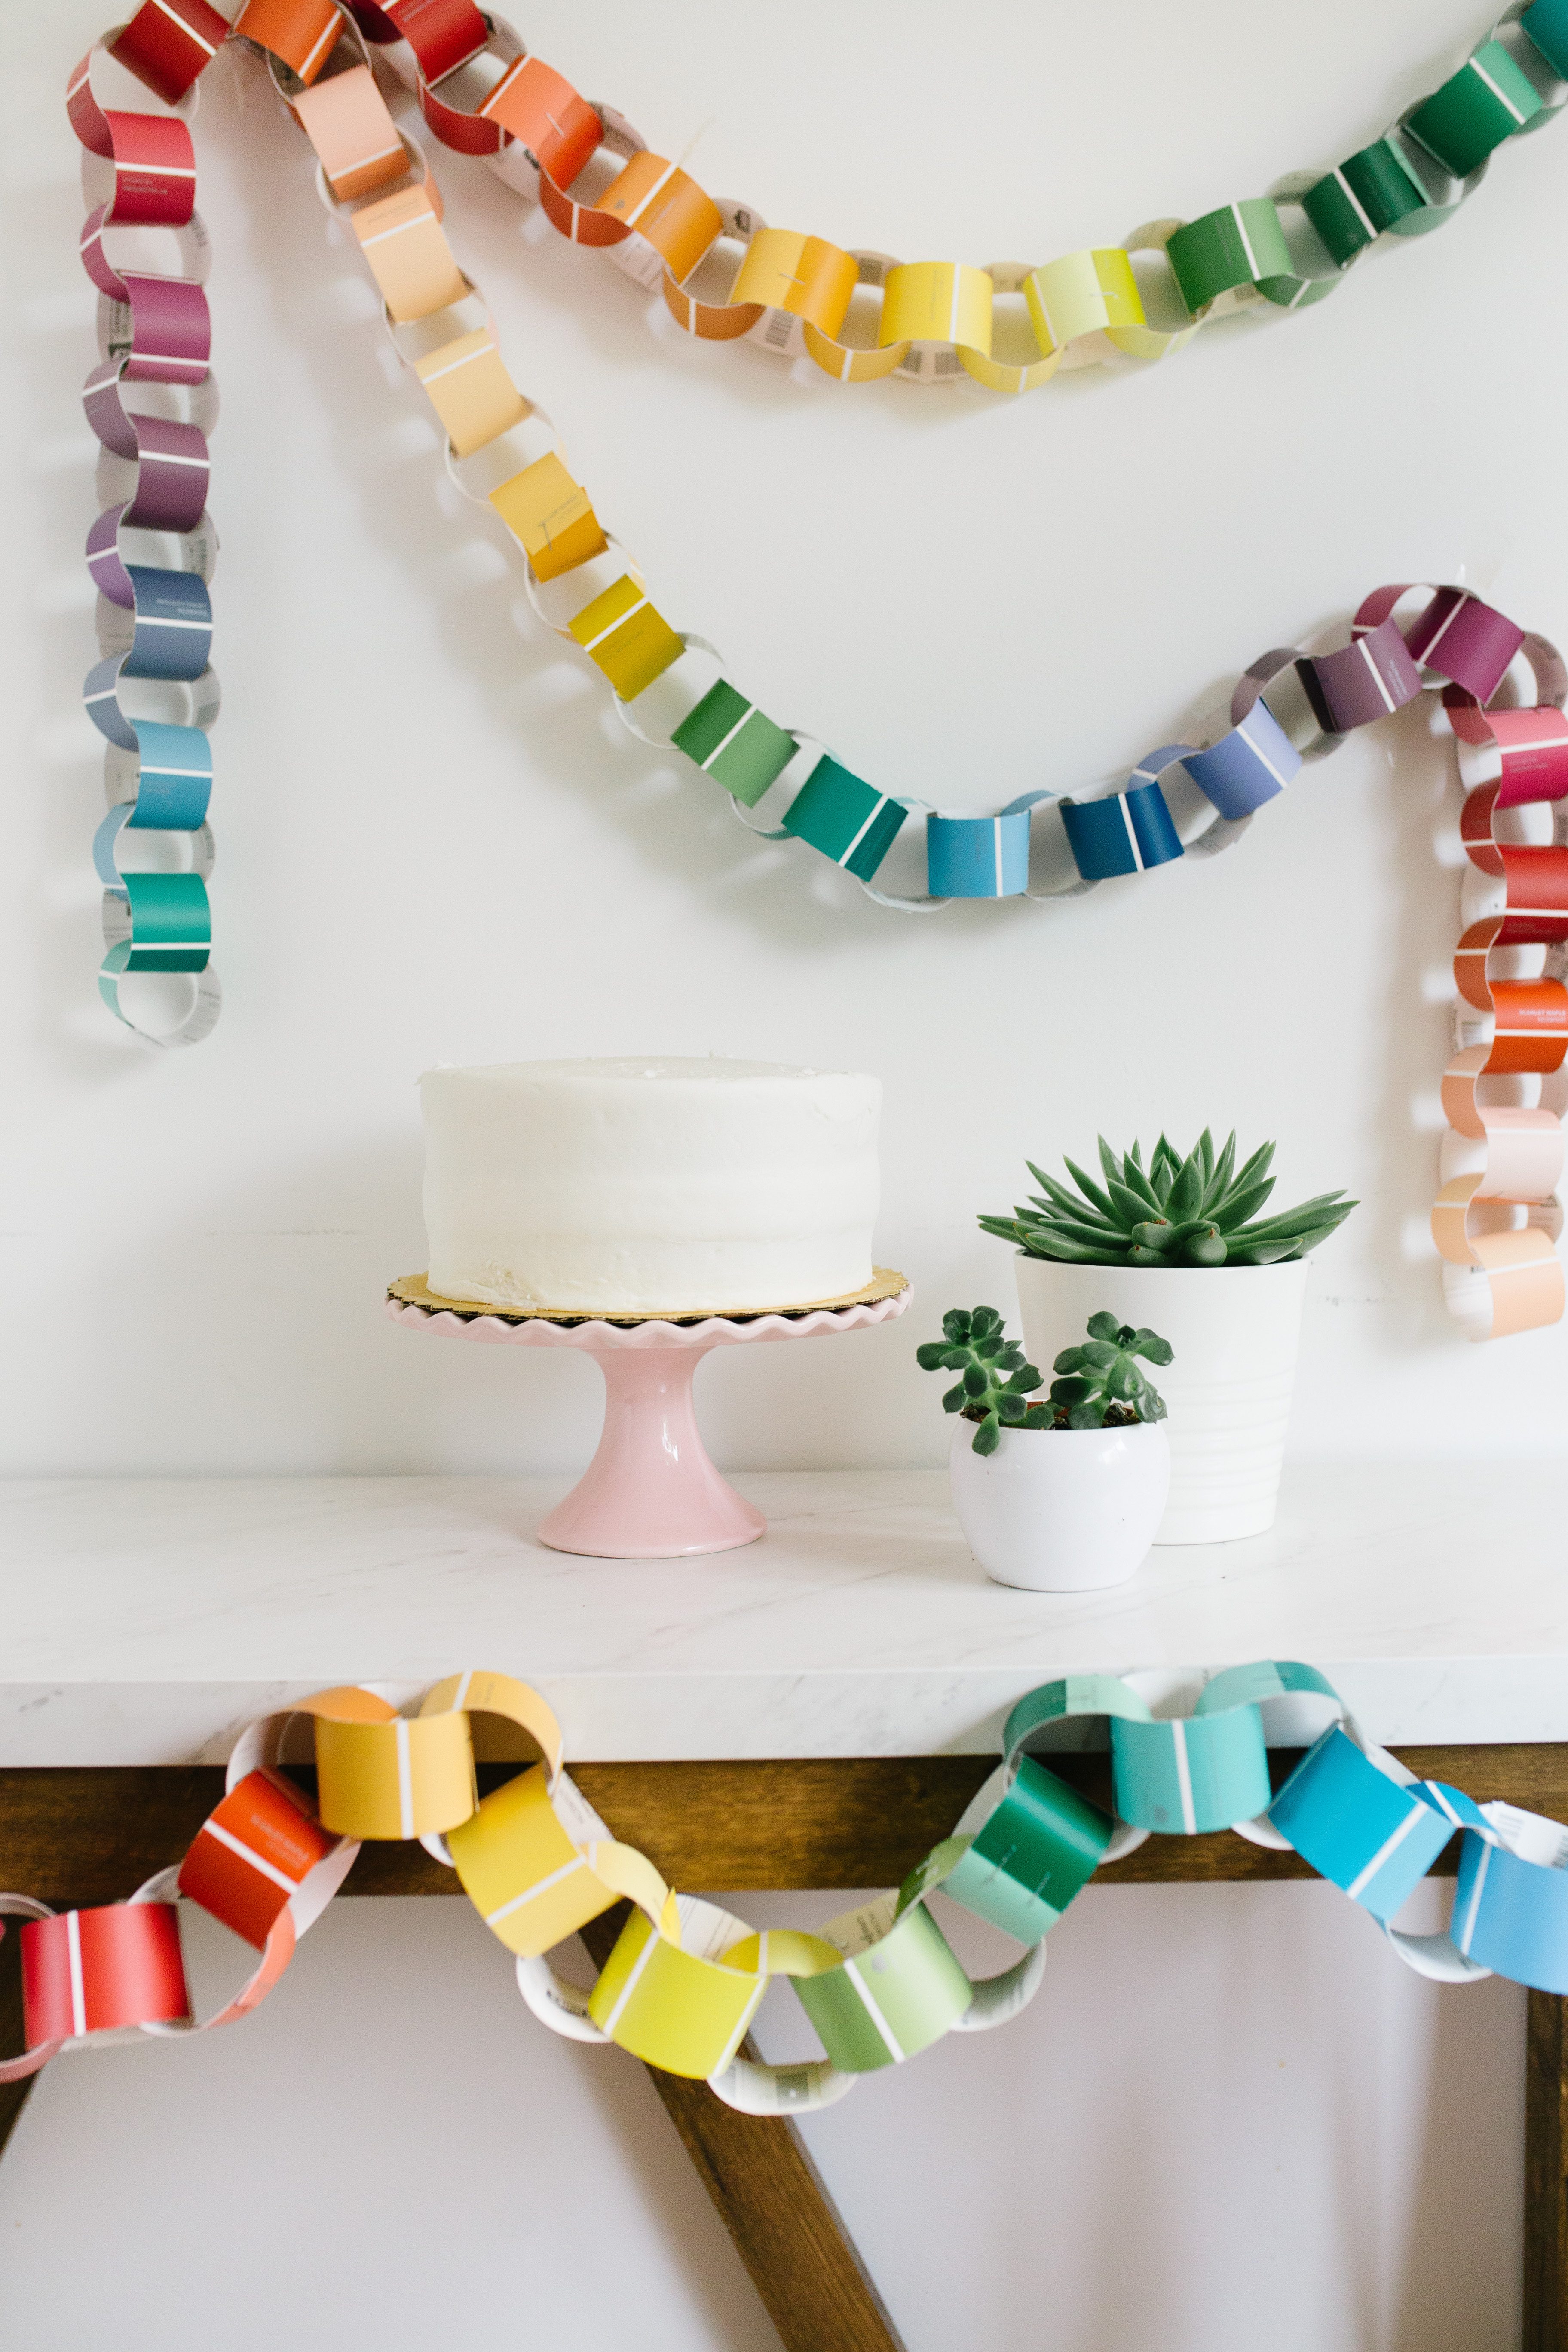
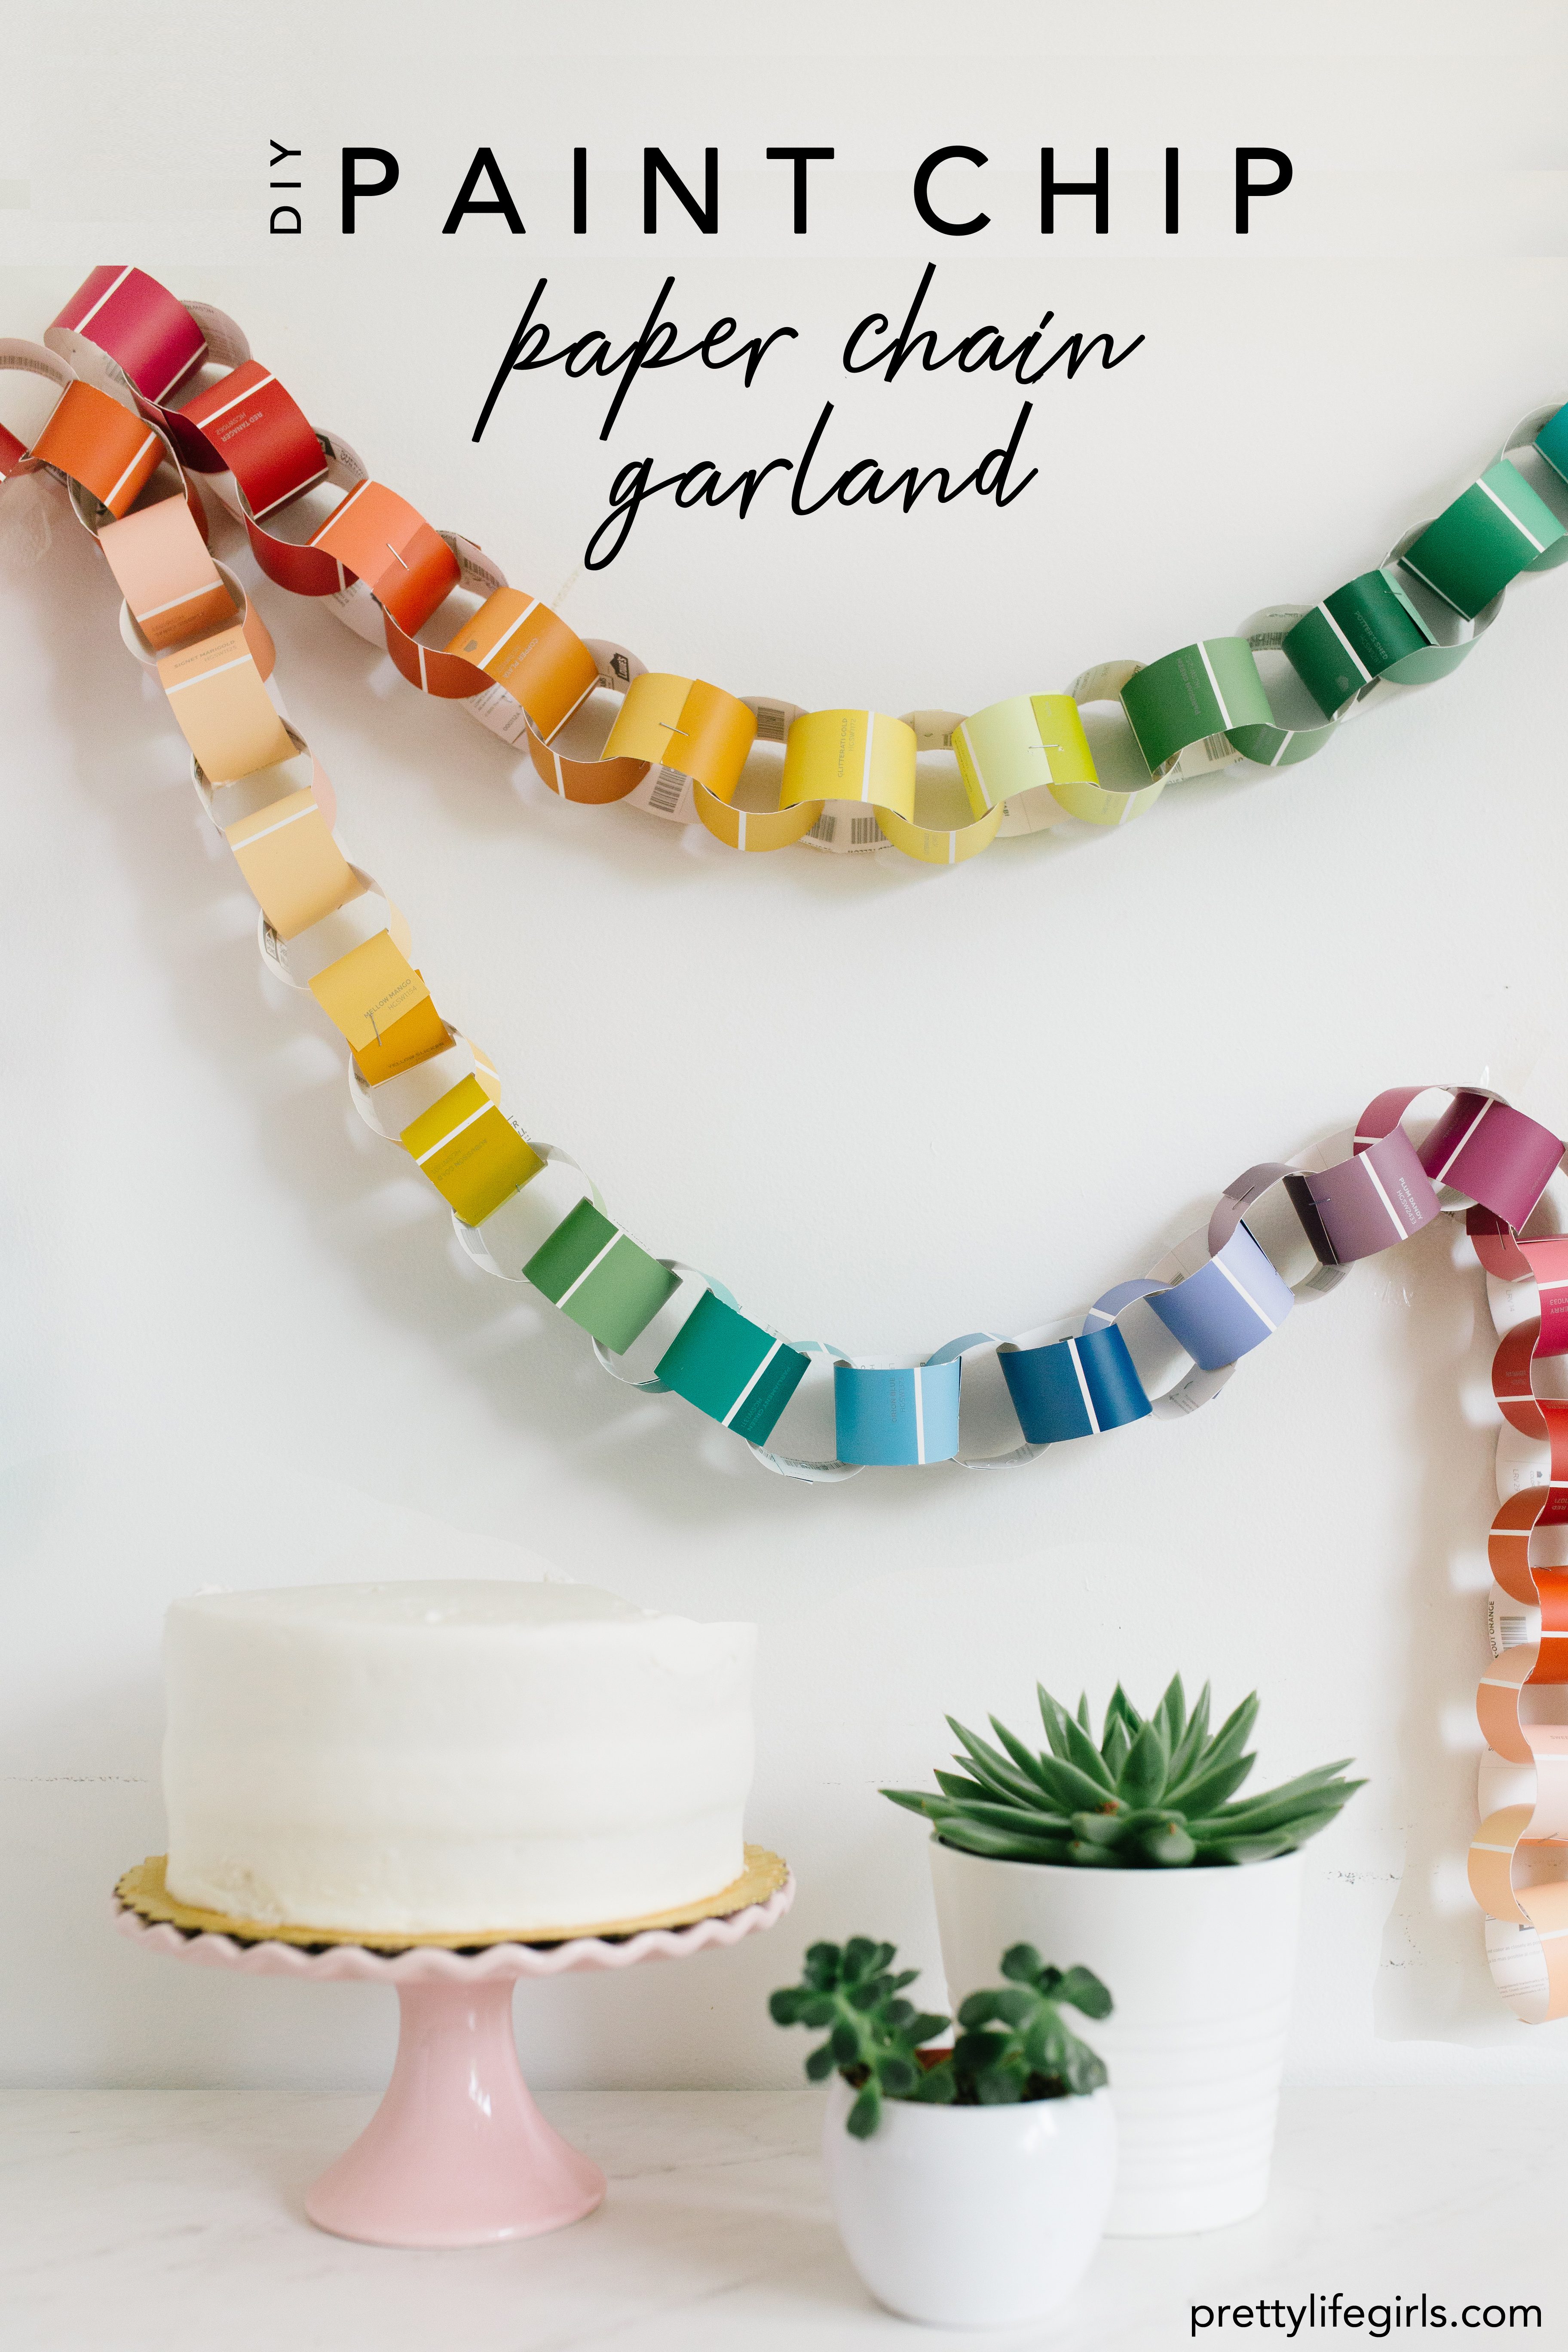
If you caught our segment on Studio 5 last month, or if you have been keeping up with us on Instagram then you know that we are crazy for a good paper chain right now. Put them on your wall, hang them at a party, drape yourself in them and make. a. statement. We don’t care what you do with them, we just want you to get some folding + gluing in your life ASAP so you can see how fun these cuties can be. SO, now that we have shown you how to make the perfect paper chain backdrop (find them here and here) and a wonderful wall hanging (right here), we are going to show you another fun way to chain it up with a DIY Paint Chip Paper Chain Garland!
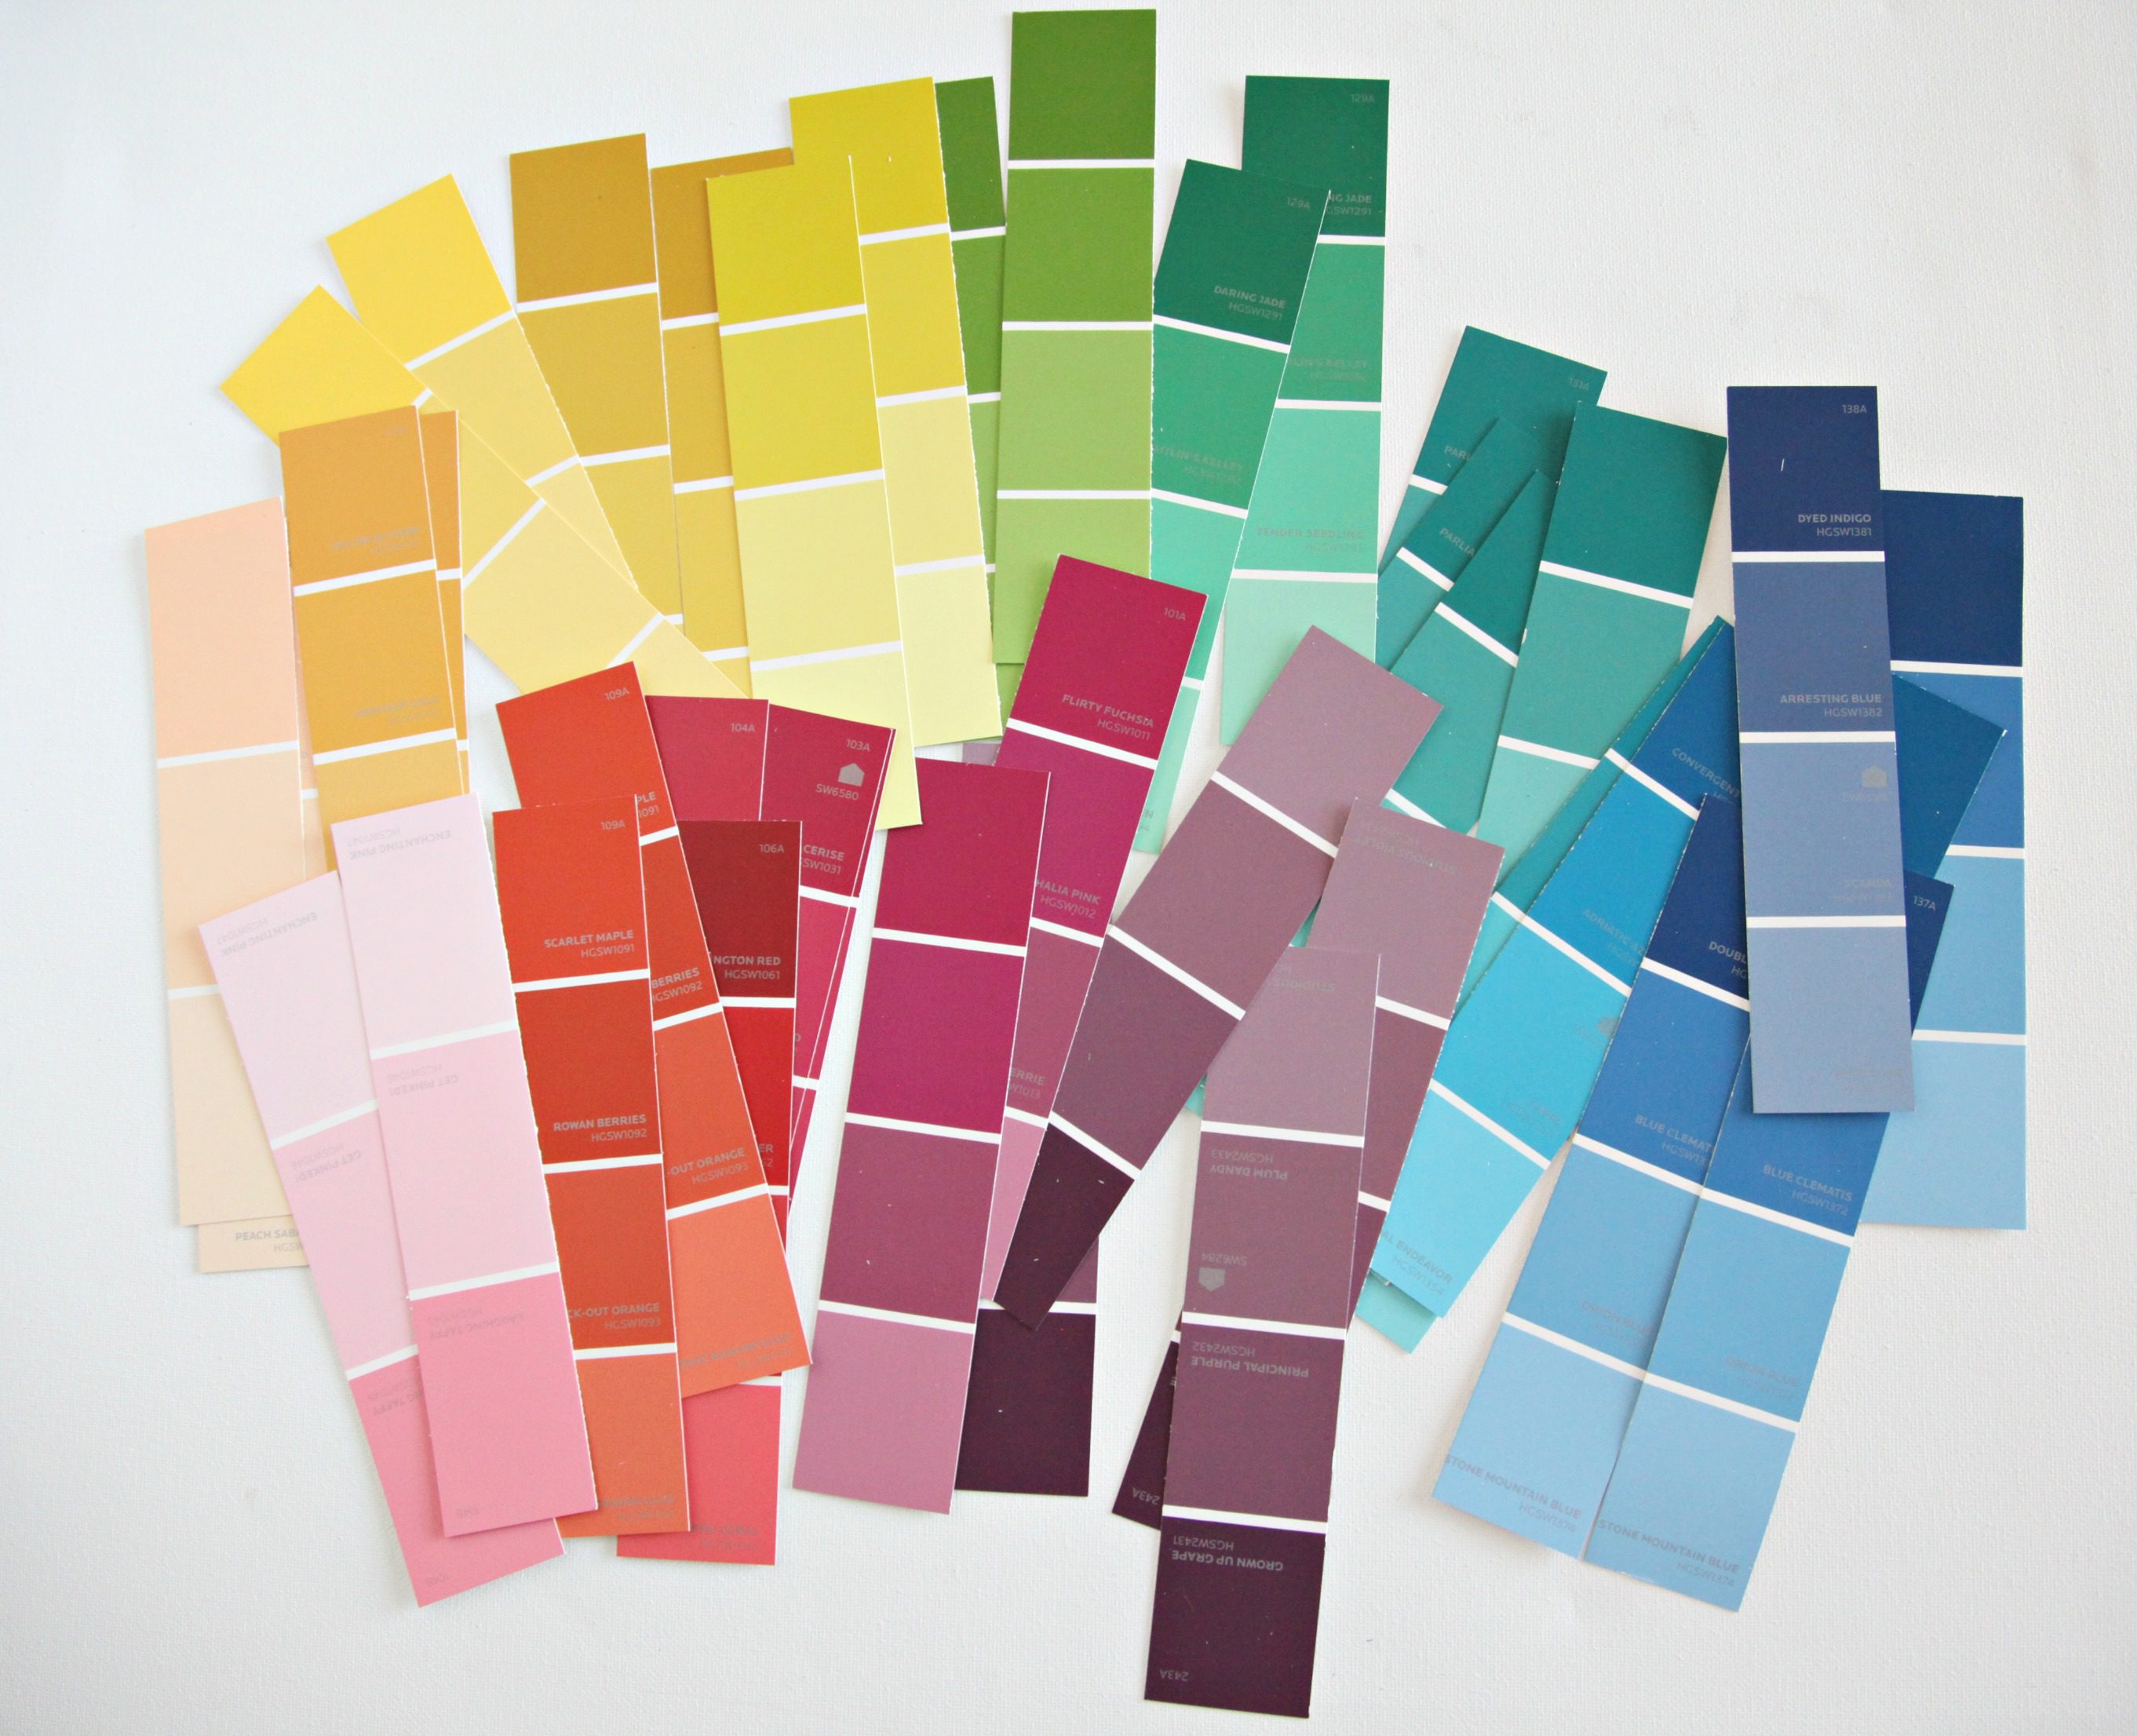
We love this one for many reasons but a big reason has got to be affordability! Buying decor for a party can really add up and this is a free way to make a big impact! Plus, the color scheme possibilities are endless and LOOK at how pretty! Let’s make them!
Supplies needed to make your own paint chip paper chain garland:
Paint chips in desired colors
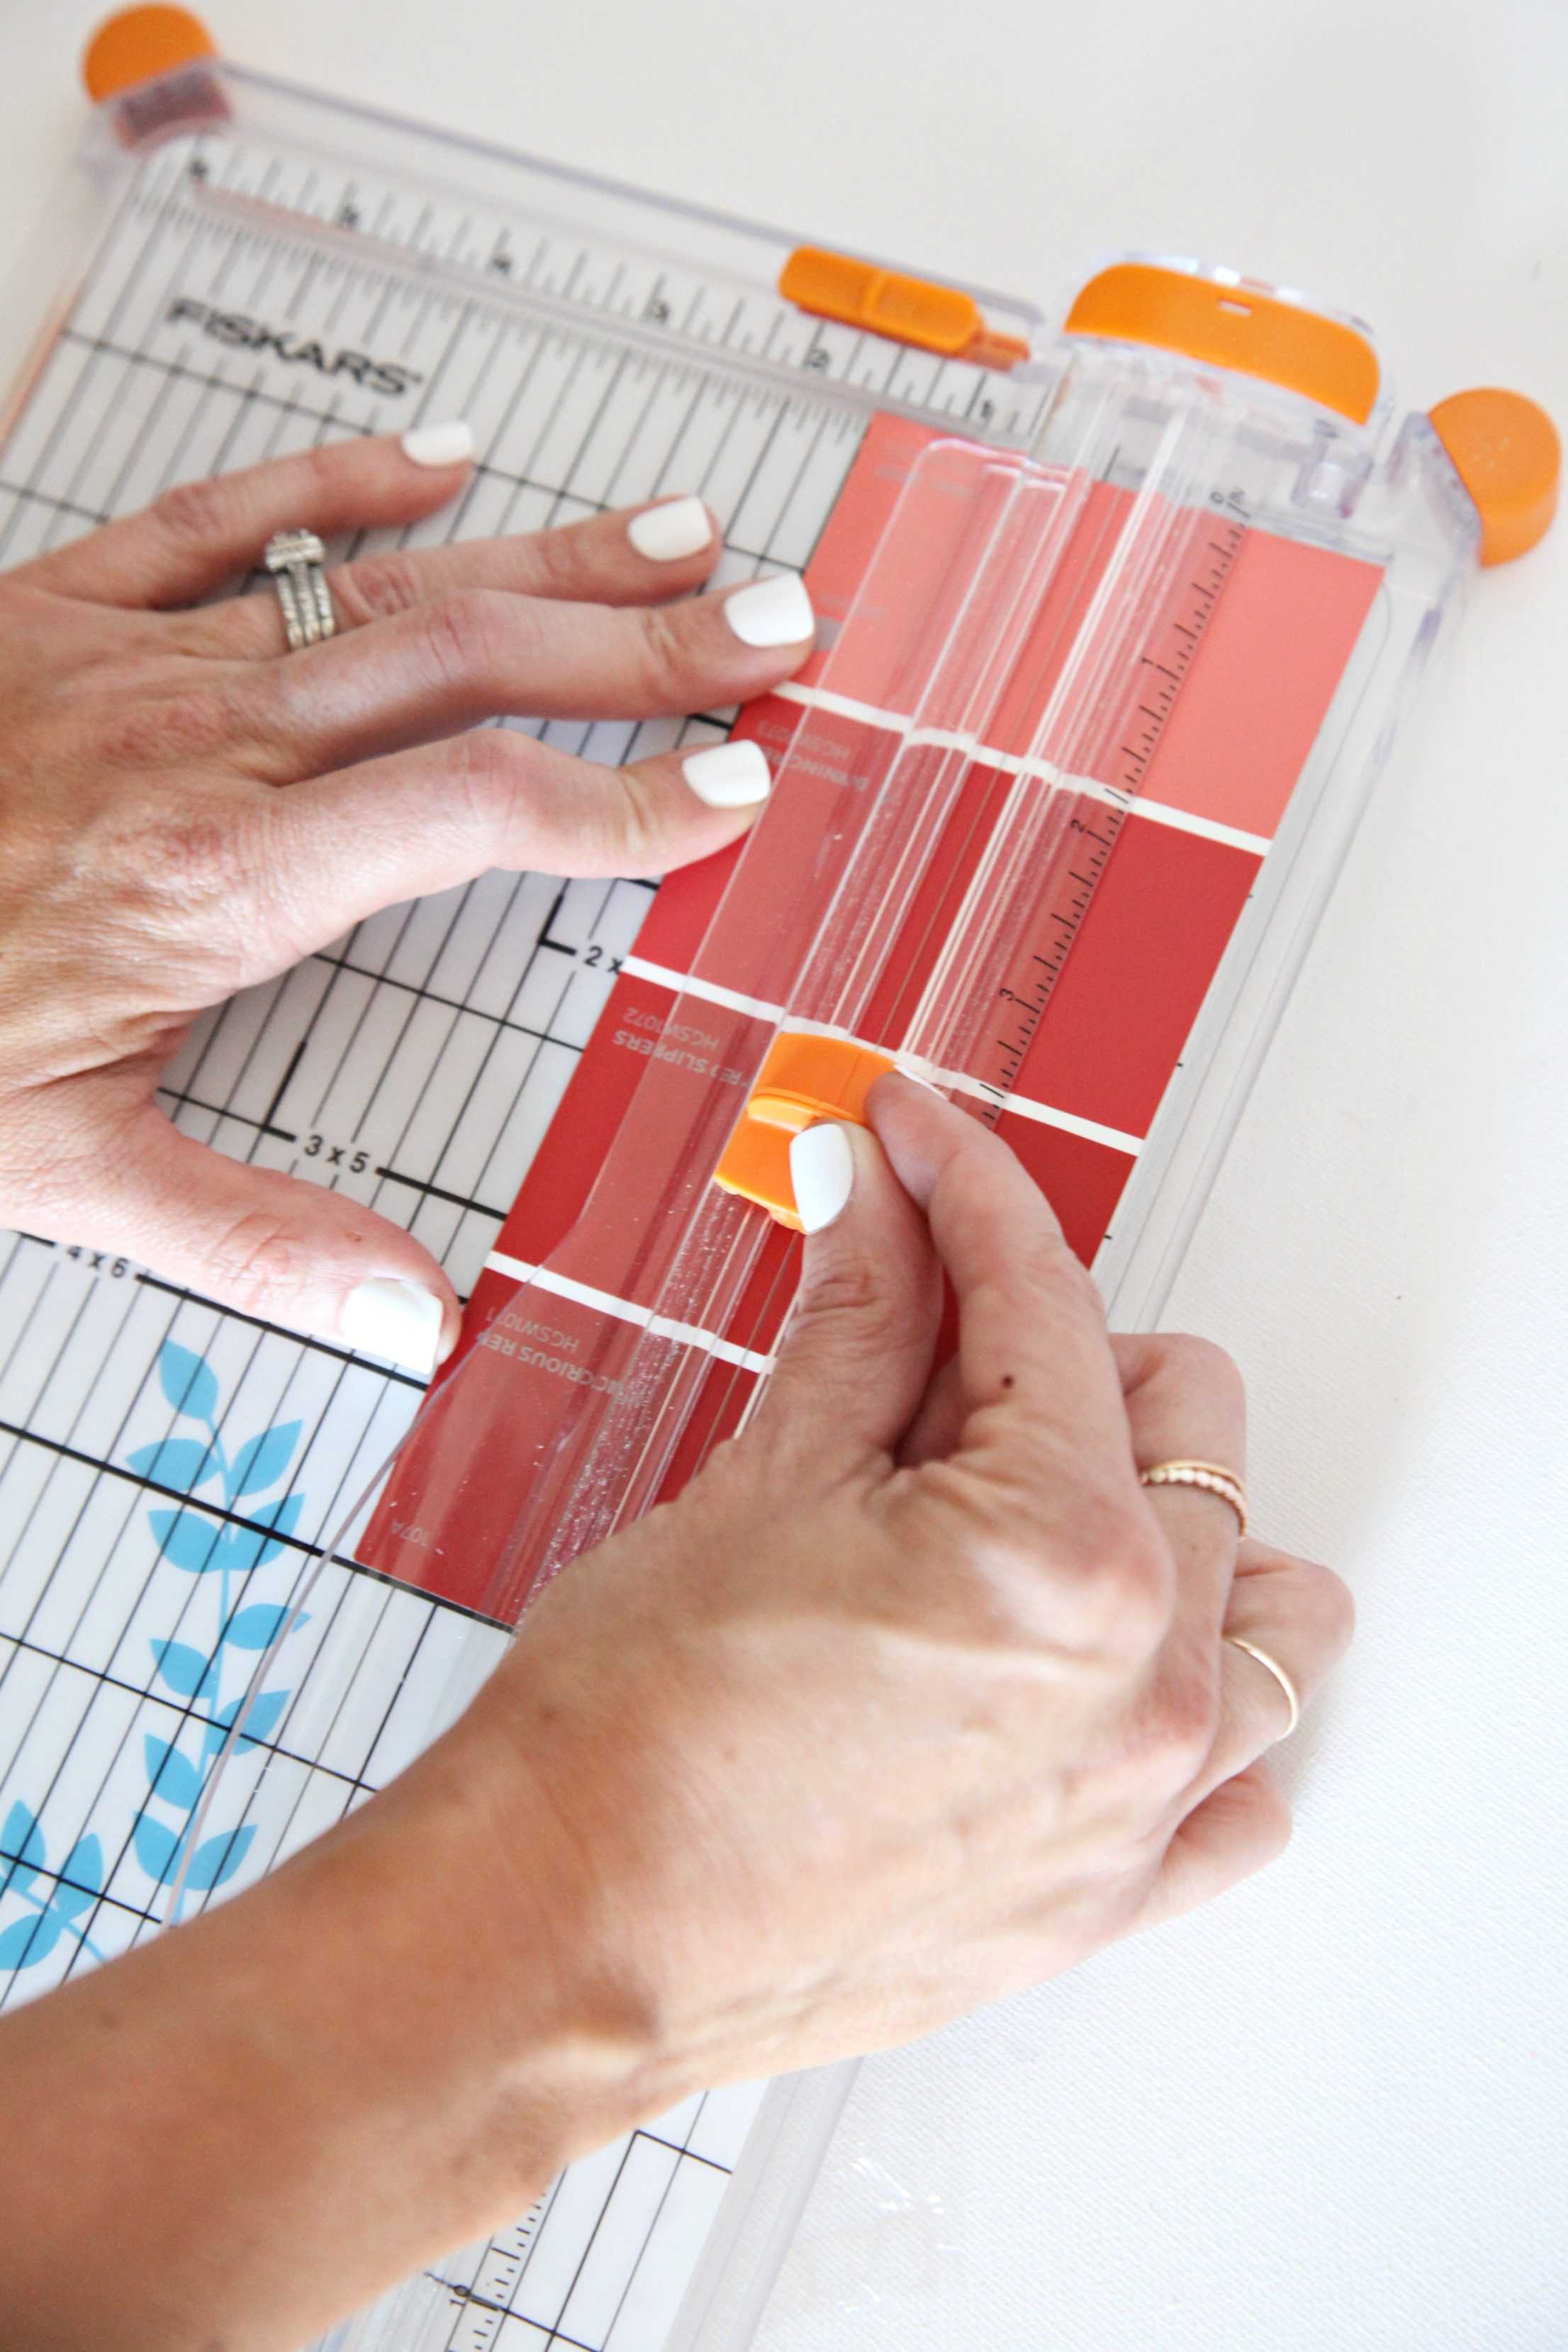
Scissors or Paper Slicer
Stapler + Staples
String or tape for hanging
Step 1: Using a paper slicer or scissors, cut the paint chips to the desired size. (Ours were about 1.5 inches wide) Tip: It’s so easiest to pick paint chips that are already a rectangular shape so that all you have to do is slice them in half!
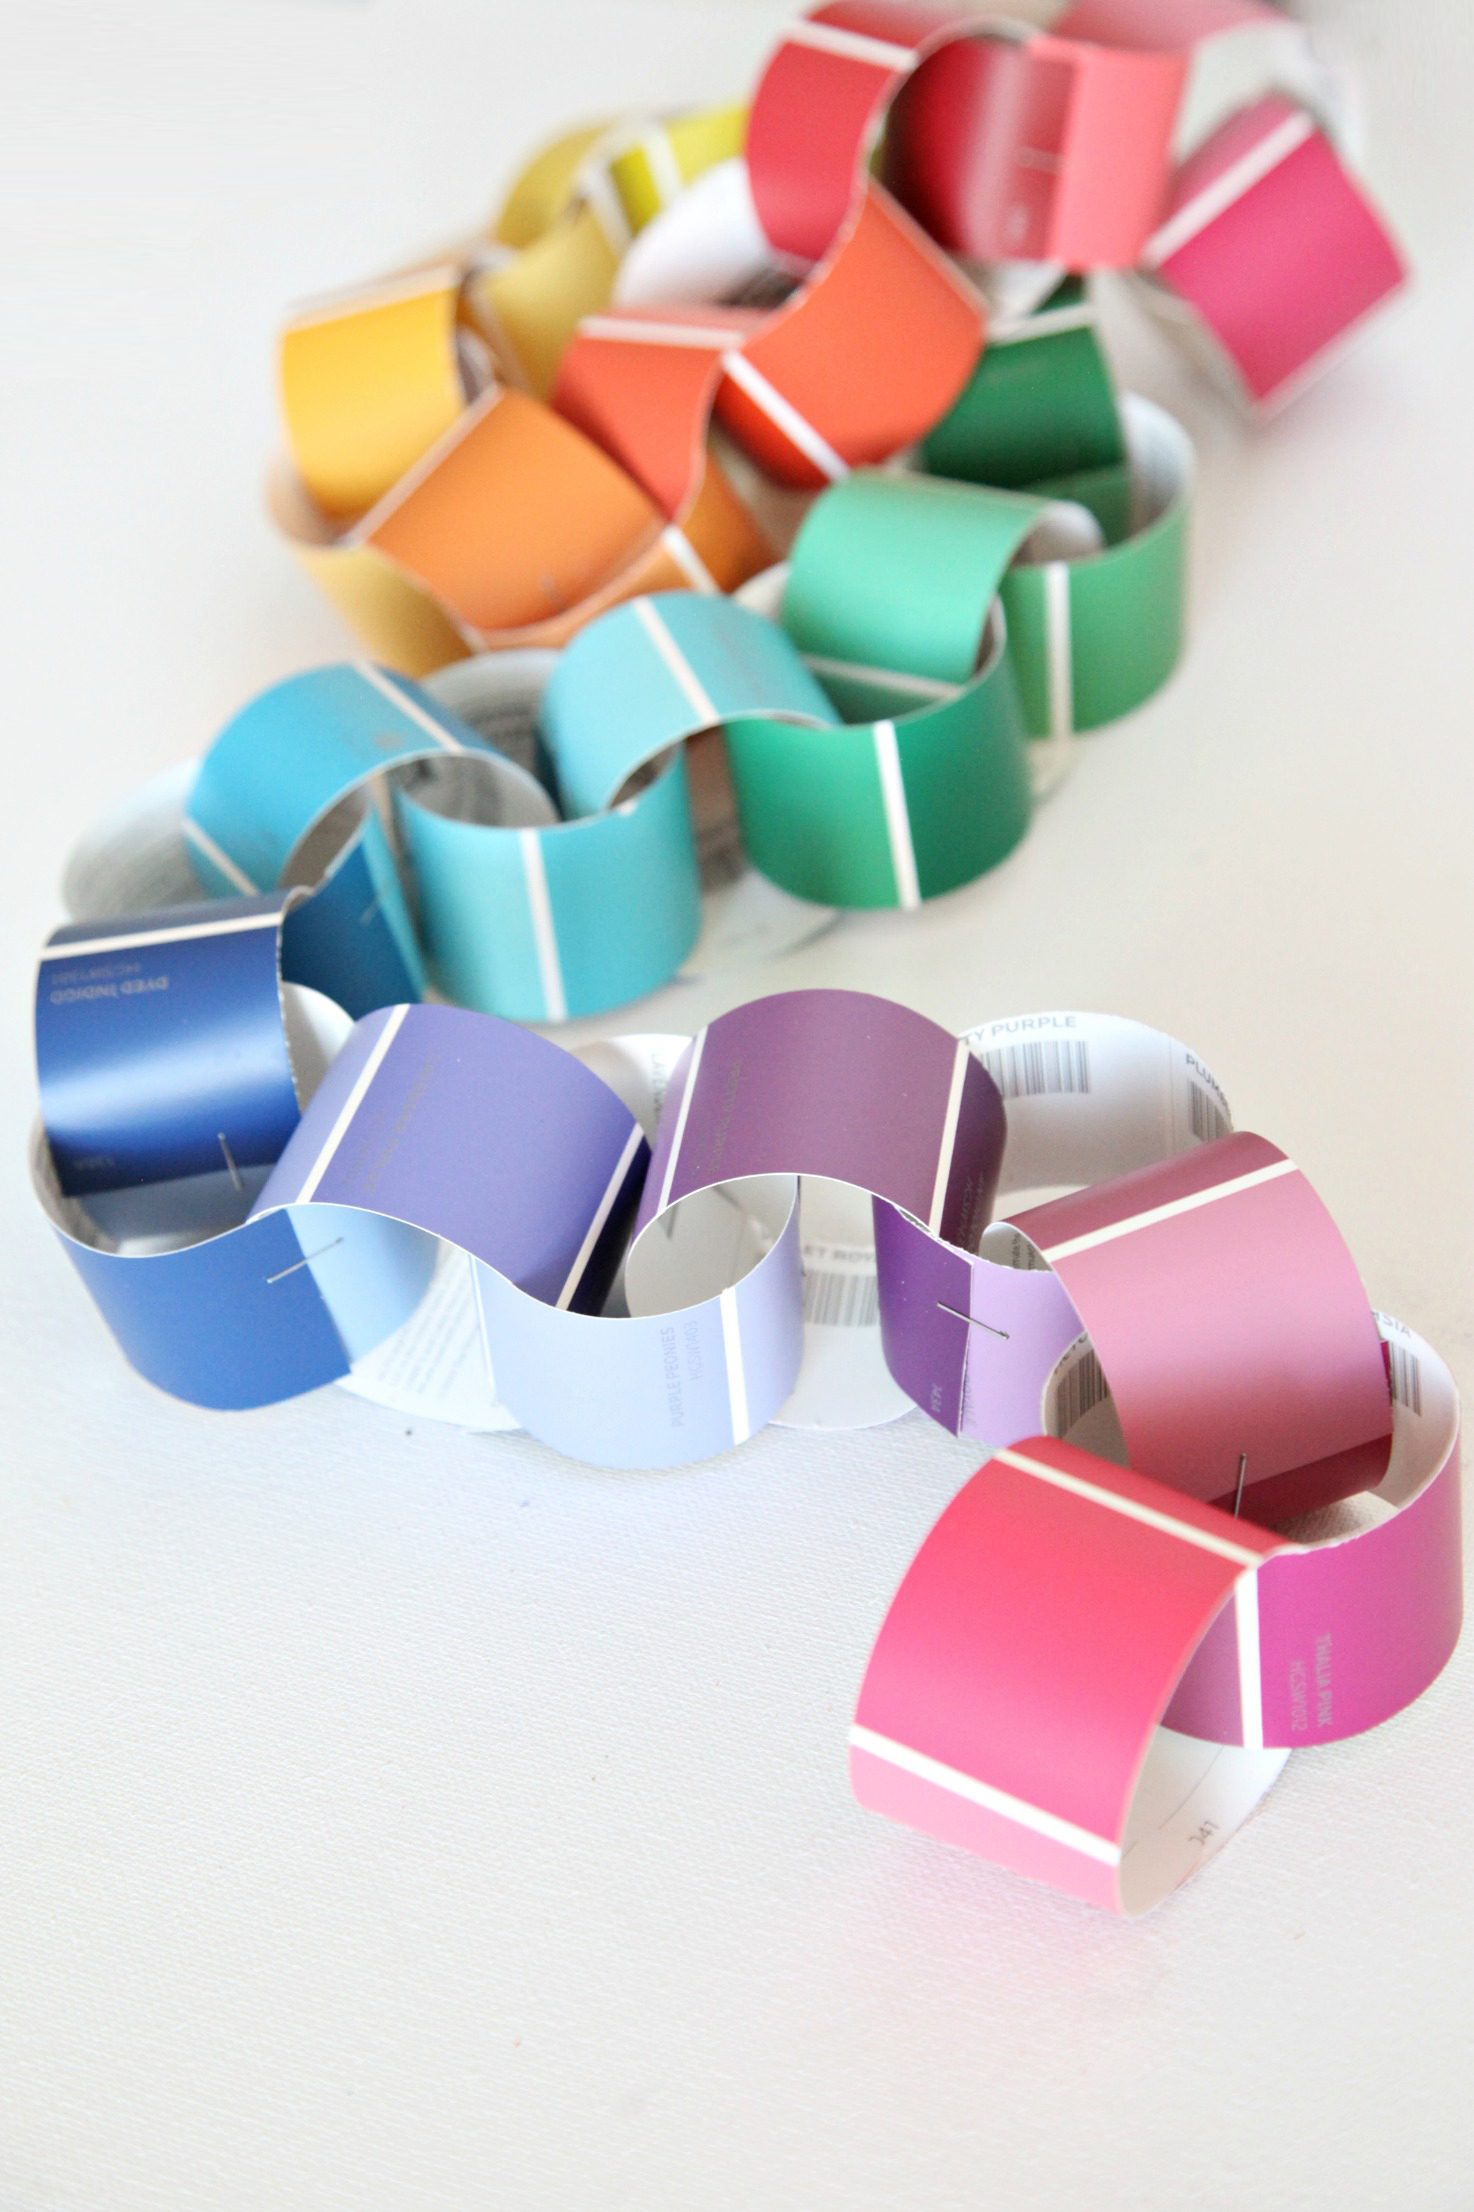
Step 2: Begin by curling your first paint chip into a ring and staple it closed. We found that hot glue would not secure the chips because of their coating so staples worked best!

Step 3: Slide another paint chip through the first ring and make another ring and secure with staples. Repeat until your chain becomes your desired size.
Step 4: Hang chain using string or tape.
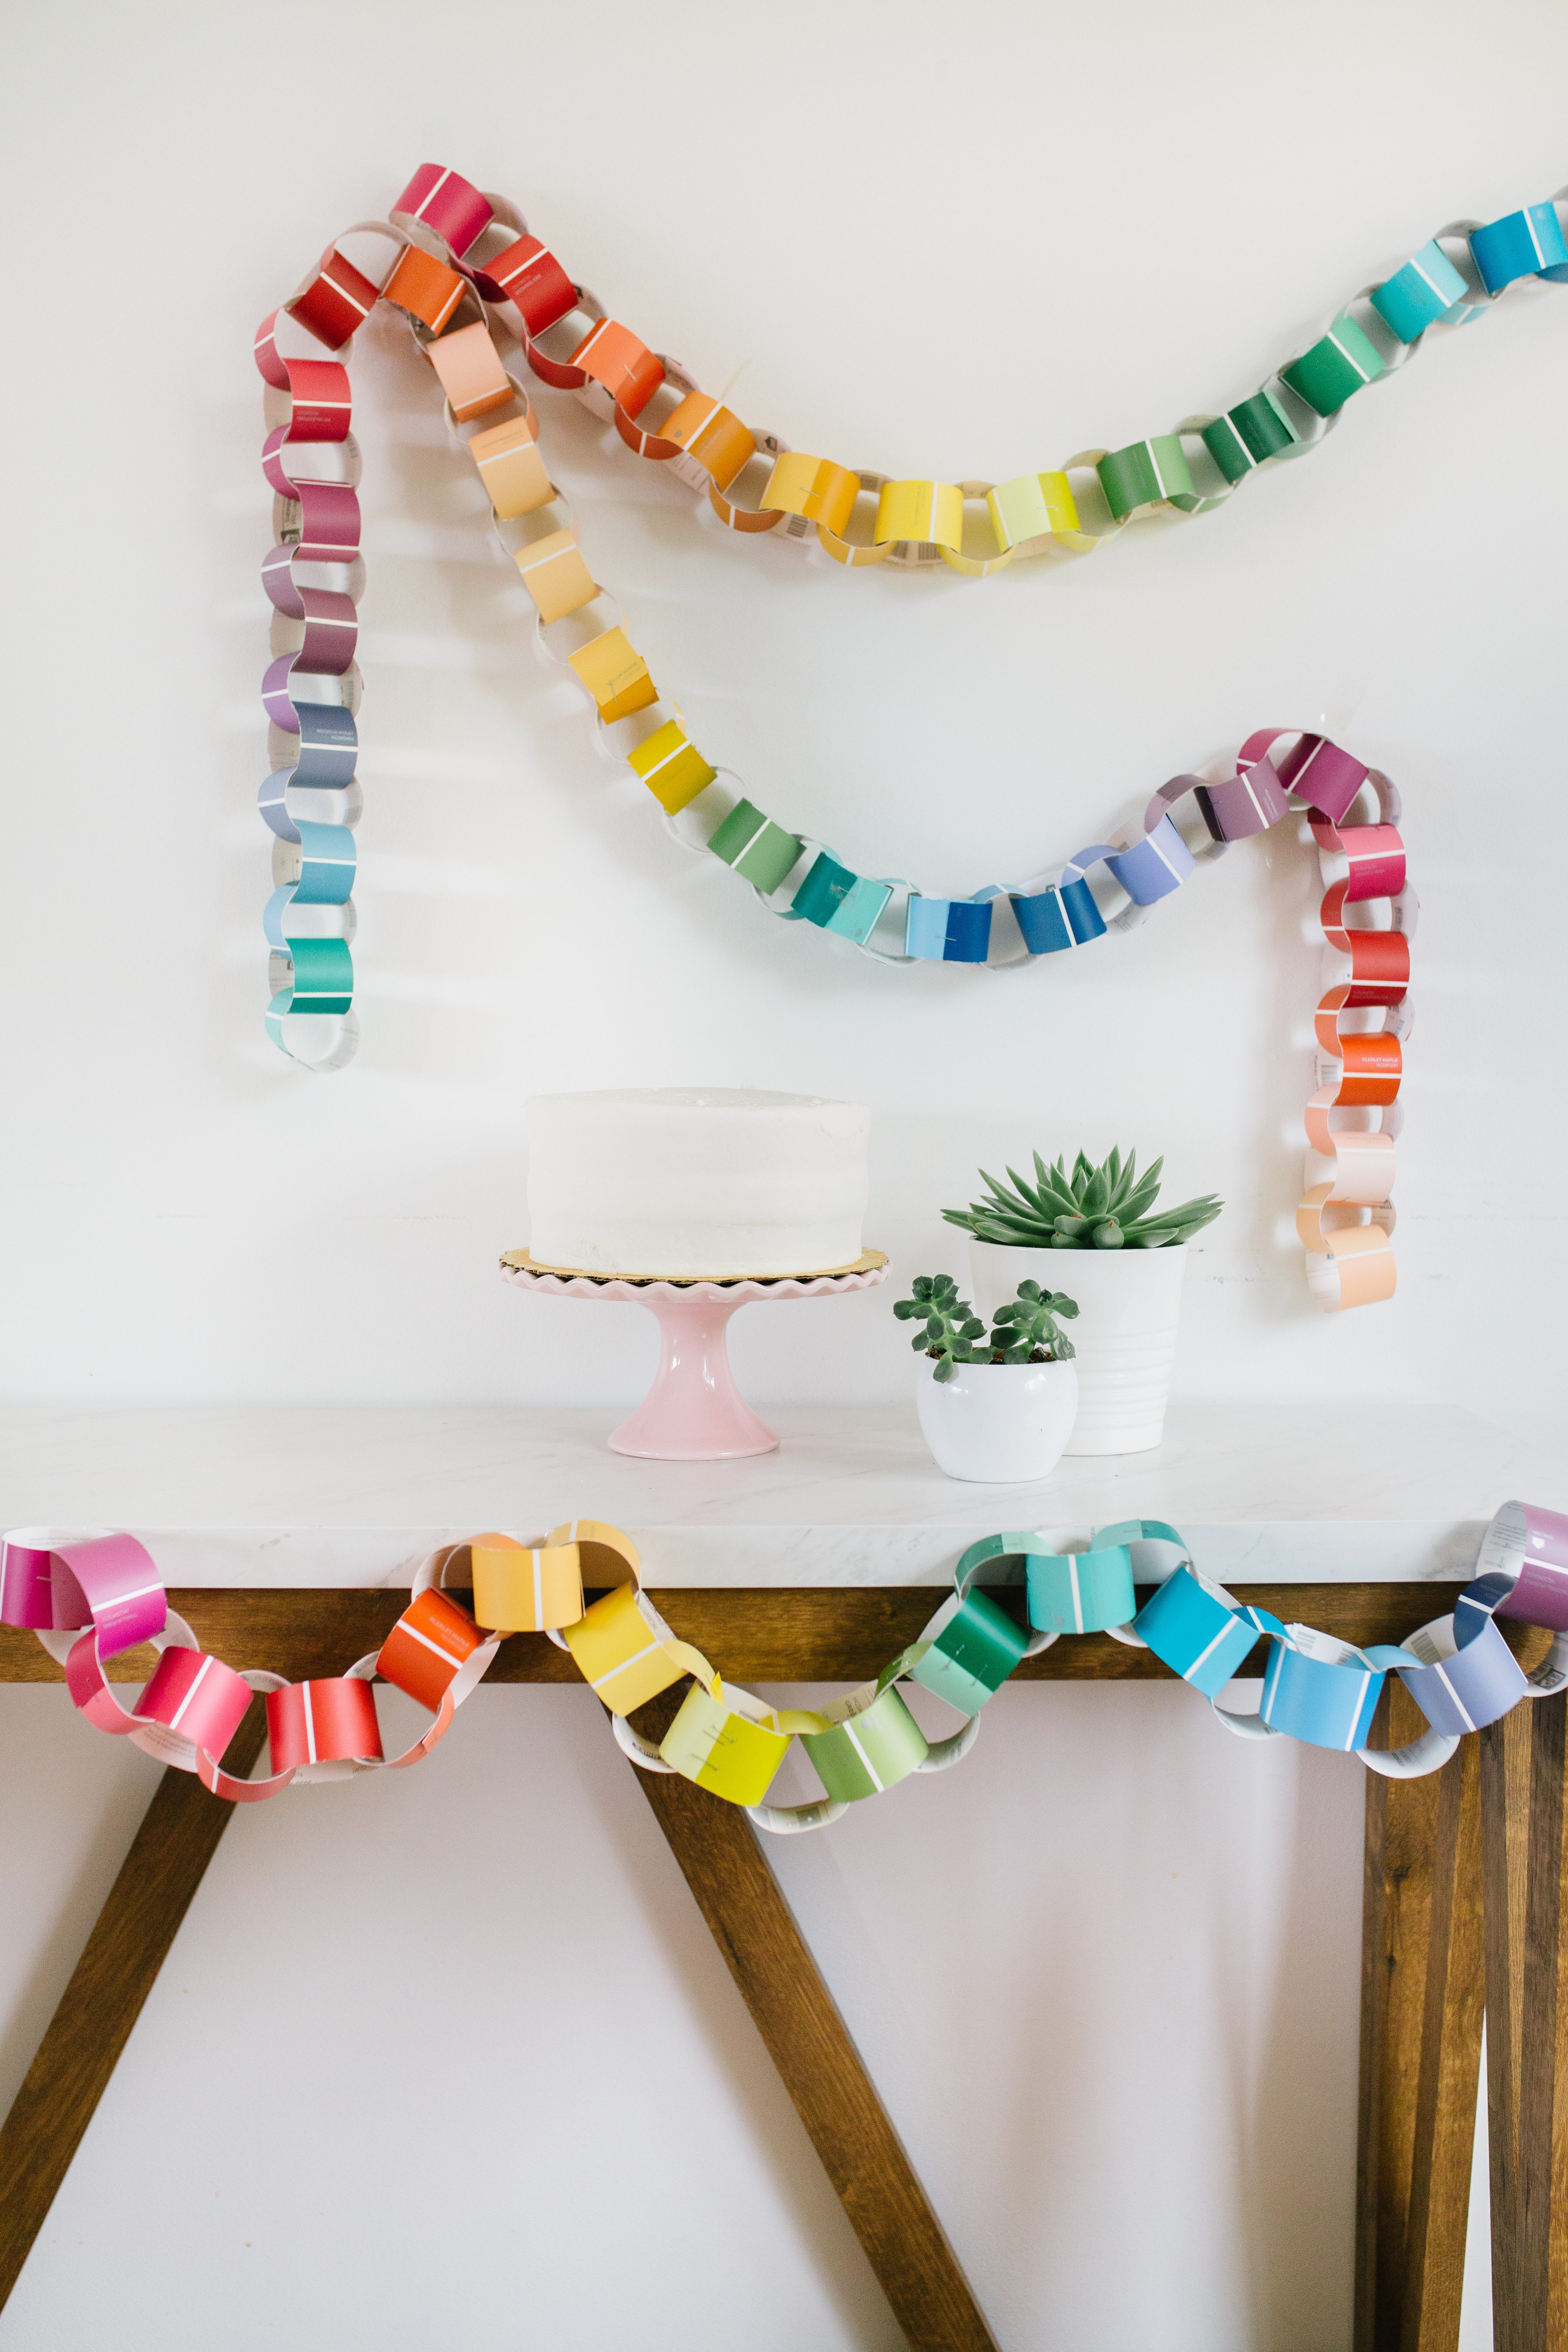 SO fun, right? It adds an unexpected pop of color and we love the added interest the details of the paint chips add. Plus, these suckers couldn’t be easier to make! Your party is gonna be off the CHAIN! (Guys, we’ve done three paper chain posts and that’s only the first time I’ve said that. Nevertheless, unfollow me if you must.)
Happy crafting!
xo, Liz

