


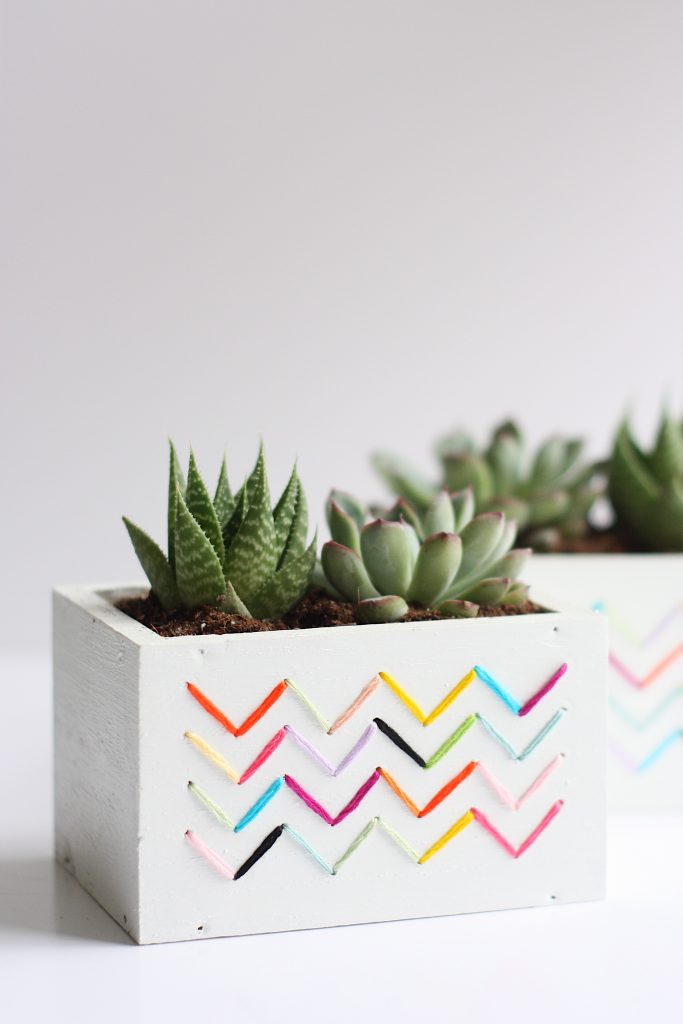
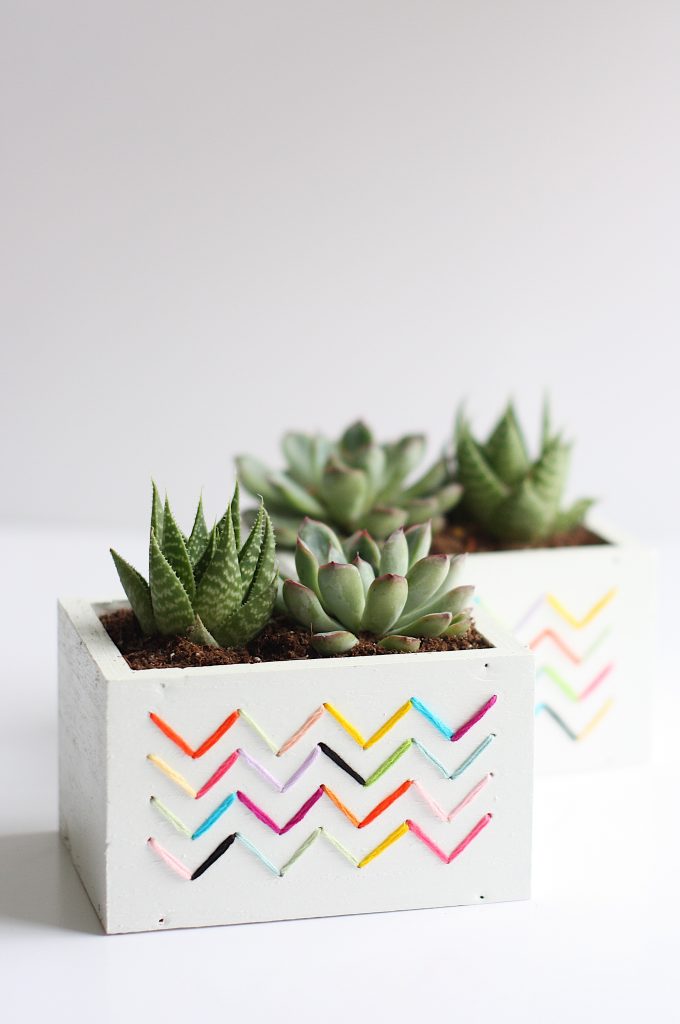
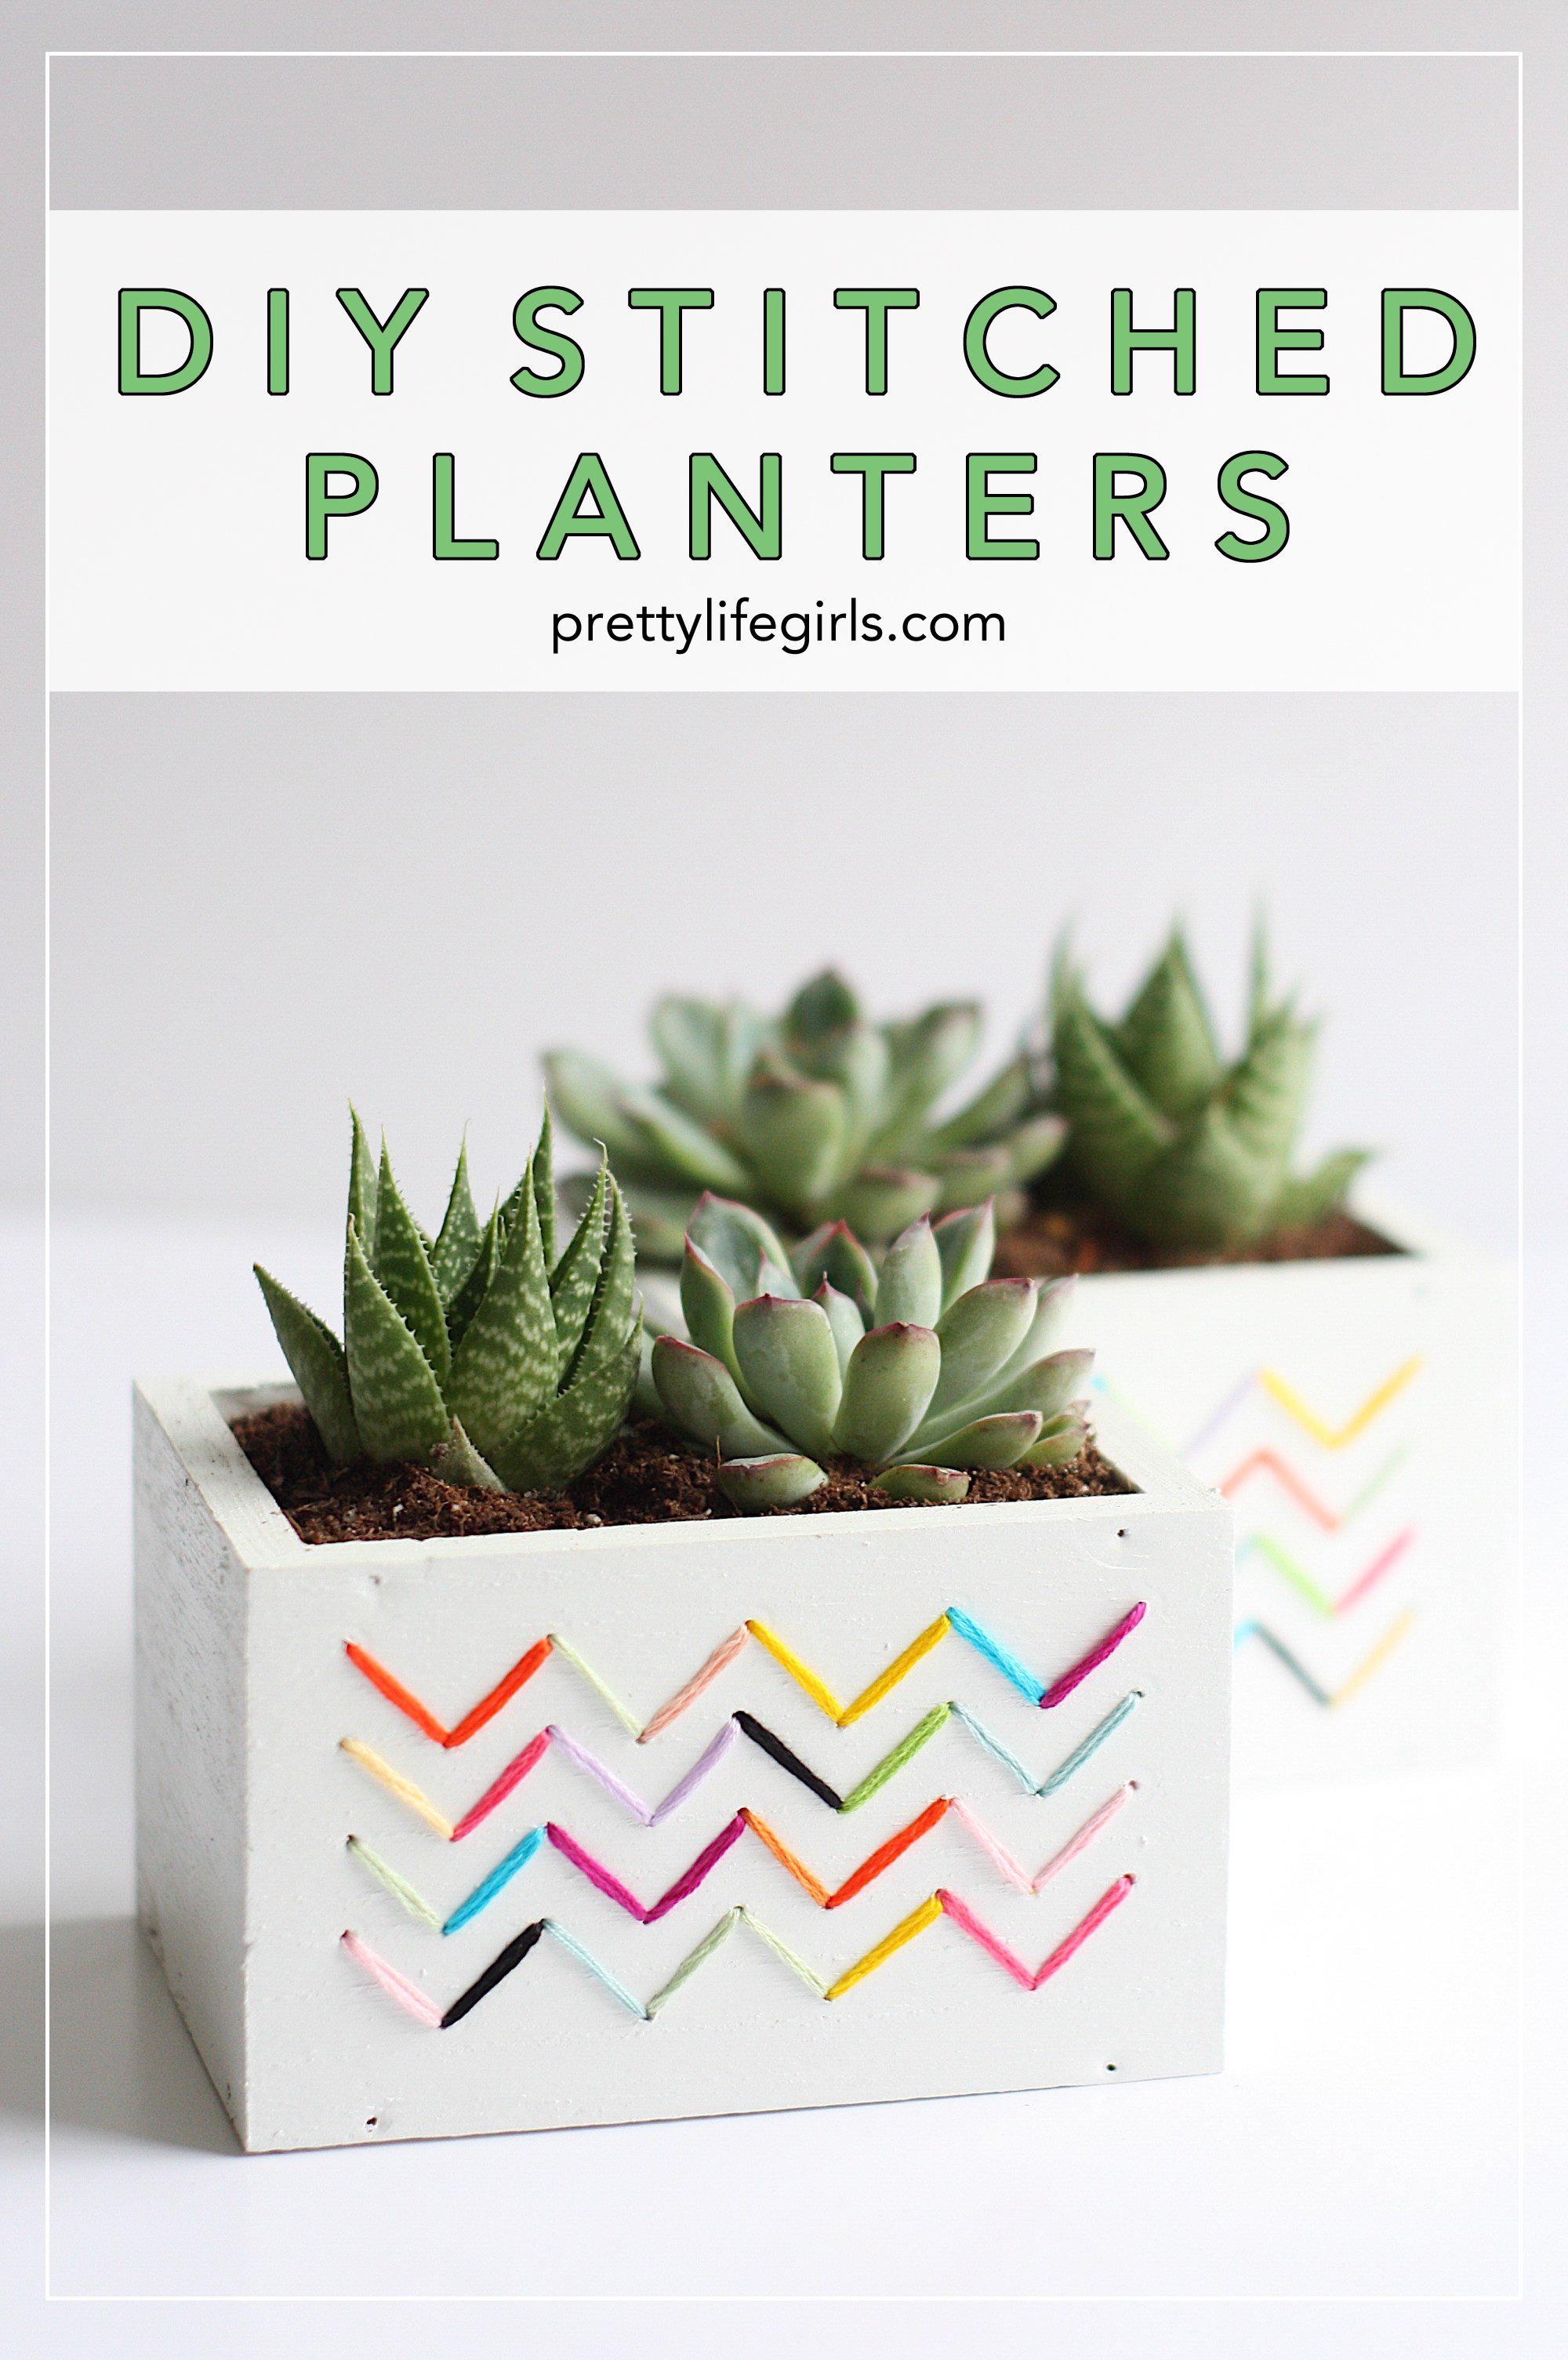
Springtime brings so much happiness, from warmer days to greener grass, and shaking off the winter cabin fever is such a relief. So, to celebrate this exciting change of the seasons, we are sharing the funnest project today: DIY Stitched Planters! These cuties are so bright and colorful, and are perfect for planting your favorite spring plants.
Supplies needed to make your own Stitched Planters
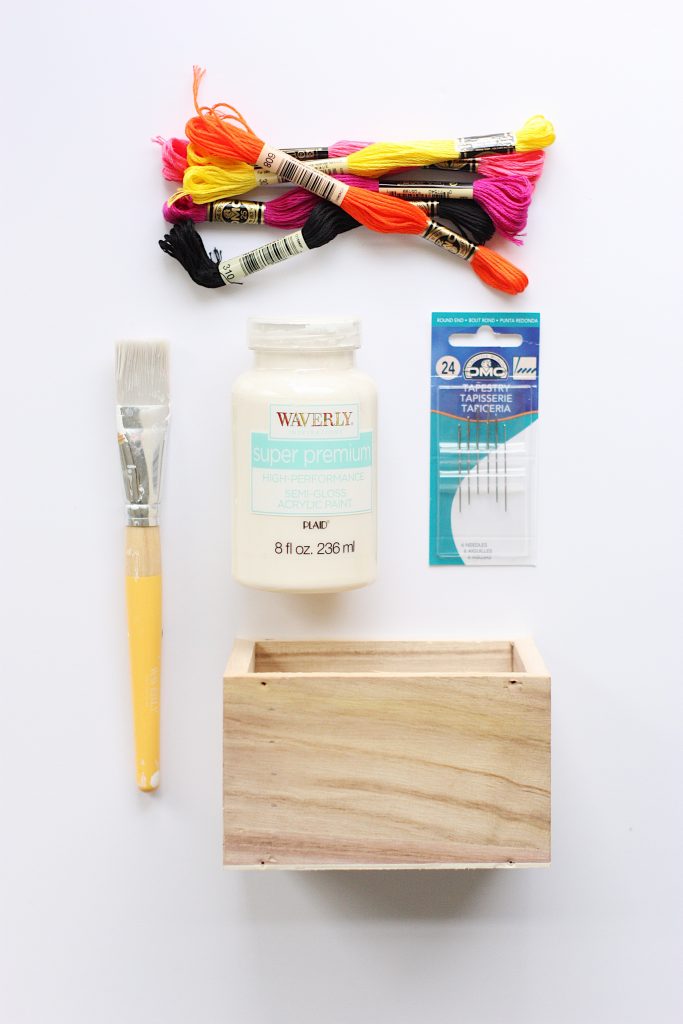
Unfinished wood box/planter
Drill
Embroidery floss
Needle
Sandpaper
Paint + brush
Waterproof tape
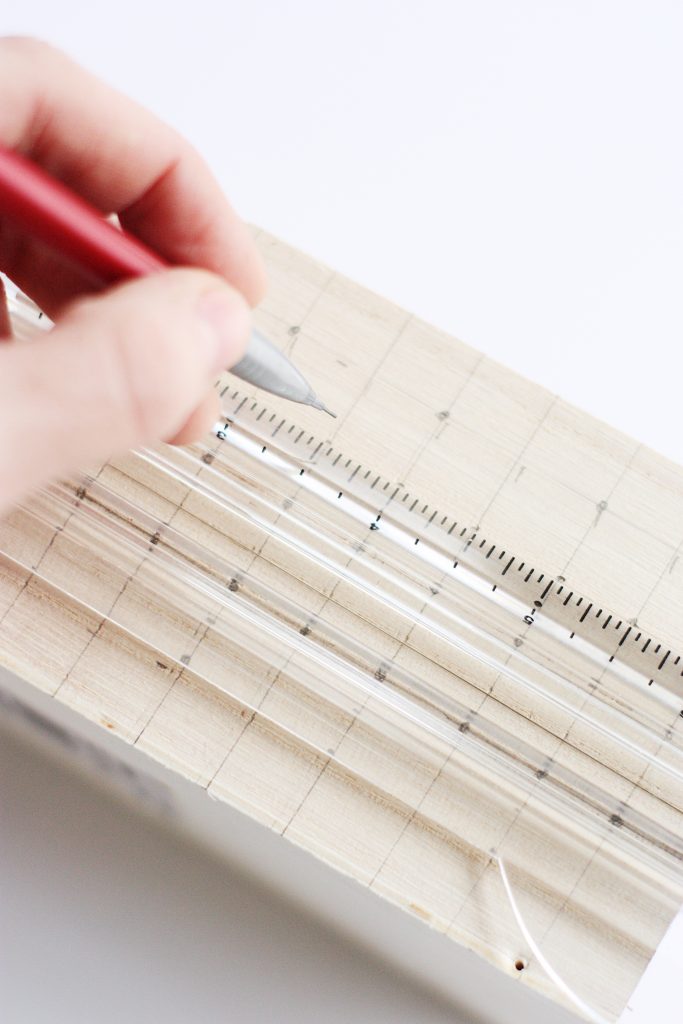
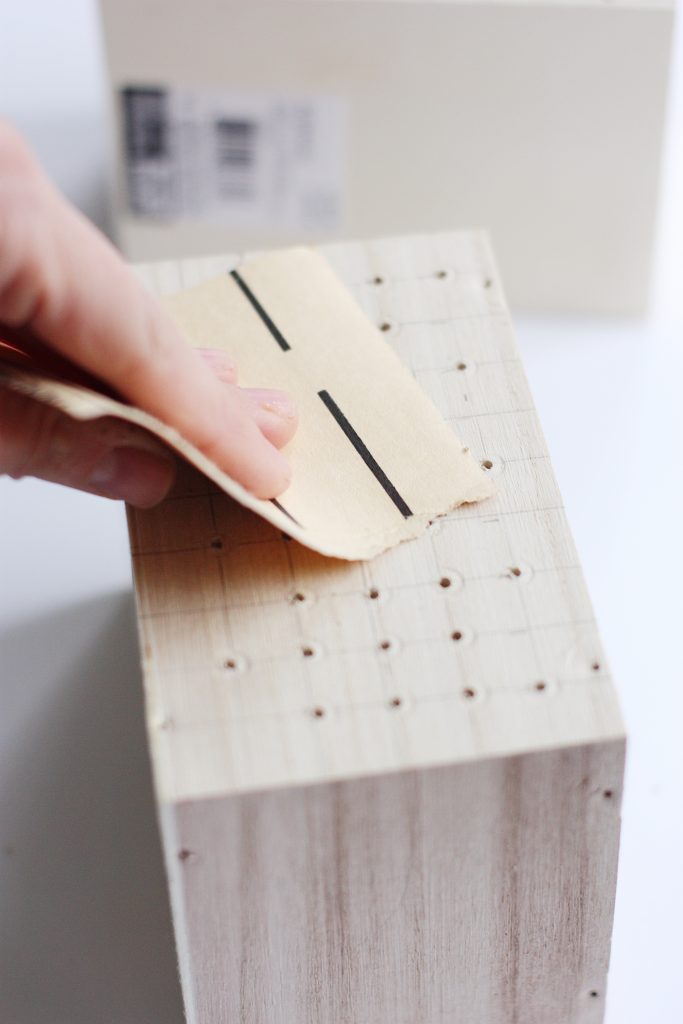
Step 1: Draw out your pattern. I did this by drawing a grid of 1/2 inch boxes across the surface of the box. Then, I drew dots on the places I wanted to drill, creating a chevron pattern.
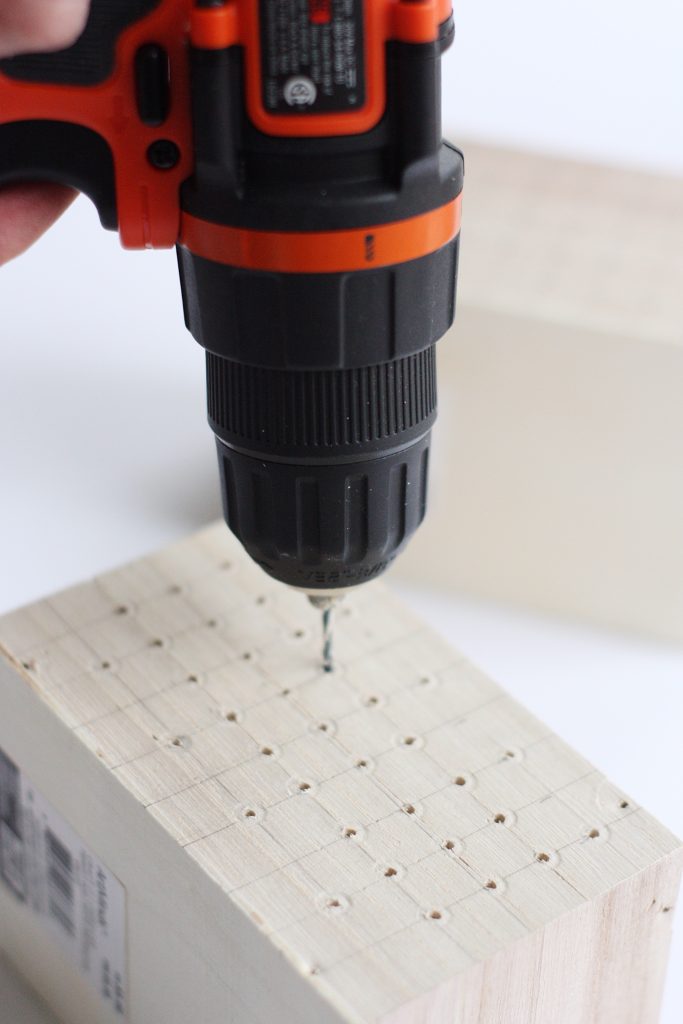
Step 2: Drill holes in the places you marked, as well as a few holes in the bottom of the box for drainage if you plan to plant real plants.
Step 3: Sand box until completely smooth.
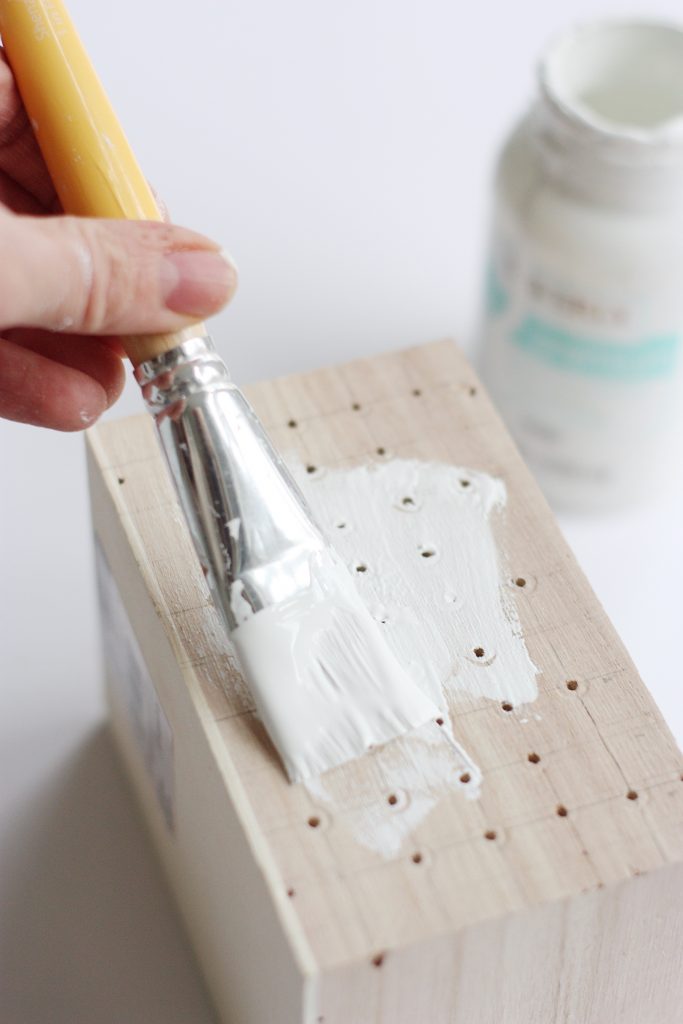
Step 4: Apply two coats of paint. Let dry completely.
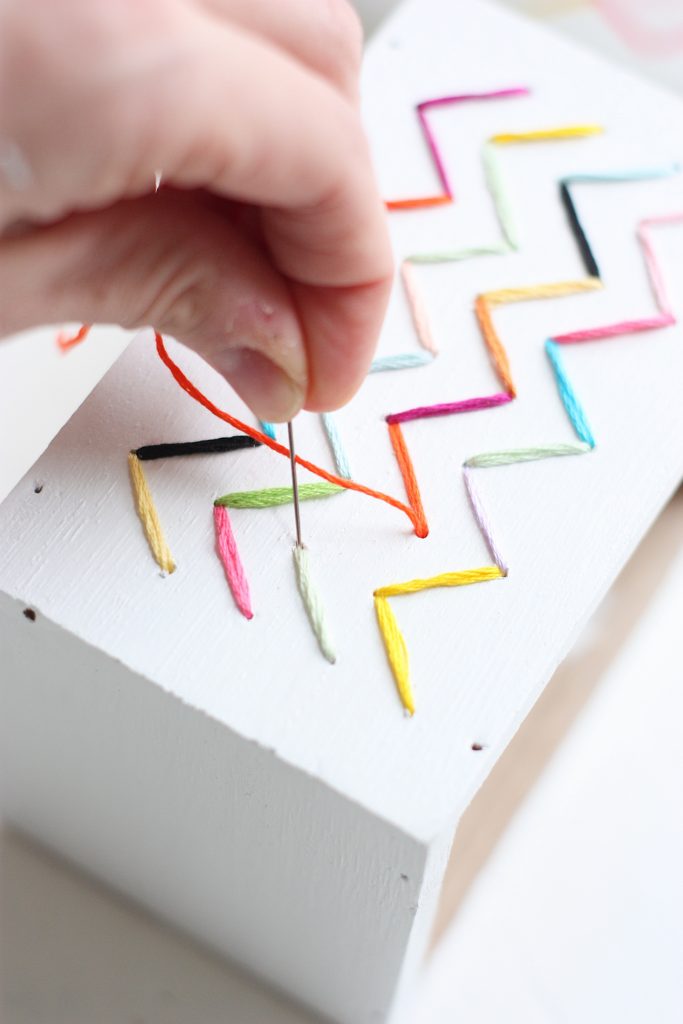
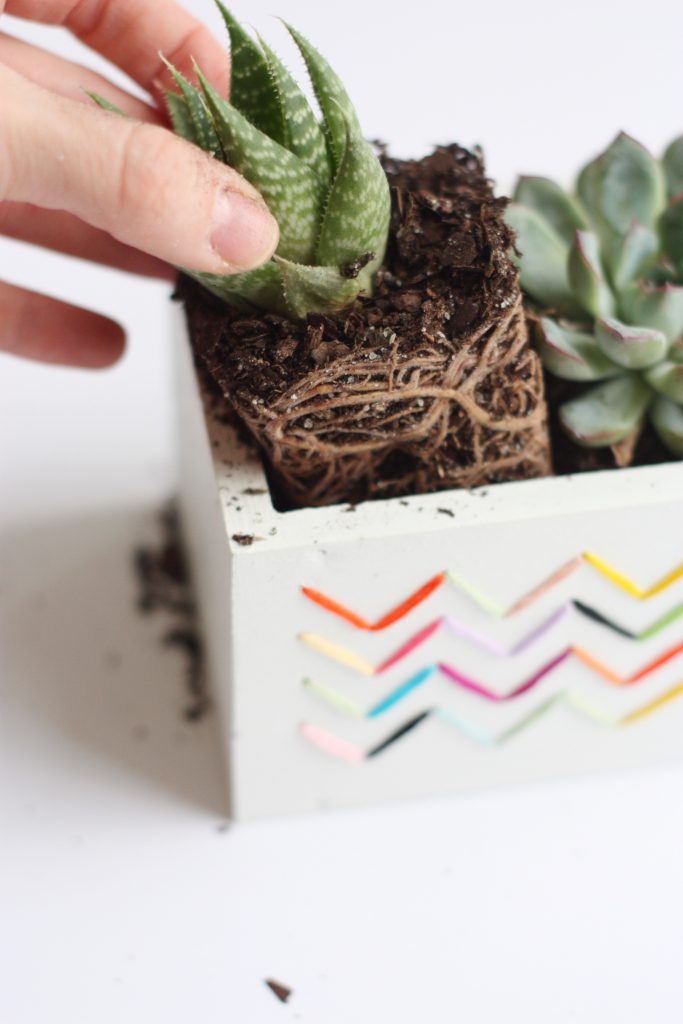
Step 5: Begin stitching your pattern! I used several colors of floss and alternated often. Once you have finished with a color, tie off the string in a tight knot inside the planter and cut away any access floss.
Step 6: Since you drilled holes into the sides of these planters, you will want to take a couple of precautions to prevent seeping onto your beautiful stitches if you decide to plant real plants and water them. For mine, I used a waterproof sealant tape. You can find all kinds of waterproof tape at your local home improvement store, just make sure that waterproof is specified. Cut a couple of pieces of tape to fit the inside of the planters and seal the inside of the planters, being sure to cover all holes and thread and seal well (if the thread isn’t covered completely and gets wet it can seep to the outside).
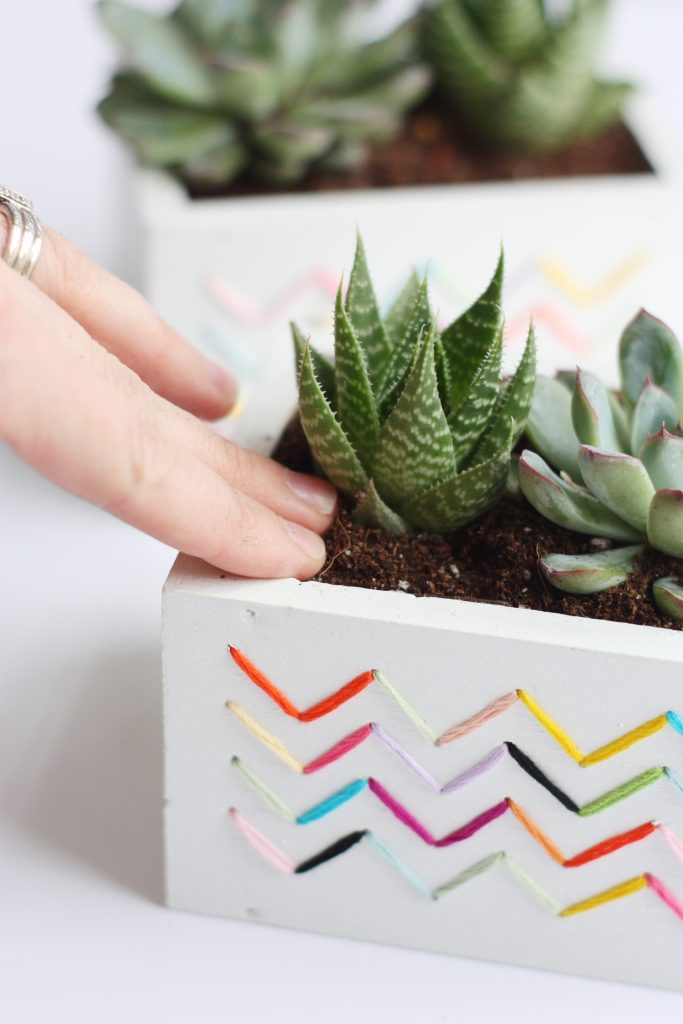
Step 7: Plant your plants!
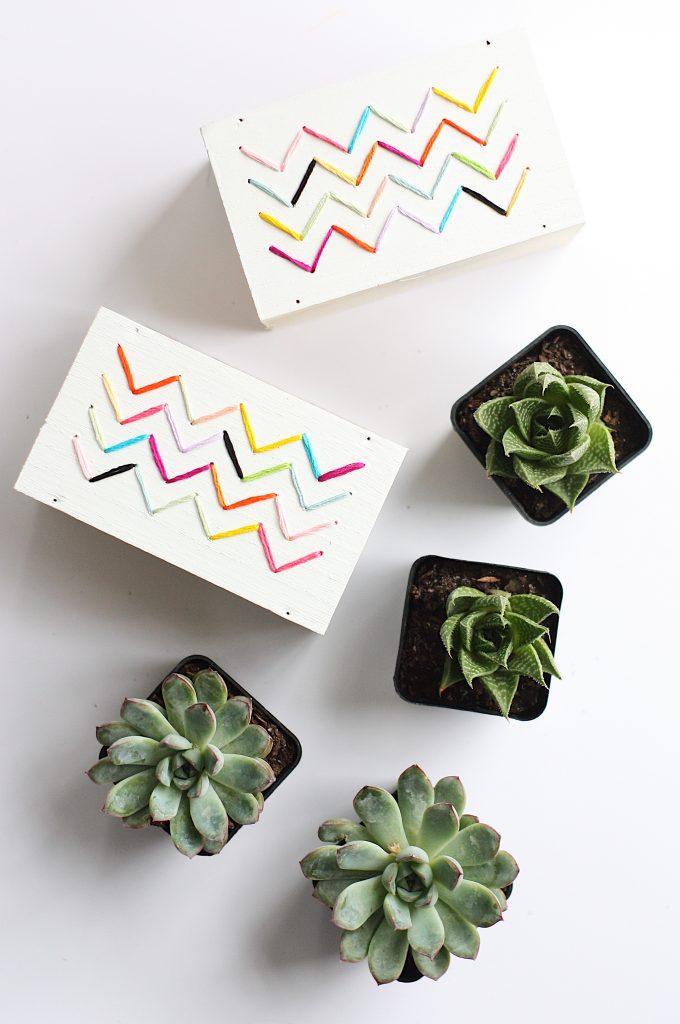
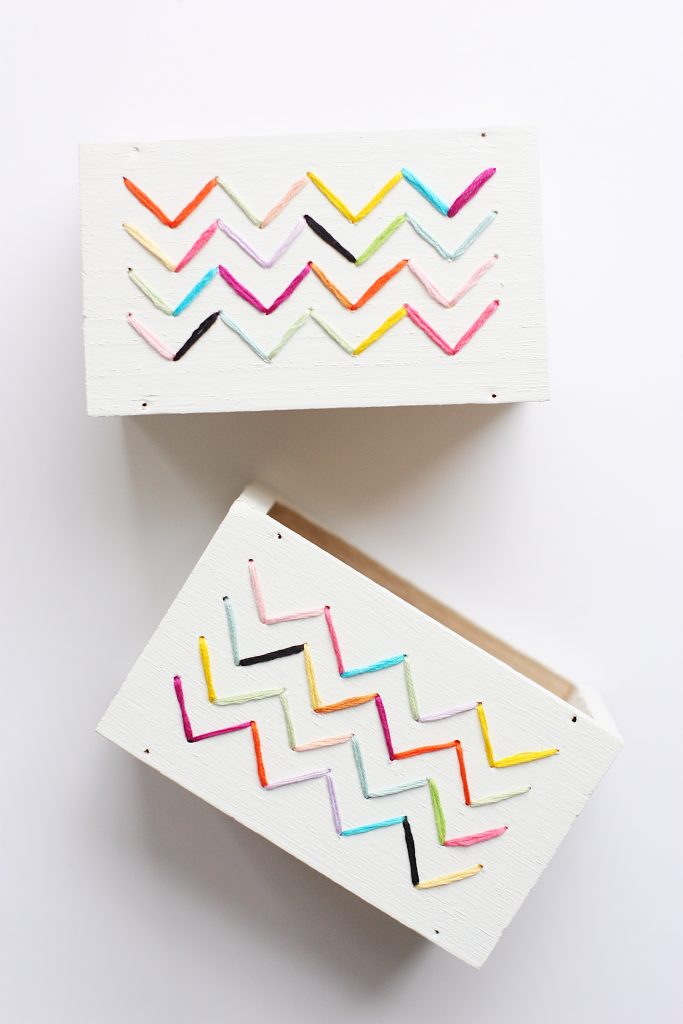
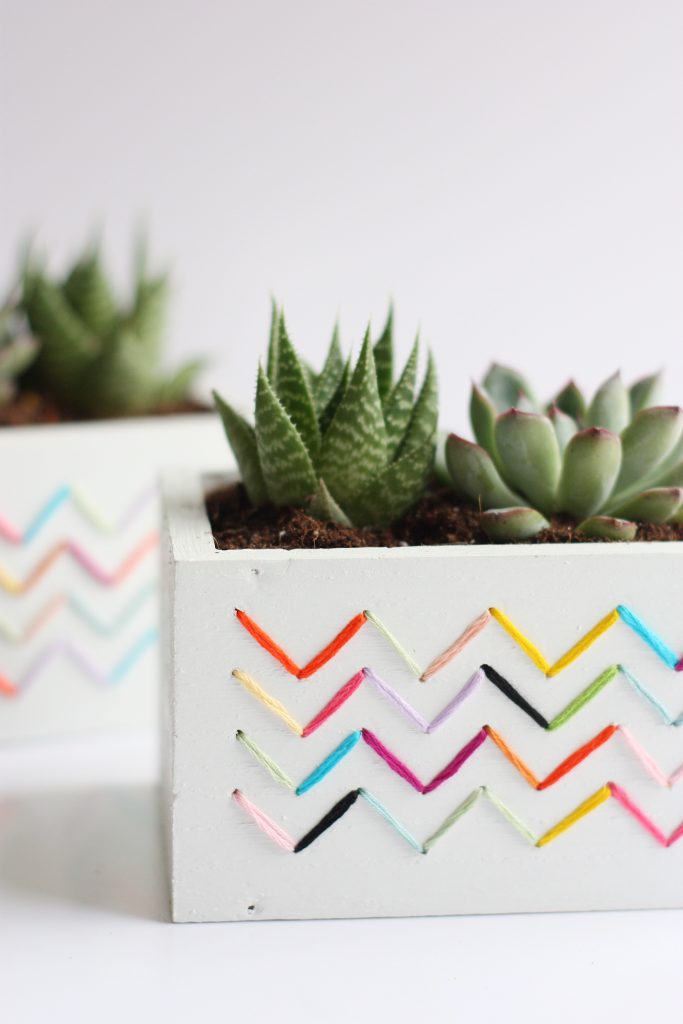
That’s it! Now you’ve got the most darling planters ready to welcome spring! Aren’t all of the colors so pretty? I’m obsessed with this one.

What spring projects are you excited to start tackling? I’d love to hear about them!
Happy planting!
ox. Liz


These are adorable planters! What a fun idea! This time of year is the worst for my allergies but I have three kids that want to be outside so I need relief. Thanks for sharing! #client
Such a clever idea! Love it
[…] DIY muy vistoso y con mucho […]
[…] These stitched planters are so […]
[…] If you love a unique planter, this DIY Stitched Planters via The Pretty Life Girls is just for you. I love the beautiful texture the floss adds to the wooden […]
[…] at the PLG we loooove embroidery. We’ve embroidered everything from zipper pouches to planters because we are obsessed with the texture and dimension embroidery gives a project, plus, […]
[…] Here the rainbow chevron pattern has embroidered. Full how-to instructions here prettylifegirls […]
[…] Stitched Planters […]
[…] Stitched Foam Pumpkins DIY Stitched Planters DIY Cross Stitch Pillow DIY Cross Stitch Sweater (coming soon – see similar post here) DIY […]
[…] even the most basic item feel one-of-a-kind and special. We’ve added stitching to sweaters, planters, photos, notebooks, and pillows, and we will never tire of the detail, texture, and originality it […]
[…] DIY Stitched Planters […]
[…] DIY Stitched Planters […]