


This DIY Kids Play Tent tutorial is sponsored by Plaid Crafts. All opinions expressed are mine alone.
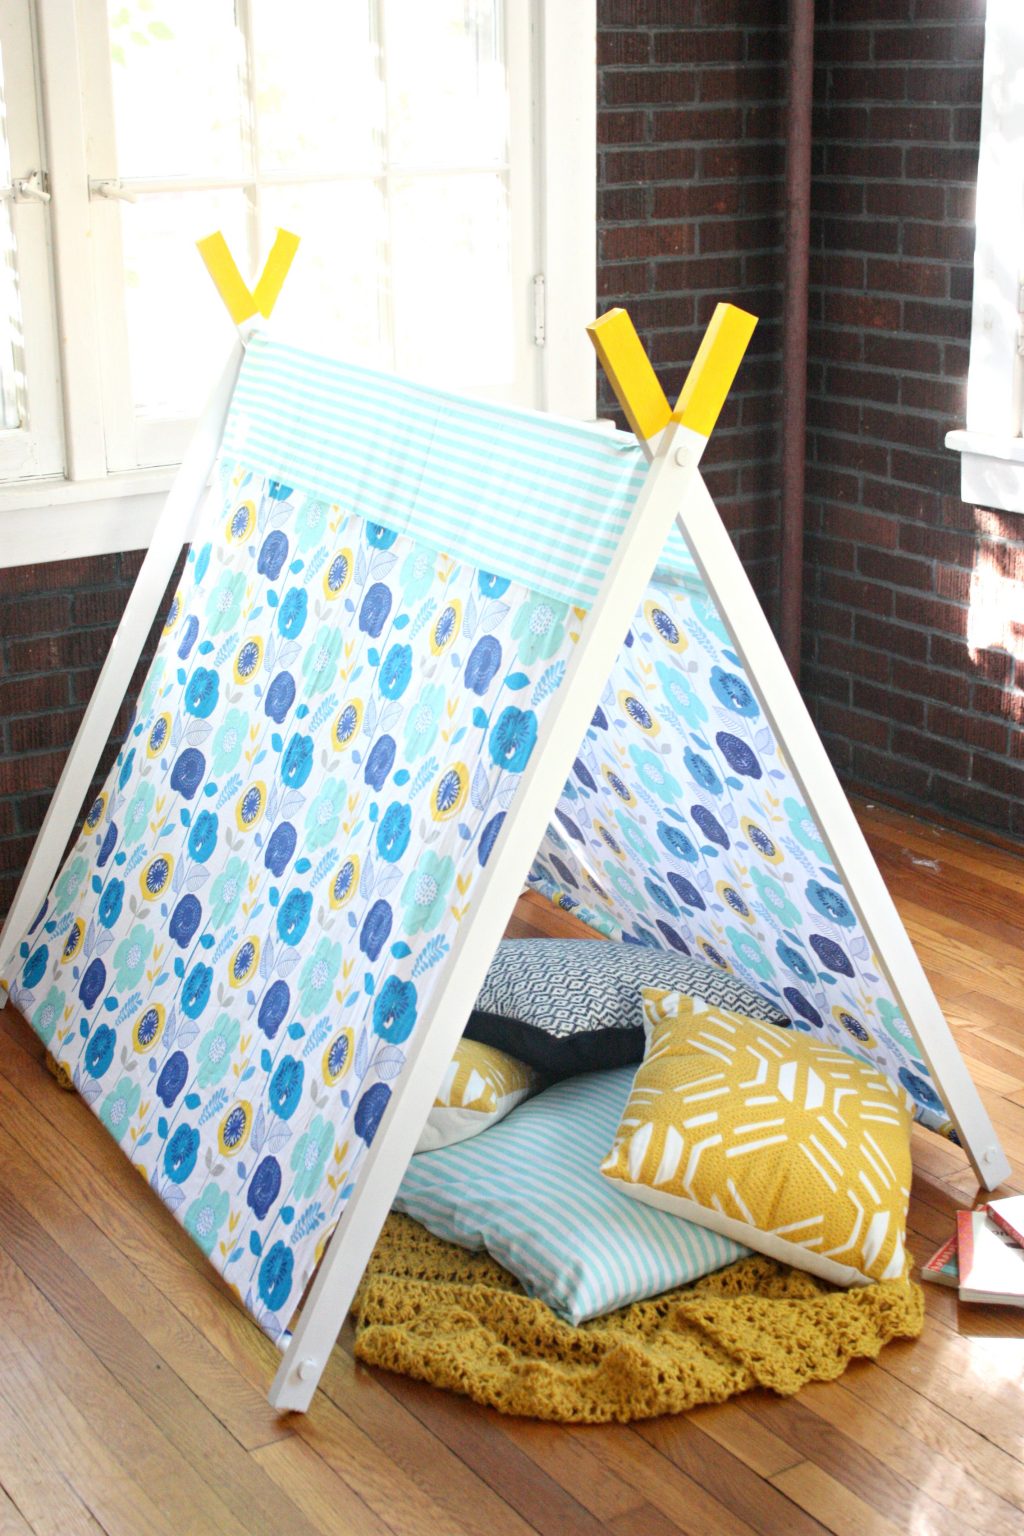
With school threatening to start and summer passing us by a lot quicker than I’d like to admit, we are trying to soak up the last of these long, lazy days any way that we can. As a result, today I am sharing the perfect DIY project for a summer weekend, this fun Kids Play Tent! This little cutie is just right for cozying up with a stack of books to make the most of summer reading, or for watching movies after dark while there’s still no school to get up early for the next day.
This DIY kids play tent was surprisingly simple to make (if you can drill 4 holes, you can make it!) and folds up for easy storage. Plus, we used the insanely gorgeous new Waverly Inspirations line (available now, exclusively at Walmart!) to take it to the next level with bold printed fabrics and a perfectly coordinated palette of super vibrant paint colors. This line is inspired by the stylish Waverly Inspirations Fabric and along with paint, includes coordinating brushes, tools, stencils and more! It’s all gorgeous. Here’s how we used our Waverly Inspirations supplies and built our tent:
How to Make your Own DIY Kids Play Tent?
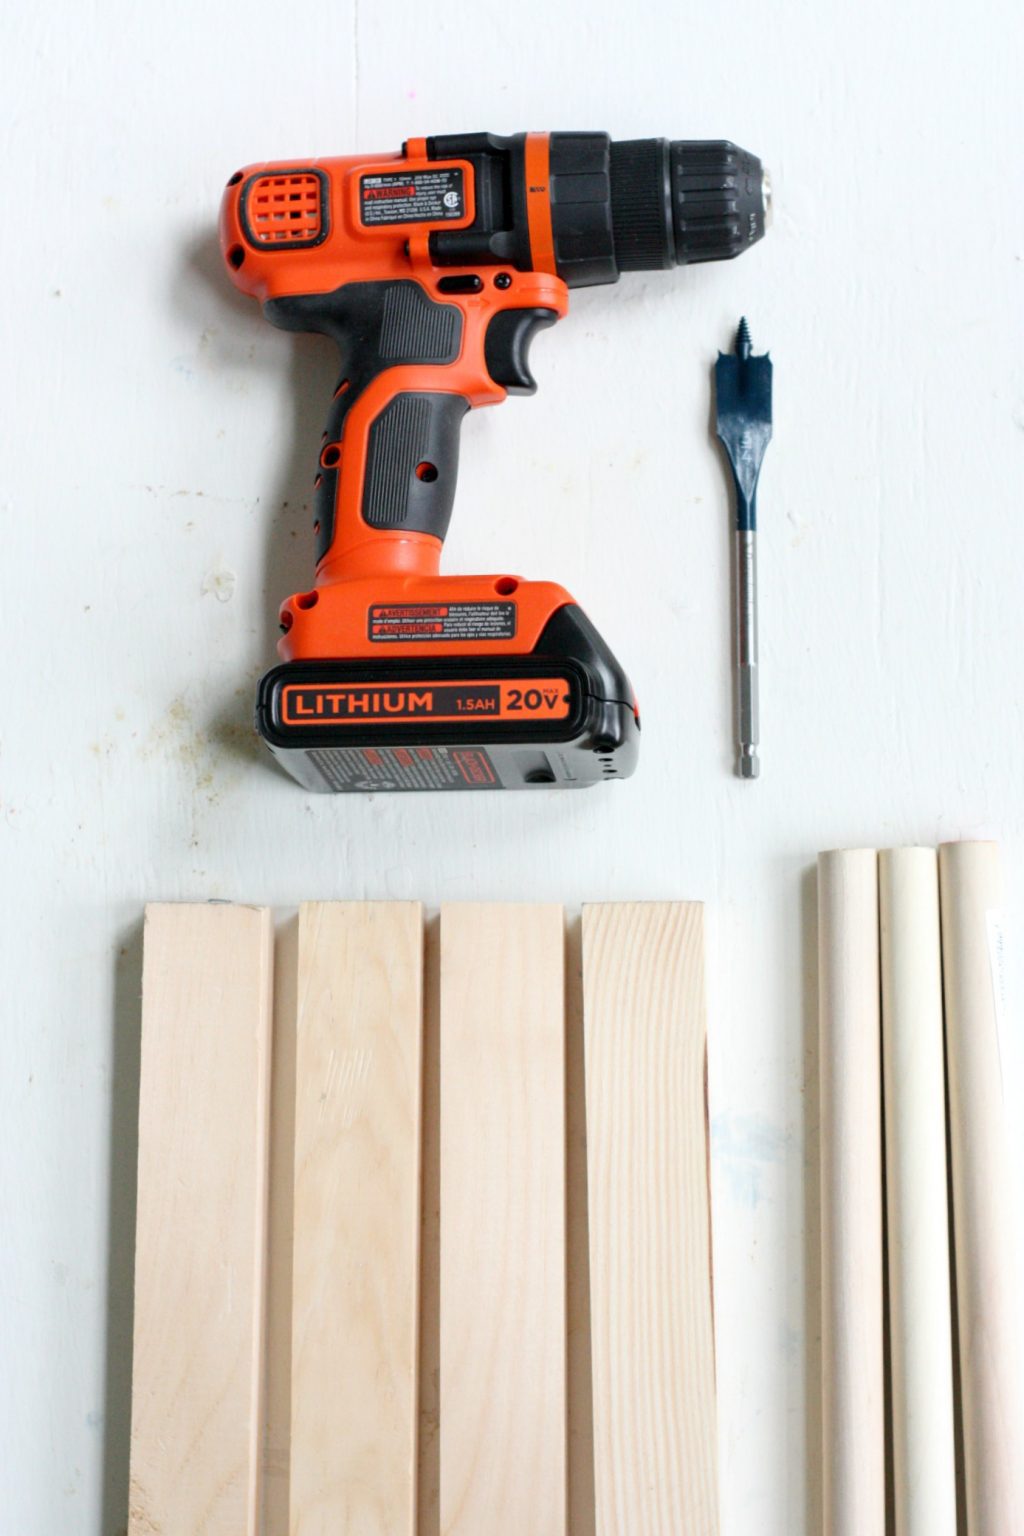
Supplies needed for your Kids Play Tent:
To build the tent:
3 – 3/4″ x 48″ Poplar Dowels
4 – 1″ x 2″ x 48″ Wood Moulding
Drill with a 3/4″ Spade Bit
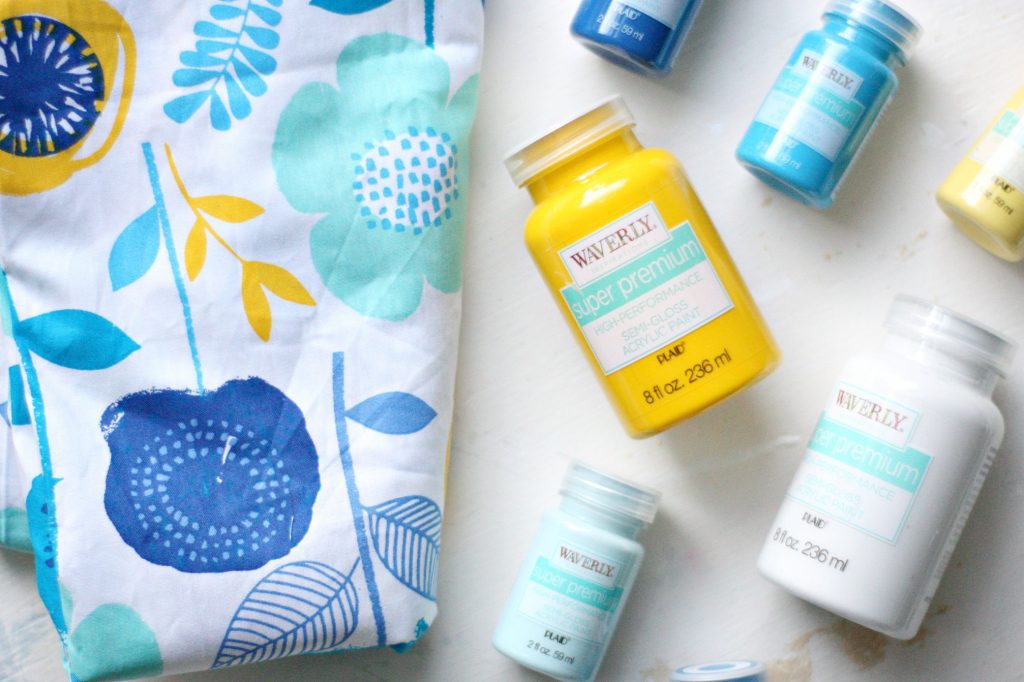
For the Tent Cover:
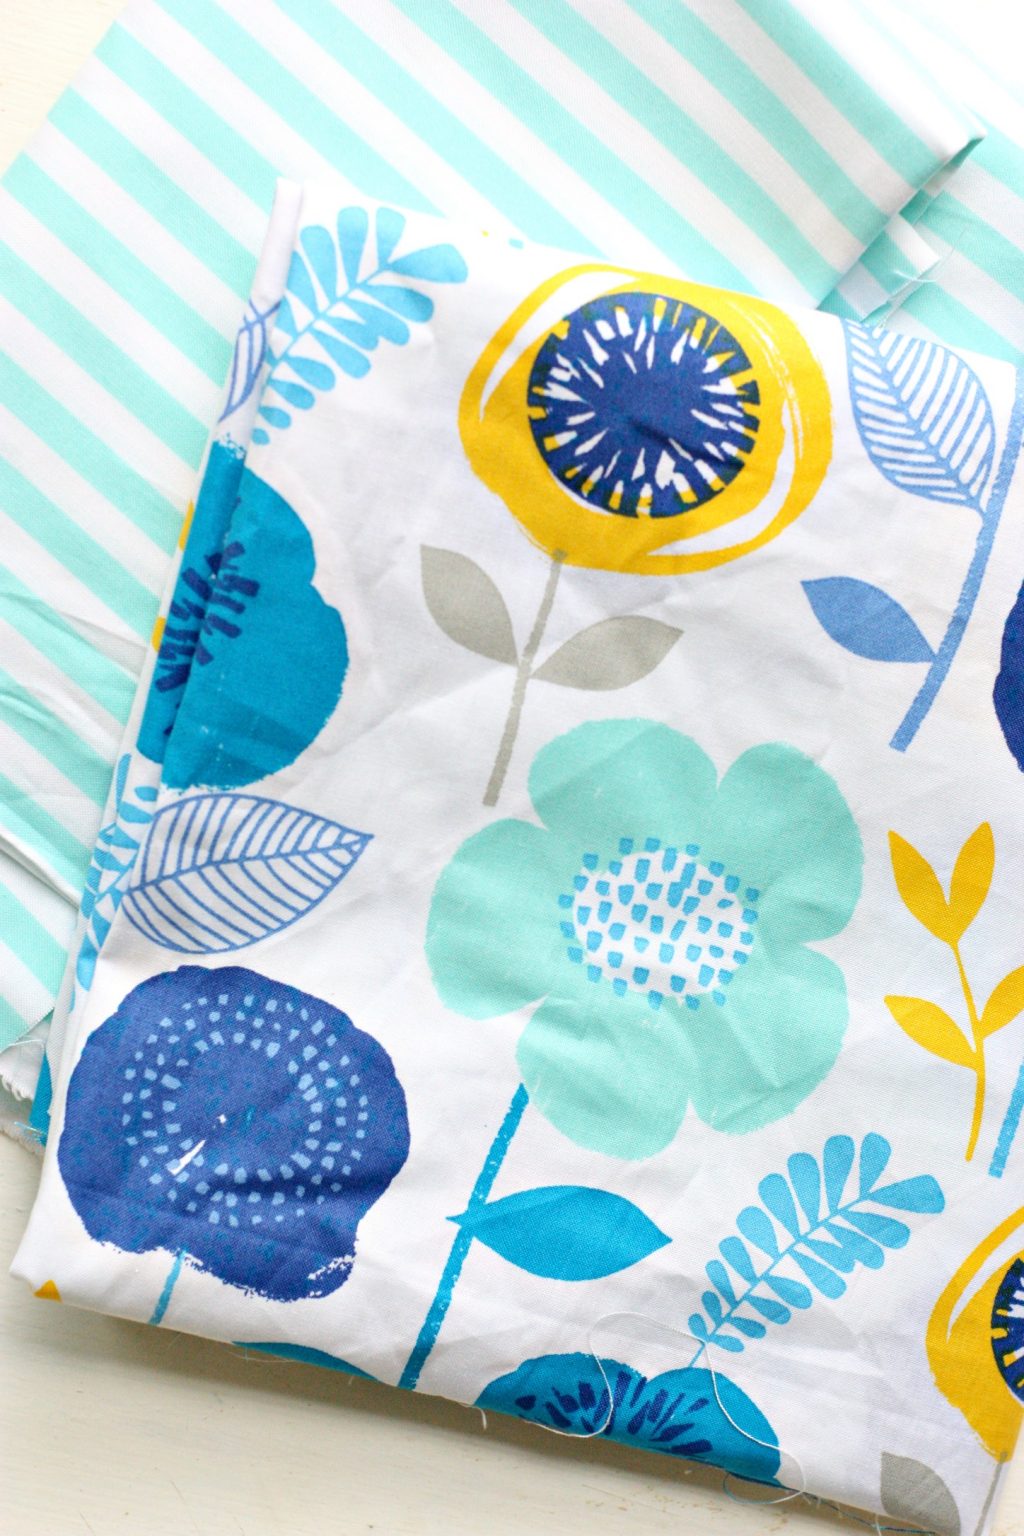
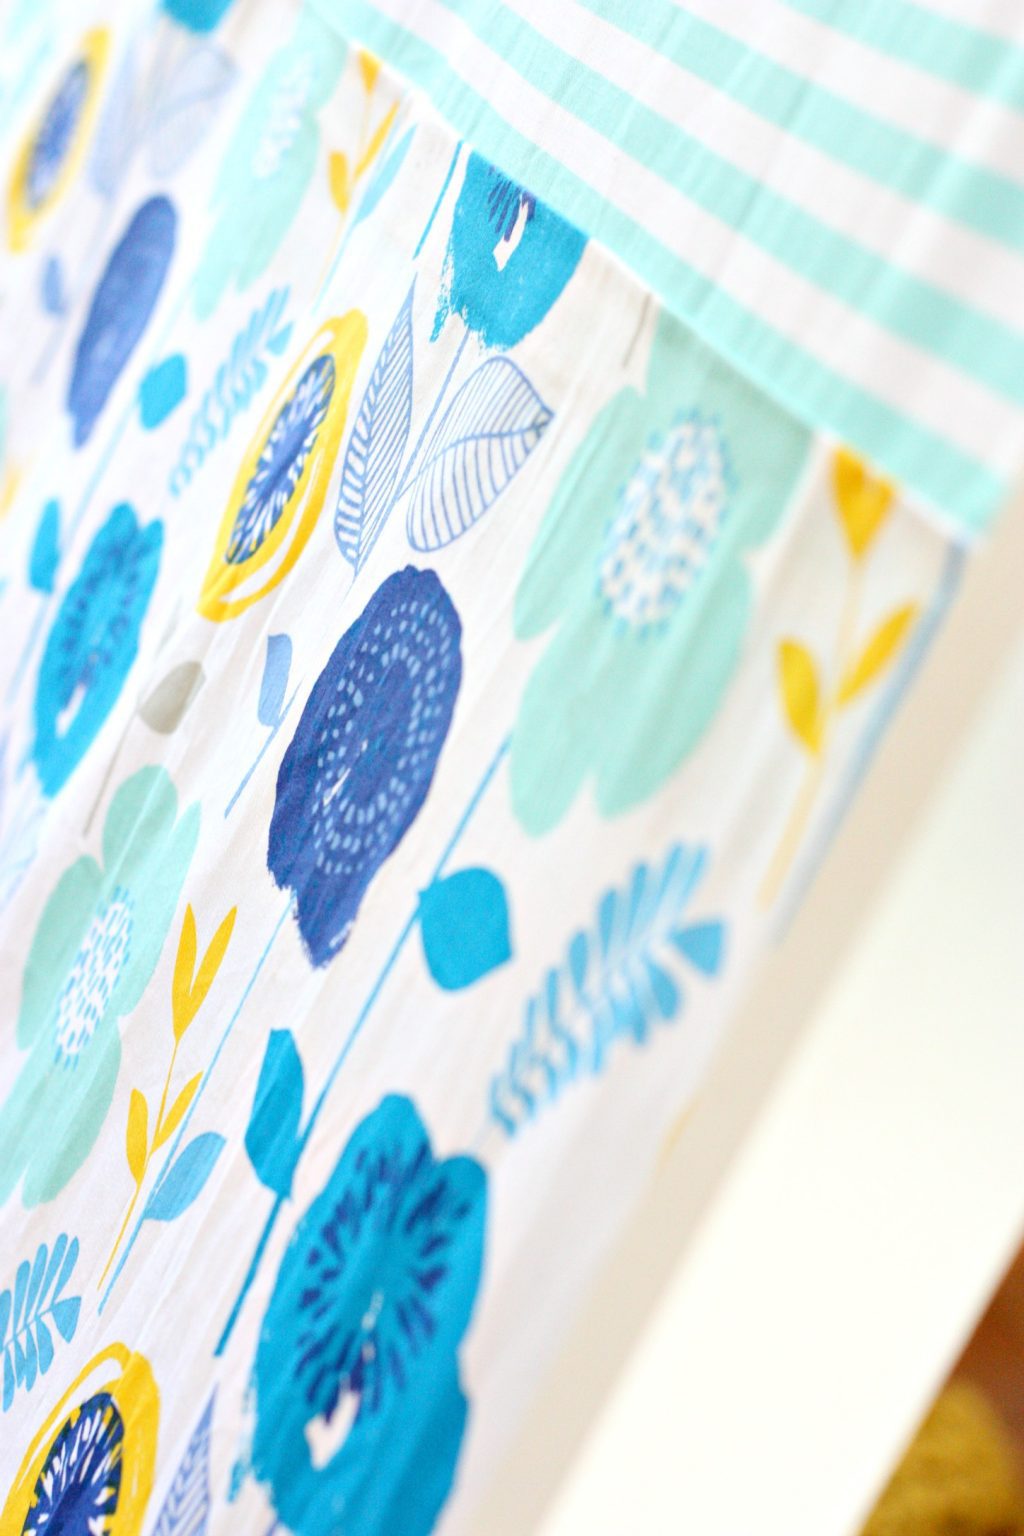
84″ x 51″ Waverly Inspirations Fabric (both the floral and the stripe I used are available at Walmart!)
Sewing Machine or Heat ‘N Bond
Glue Gun/Glue Sticks
To Paint the Tent:
Waverly Super Premium Paint and Brushes
To build your Kids Play Tent:
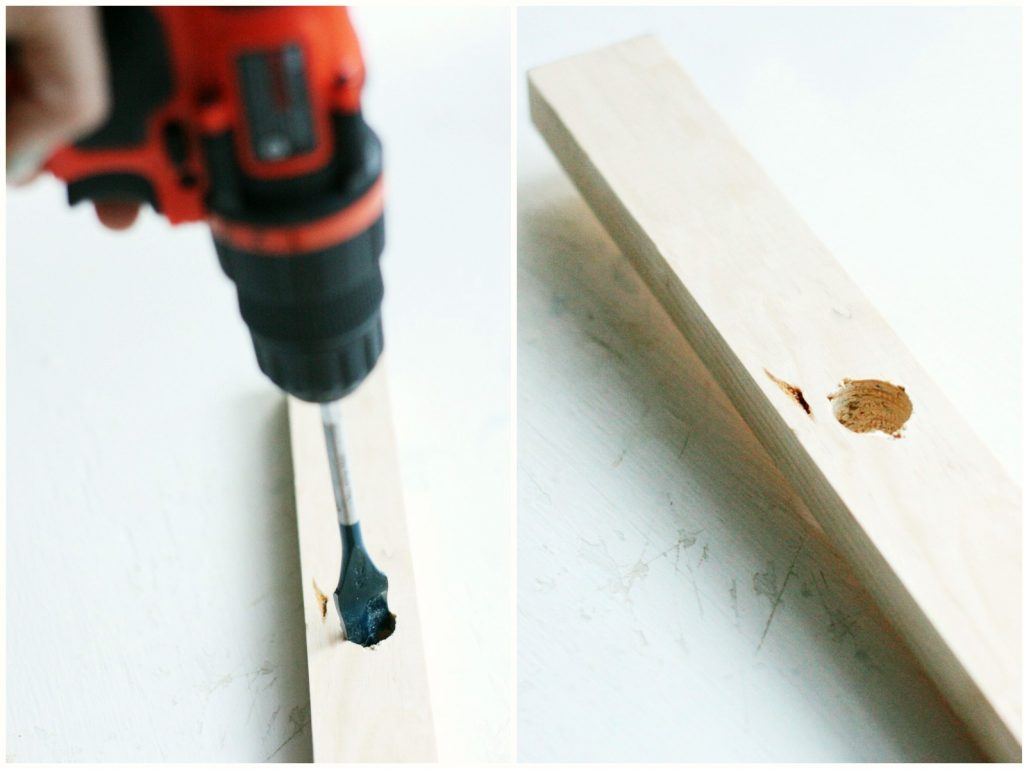
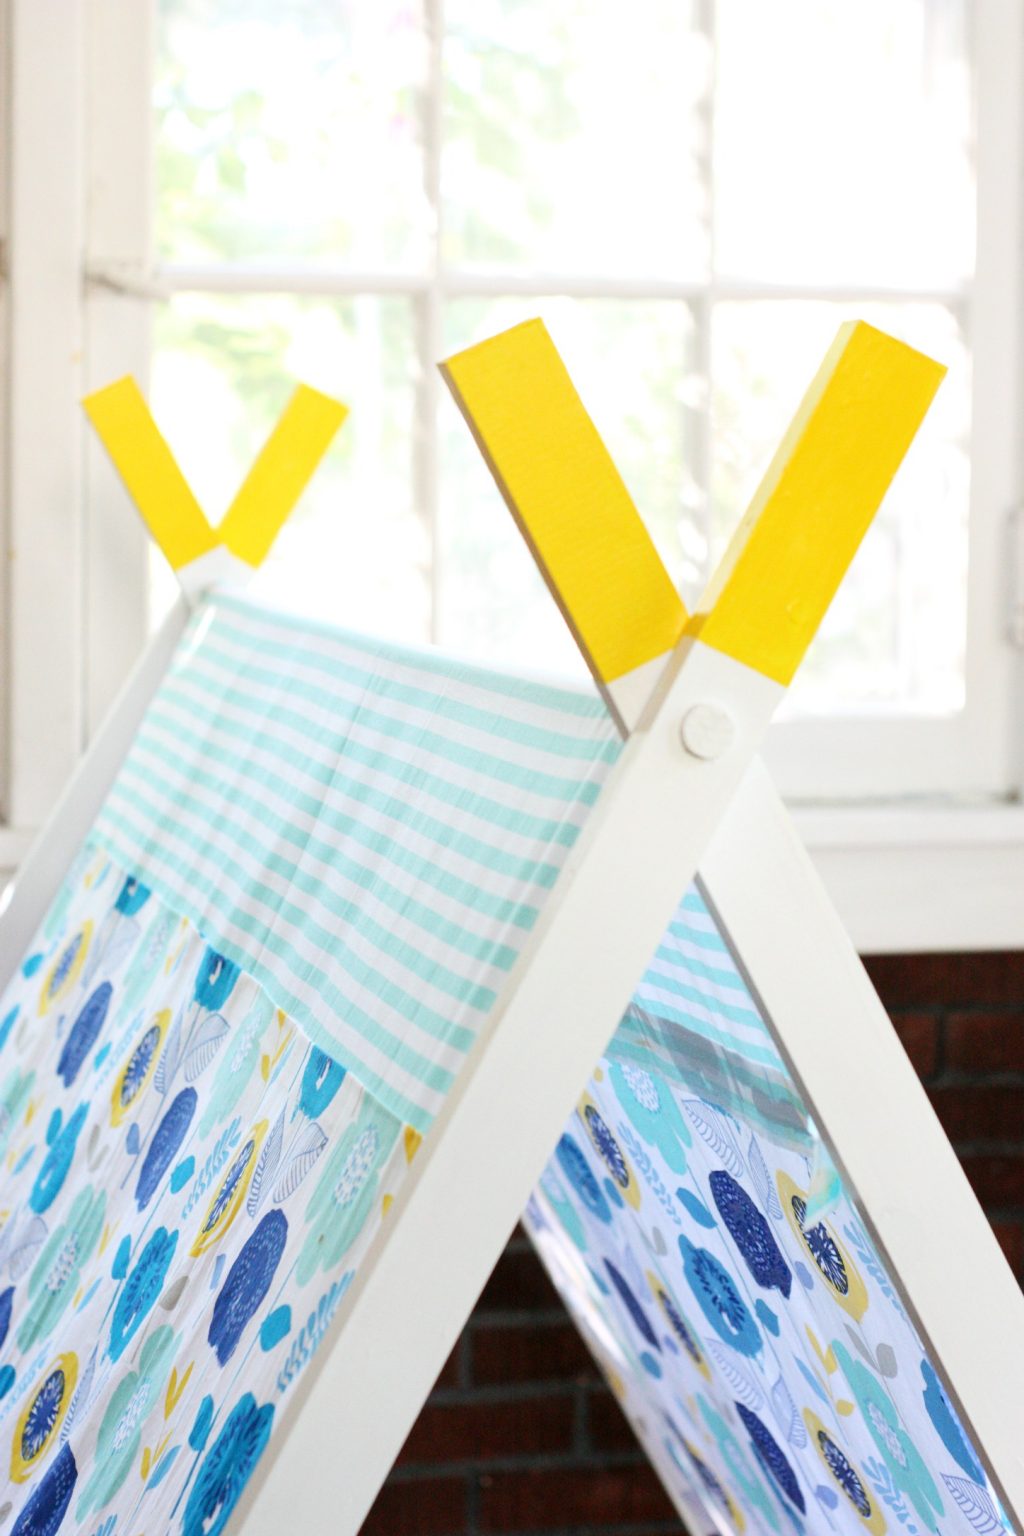
1. From the top of each moulding, measure and mark 6″ down.
2. With your drill and 3/4″ spade bit, drill a hole at your mark. Try to center the hole on your moulding. These holes will be for the top of your A-frame tent.
3. From the opposite end of your moulding, measure and mark 1.5″ down with your pencil.
4. With your drill and 3/4″ spade bit, drill a hole at your mark. Try to center the hole on your moulding. These holes will be for the bottom of your A-frame tent.
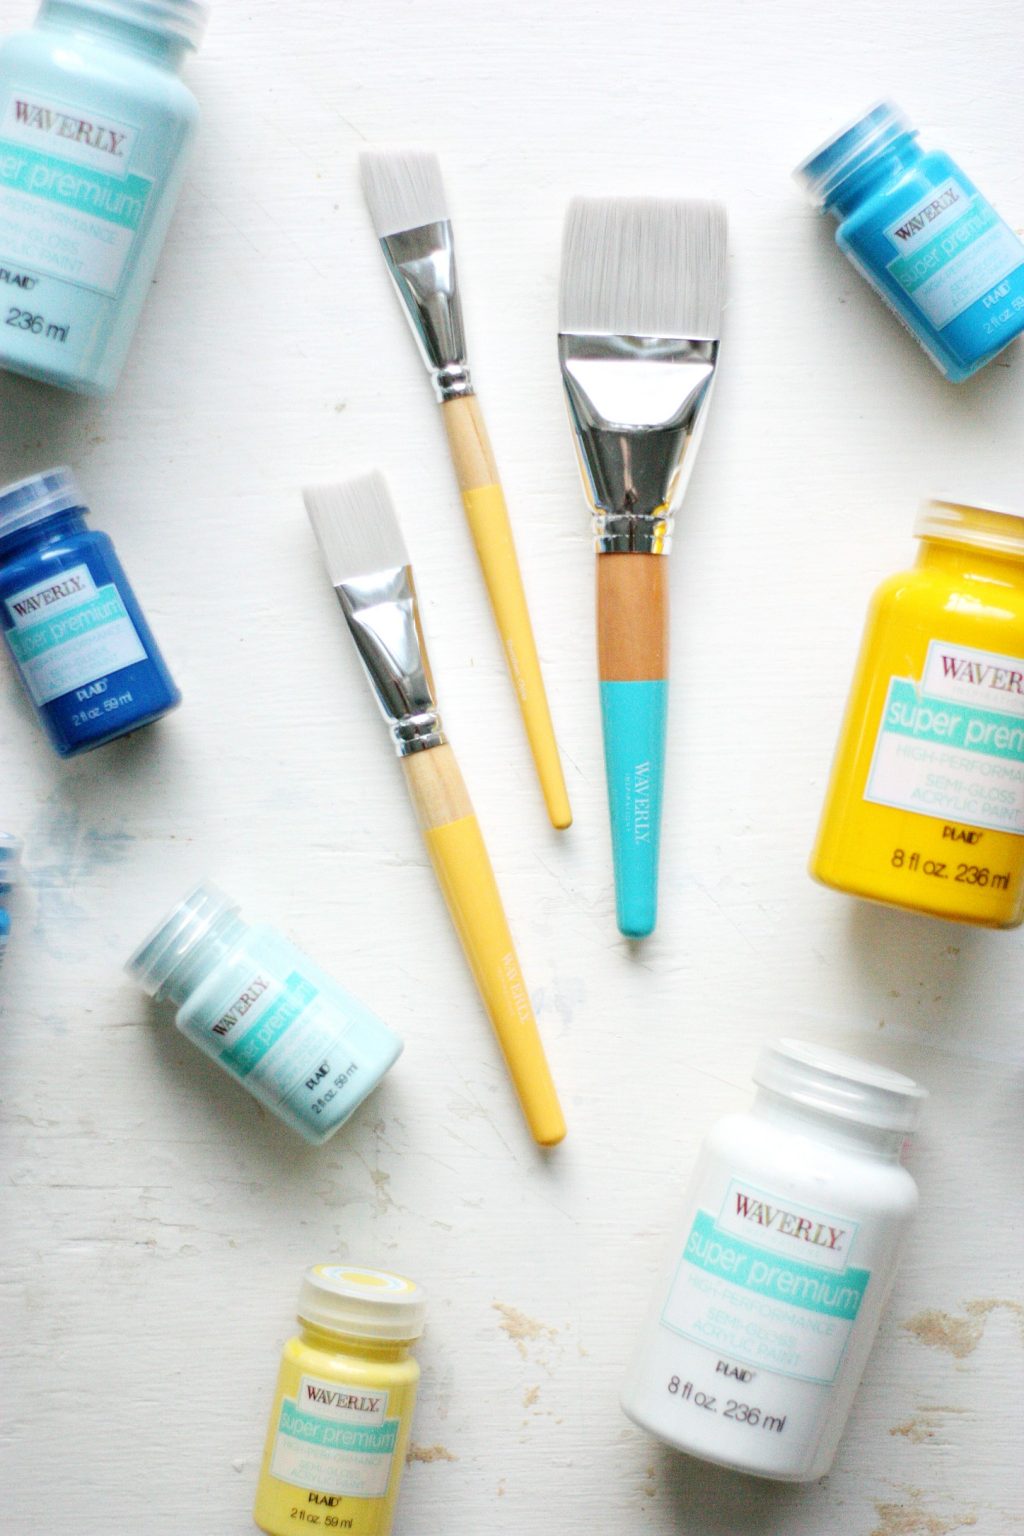
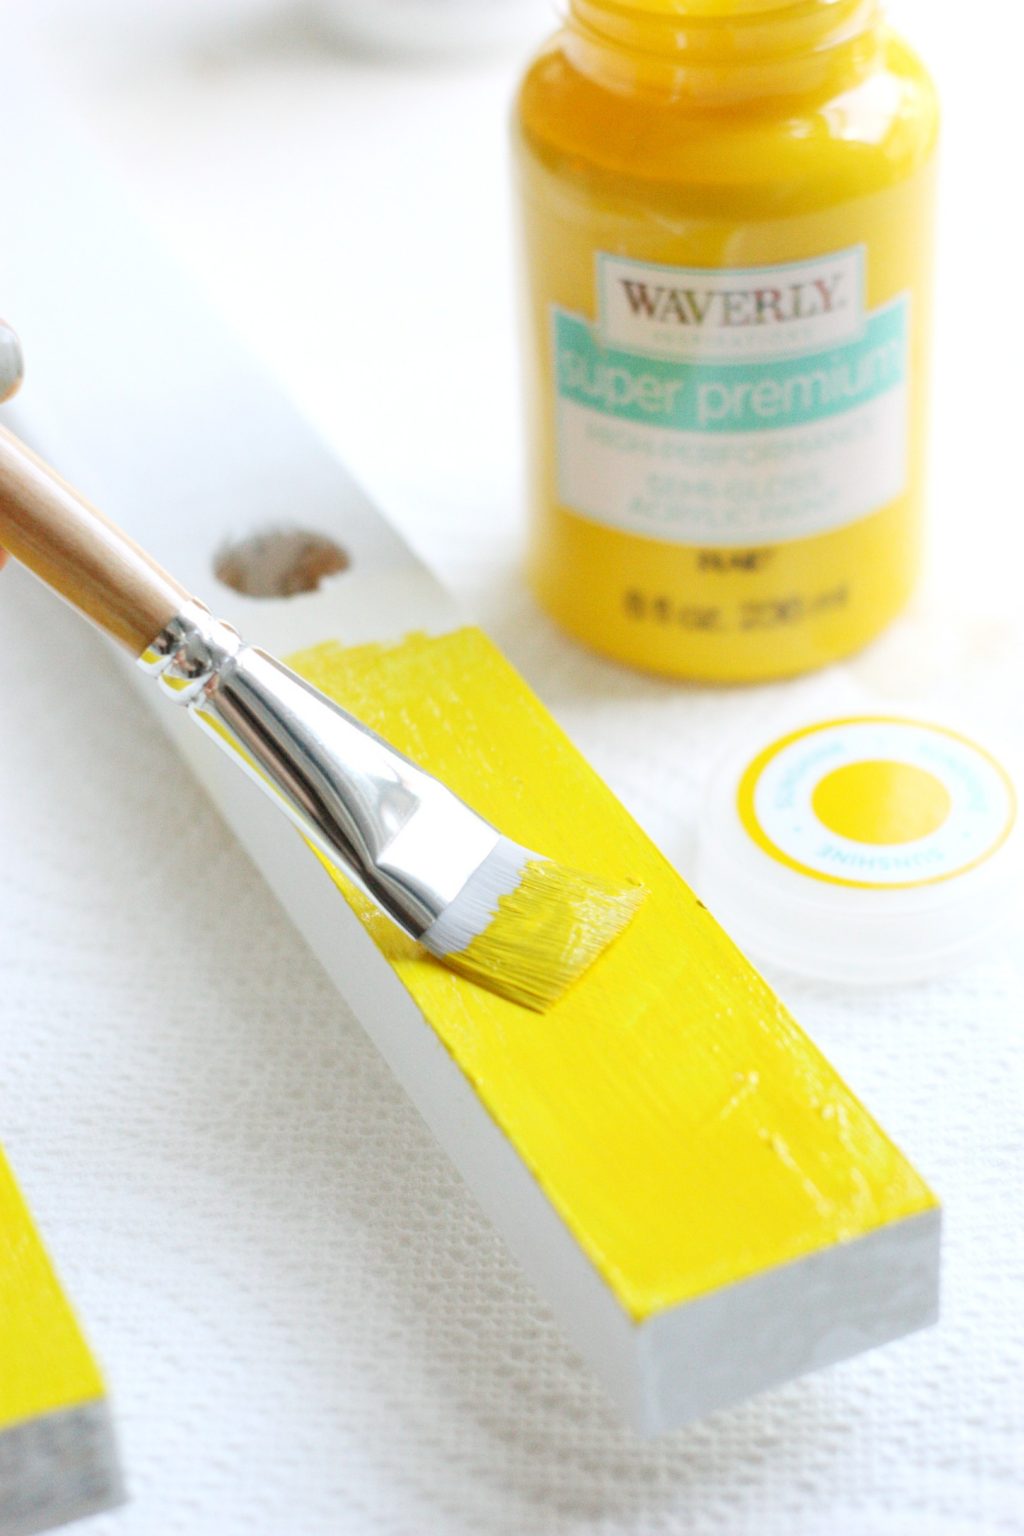
5. After you have drilled all of your holes, it’s time to paint! Using the Waverly Inspirations Super Premium Paint and brushes makes this so easy since it covers beautifully. Start by painting your dowels and mouldings white. Let dry completely.
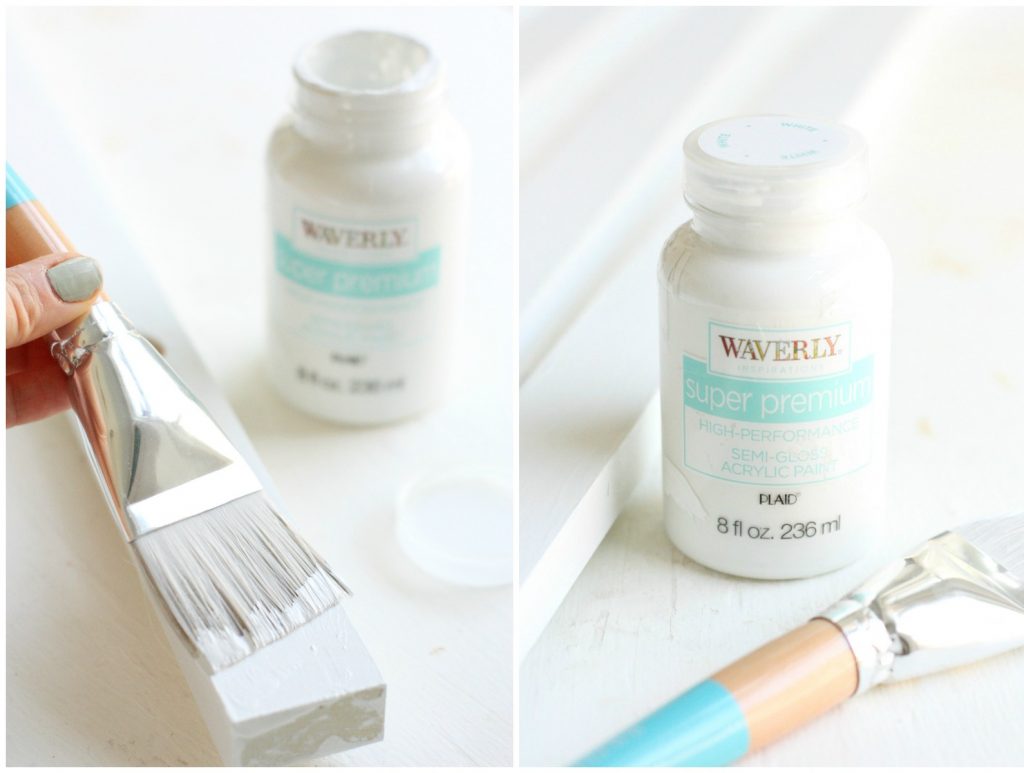
6. Tape off the top of the mouldings just above the drill holes. Paint with your accent color to create a dipped effect and let dry completely before removing the tape.

To assemble your Kids Play Tent:
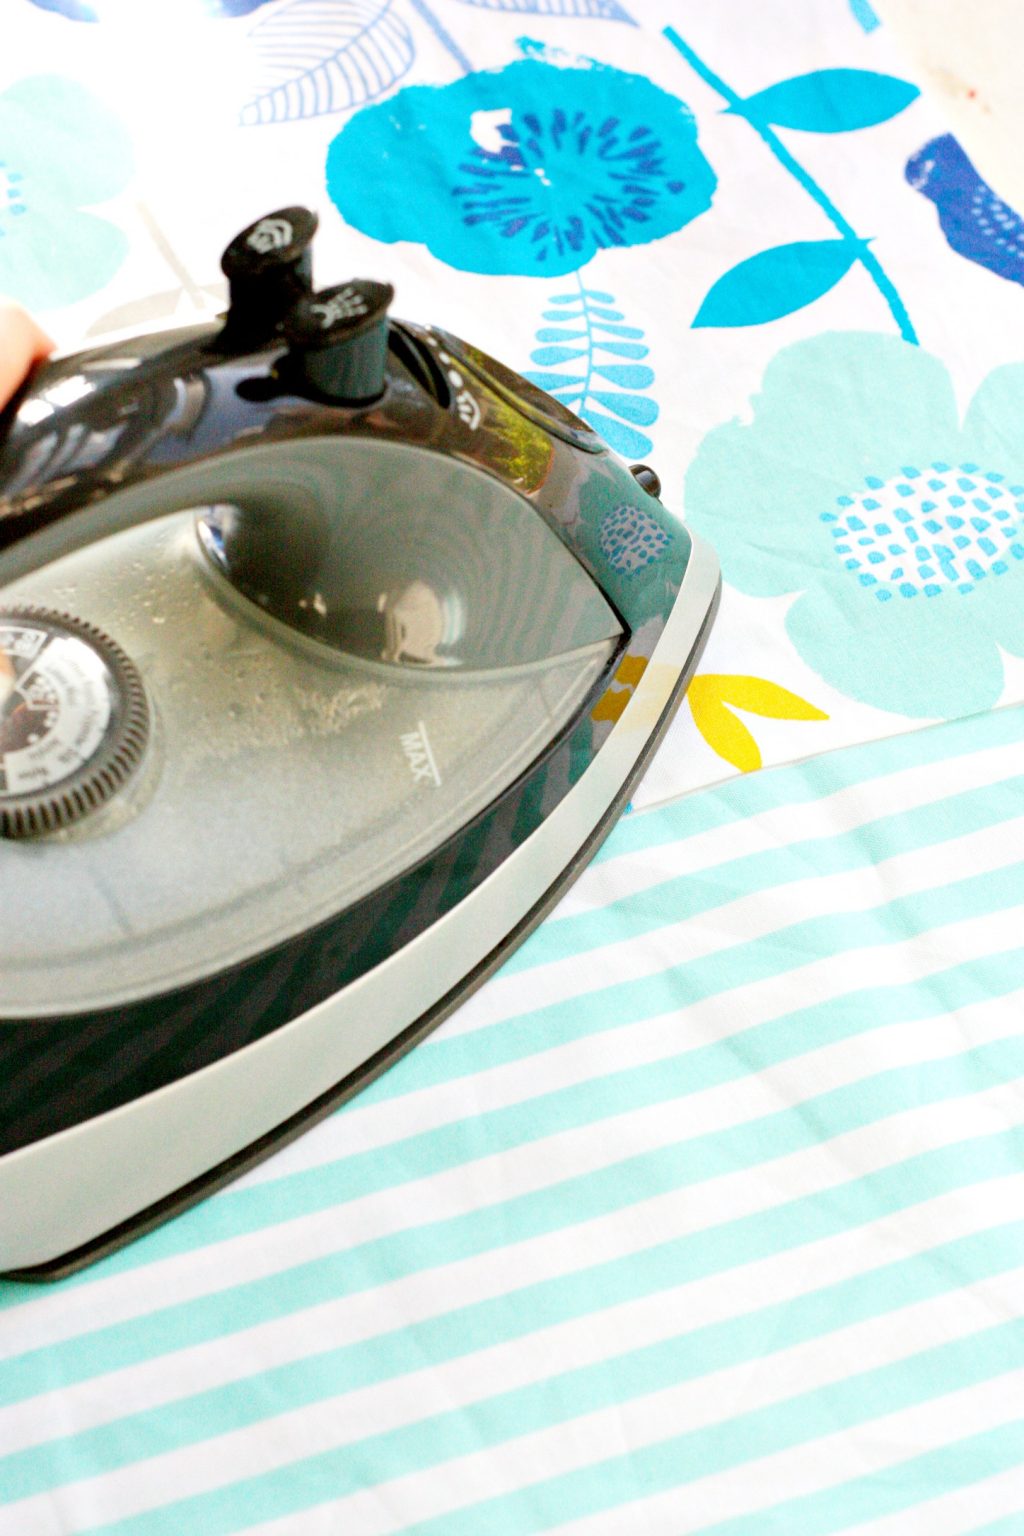
1. Cut your main fabric (in my case, the floral) into two 34″ x 51″ panels (this gives about a 2″ seam allowance). Cut the accent fabric (in my case, the stripe) into a 22″ x 51″ panel (this also gives about a 2″ seam allowance). Using a sewing machine or Heat N’ Bond and an iron, connect the three panels, with the accent fabric in the middle. Once connected, the panel should measure around 51″ x 84″.
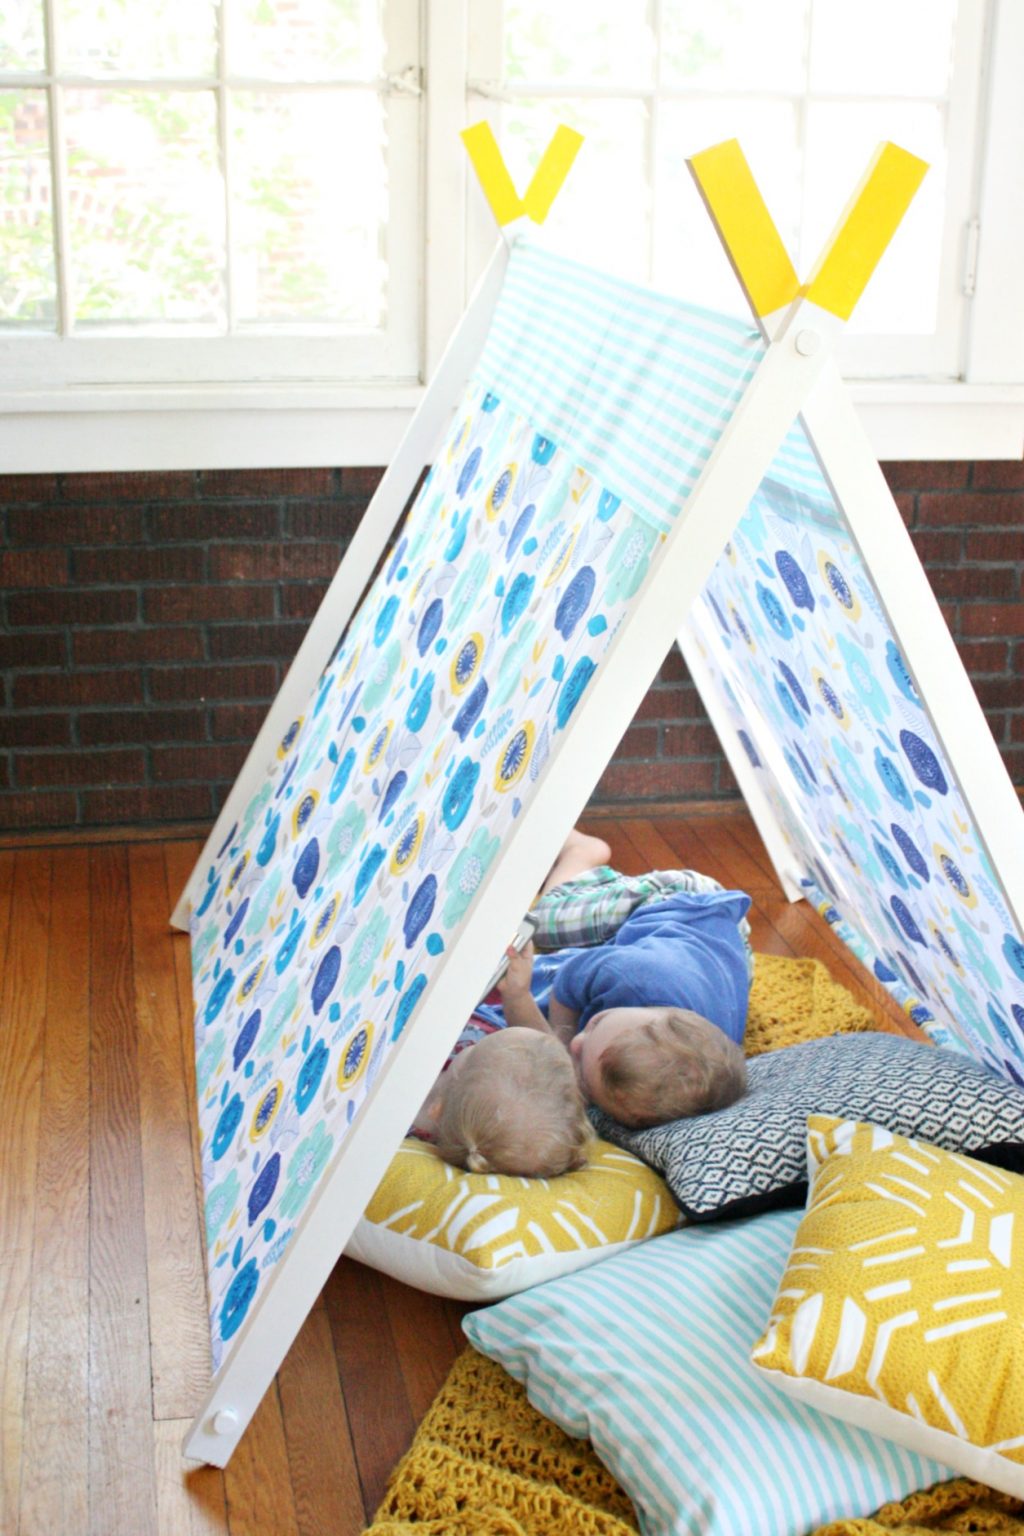
2. Group dowels into pairs and line up the top holes. Push dowel through the holes of the top moulding (6″ down from top). The hole should have a pretty tight grip and keep the dowel in place. Repeat with the mouldings for the opposite end. Drape your tent cover on top.
3. Take the remaining dowels and push through the holes on the bottom of the mouldings. Apply hot glue to the bottom dowel on one side and roll fabric around the dowel until secure. Repeat with second dowel on the opposite side.
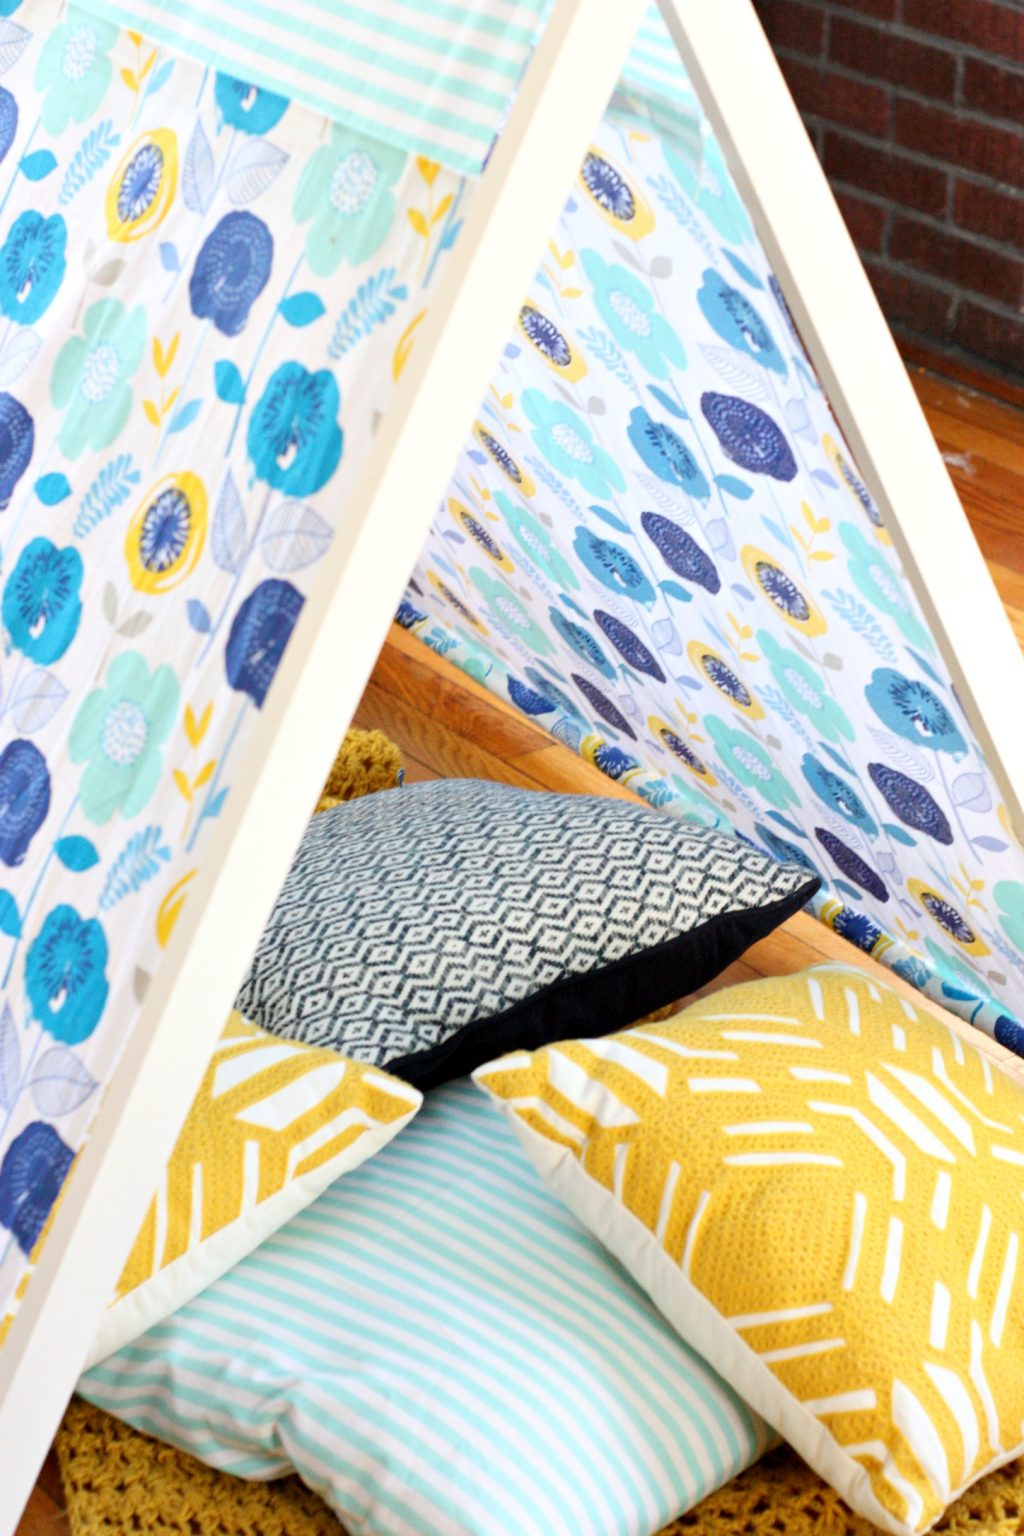
That’s it! Now it’s time to get lots of pillows and blankets and get cozy in your kids play tent!
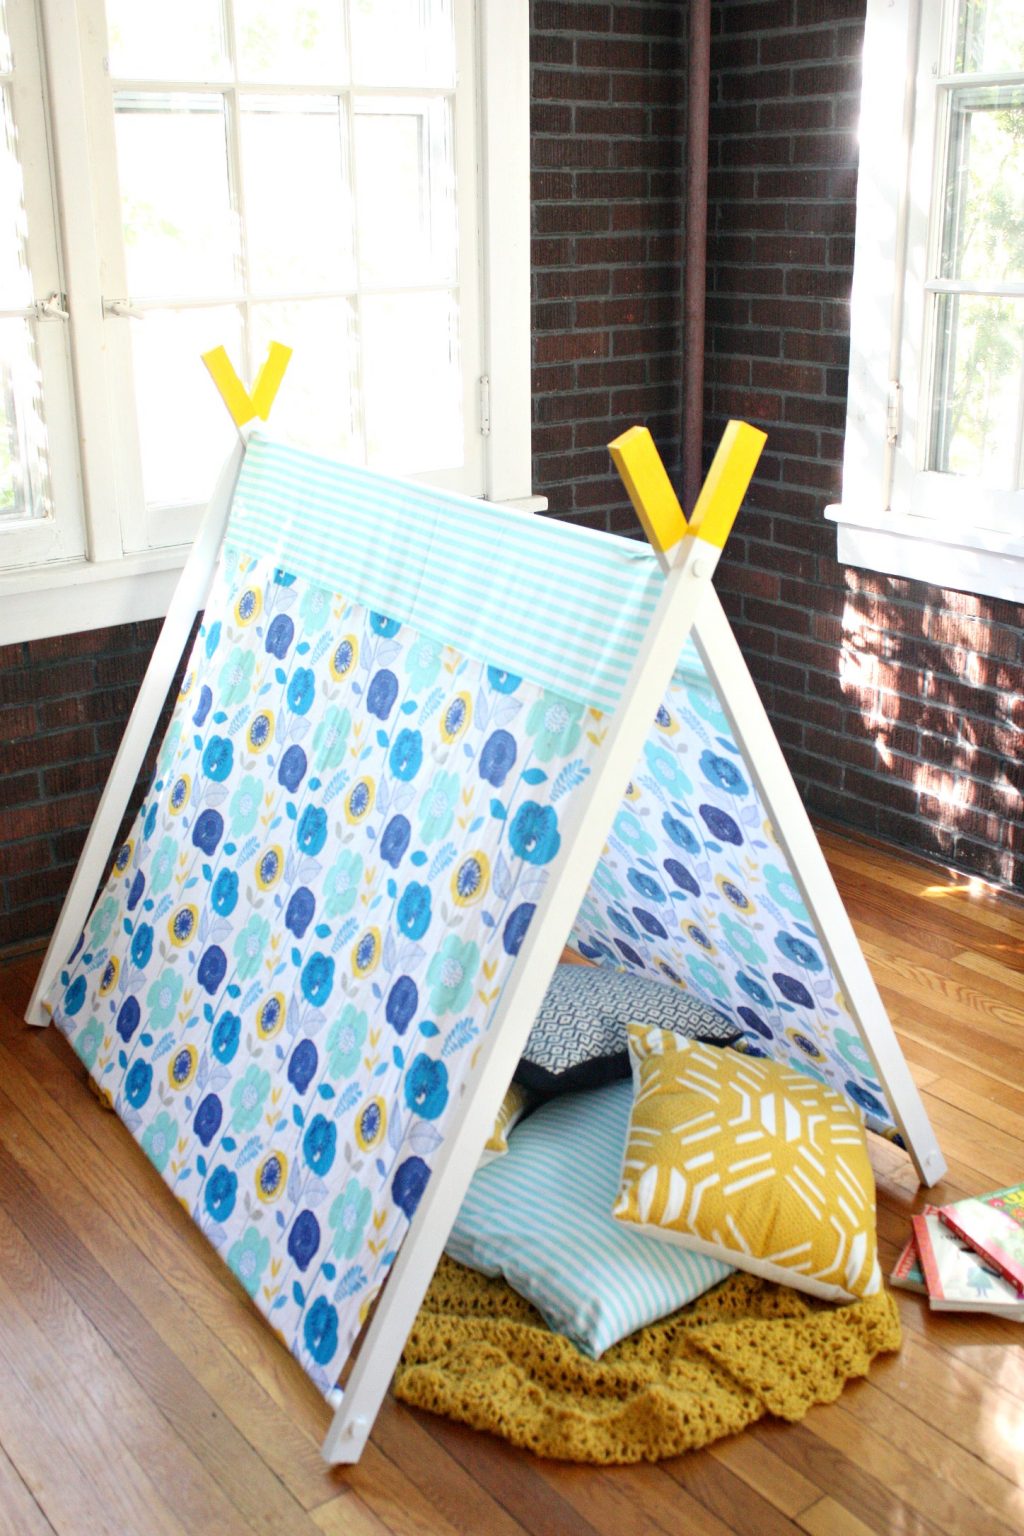
Isn’t it darling? Using the Waverly Inspirations line made it SO easy to make this simple tent colorful and stylish because everything was already coordinated in such fun ways. All we had to do was put the tools to use!


If you need us, I think you know where you can find us for the rest of the summer! Now, what fun projects do you have in mind to make with Waverly Inspirations Line? Give us the deets! And be sure to follow our friends at Plaid Crafts on Facebook, Instagram, Pinterest, and via Email as they celebrate 40 years of crafting with more super cool new product launches!
ox. Liz


That is SO adorable! Love the tent, the fabric, the colors…everything about it!
This is ADORABLE and my kids most definitely need one!
What a fun place for kids’ pretend play!! I’ve got a Craft Gossip post scheduled for later today that features your tutorial: http://sewing.craftgossip.com/?p=89284 –Anne
Will a twin inflatable air mattress fit in it?
What keeps it from opening?
[…] DIY A-Frame Play Tent […]
[…] You can always make your own with this DIY tutorial. […]
[…] Source Prettylifegirls […]
[…] Source Prettylifegirls […]