


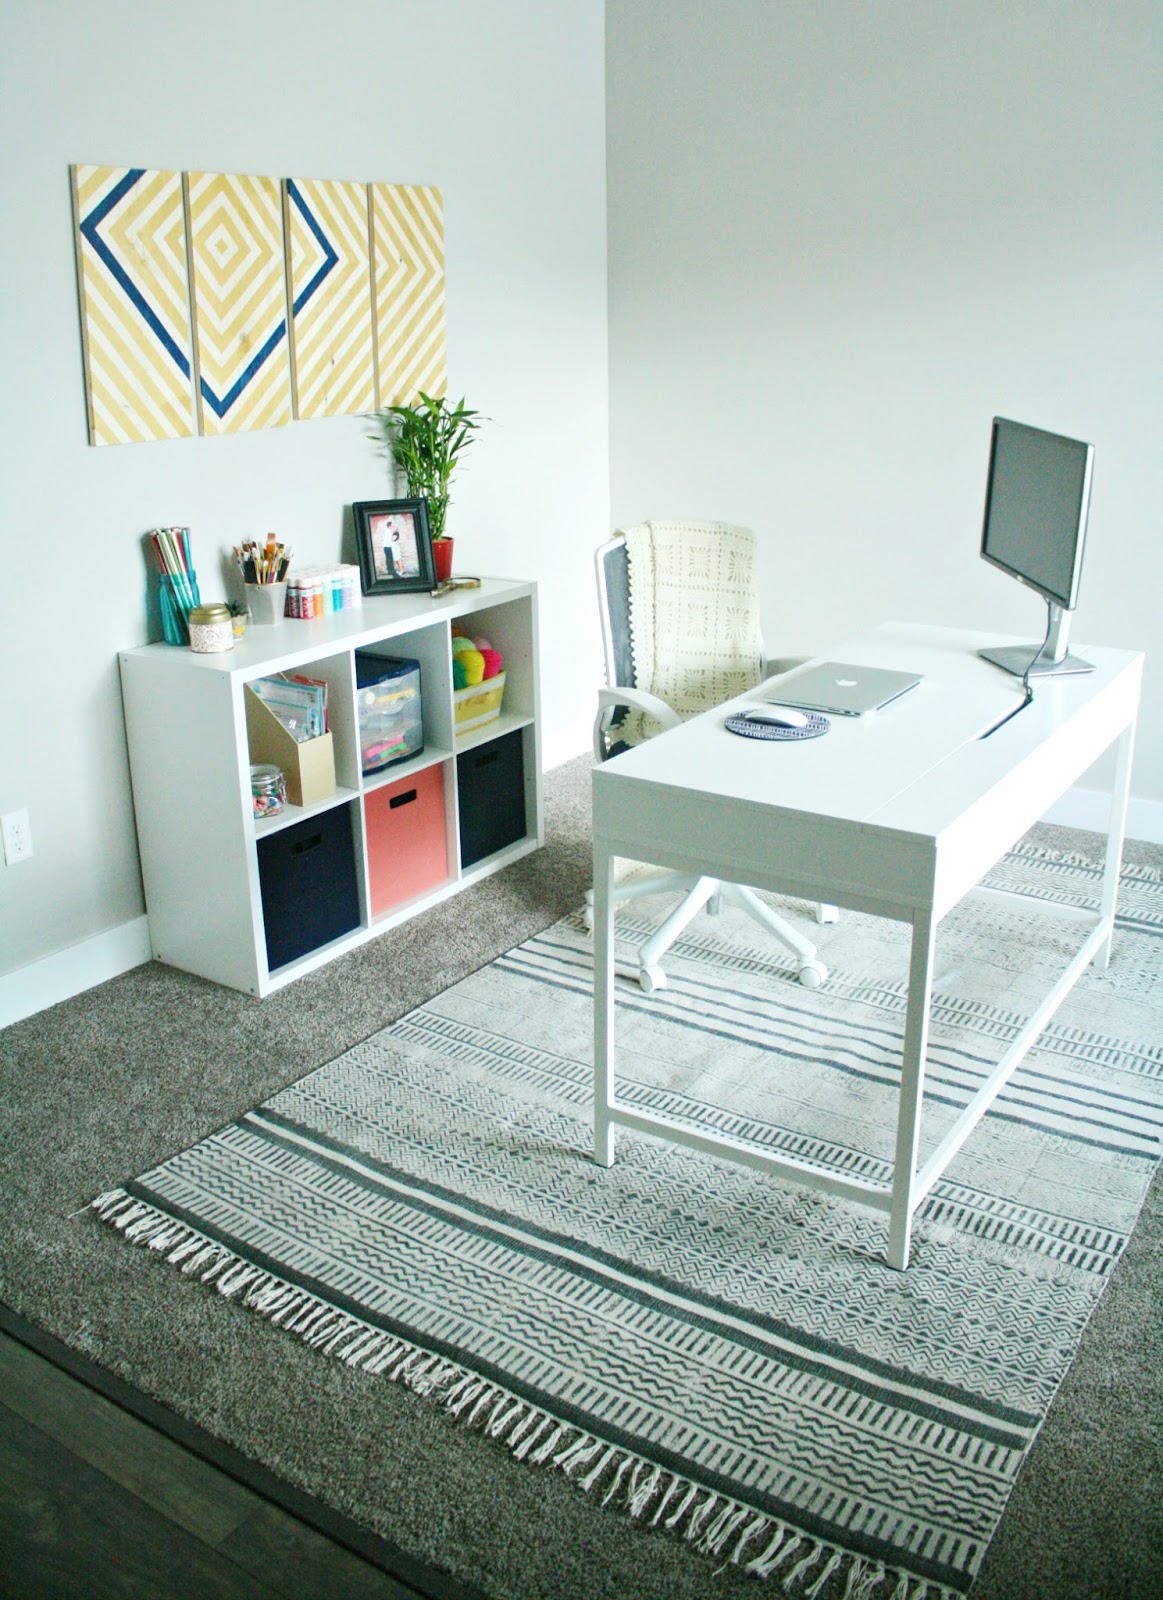
My brother and I both recently purchased new homes so we both had some walls that needed jazzing. For him, it was a guest room that needed a pop of color, and I needed something visually interesting in my new office, so I got to work! I found this tutorial for DIY Wooden Wall Art on Pinterest and loved the bold design, pop of color, and the best part, it was EASY. So easy, in fact, that I was able to bust out two of them without breaking a sweat to take my brother’s guest room and my office to the next level.
Here is what I did.
Supplies
Wooden boards
Ruler/straight edge
Pencil
Painter’s tape
X-acto knife
FolkArt ® craft paint (one primary color and one accent color)
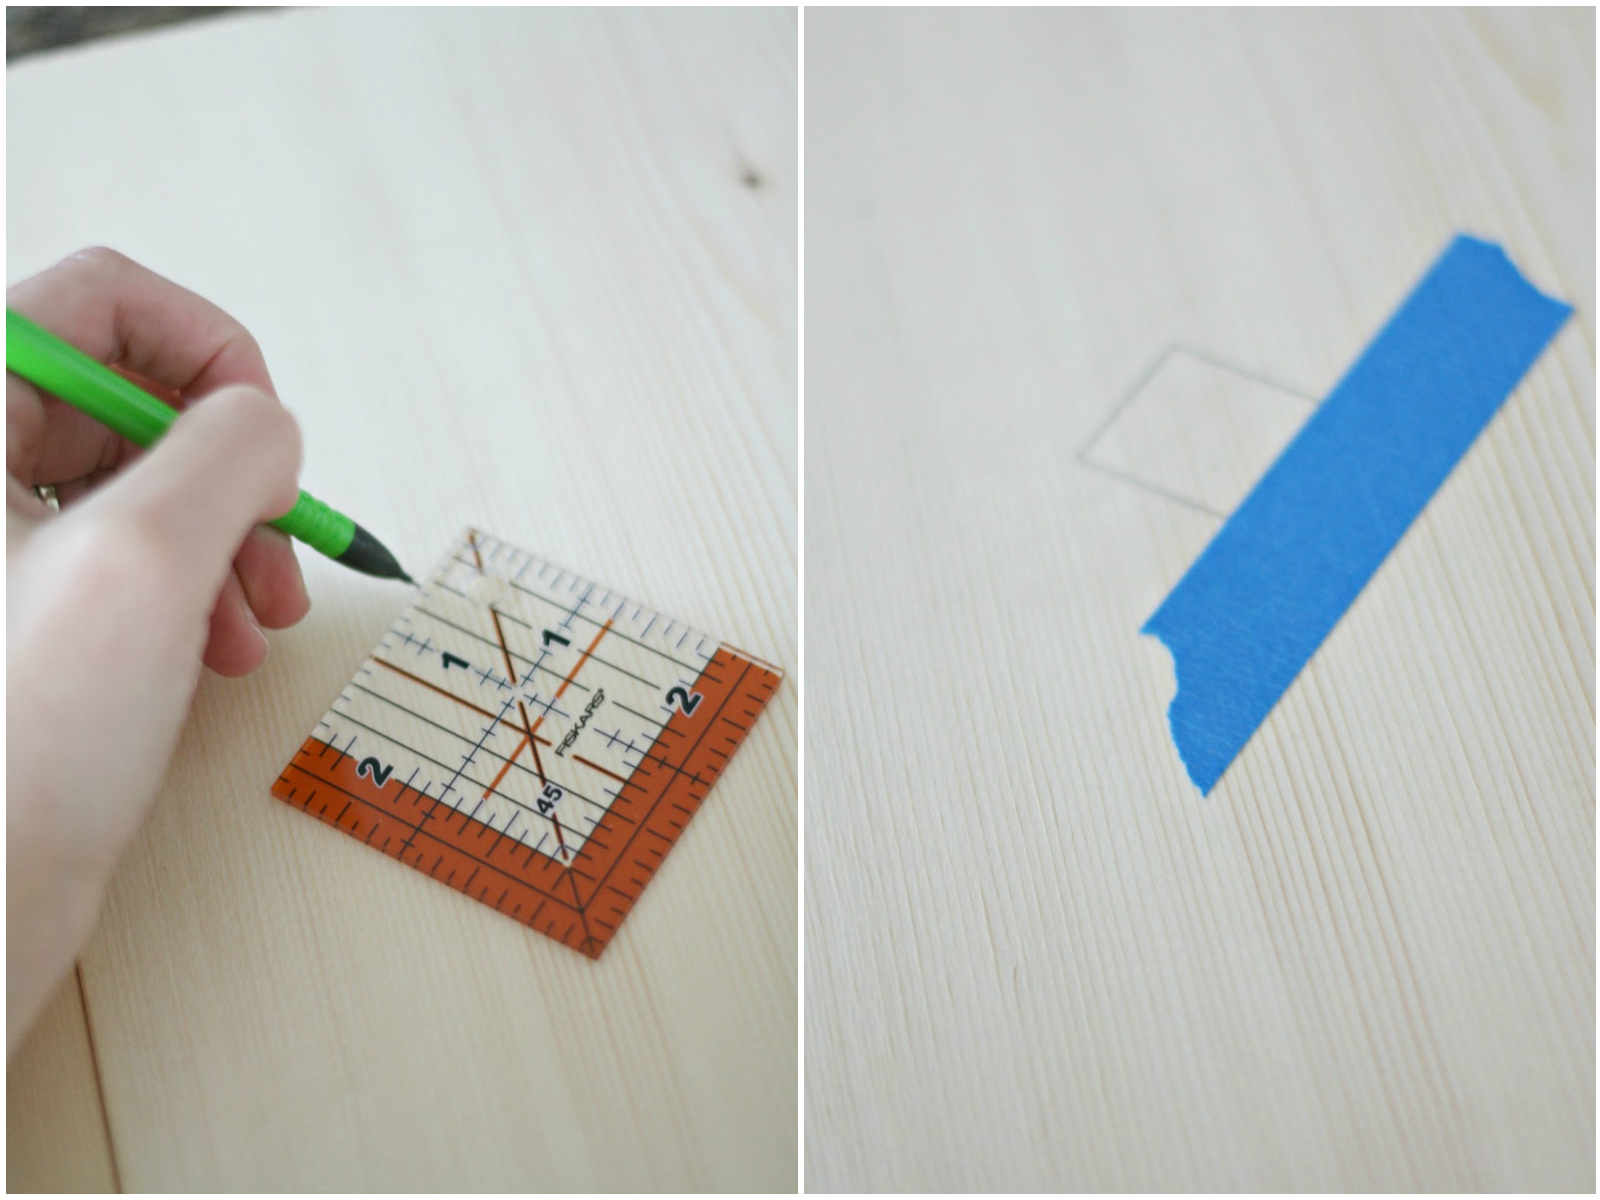
Start by drawing a square as the starting point for your design. Then tape around the square with your painter’s tape. Cut the edges of the tape to make it square.
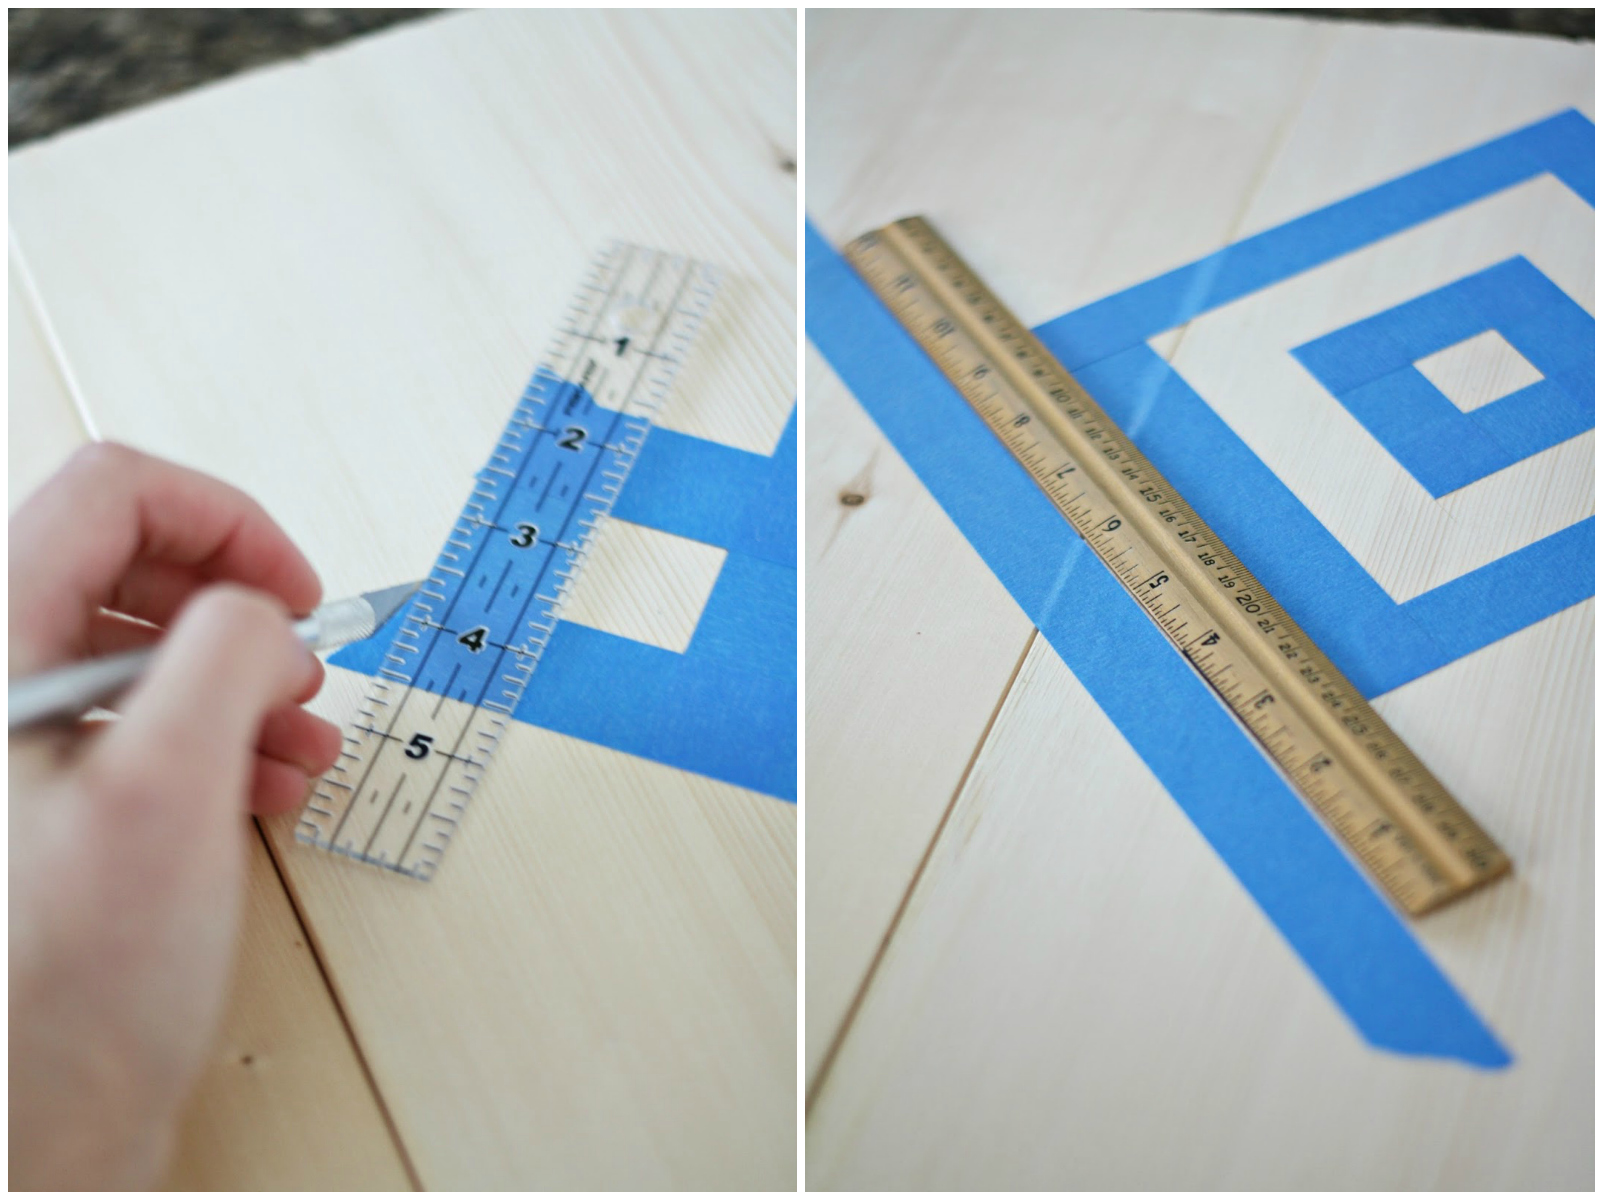
Using your ruler to space out the tape, lay the next lines of tape. Cut the edges. Repeat until the board is covered.

Paint one square with your accent color. Paint the rest of the board with the primary color.
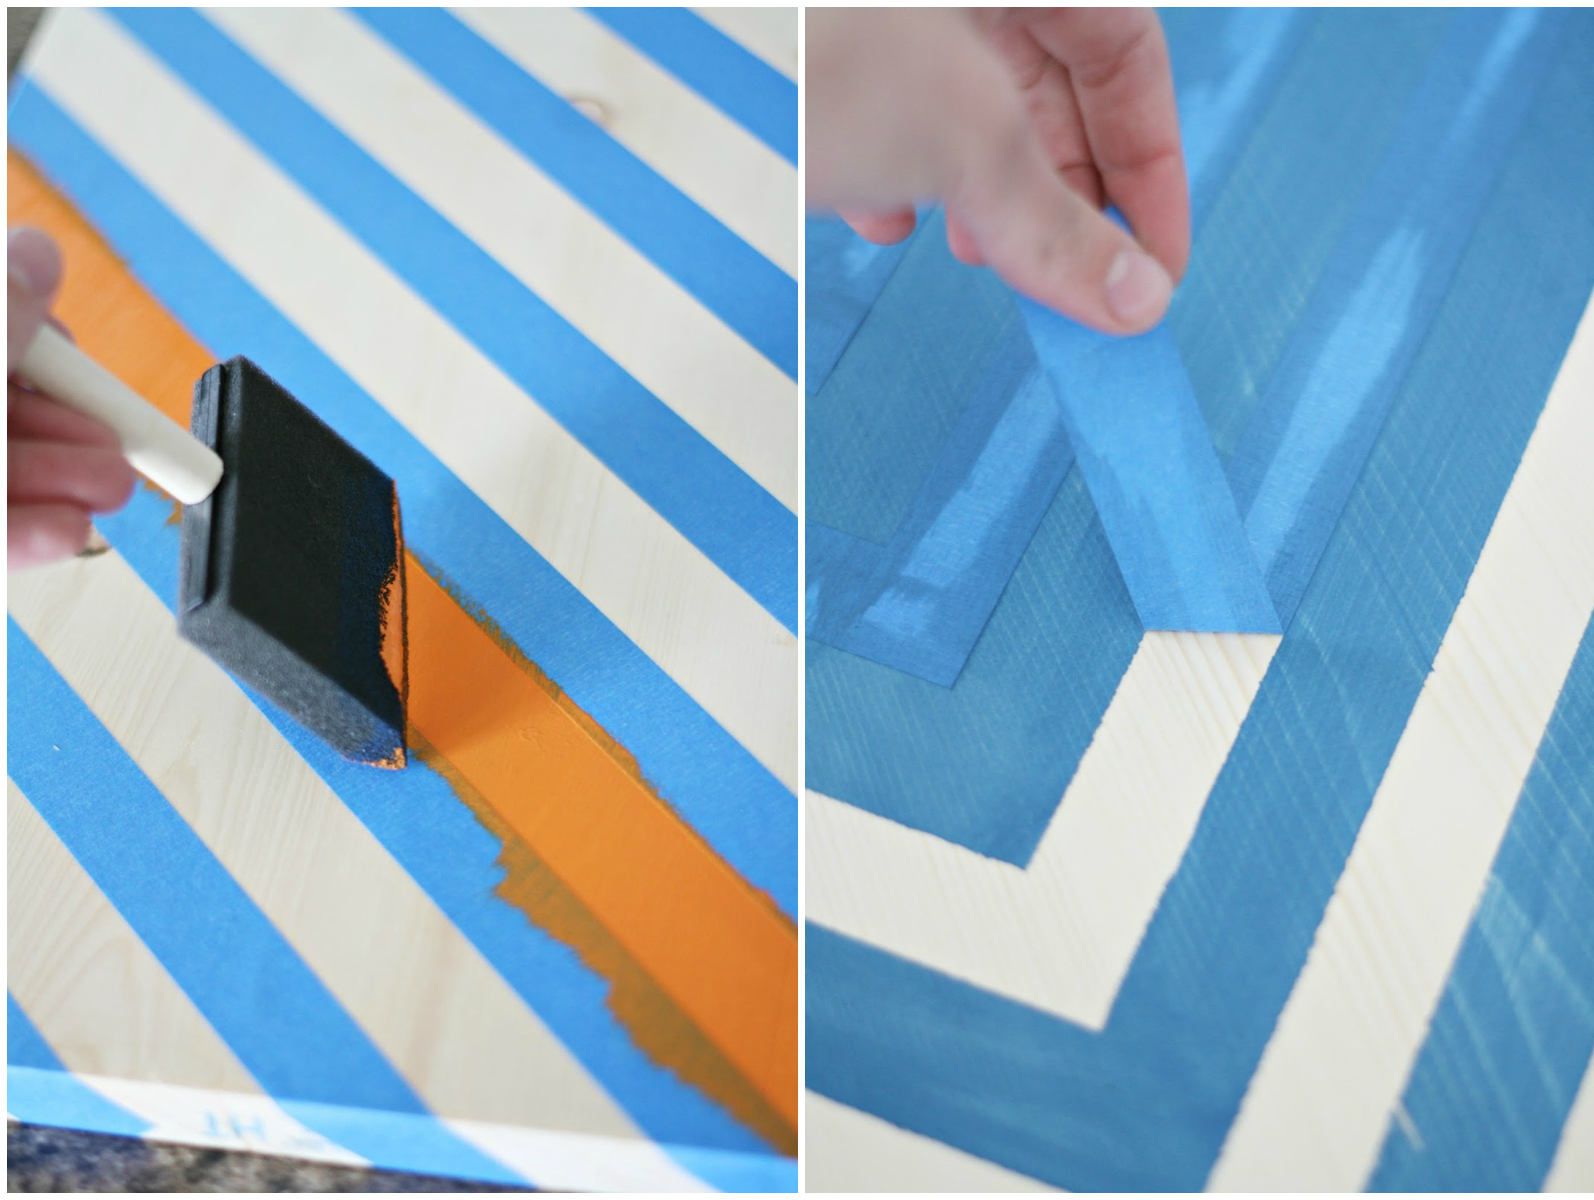
Remove the tape (the paint doesn’t have to be dry for this).
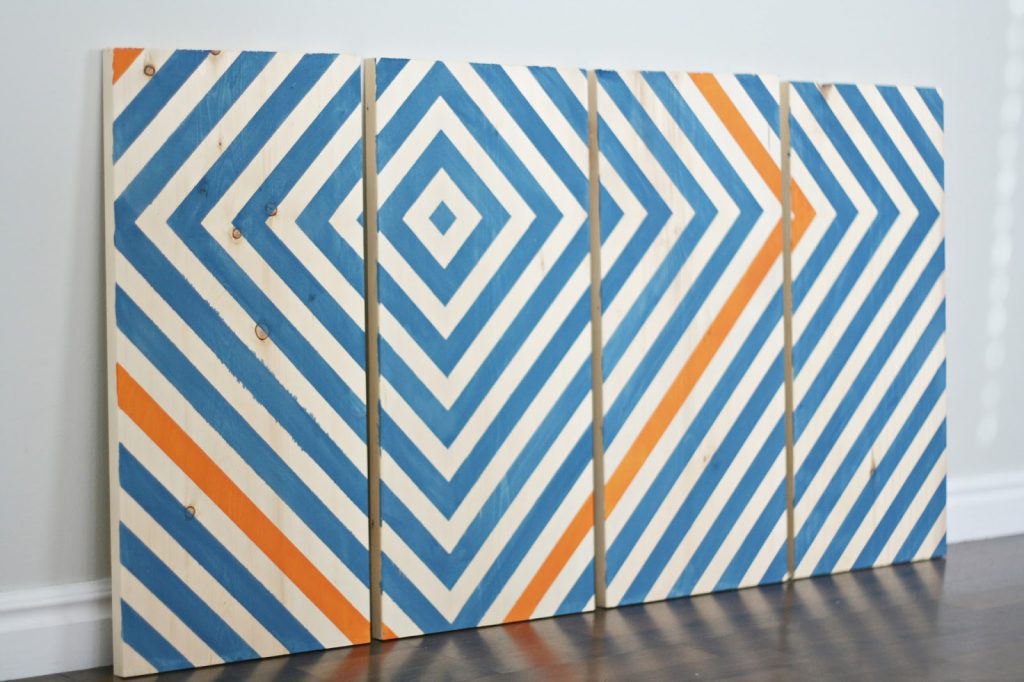
This project was so easy, the taping was kind of therapeutic for me (is that weird?), and the final result is awesome! The blue and orange one went to my bro’s (now darling, obvi) guest room and a gold + navy one went in my pretty big-girl office:
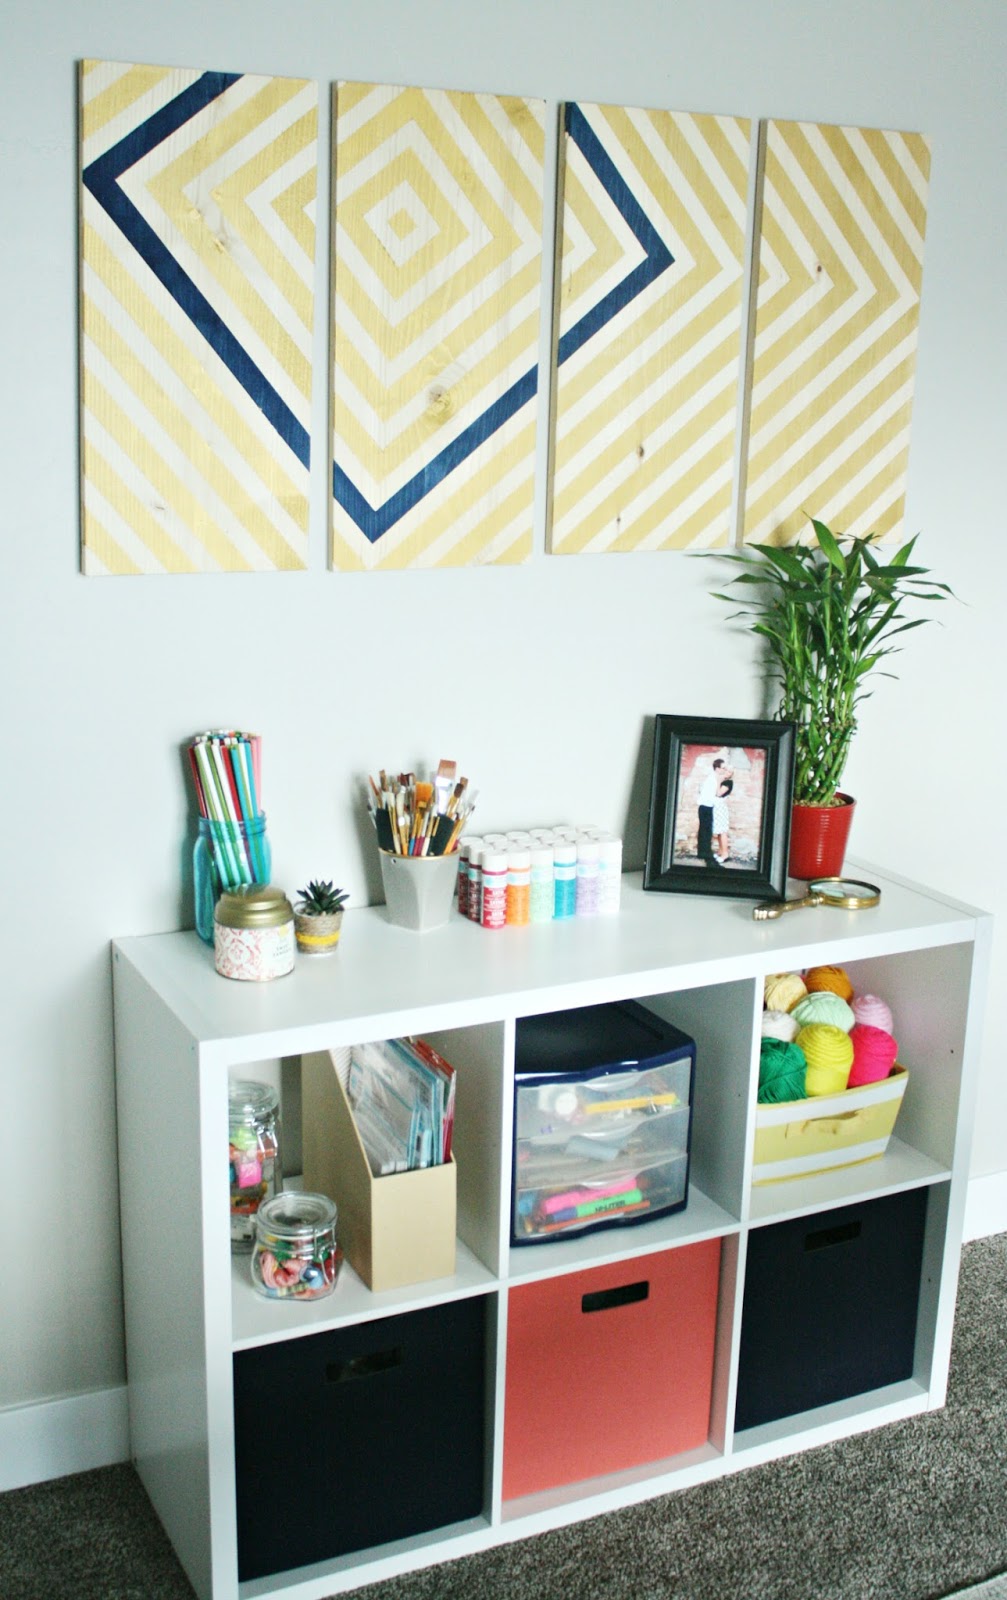


Aren’t they fun? Happy wall jazzing!
ox. Sam


Your office looks so cute! And I love this wall art!
Paige
http://thehappyflammily.com
Love it!
I love this! We're redoing our master bedroom and this would be perfect to add some color. Did you buy the boards this size or did you have them cut? What size did you use? Thanks!
Hi Tiff! My friend actually had some extra wood that she gave me that was already cut. I think it was around 10"x28". But in the original tutorial (which I link in the first paragraph), they just used plywood and it looks amazing! Good luck with your room!
What did you use to hang them? So cute!
Command strips! So so so easy!