


Over the years we’ve been lucky enough to be apart of several Mod Podge milestones and celebrate the iconic brand as it continues to be a staple for any craft room. And, if you can believe it, it’s now been 55 years since Jan Wetstone created the product, revolutionizing the way makers decopauge, glue, seal, and create! In celebration, we’ve got a new project of our own using Mod Podge as well as Aleene’s glue! Mod Podge and Aleene’s were both founded by women who created a path for makers that is still inspiring artists of all kinds over a half a century later.
To commemorate the occasion, we’re giving a classic decor piece a modern twist, making patterned candle holders! When we think about making, we think about connection — connecting to those we make with and using what we make to bring people together — and candle holders bring an ambiance to any table where you may gather! We used Aleene’s glue to assemble the candle holders from unfinished wood pieces, then used Mod Podge to apply patterned napkins to make them extra special!
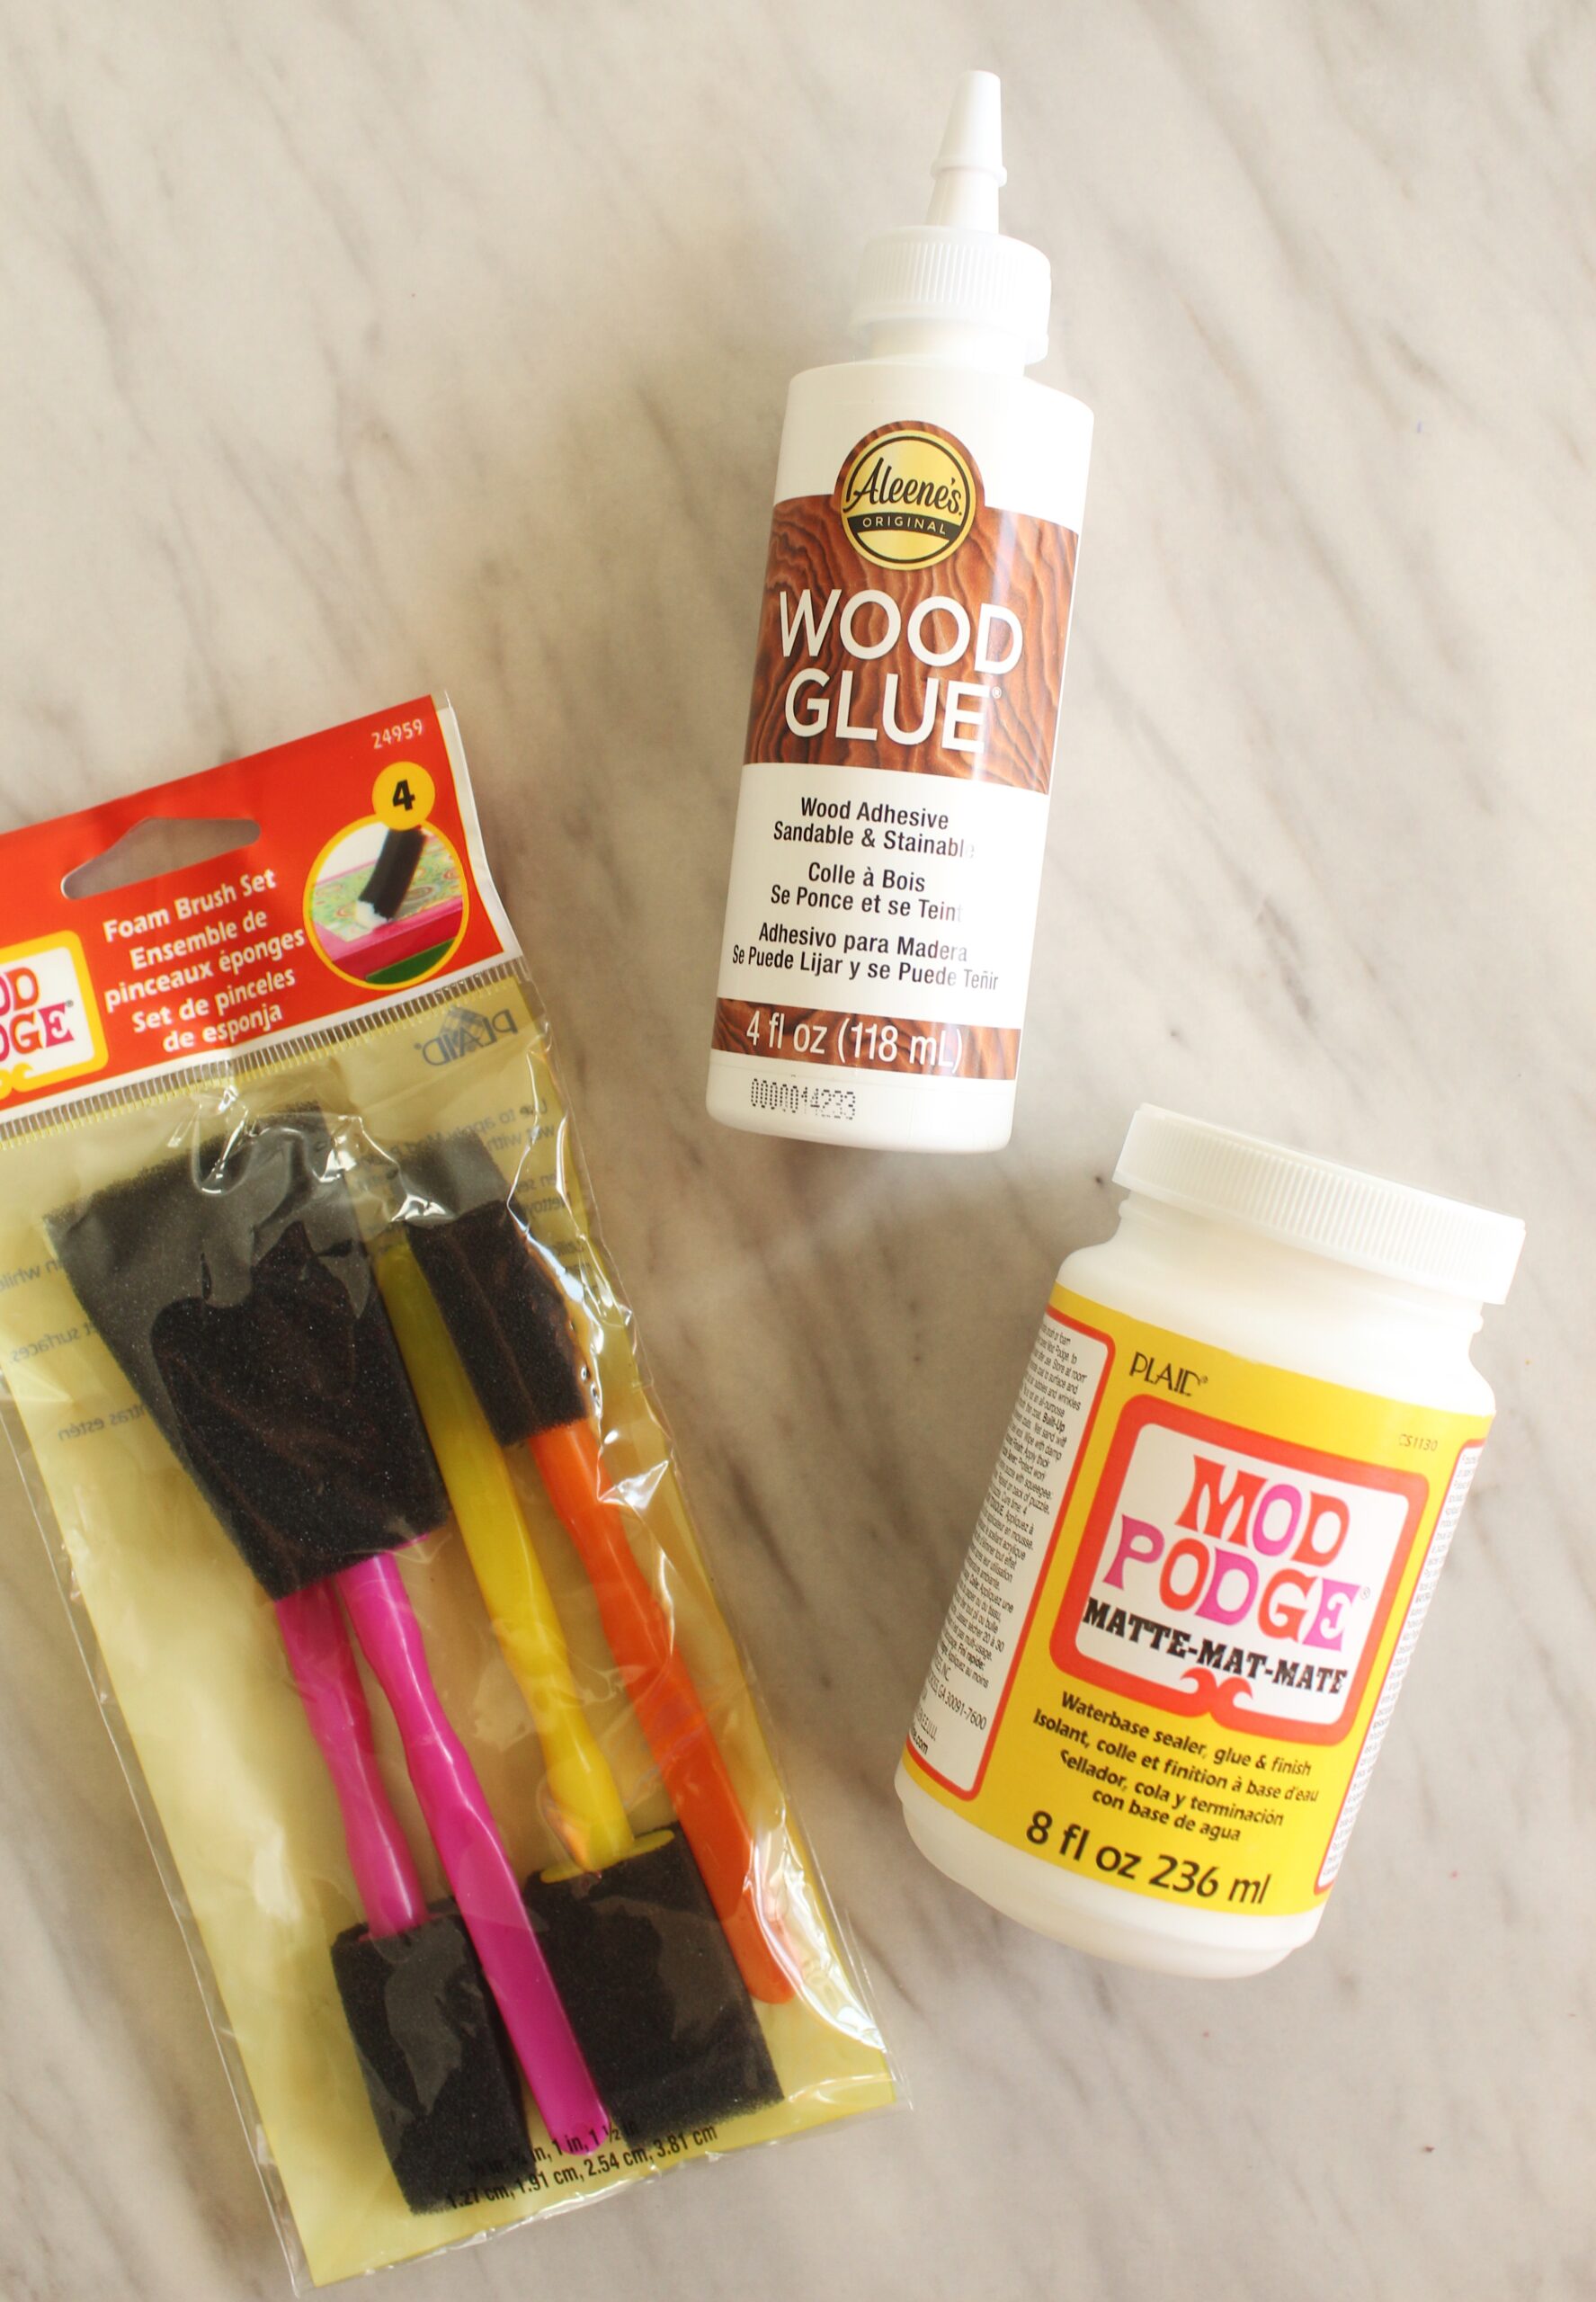
Here is what you need:

Supplies needed to make DIY Taper Candle Holders
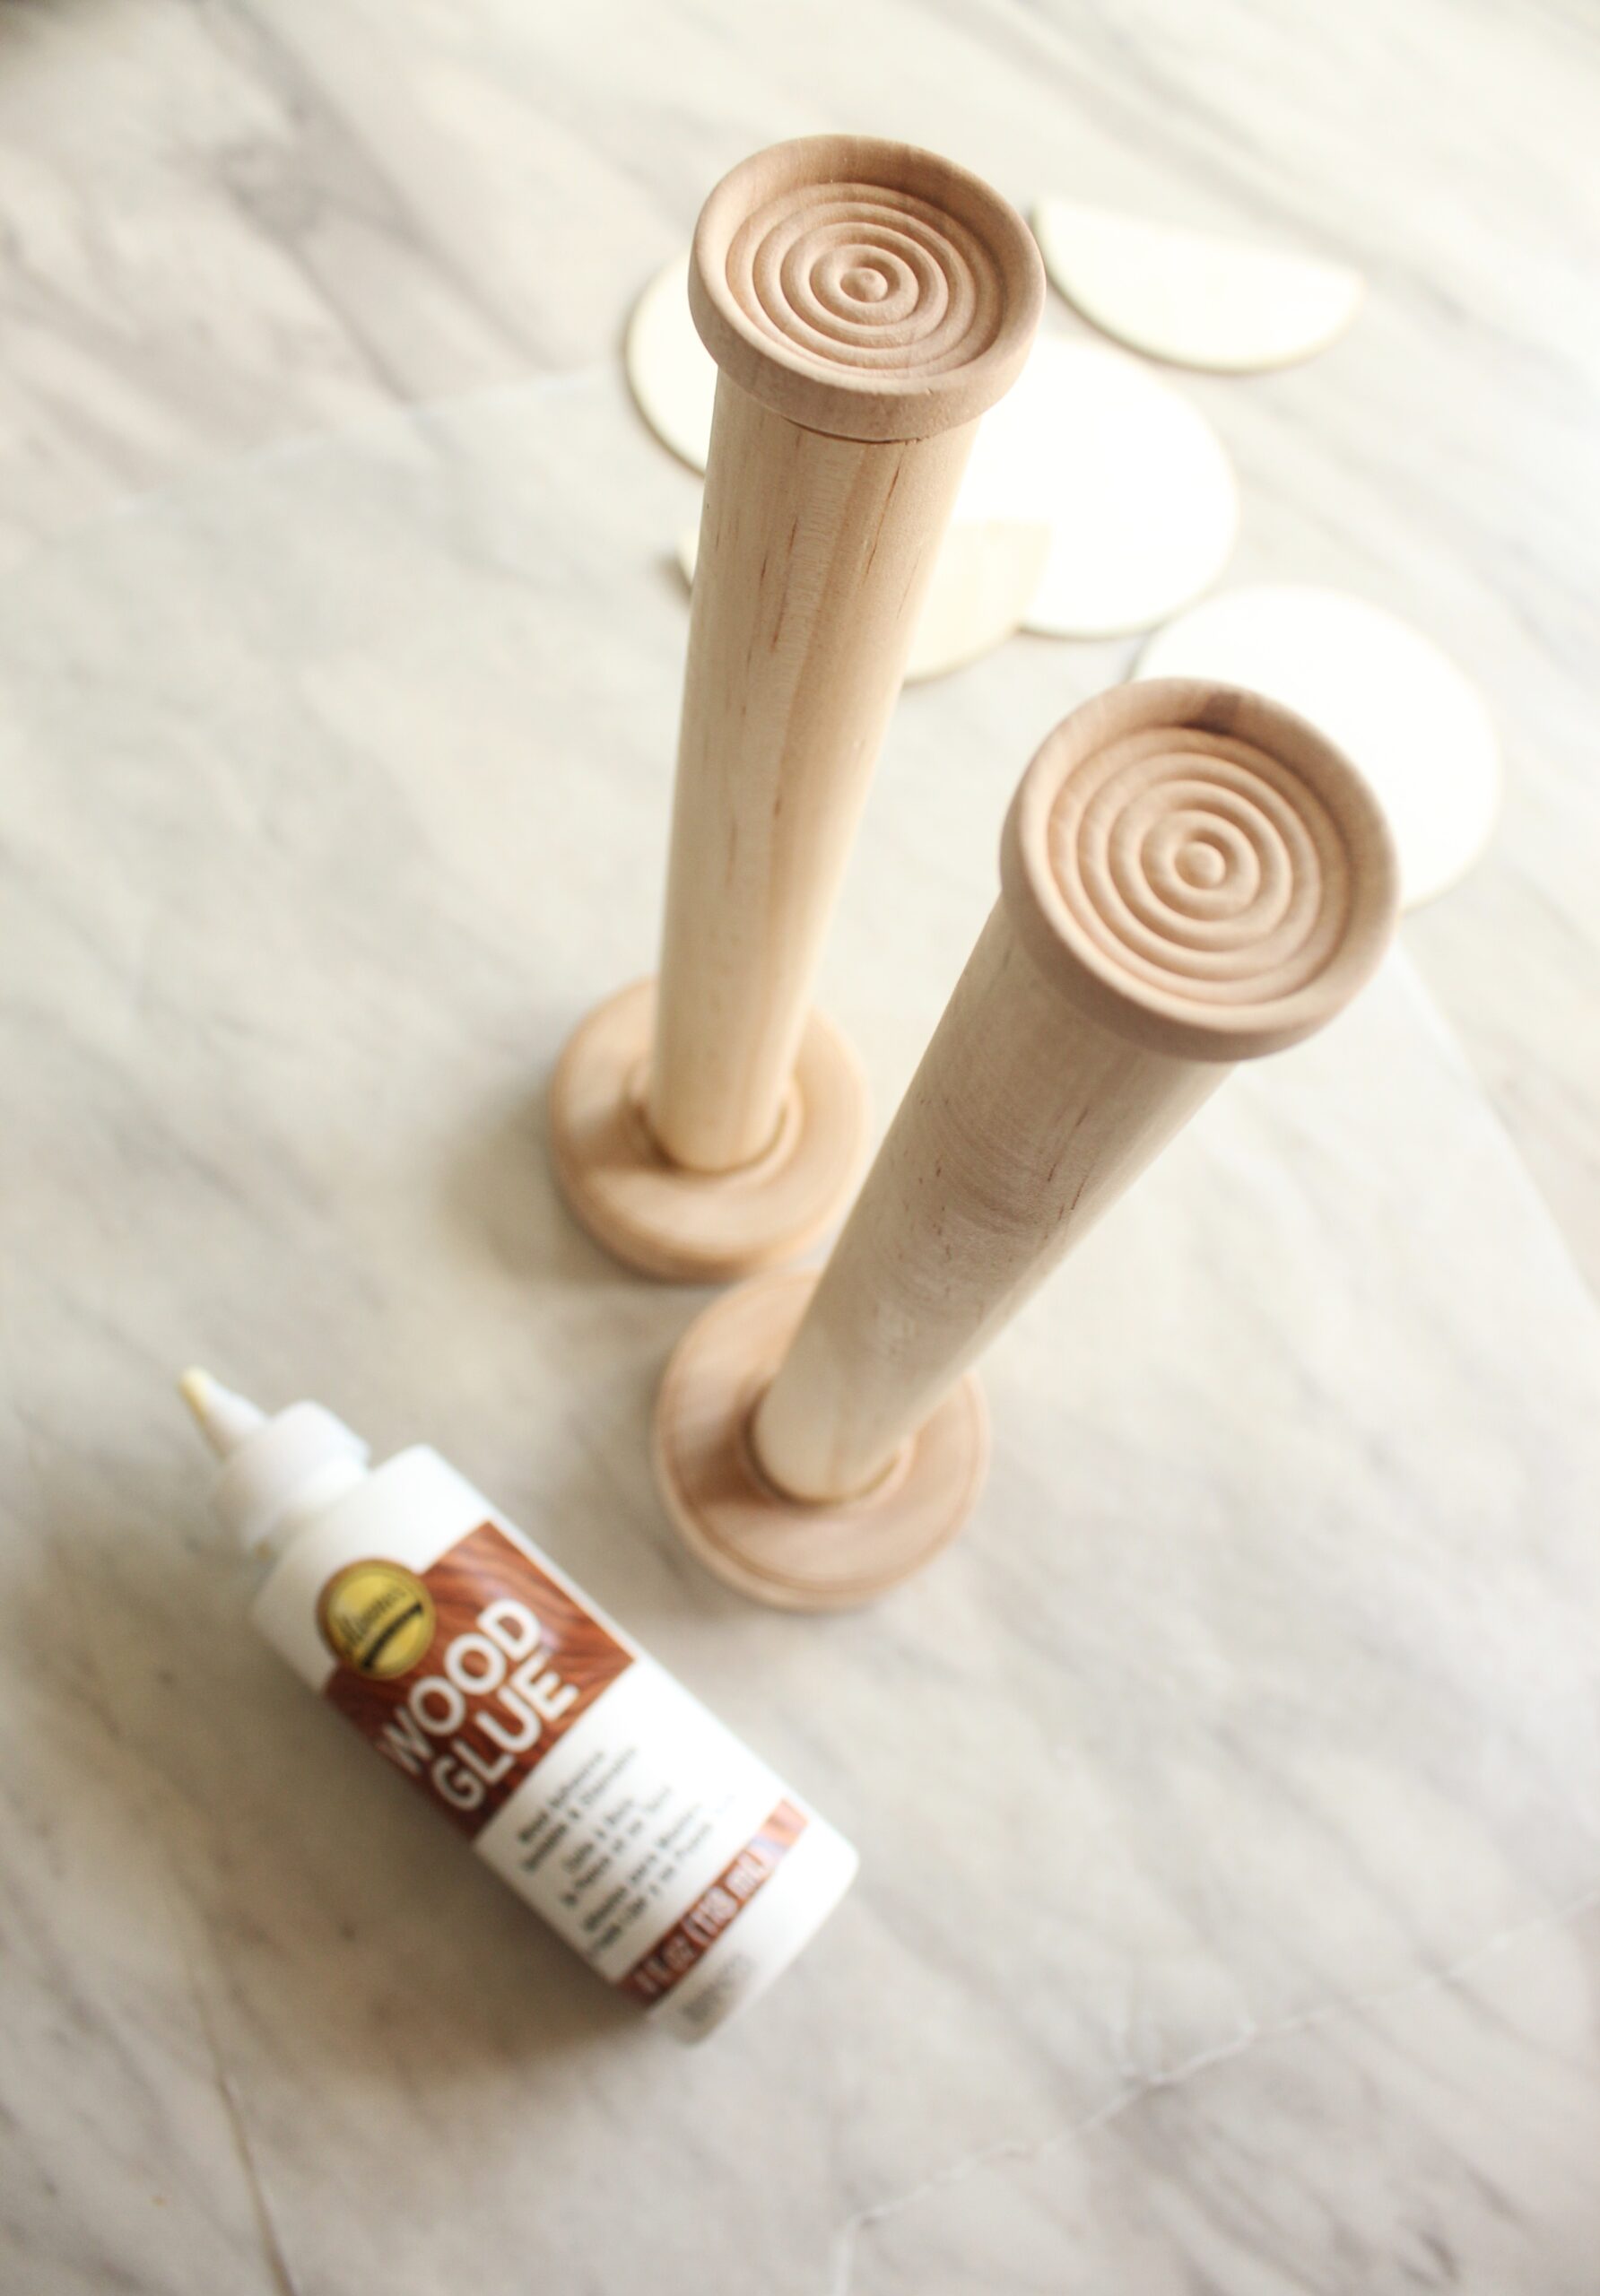
Wood Dowel 1″ diameter, cut to your desired length (ours were about 12 inches)
Unfinished Wood Checker Pieces, 1 1/4″
2″ Wooden Wheels
4 Flat Wooden Circles
Table Saw
Aleene’s Original Wood Glue
Mod Podge in Matte
Foam Brush
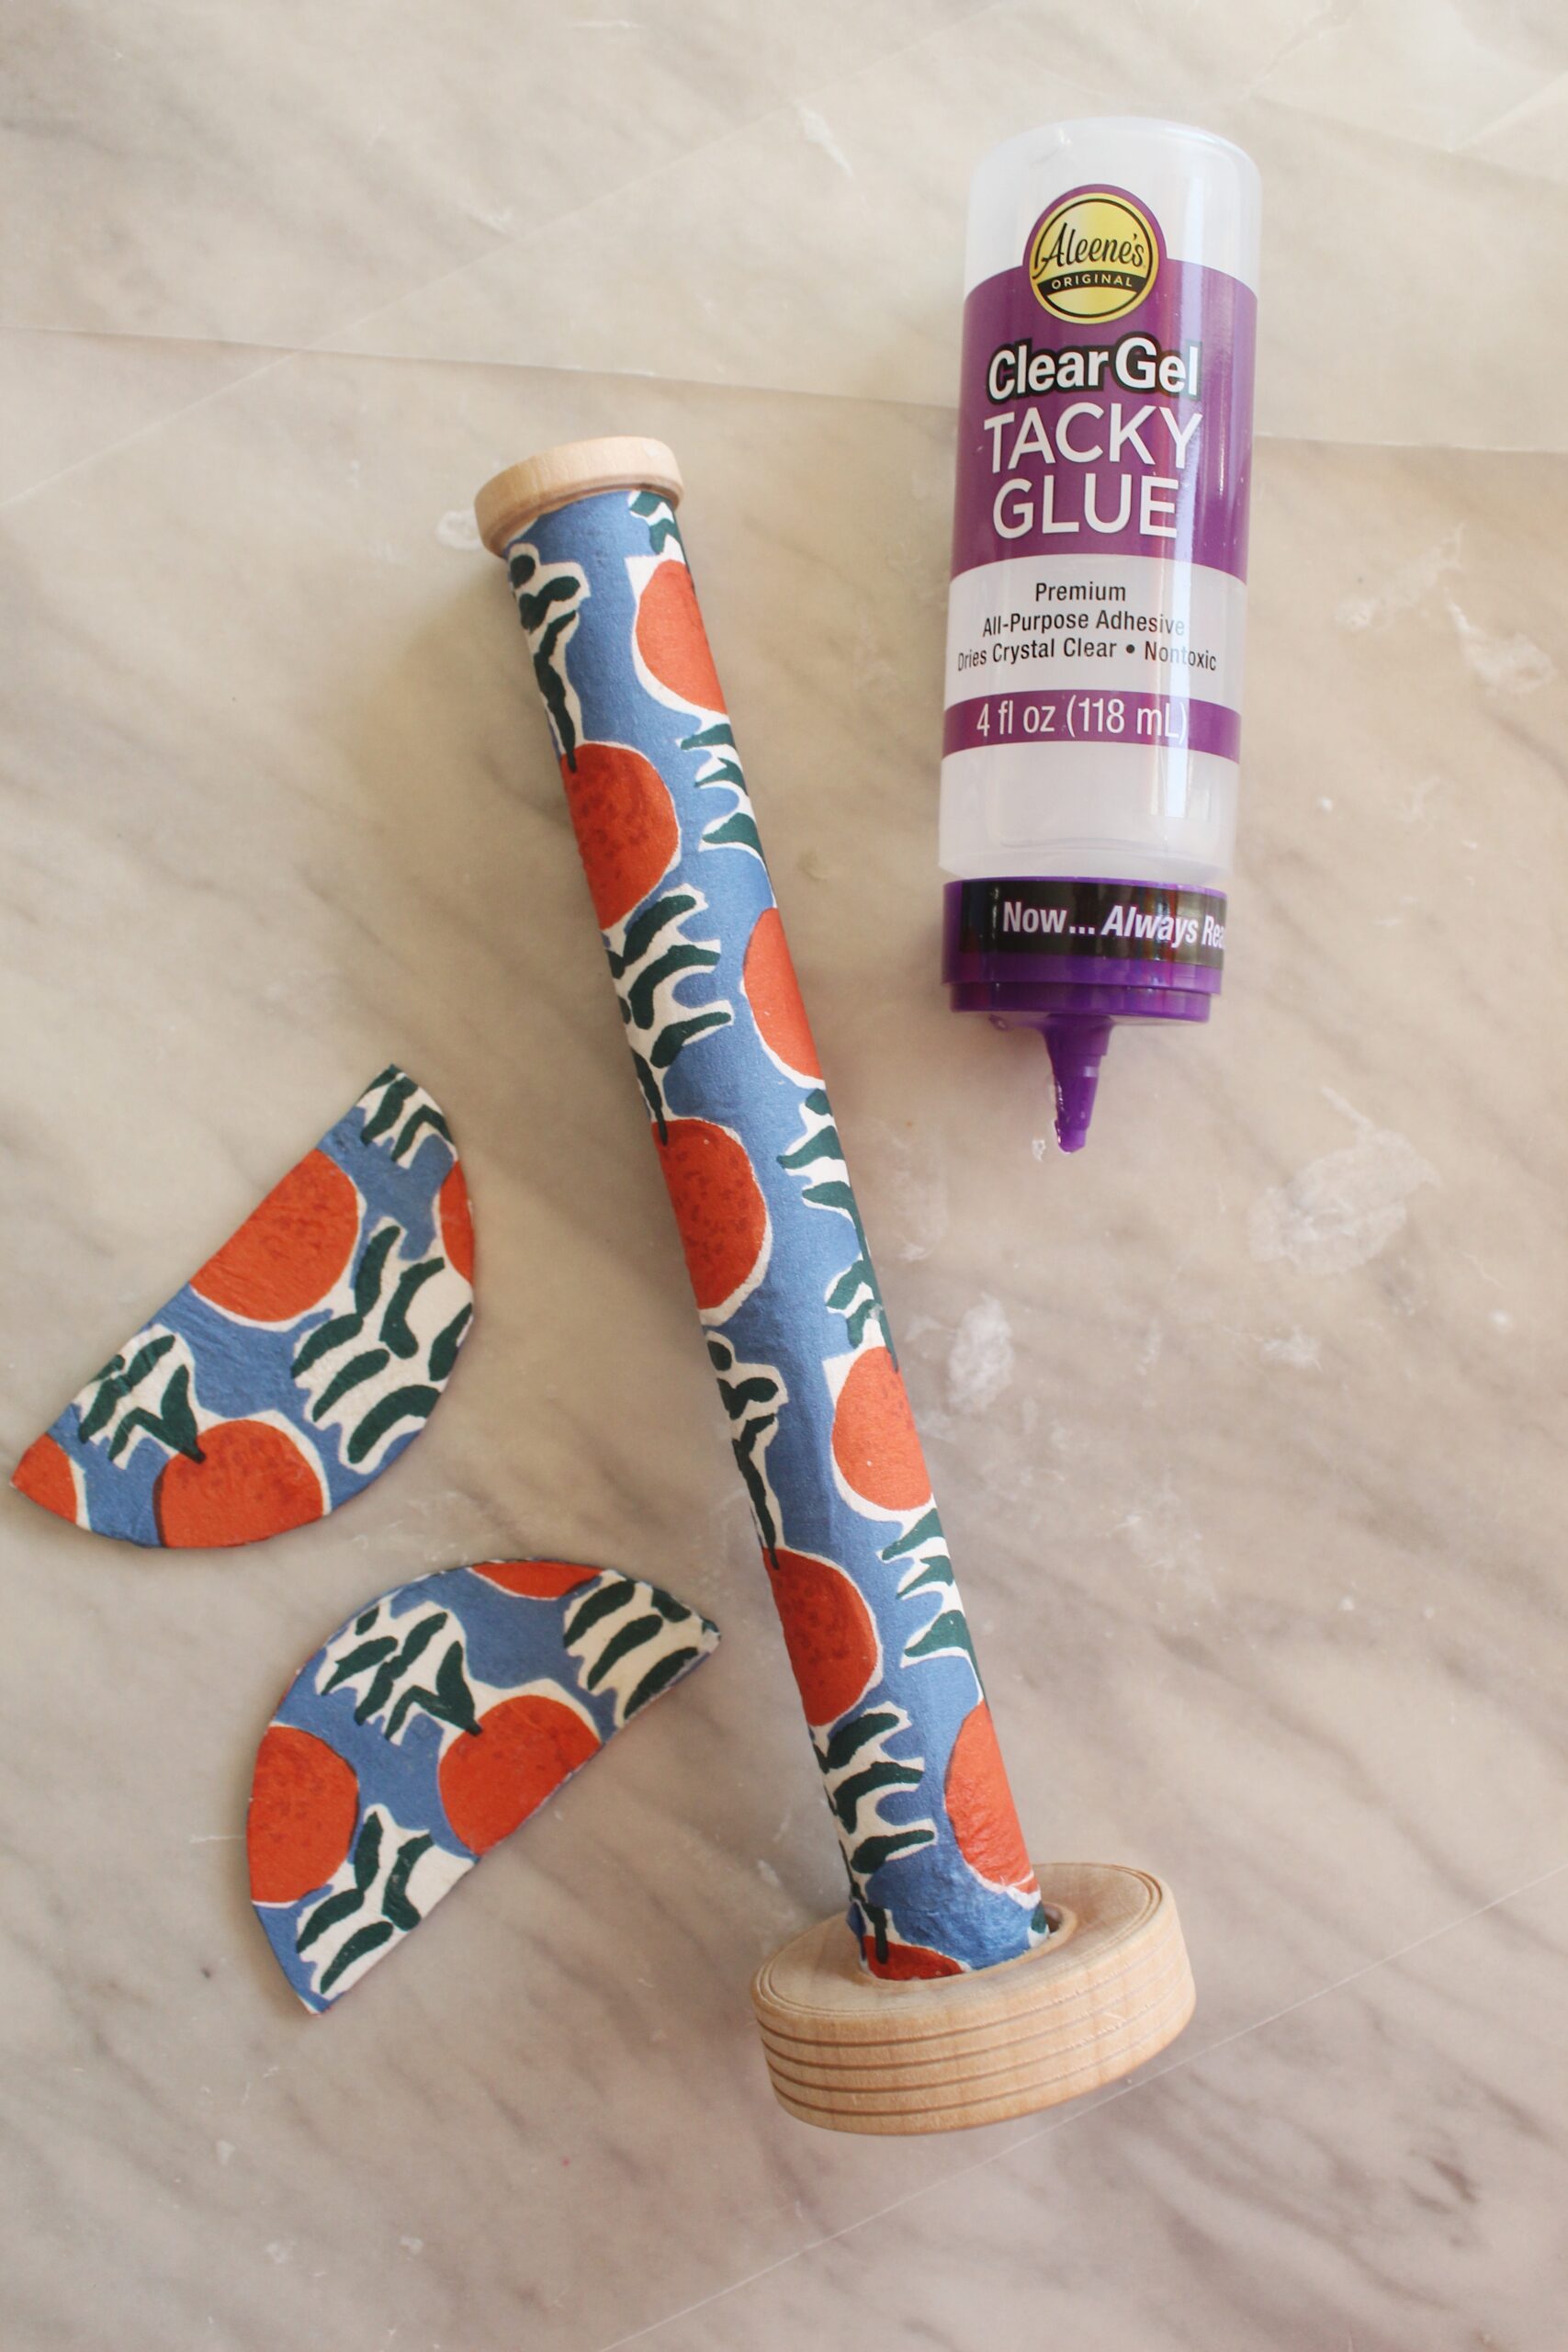
Aleene’s Original Clear Gel Tacky Glue
Patterned Paper Napkins
Candle Adhesive (if desired)
Taper Candles
How to make DIY Taper Candle Holders
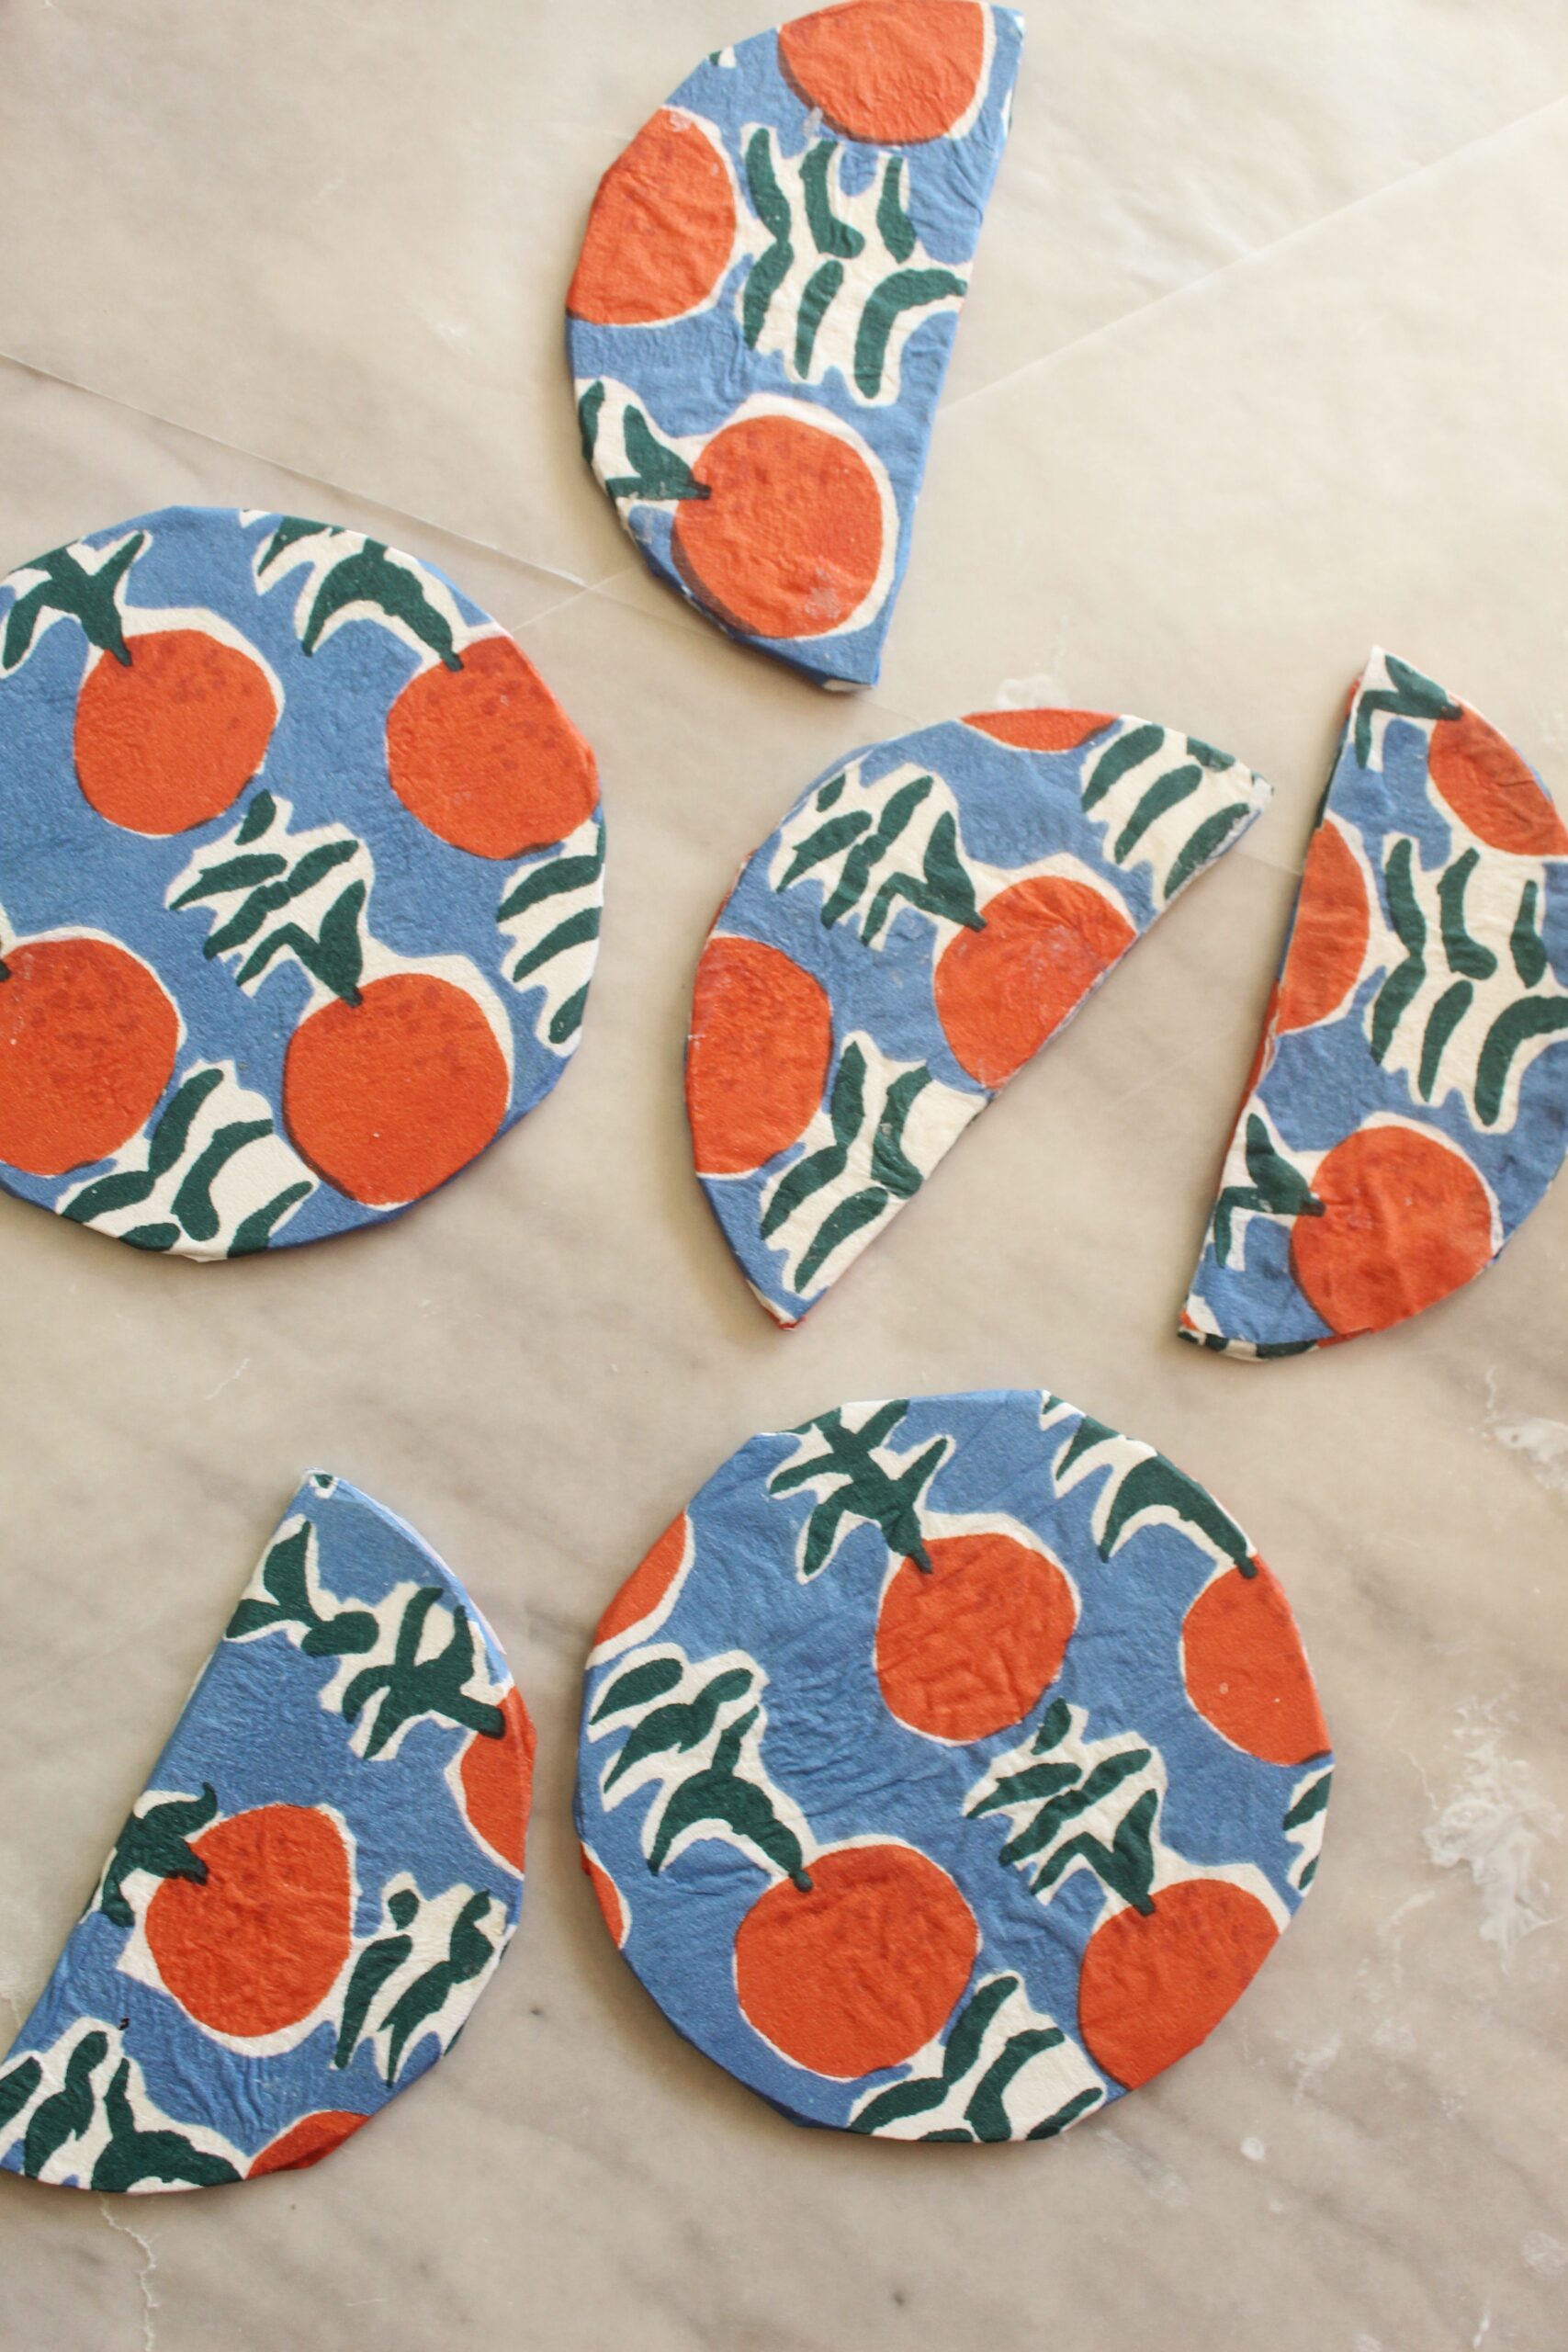
Step 1: Using a table saw, cut two of the wooden circles in half. Set aside.

Step 2: Apply the wood glue to the inside of the wooden wheel and press the dowel into the glue, assuring that it is standing straight. Repeat with as many candle holders as you would like to make. Let glue dry completely.
Step 3: Attach the checker pieces to the top of the dowels using the wood glue. Let dry completely.

Step 4: While the candleholders are drying, attach the napkins to the wooden circles and circle halves using Mod Podge. To do this, cut a piece from the napkin that is a bit bigger than the circle piece. Next, apply a generous layer of Mod Podge to the circle. Press the cut napkin piece to the Mod Podged side of the circle and smooth the area with your fingers.
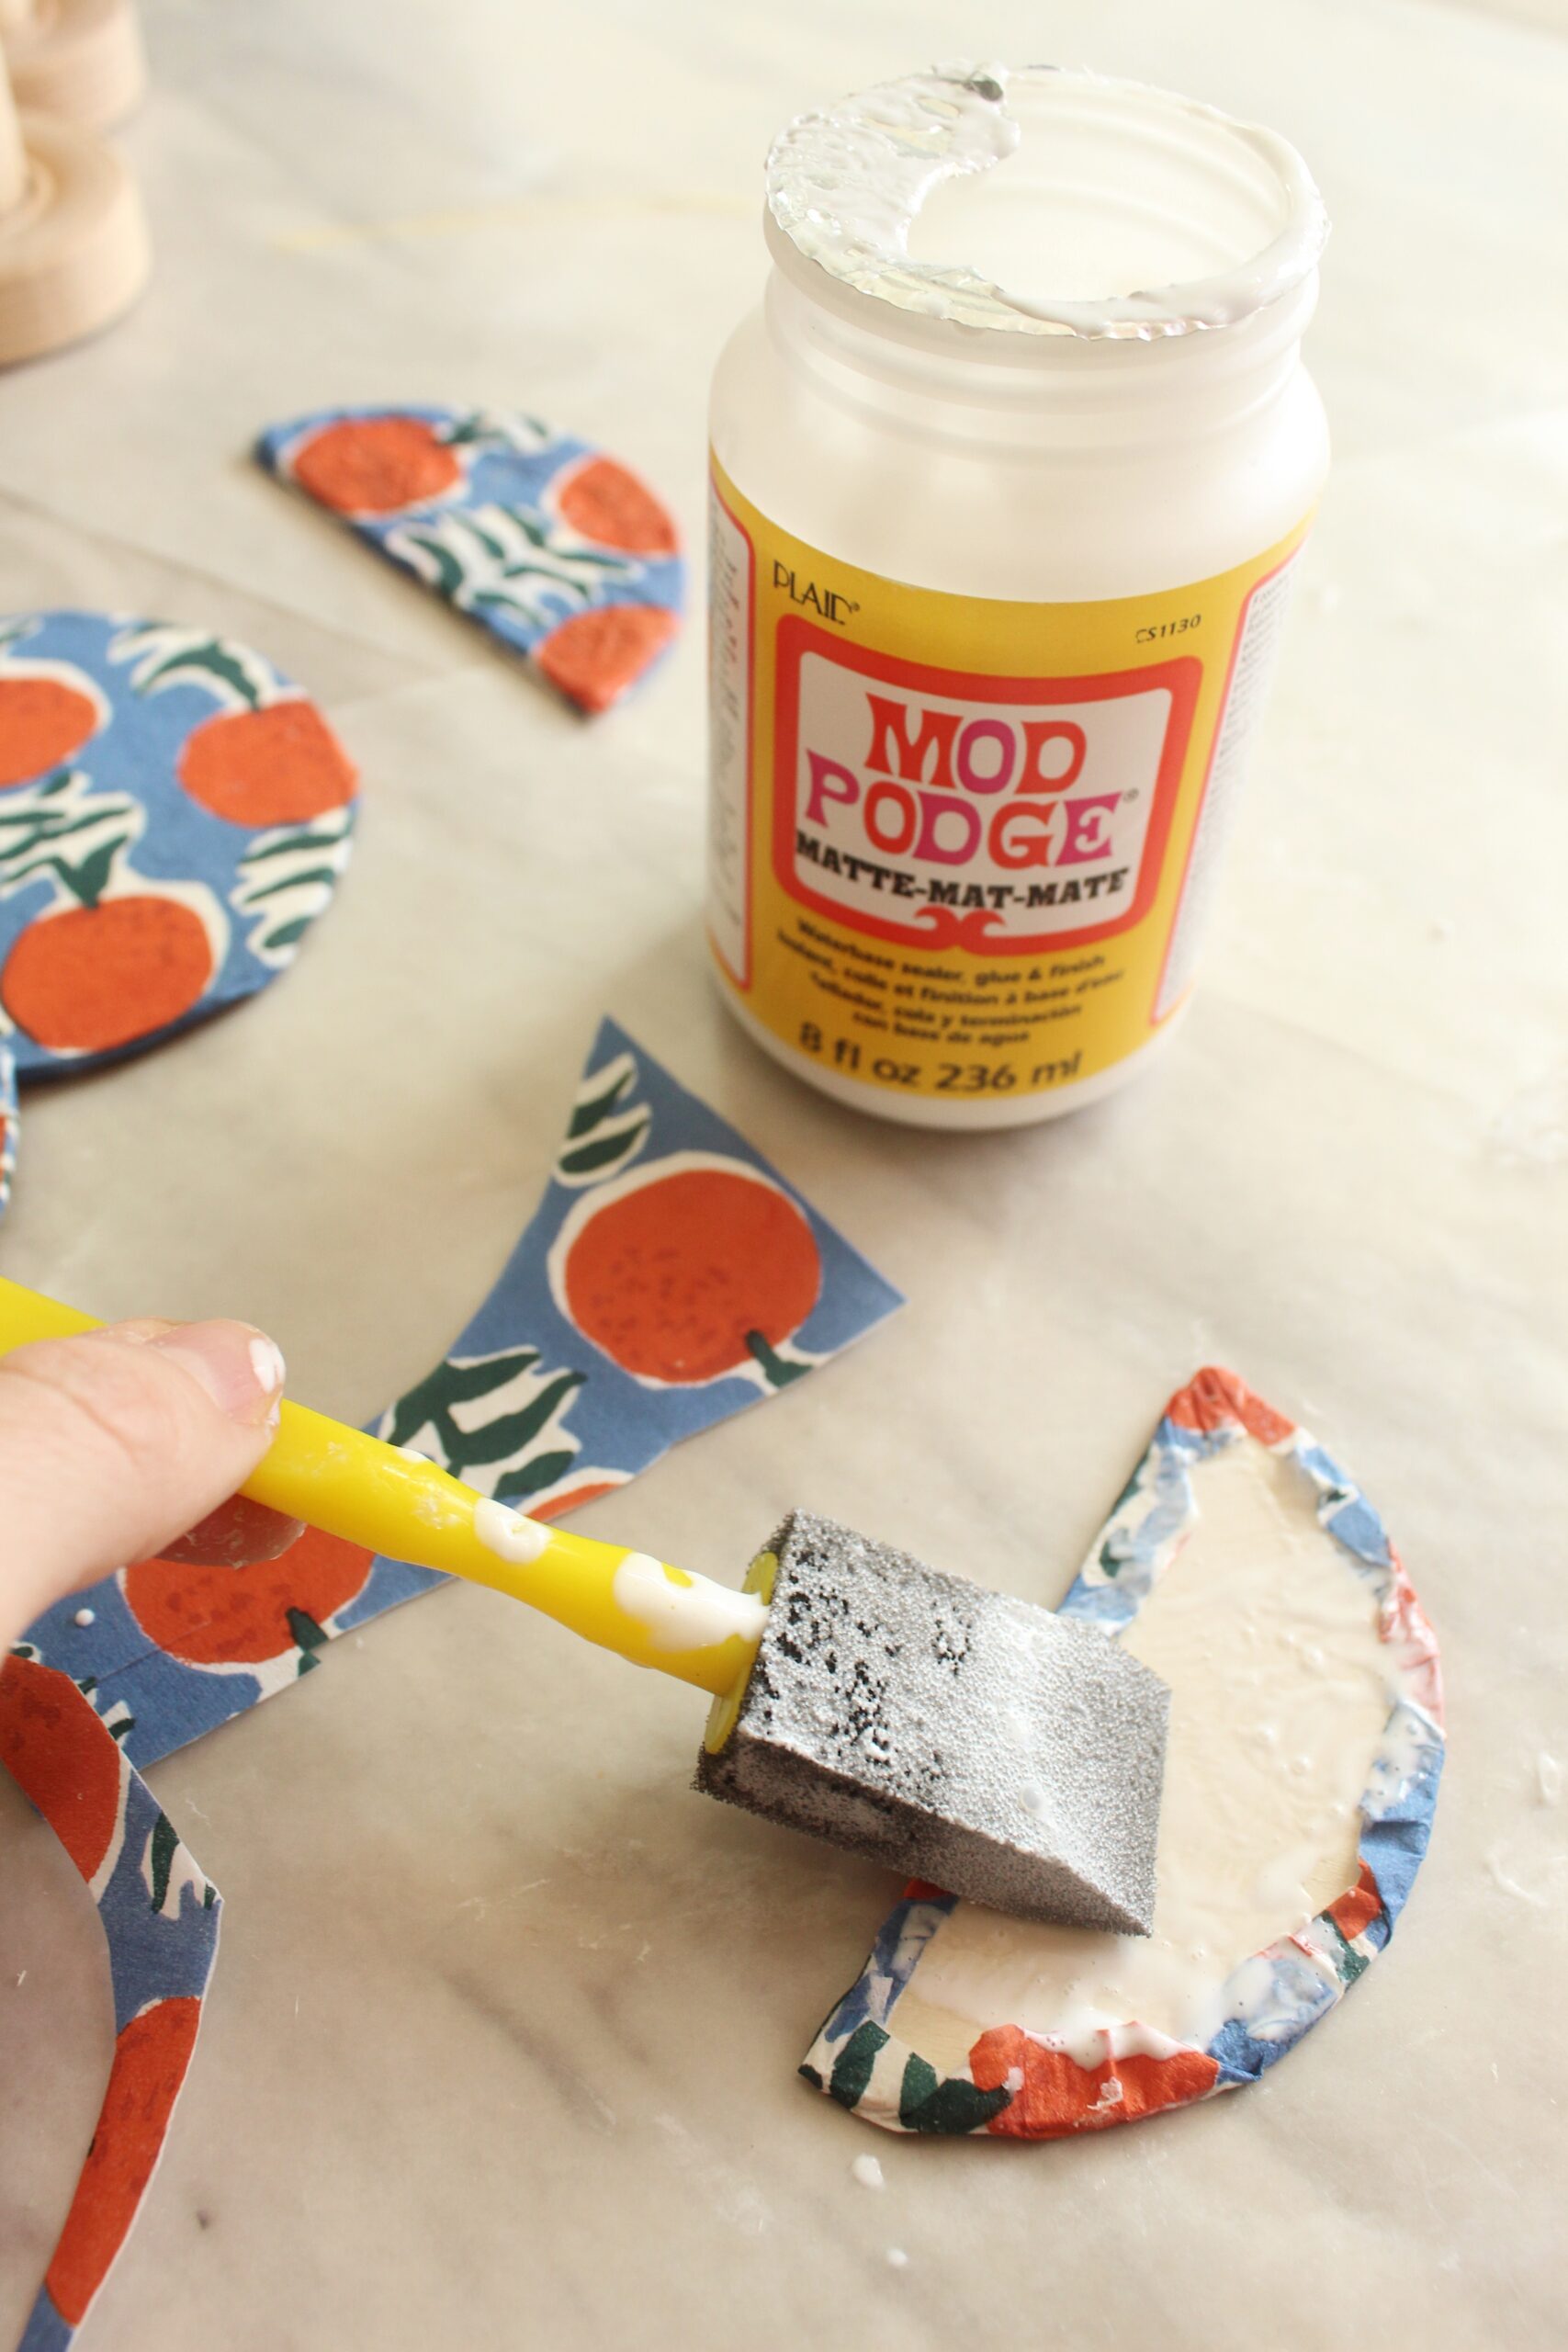
Step 5: Flip the circle piece over and apply Mod Podge to the other side. Then, fold the napkin around the edge of the flipped side to cover the edge of the circle piece completely. Then, cut a piece of napkin to fit the circle shape, apply Mod Podge to the uncovered side and press the napkin piece to the other side, covering the pieces of the napkin that were the excess from the other side.
Step 6: Repeat steps 4-5 on as many circle pieces as desired. Let the pieces dry completely.
Tip: Right after applying the napkins to the wood your napkins may bubble and wrinkle a bit. This is a normal part of using Mod Podge and the bubbles and wrinkles will typically relax out of the napkins as it dries.
Step 7: Cut a piece of napkin to fit around the dowel. Apply Mod Podge to the dowel and place the napkin on the Mod Podge. Use your fingers to smooth out any bubbles and seal the ends by applying a layer of Mod Podge over the top, where the ends of the napkin meet.

Step 8: Once the dowel and circle pieces are completely dry, attach them to the circle pieces to the dowel using the tacky glue. Let dry completely.
Step 9: Once dry, apply candle adhesive to the tops of the candle holders and attach the taper candles.
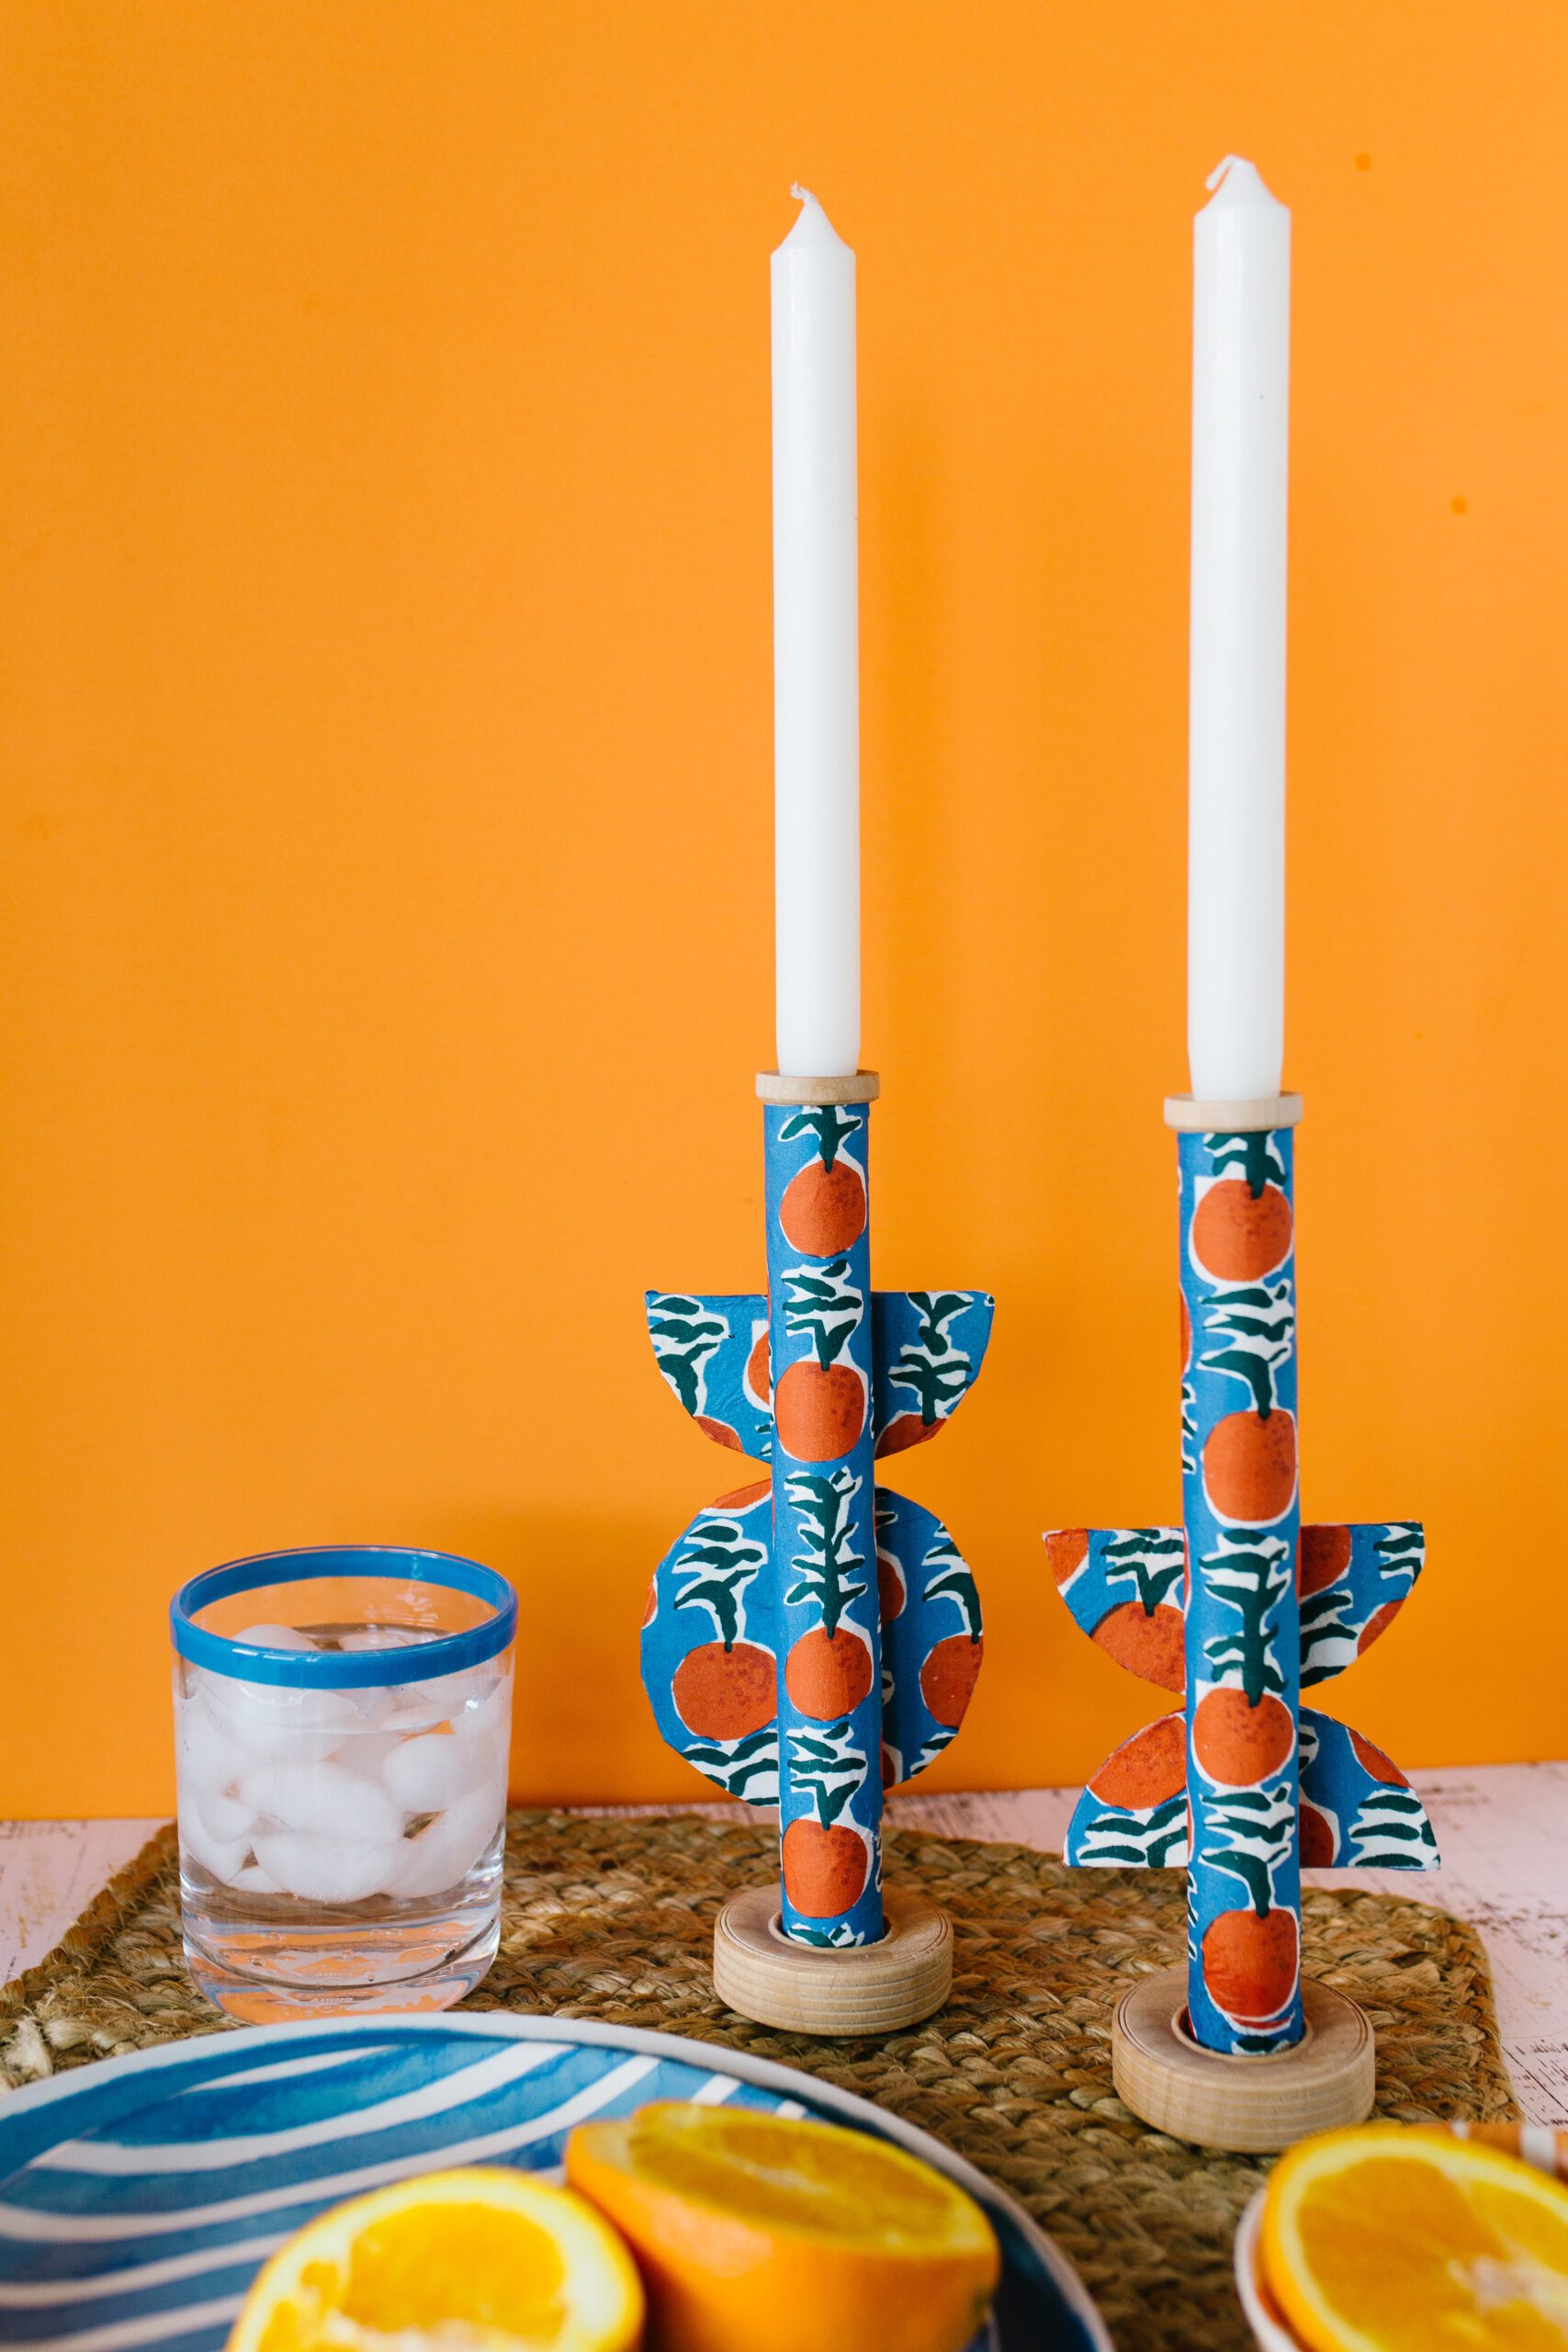
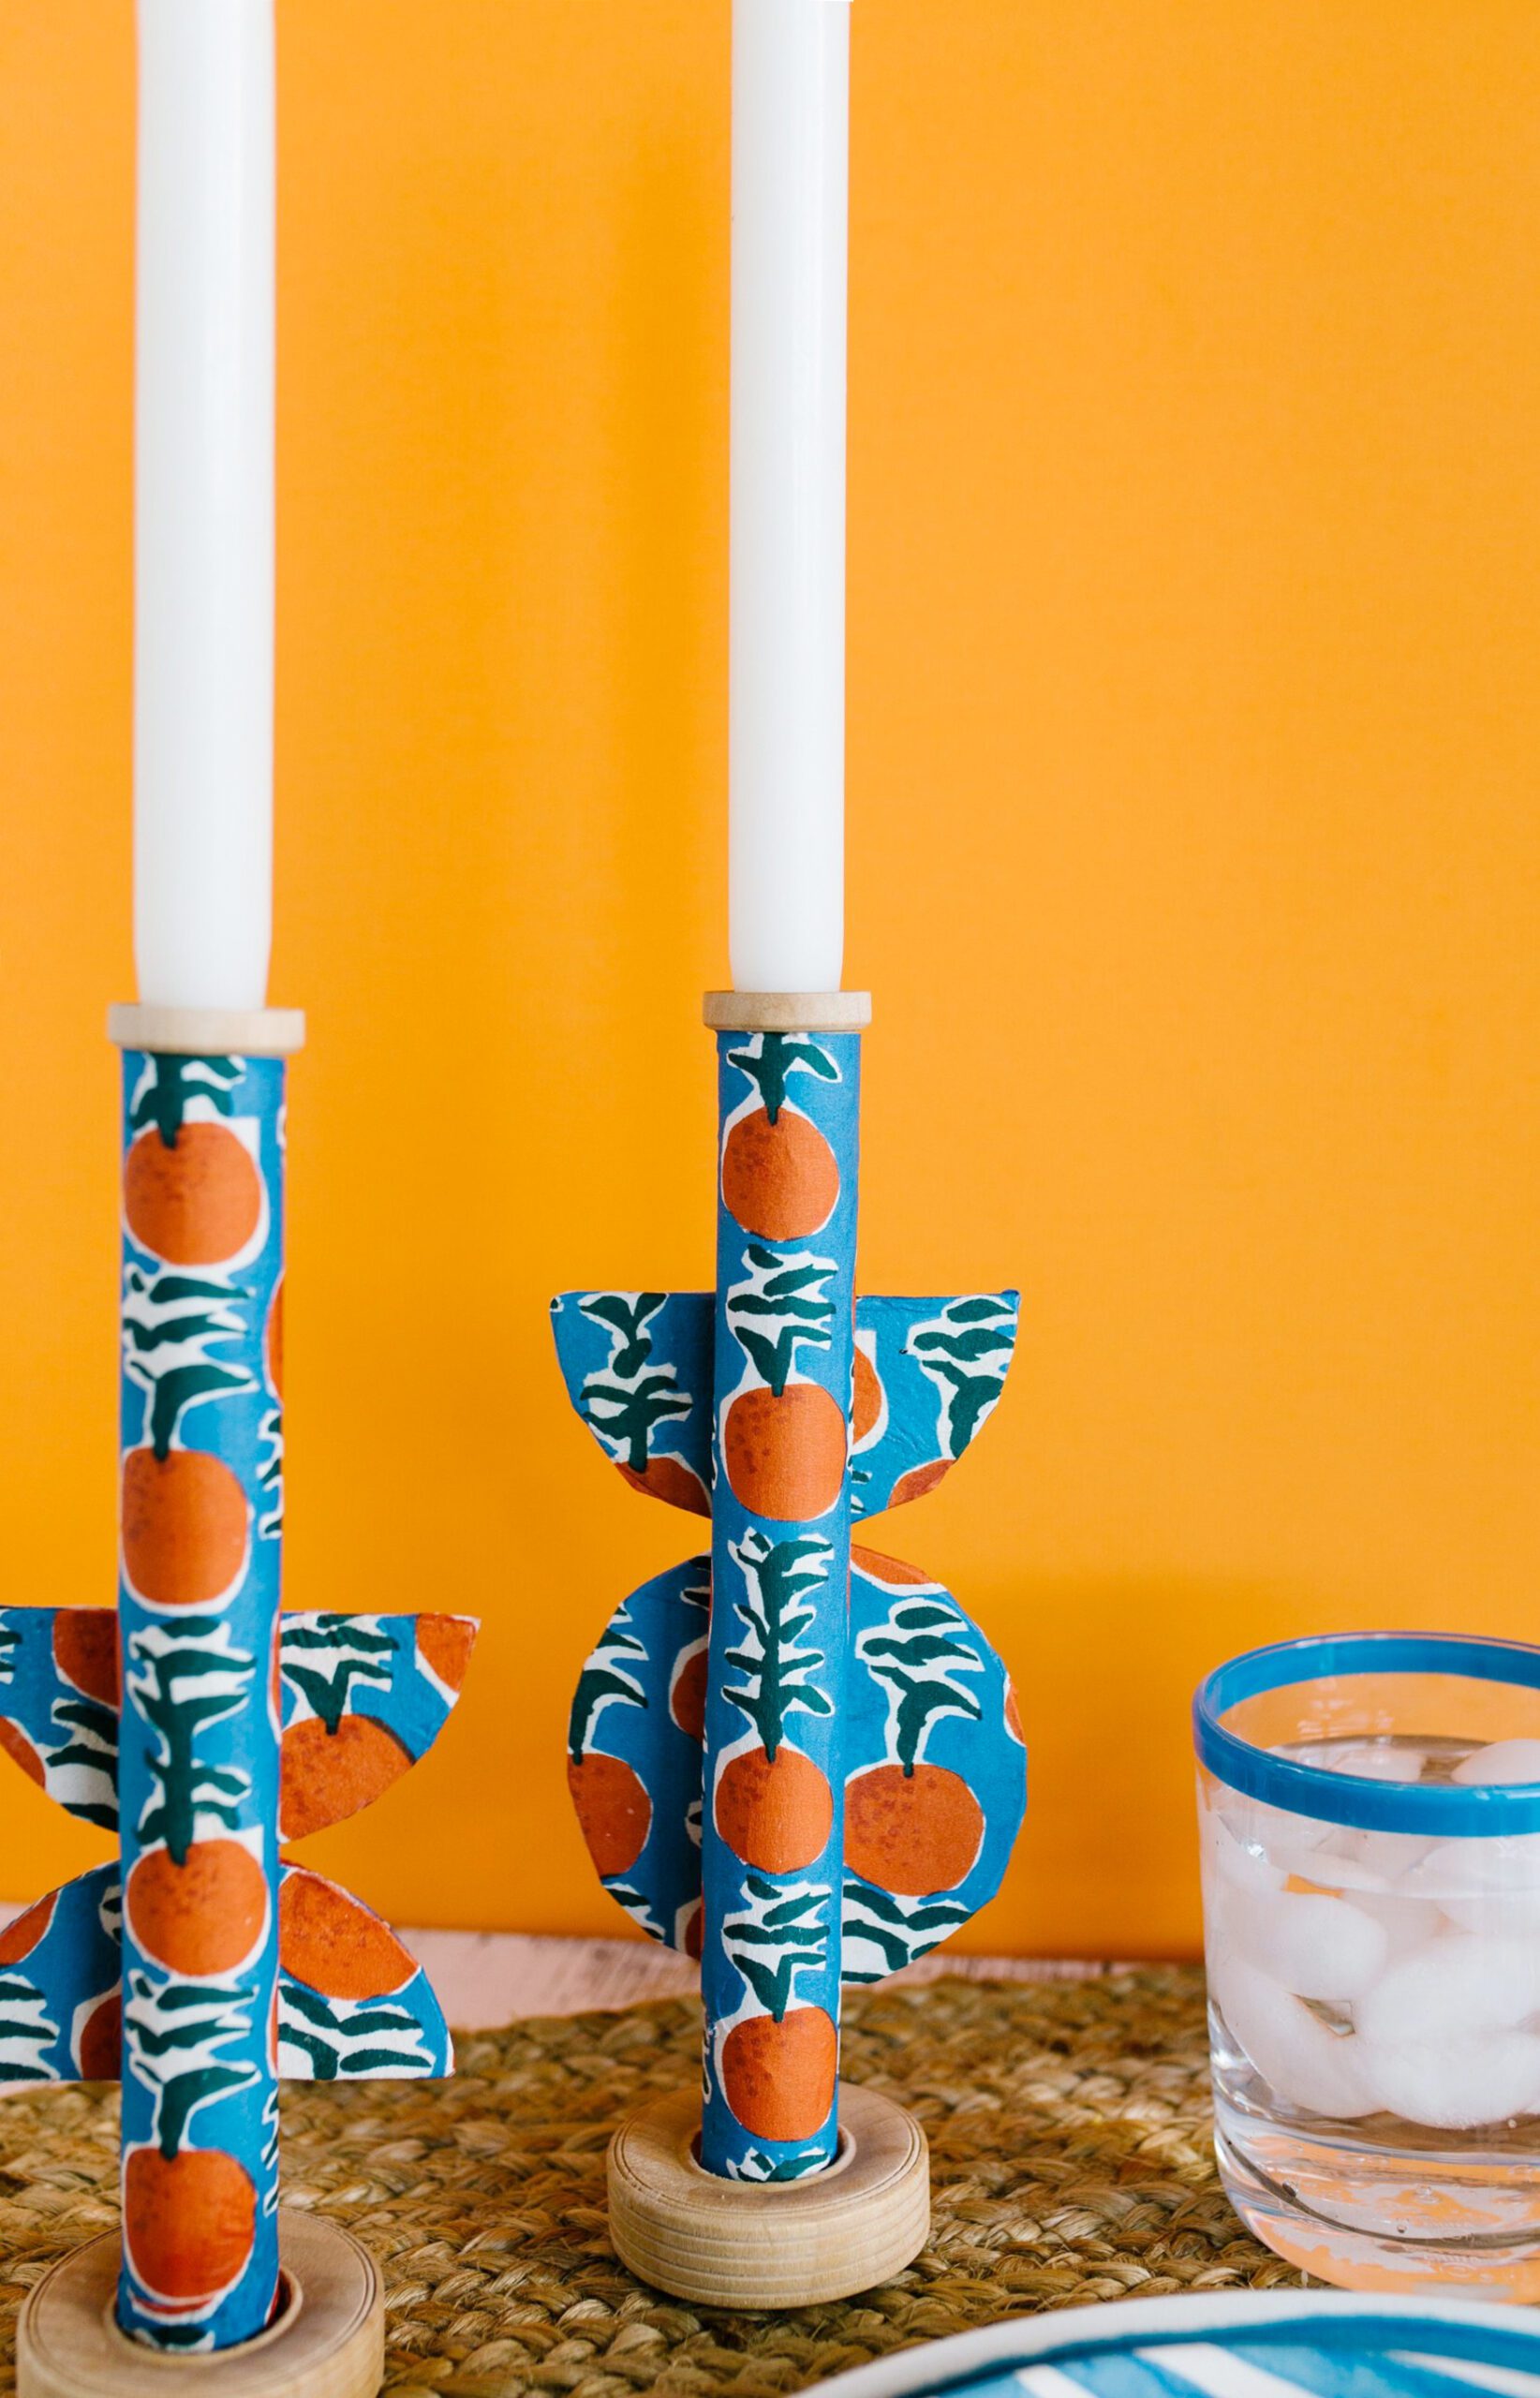
That’s it! Aren’t they the most fun? You’re going to love making these candle holders, matching them with any decor color scheme or holiday table you make be setting!

Happy making!
ox. Liz

