


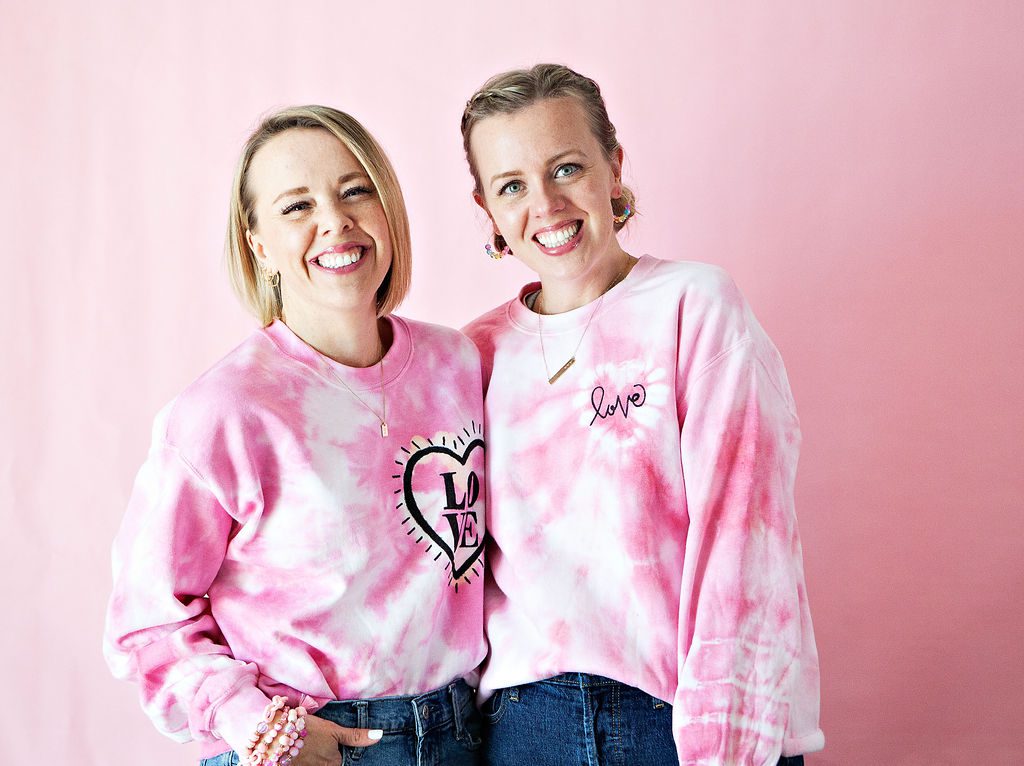
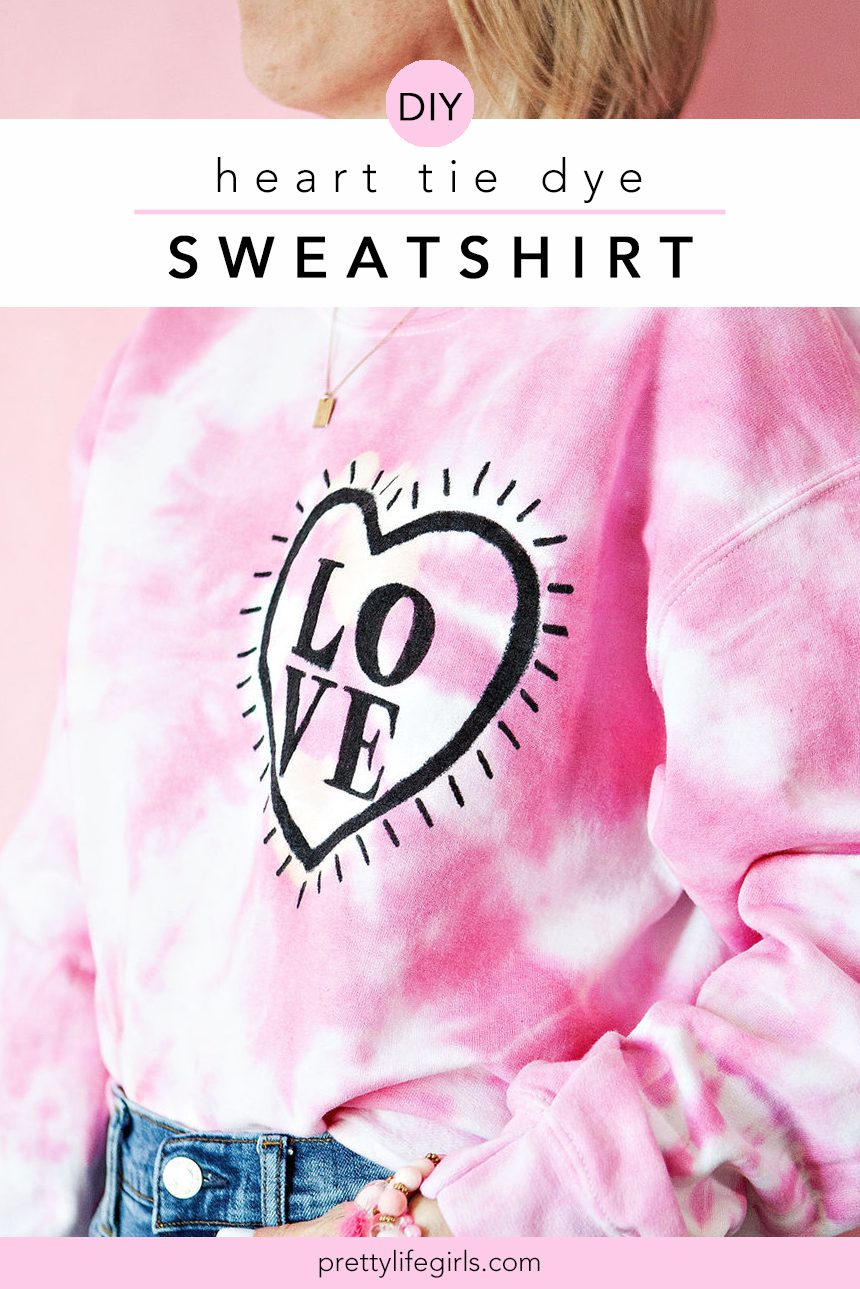
It’s Valentine’s month and we are ready to give you alllll the pink! (We’re pretty sure that’s the law.) And since this is the month where we focus on what we love most, it only makes sense that we do some pink tie dye, one of our truest crafting loves! So, today we are going to share with you a fun binding method, perfect for sharing the love–we’re doing a heart binding! This method is so much fun and creates a heart pattern that is unique and adorable every time. Plus, we added some Valentine’s embellishments with fabric markers to make it extra special. You’re going to love making and wearing this one, and we can’t wait to show you how to do it!
Supplies needed to make a Heart Tie Dye Sweatshirt
White Cotton Sweatshirt
Tulip One-Step Tie Dye in Red (their dyes tend to turn out more pink than red)
Rubberbands
Plastic Wrap
Fabric Marker
How to make a Heart Tie Dye Sweatshirt
Watch the video, or read the steps below!
Step 2: Prepare a dyeing surface. I usually work in my sink because it is stainless steel, but you could work in a large dye-safe container or on a covered surface.
Step 3: Prepare your tee to be bound by folding it using the heart technique, but instead of beginning at the center of the shirt as is traditionally done, on the chest of the shirt, and off to one side. (If you have never bound a heart, find our tutorial here, or, see the video above if you’d like further clarification about this folding/binding technique.)
Step 4: Place your bound fabric on the surface you prepared for dyeing and completely saturate the bundle with dye on one side. Then, flip it over and saturate the other side.
Step 5: Once the bundle of fabric has been completely covered in dye, wrap it in plastic wrap to keep it wet while it sets. Let set for 8-24 hours, or according to your dye package directions.
Step 6: Once the dye has set, remove the bundle from the plastic wrap and carefully remove the string using scissors.
Step 7: Rinse the tee until the water runs clear, then wash and dry it by itself.
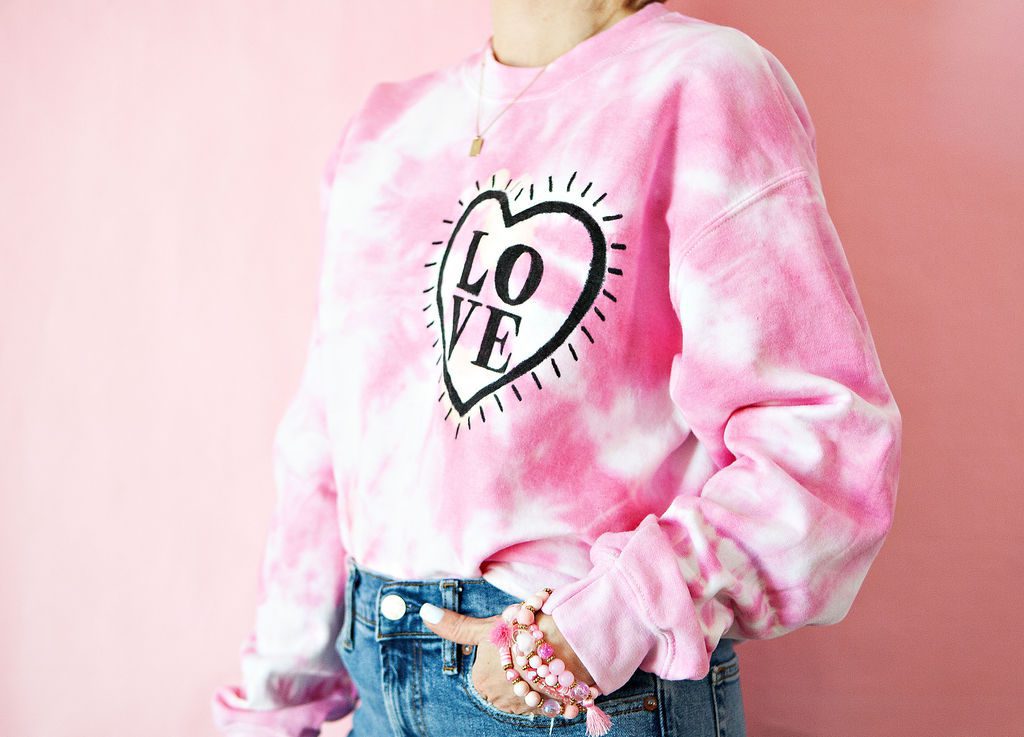
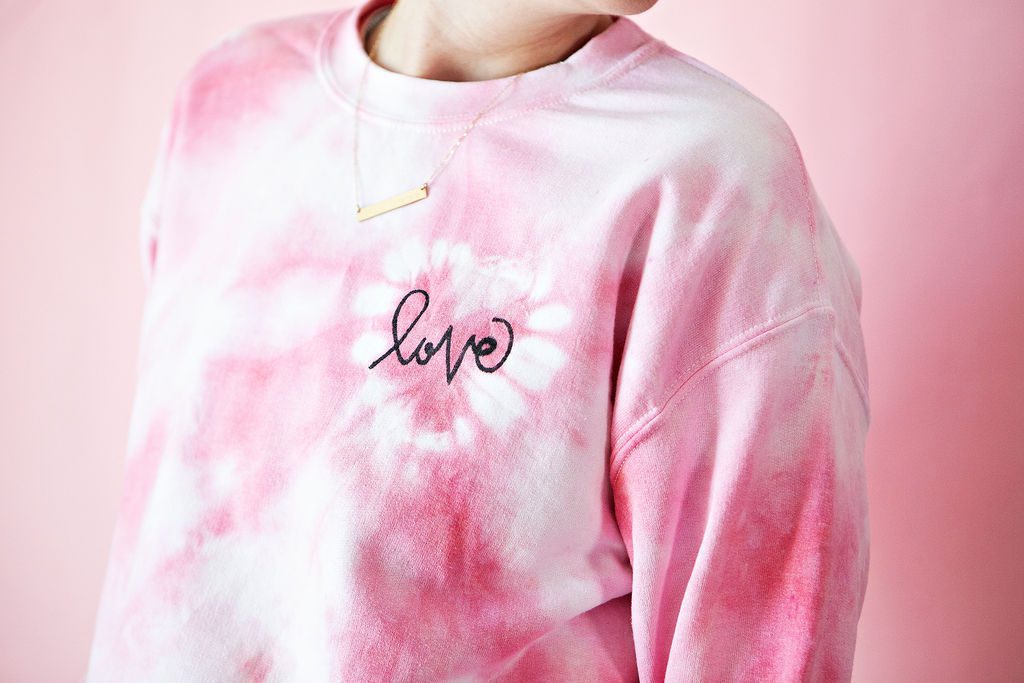
Step 8: Once the shirt is dry, use fabric markers to add Valentines embellishments!
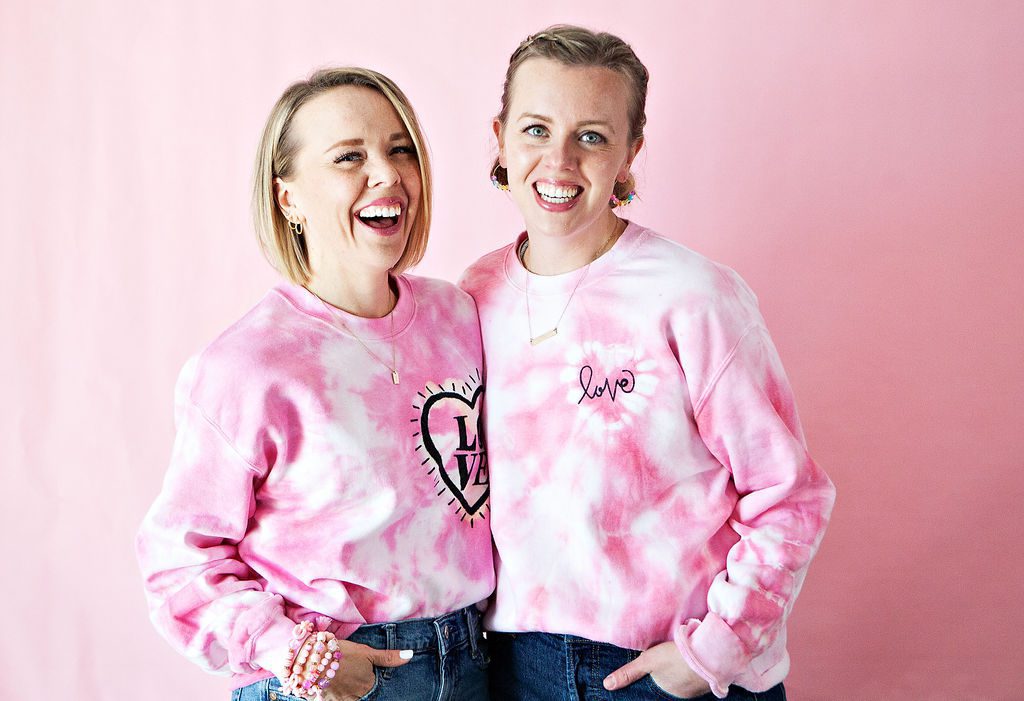
That’s it! Now put on your adorable sweatshirt and go spread the love!
Happy making!
-Liz & Sam

