This Macrame Bulb Ornaments tutorial is sponsored by Michaels. All opinions are ours alone.
This post may contain affiliate links, which help us support this site.
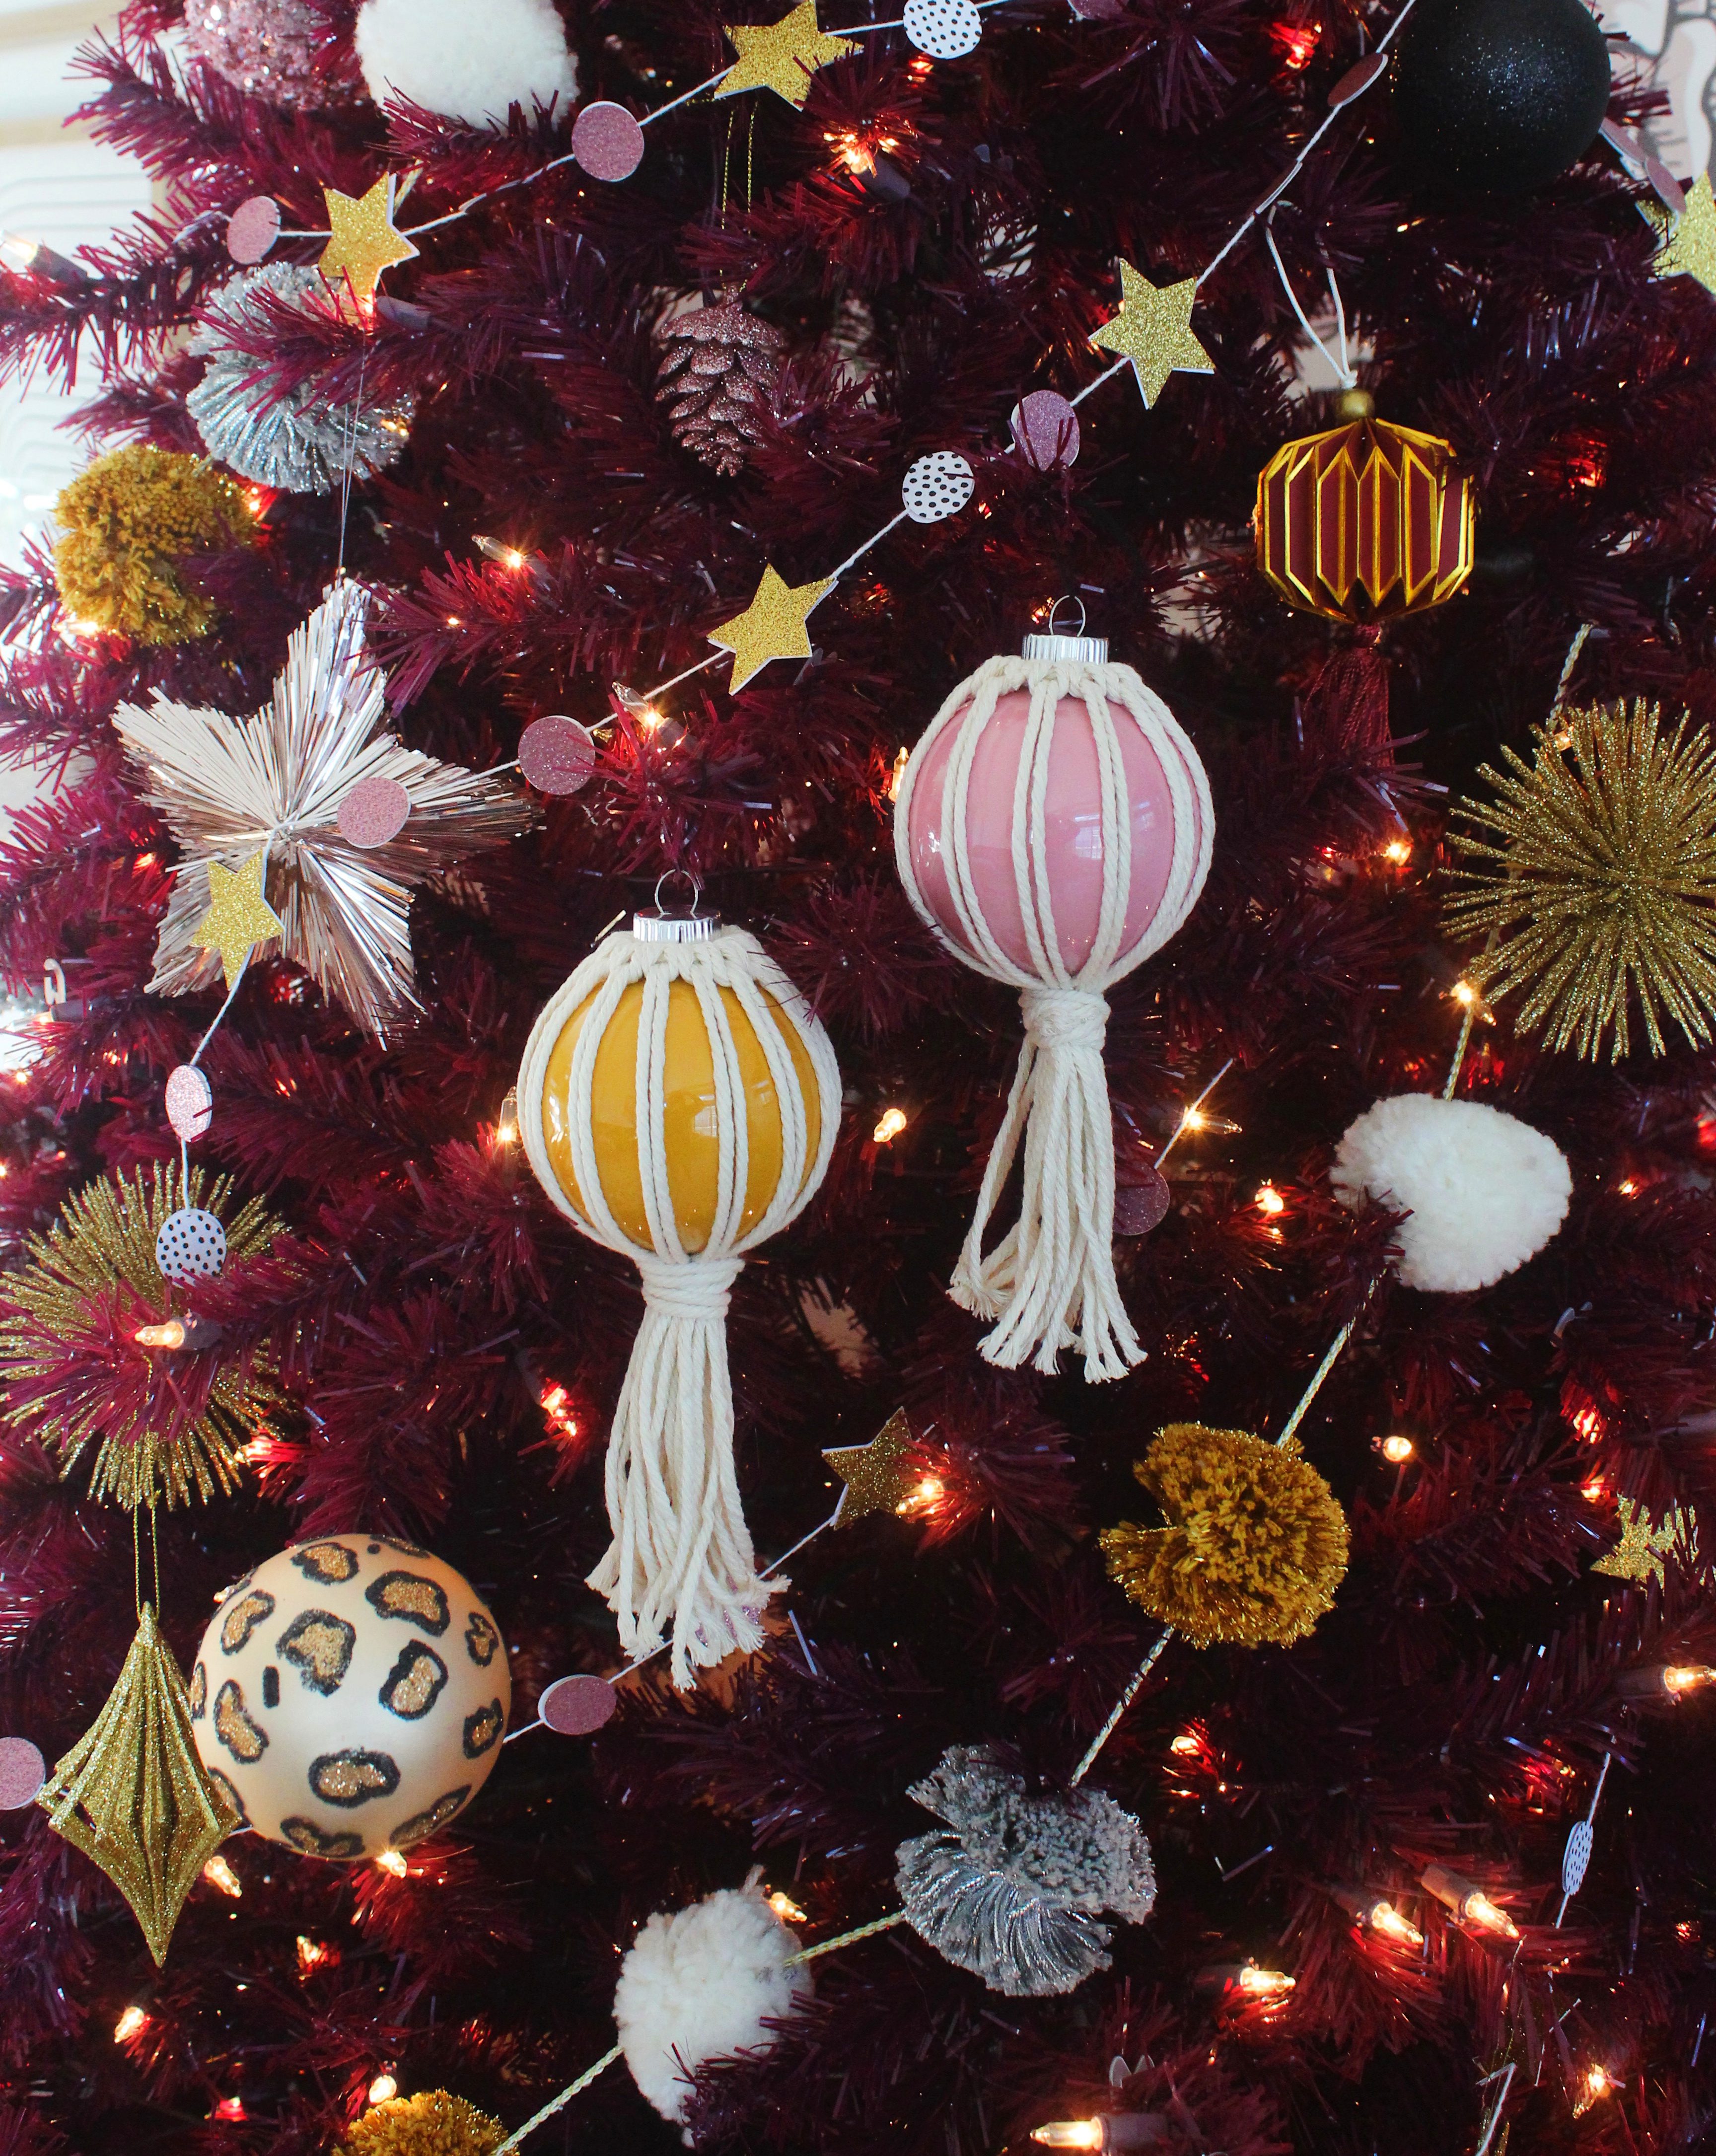
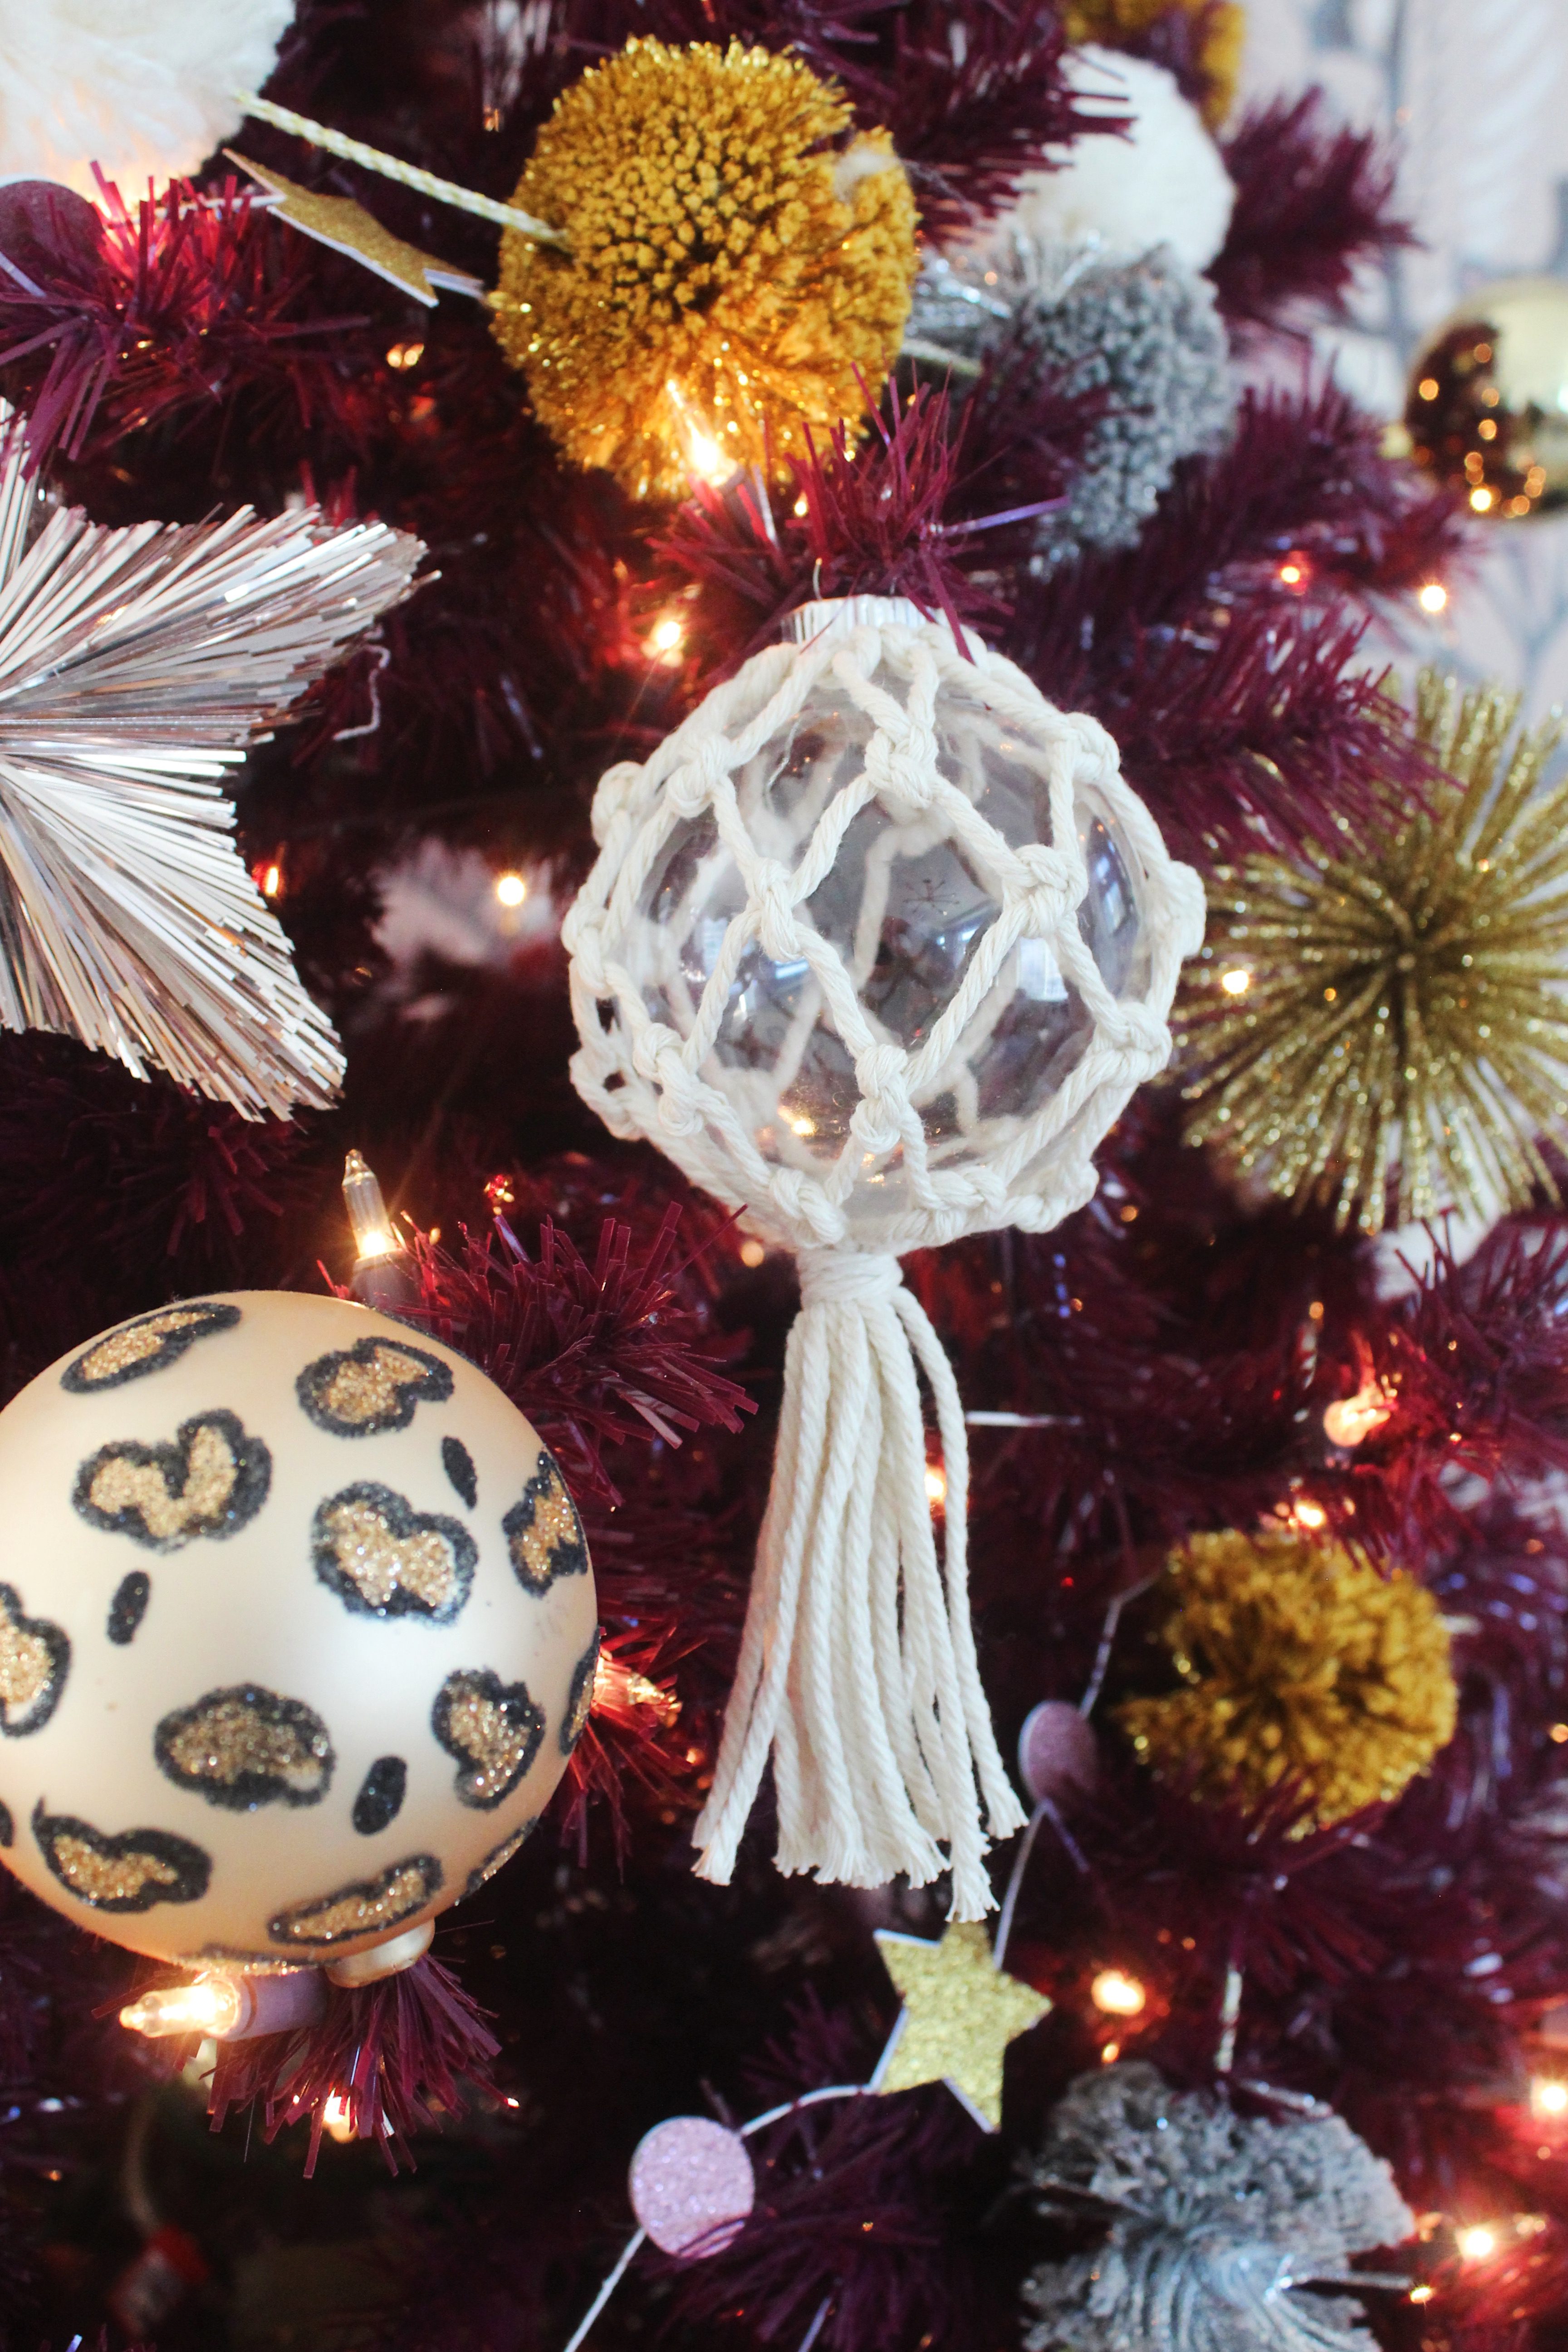
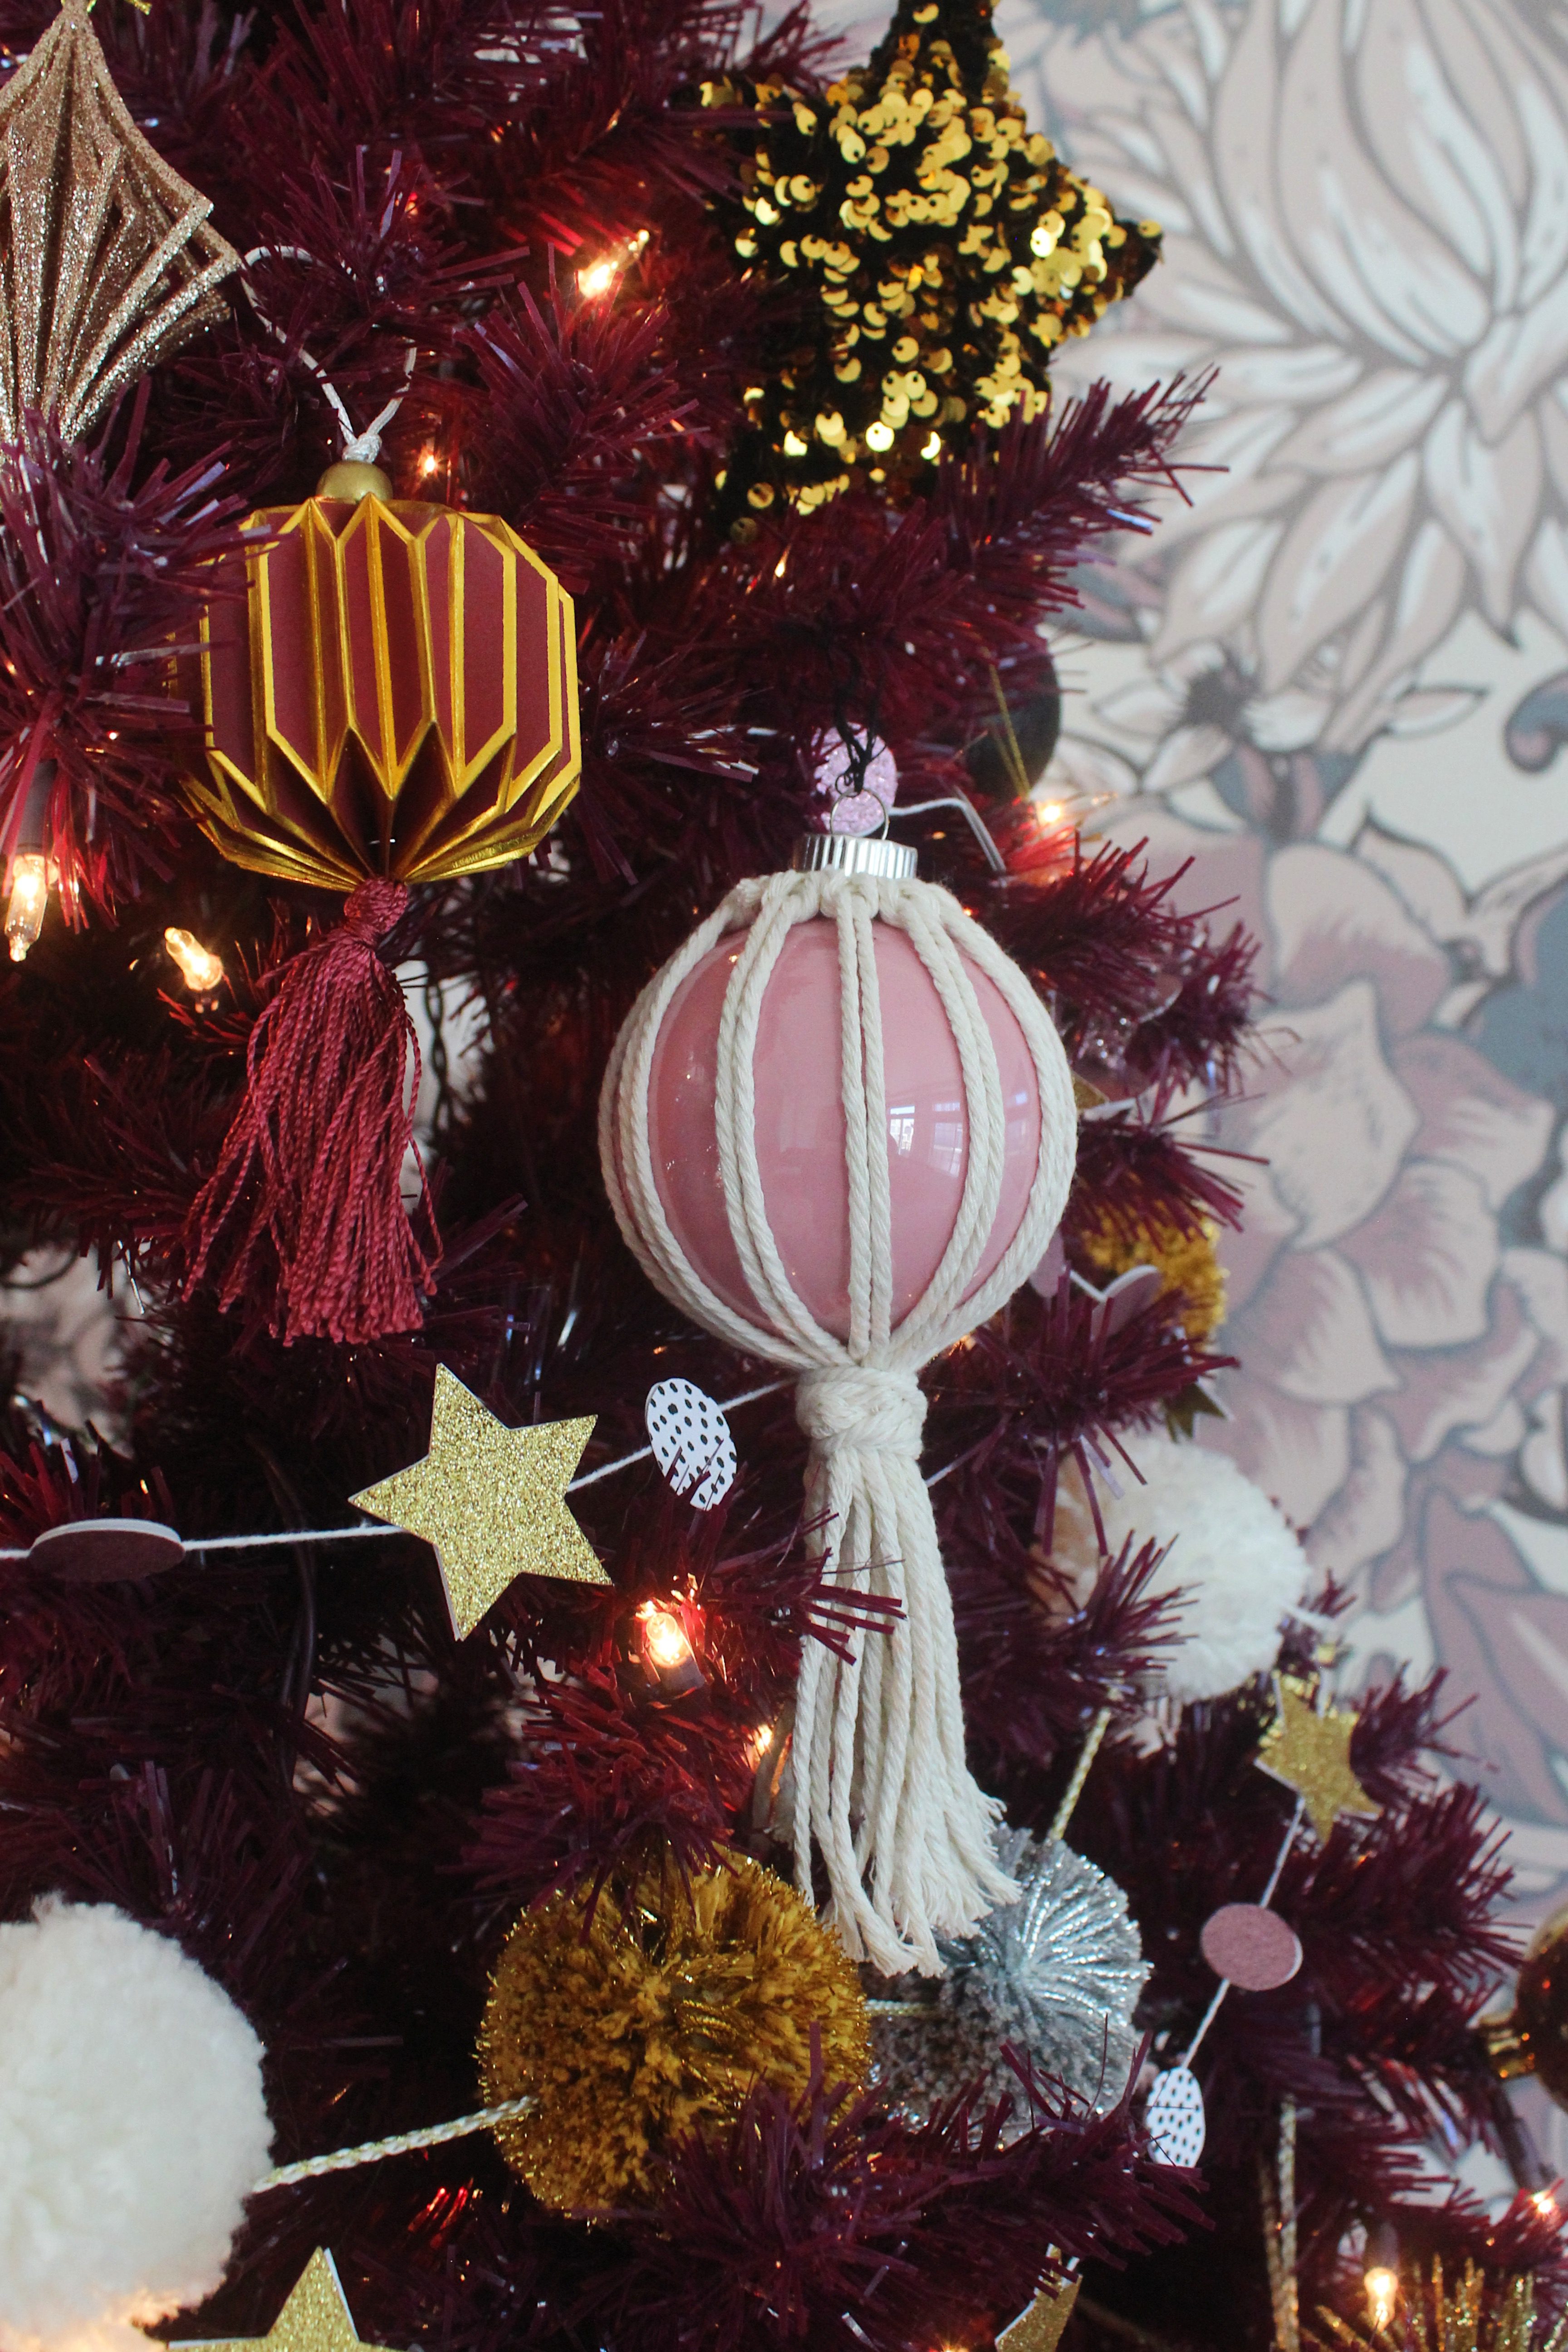
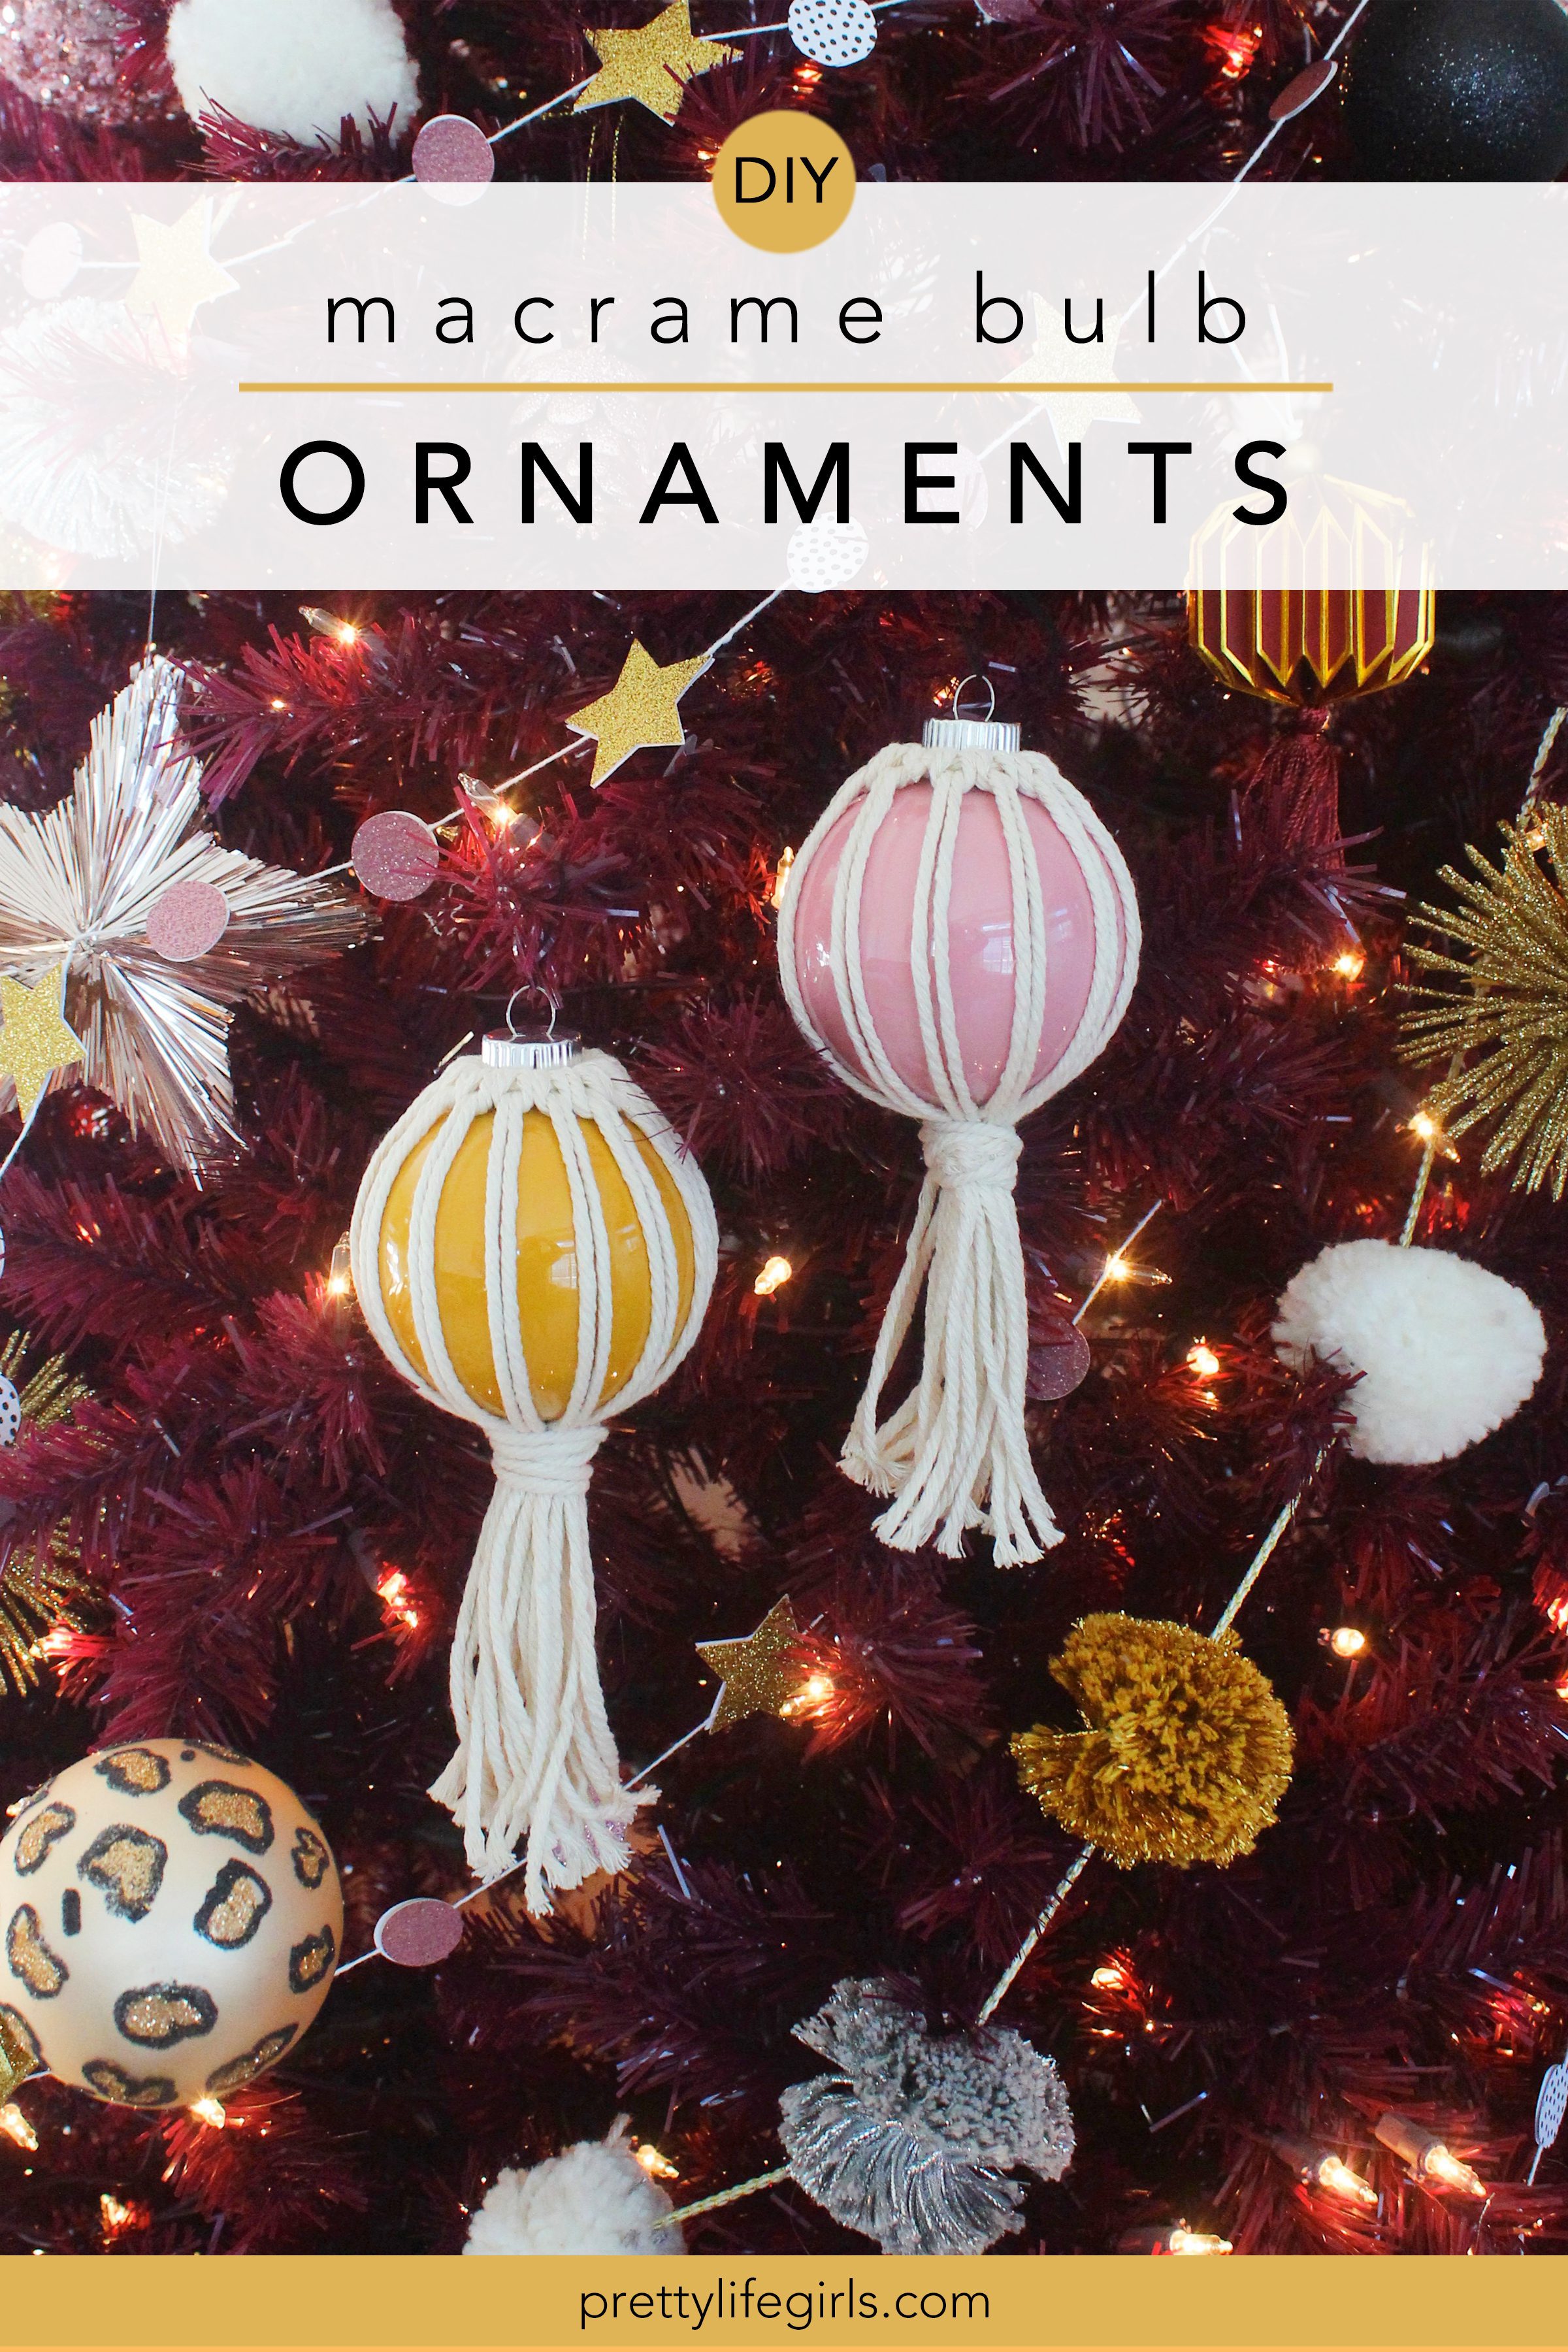
Last year we made some macramé ornaments that were our favorite DIY project of the season, so this year we decided we had to make more and try out a couple new methods! To change things up, this year we used clear ball ornaments from Michaels Stores and tied our macramé around the ornaments in two different patterns, resulting in the fun combo of these Macrame Bulb Ornaments! Plus, we added a little color with our paint shake ornament technique that is the perfect way to create the exact color scheme for your holiday decor!
You’re going to love how simple these ornaments are to execute and the added interest they will give to any tree, plus, you can grab everything you need to make them from Michaels Stores, which has curbside pickup, so it couldn’t be easier!
Here’s what you need to get started!
Supplies needed to make Macrame Bulb Ornaments
Clear Ball Ornaments, 80mm
3mm Macramé Cord
Scissors
FolkArt Multi-Surface Acrylic Craft Paint (striped ornaments)
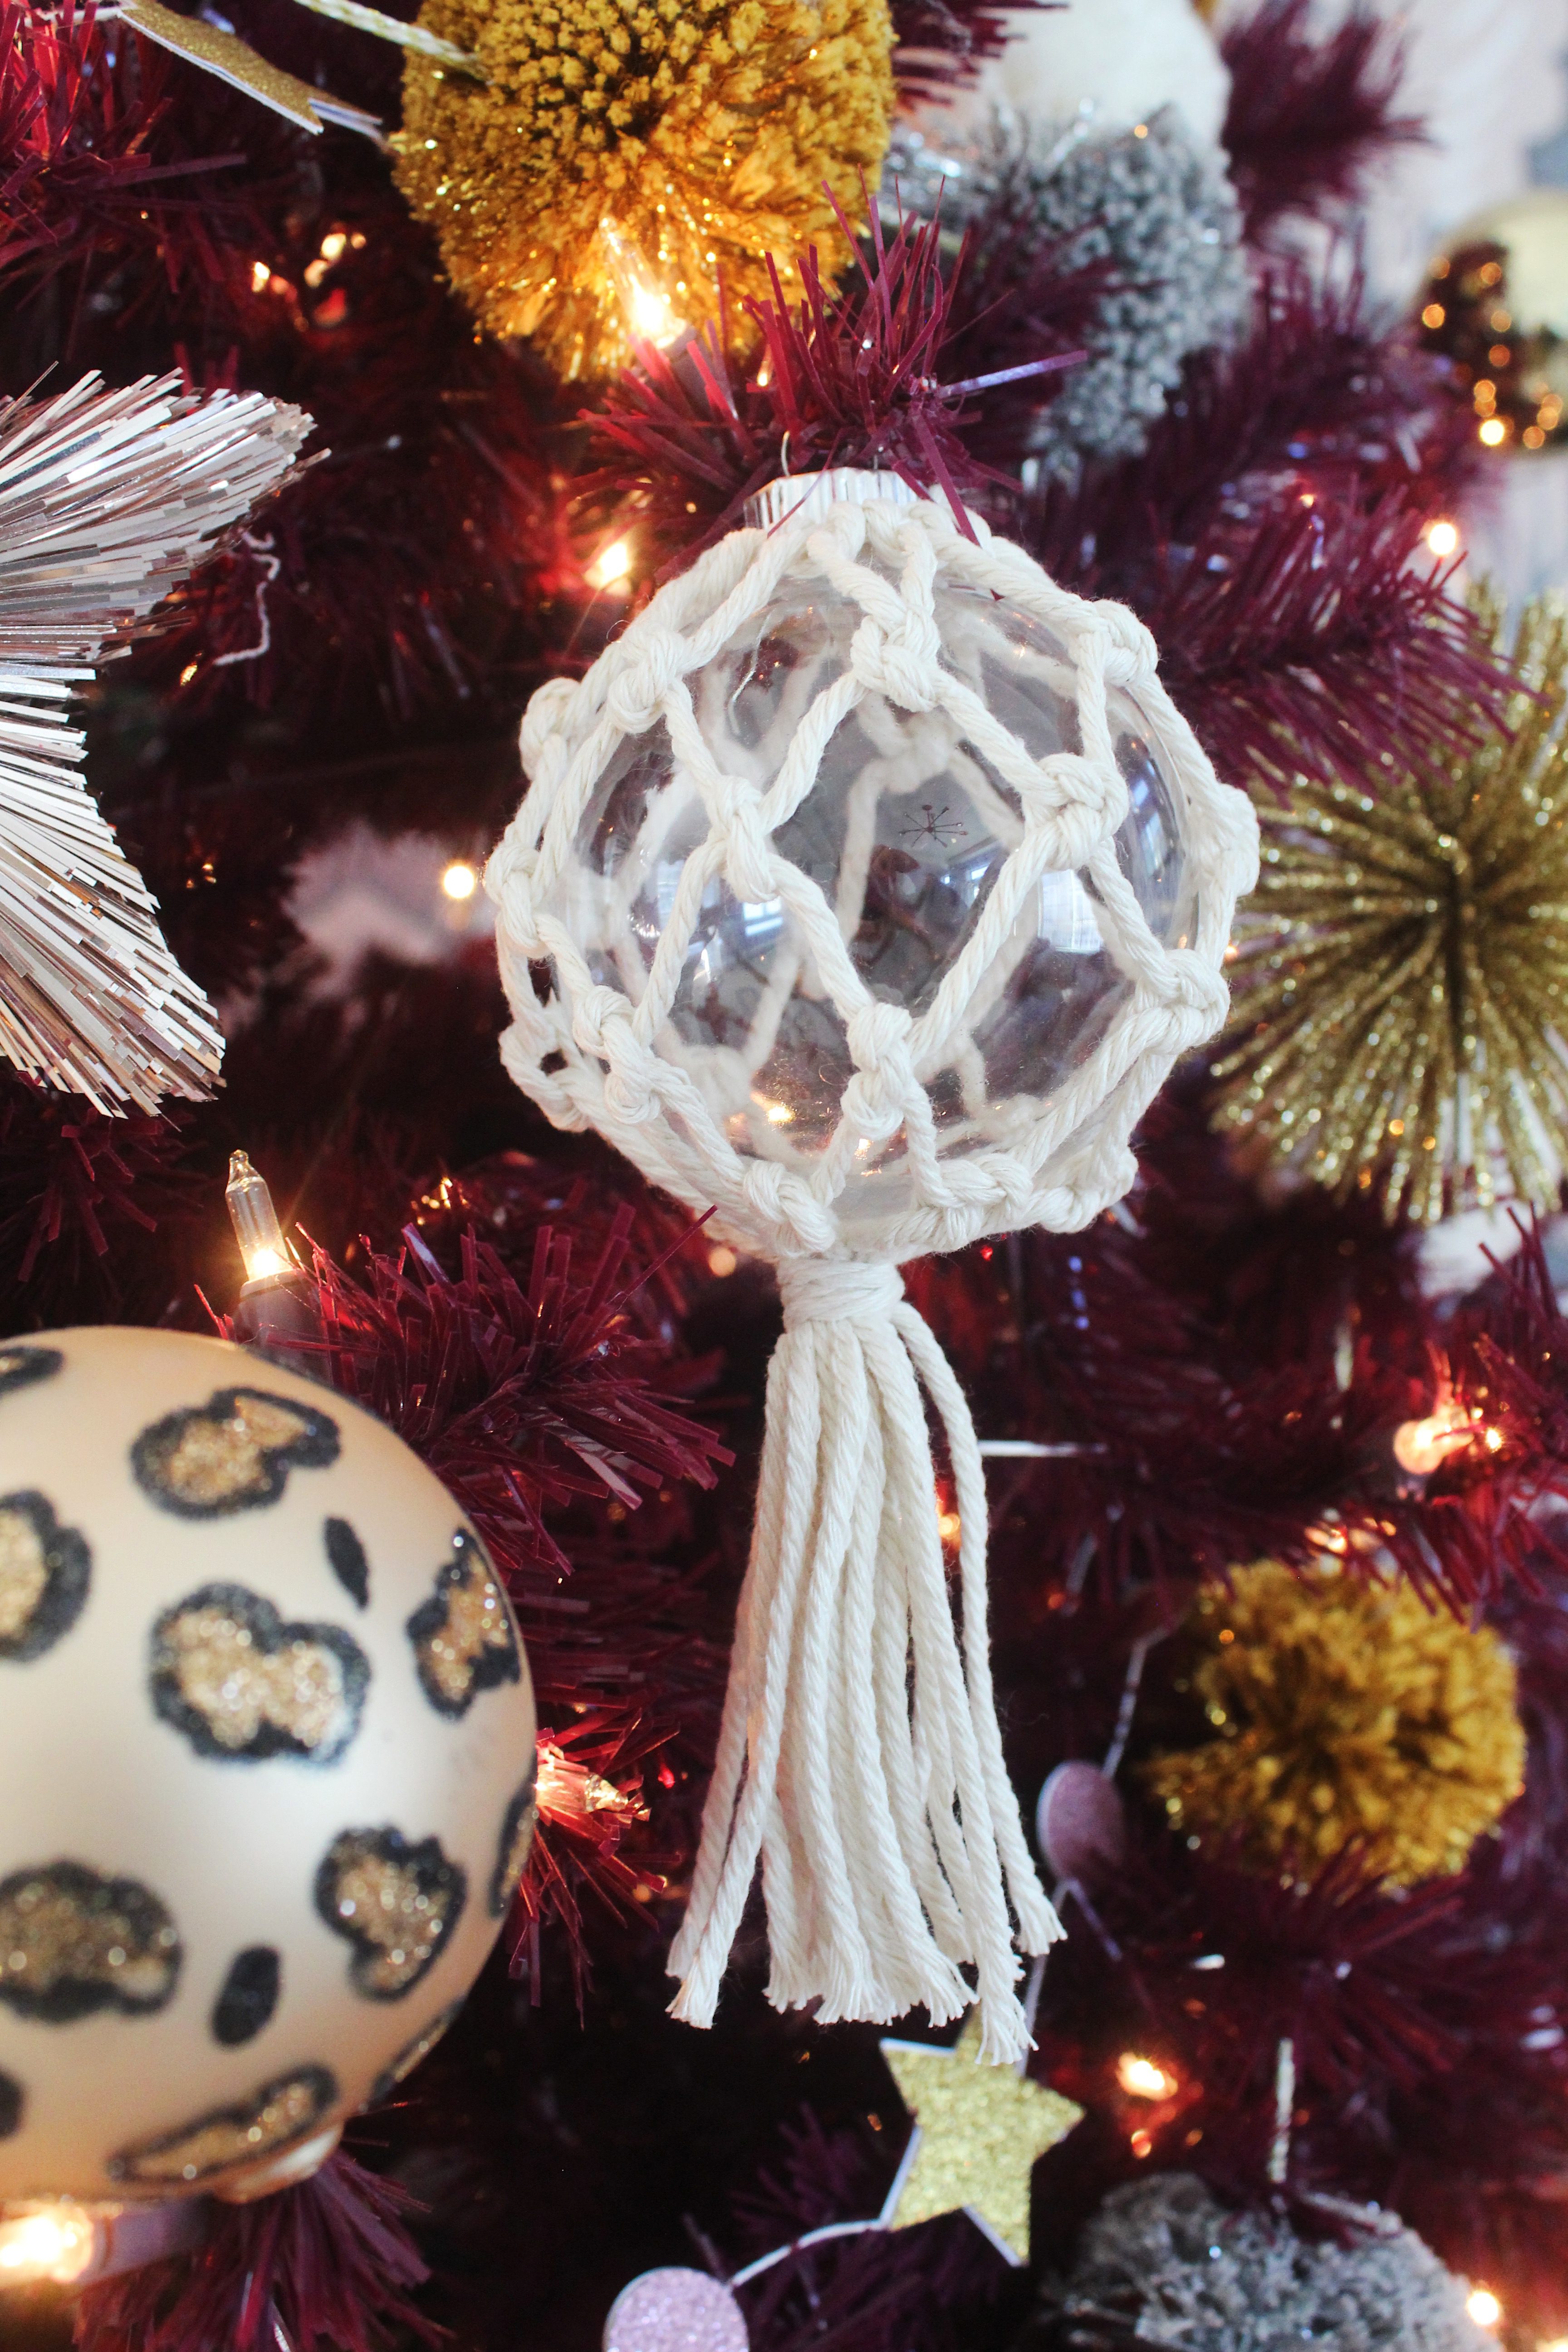
How to make Macrame Bulb Ornaments – Diamond Pattern
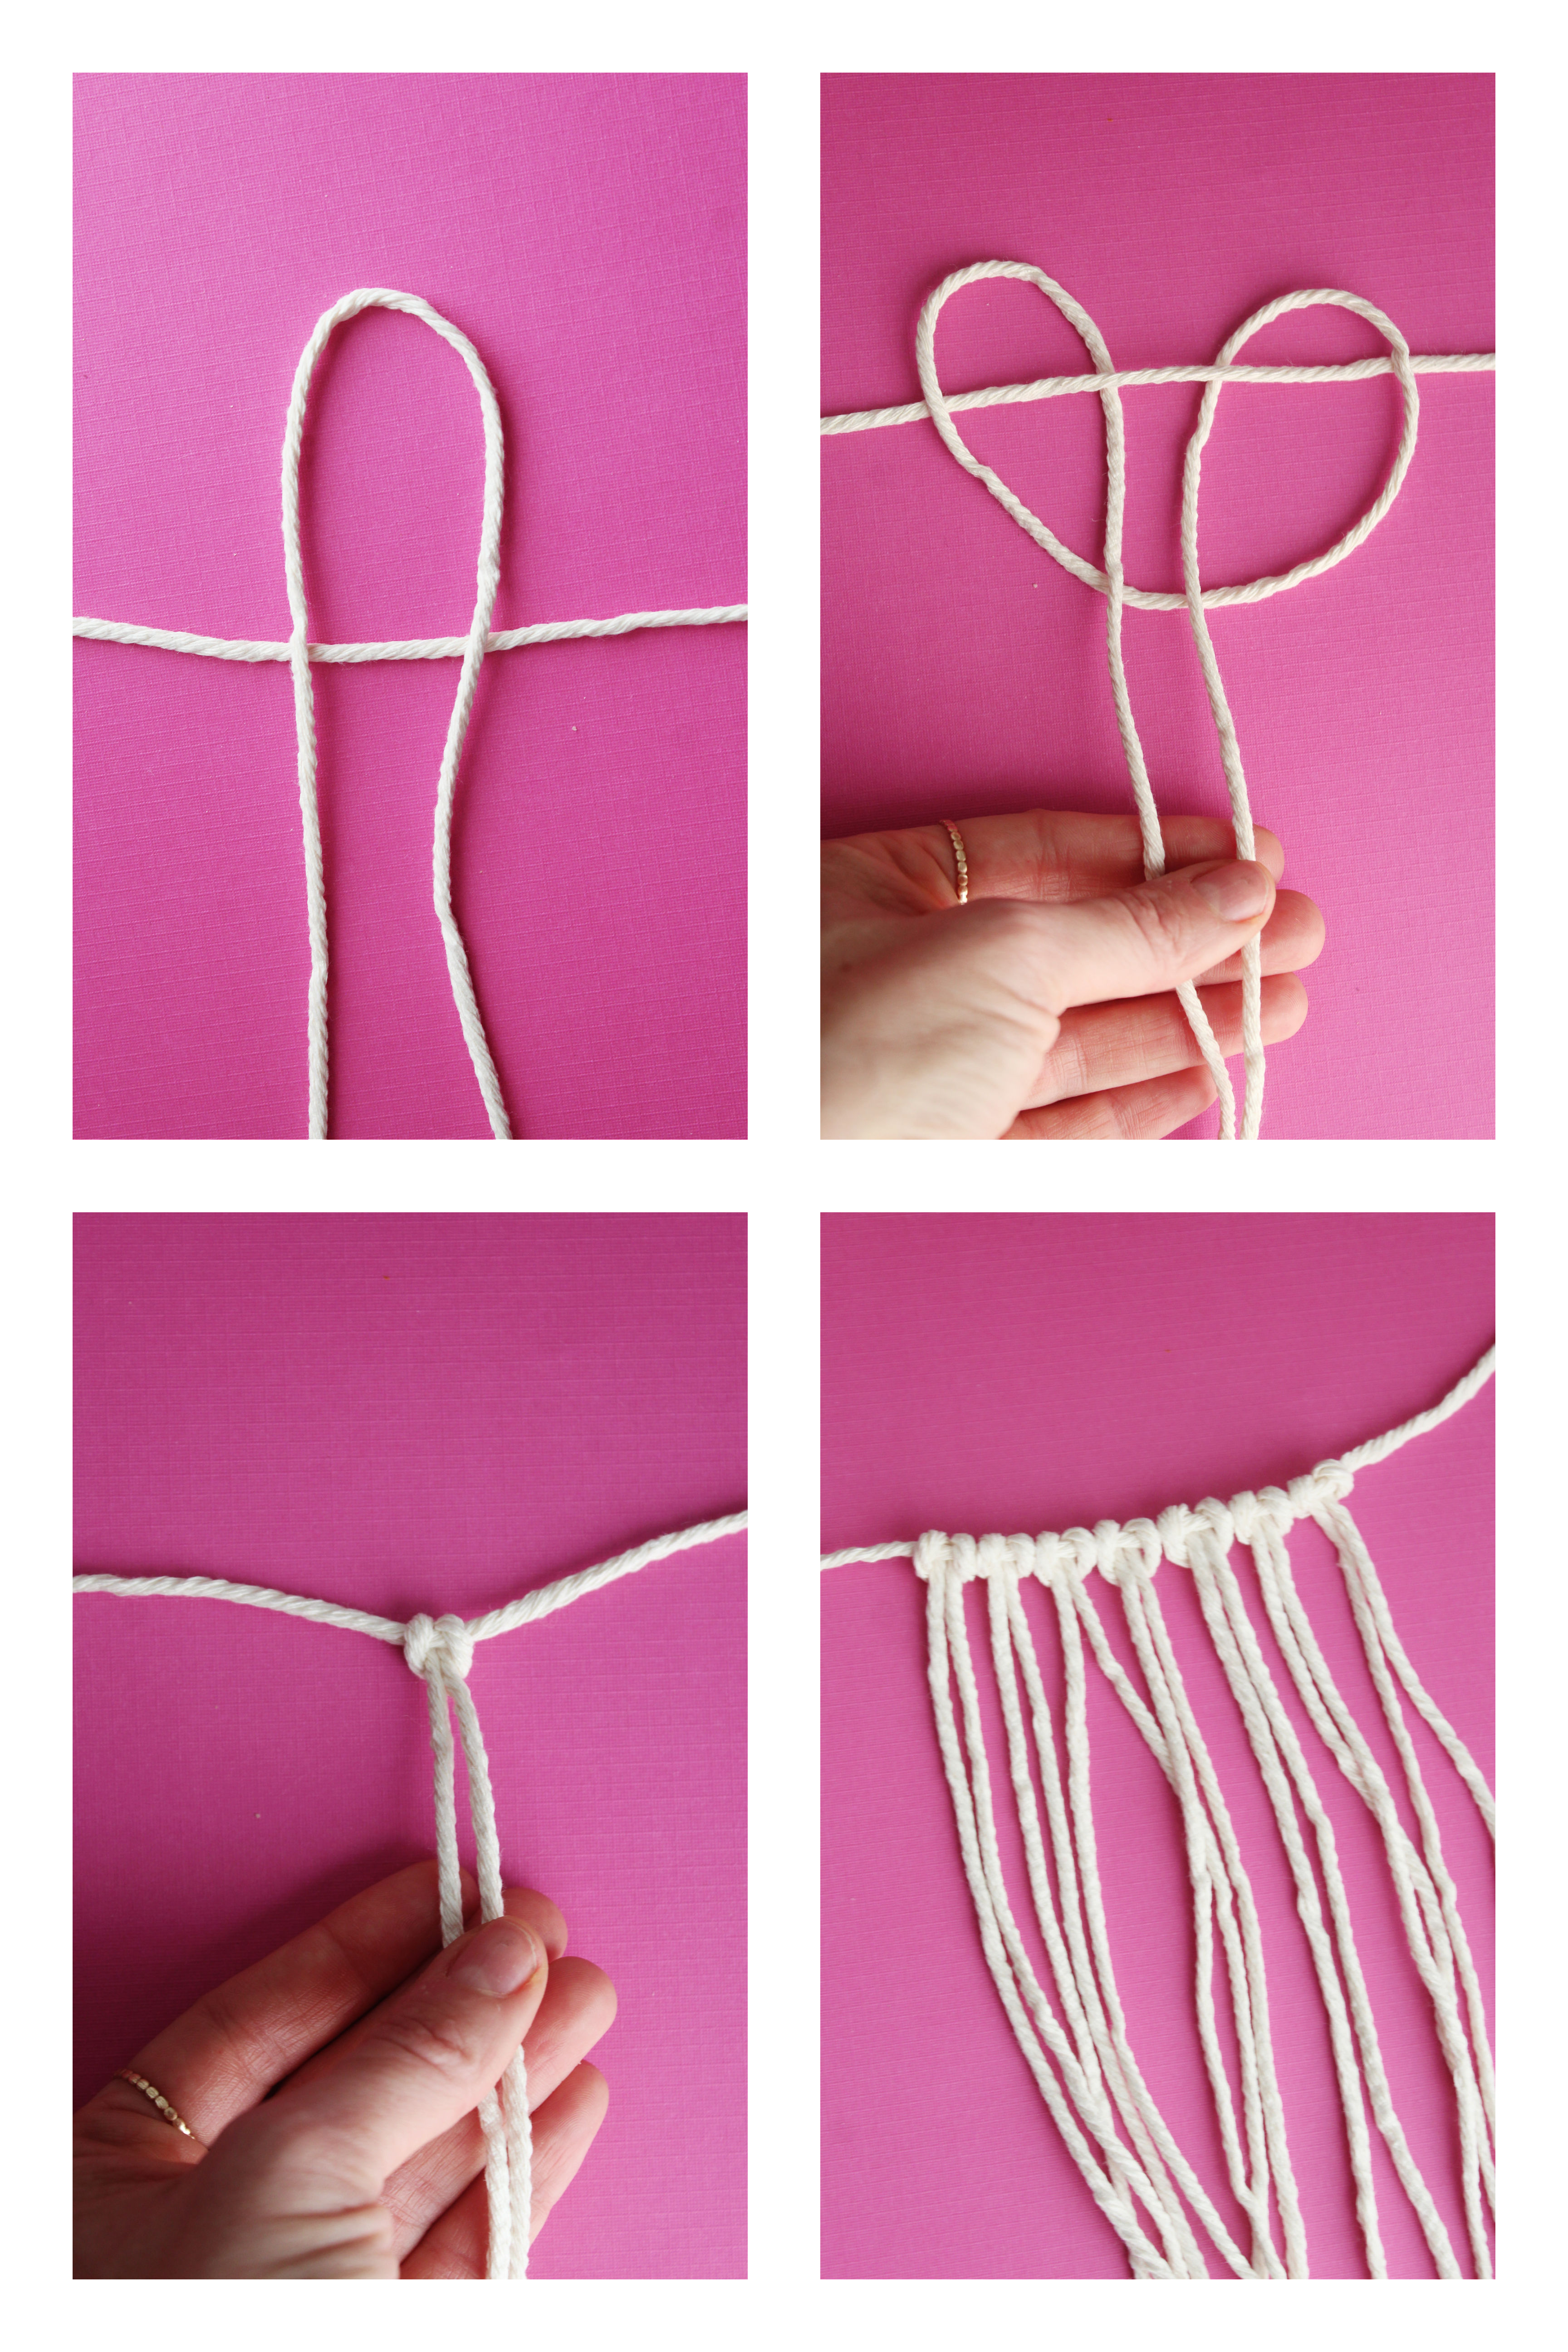
Step 1: Cut 8 pieces of 30” macrame (if your ornaments are larger than 80mm, you’ll want to adjust your lengths).
Step 2: Use one of the 30” pieces as your main strand. Fold one of your other 30” strands in half and attach using a Lark’s Head knot to the the middle of the main strand and tighten. (If you’ve never made a Lark’s Head knot, watch our video tutorial here.)
Step 3: Attach the other 30” pieces with the Lark’s Head knot and center them on the main strand.
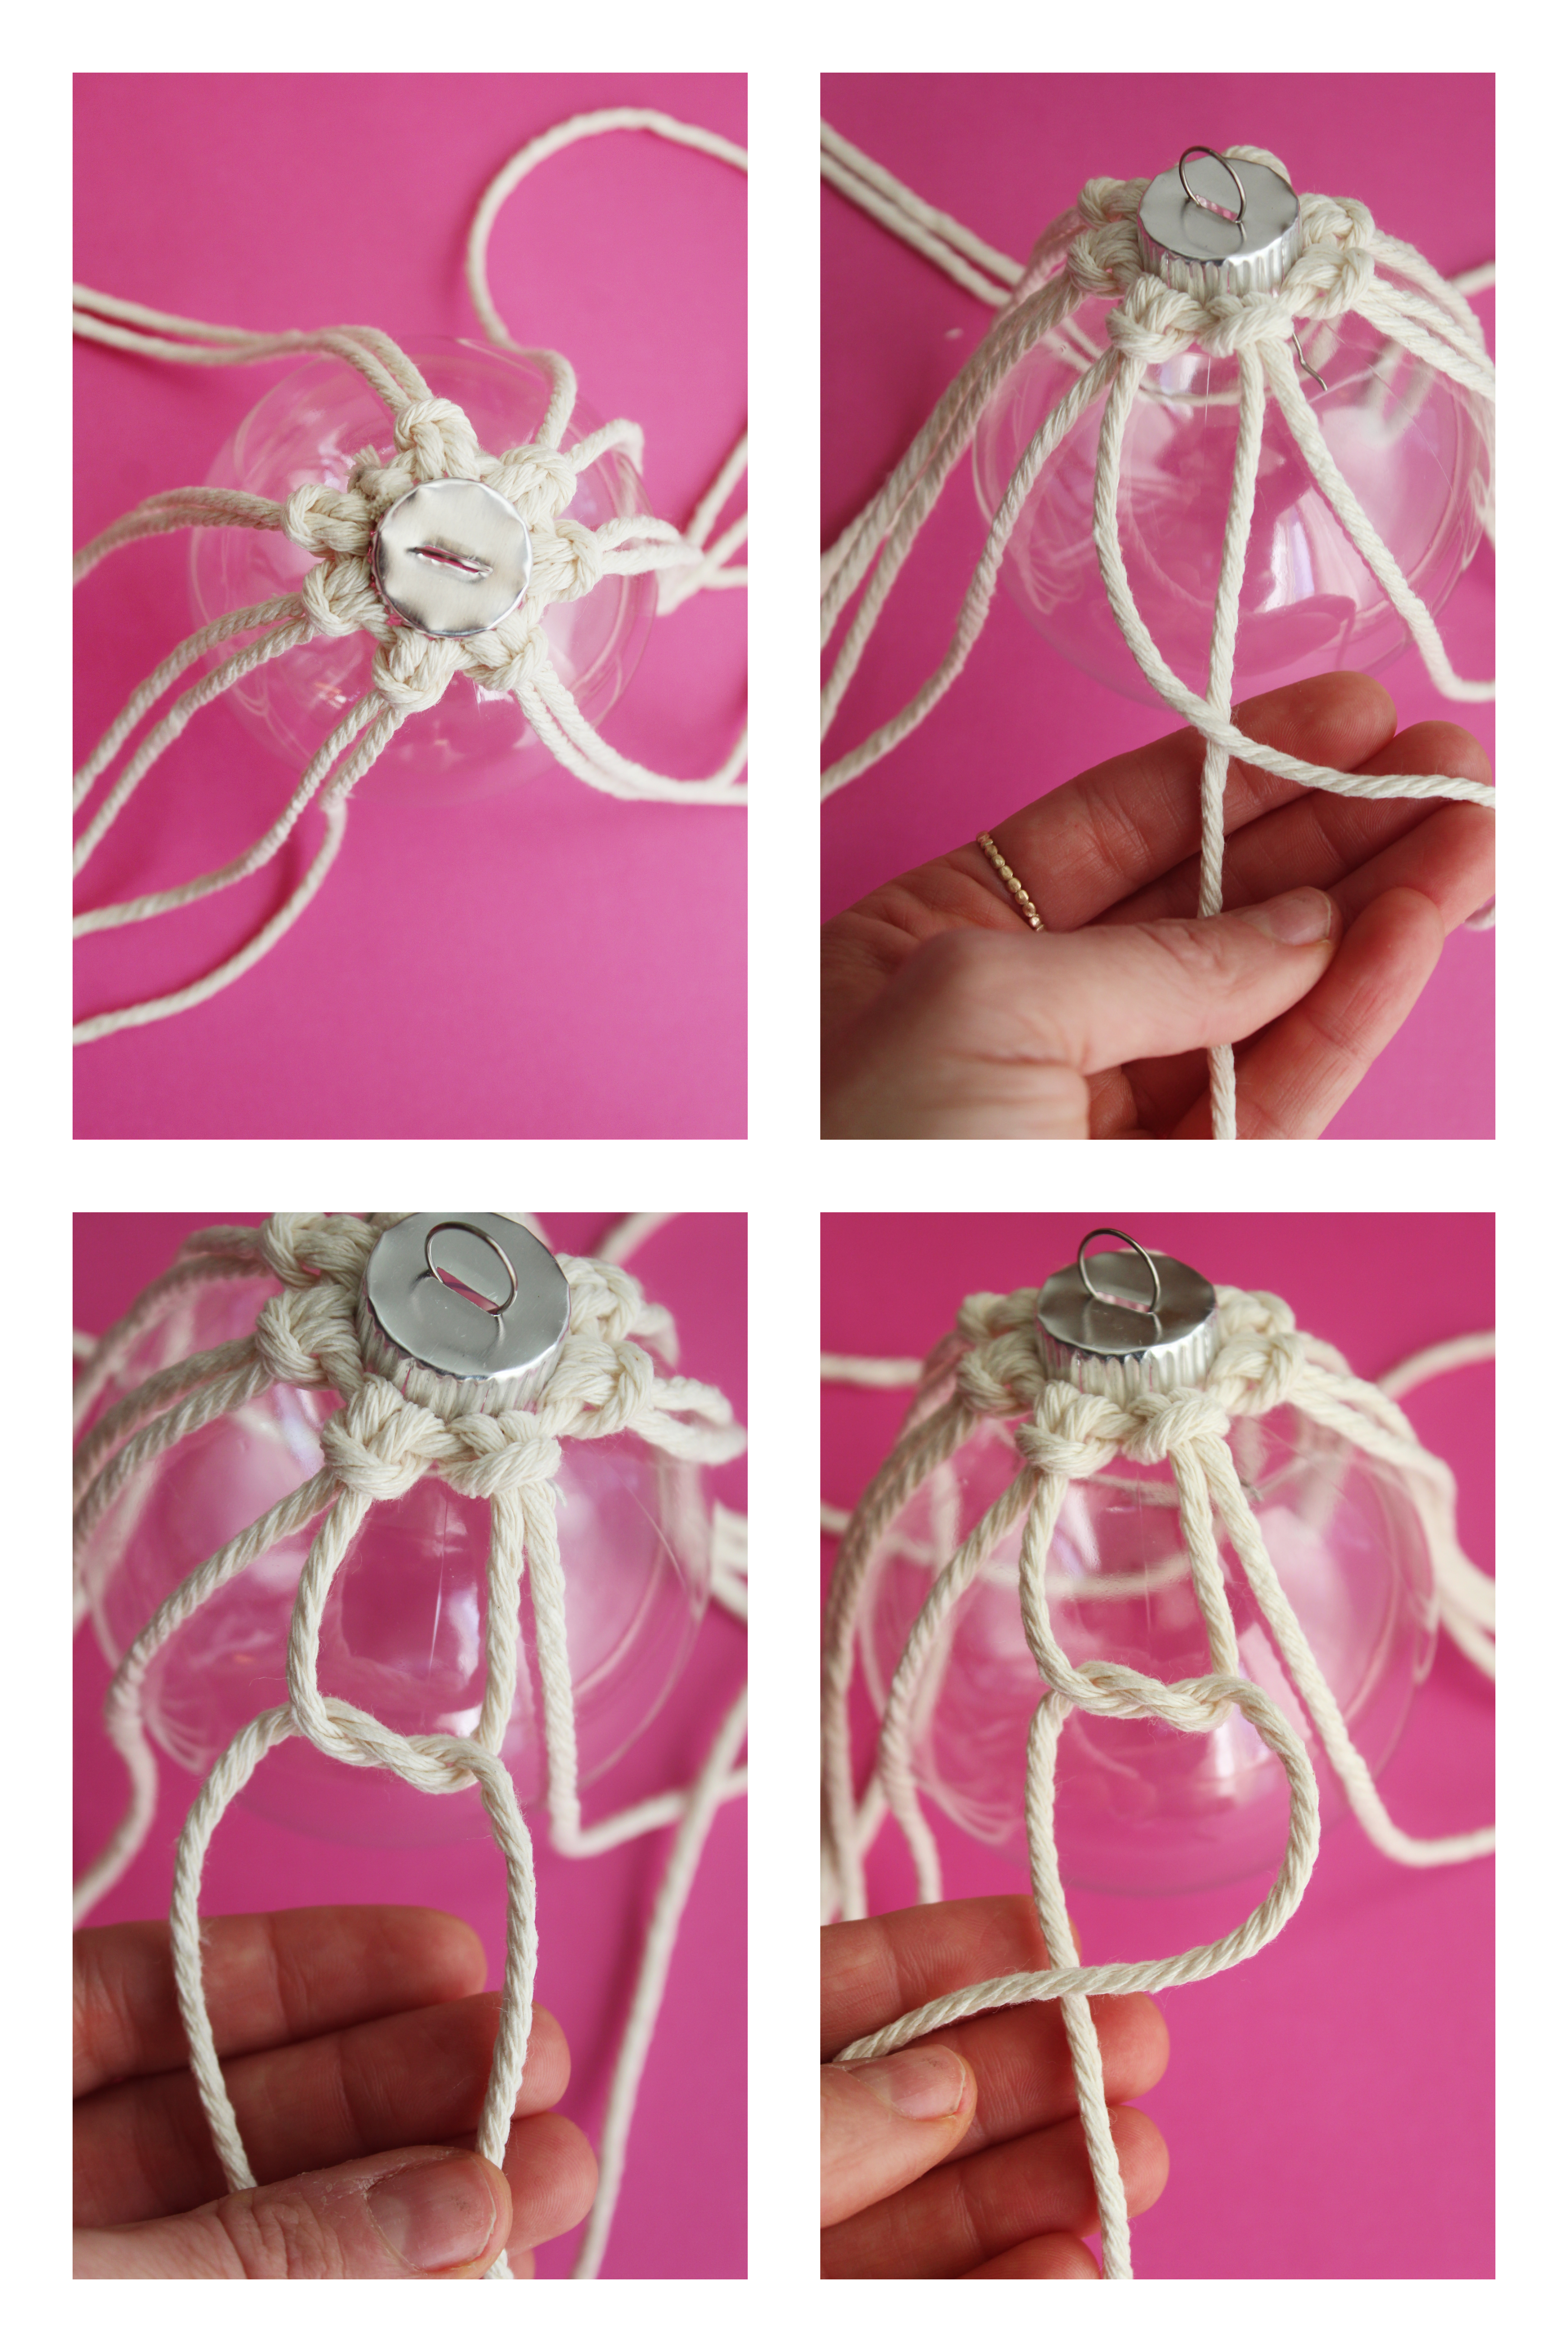
Step 4: Loop the main strand around the top of the ball ornament. Tighten and knot it. Space all your knots out evenly around the top.
Step 5: Take two bordering strands (one strand from two different Lark’s Head knots that are next to each other). Cross the left over the right. It is important to remember which side crosses which as we will do the opposite side later.
Step 6: Continue pulling the left strand down, around and over the right.
Step 7: Now we switch to the opposite side. Cross the right over the left
Step 8: Continue pulling the right strand down, around and over the left. You now have a square knot. Tighten.
Step 9: Repeat the square knots on all the strands around the ornament.
Step 10: Change directions with your strands and repeat the square knots. Continue this method till you get to the bottom.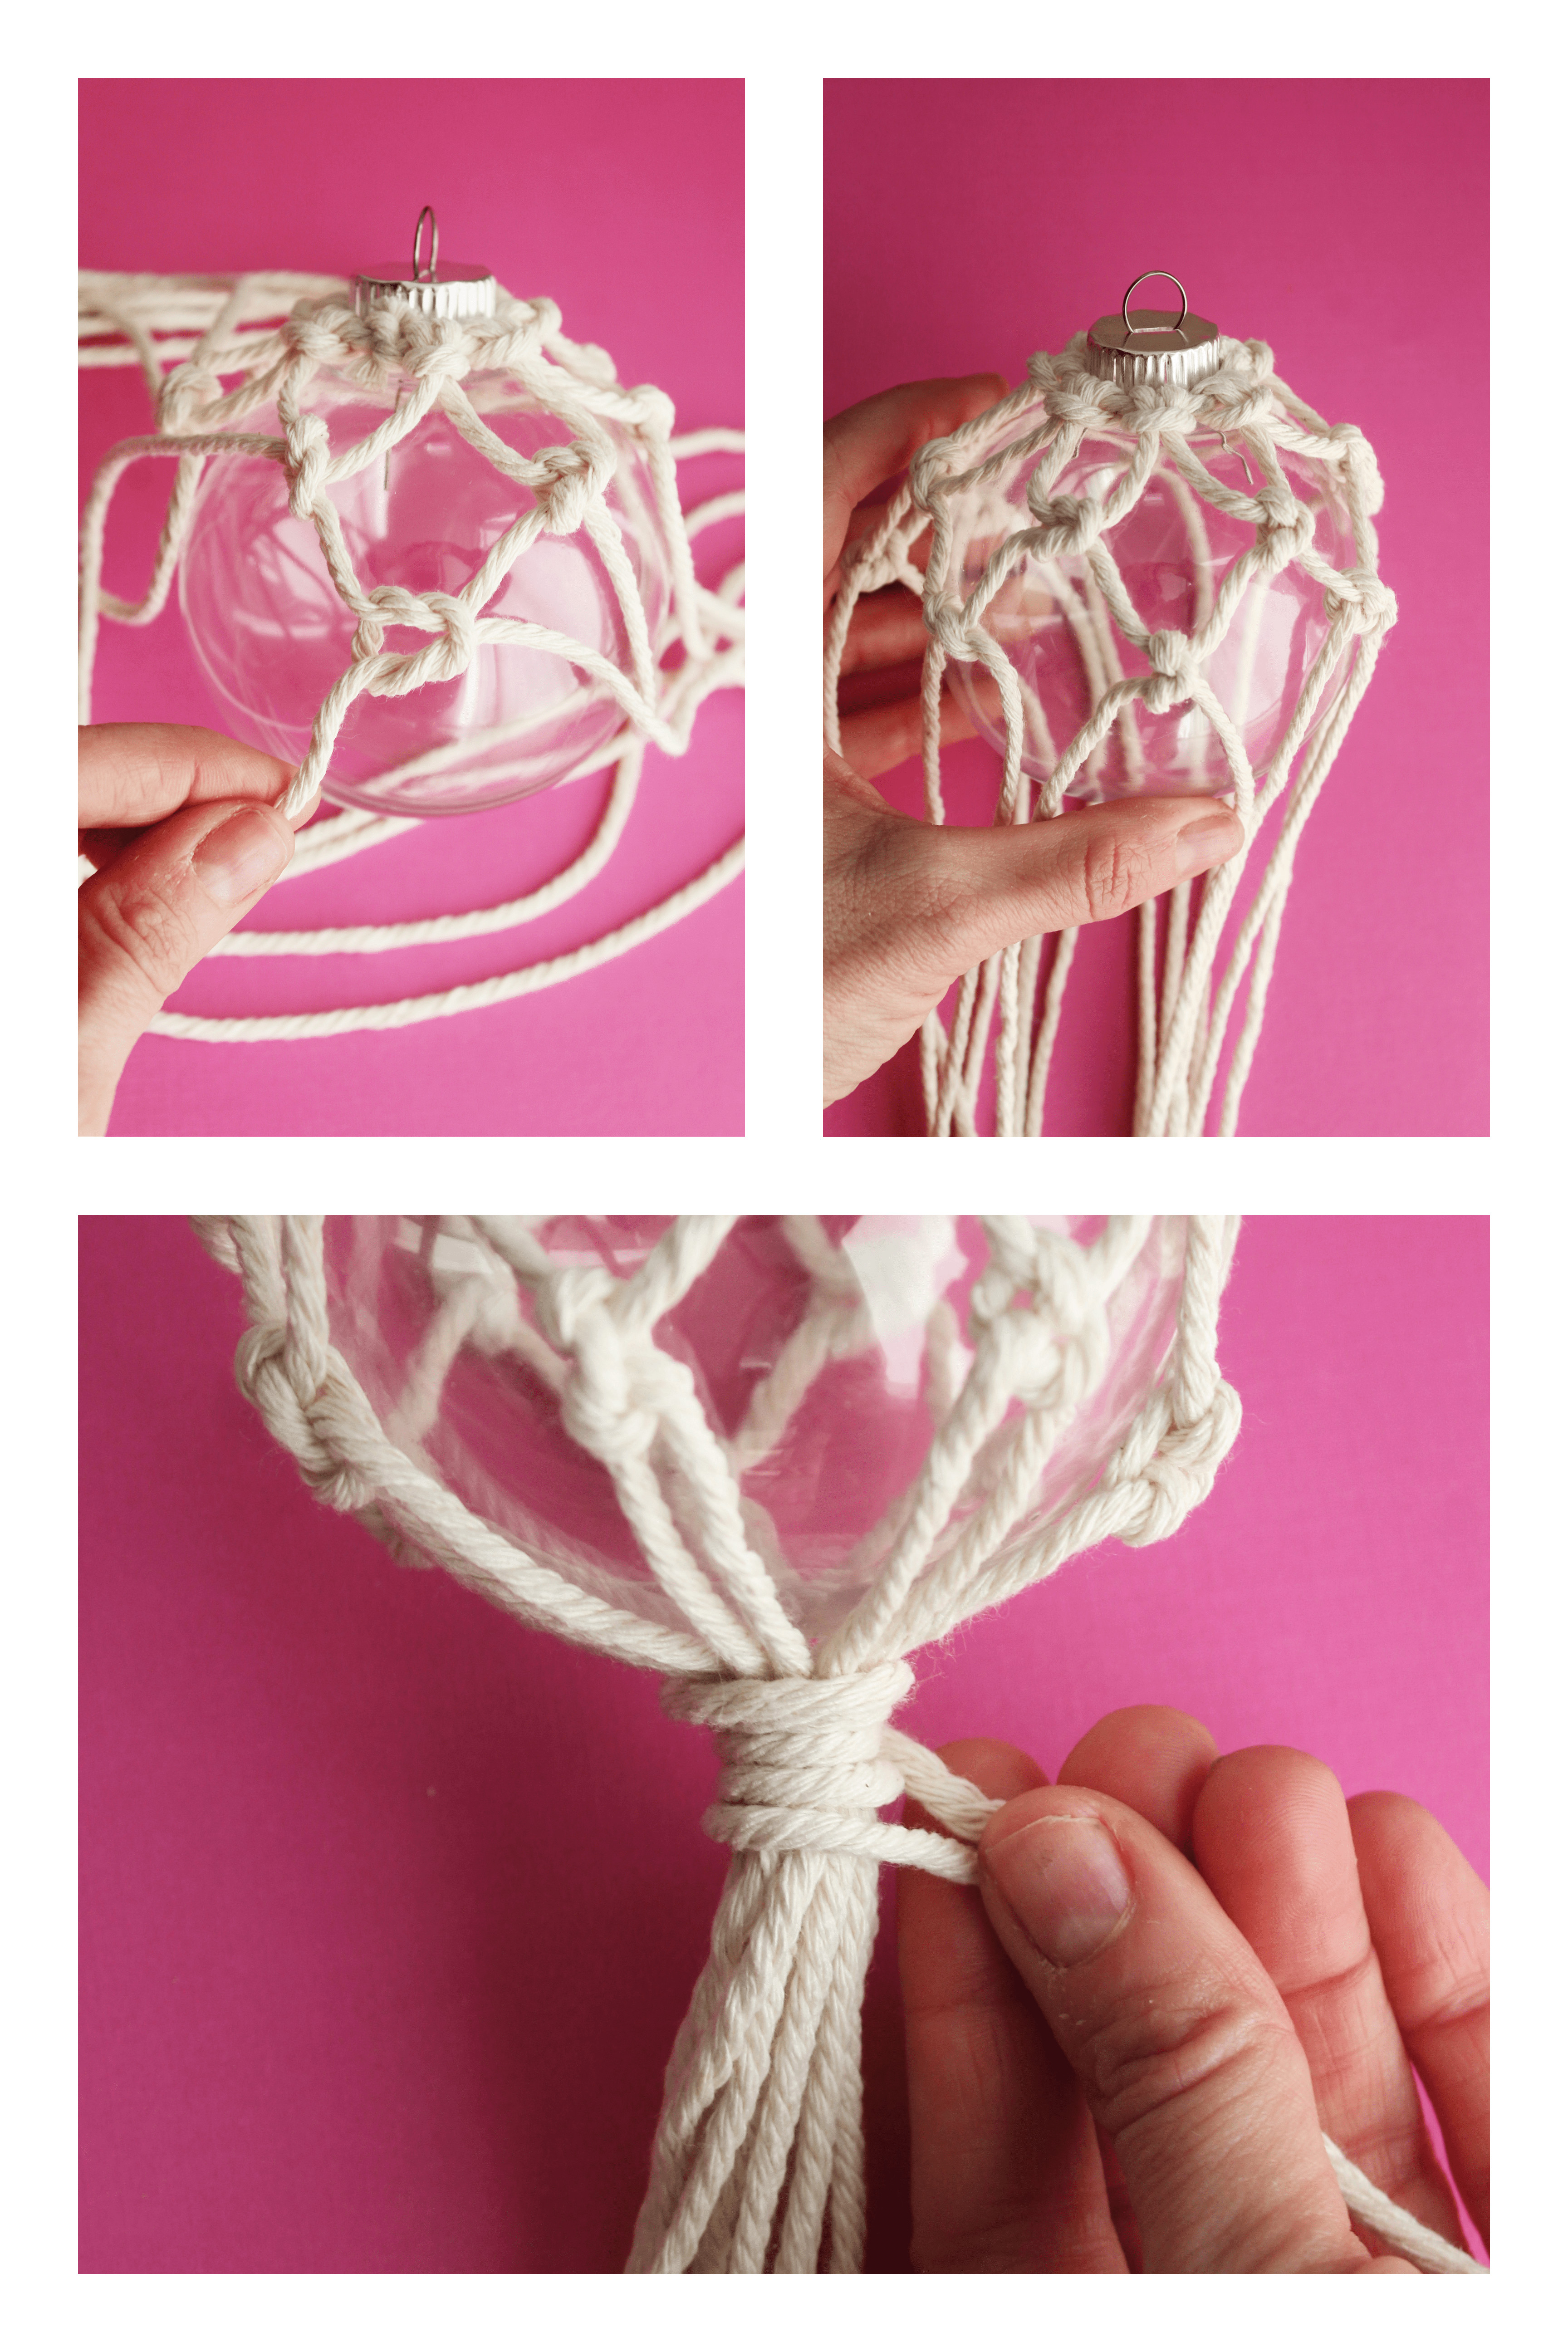
Step 11: Pinch the bottom of your strands. Take the your remaining piece of macrame cord and wrap it around the tails at the bottom of your ornament. Tie a knot to secure and trim any excess pieces.
Step 15: Trim the tails of the ornament to your desired size using scissors.
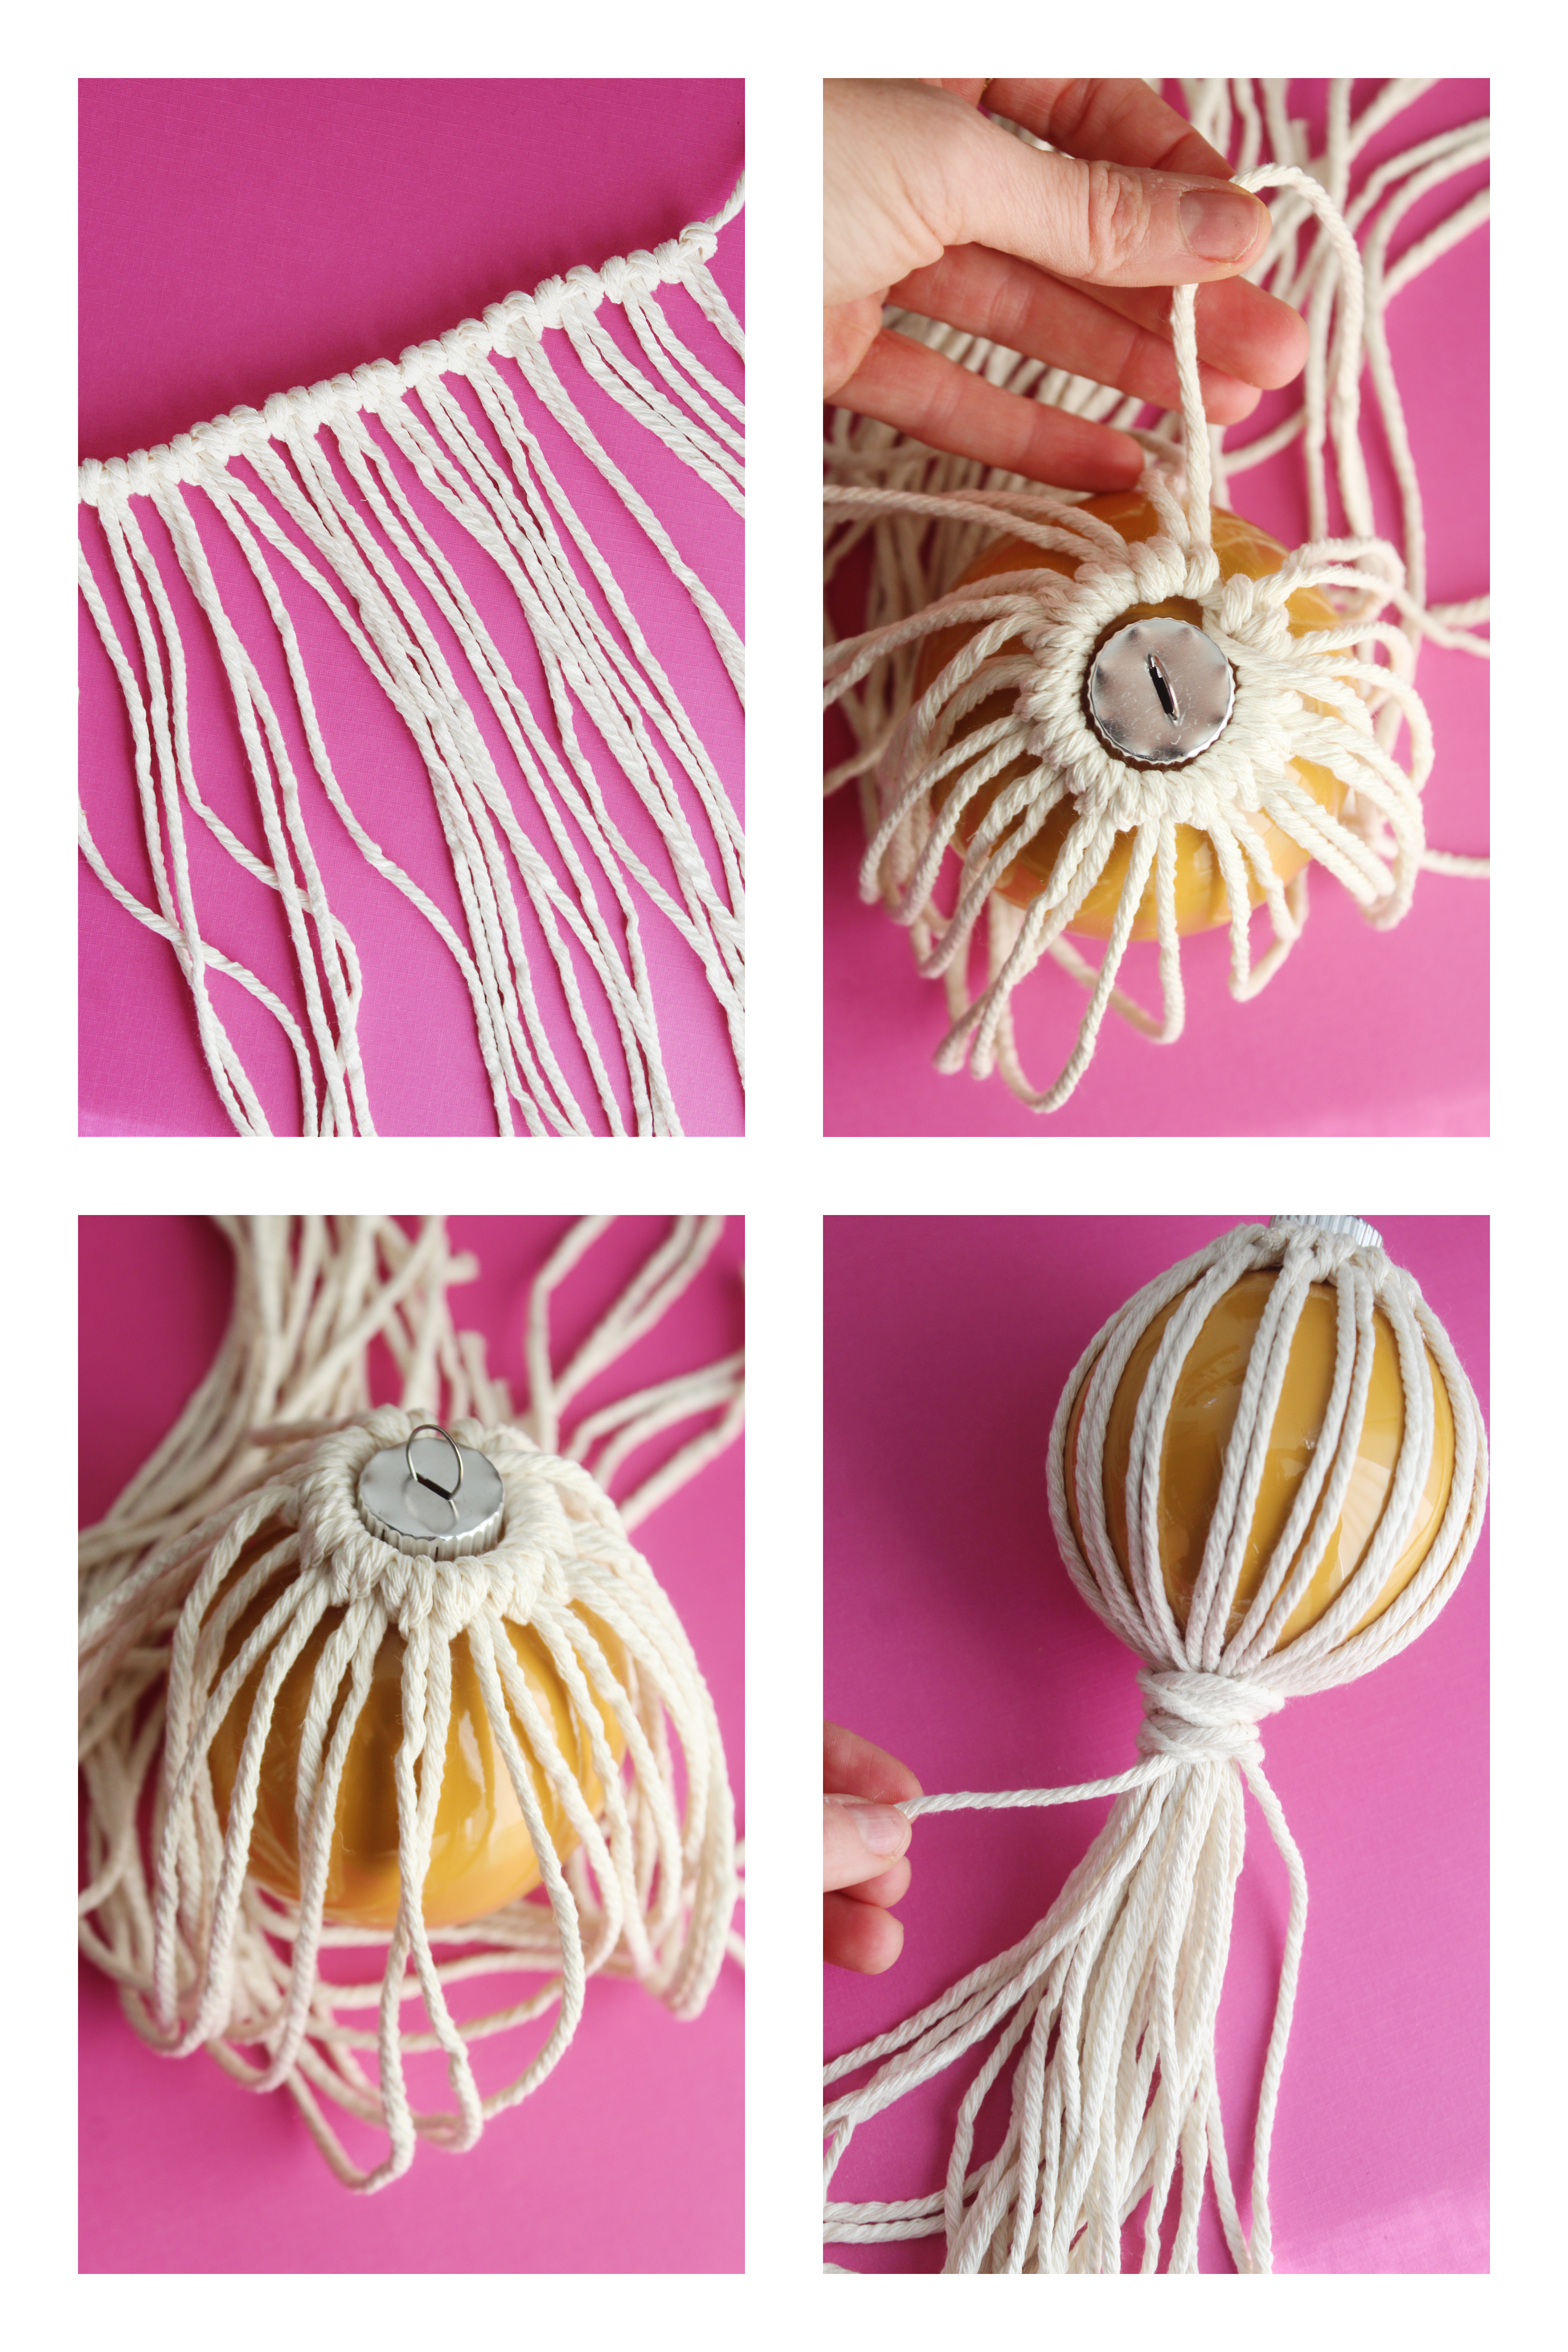
How to make Macrame Bulb Ornaments – Stripe Pattern
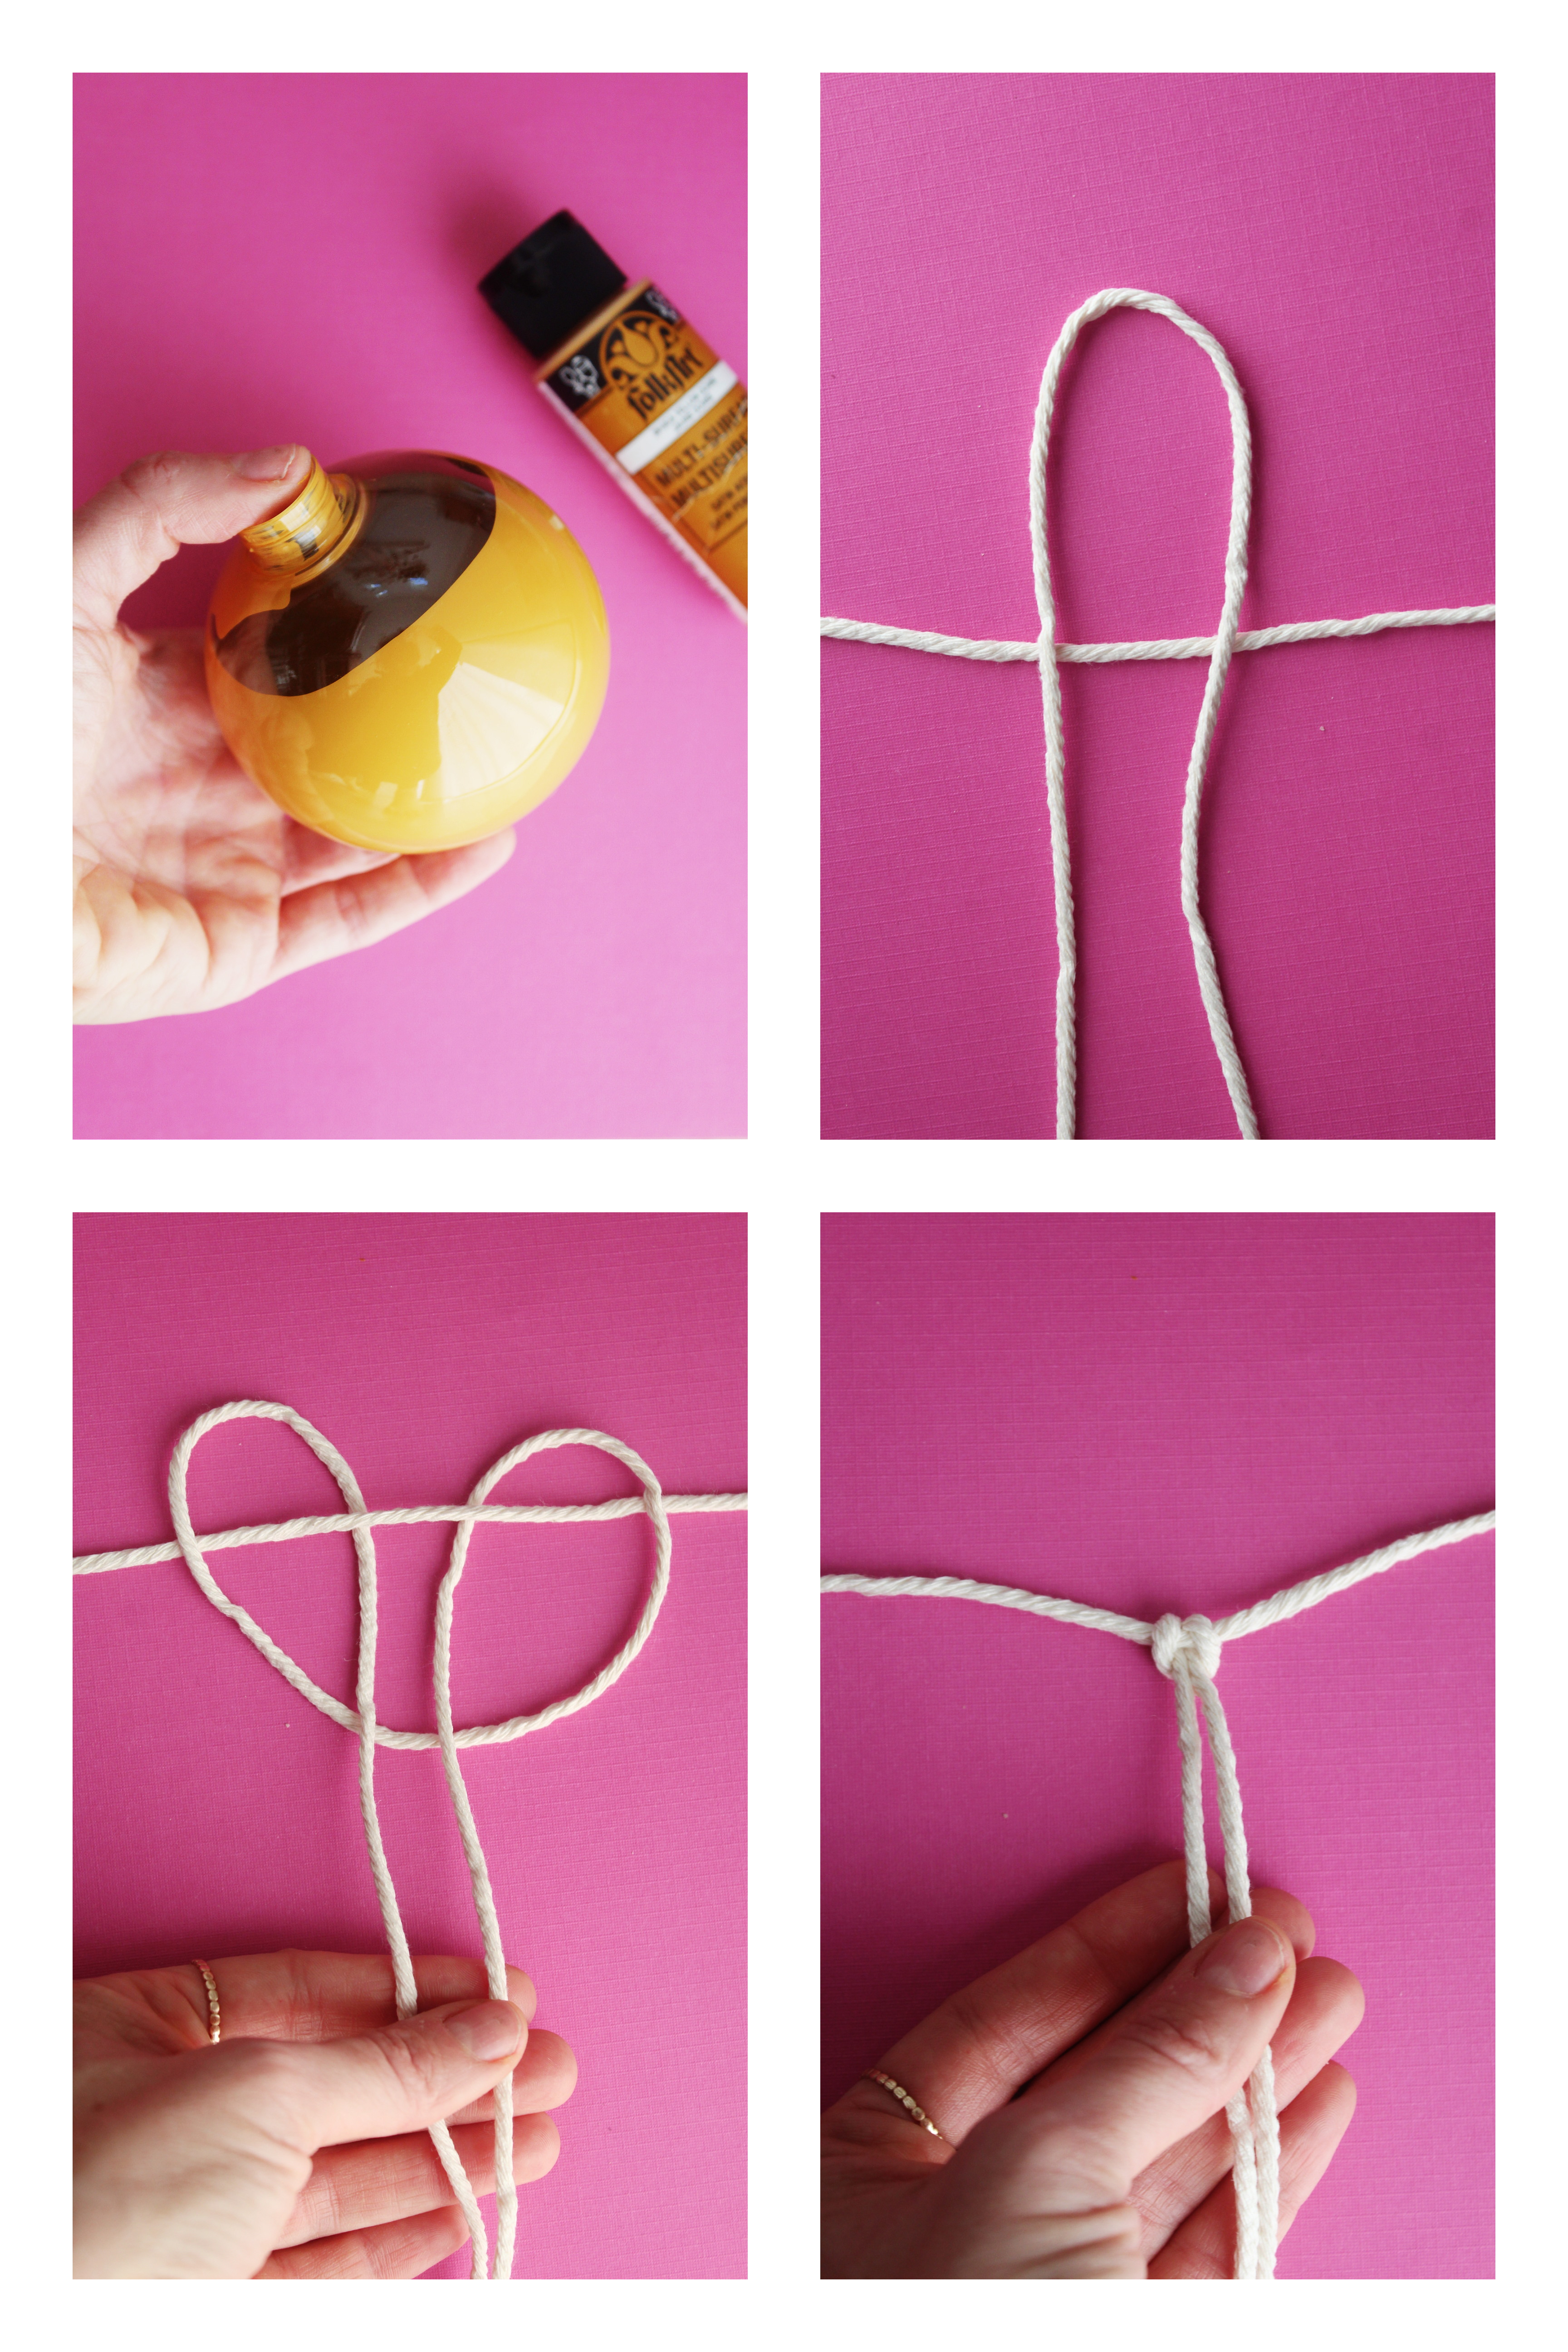
Step 1: Remove the top of the ornament and squeeze a quarter-sized amount of paint into the ornament. Cover the hole with your thumb and start shaking and tapping the ornaments against your hands to coat the interior of the ornament. If you feel like you need more paint, add a little more at a time, being careful not to over saturate the inside, until the entire bulb is coated in paint. (View our full post on paint shaking ornaments, here!)
Step 2: Rotate the ornaments every couple of hours and let the ornaments dry completely with the tops off. (I let mine dry overnight.)
Step 3: Once the bulbs are dry, cut 15 pieces of 24” macrame cord. (You may have to adjust this length depending on the size of your ornaments. Ours were 80 mm.)
Step 4: Use one of the 24” pieces as your main strand. Fold one of your other 24” strands in half and attach using a Lark’s Head knot to the the middle of the main strand and tighten. (If you haven not tied a larks head knot before, watch our video here.)
Step 4: Attach the other 24” pieces with the Lark’s Head knot and center them on the main strand.
Step 5: Loop the main strand around the top of the ball ornament. Tighten and knot it. Space all your knots out evenly around the top.
Step 6: Pinch the bottom of your strands. Take the your remaining piece of macramé cord piece and wrap it around the tails at the bottom of your ornament. Tie a knot to secure and trim any excess pieces.
Step 7: Arrange the lined strands on the bulb into sections of two to create stripes.
Step 8: Trim the tails of the ornament to your desired size using scissors.
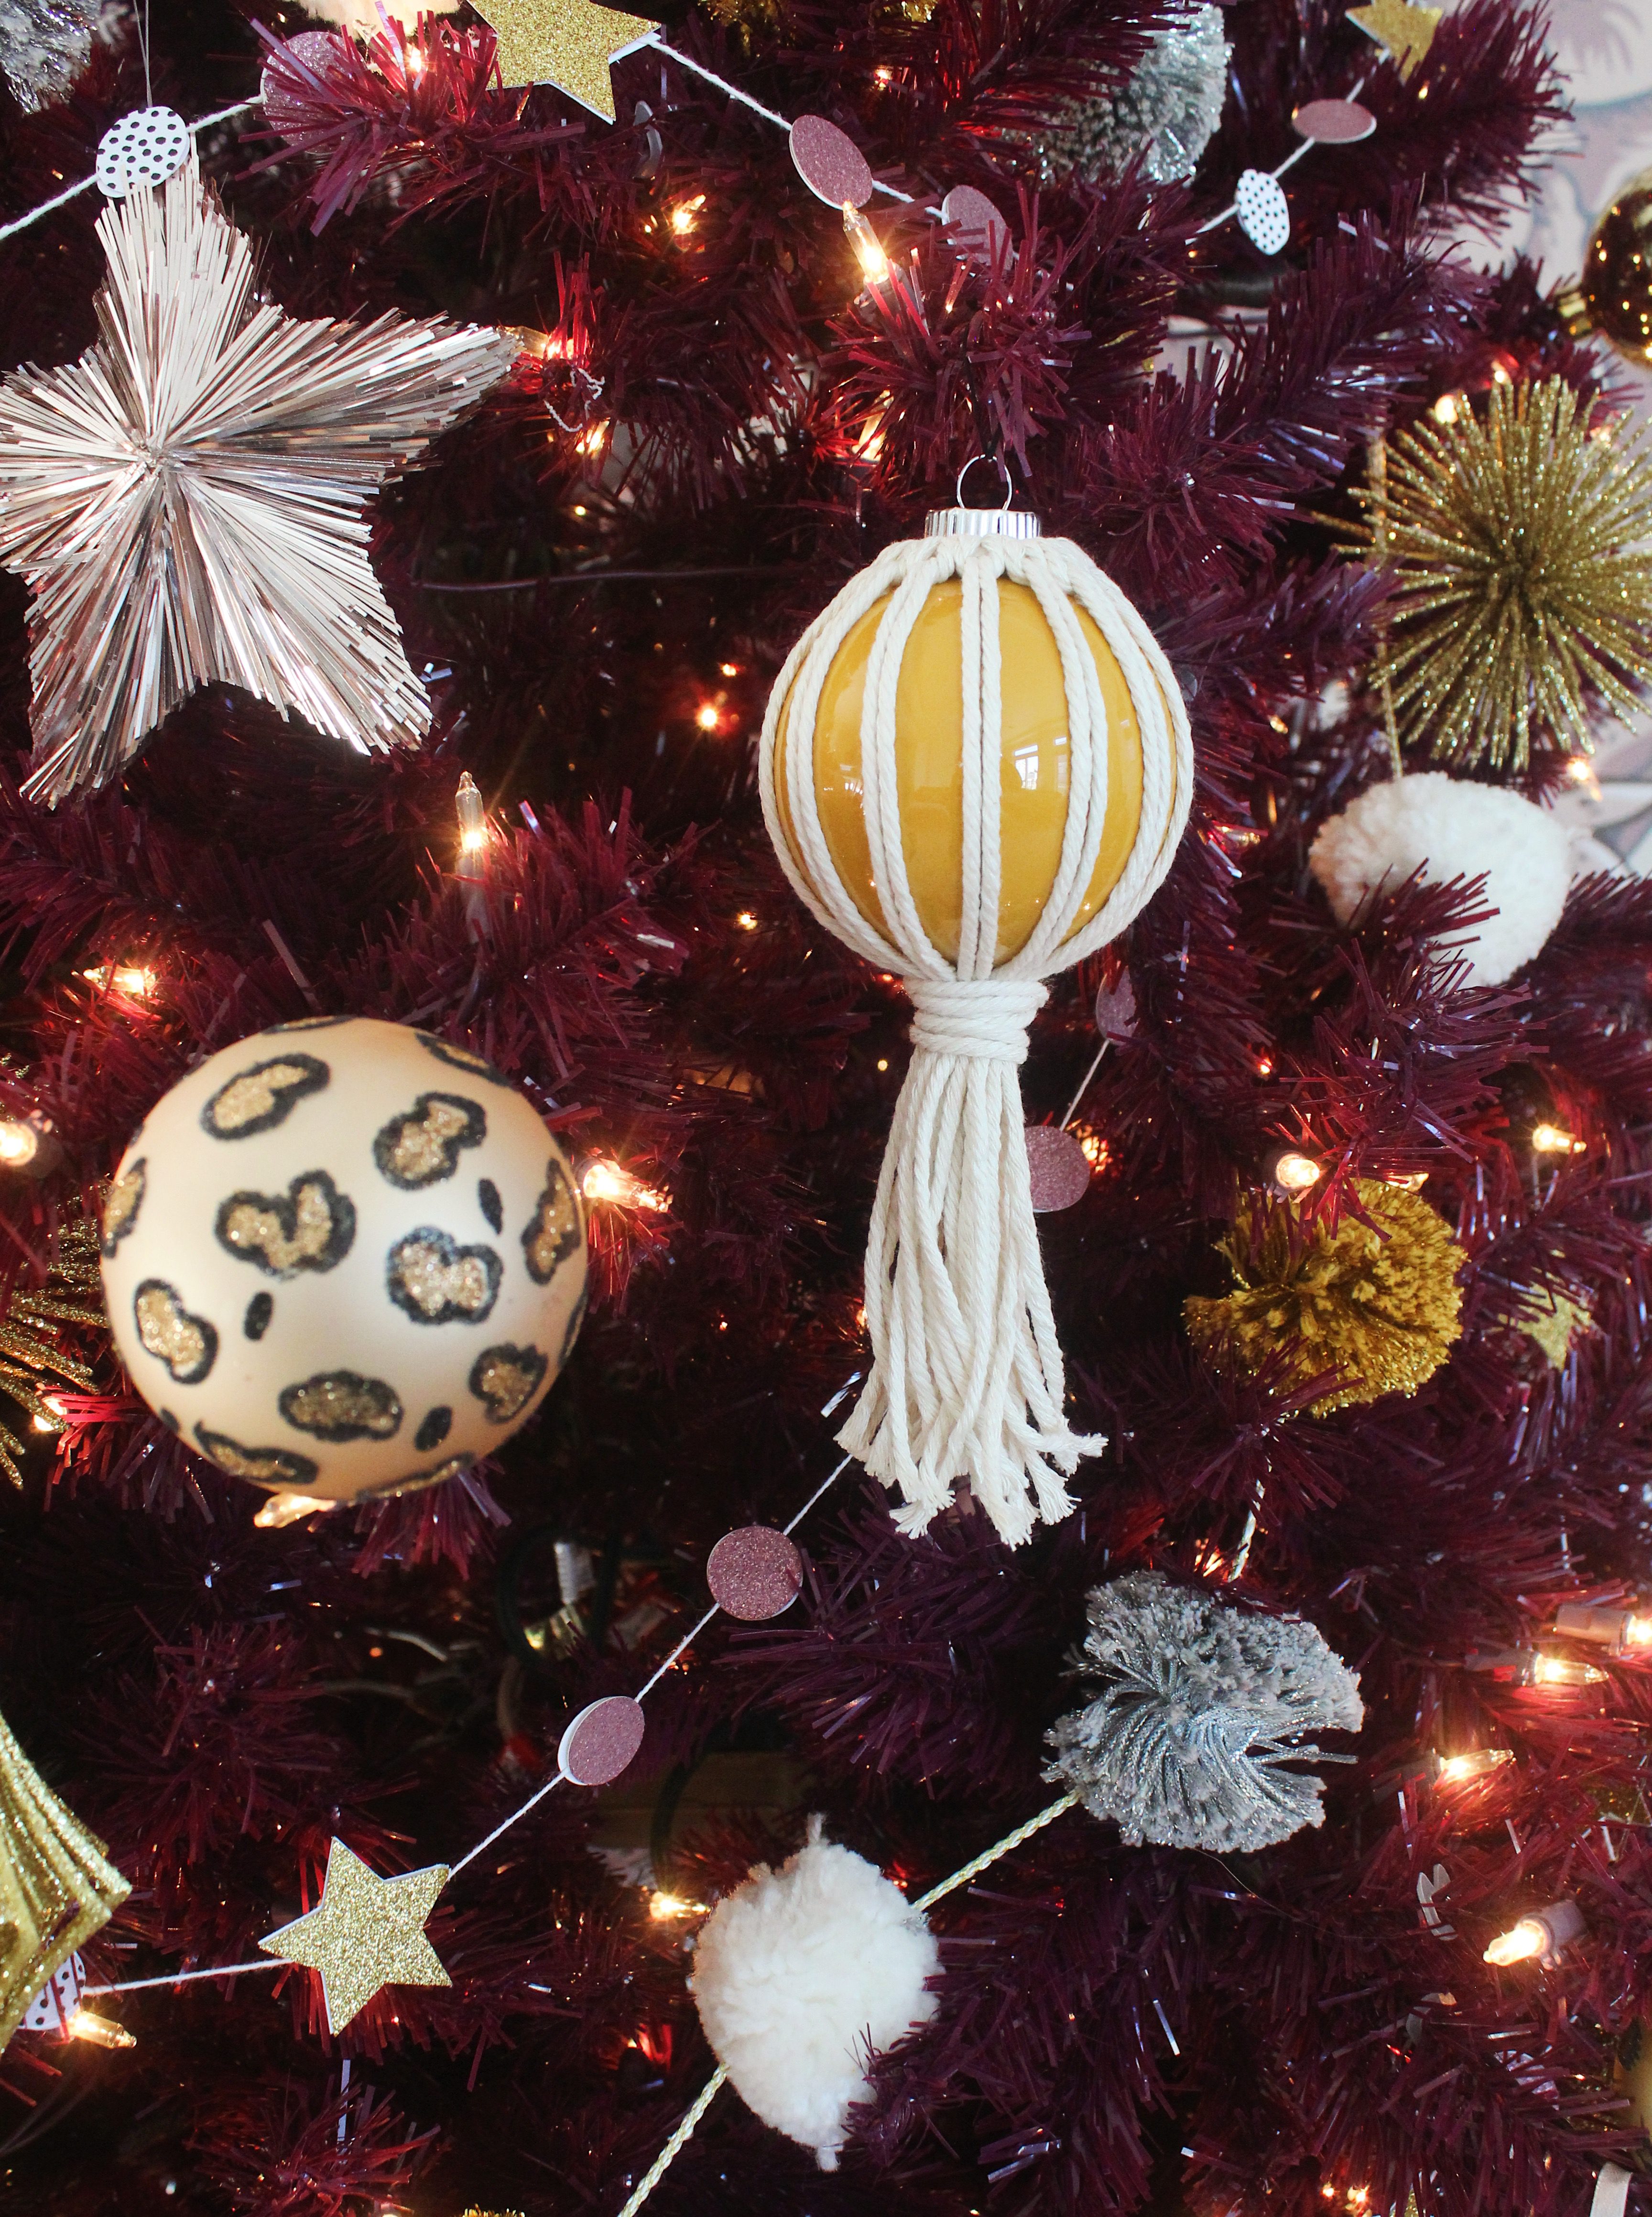
That’s it! Now you’ve made two kinds of gorgeous macramé ornaments, just by tying a few simple knots! You’re going to have so much fun adding these to your Christmas decor, giving give it some boho flair! Plus, by adding a little paint to your bulbs you can add a rainbow of color, too!
You can find all of the supplies you need to make these cuties at Michaels Stores, along with an endless supply gorgeous holiday decor and DIY tools!
Happy making!
ox. Liz and Sam
Check out these other DIY ornament projects!
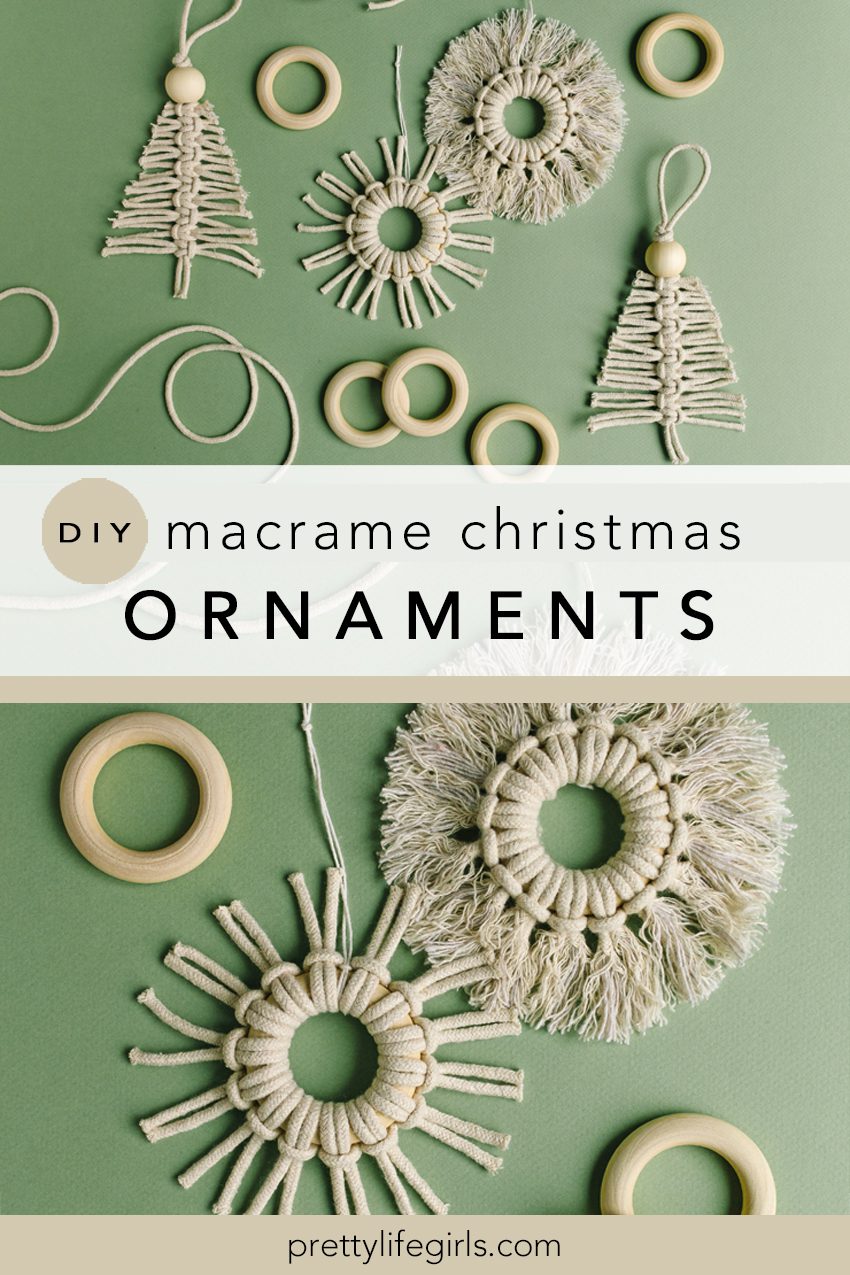
DIY Macrame Christmas Ornament
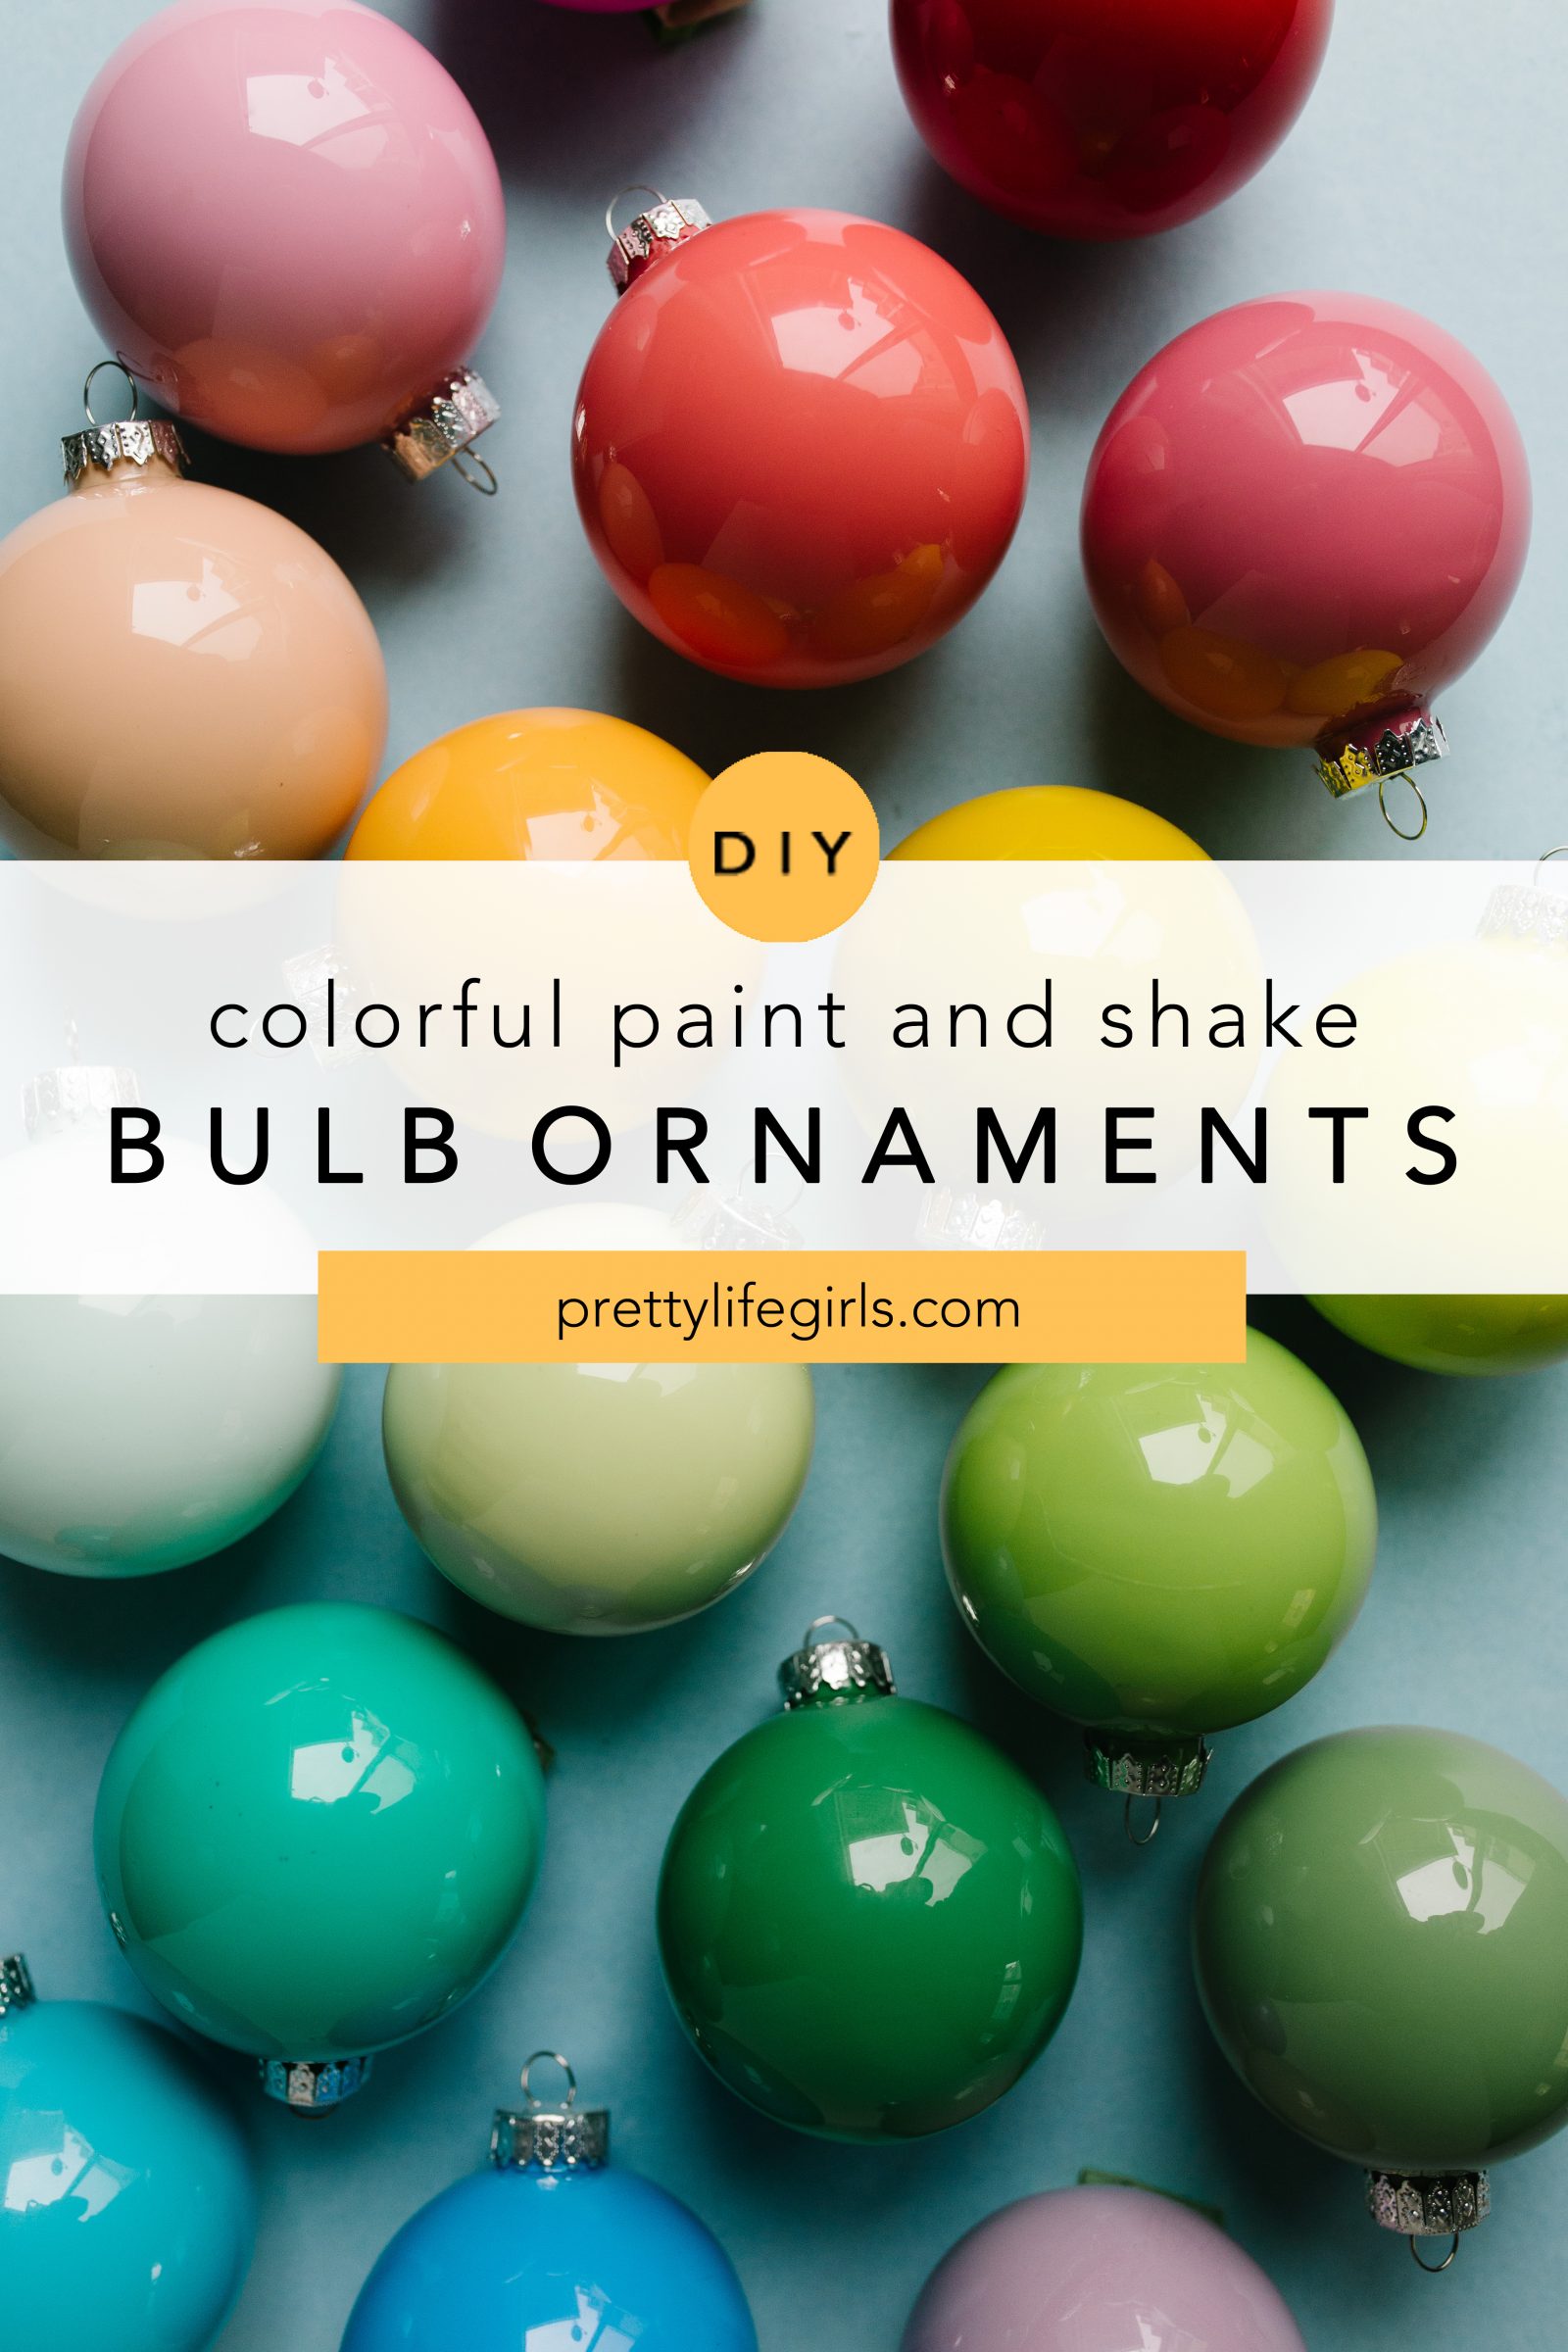
Colorful Paint and Shake Bulb Ornaments