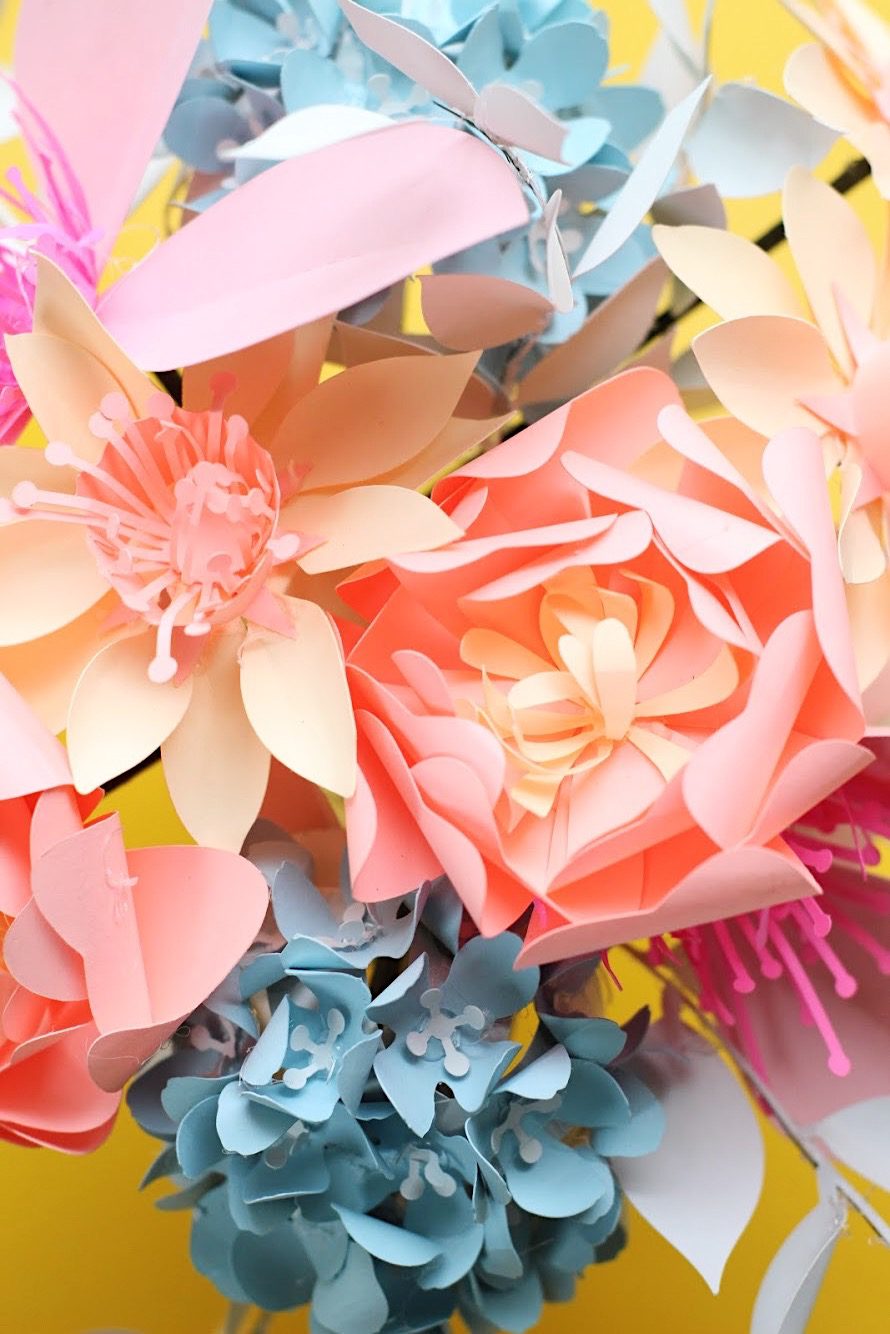
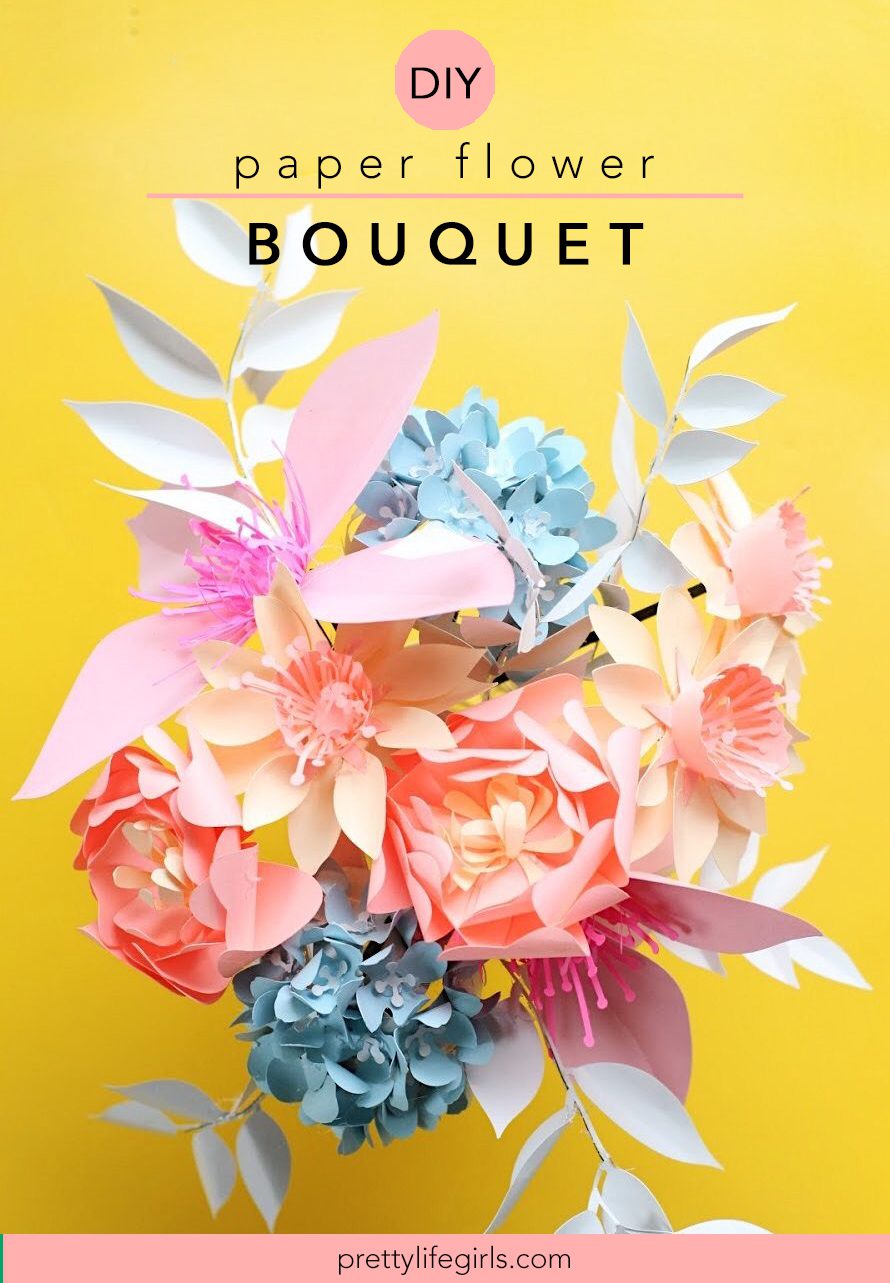
This weekend marks the first day of spring! And while our weather hasn’t caught up yet to what the calendar is saying, we say bring on all the pastels and tiny bunnies, Easter eggs and colorful flowers! So, to welcome this most sweet of all of the seasons finally making an appearance, I’ve decided to make a little bit of spring in my craft room using paper to create a paper flower bouquet!
If you have never tried your hand at making paper flowers before, get excited! It’s the most fun! You’re sure to be pleasantly surprised by the gorgeous blooms you can create by being creative with the way you assemble and fold them. Plus, be sure to pick a dreamy color palette to take your bouquet to the next level of lovely. Here is what you need:

Supplies needed to make a Paper Flower Bouquet
Astrobrights “Dreamy” assorted cardstock
Astrobrights blue cardstock
Astrobrights pink cardstock
Craft cutter or scissors
Wired wood sticks
Pencil
Hot glue gun and glue sticks
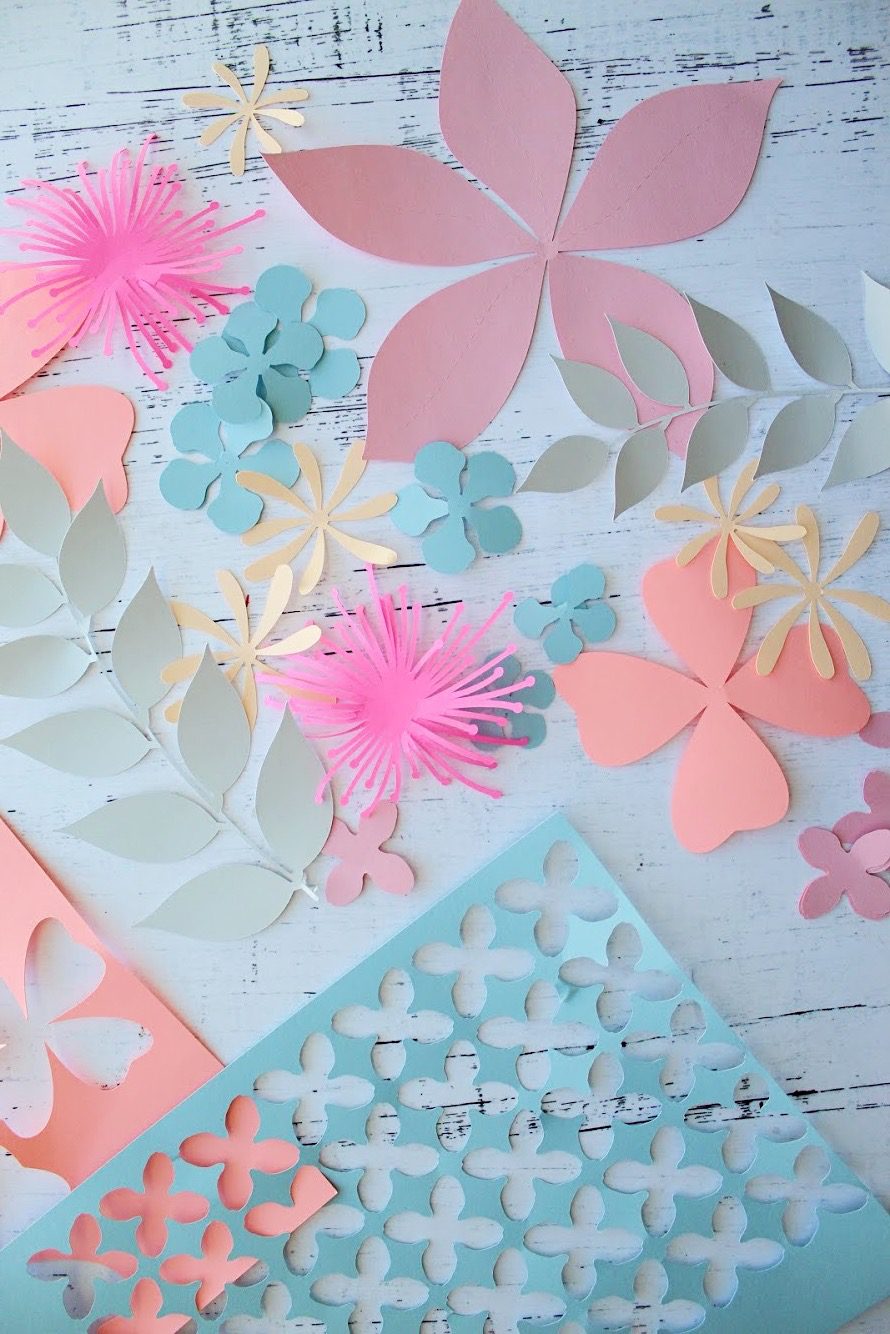
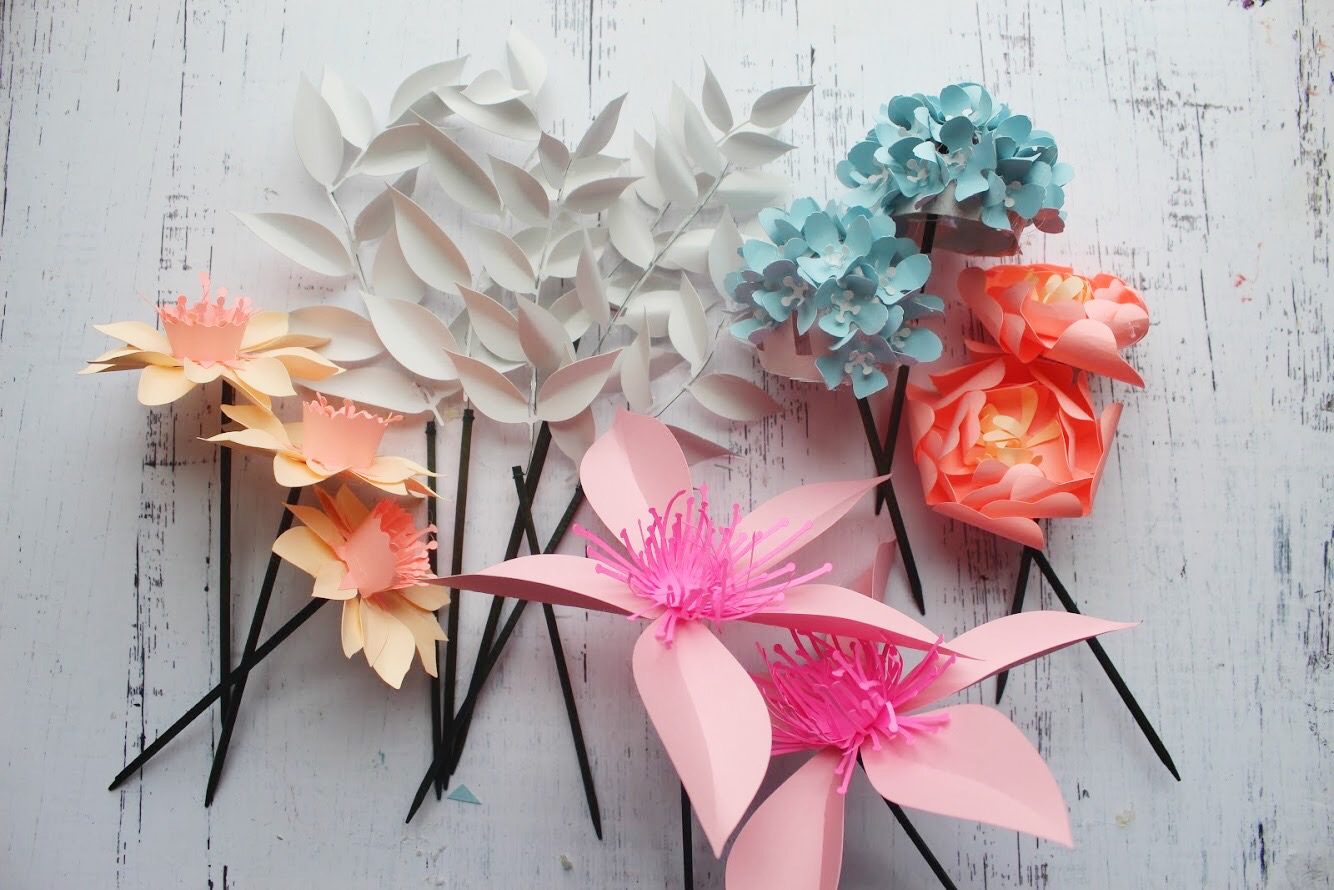
Flower patterns: Hydrangea Flower, Daffodil, Branches, Flower with Stamens, Spring Flower
How to make a Paper Flower Bouquet
Step 1. Download your flower patterns into your cutting machine software, load your paper into your cutting machine and cut out your flower pieces using a craft cutter. If you do not have a craft cutter, you can save the patterns as a PDF, print them onto your paper, then cut with scissors.
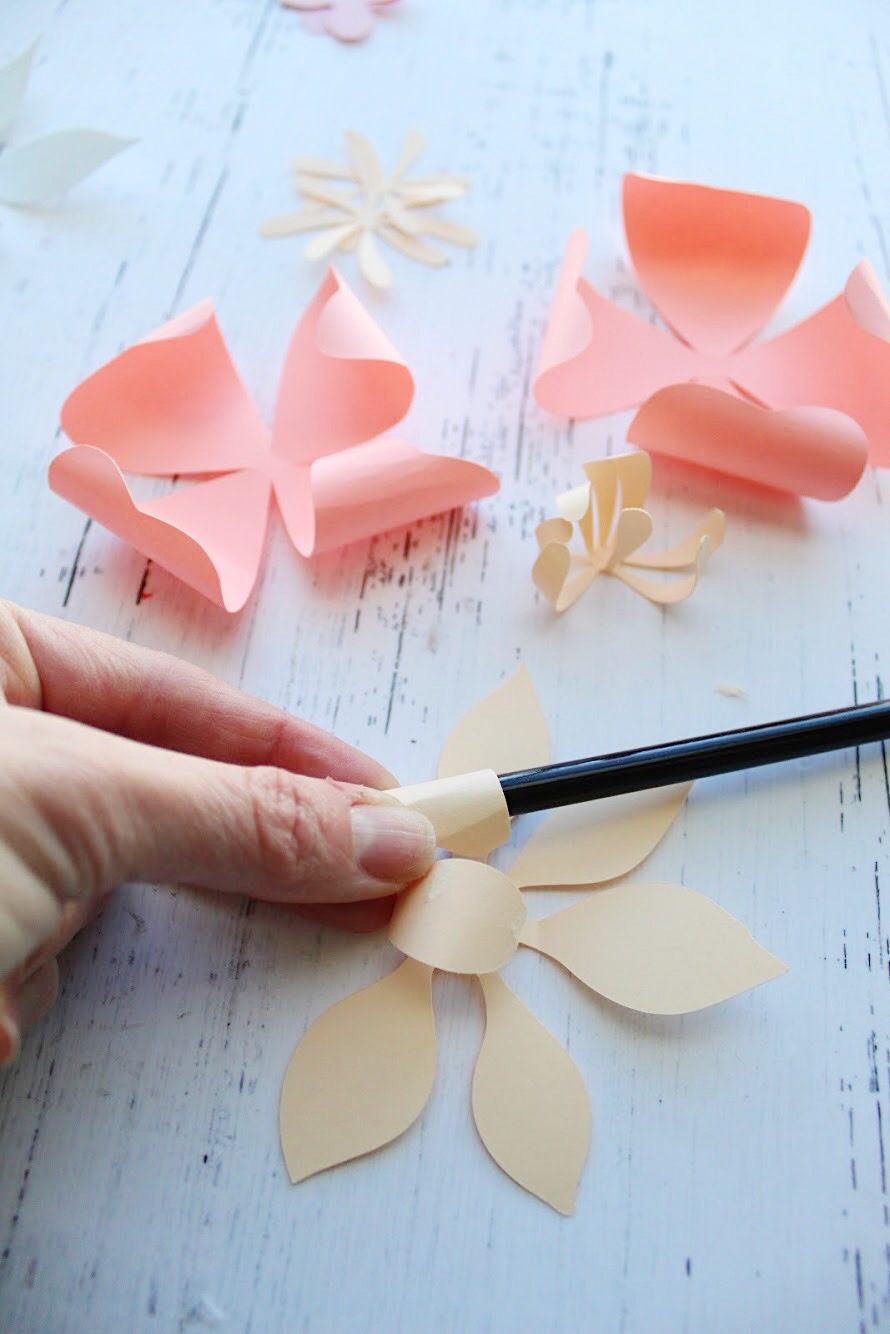
Step 2. Roll the leaves and petals around a pencil to create dimension.
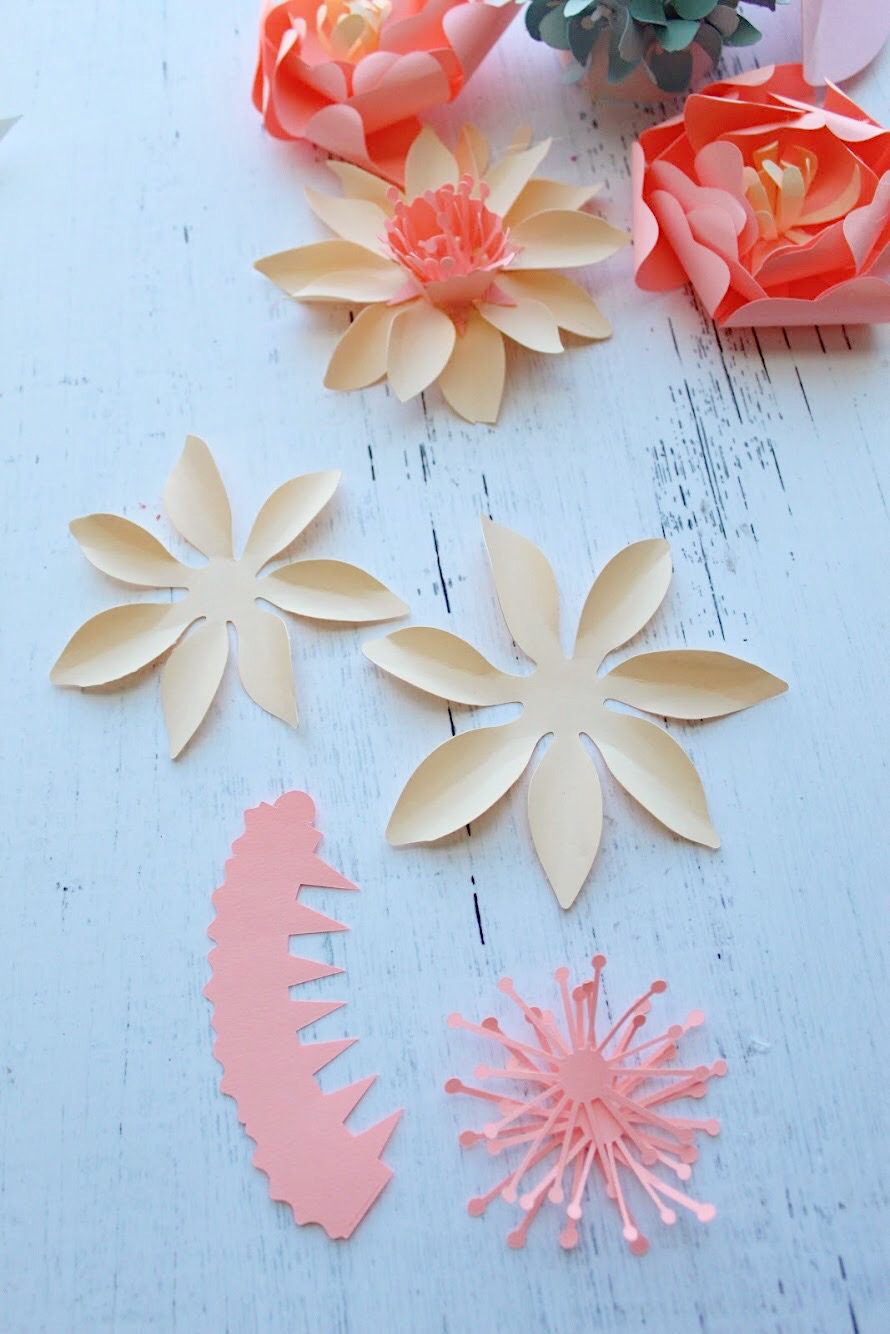
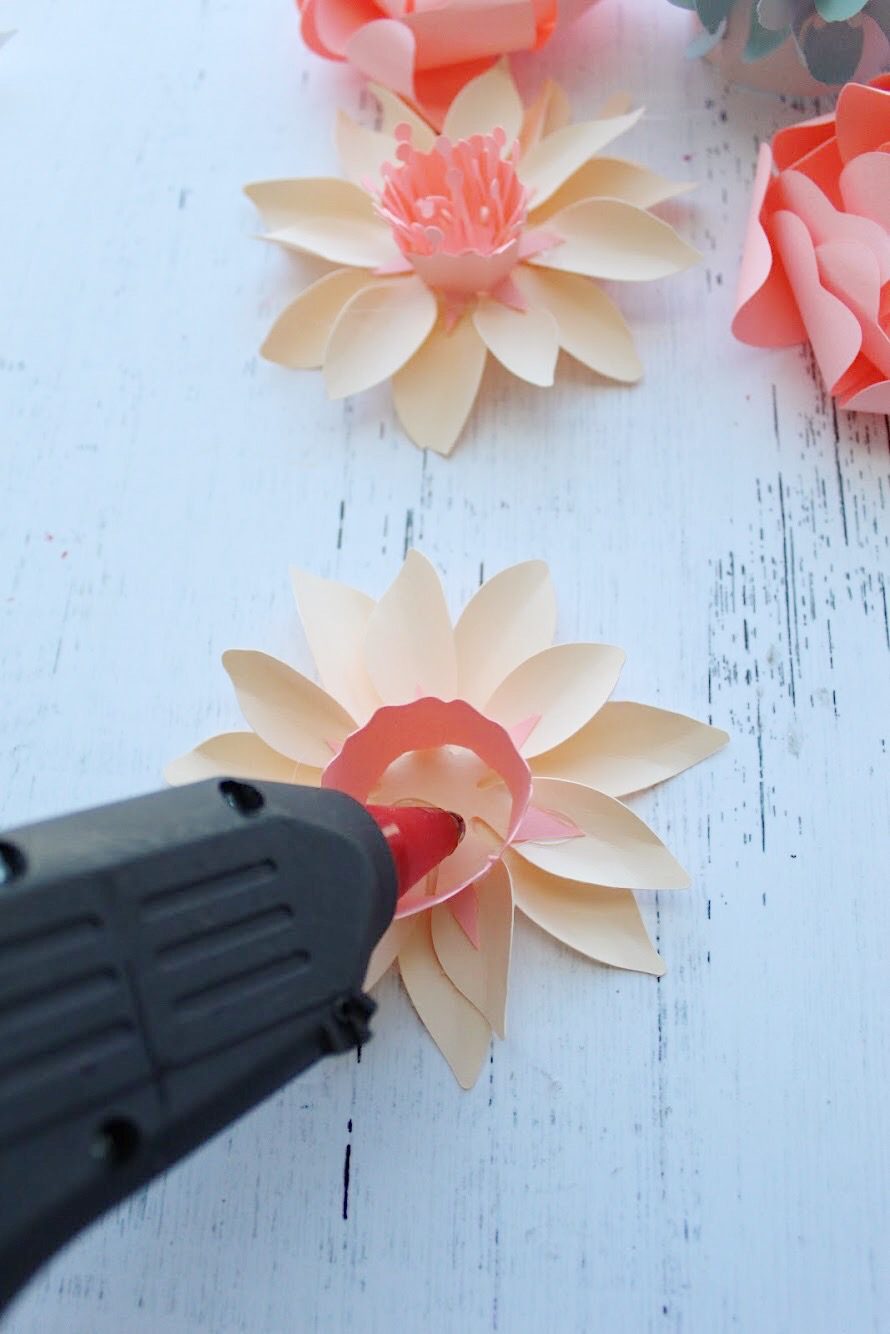
Step 3. Assemble your flowers by stacking the outer petal pieces and securing each with hot glue, followed by the center pieces and securing each with hot glue.
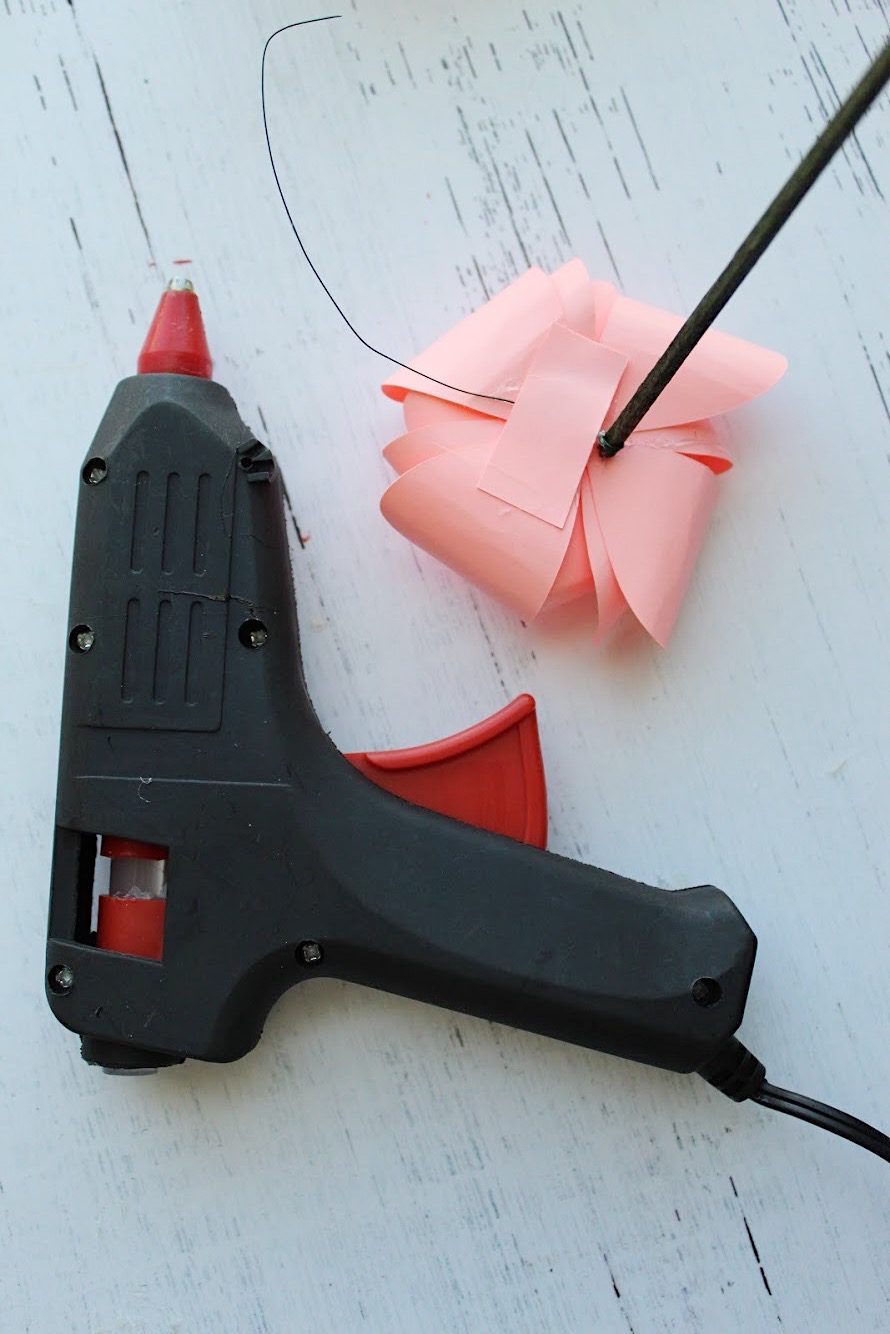
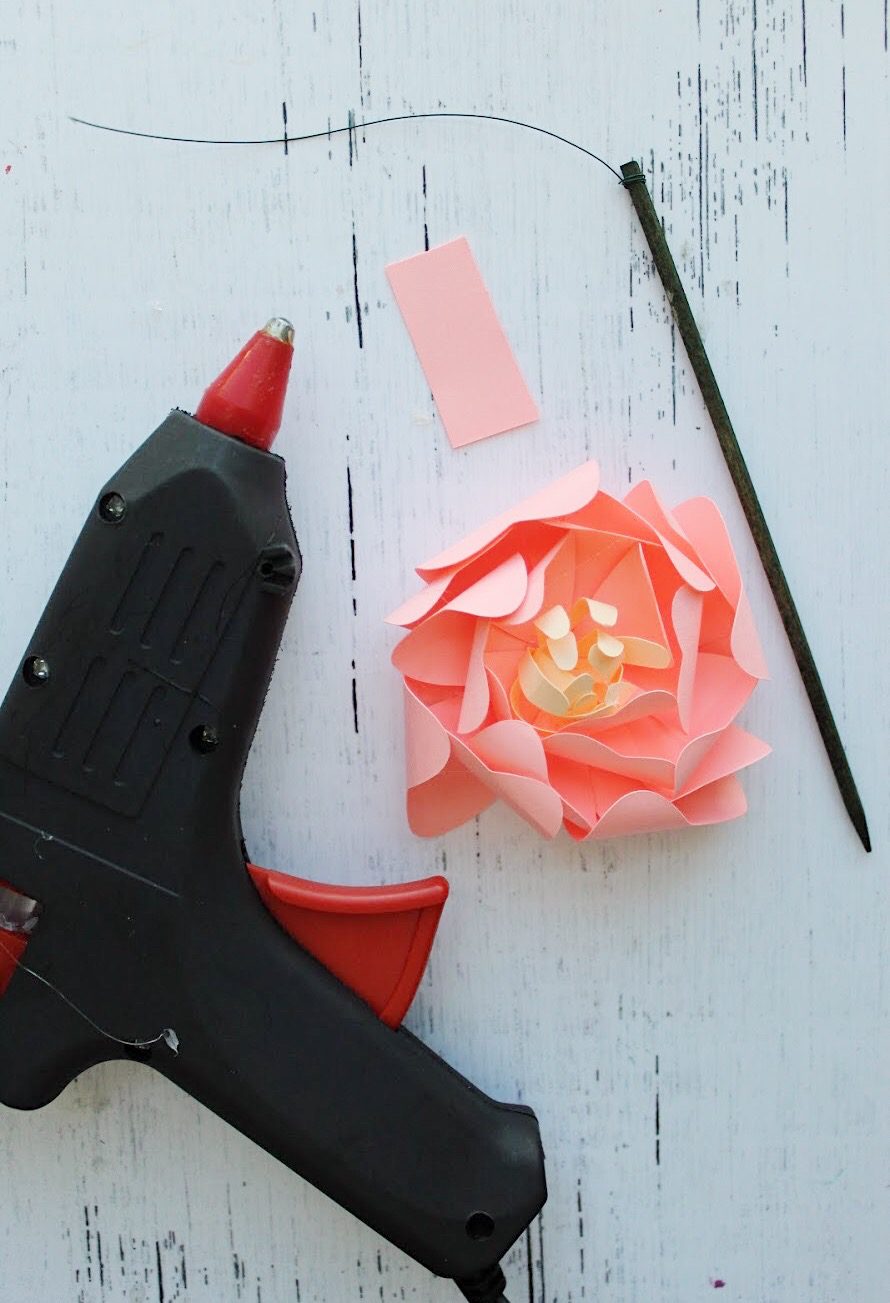
Step 4. Attach the wired wood sticks to your assembled flowers. Cut a 1-inch piece of paper and set aside. Put a generous amount of hot glue on the bottom of the flower and press the wire on the wood stick into the glue. While the glue is still hot, place the 1-inch piece of paper over the wire and into the glue to help secure the wired wood stick to the flower.
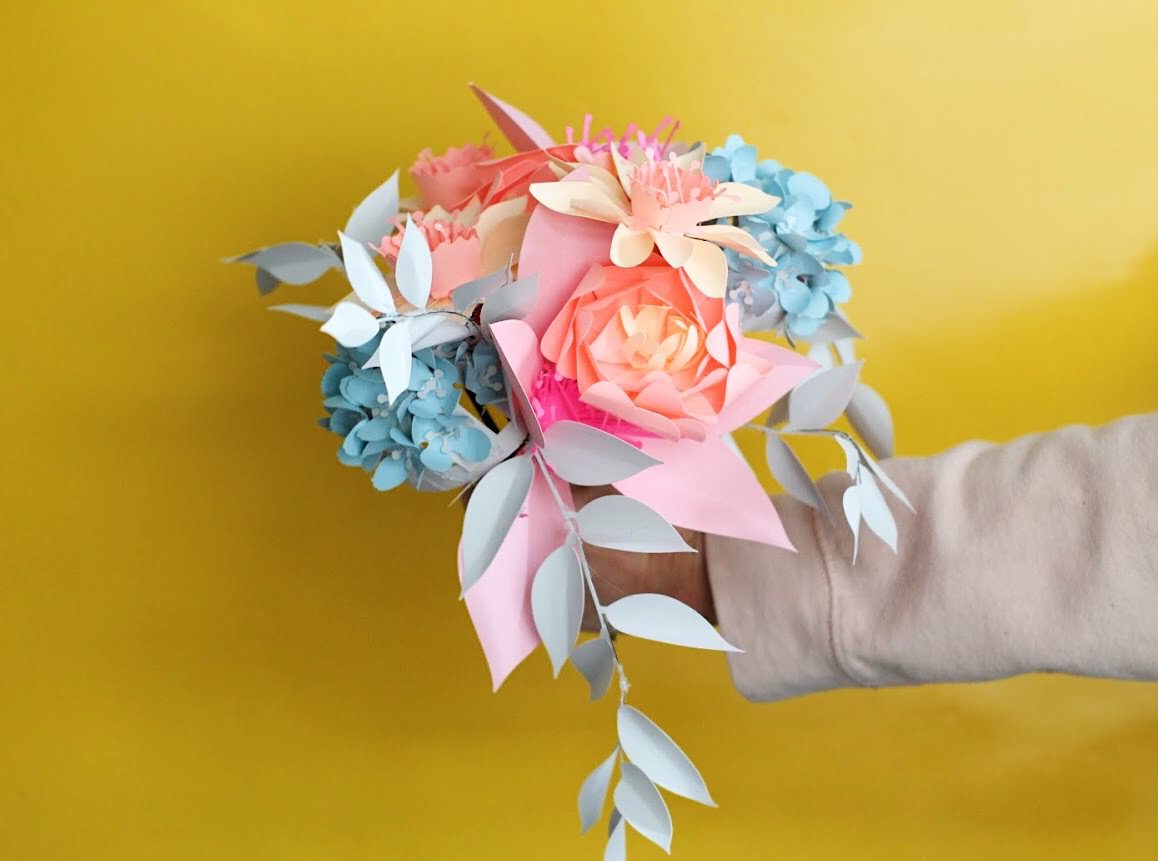
Step 5. Combine all of the flowers (now on their wired wood sticks) and wrap a ribbon or string around them to keep them in a bunch, or place in a vase to enjoy.
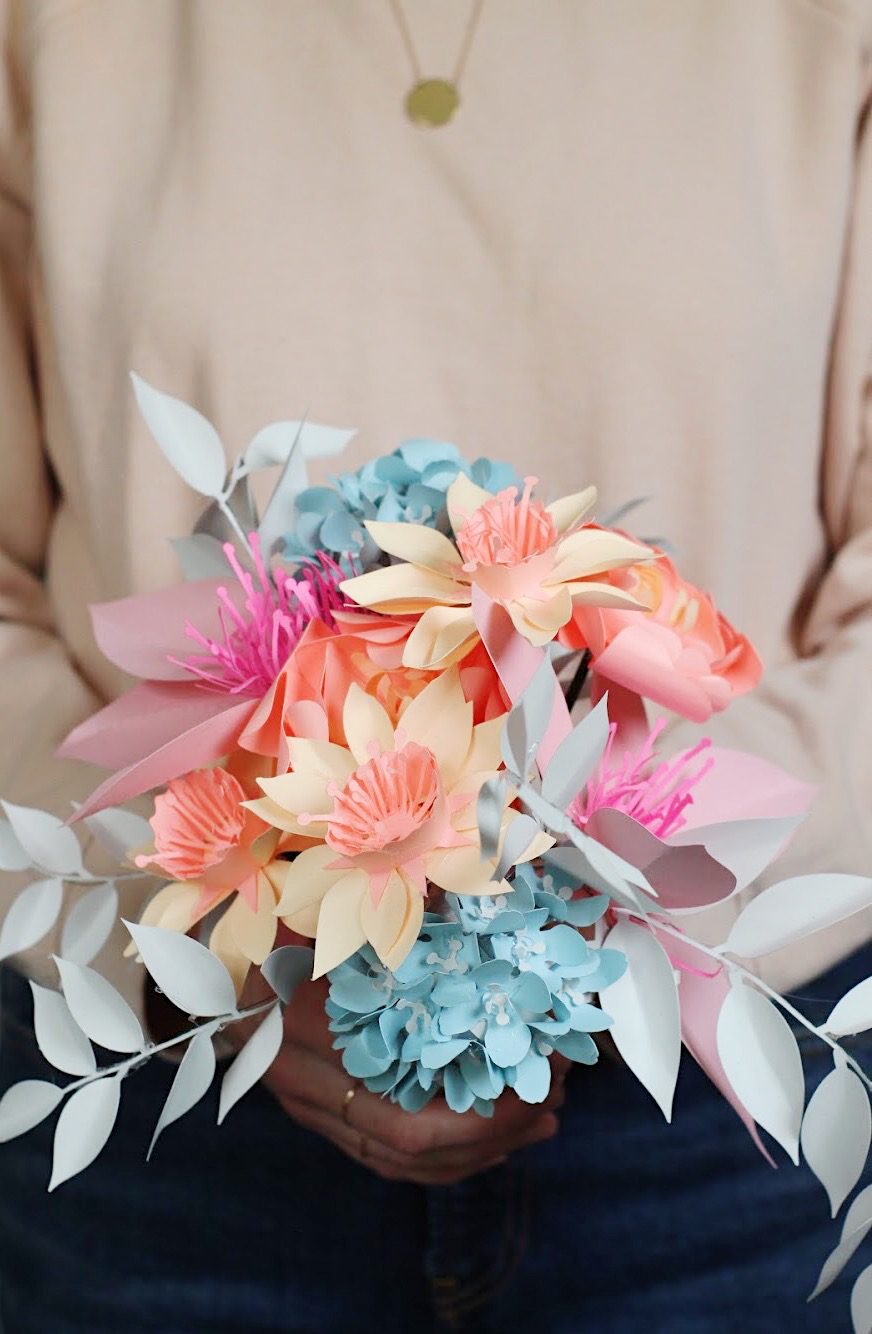
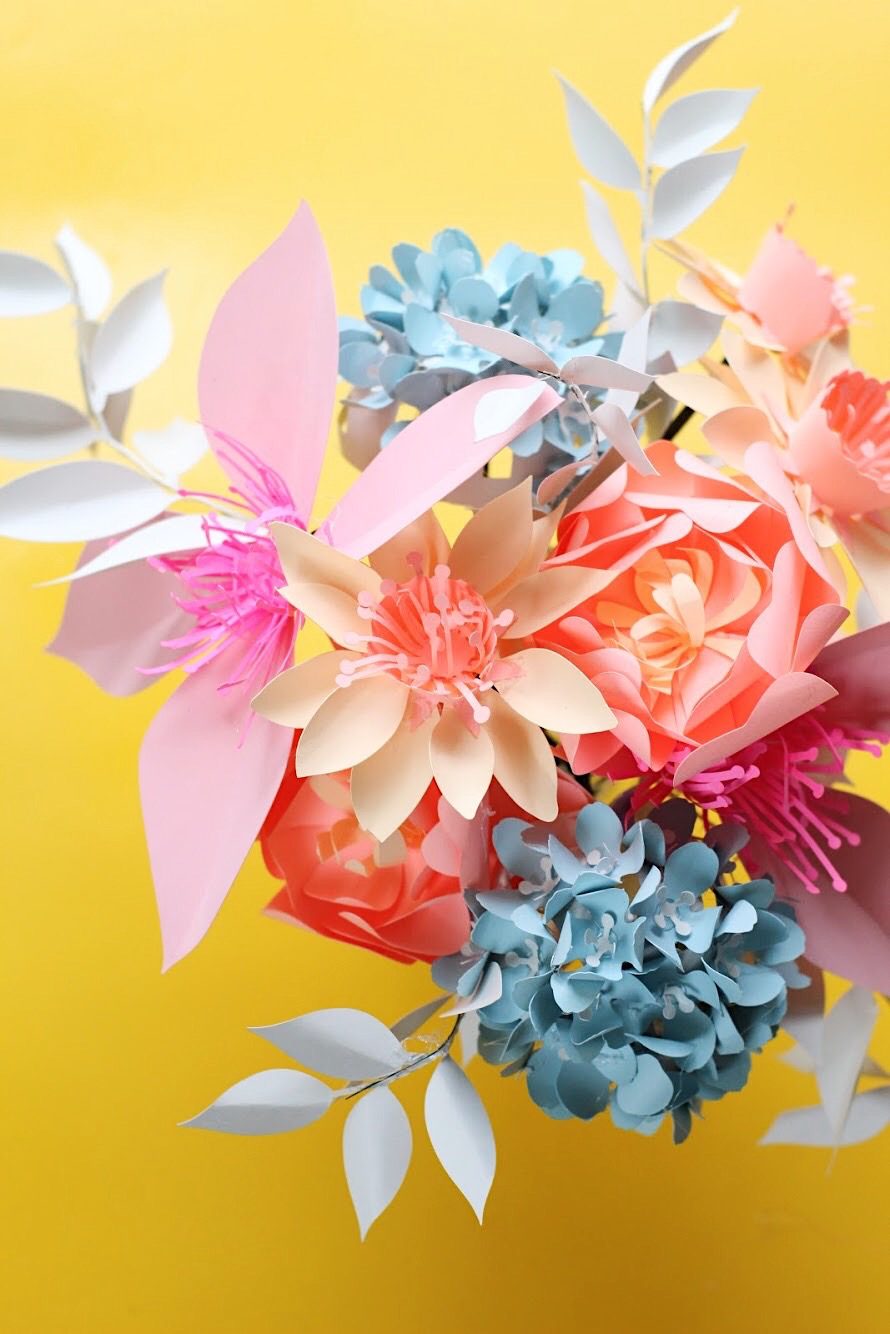
Aren’t they gorgeous? And since they are paper they are sure to last until summer, if you’d so desire! We are obsessed with the ways that folding and layering the pieces of the flowers create dimension that mimics the real thing. For me it’s those darling daffodils that I can’t get over! What are your favorites?
What spring projects are you excited to make now that spring is here? We’d love to hear all about them!
Happy making!
-Liz
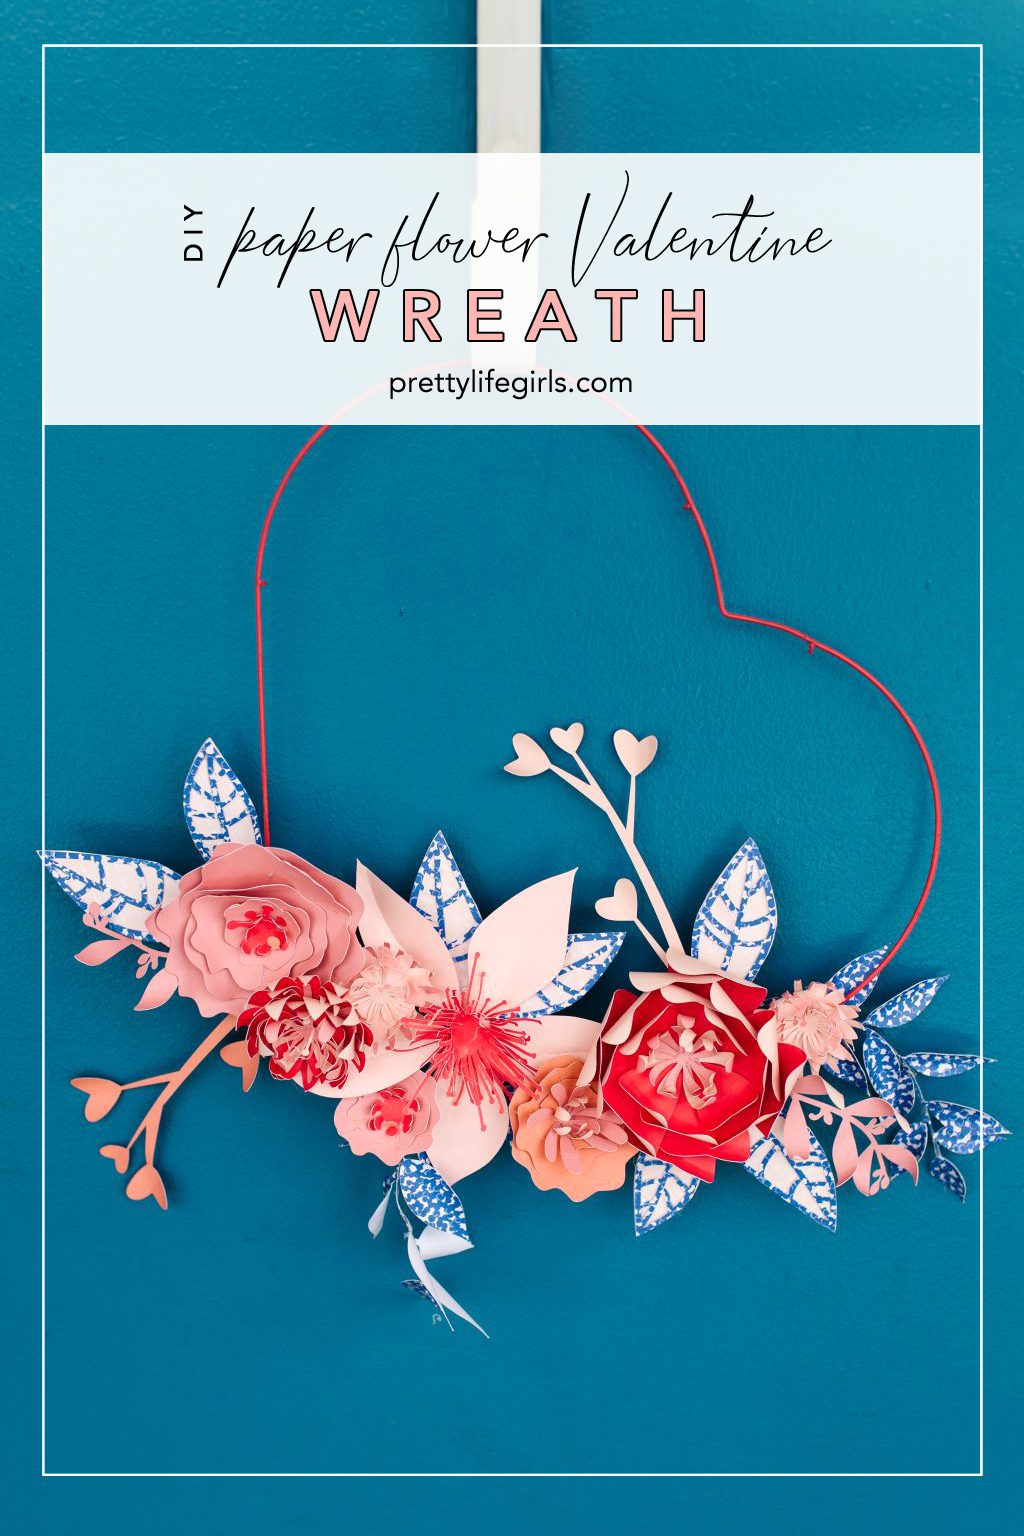
Looking for more DIY flower projects? Check out these tutorials!
 Paper Flower Embroidery Hoop Fall Wreath