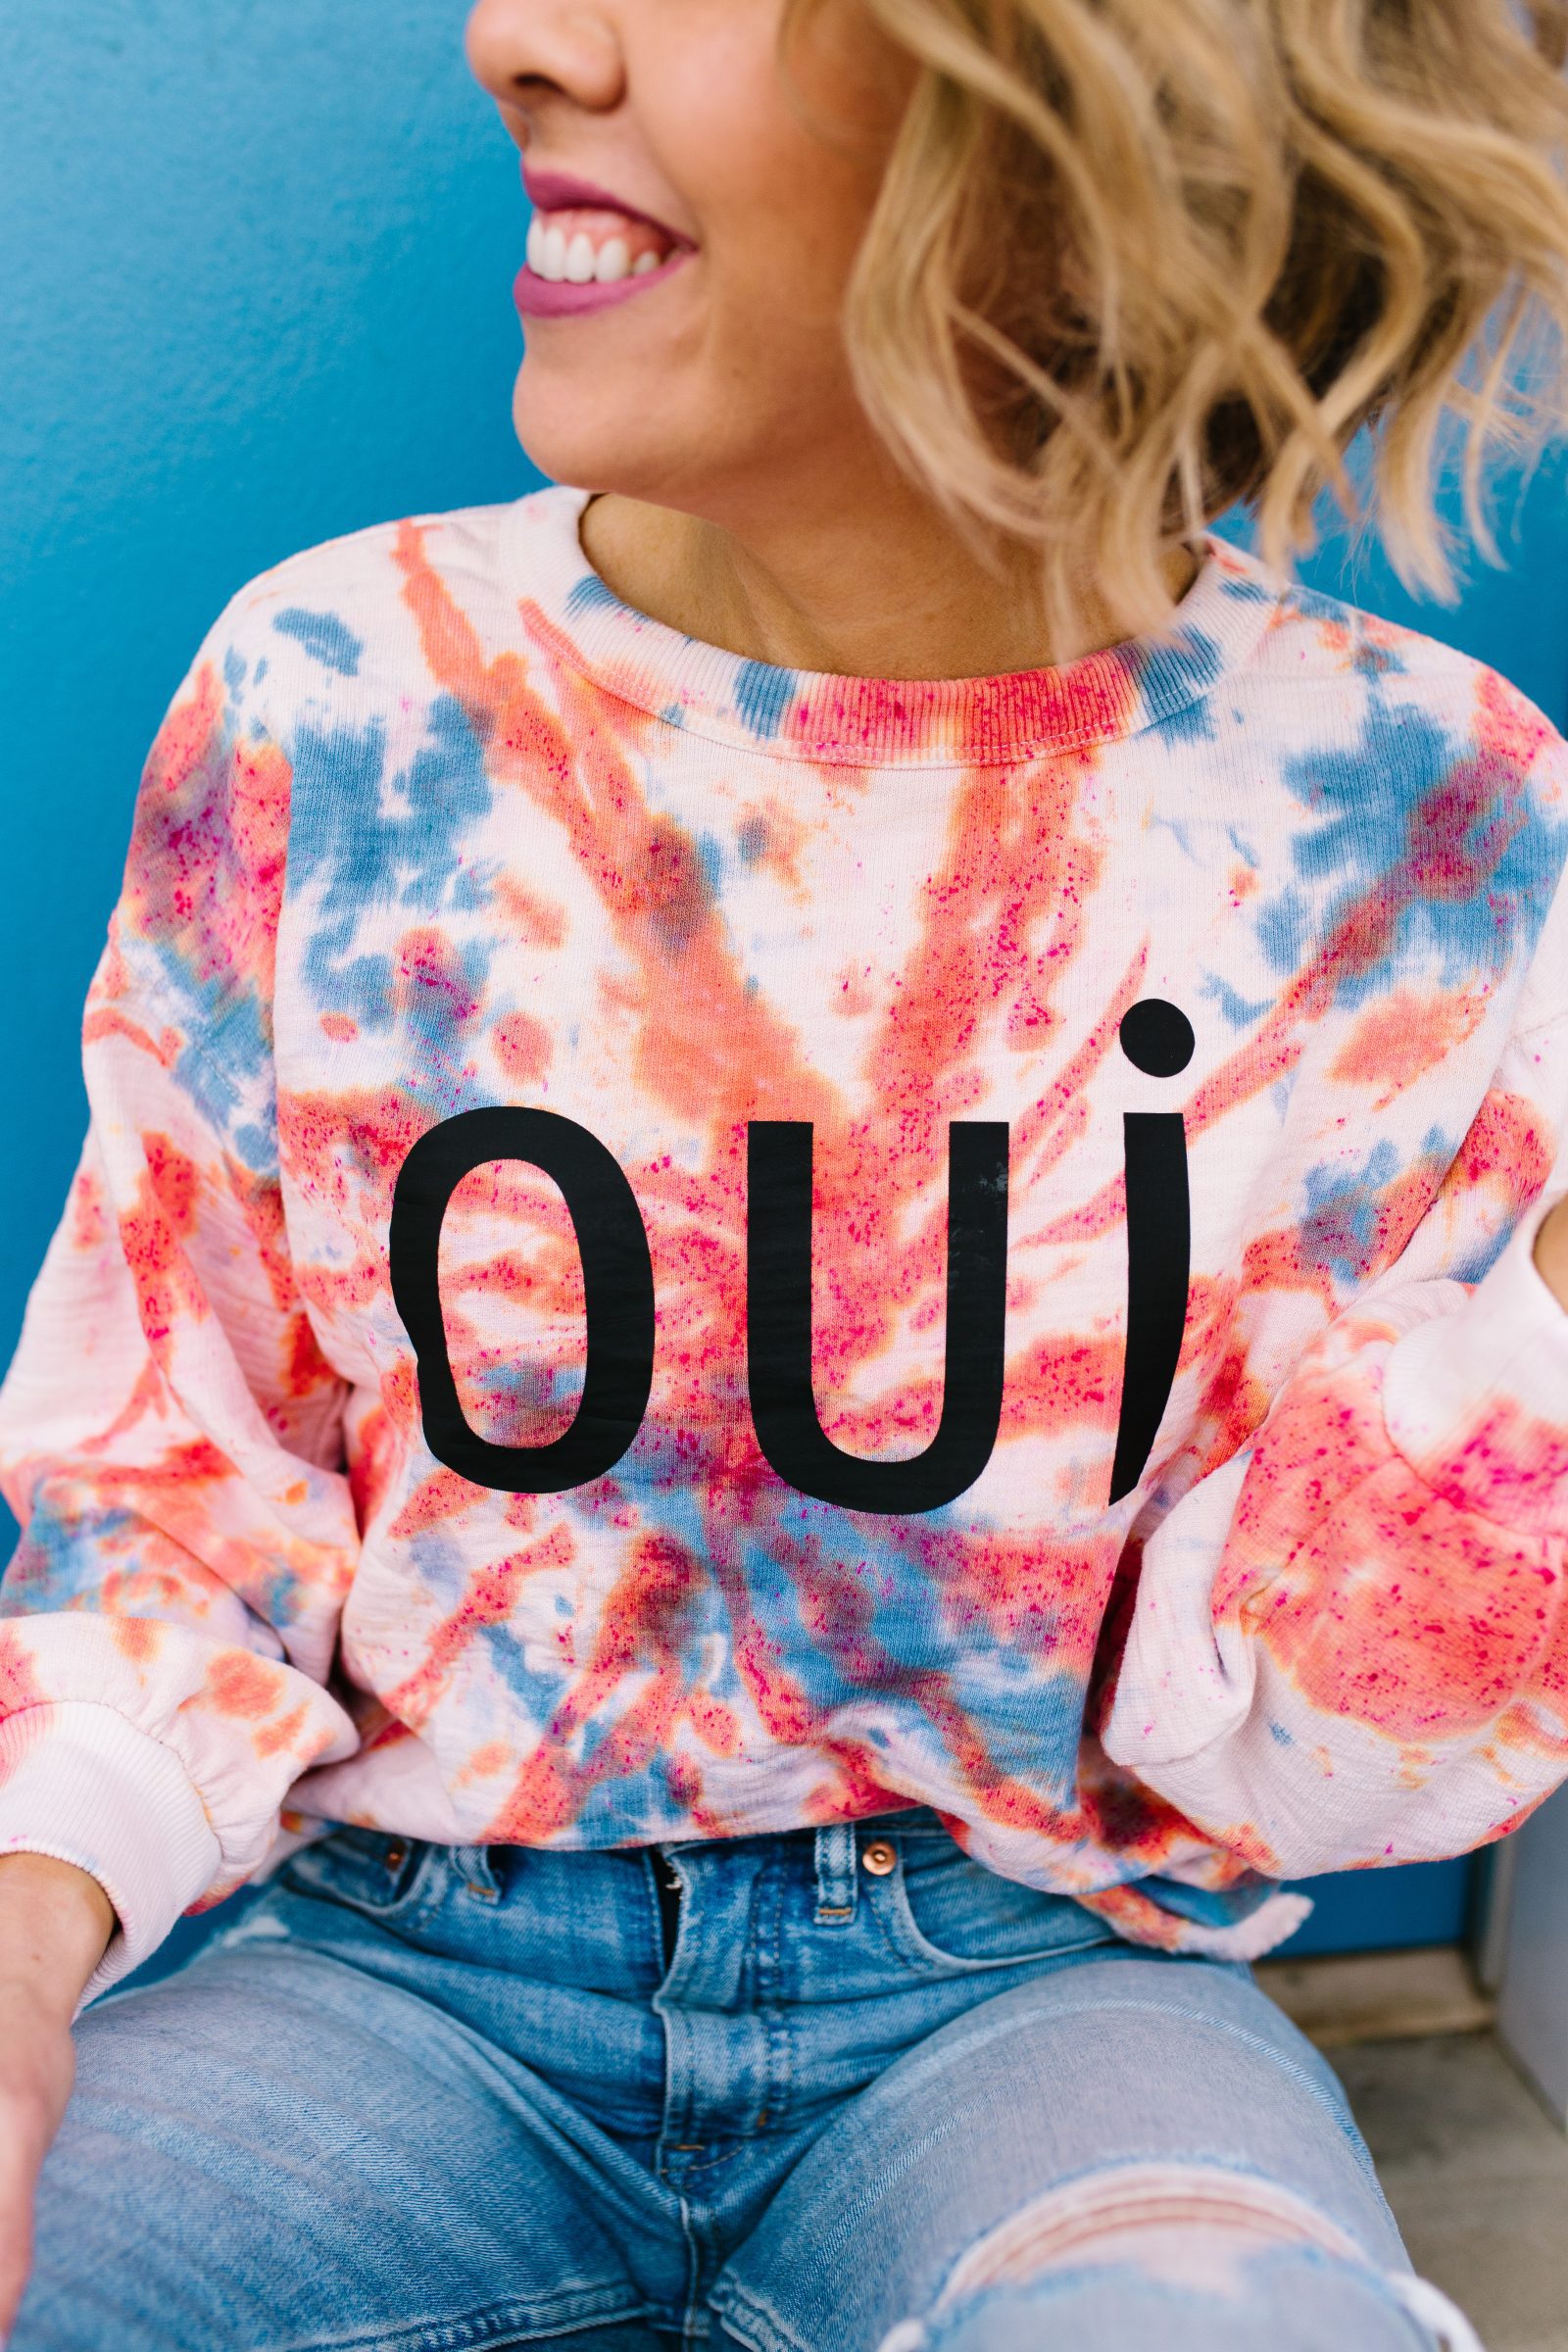
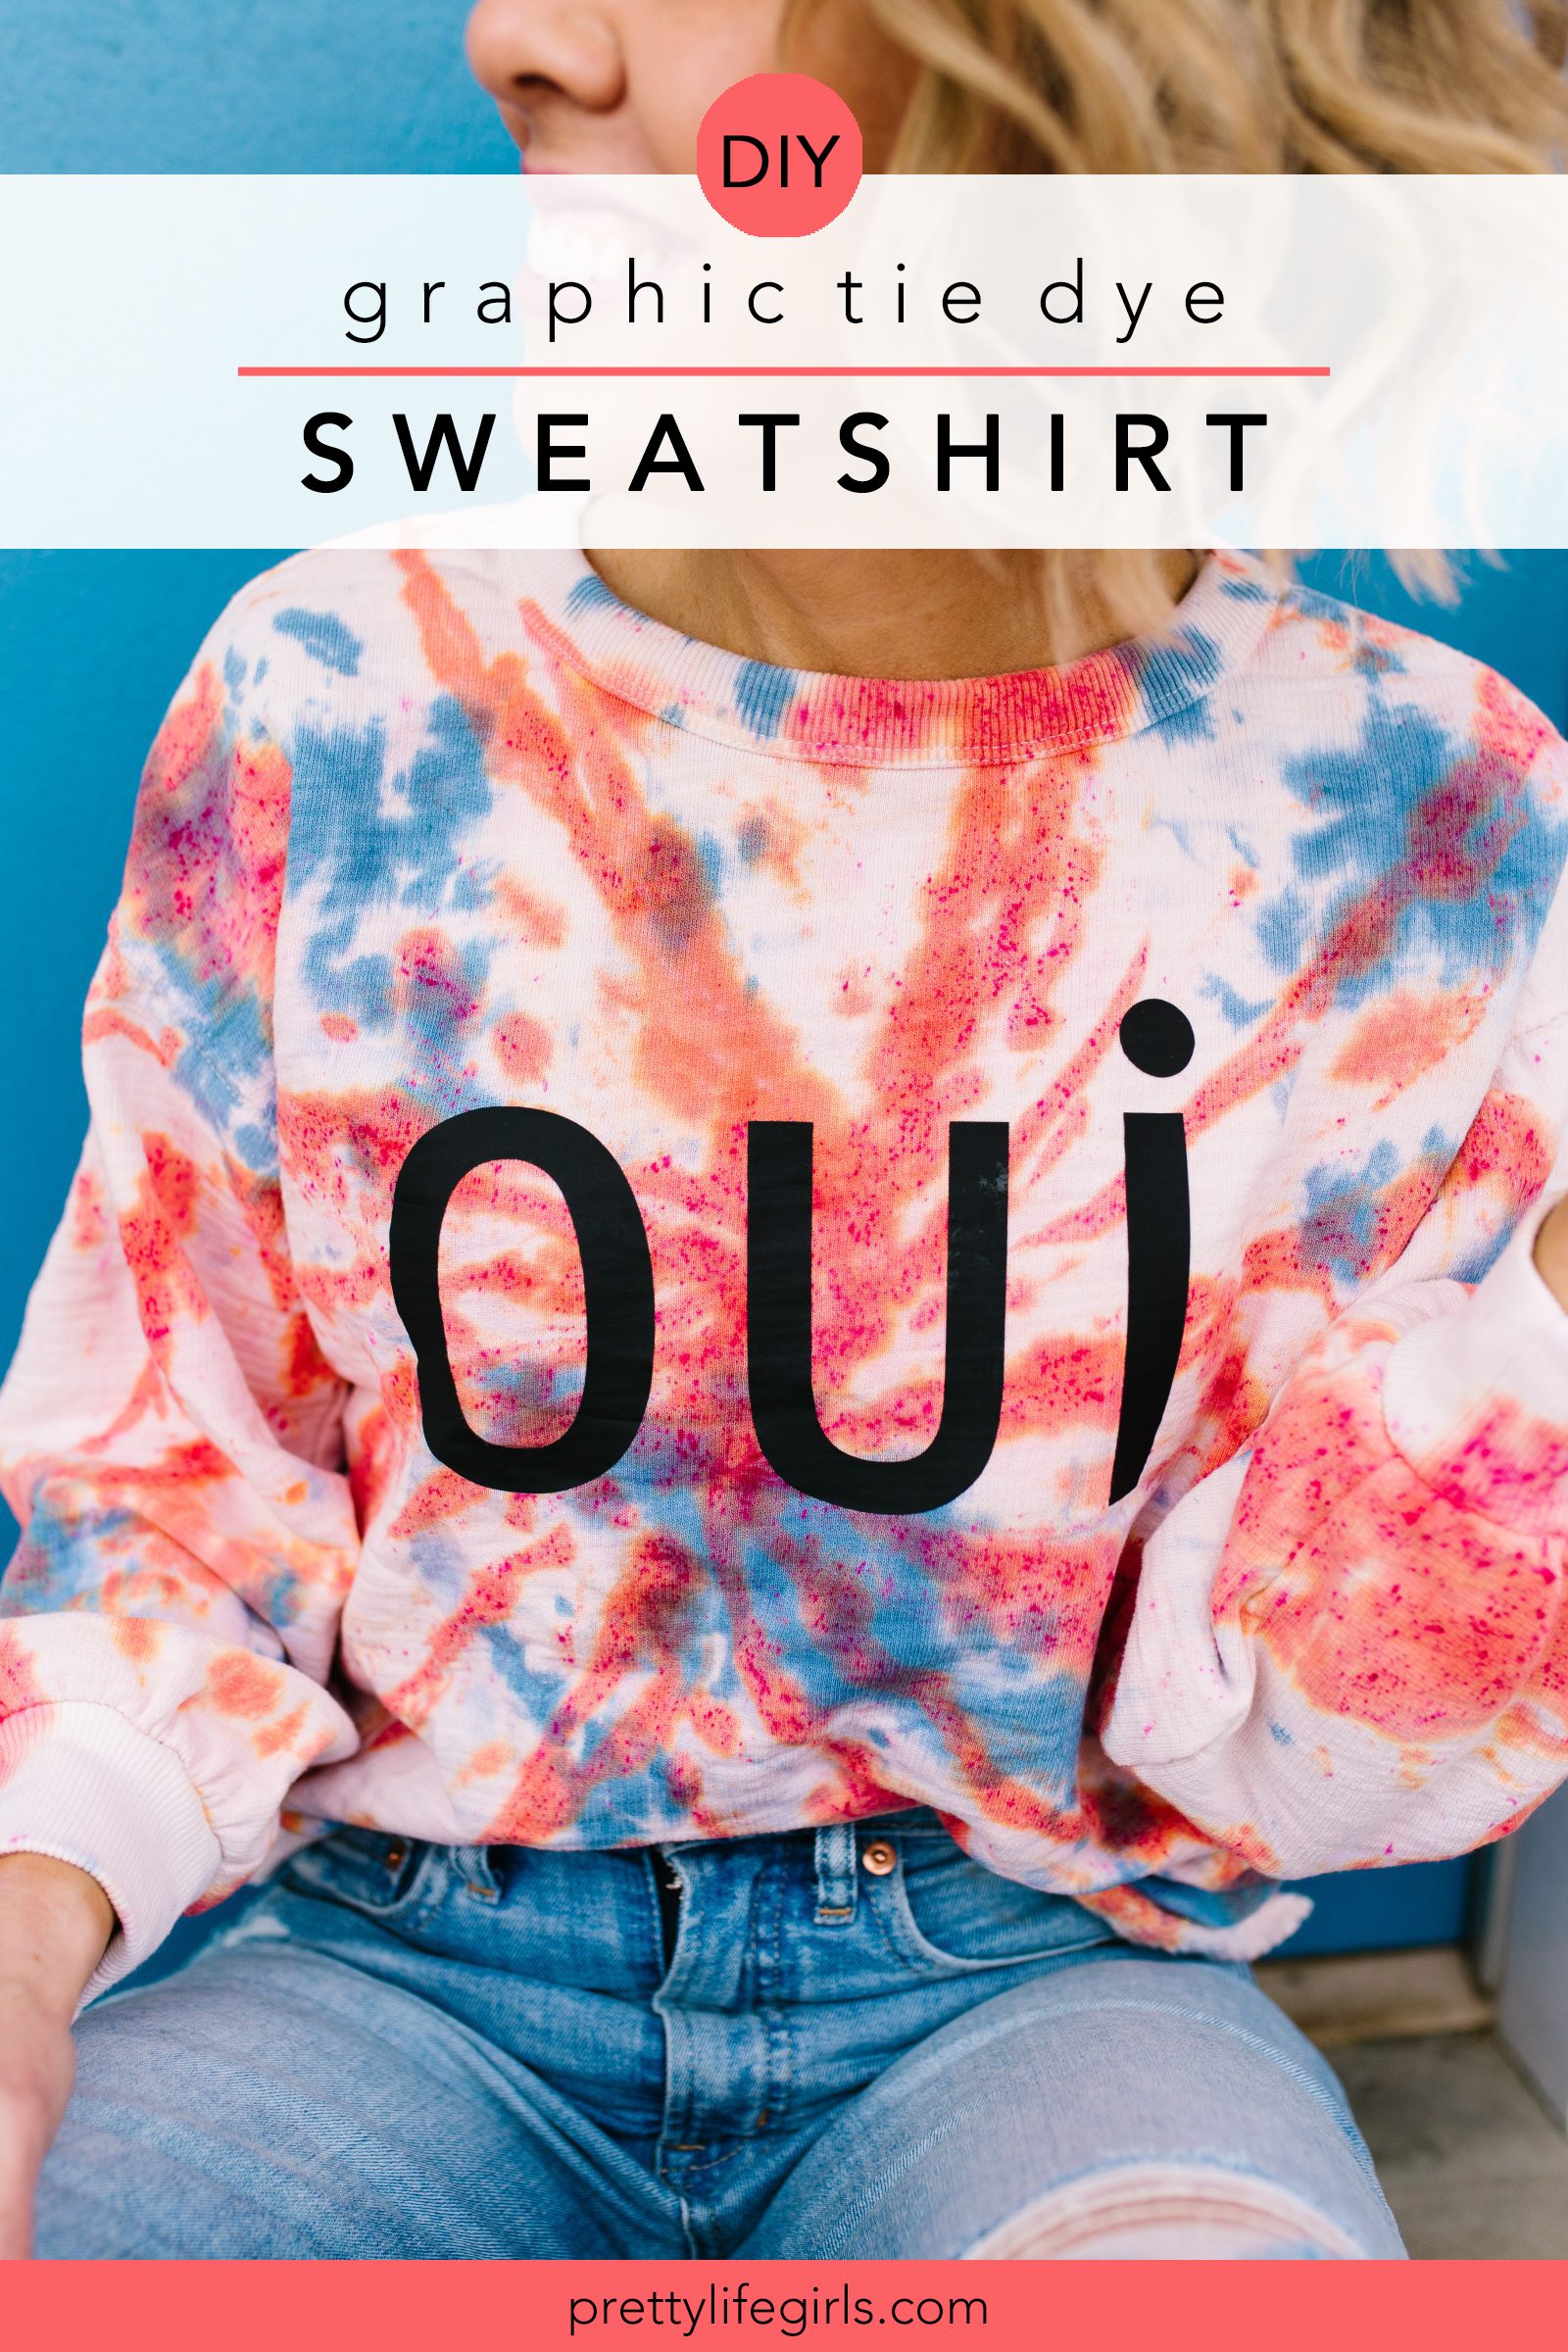
Tie dye is everywhere at the moment, from Target and Walmart to expensive boutiques, so when you know how to make it yourself, it can feel like a super power when you find a piece you love that might be out of your price range. Case in point — this DIY Graphic Tie Dye Sweatshirt. When I came across this Oui sweater from Anthropology that is almost $100 I knew had to try to replicate it, and I knew I could do it for just a few dollars.
The key to getting it right for this project is being able to identify the binding techniques that are used and managing the setting methods since you will be layering dye. (We talk about all about this in our new book DIY Guide to Tie Dye Style, out May 25, which is a perfect reference guide to all different kinds of binding methods, setting tips and more!) We used a swirl binding technique as well as a crumple technique to achieve the different designs and set the first color completely before applying the second color. Lastly, we used our Silhouette Cameo and some heat transfer vinyl to attach the letters. Let us show you how!

Supplies needed to make a DIY Graphic Tie Dye Sweatshirt
100% cotton sweatshirt (ours was cream colored)
Tulip Tie Dye in coral and blue
Rubber bands
Gloves
Plastic wrap
Heat transfer vinyl in black
Silhouette Cameo or craft cutter of your choice
Iron
How to make a DIY Graphic Tie Dye Sweatshirt
(See our reel at the end of the steps to see us make ours!)
Step 1. Wash and dry sweatshirt, then re-wet the sweatshirt until completely saturated with water.
Step 2. Prepare tie dye according to package directions.
Step 3. On a dye-safe surface, bind the sweatshirt in a swirl pattern with rubber bands. (If you have never bound this way before, this is a great reference.)
Step 4. Apply coral dye to every other wedge of the bound bundle. Then, flip over the sweatshirt and apply dye to the same wedges on the other side.
Step 5. Let dye set according to package directions. (If you would like to speed set the coral dye, wrap the dyed bundle with plastic wrap until completely covered. Line your microwave with paper towels and place the fabric bundle in the microwave. Cook for 2 minutes, making sure you watch the bundle closely to ensure that the plastic does not melt as the strength of microwaves can vary. After 2 minutes, flip over the bundle and cook for another 2 minutes. After that, remove the bundle from the microwave and let cool before removing the fabric from the plastic.
Step 6. Once the dye is set, remove the rubber bands from the sweatshirt and rinse until the water runs clear.
Step 7. Return the bundle to your dye safe work surface and bunch up the fabric in a crumpled pile. Then, squirt the blue tie dye in just a few areas. Let dye set completely according to package directions. (We don’t recommend speed setting the blue dye because it could bleed in the microwave.)
Step 8. Once the blue dye is set, rinse the sweatshirt until the water runs clear. Then, wash and dry the sweatshirt according to dye package directions, by itself in a washer and dryer.
Step 9. While the sweatshirt is being washed, design, cut and weed your letters using your Silhouette Cameo or your desired cutting machine, making sure to mirror your design. (If you have never done an HTV application before, we have a bunch of tutorials you can find here to help you on your way!)
Step 10. Once the sweatshirt is dry, apply the letters to the center of the sweatshirt using a hot, dry iron, according to HTV package directions.
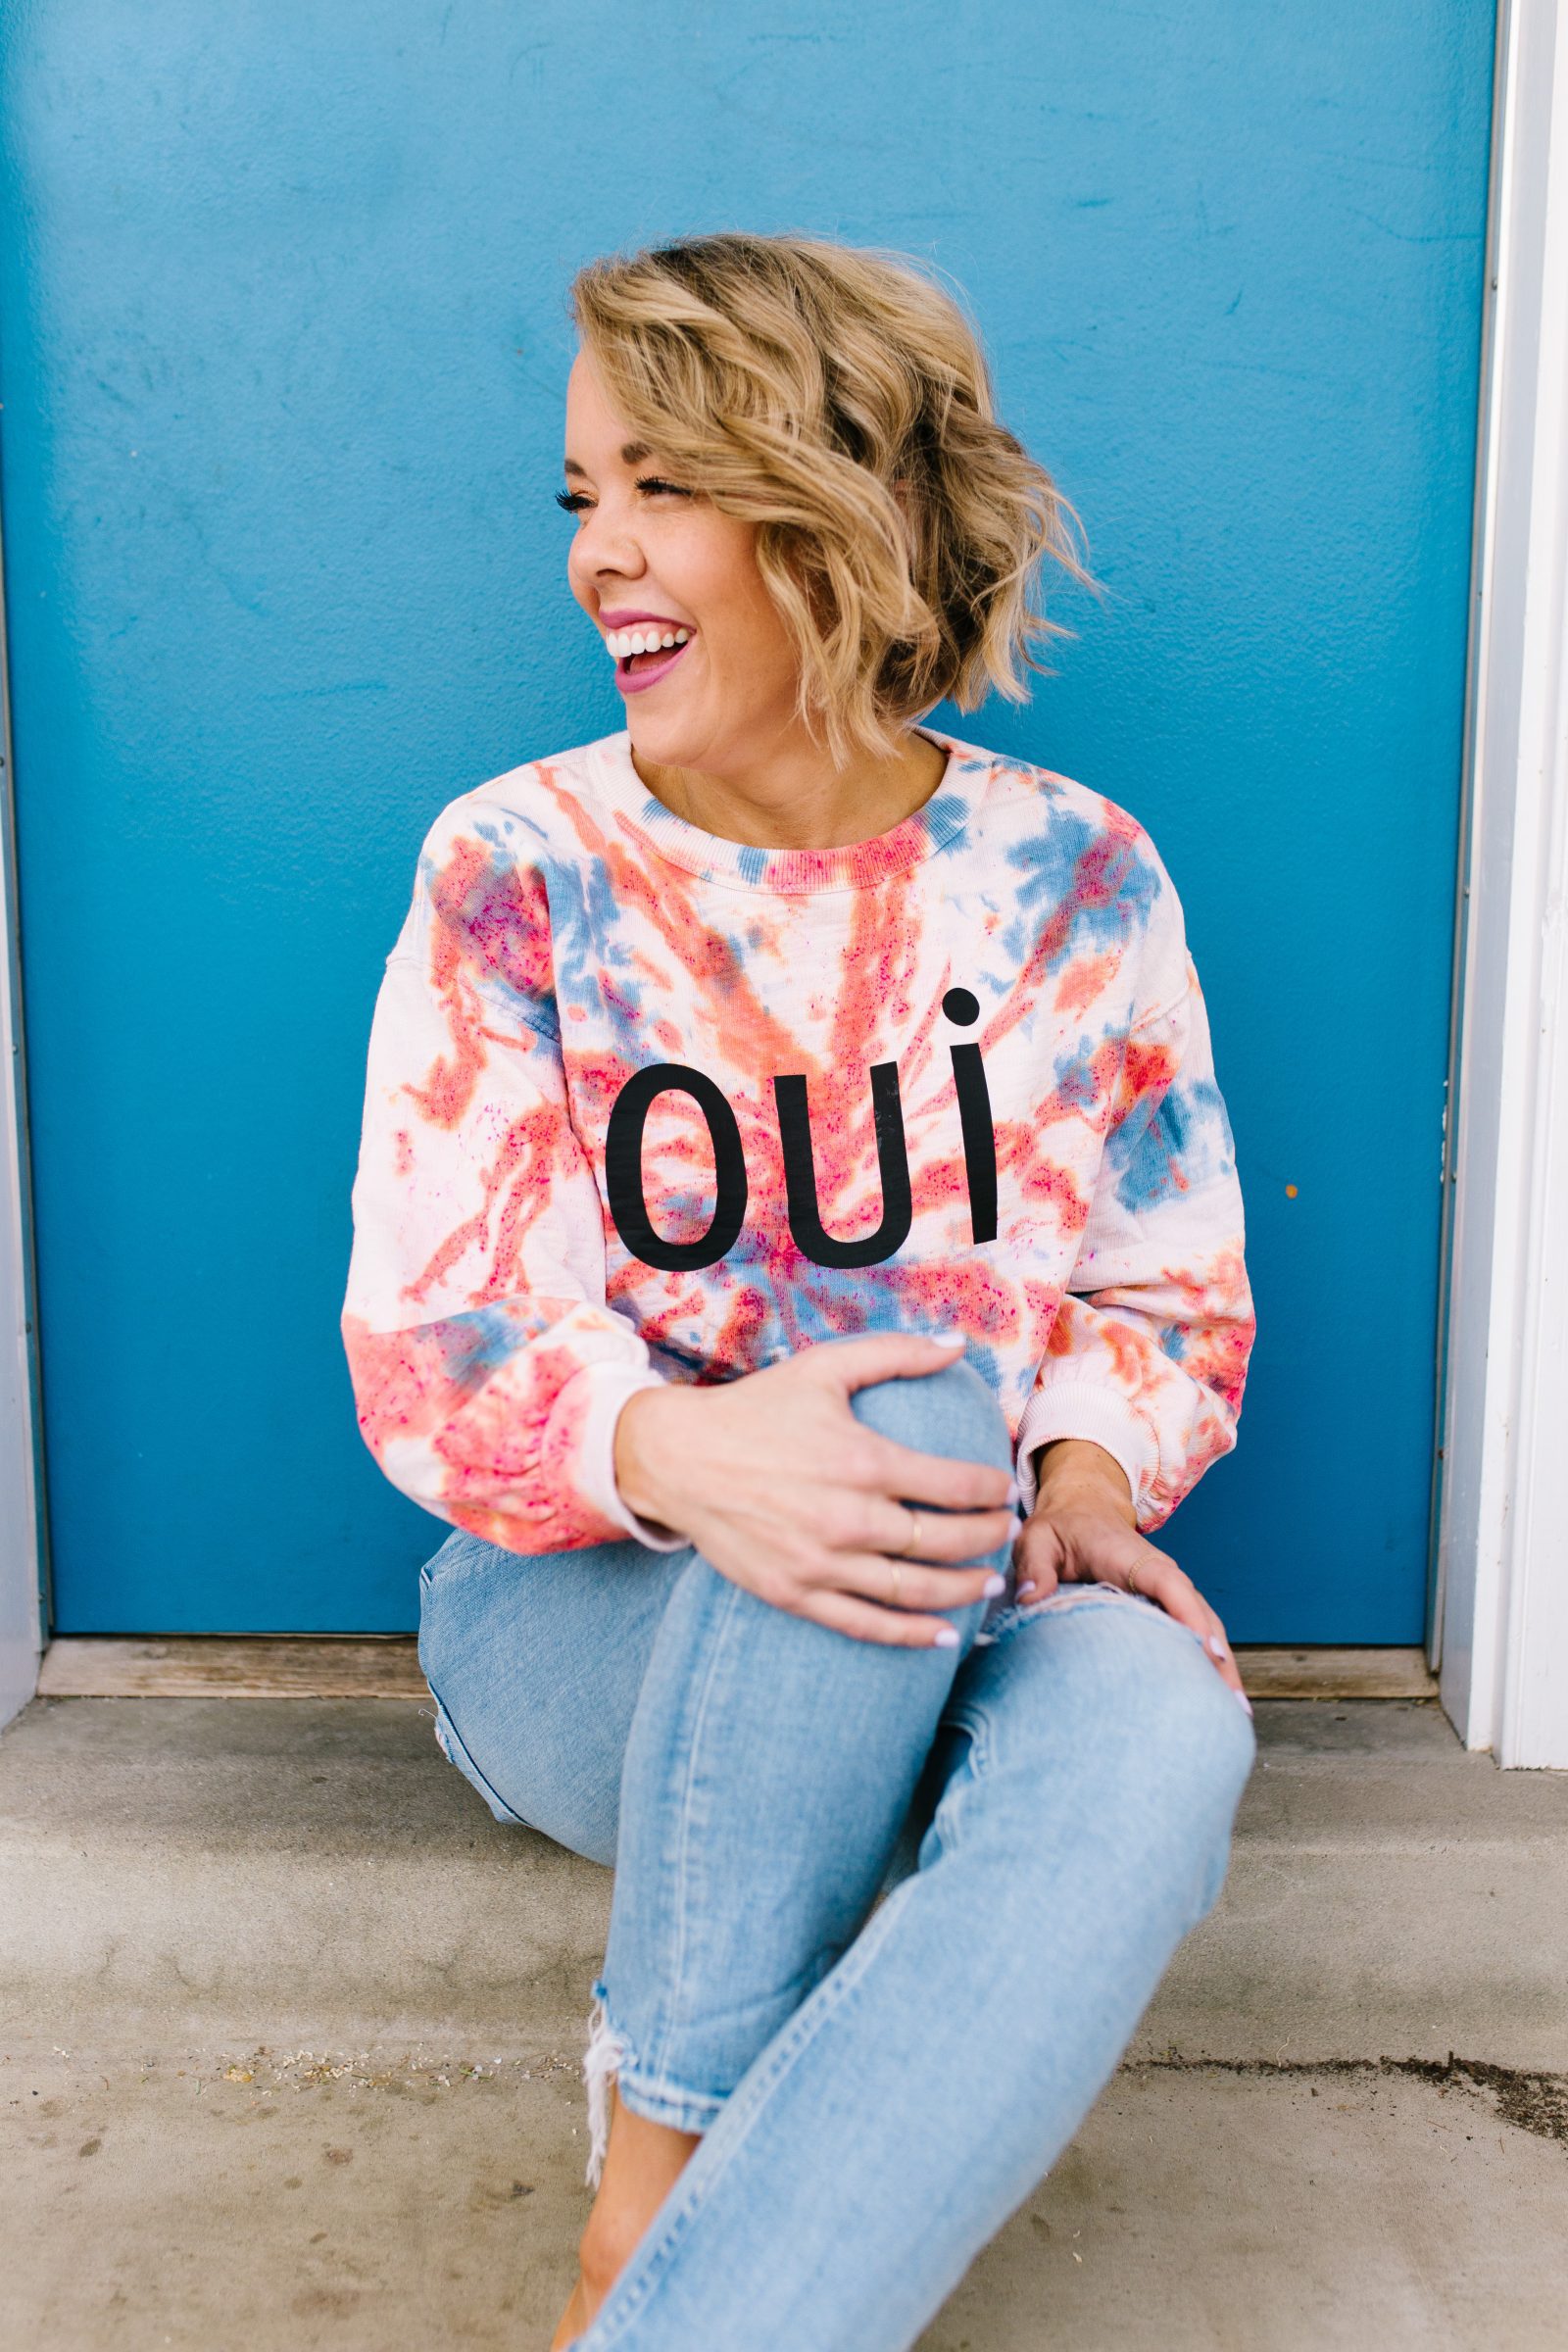
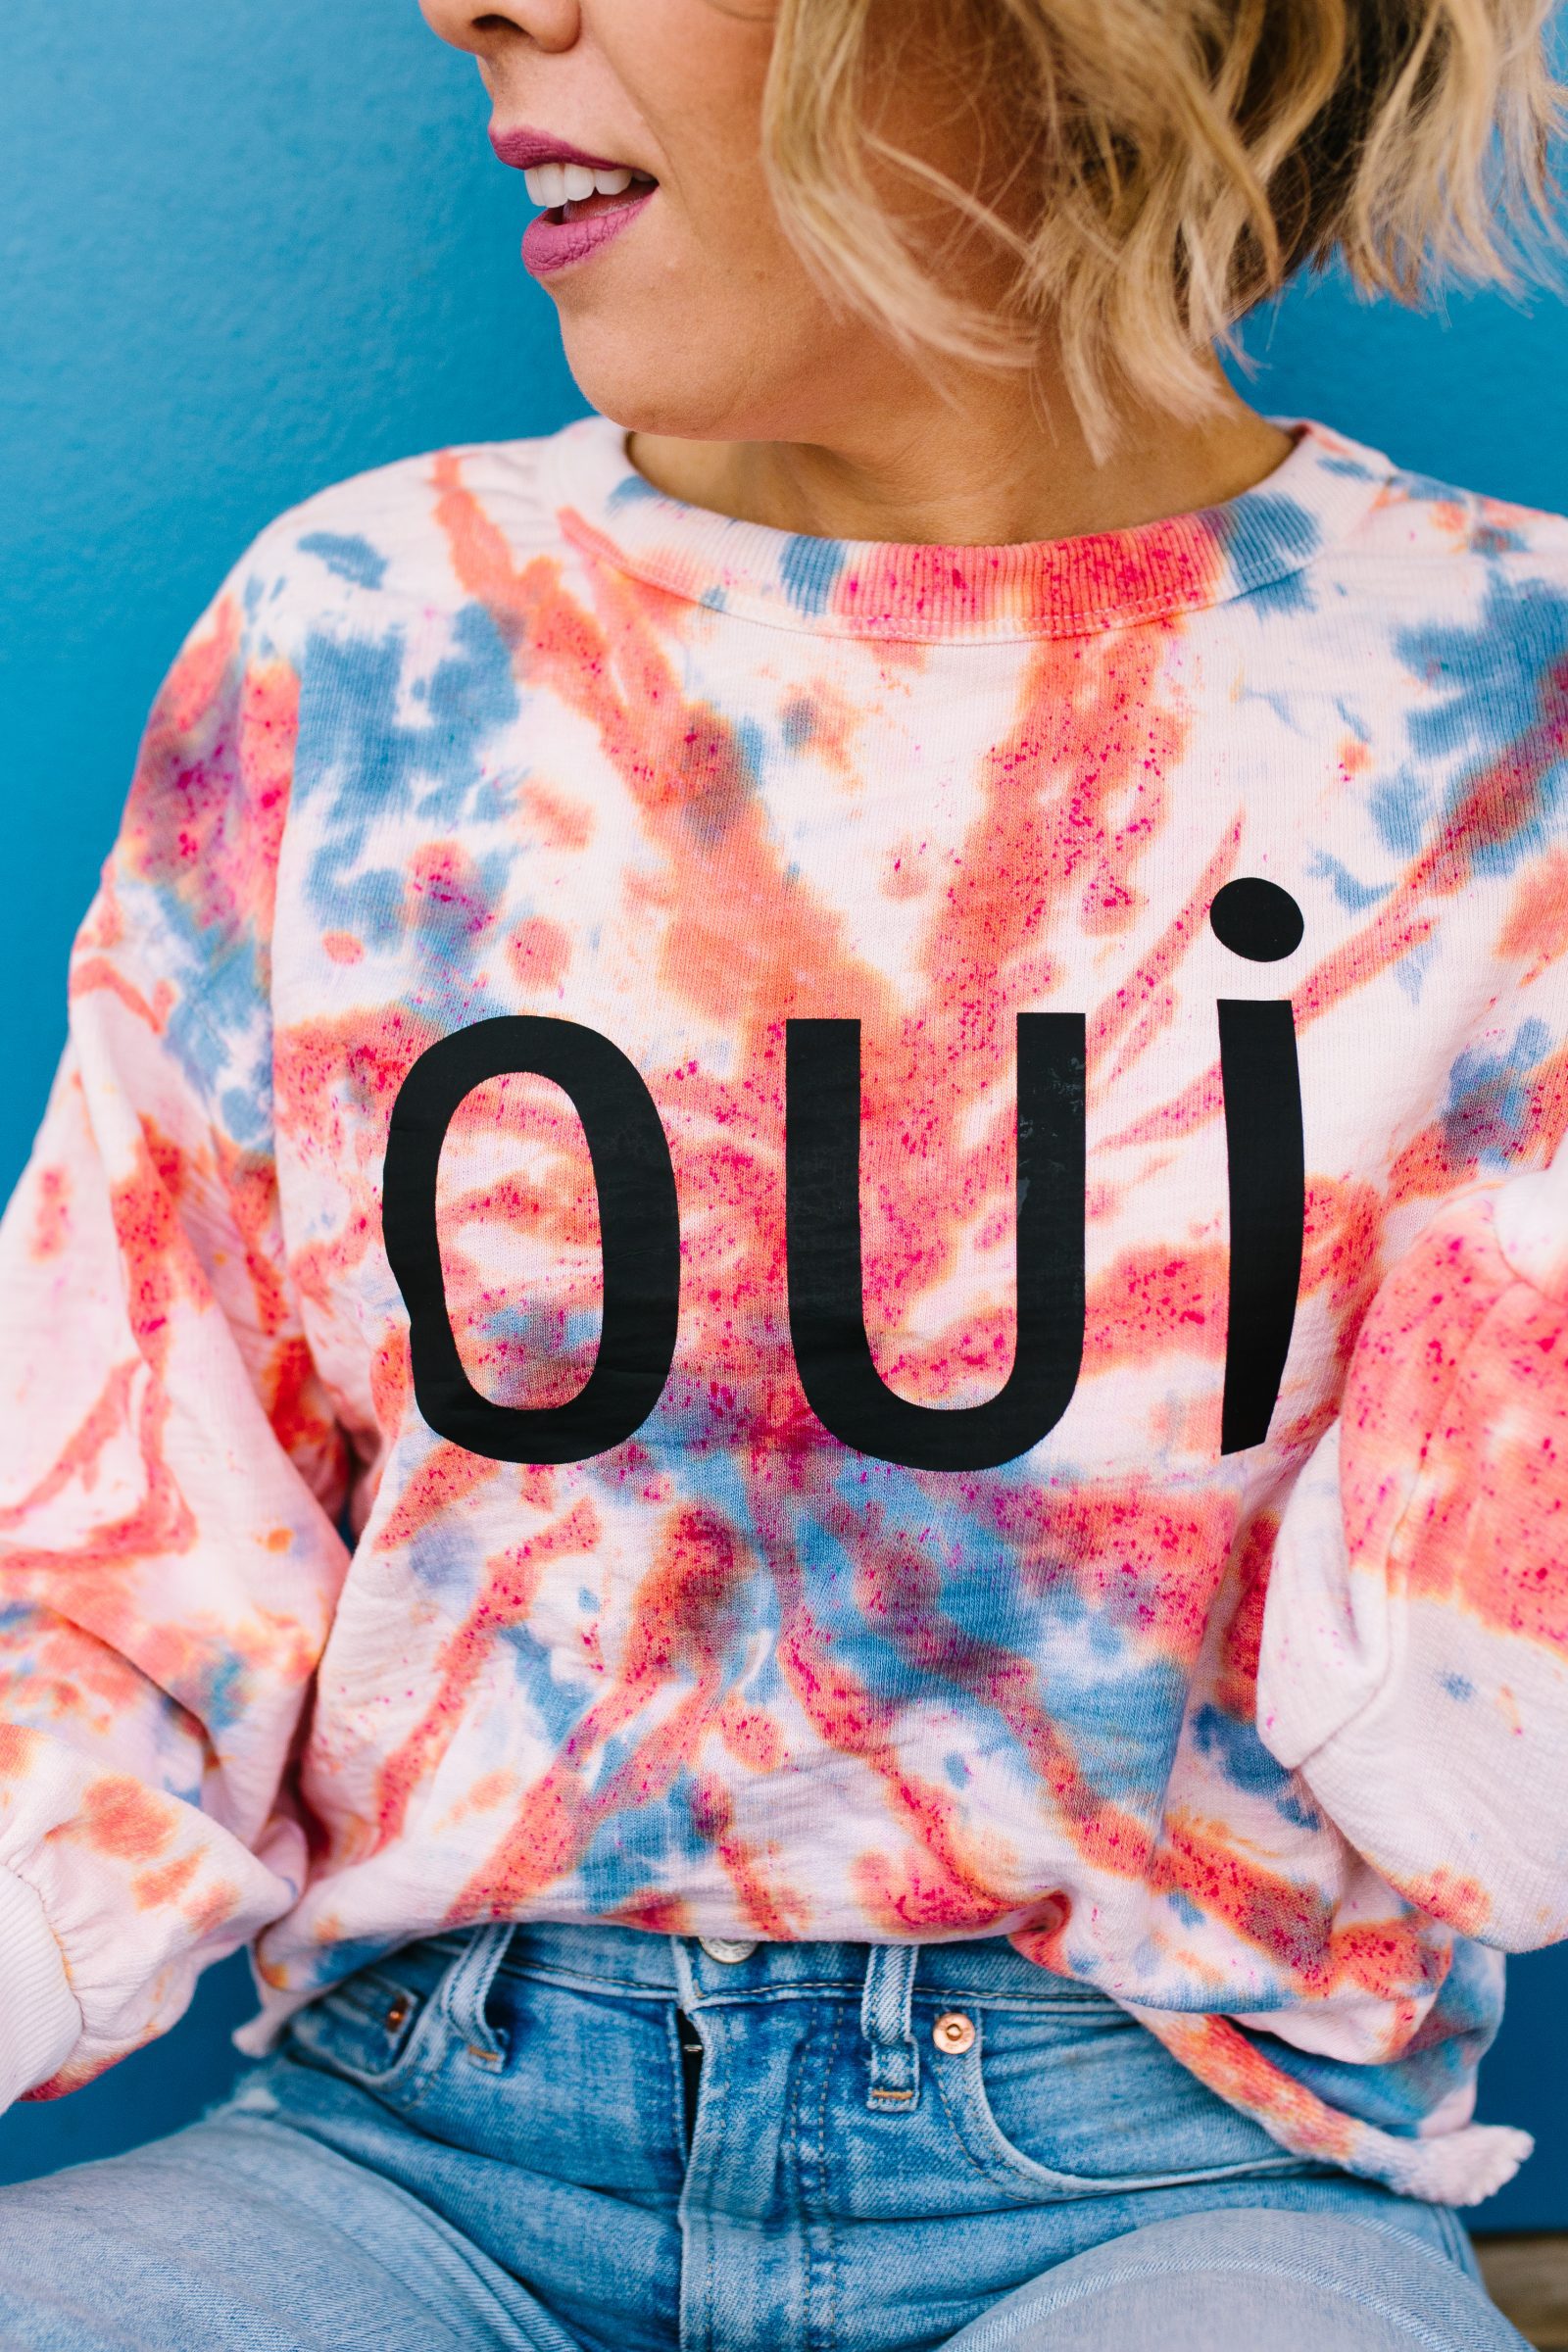
That’s it! Since I had the majority of these supplies on hand, I spent under $10 to replicate the $99 Anthro version, and even if you had to collect a tool or two to make yours happen, you would still be significantly under that price tag! Like I mentioned earlier, the most important factor to success for this one is to let each color completely set on its own before moving forward so that the dye stays put. Other than that, there is nothing too tough about making your own version of this cutie!

Do you have any tie dye projects you are DYEING to make? We’d love to hear your ideas!
Happy making!
ox. Liz
Check out these other tie dye projects!
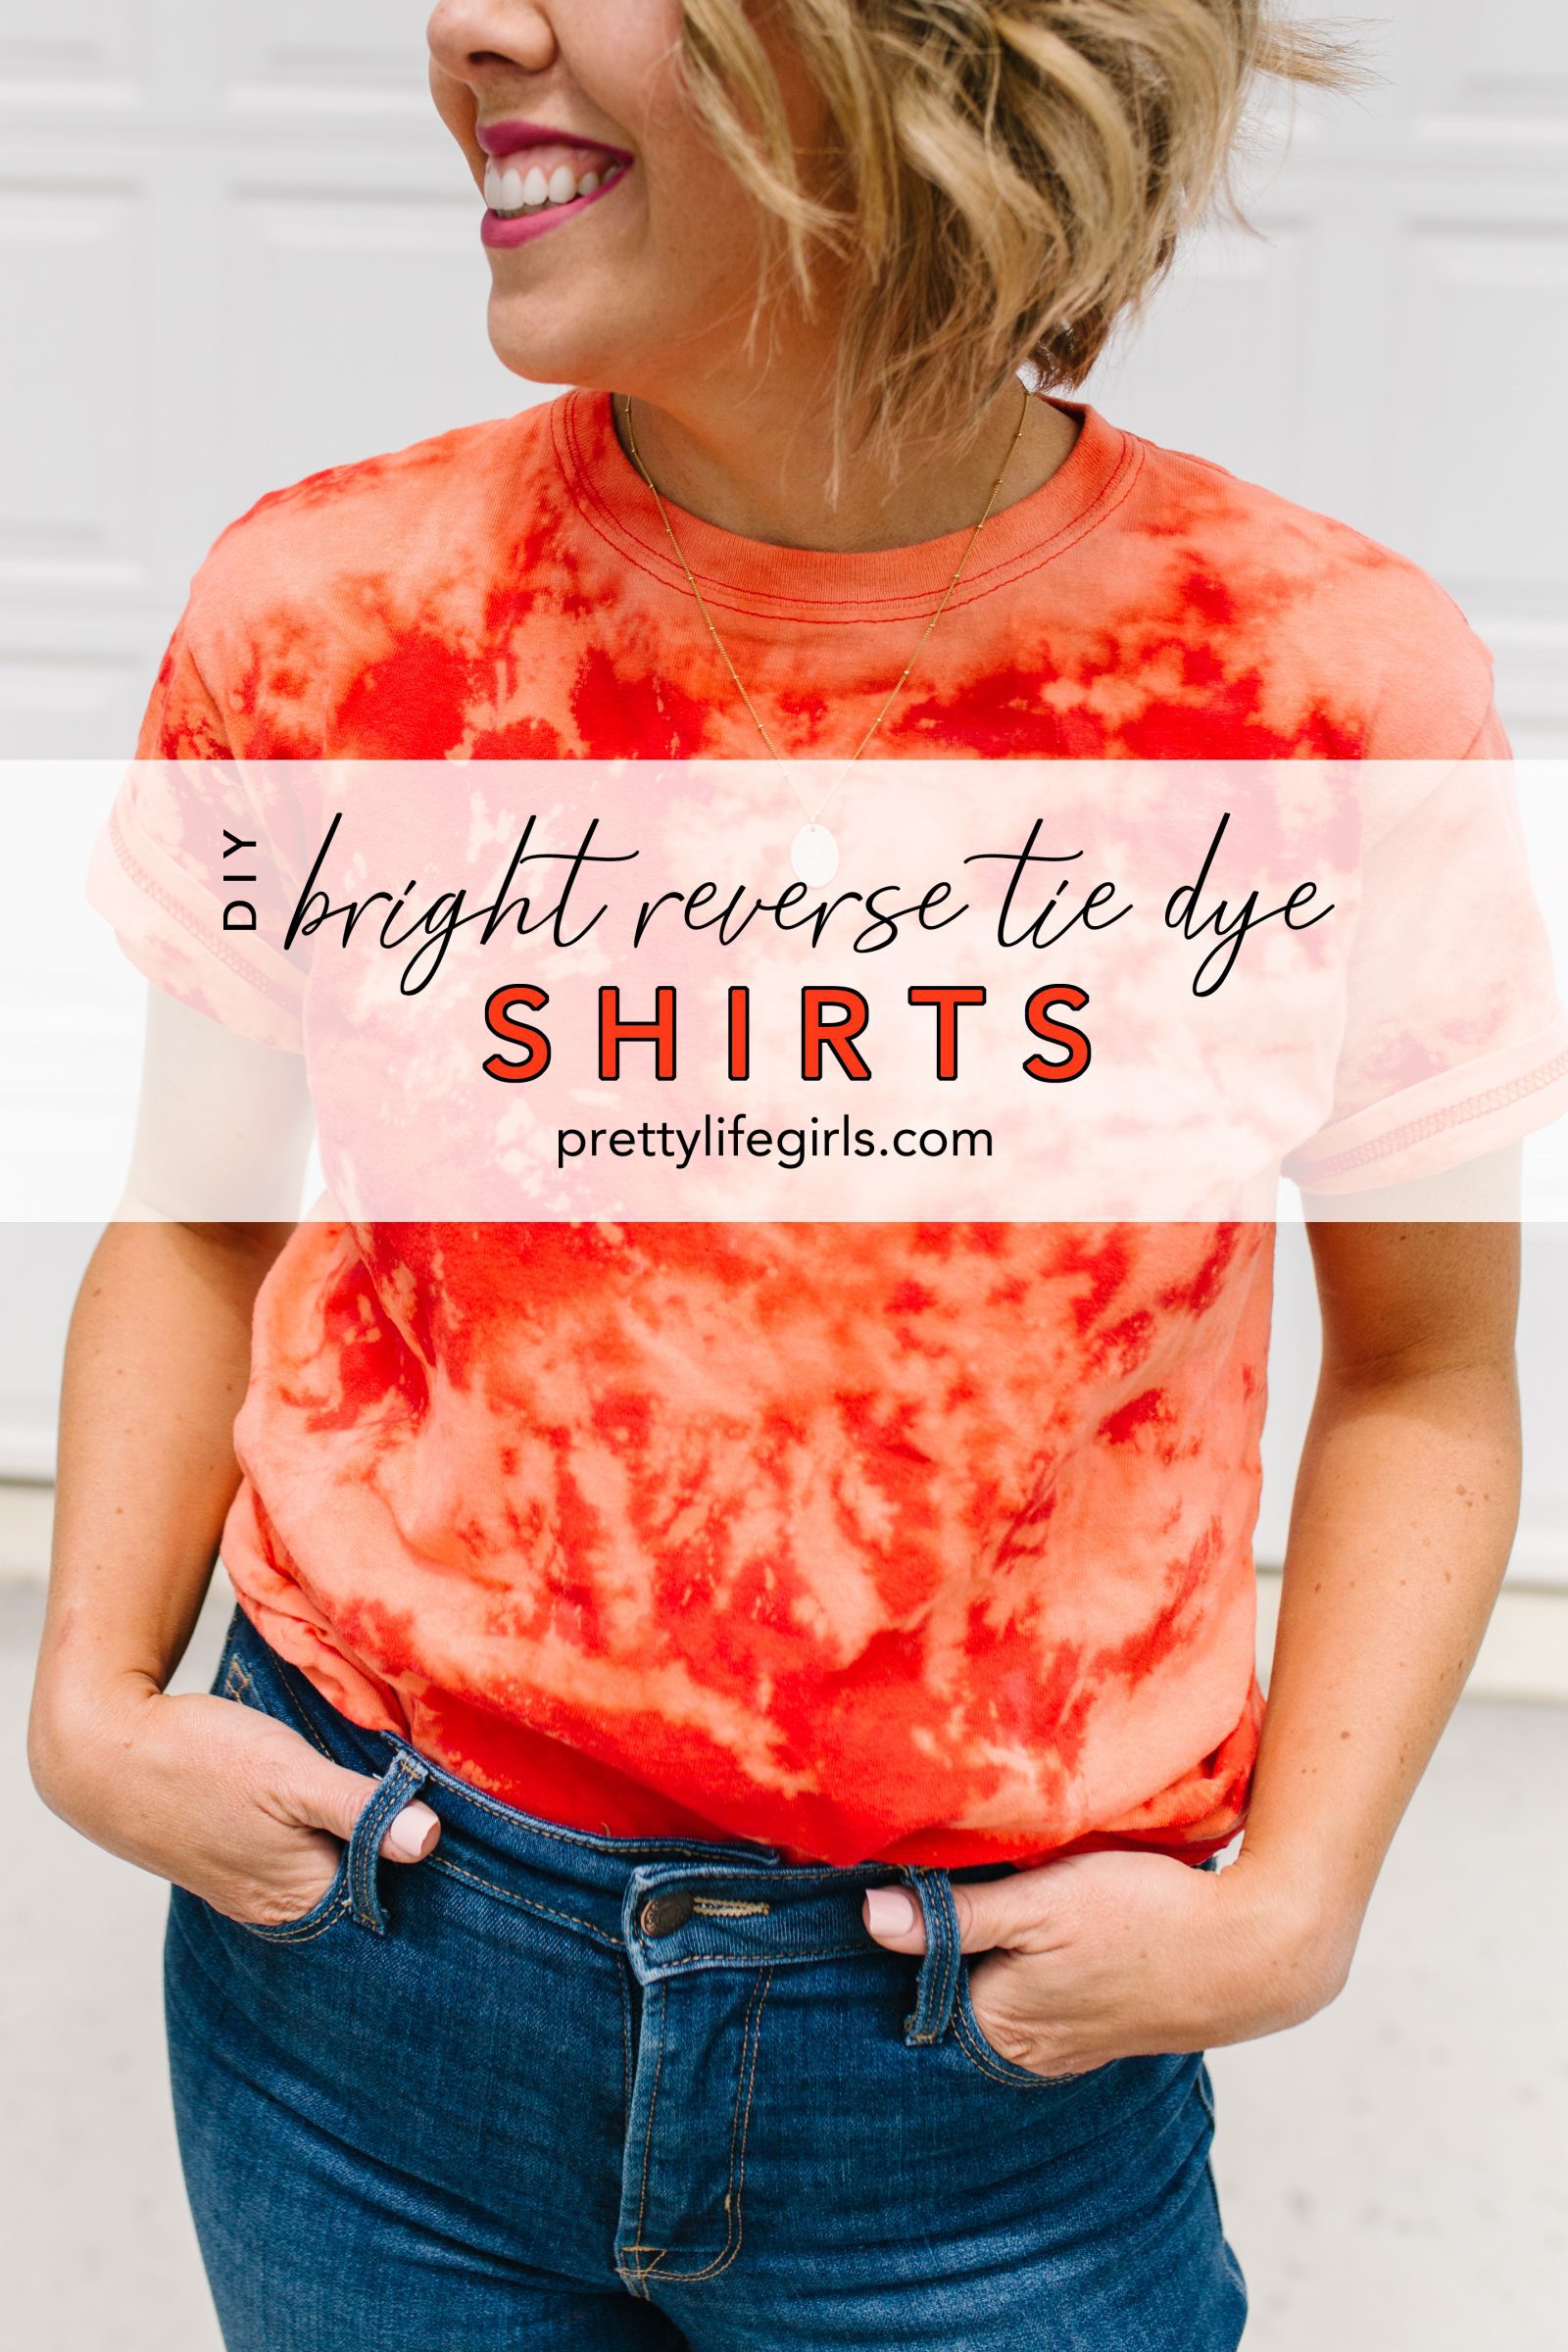 DIY Bright Reverse Tie Dye Shirts
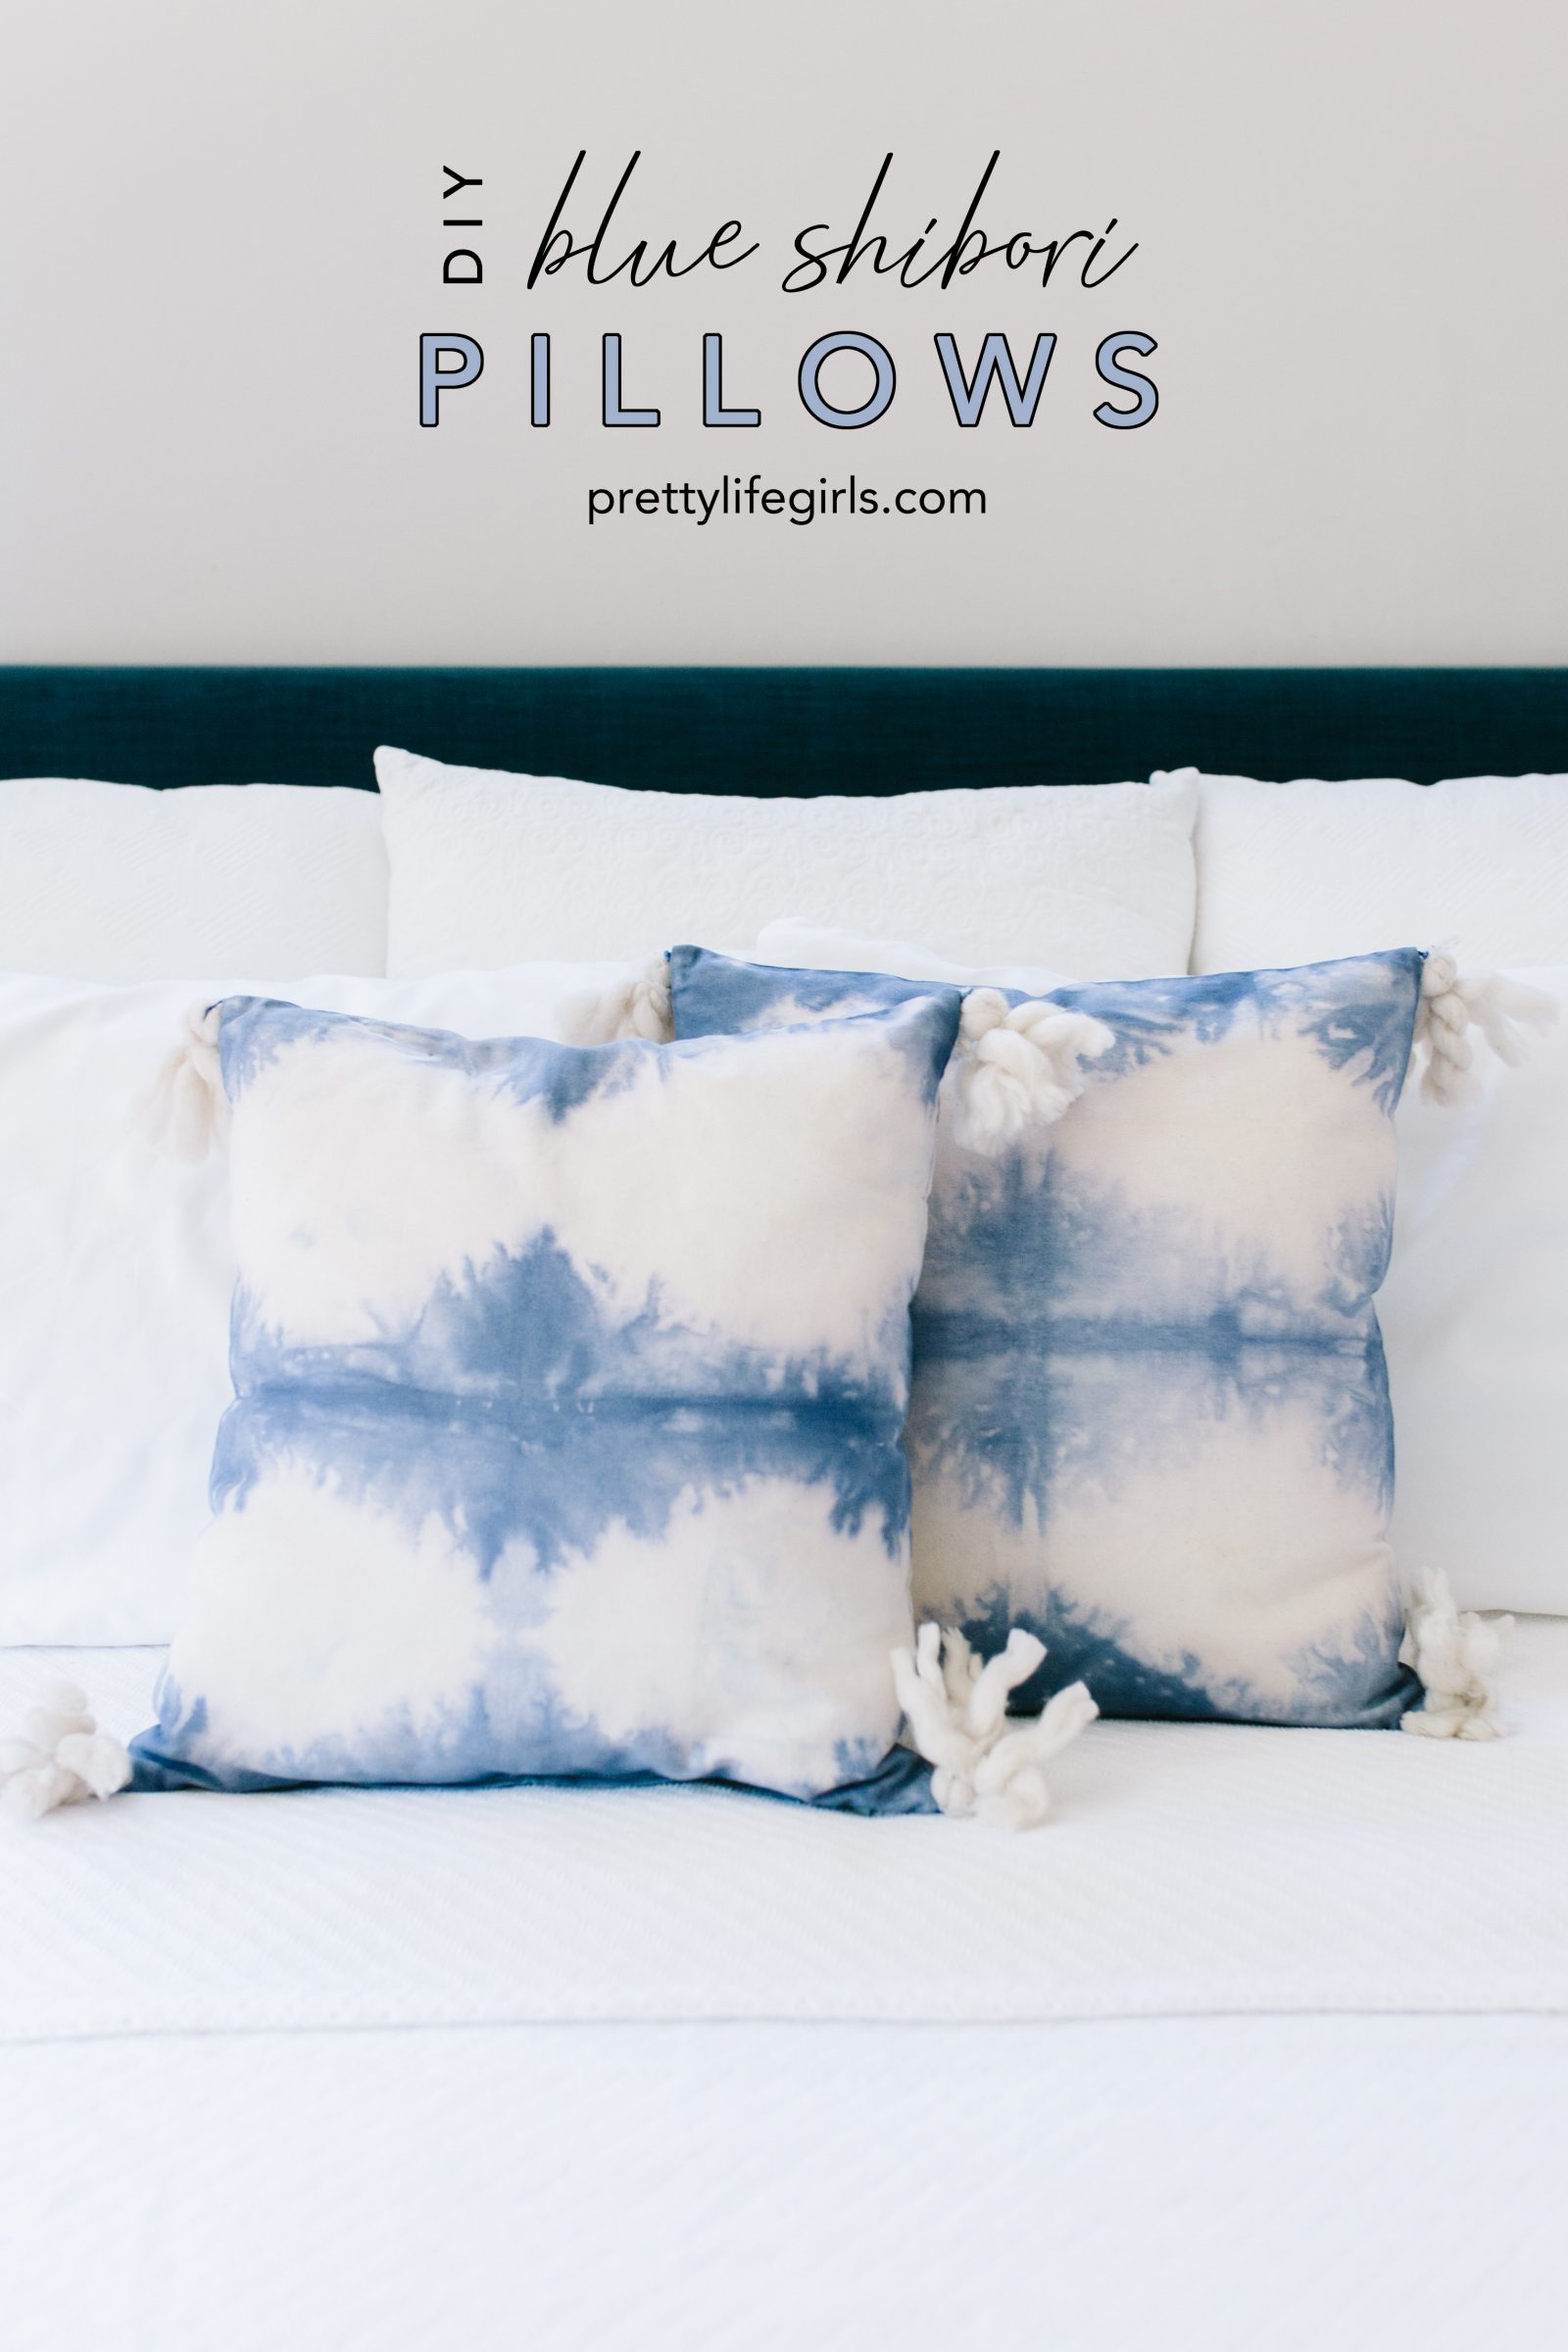 DIY Blue Shibori-Inspired Throw Pillows