This Cameo Pro Christmas Print is sponsored by Silhouette. All opinions are ours alone.
This post may contain affiliate links, which help us support this site.
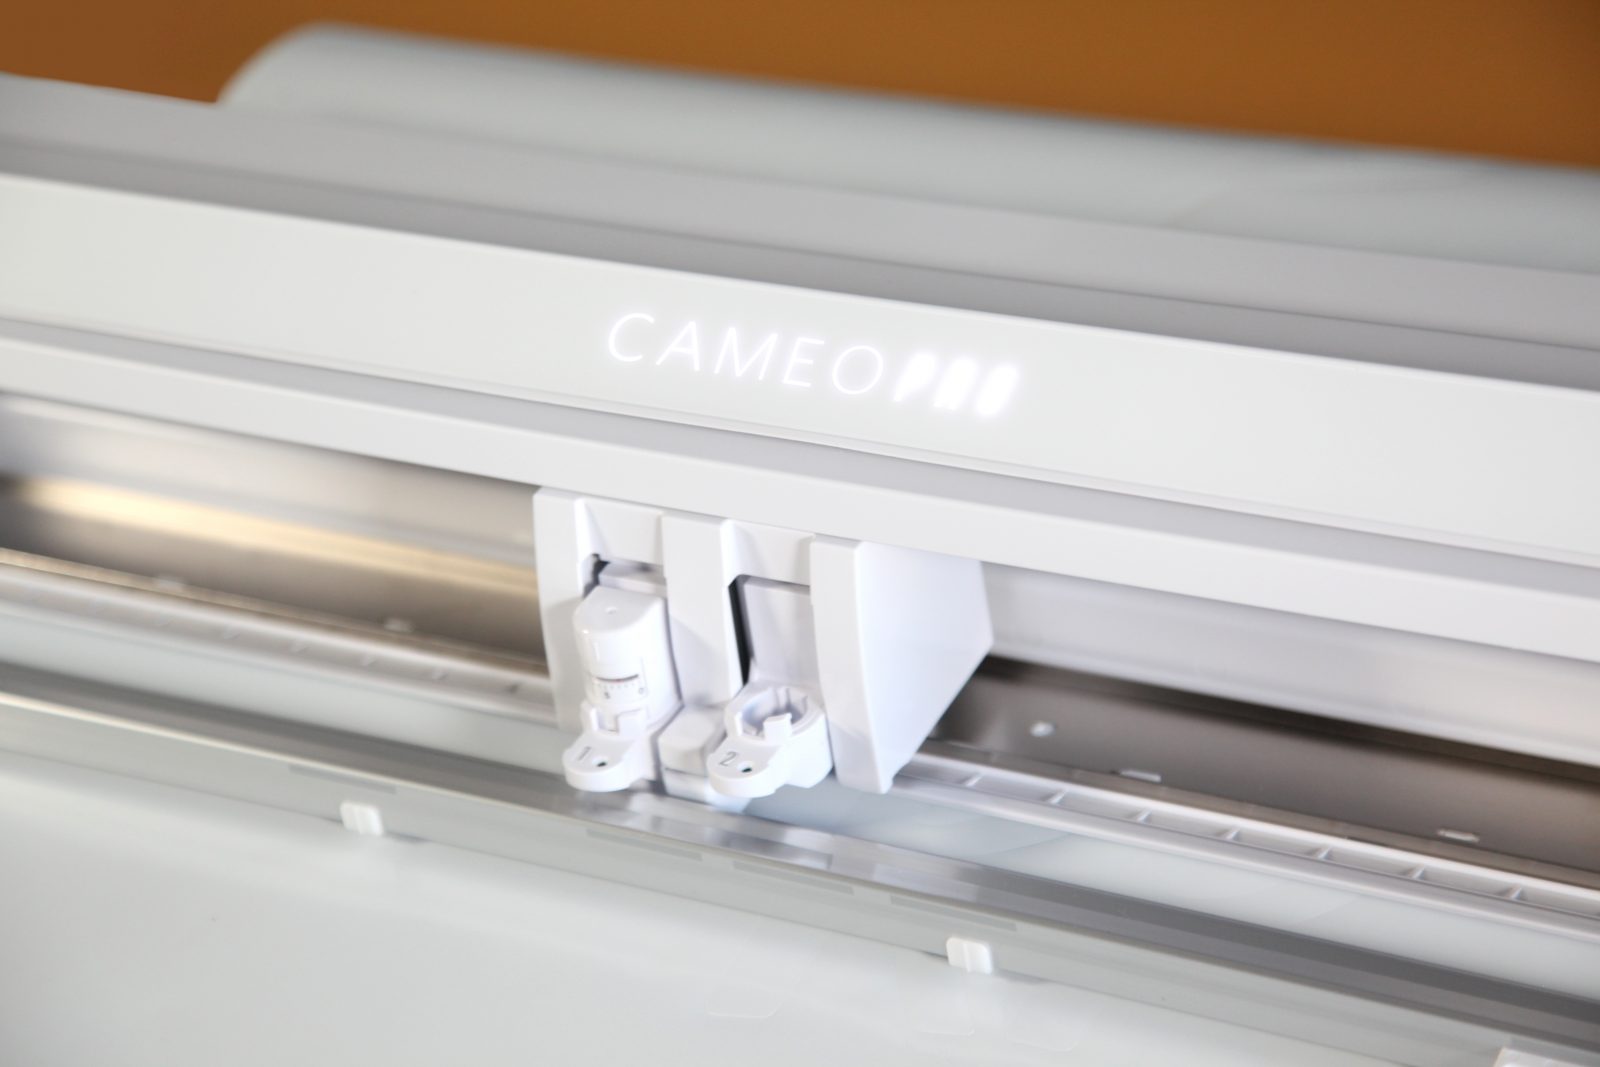
Christmas came early for Silhouette lovers! A couple of weeks ago the new Silhouette Cameo Pro was released, the biggest cutting machine in its class, and a total game-changer for DIYers of all kinds! This machine has a 24-inch cutting width which means it can help you bring your biggest ideas to life! My head is spinning with ideas for wallpaper, oversized art, sewing projects and more since this thing can cut larger designs, plus a higher quantity at once than any other machine!
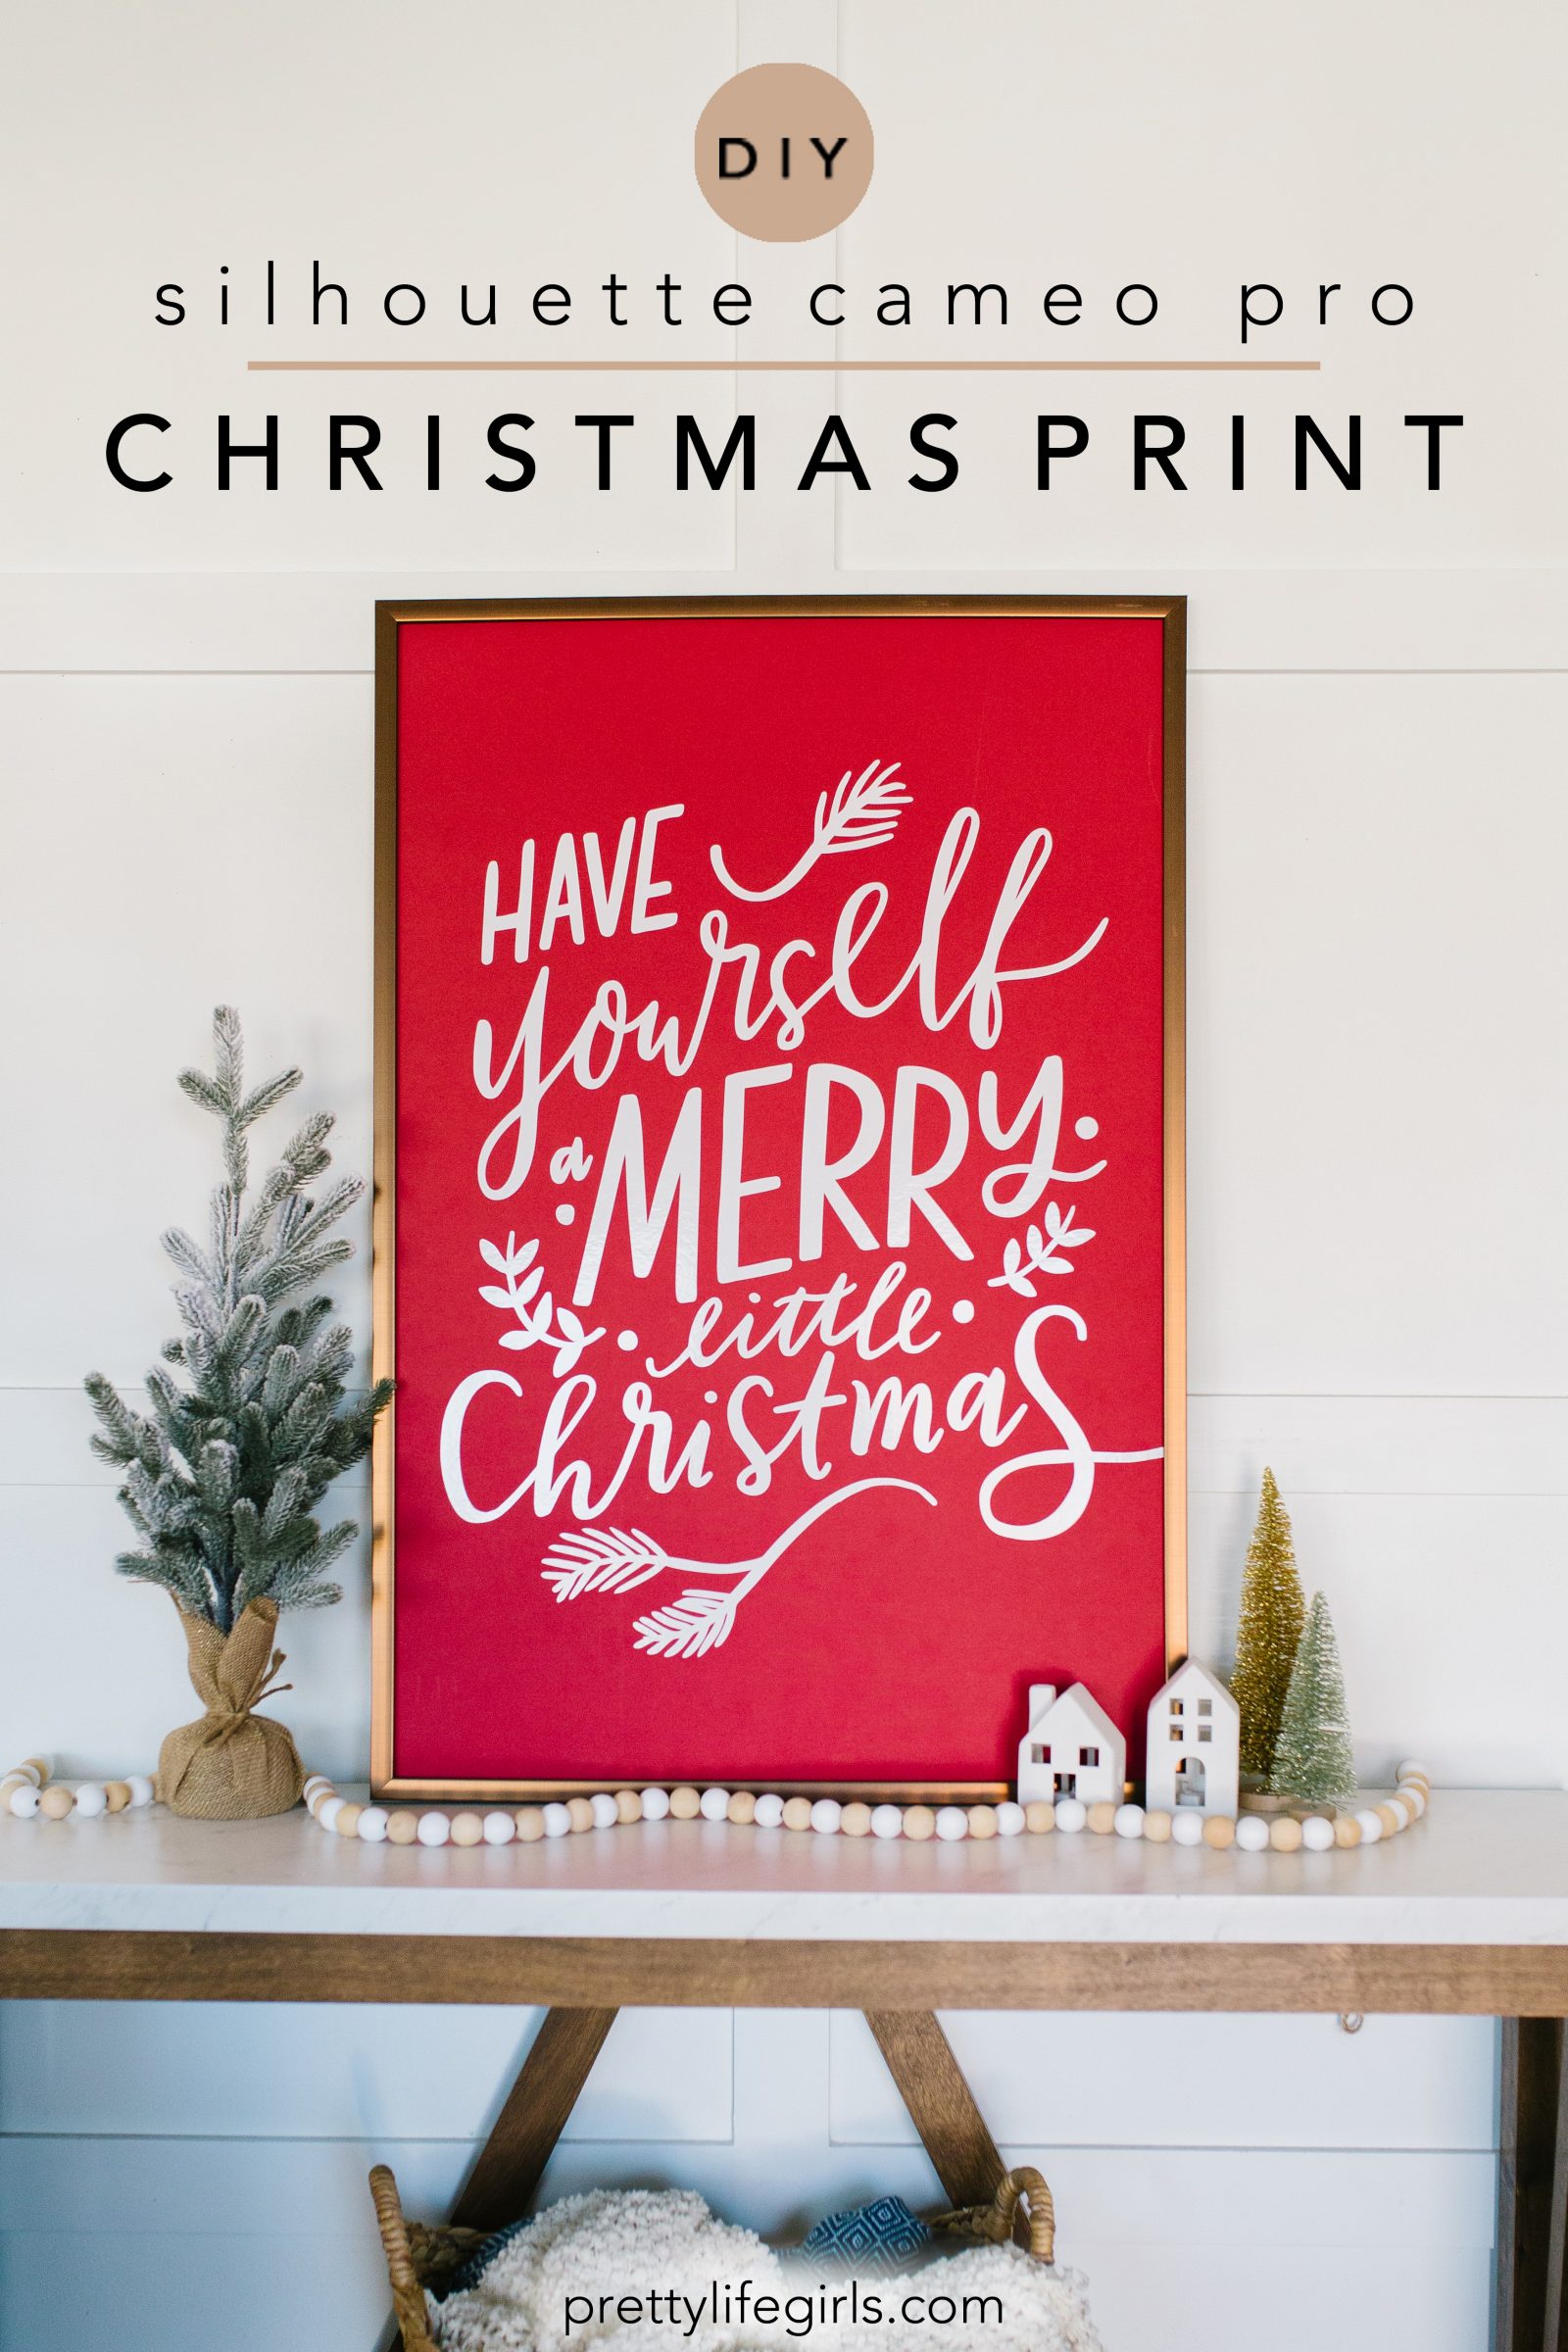
So, for our inaugural project with the Silhouette Cameo Pro, we decided to make an oversized art piece similar to ones we have seen in online boutiques for well over $100 (since the bigger the art, the bigger the price tag)! However, with this new machine, size is not a problem, and this baby can cut designs that will easily fit the dimensions of a poster board. We made this piece of festive holiday art for a fraction of what it would have cost to purchase it, and used a gorgeous design from the Silhouette Design Store to make it happen! Here is how we did it:

Supplies needed to make a Silhouette Cameo Pro Christmas Print
Silhouette Cameo Pro
Weeding hook
24″ Adhesive vinyl
Mat board
Transfer tape
Poster frame

How to make a Silhouette Cameo Pro Christmas Print
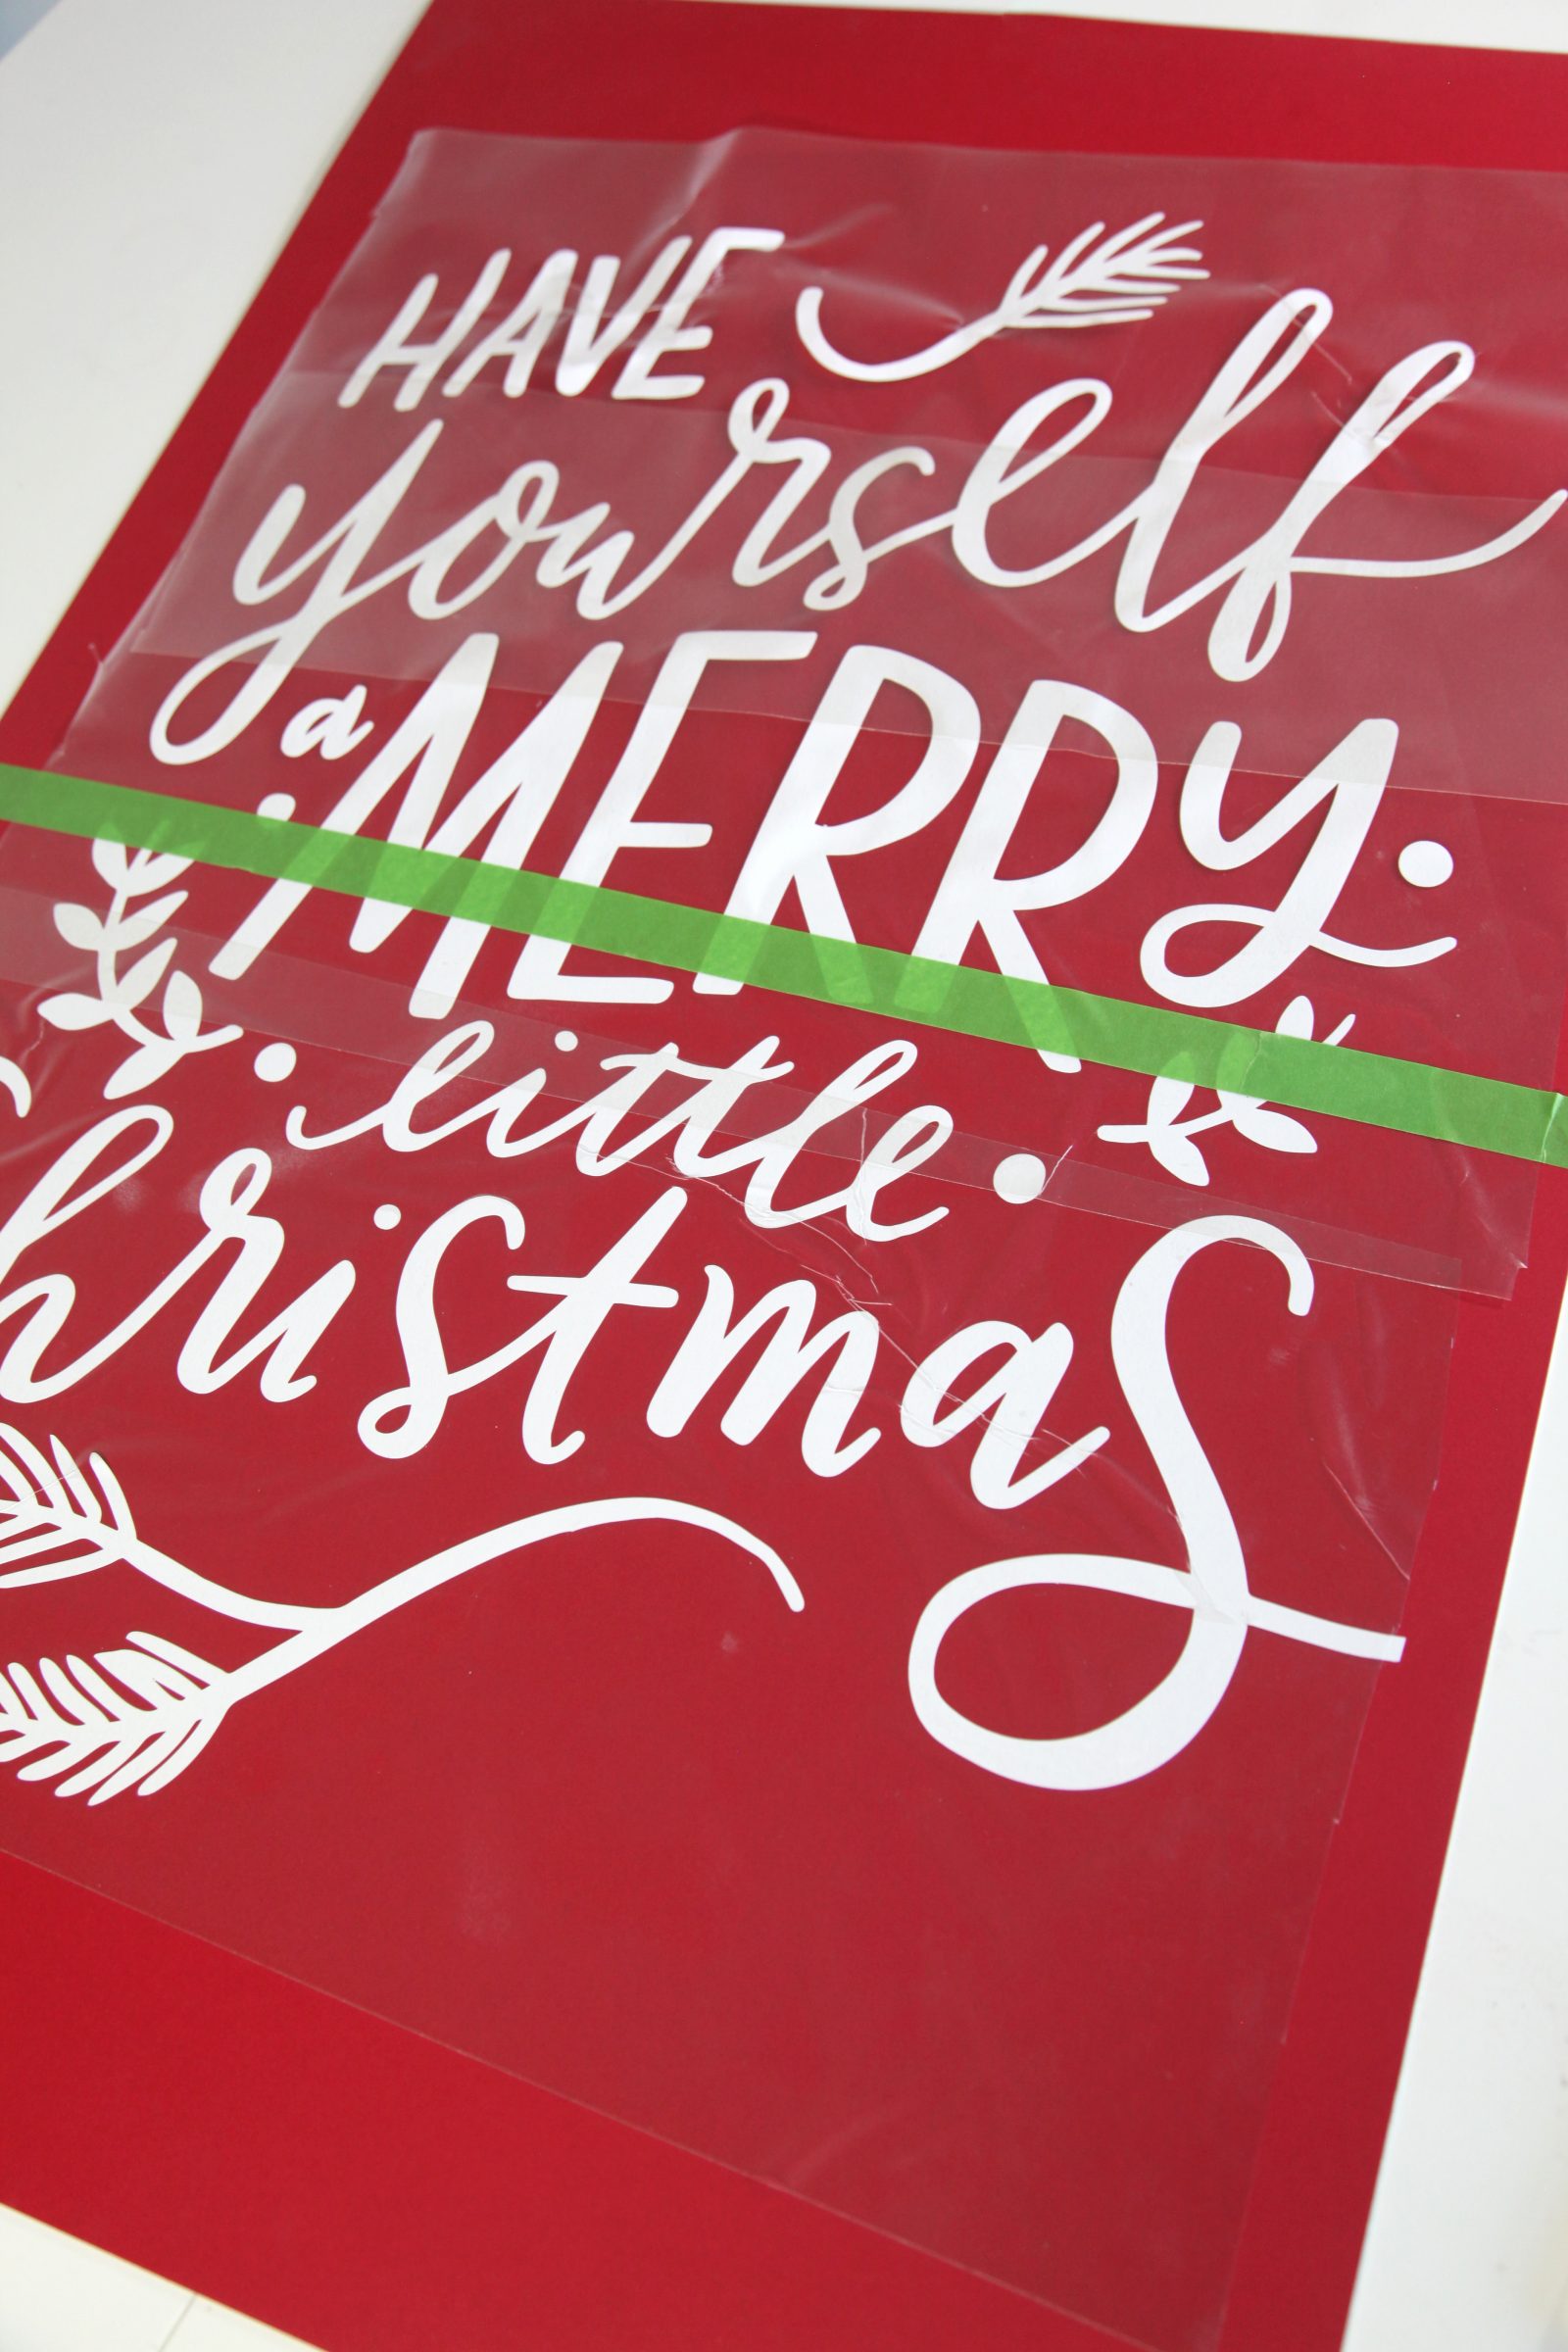
Step 1: Arrange and cut your design with Silhouette Studio. We used this design. For extra details on cutting with a Silhouette machine, see this post, but be sure to make adjustments for the size of your print!
Step 2: Using a weeding hook, weed the excess vinyl.
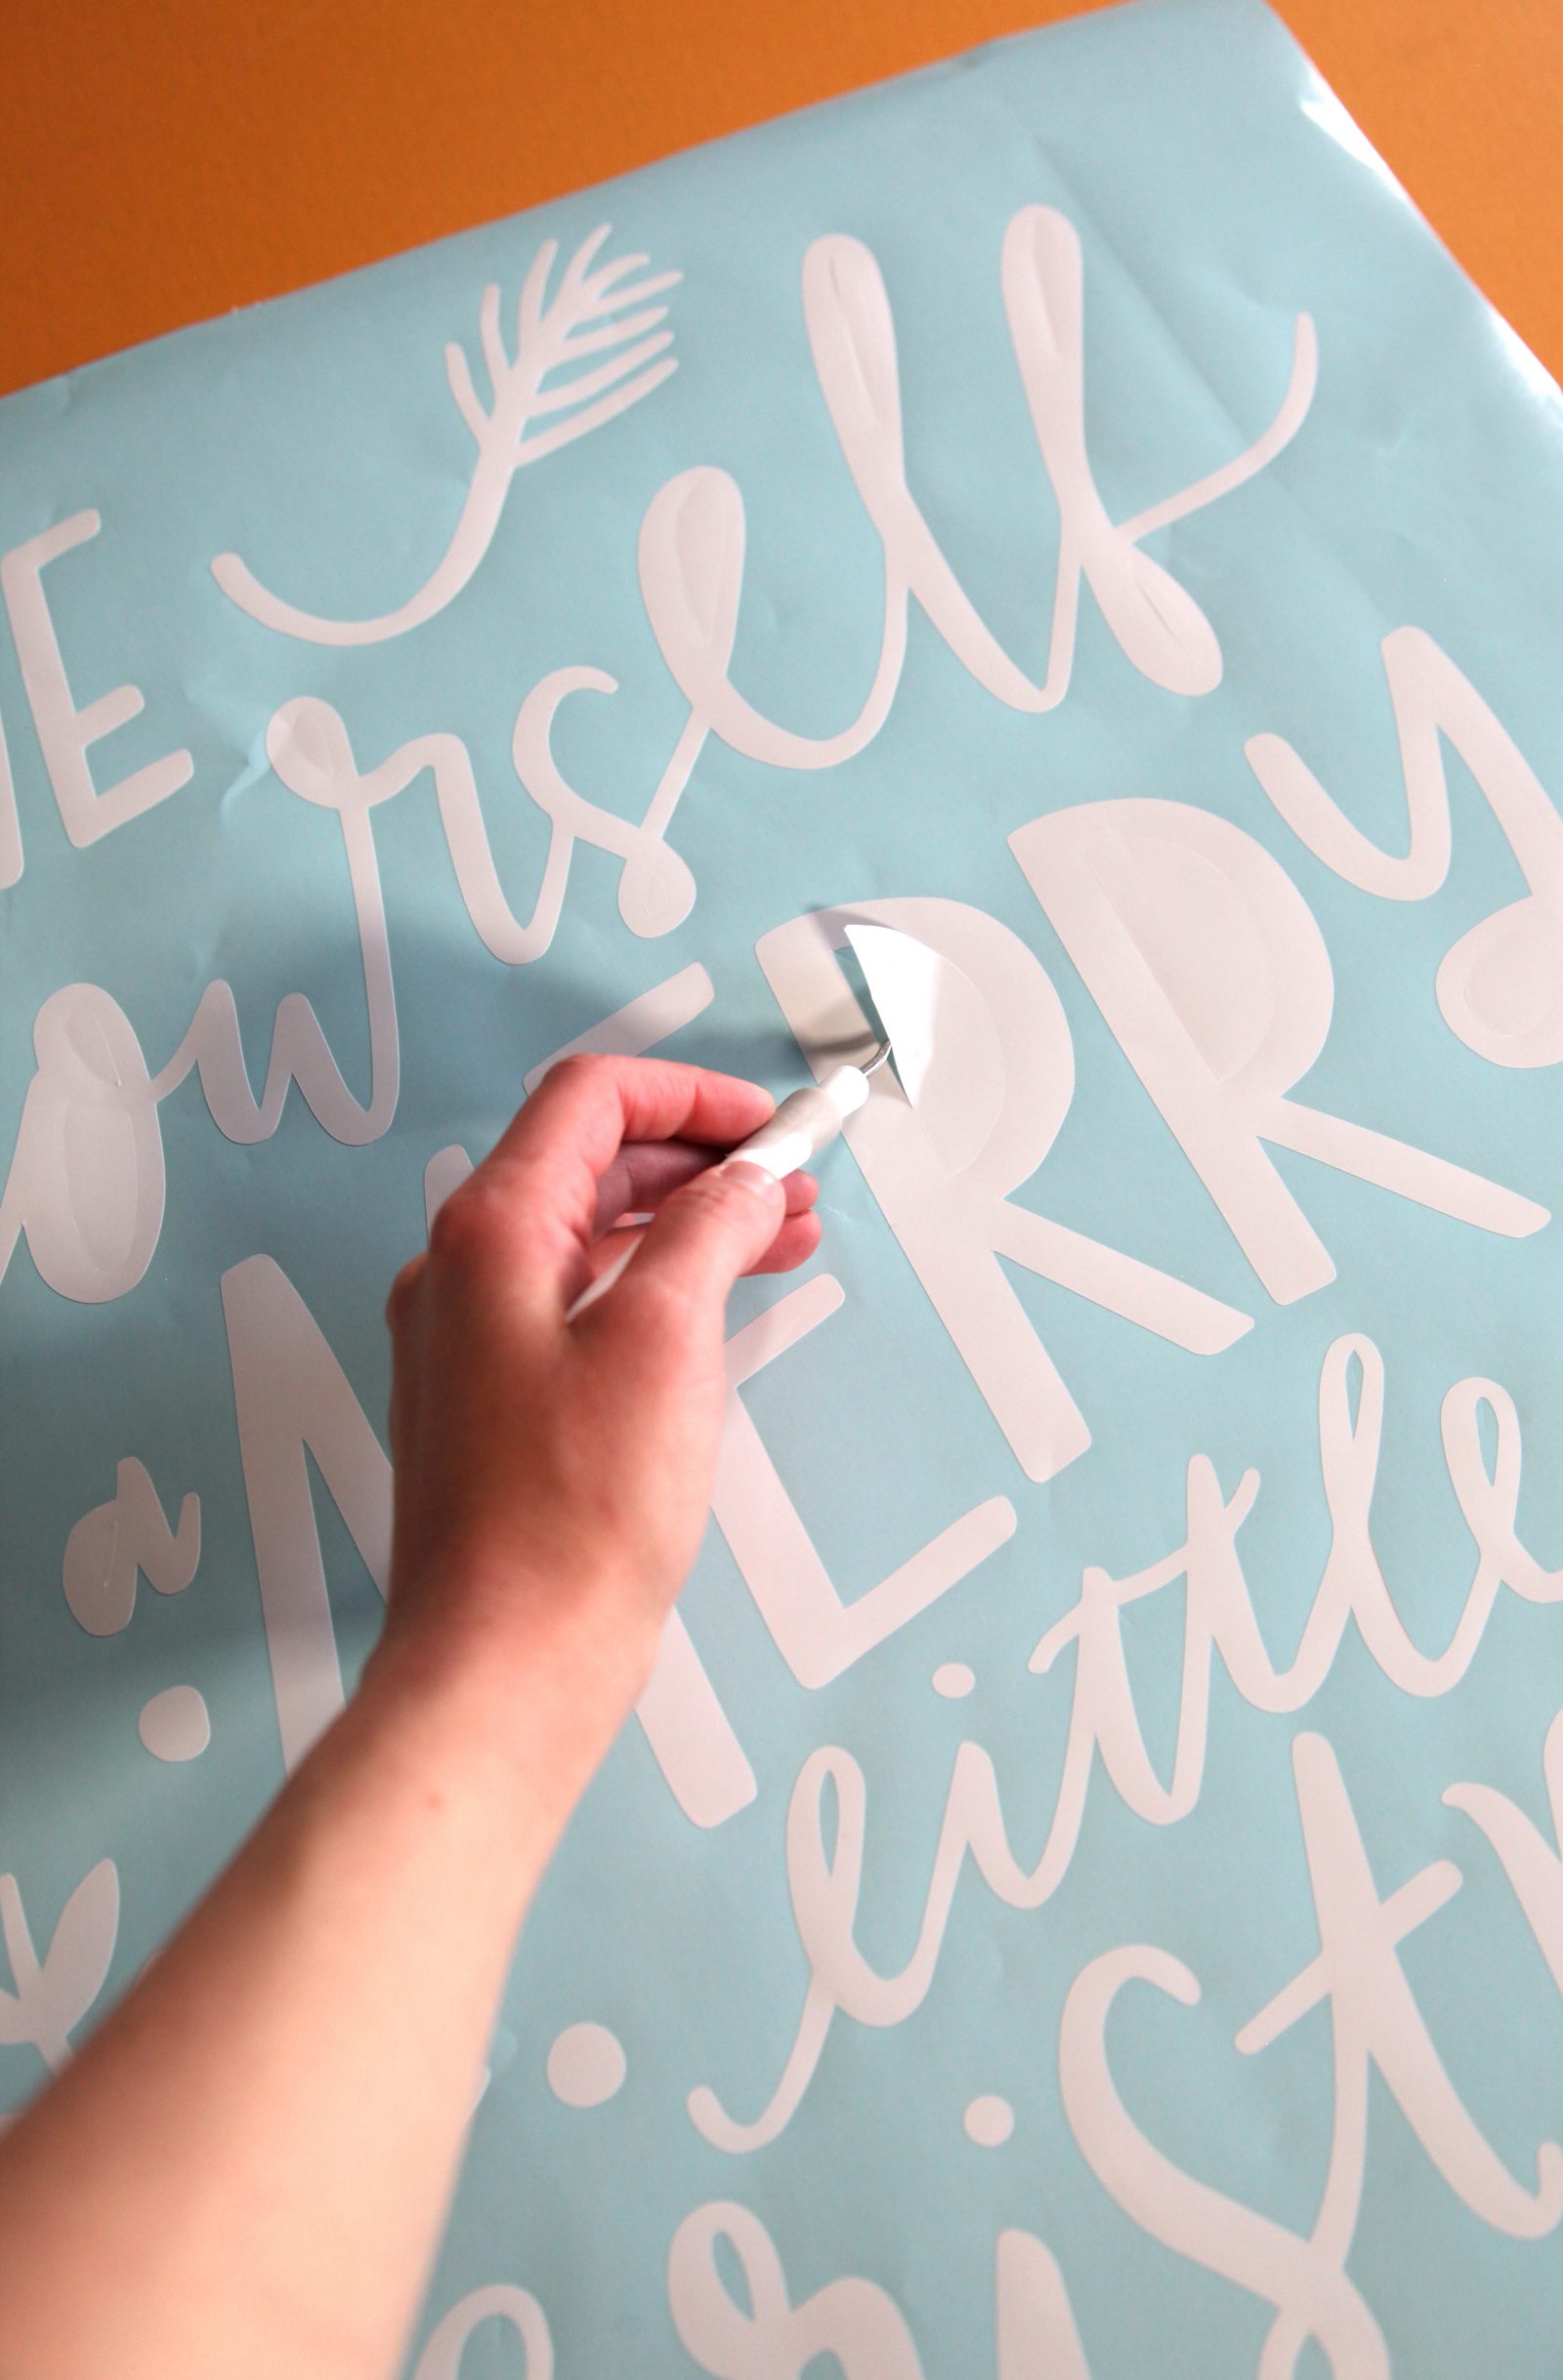
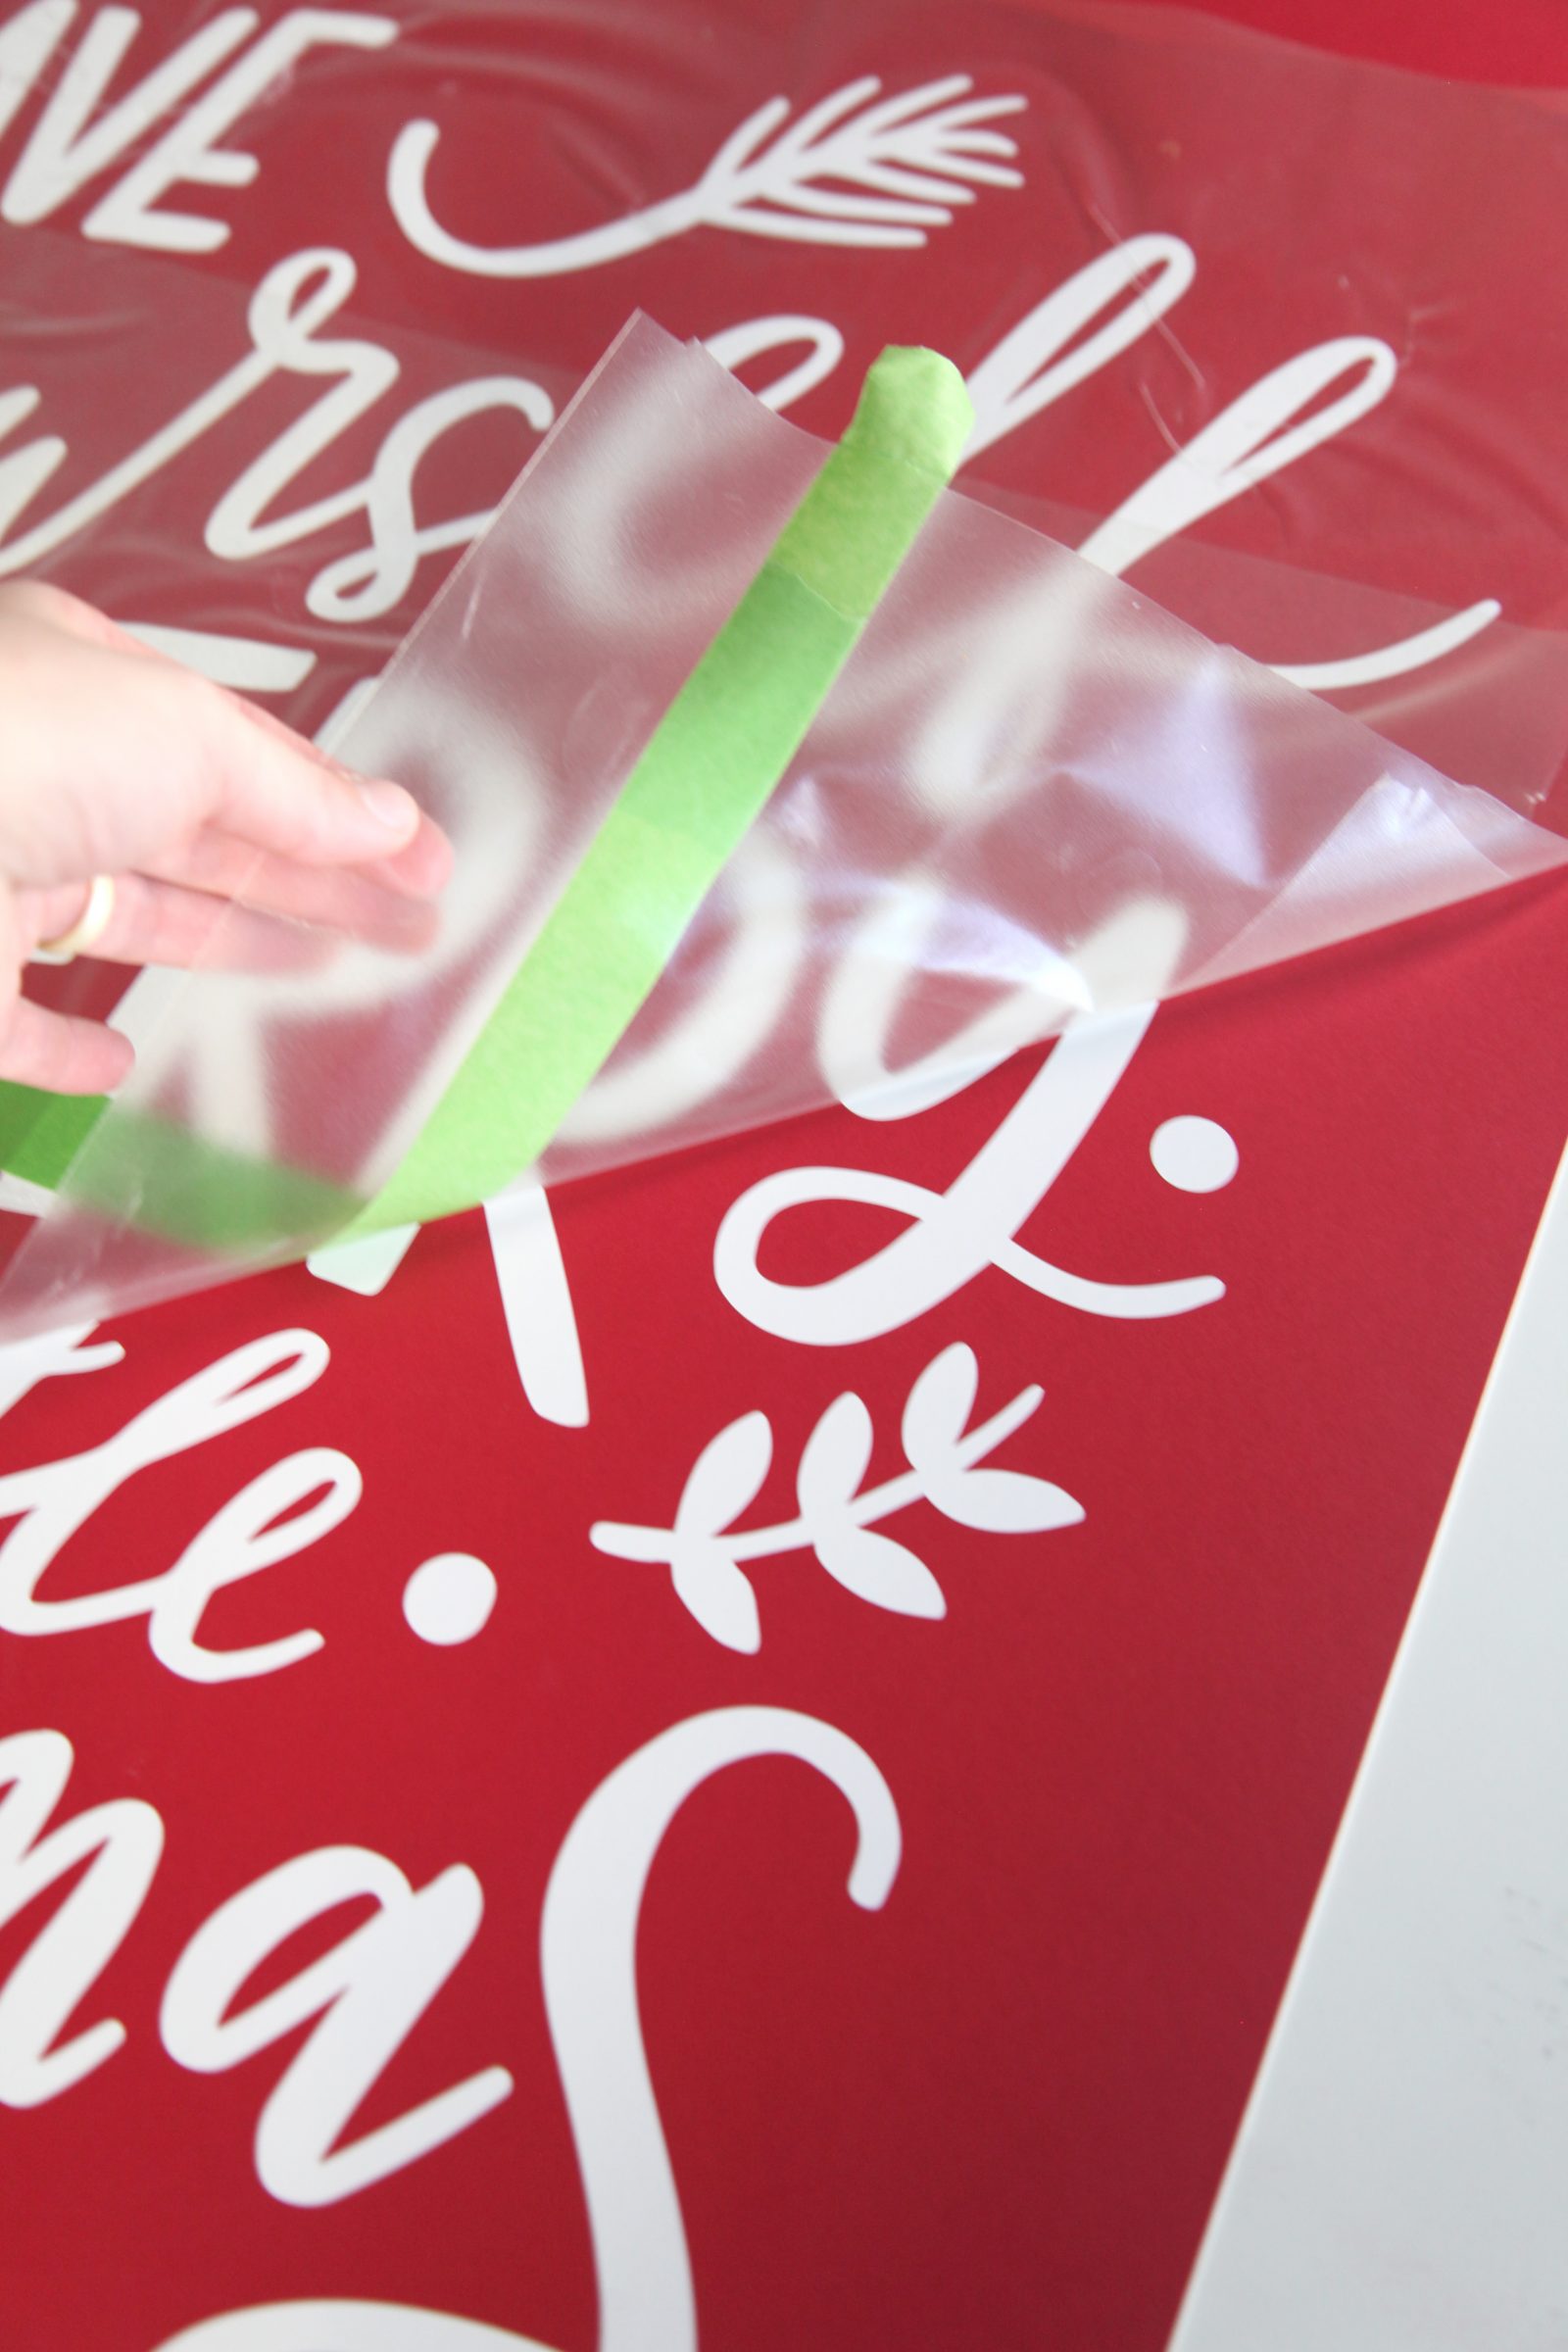
Step 3: Cover the design in transfer tape and press with a scraper. Then carefully remove the design from the carrier sheet and place it on the mat board.
Step 4: Press the design on the mat board surface with a scraper. Then carefully remove the transfer tape.

Step 5: Frame your print. You might need to trim the mat board slightly to get it to fit into the frame.
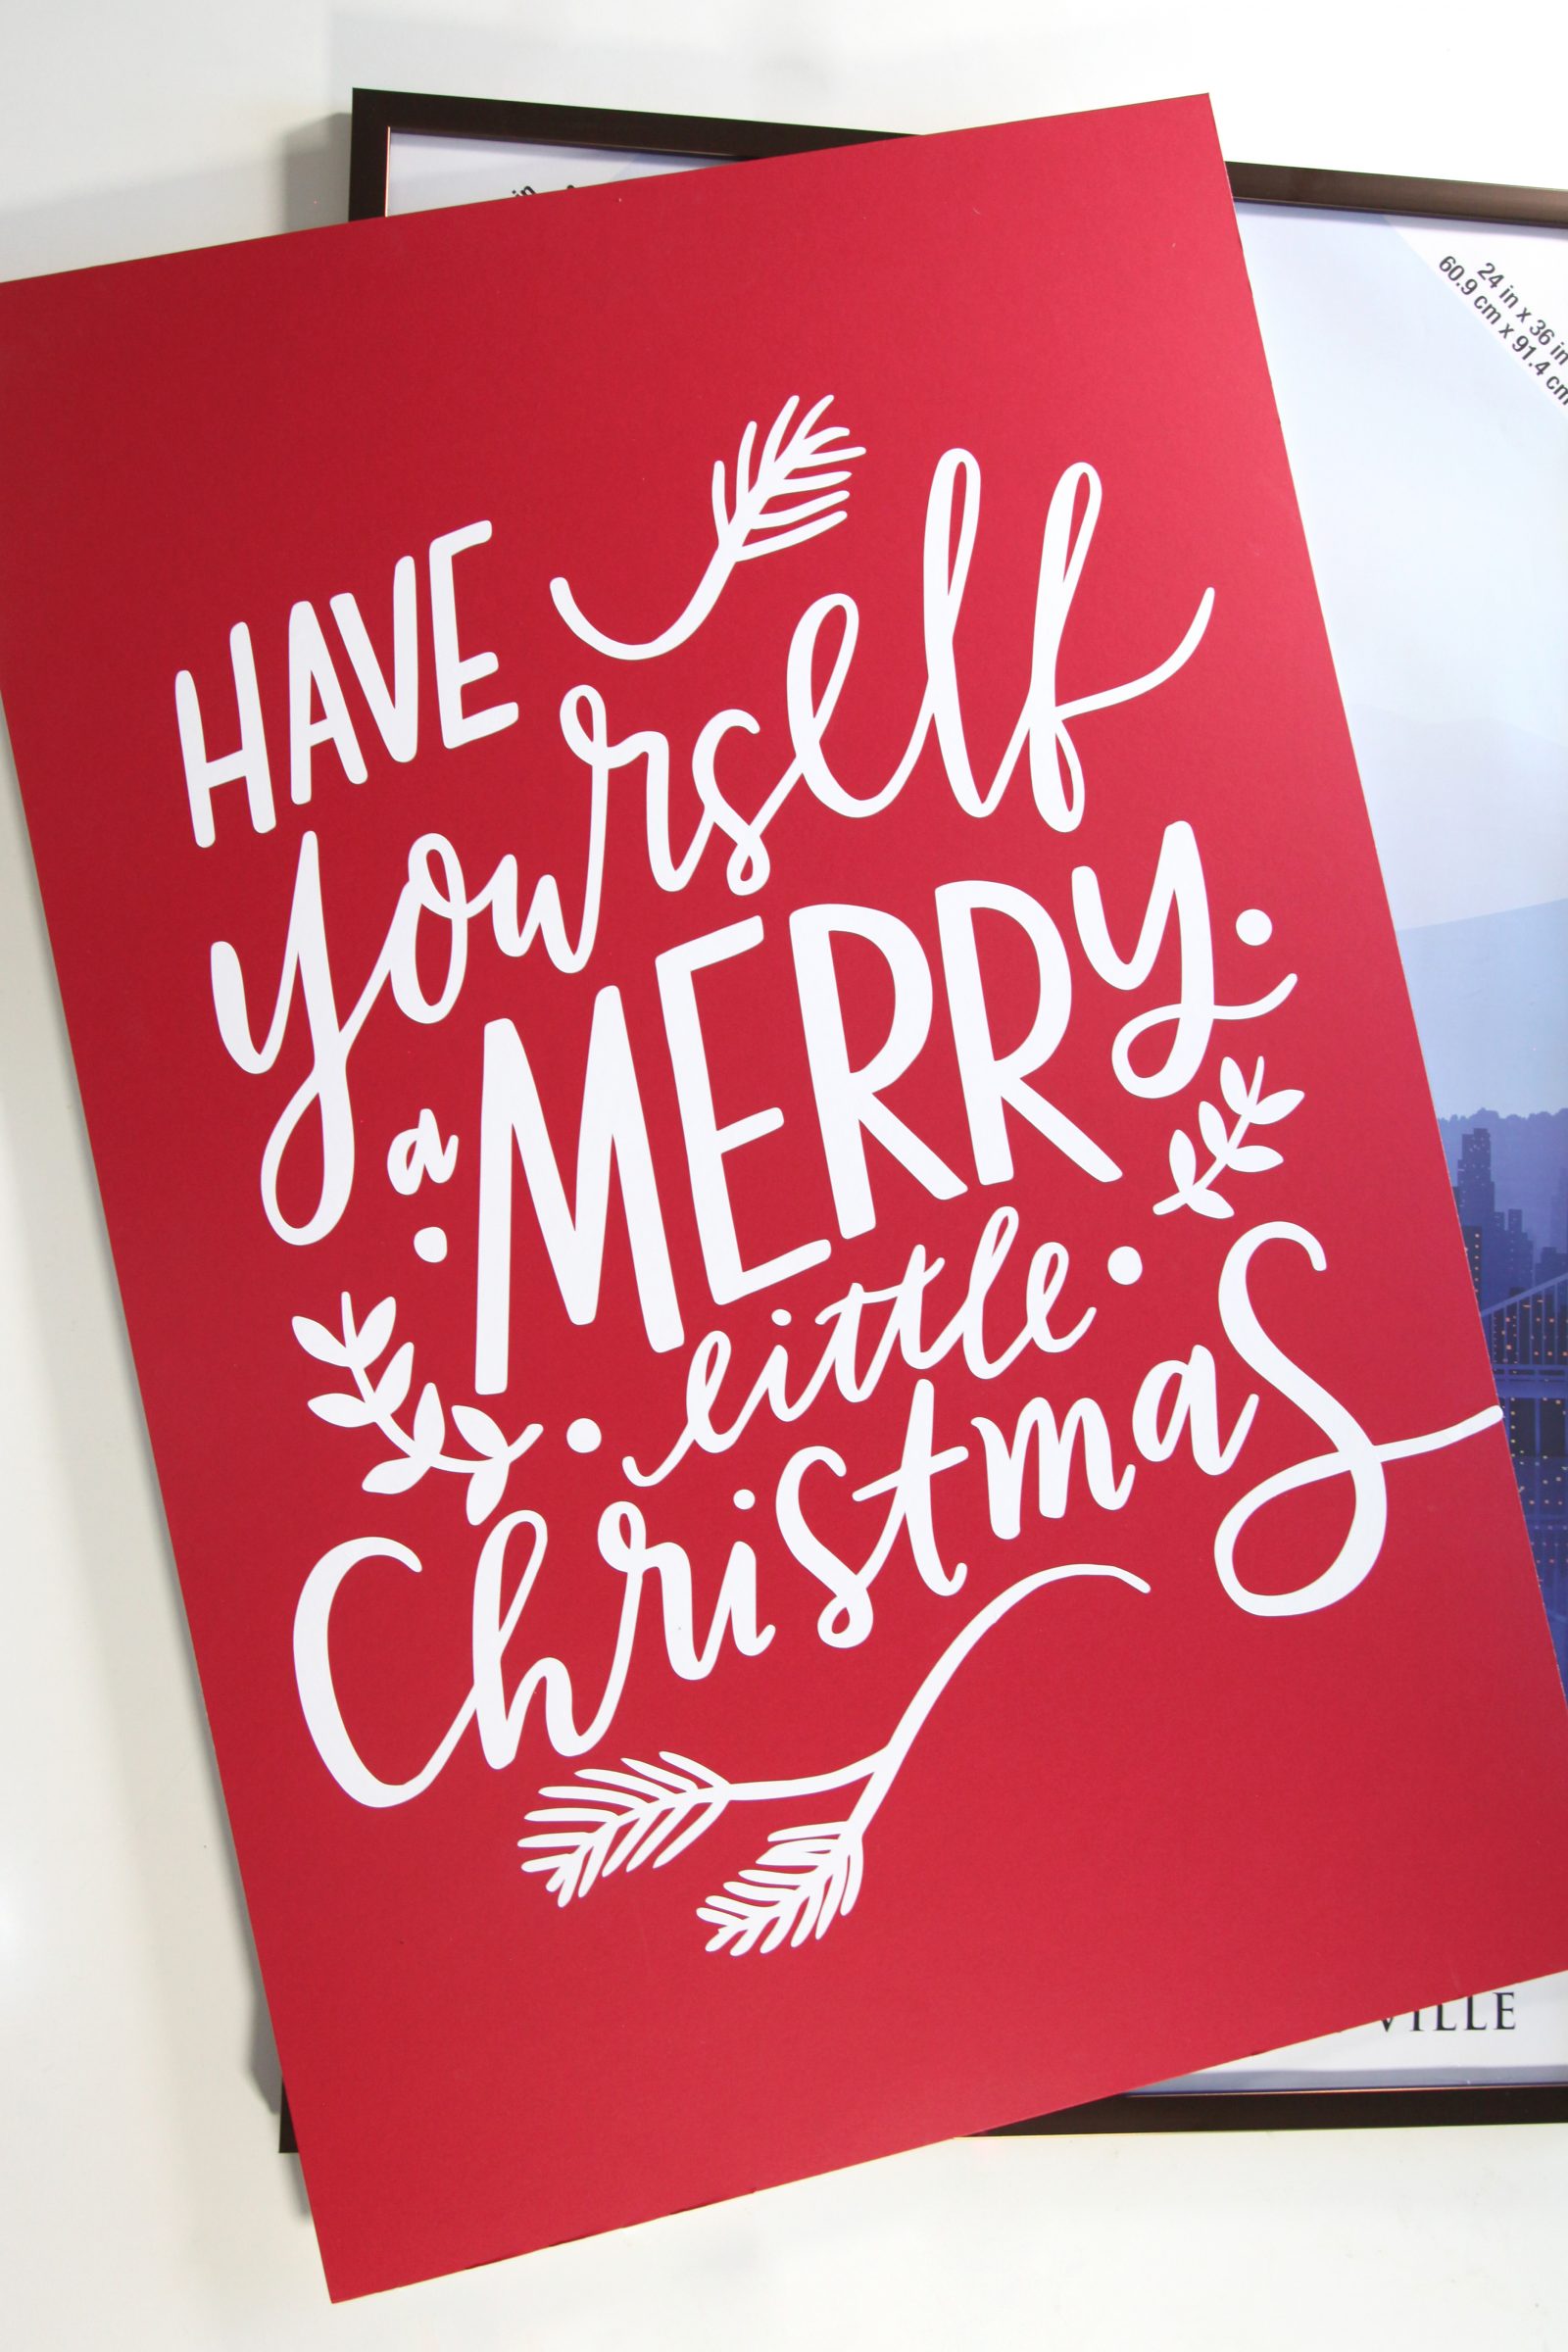
The Cameo Pro makes it so easy to make beautiful, large prints that make a HUGE impact! We can’t wait to make more!

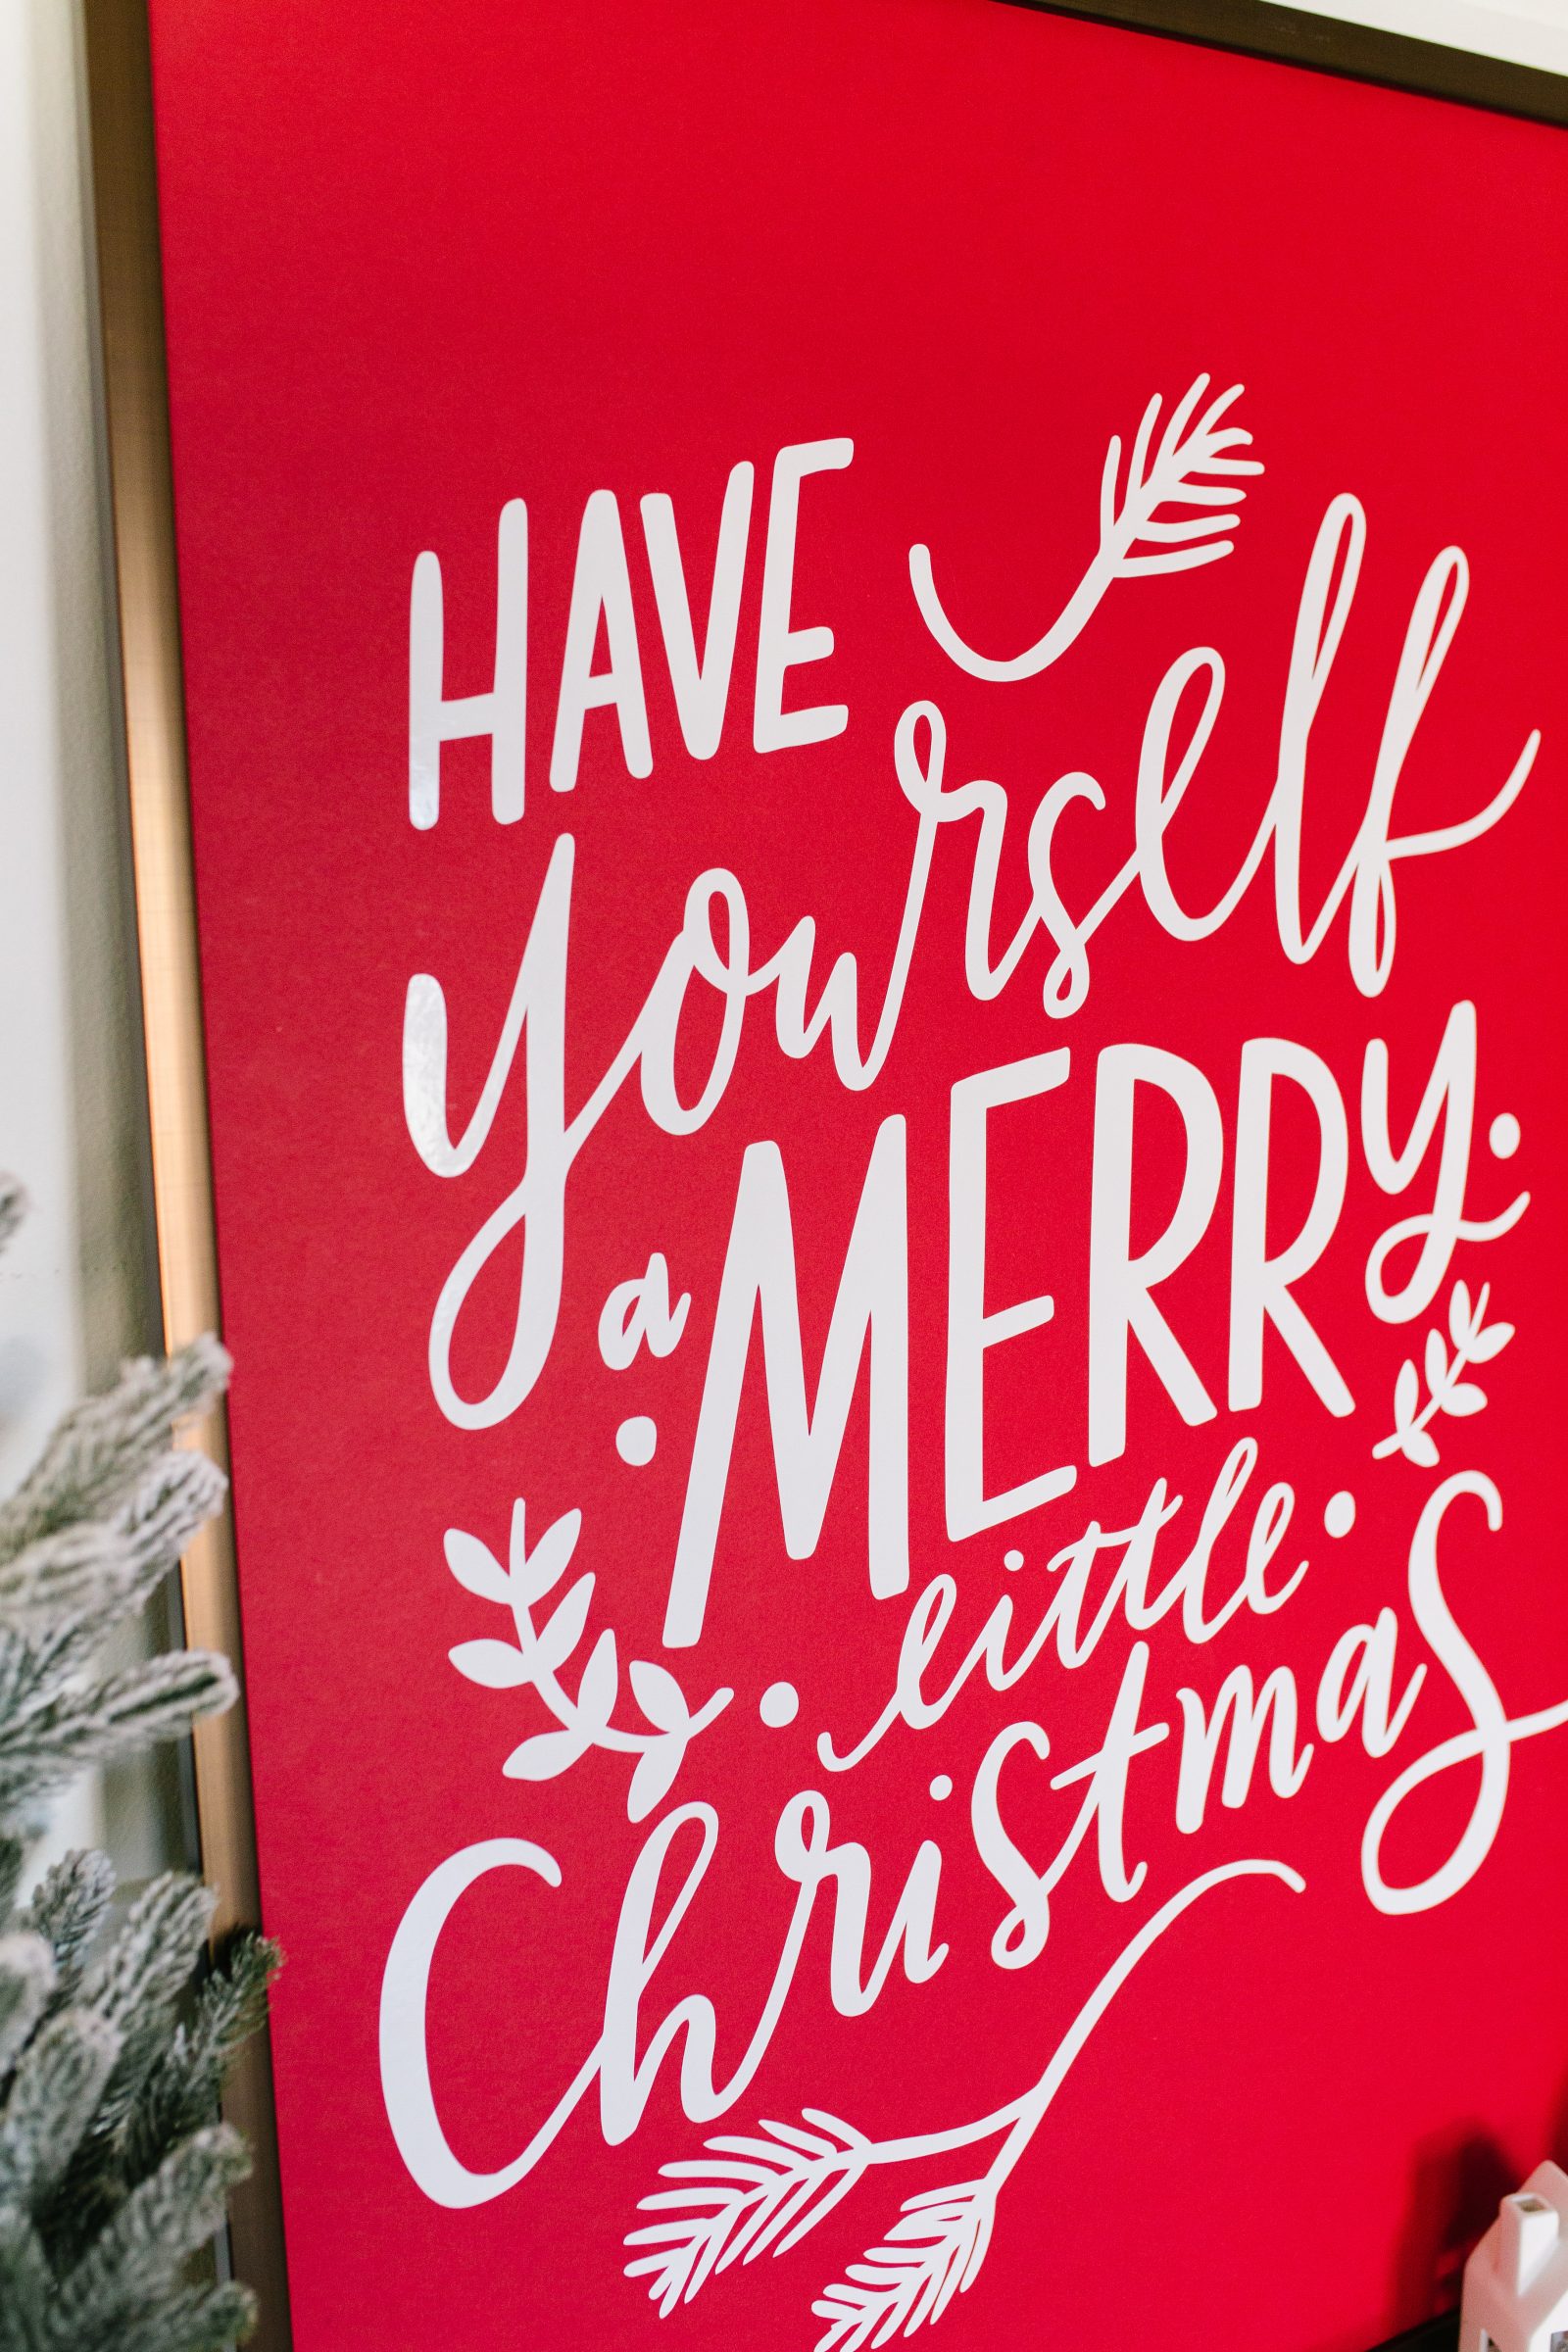

Happy making!
Sam