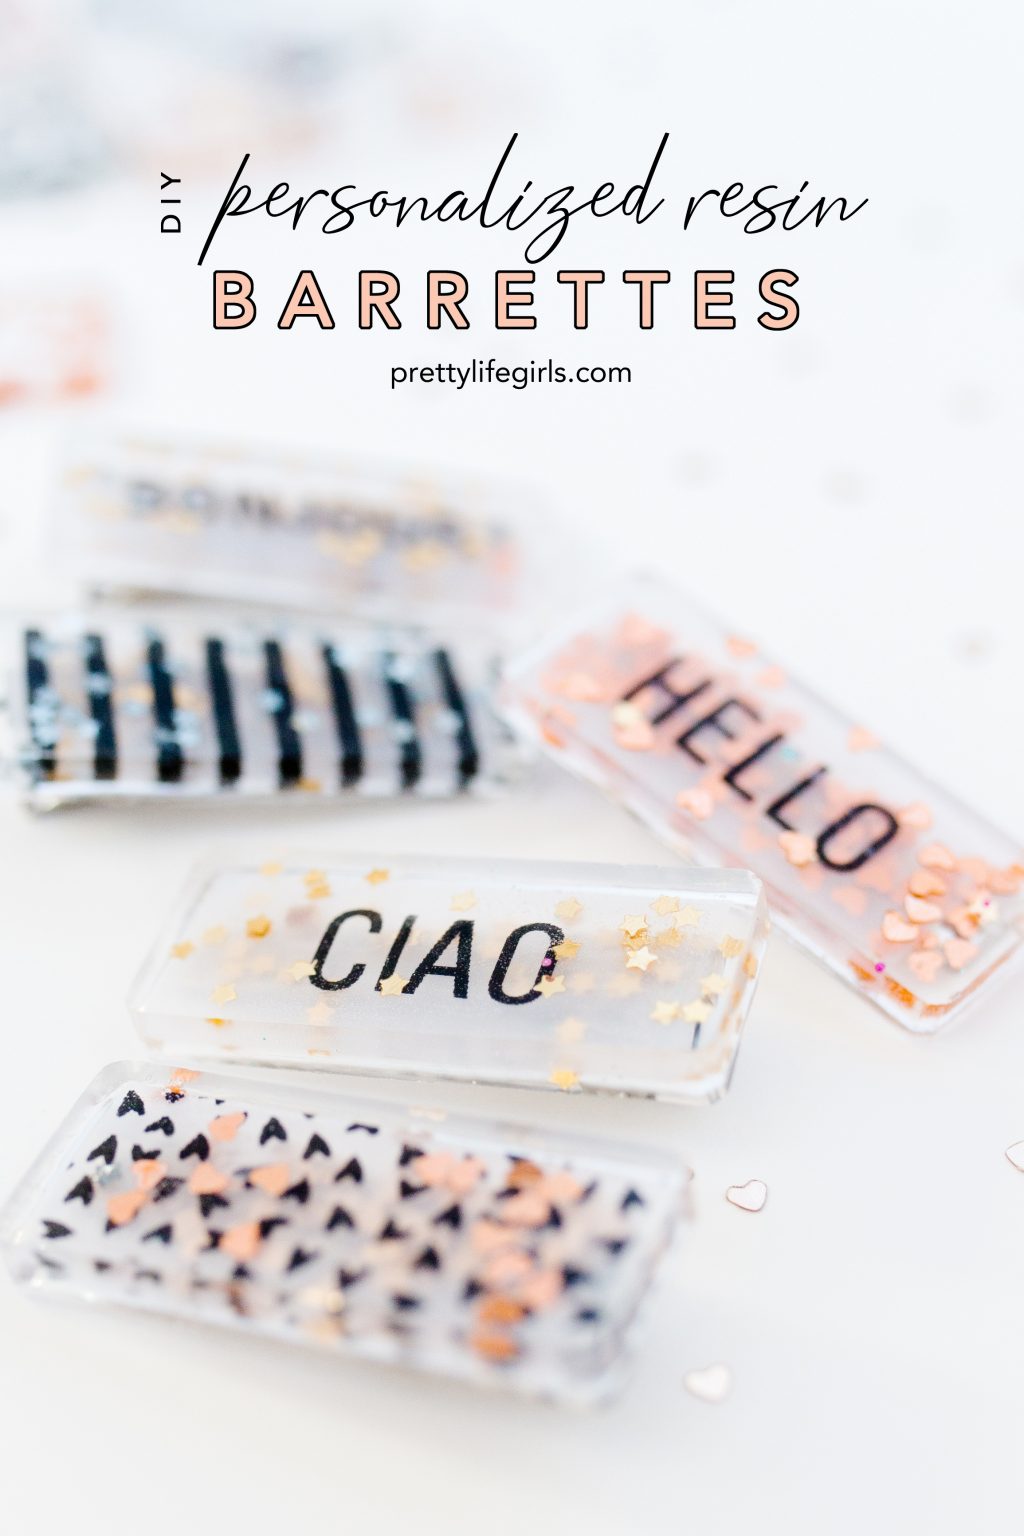
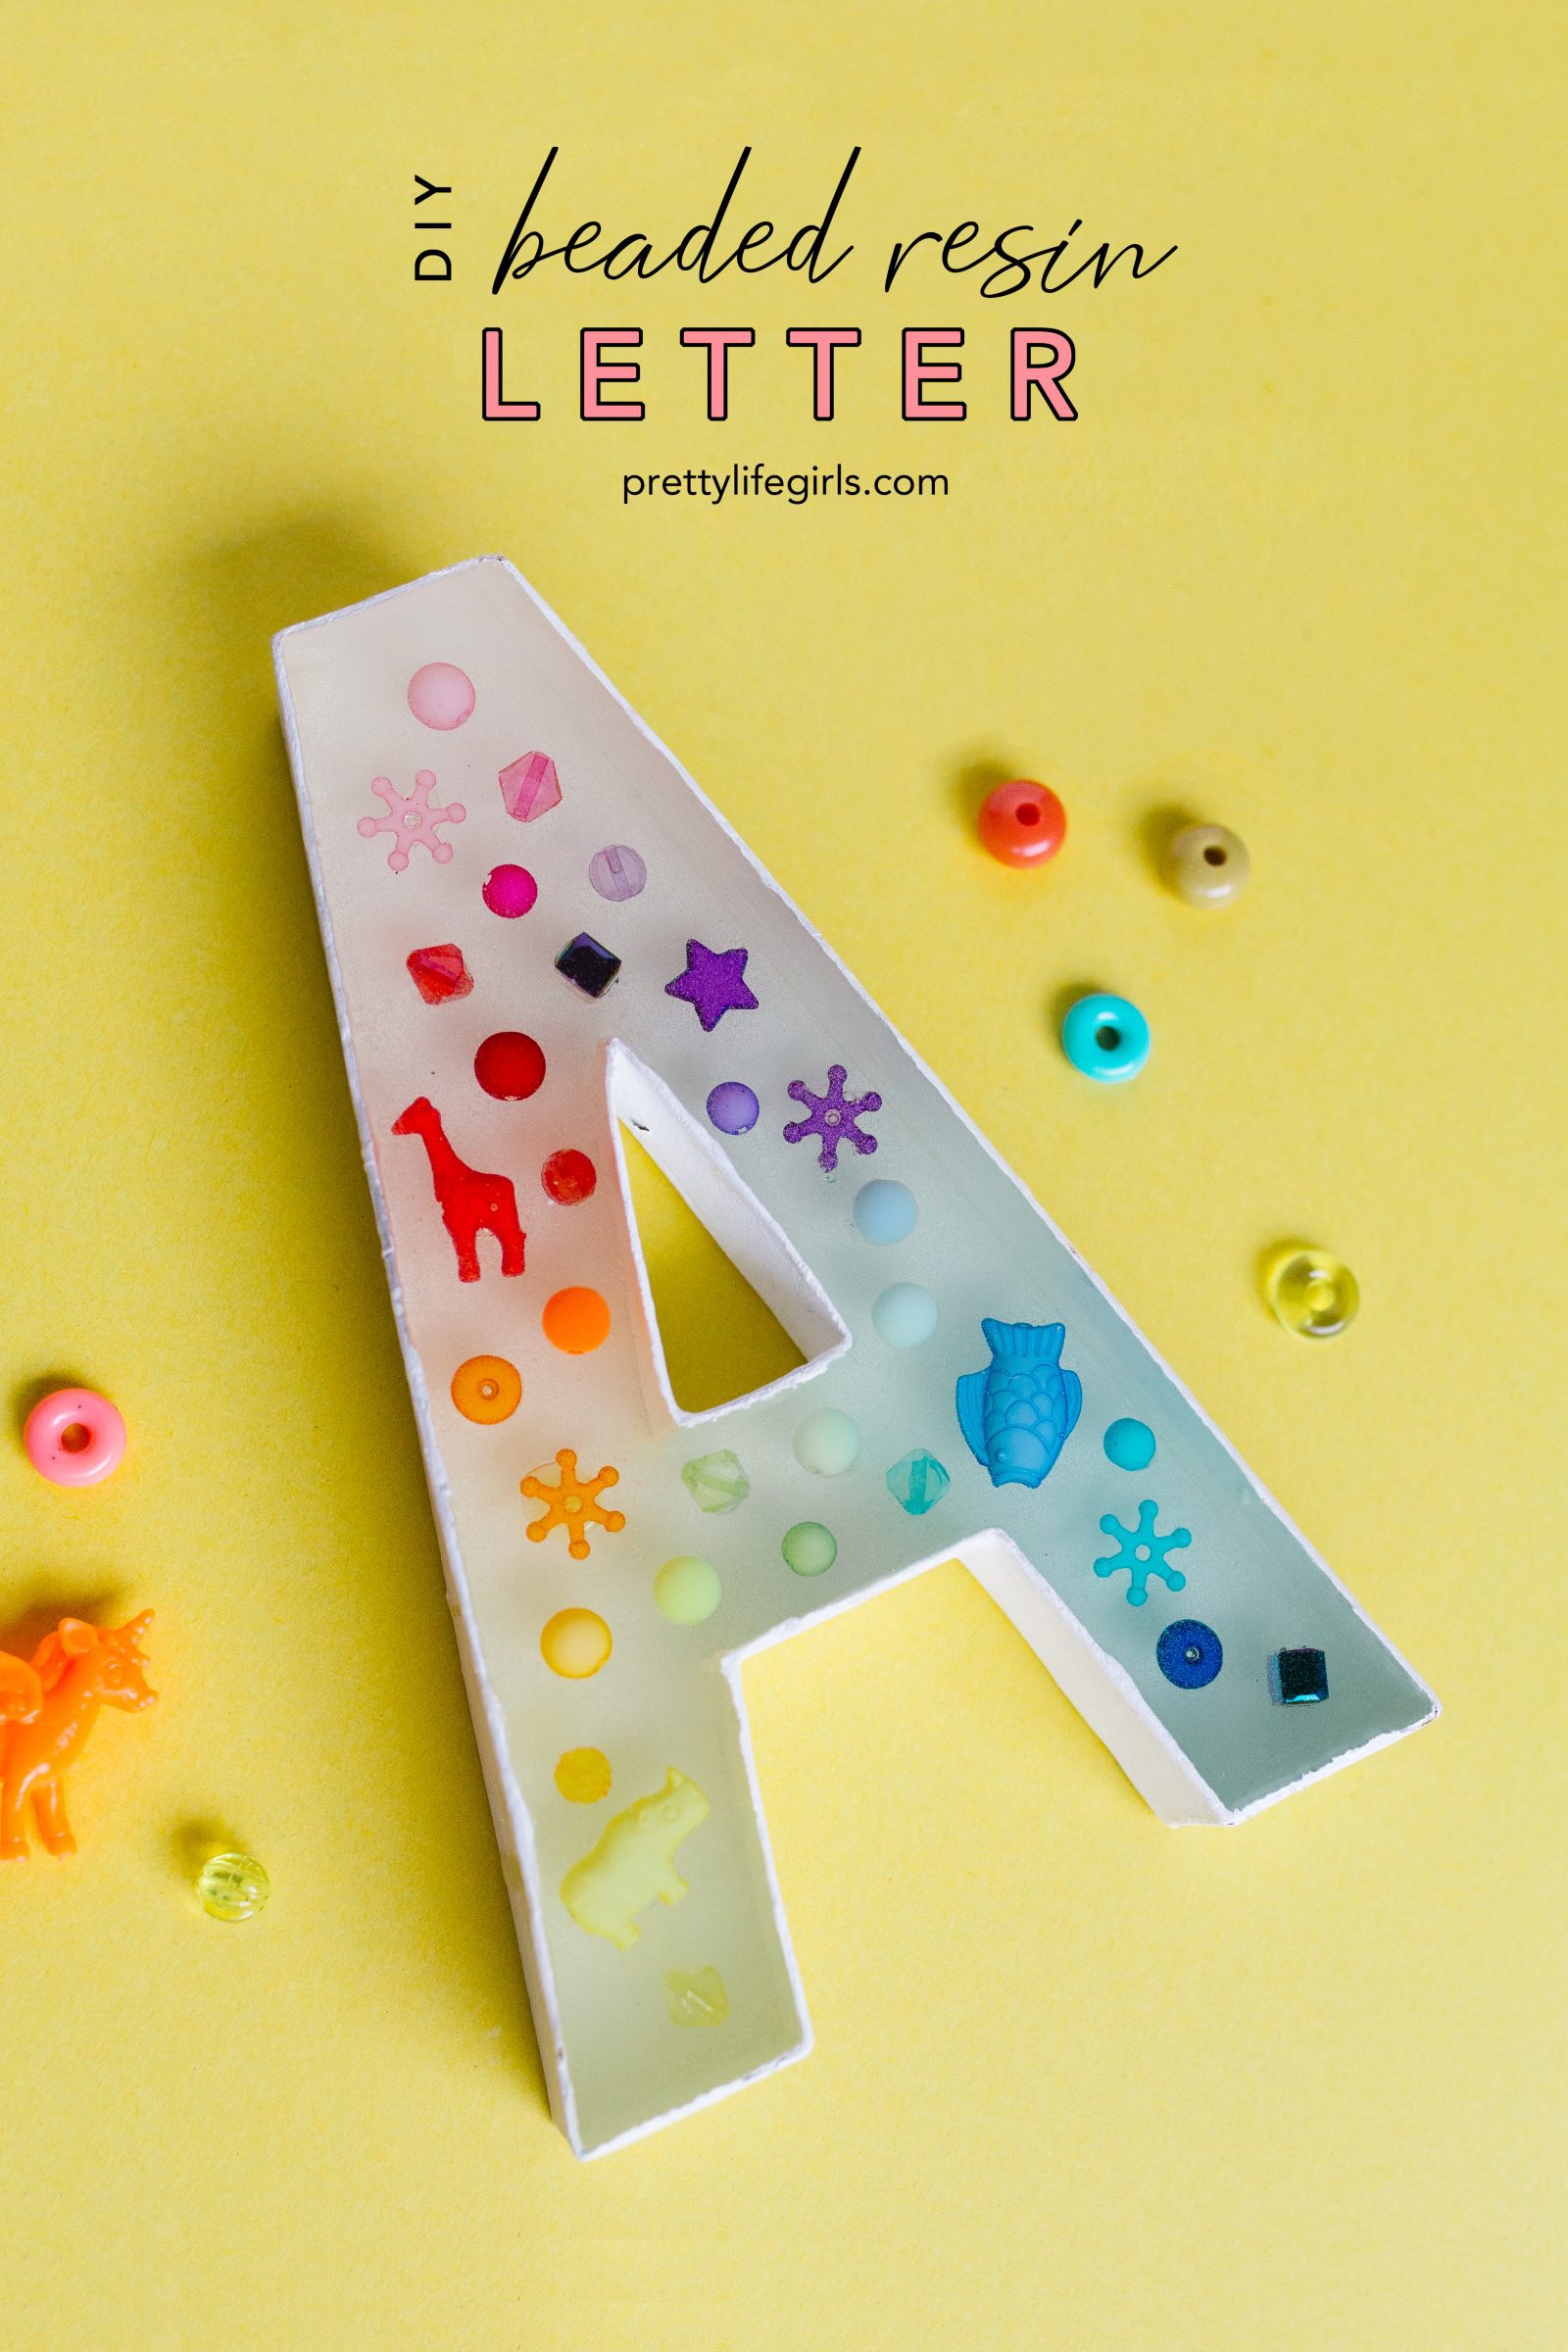
Resin is having a major crafting moment and we are here. for. it. You might have seen our first foray into pouring resin with these graphic barrettes, and since that attempt we have been obsessed with the stuff. It’s so fun to cast everything from glitter to sprinkles in crystal clear resin and today we are making fun resin letter that we love for adding a special touch to a nursery or child’s bedroom. Here is what you need:
Supplies needed to make a DIY Beaded Resin Letter
Box cutter
Paper mache letter
White acrylic paint
Paintbrush
Mod podge
Foam brush
Scissors
Garbage bag or plastic drop cloth
Pourable resin (we used approx 24 oz. of mixed resin, i.e., 12 oz. of epoxy and 12 oz. of hardener)
Rubber gloves
2 Disposable containers
2 Wooden paint stirrers or large wooden craft sticks
Cardboard box large enough to cover the letter
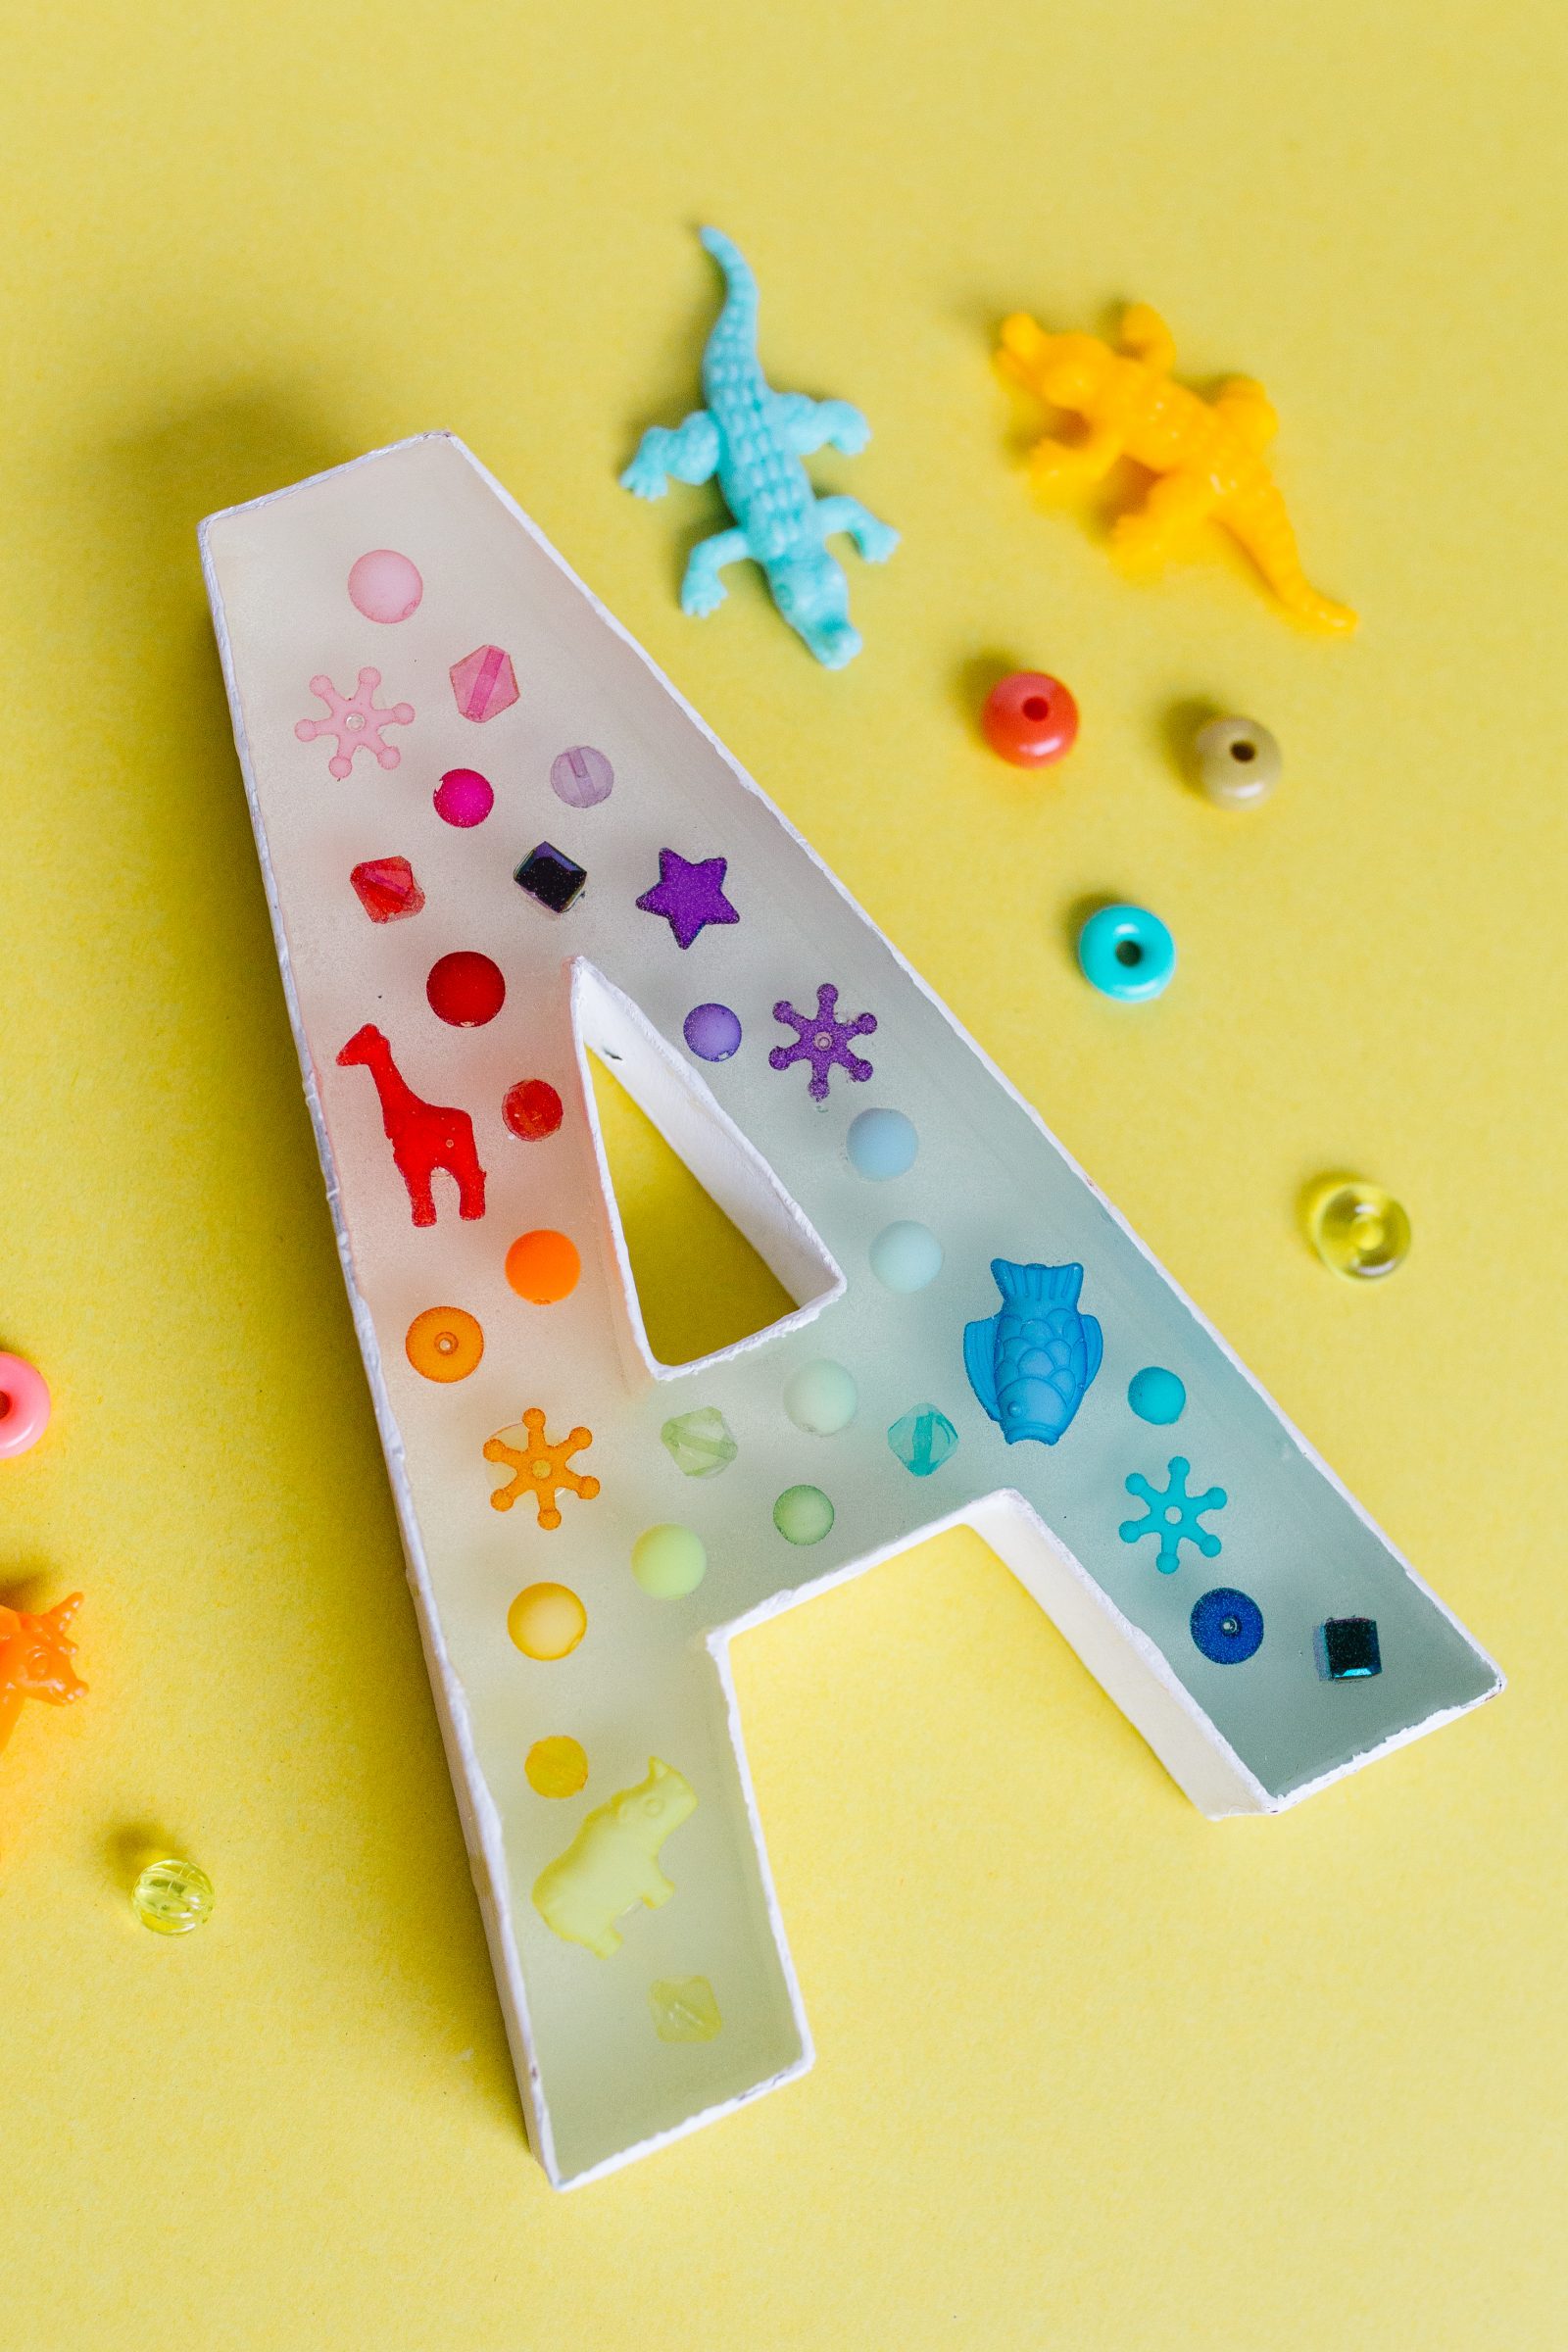
Assorted beads
Hot glue gun filled with glue
Drinking straw
How to make a DIY Beaded Resin Letter
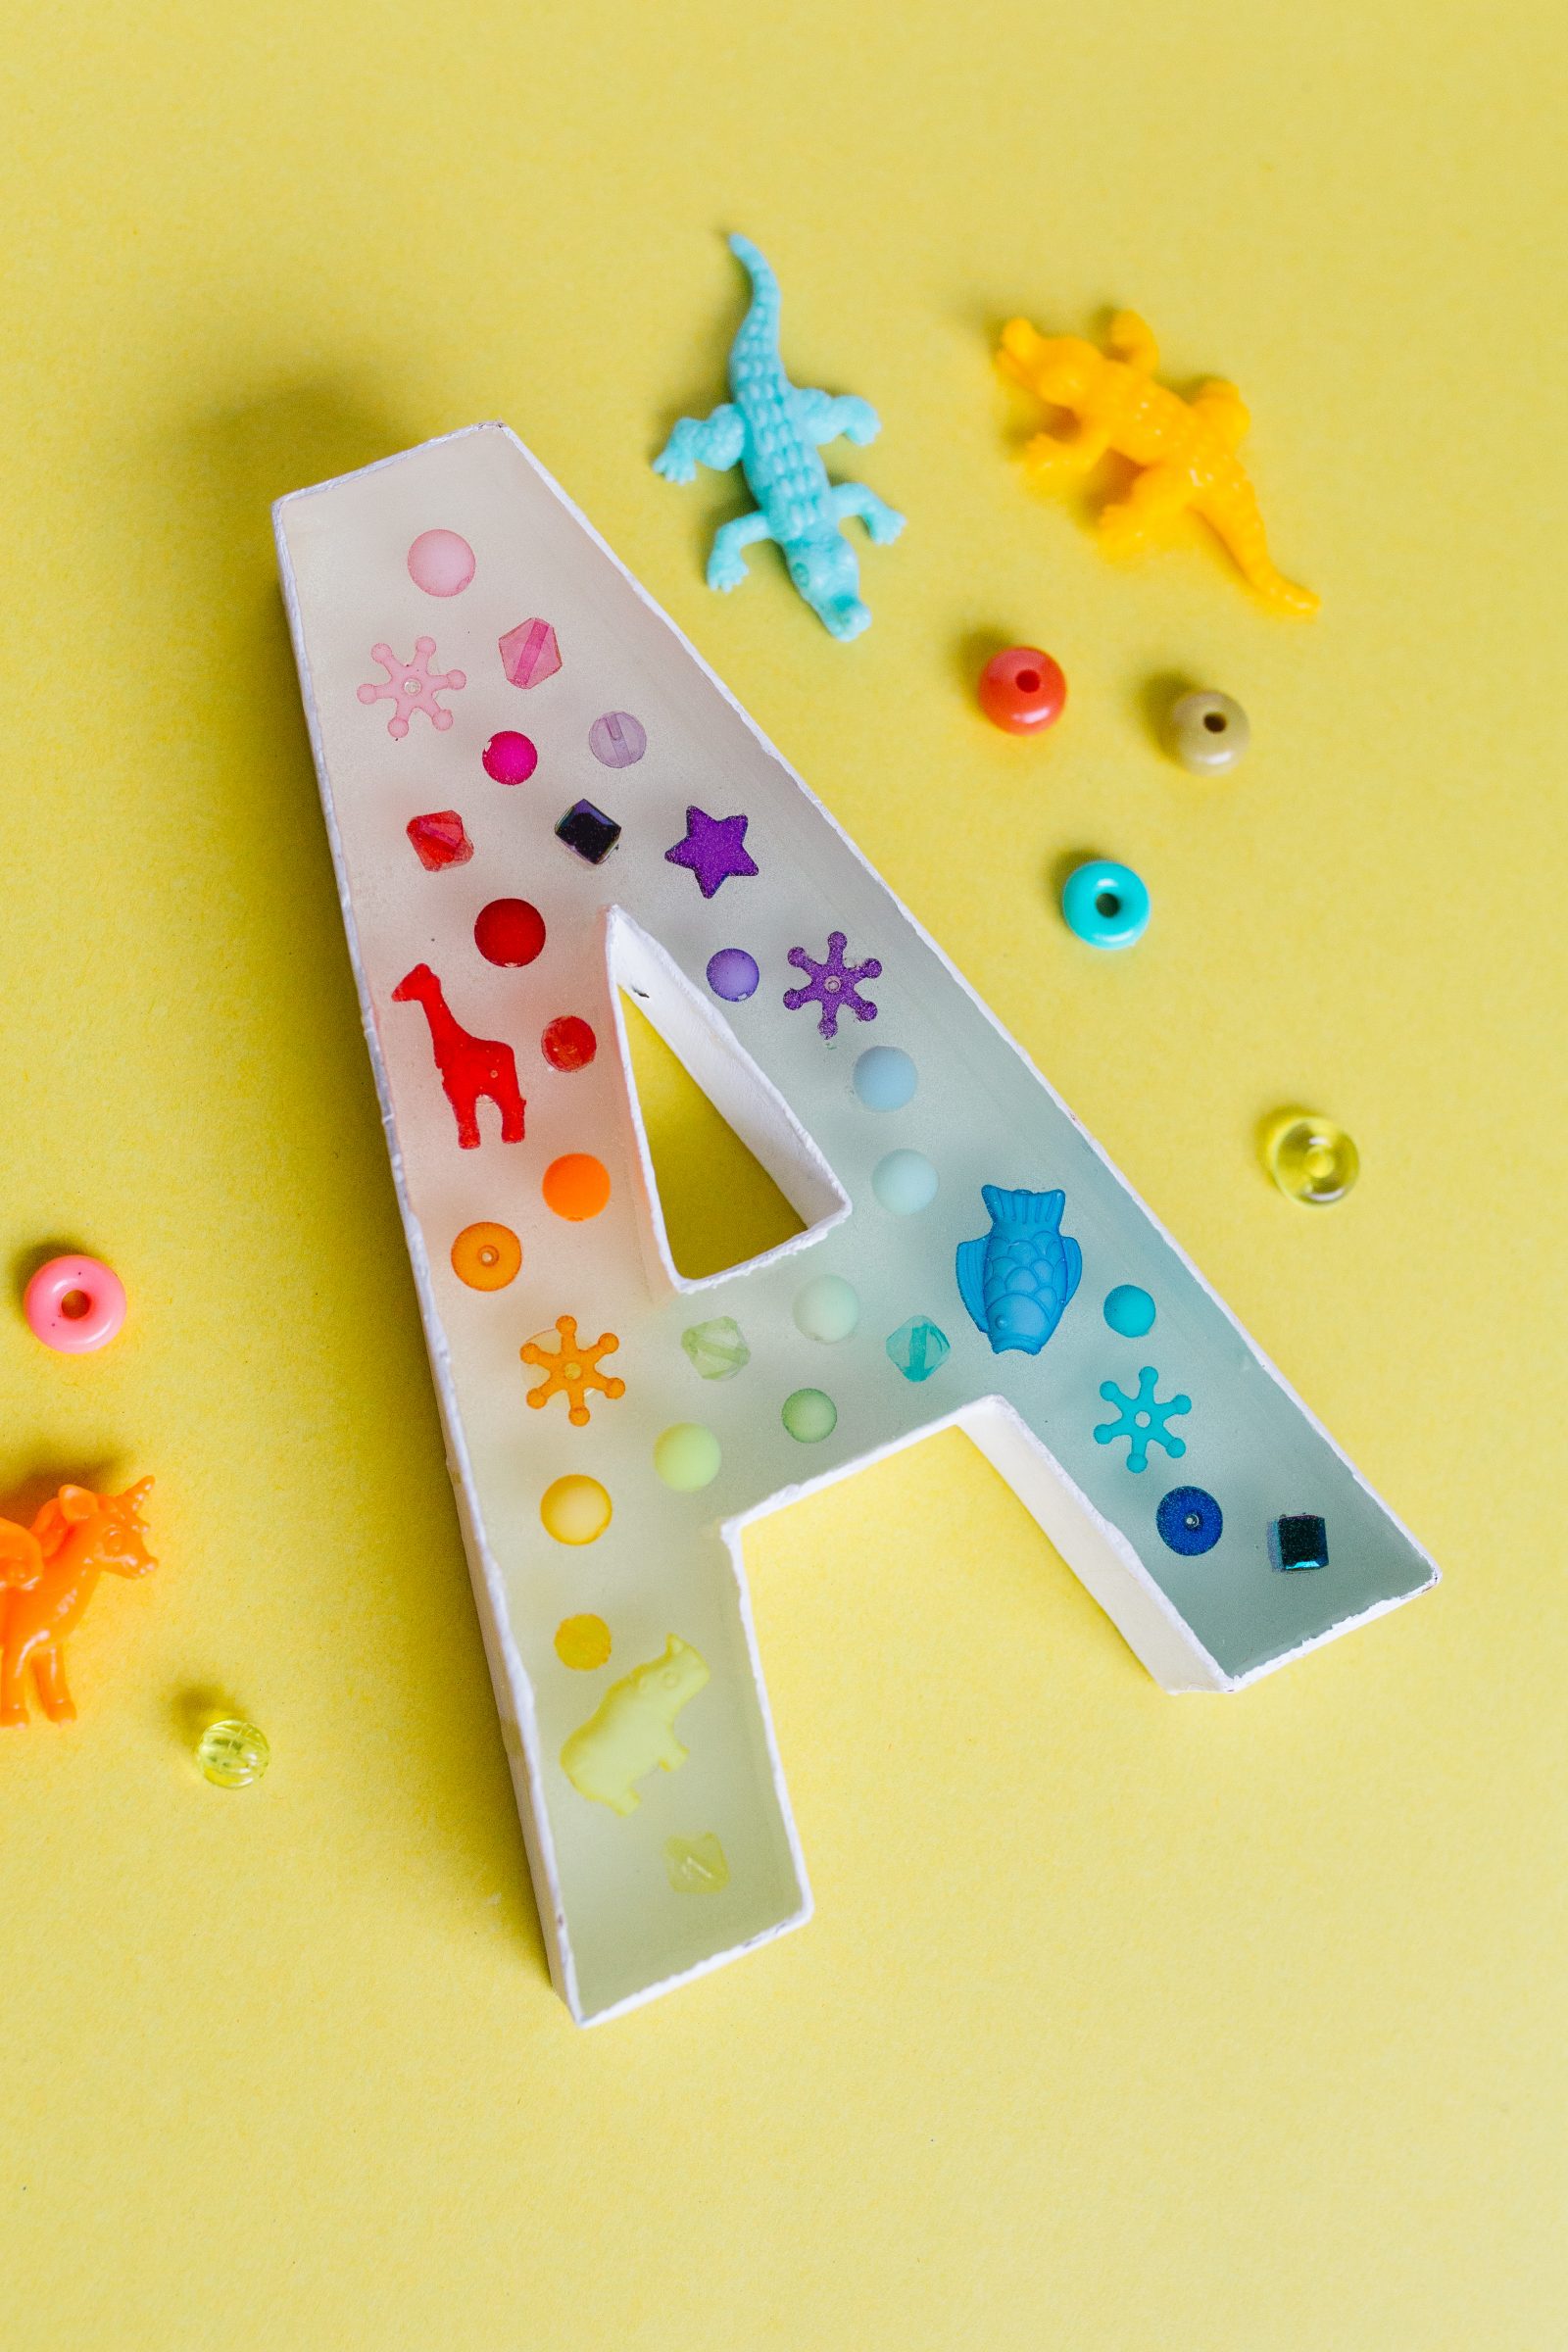
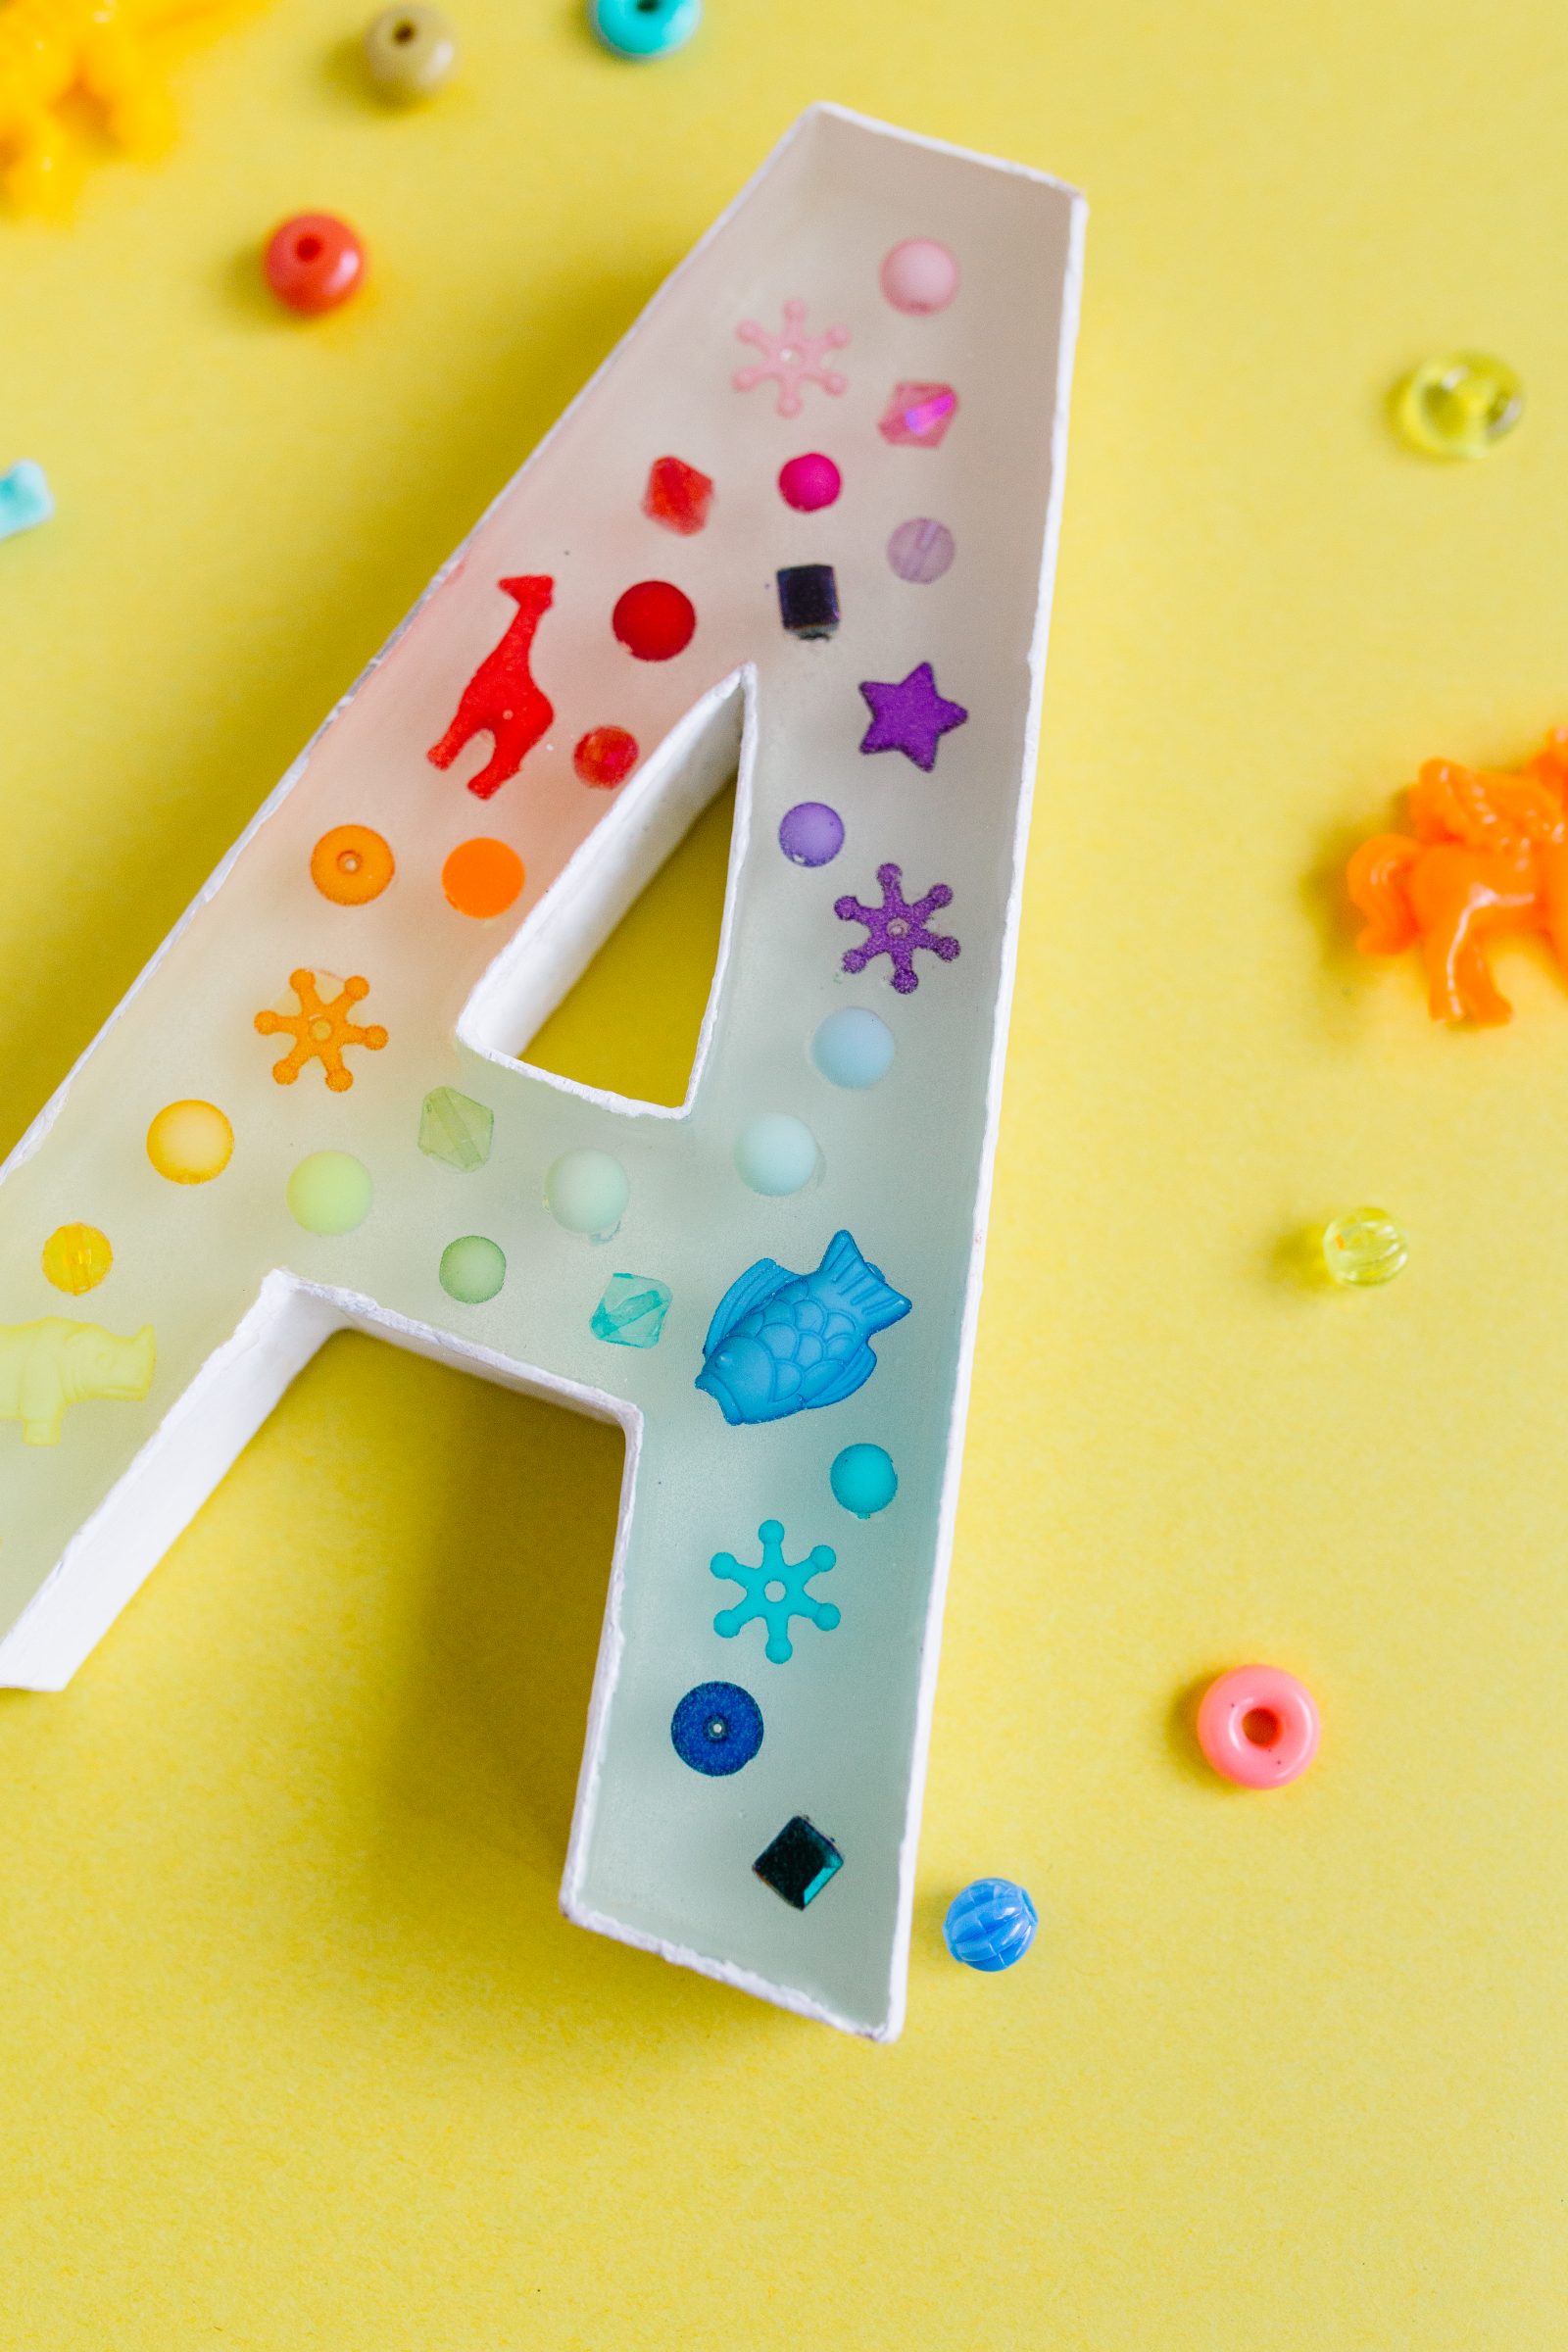
- Using a box cutter, remove the front panel of the chipboard letter and any interior pieces to create a hollow chipboard letter.
- Paint the letter with two to three coats of white paint. Let the paint dry completely between each coat.
- Apply a generous layer of Mod Podge to each letter using a foam brush. Let the Mod Podge dry completely.
- Prepare your workspace for resin pouring. Place a smooth garbage bag or plastic drop cloth on an even surface, and put on gloves.
- Prepare the first 12 oz. of resin according to package directions. Generally this means mixing an equal amount of clear epoxy resin and clear epoxy hardener in a disposable container with a wooden paint stirrer or large wooden craft stick, then mixing it slowly (to help avoid bubbles) for about 5 minutes.
- Fill each letter halfway with resin. If desired, cover the letters with a cardboard box to prevent dust or debris from landing in the resin. Let the resin cure completely according to package directions.
- Dispose of the used mixing tools. Do not reuse for the next batch of resin.
- Once the resin is cured completely, glue the beads directly onto the resin using a hot glue gun.
- Prepare the remaining 12 oz. of resin according to previous directions and slowly pour over beads until the resin just fills the letter. Do not overfill.
- If bubbles are present, hover over the bubbles with a straw and gently blow through the straw to remove them.
- Cover with the letter with a box and let the resin cure completely (overnight worked for us!) before displaying.
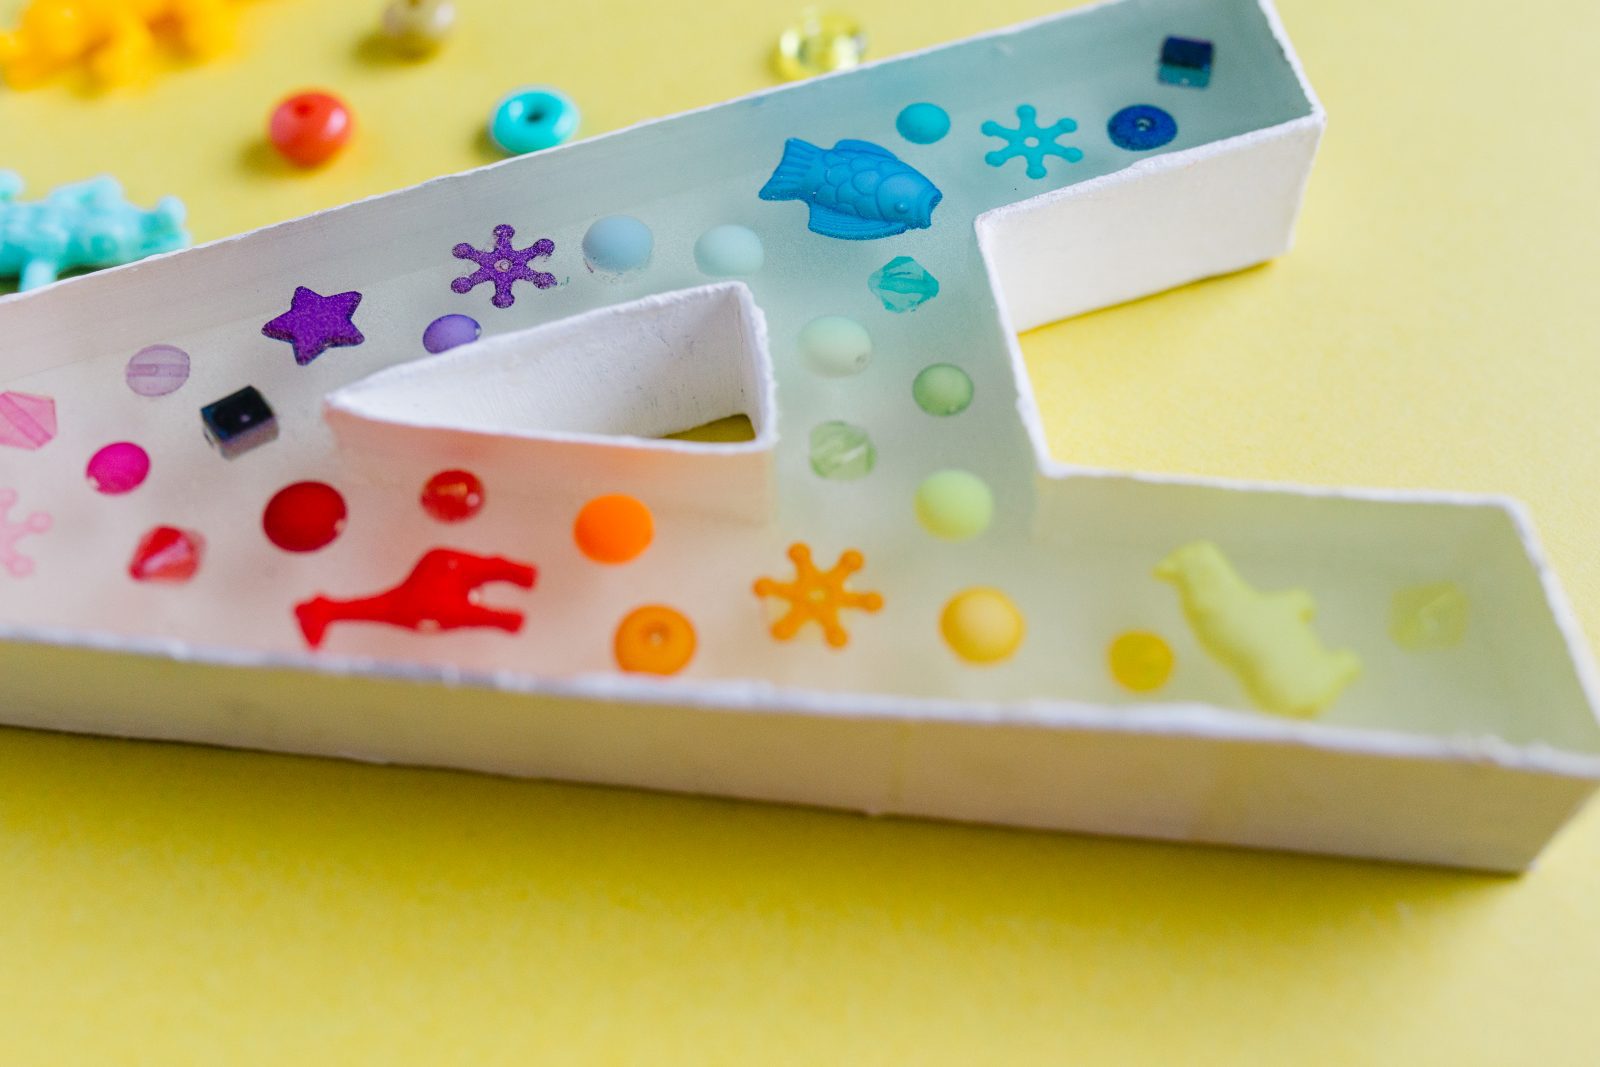
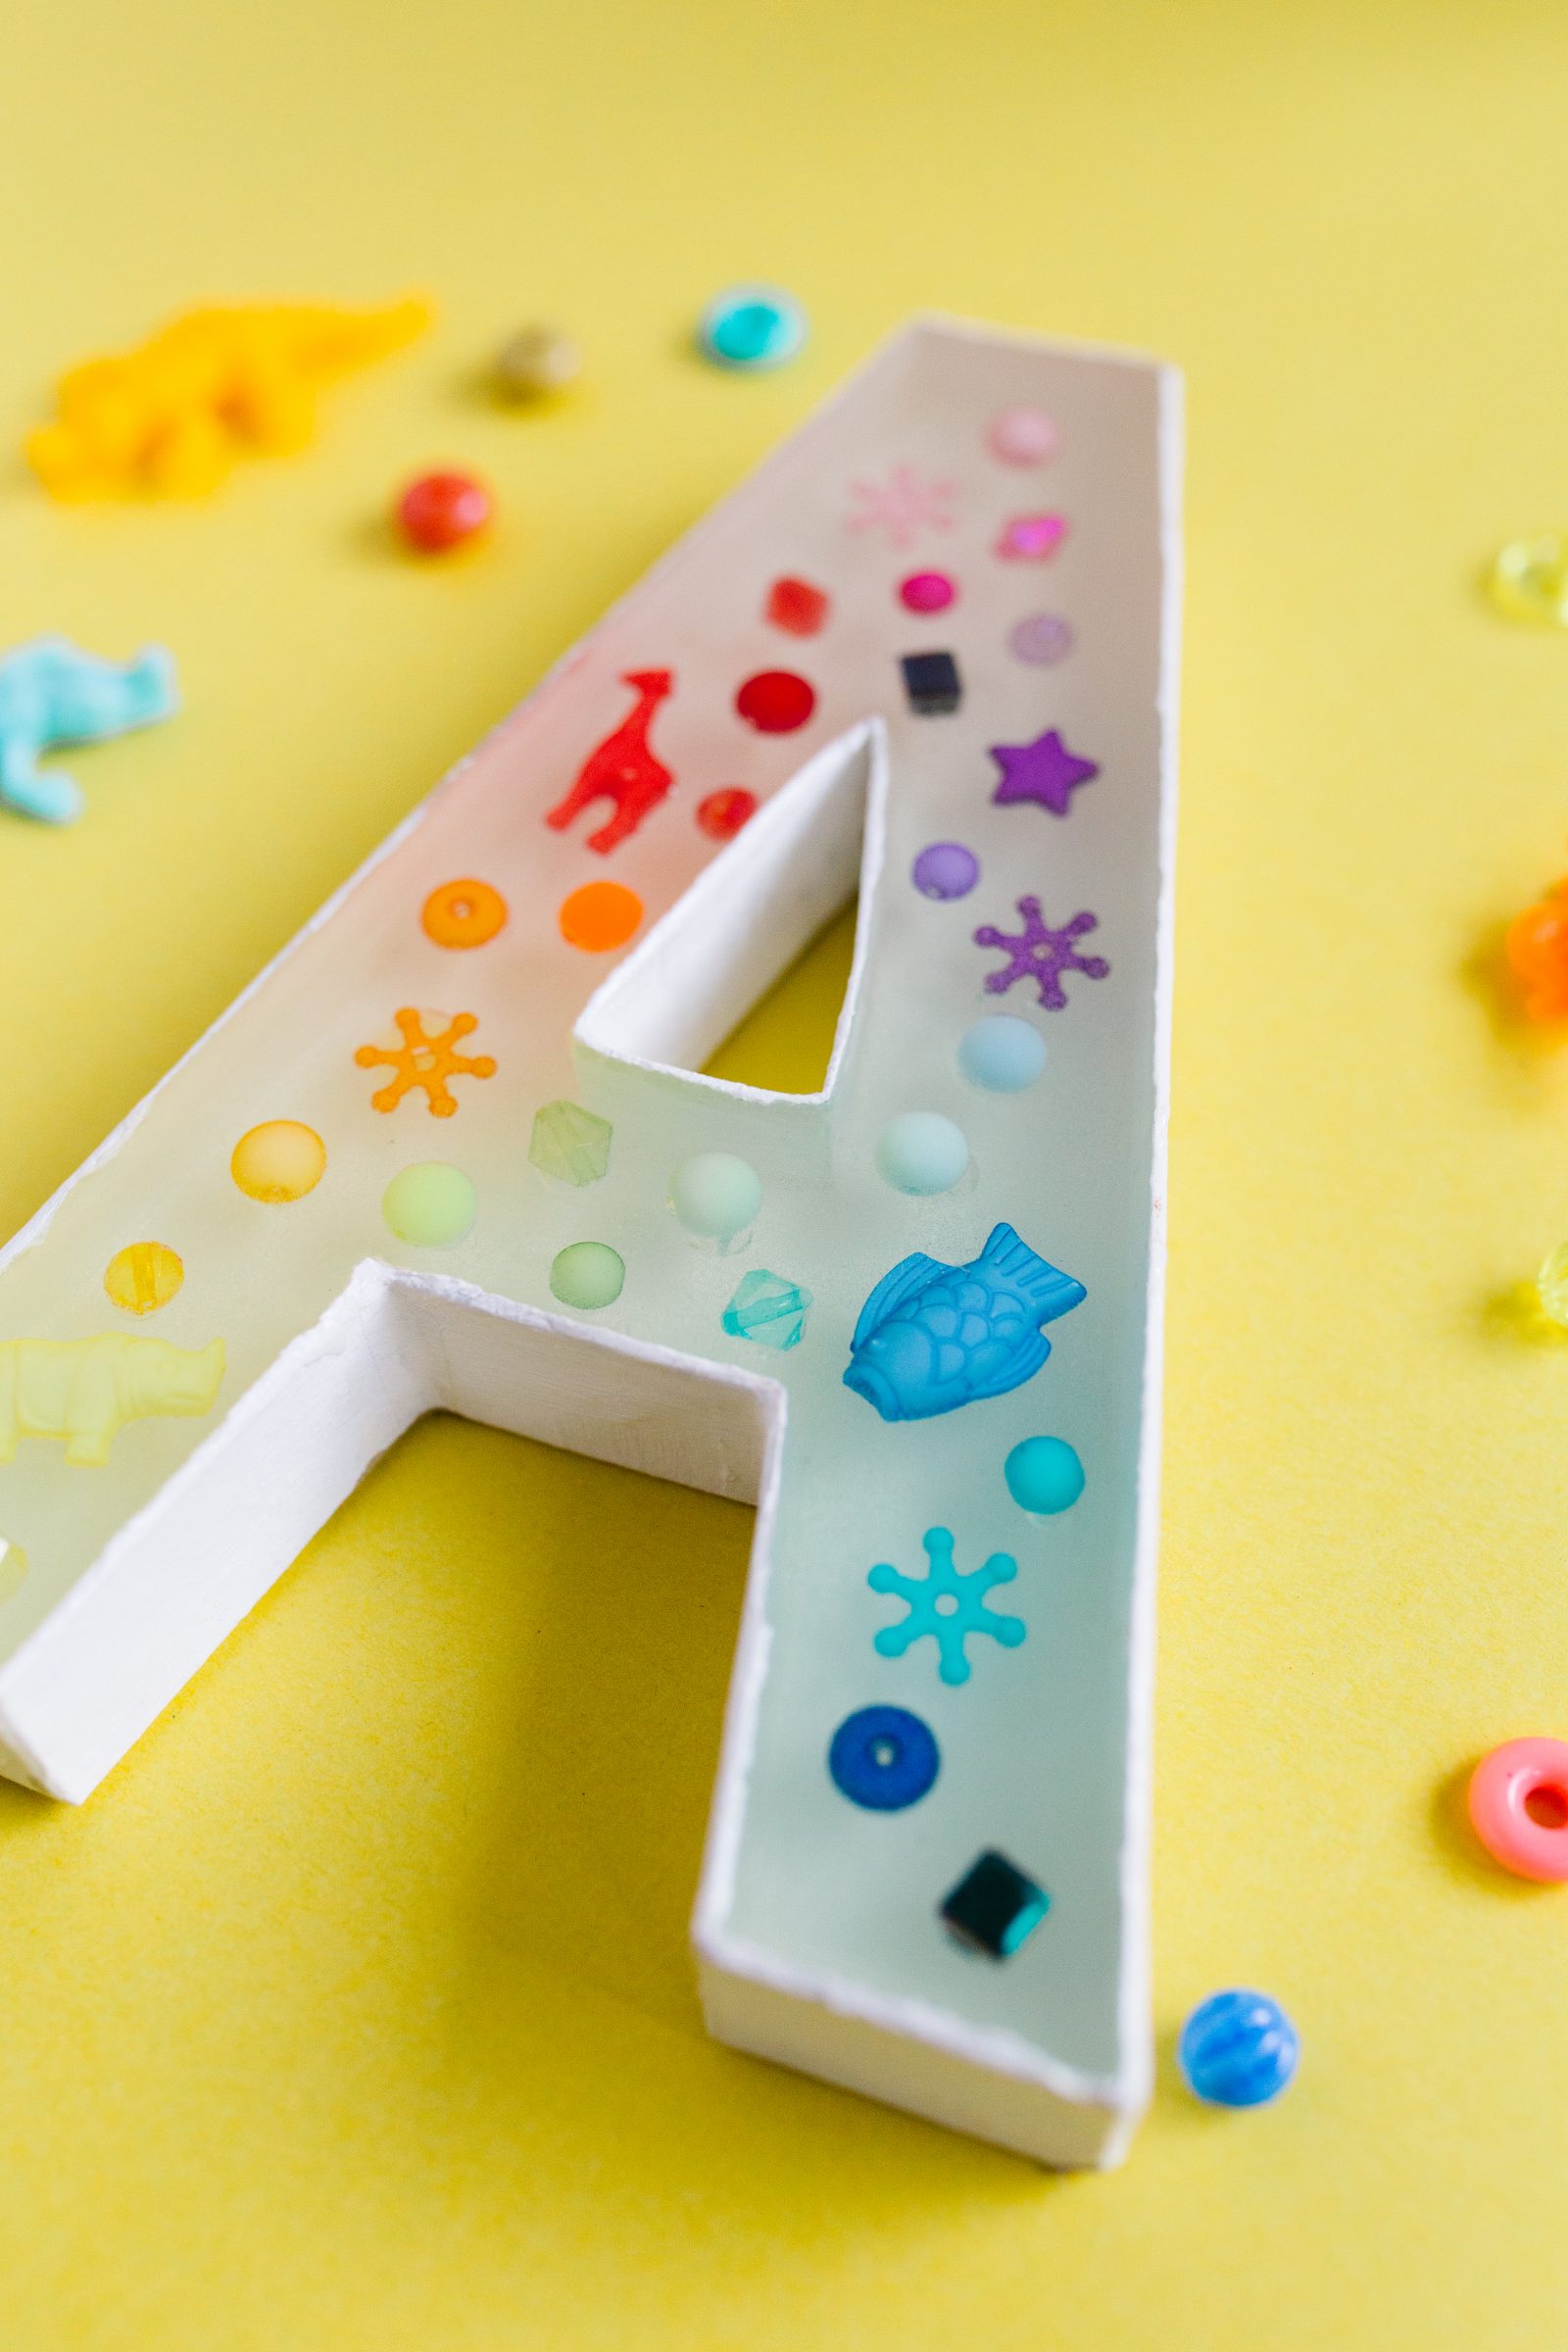
Isn’t that the most fun? Just think of the things your could cast! We love the graphic element that the beads add to this cutie, but you could swap them out for any little embellishment or trinket that fit your decor or was sentimental to you! The possibilities are endless! Plus, resin dries so solid that this thing is hard as a rock and is nearly indestructible, which is definitely a pre-req if it’s going in my kid’s rooms.
So, what do you think? Are your ready to try resin? Let us know if you have any questions about getting started! We know you’re gonna love it!
Happy making!
ox. Liz