This Paper Chain Backdrop post was originally published in August 2019 and updated as of May 2022. This post may contain affiliate links, which help us support this site.
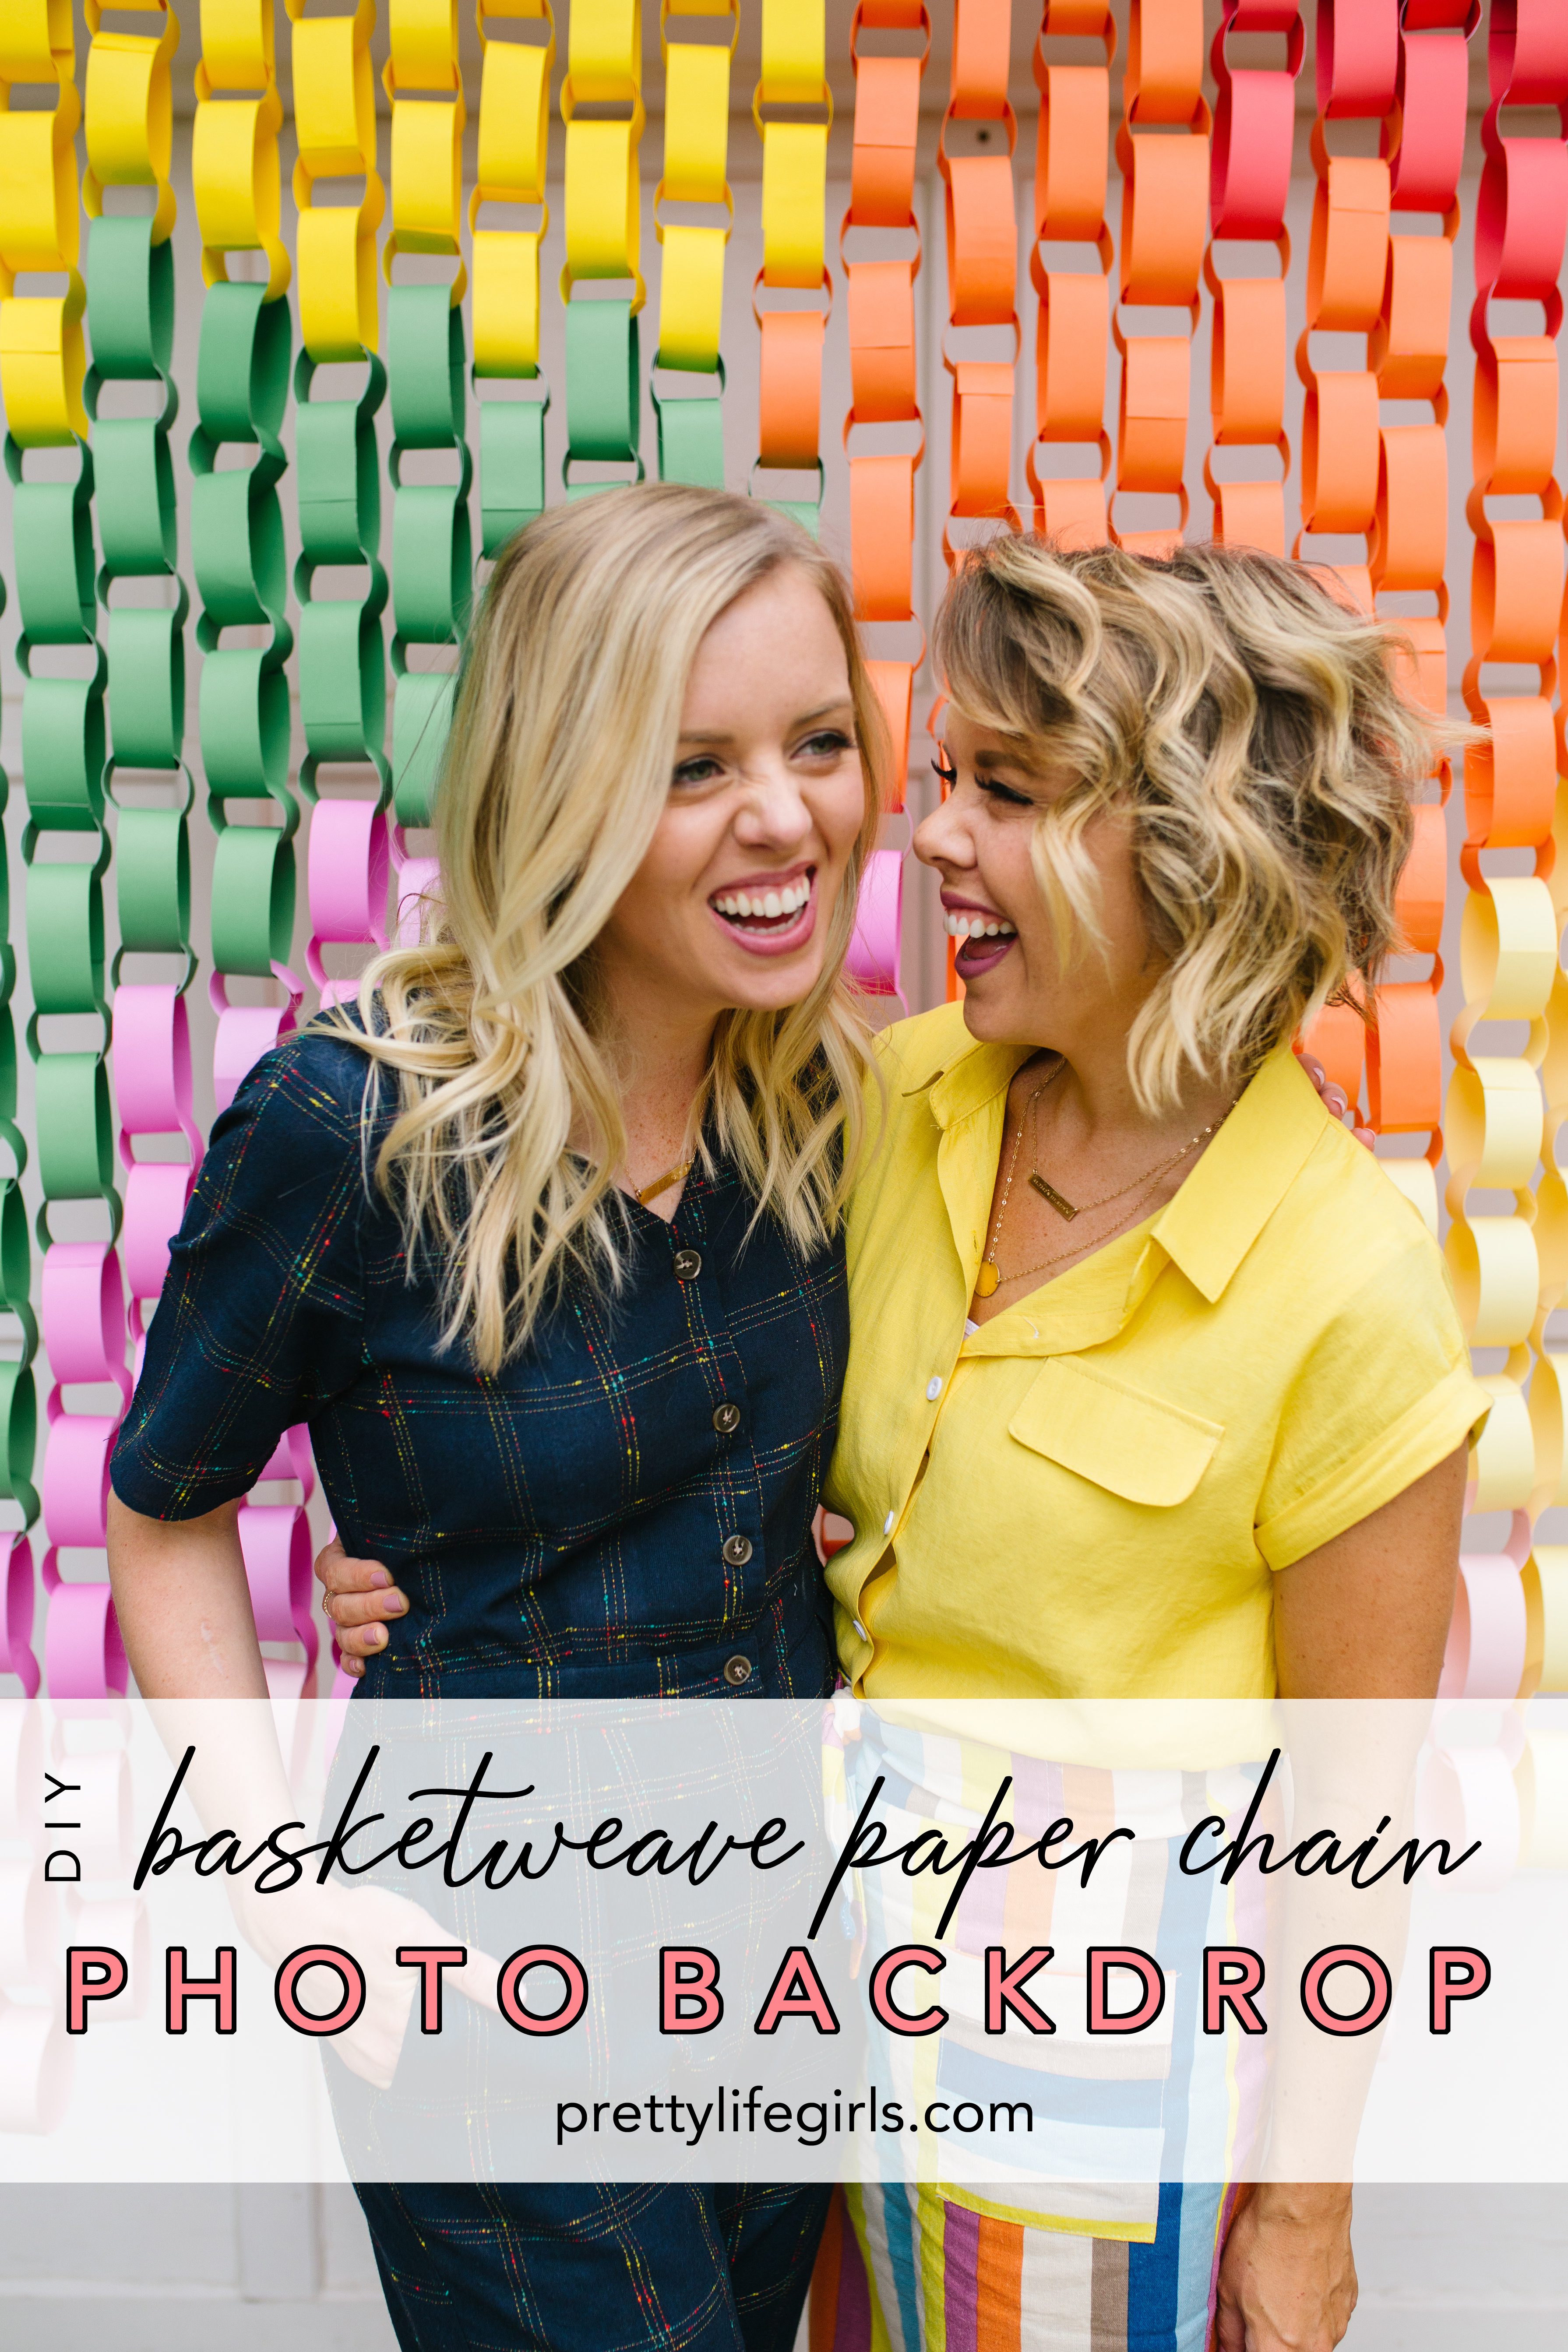
When we made our first paper chain display (inspired by this one from the House that Lars Built), we sort of caught a paper chain fever, and now we want to make ALL THE PAPER CHAIN CRAFTS. We love them. One of our latest paper chain projects is this Basket Weave Paper Chain Backdrop – a little twist on our original paper chain backdrop – and we are excited to share it here on the blog! Keep scrolling for the tutorial.
Supplies needed to make your own Basket Weave Paper Chain Backdrop
Backdrop template (Access it at the bottom of this post)
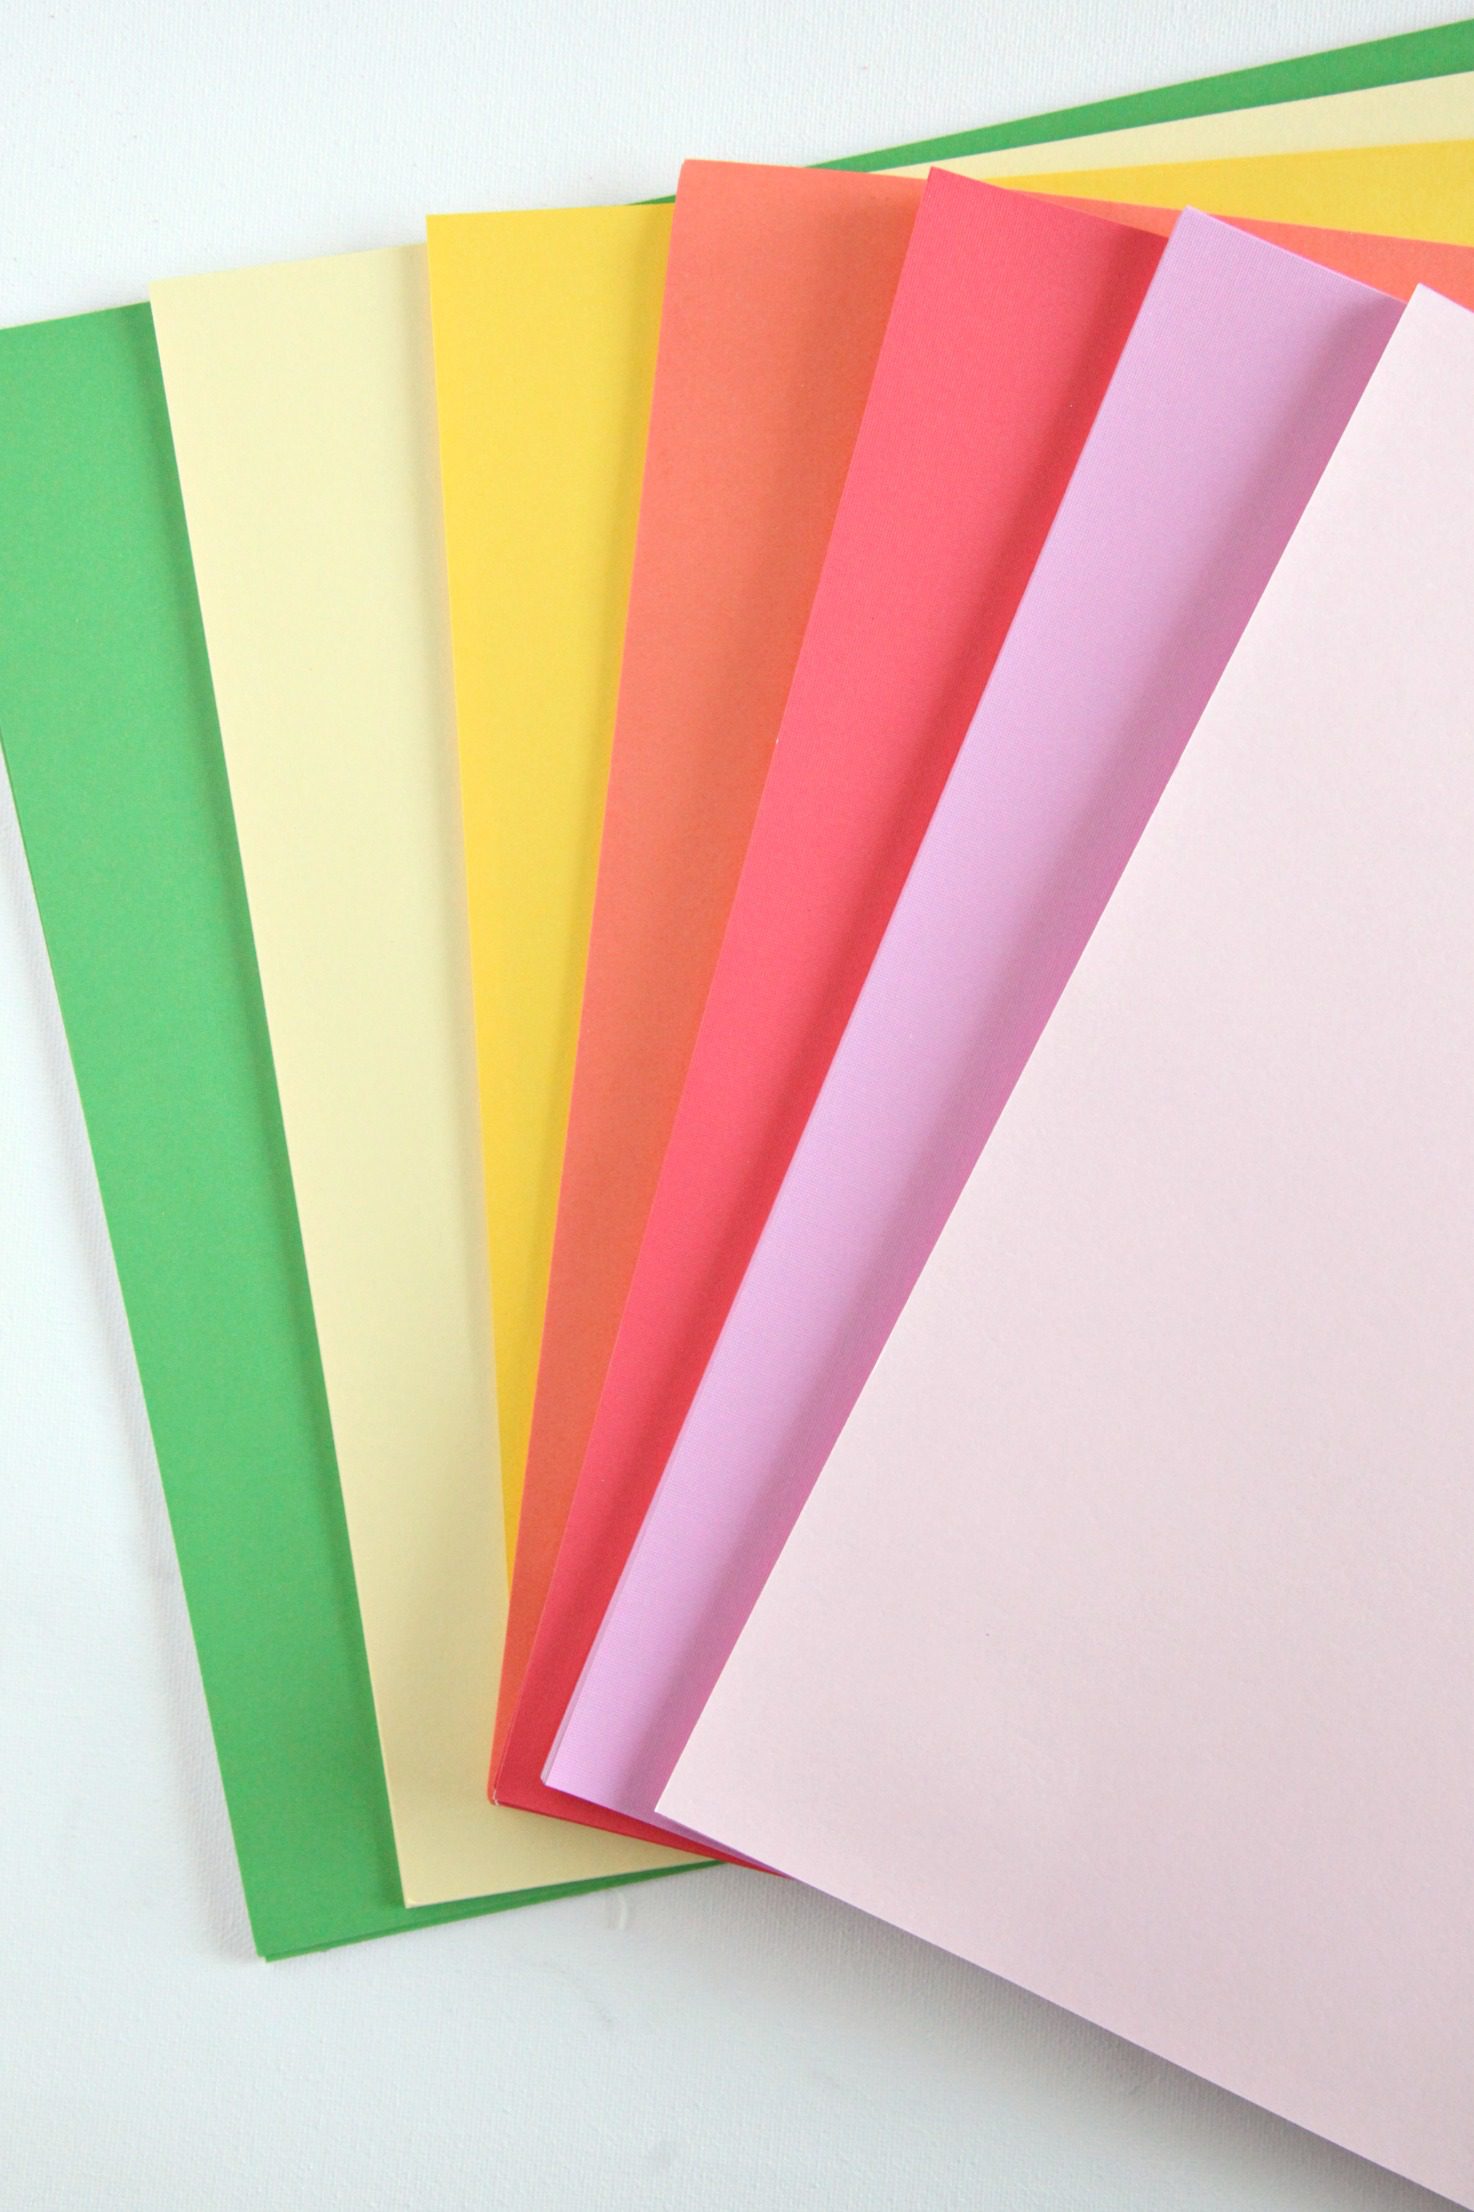
12×12 Cardstock (9 green, 10 cream, 10 yellow, 16 peach, 10 red, 12 dark pink, 14 light pink)
Paper slicer
Hot glue/glue gun
Backdrop stand (or dowels)
How to make your own Basket Weave Paper Chain Backdrop
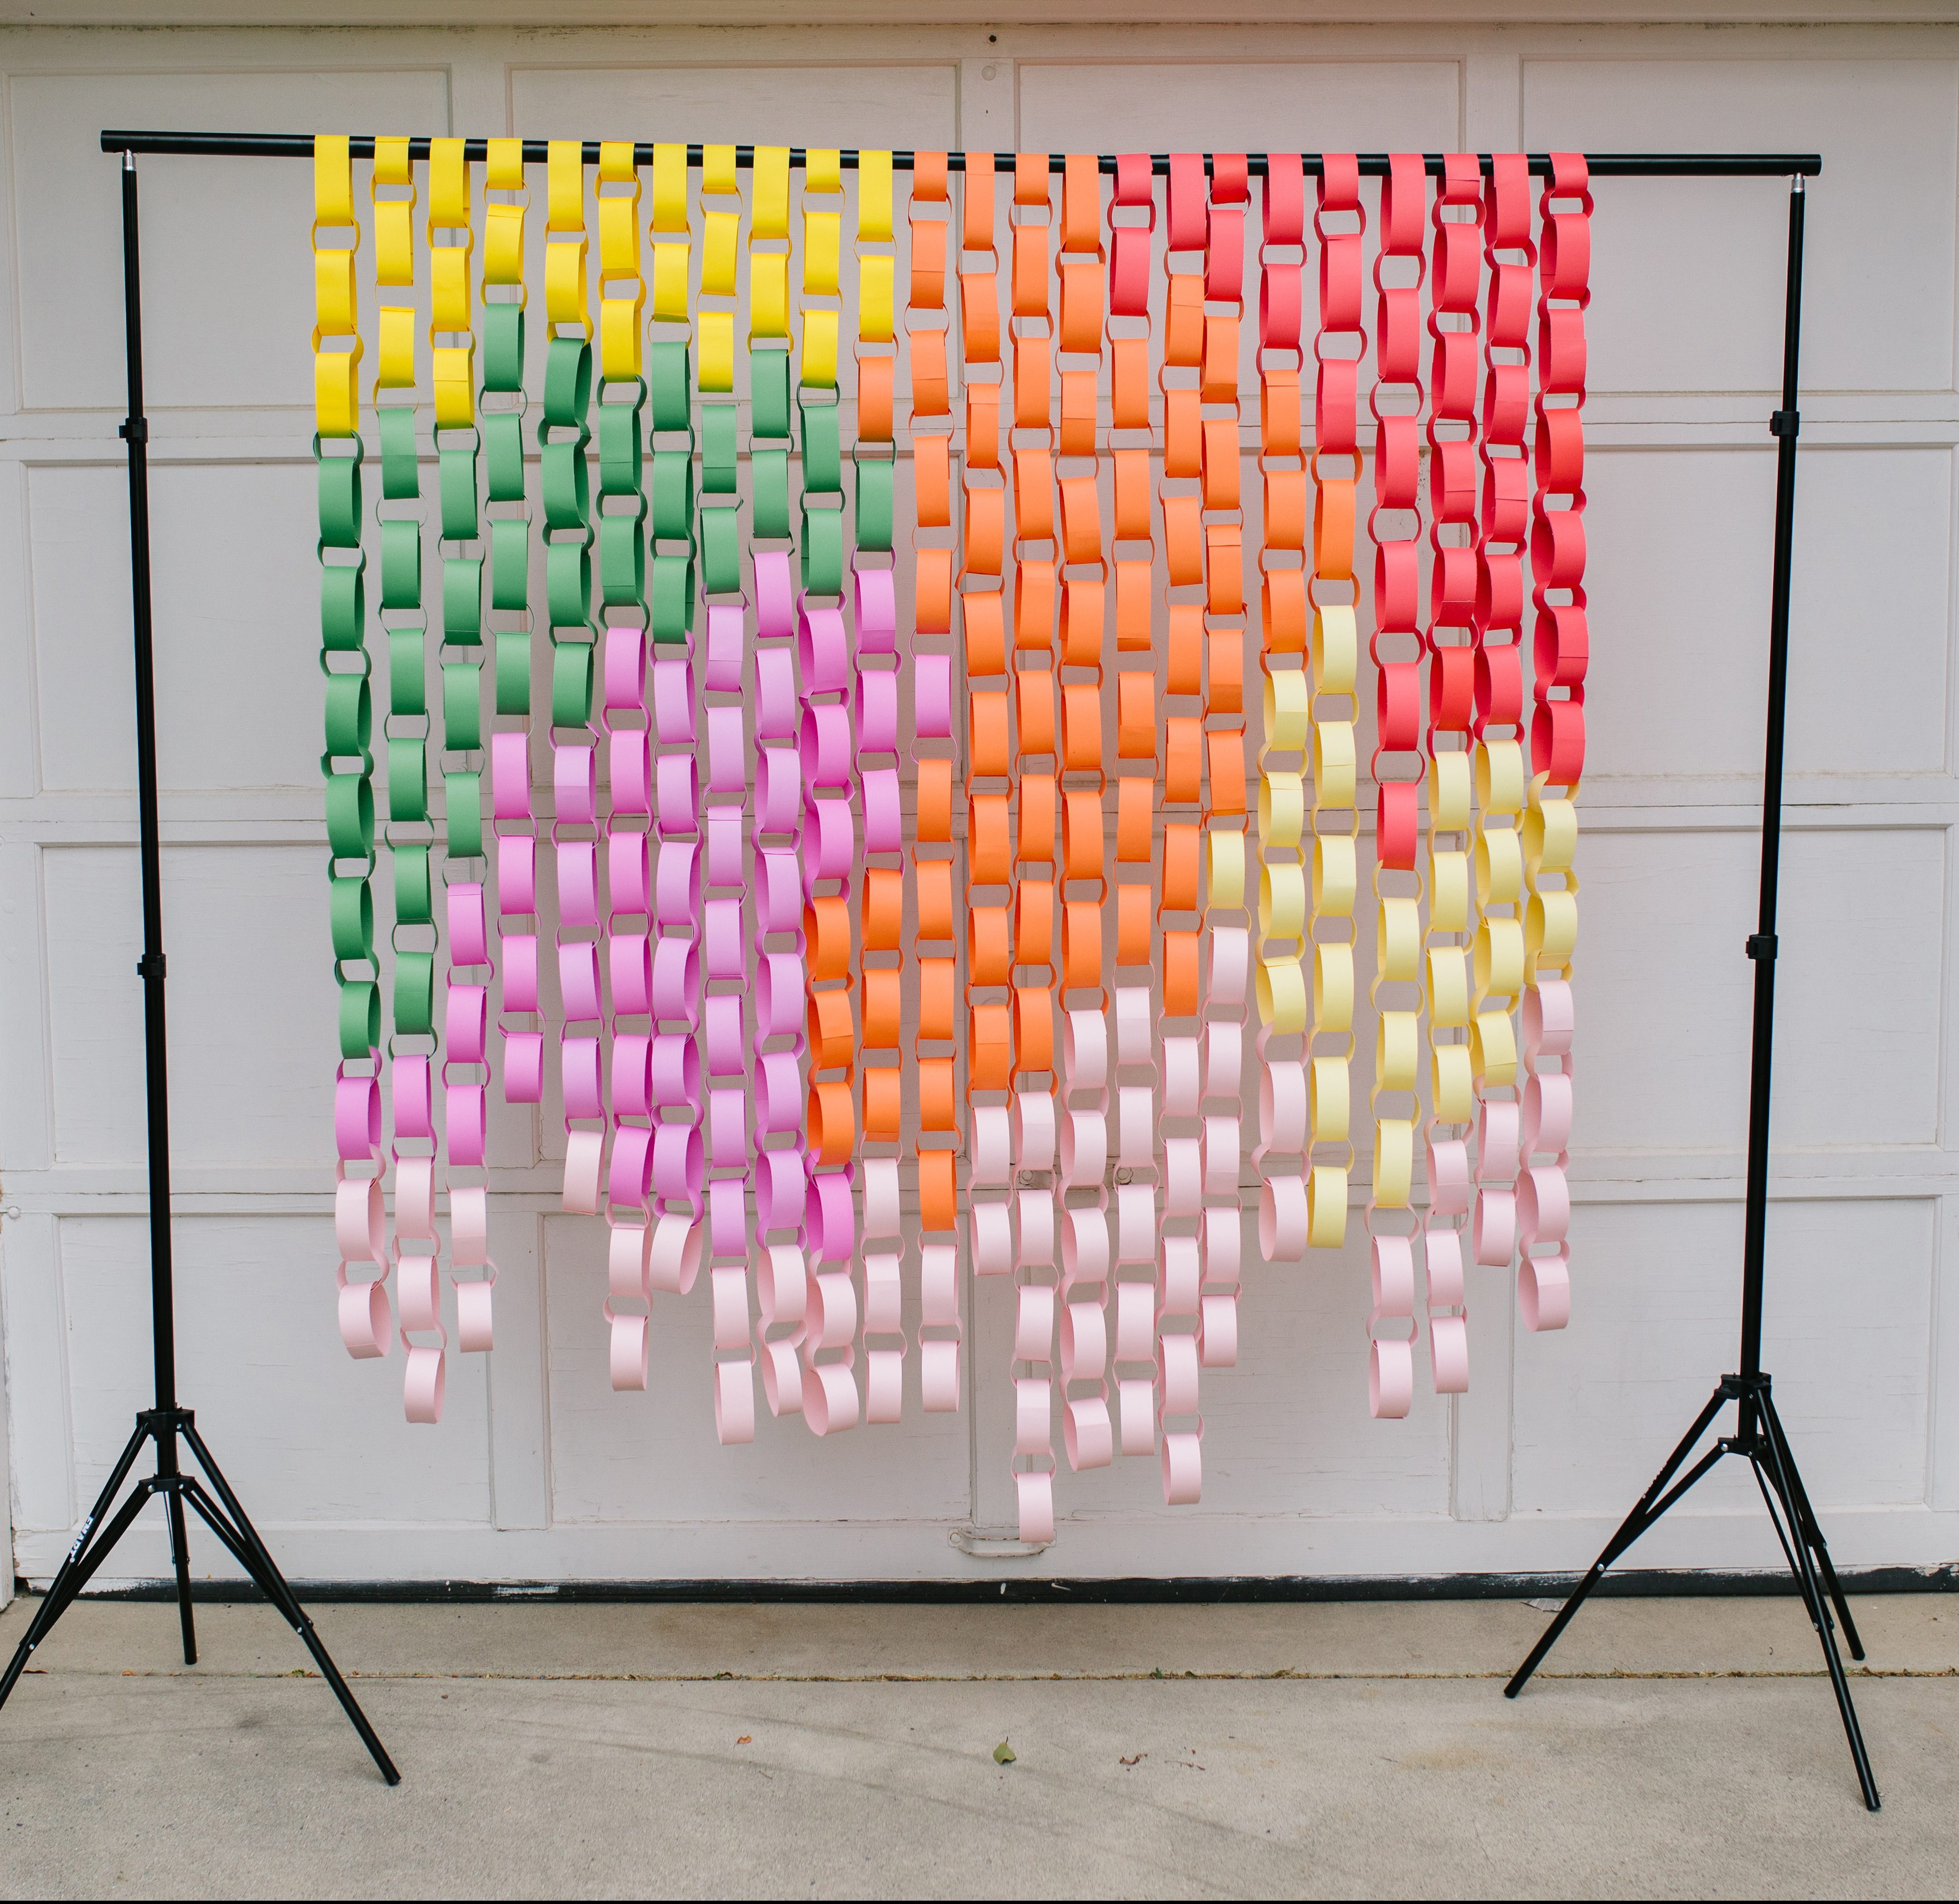
Step 1: Begin by mapping out your design. If you are using our template (available for download at the bottom of this post), each square represents 1 link.
Step 2: Cut the paper into 1.5 inch strips, keeping them sorted by color. Using the paper strips and hot glue, create each chain following the pattern, working from top to bottom and alternating between large links and tight links (pictured below). Switch between large and tight links on the first link of each chain.
Note: If you will be assembling the backdrop somewhere else, it’s super helpful to number each chain on the inside of the top link for quick assembly.

Step 3: Once all of your rows are made, slide the tops of the paper chains onto the backdrop stand.
Note: We ended up trimming some of the links off the bottom to make it more irregular.
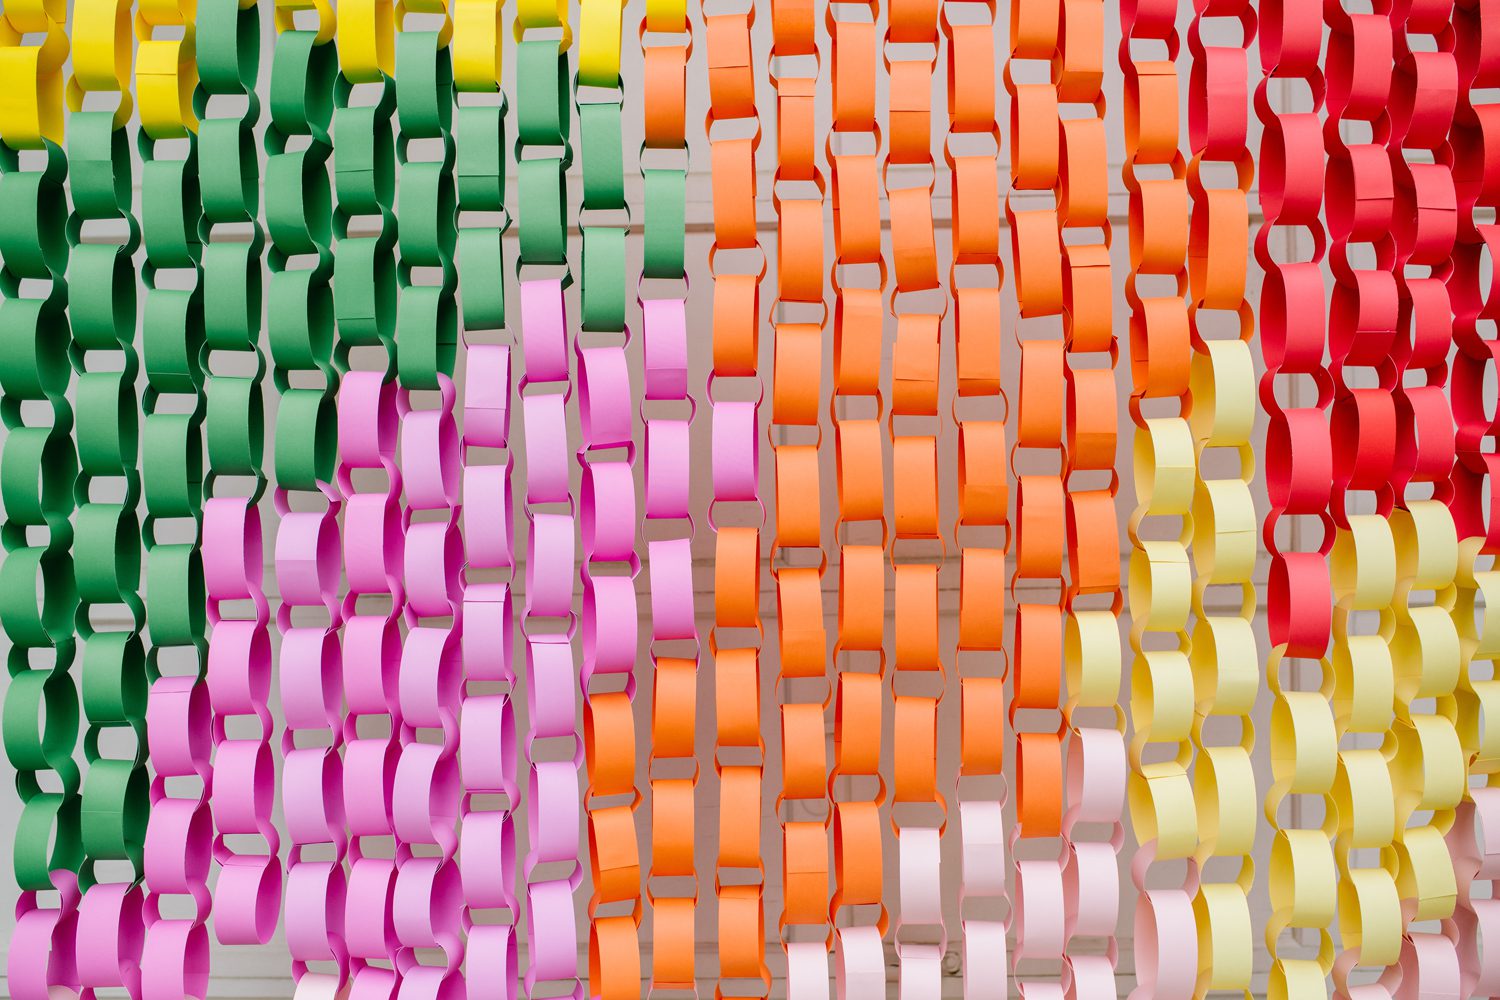
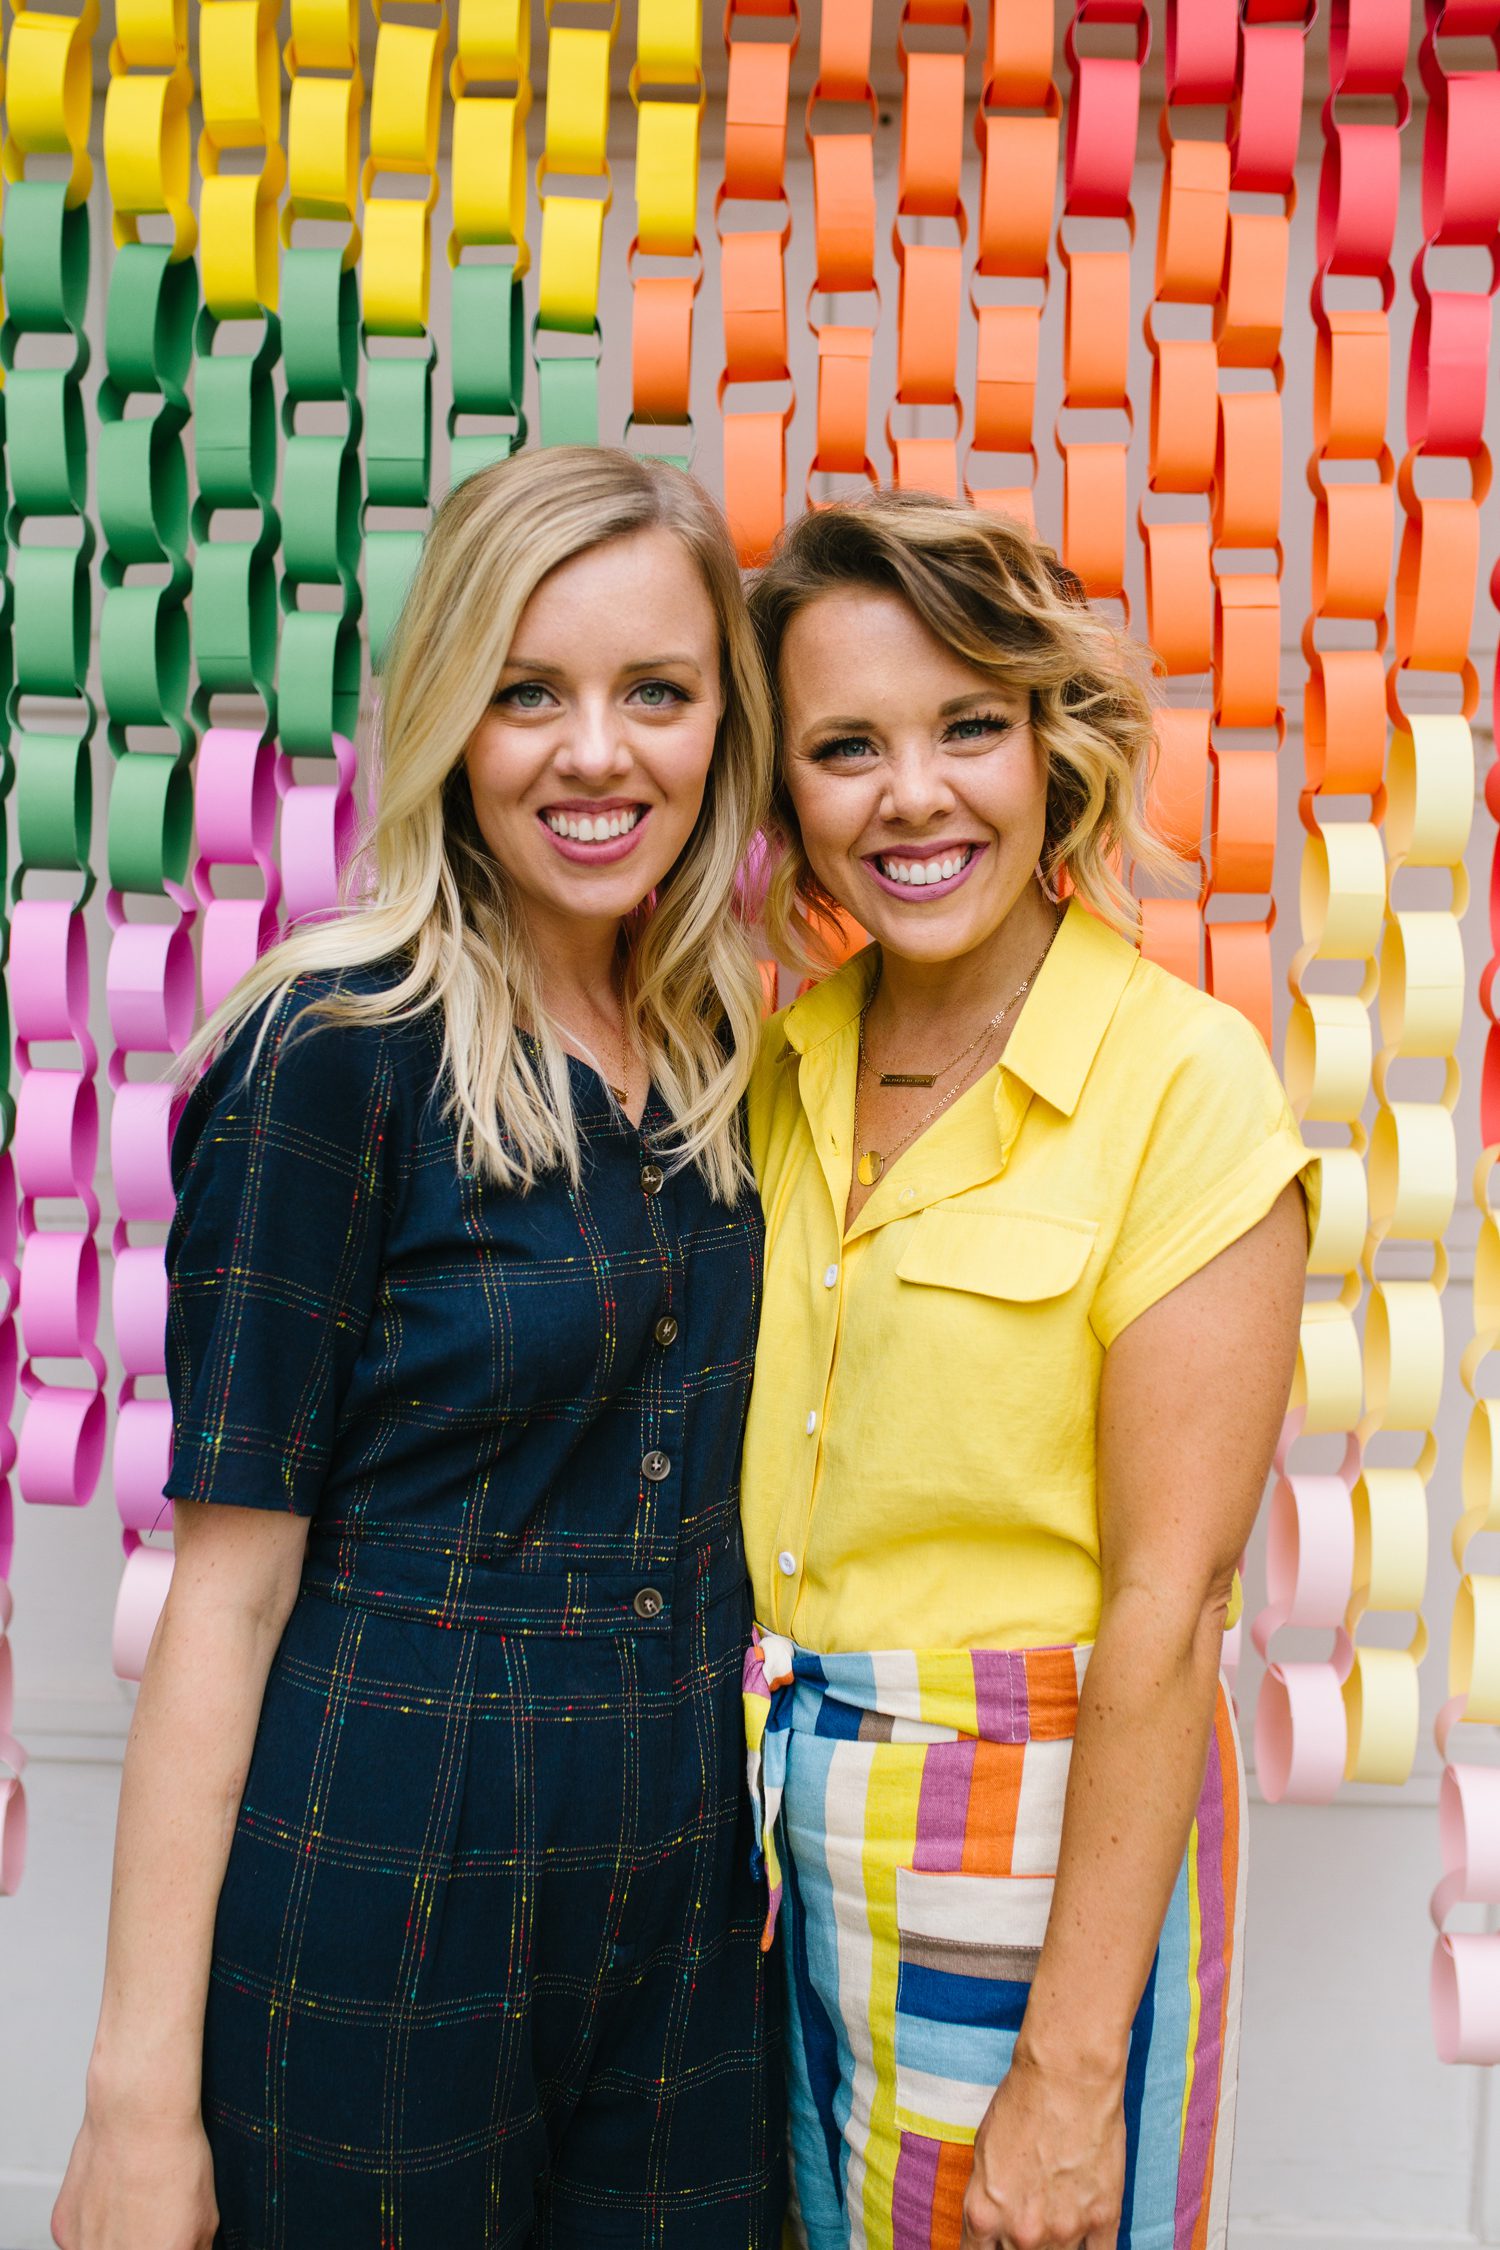
 So fun! I love how alternating the chain sizes creates a staggered, basket weave effect – the perfect photo backdrop!
Happy crafting!
xo, Sam