This post is sponsored by Brother. All opinions expressed are my own.
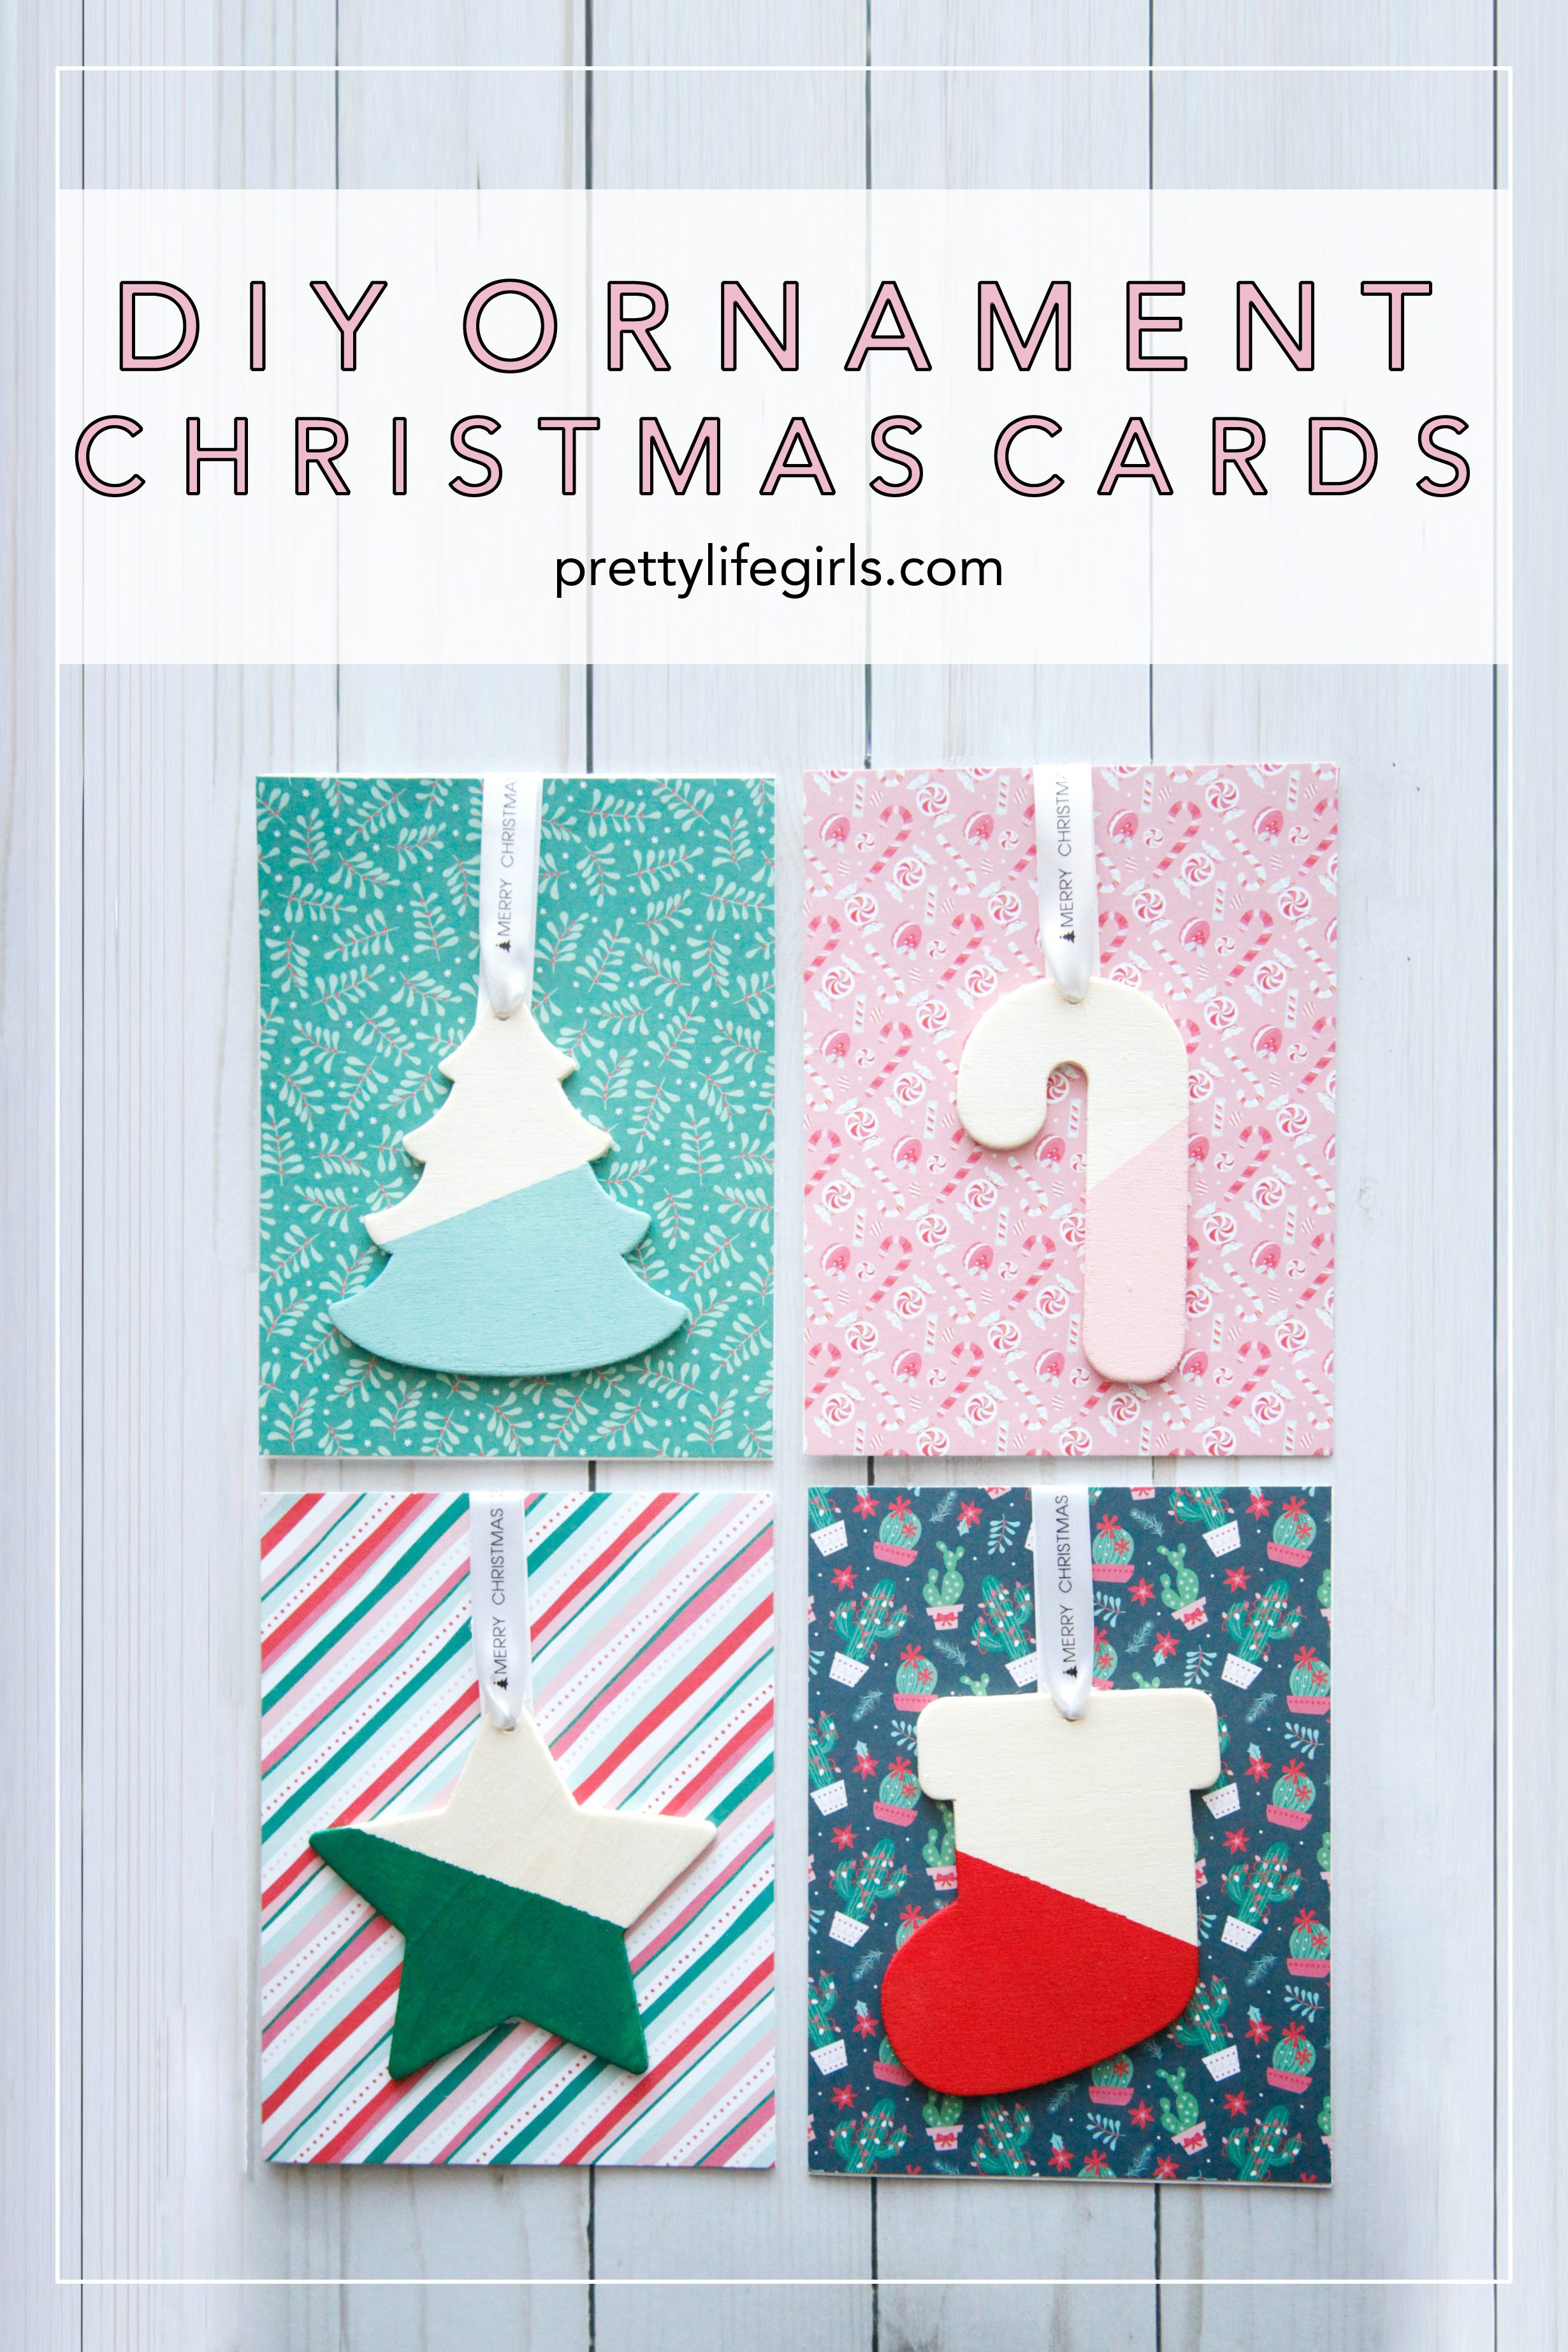
We love thinking of fun, new, and EASY ideas for gifts at Christmas time. This time of year is crazy enough as is – none of us need to spend hours and hours on gifts for everyone we know! So we are so excited to share this tutorial for DIY Ornament Christmas Cards using the P-touch Embellish Ribbon & Tape Printer from Brother. A pretty card with an easily removable ornament, these cuties come together so quickly, and are the perfect gift for anyone on your list.
If you haven’t heard of the P-touch Embellish, it’s a ribbon and tape printer that is perfect for adding a personal touch to holiday-themed DIY projects. It’s super easy to use, and the possibilities are endless! 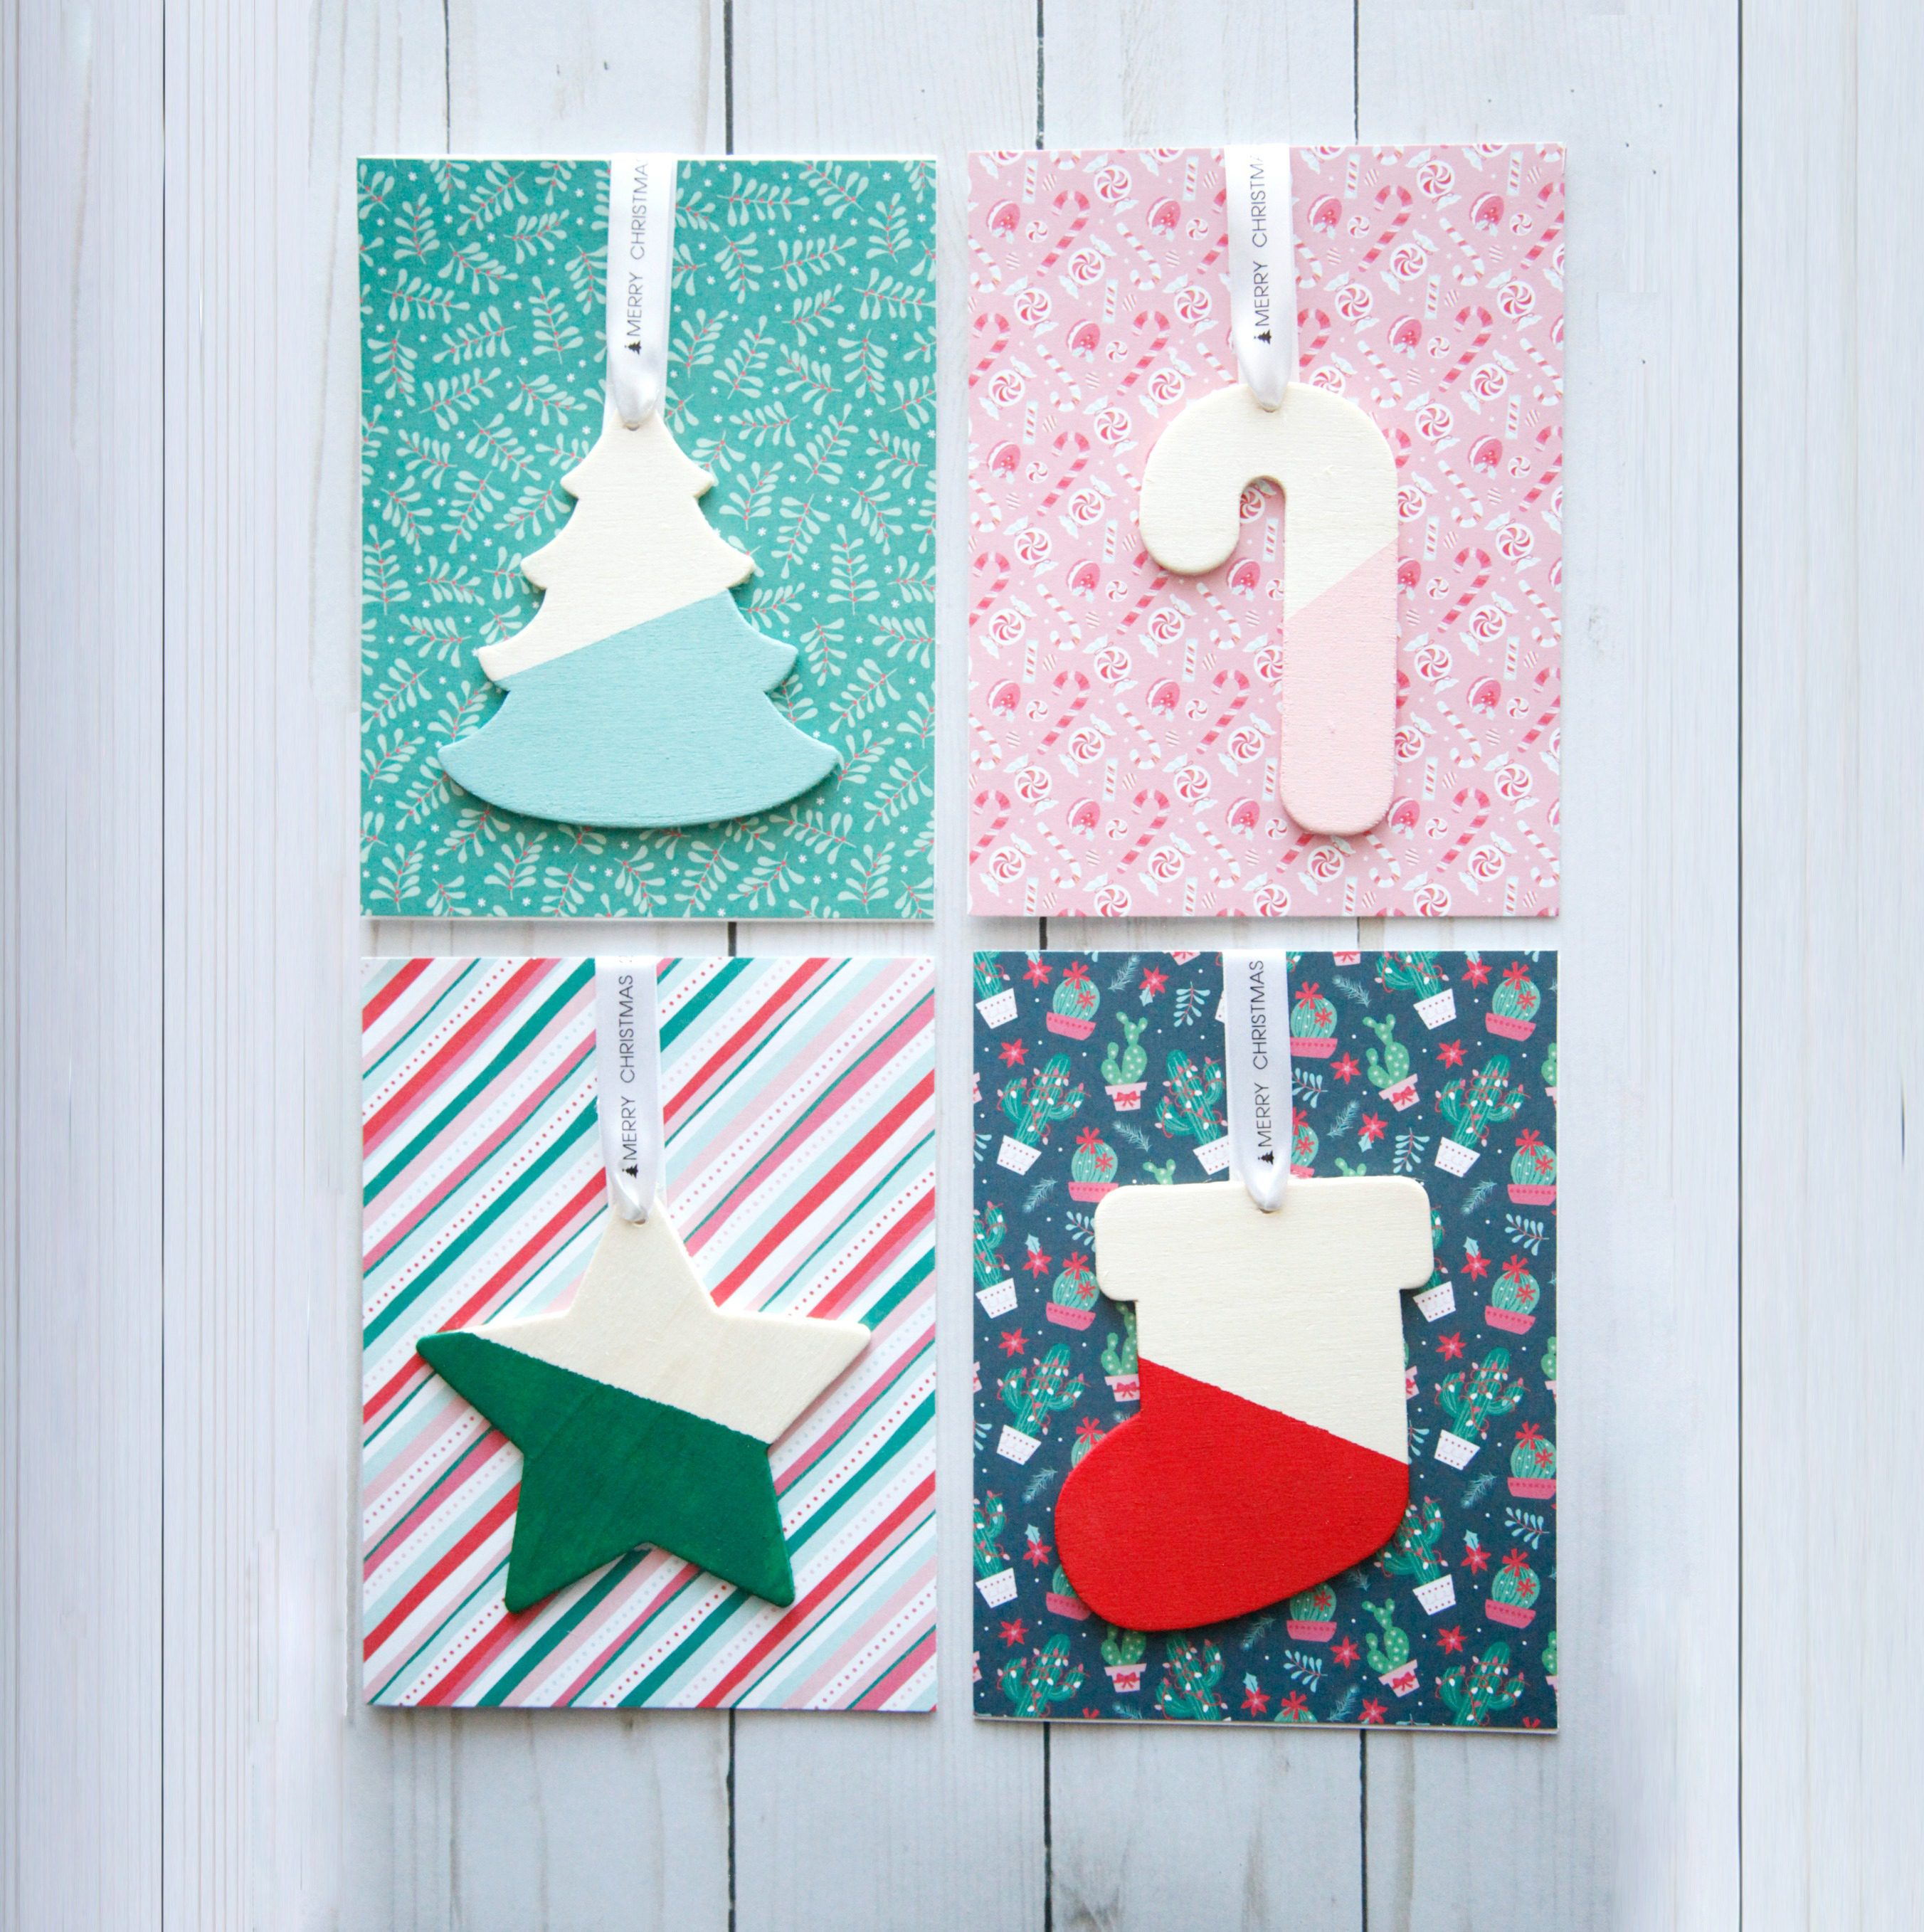
Supplies needed to make your own Ornament Christmas Cards
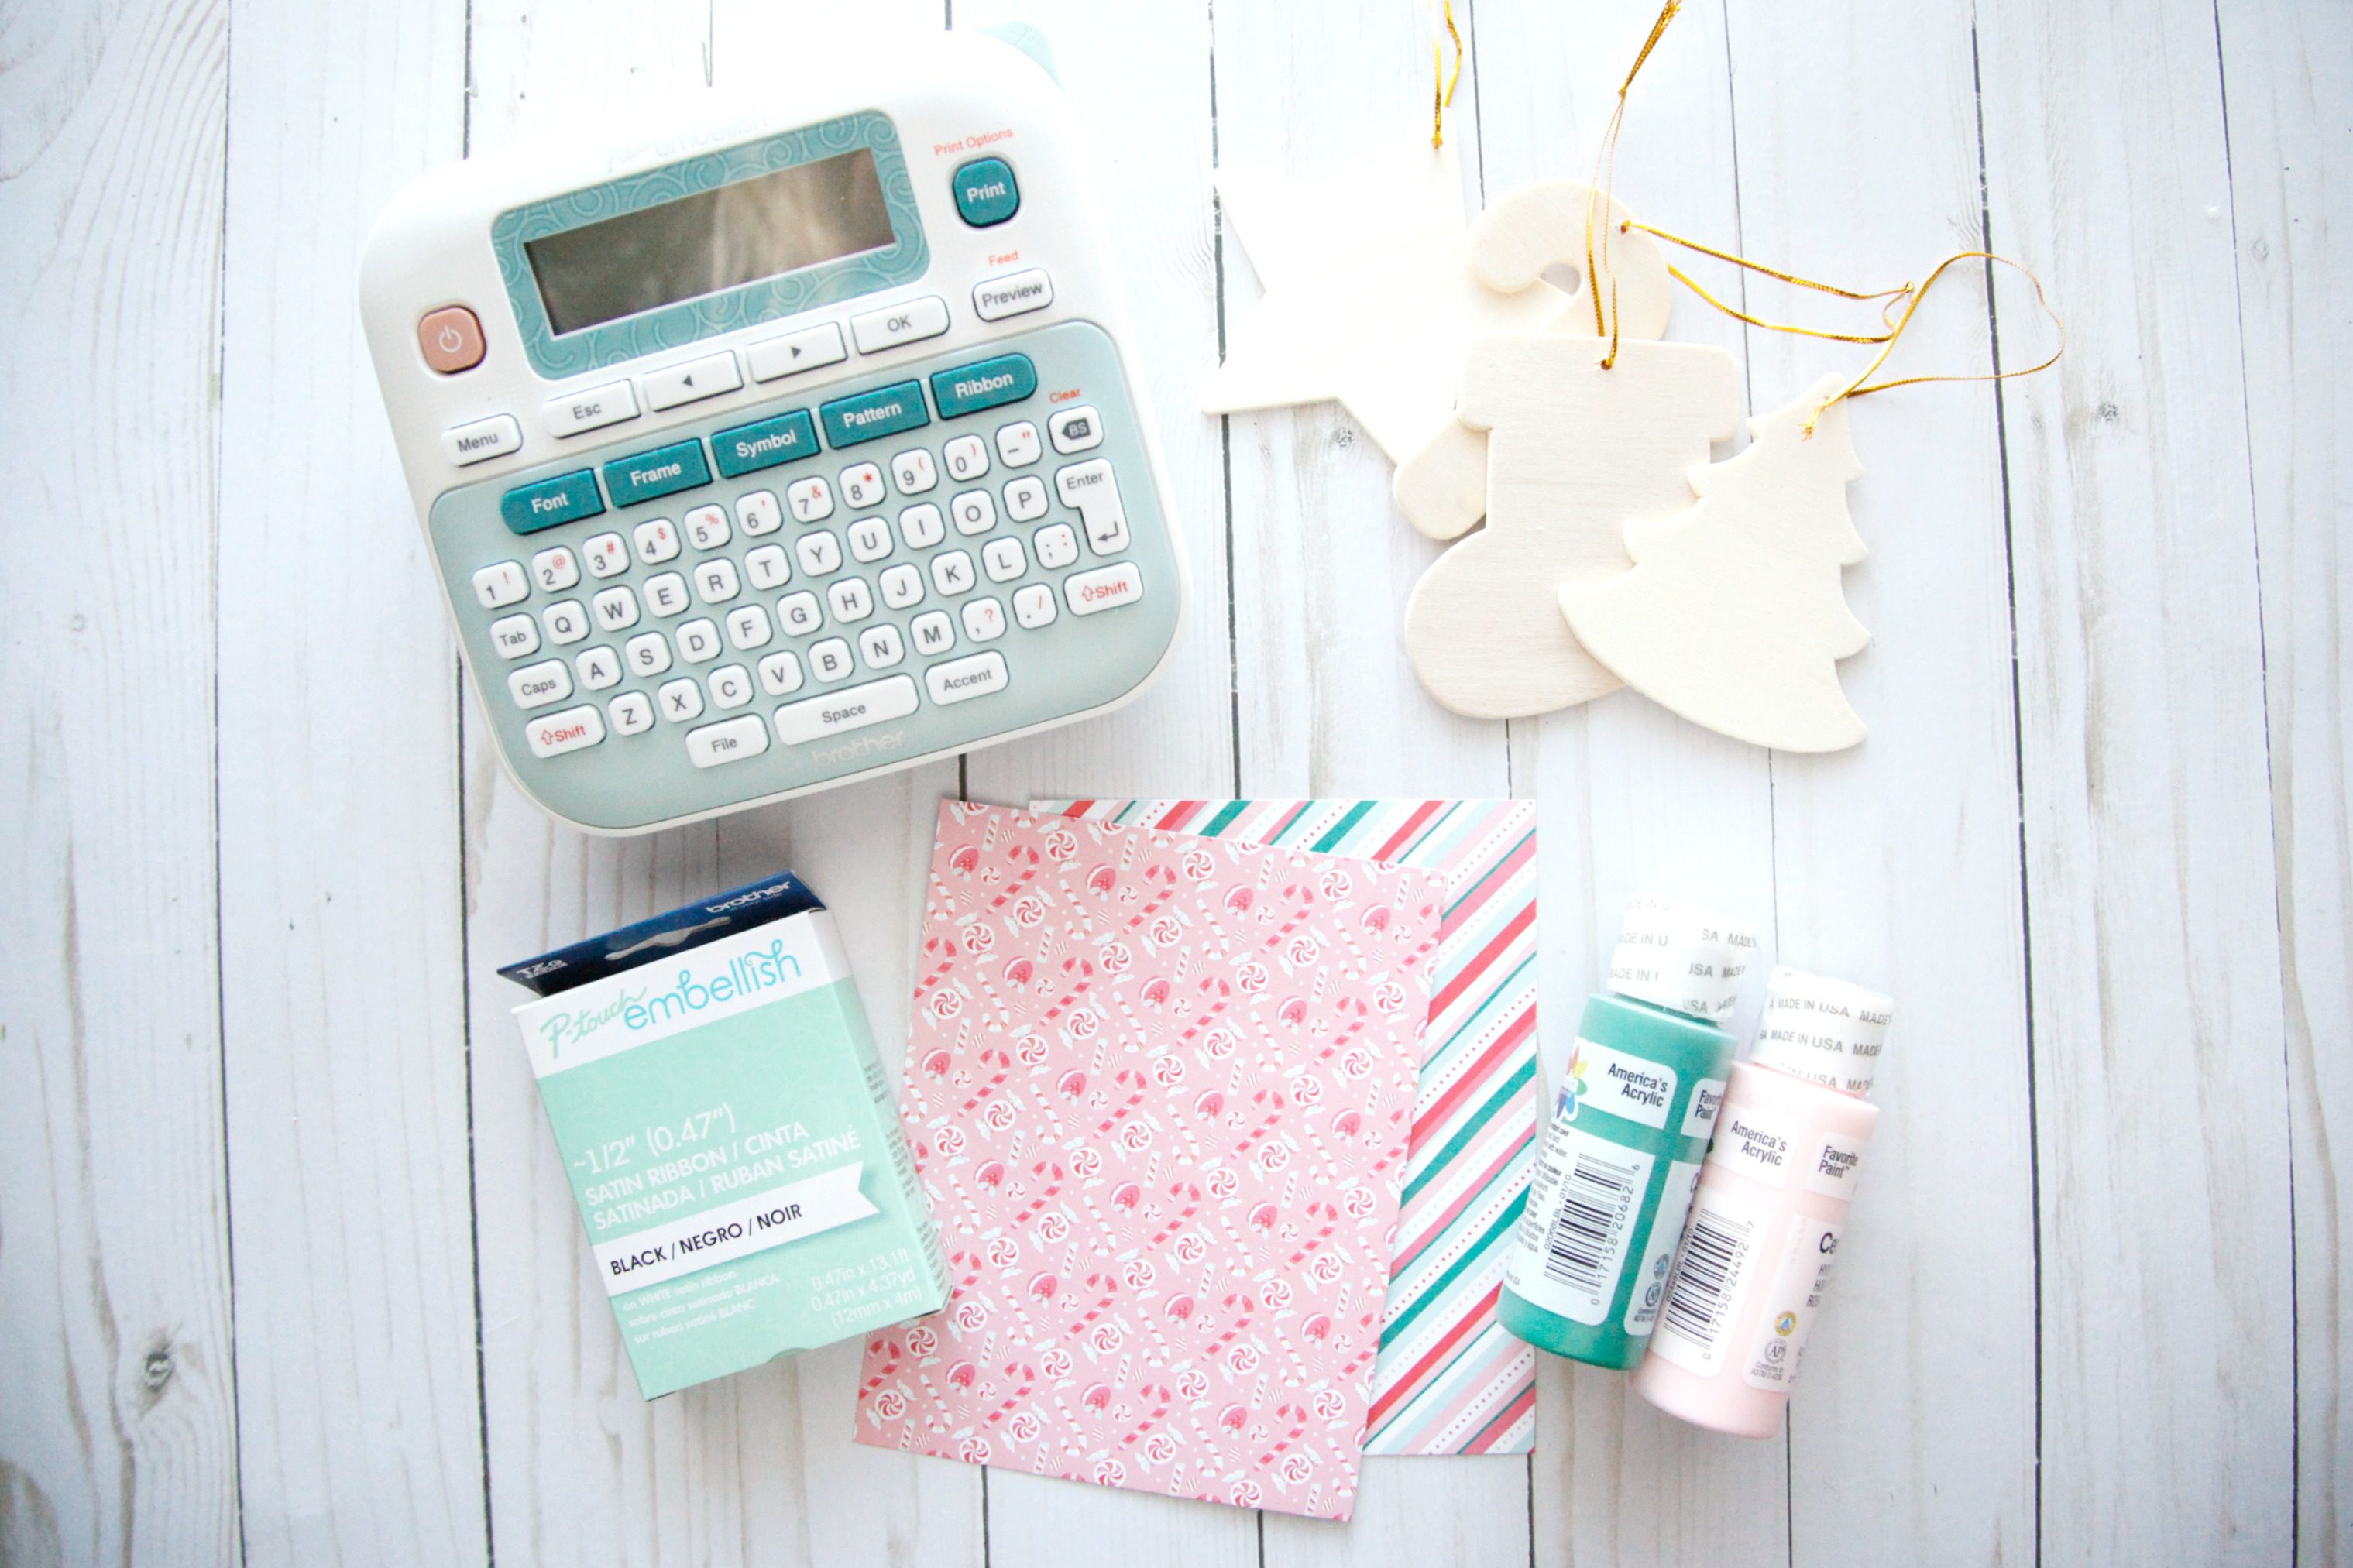
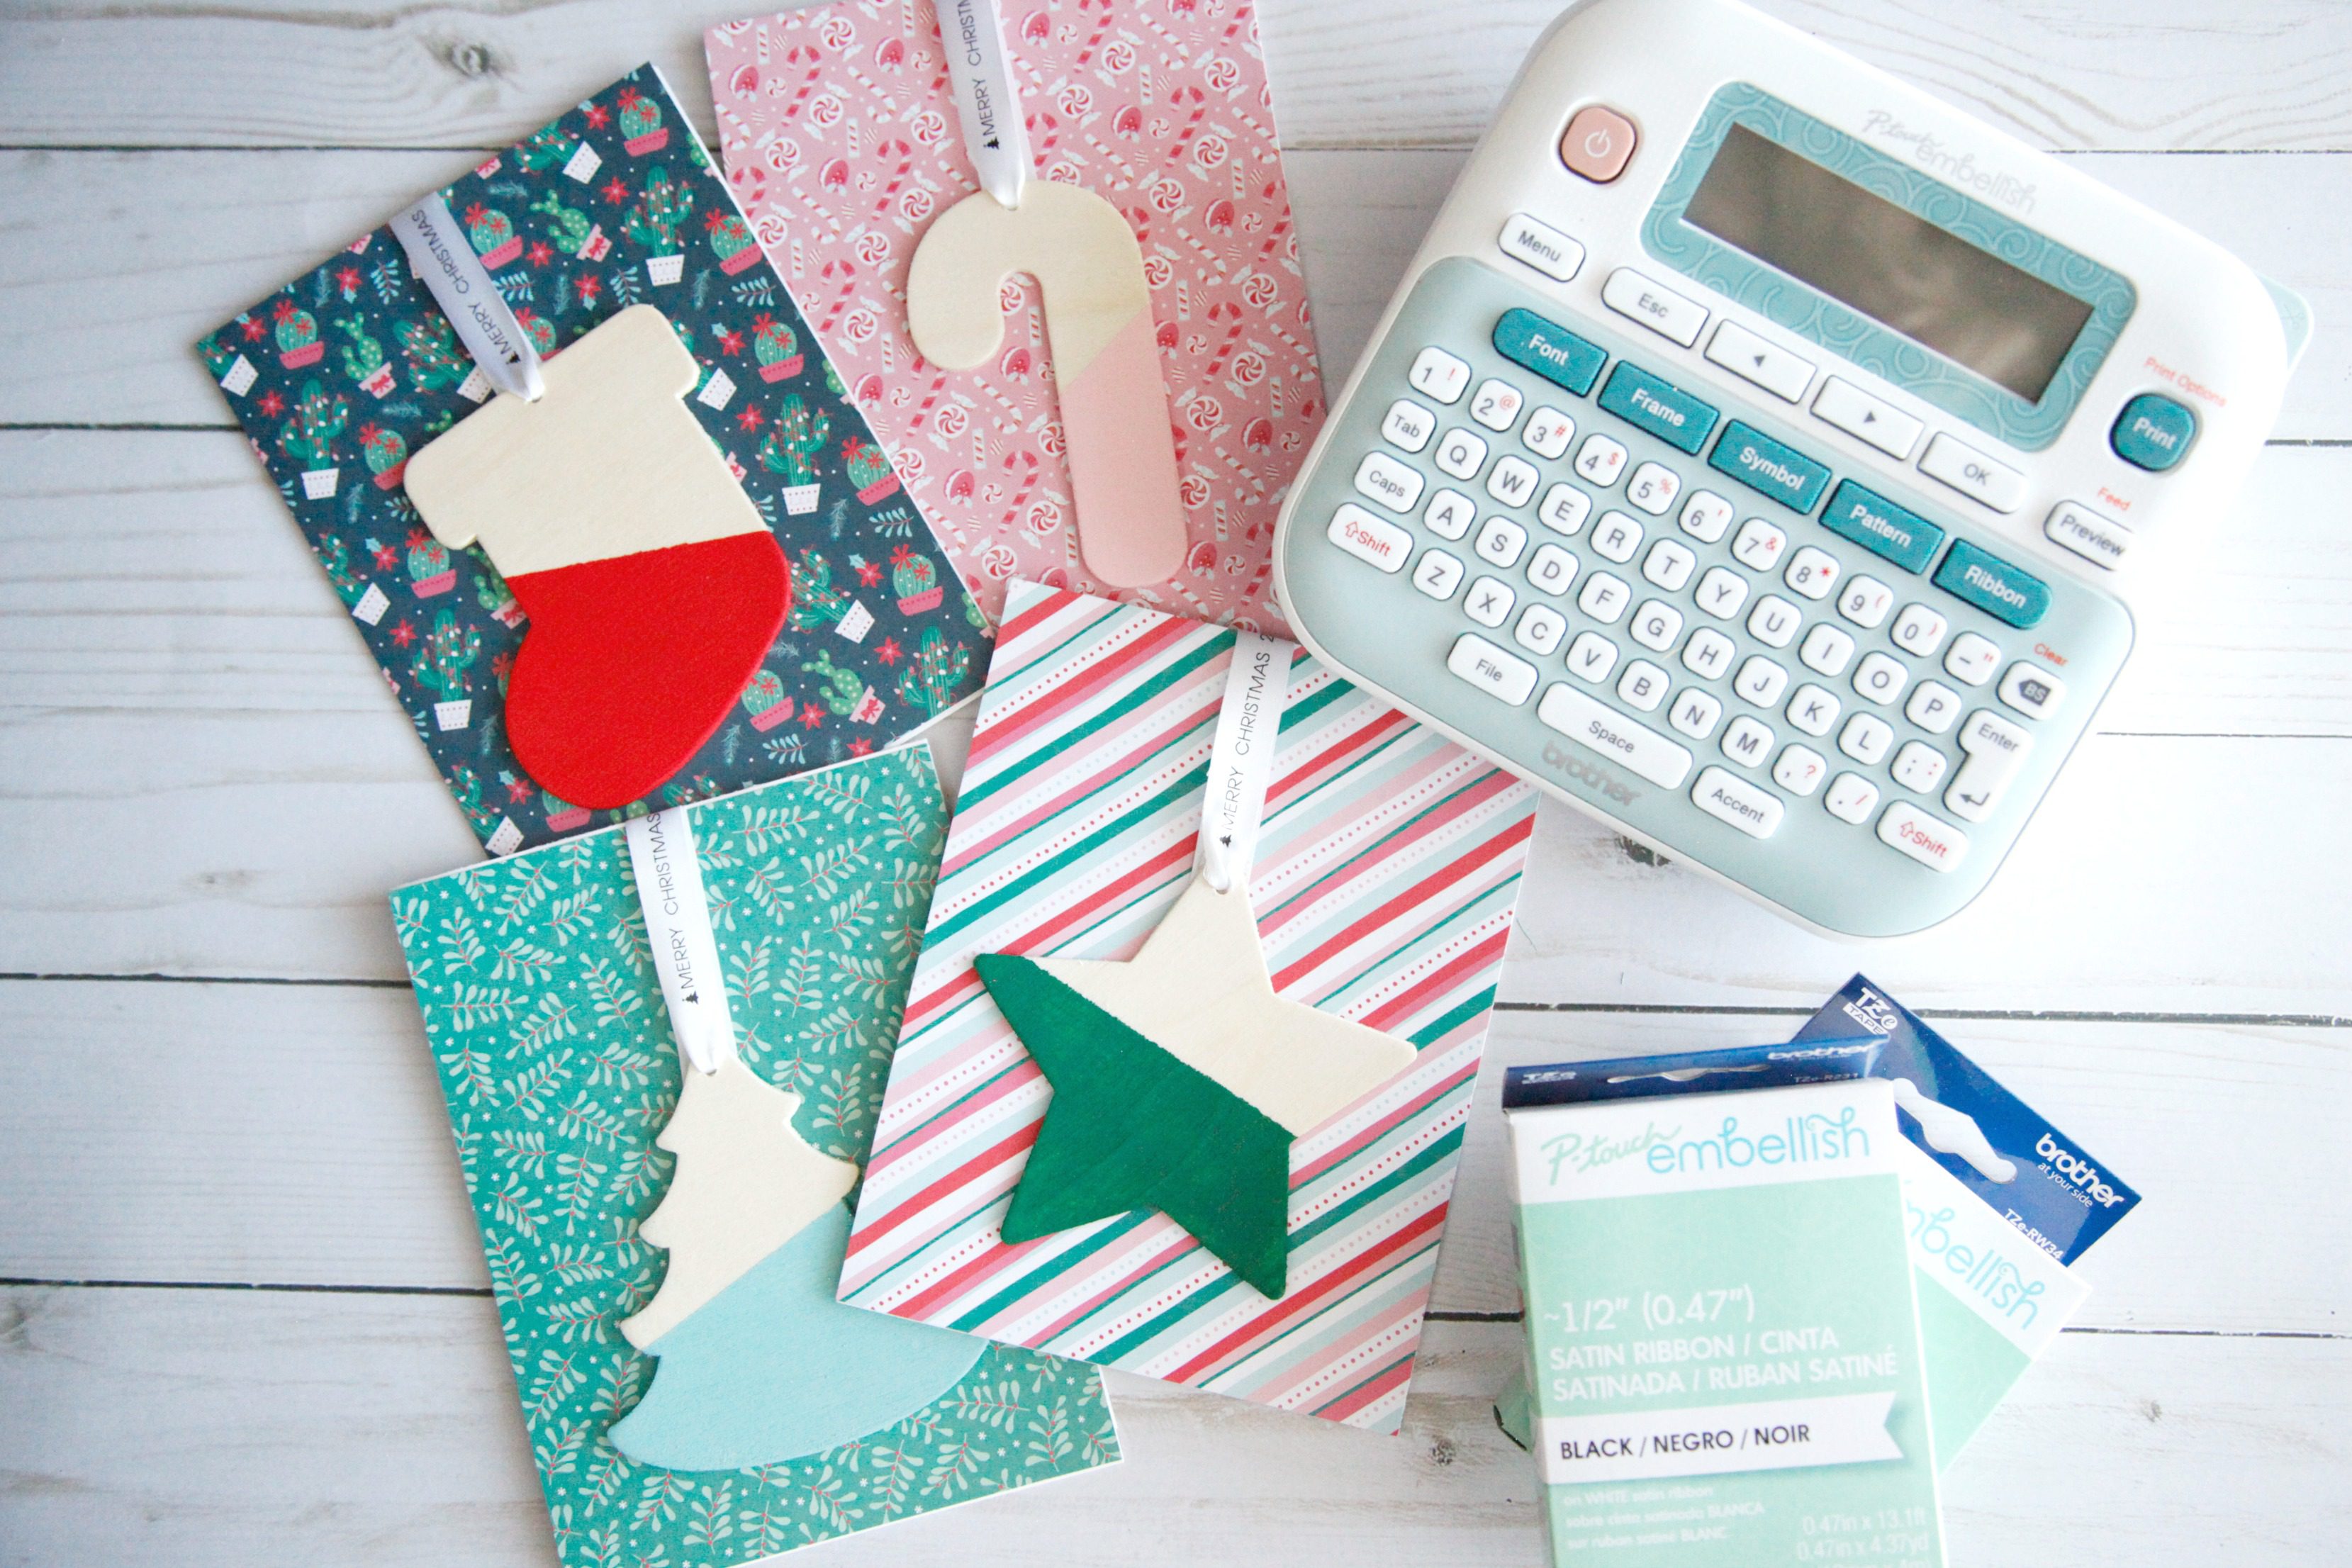
Brother P-touch Embellish
Brother Black on White Satin Ribbon
Unfinished wood ornaments
Craft paint
Paint brush
Painters or masking tape
Patterned paper
Double-sided tape or glue
How to make your own Ornament Christmas Cards
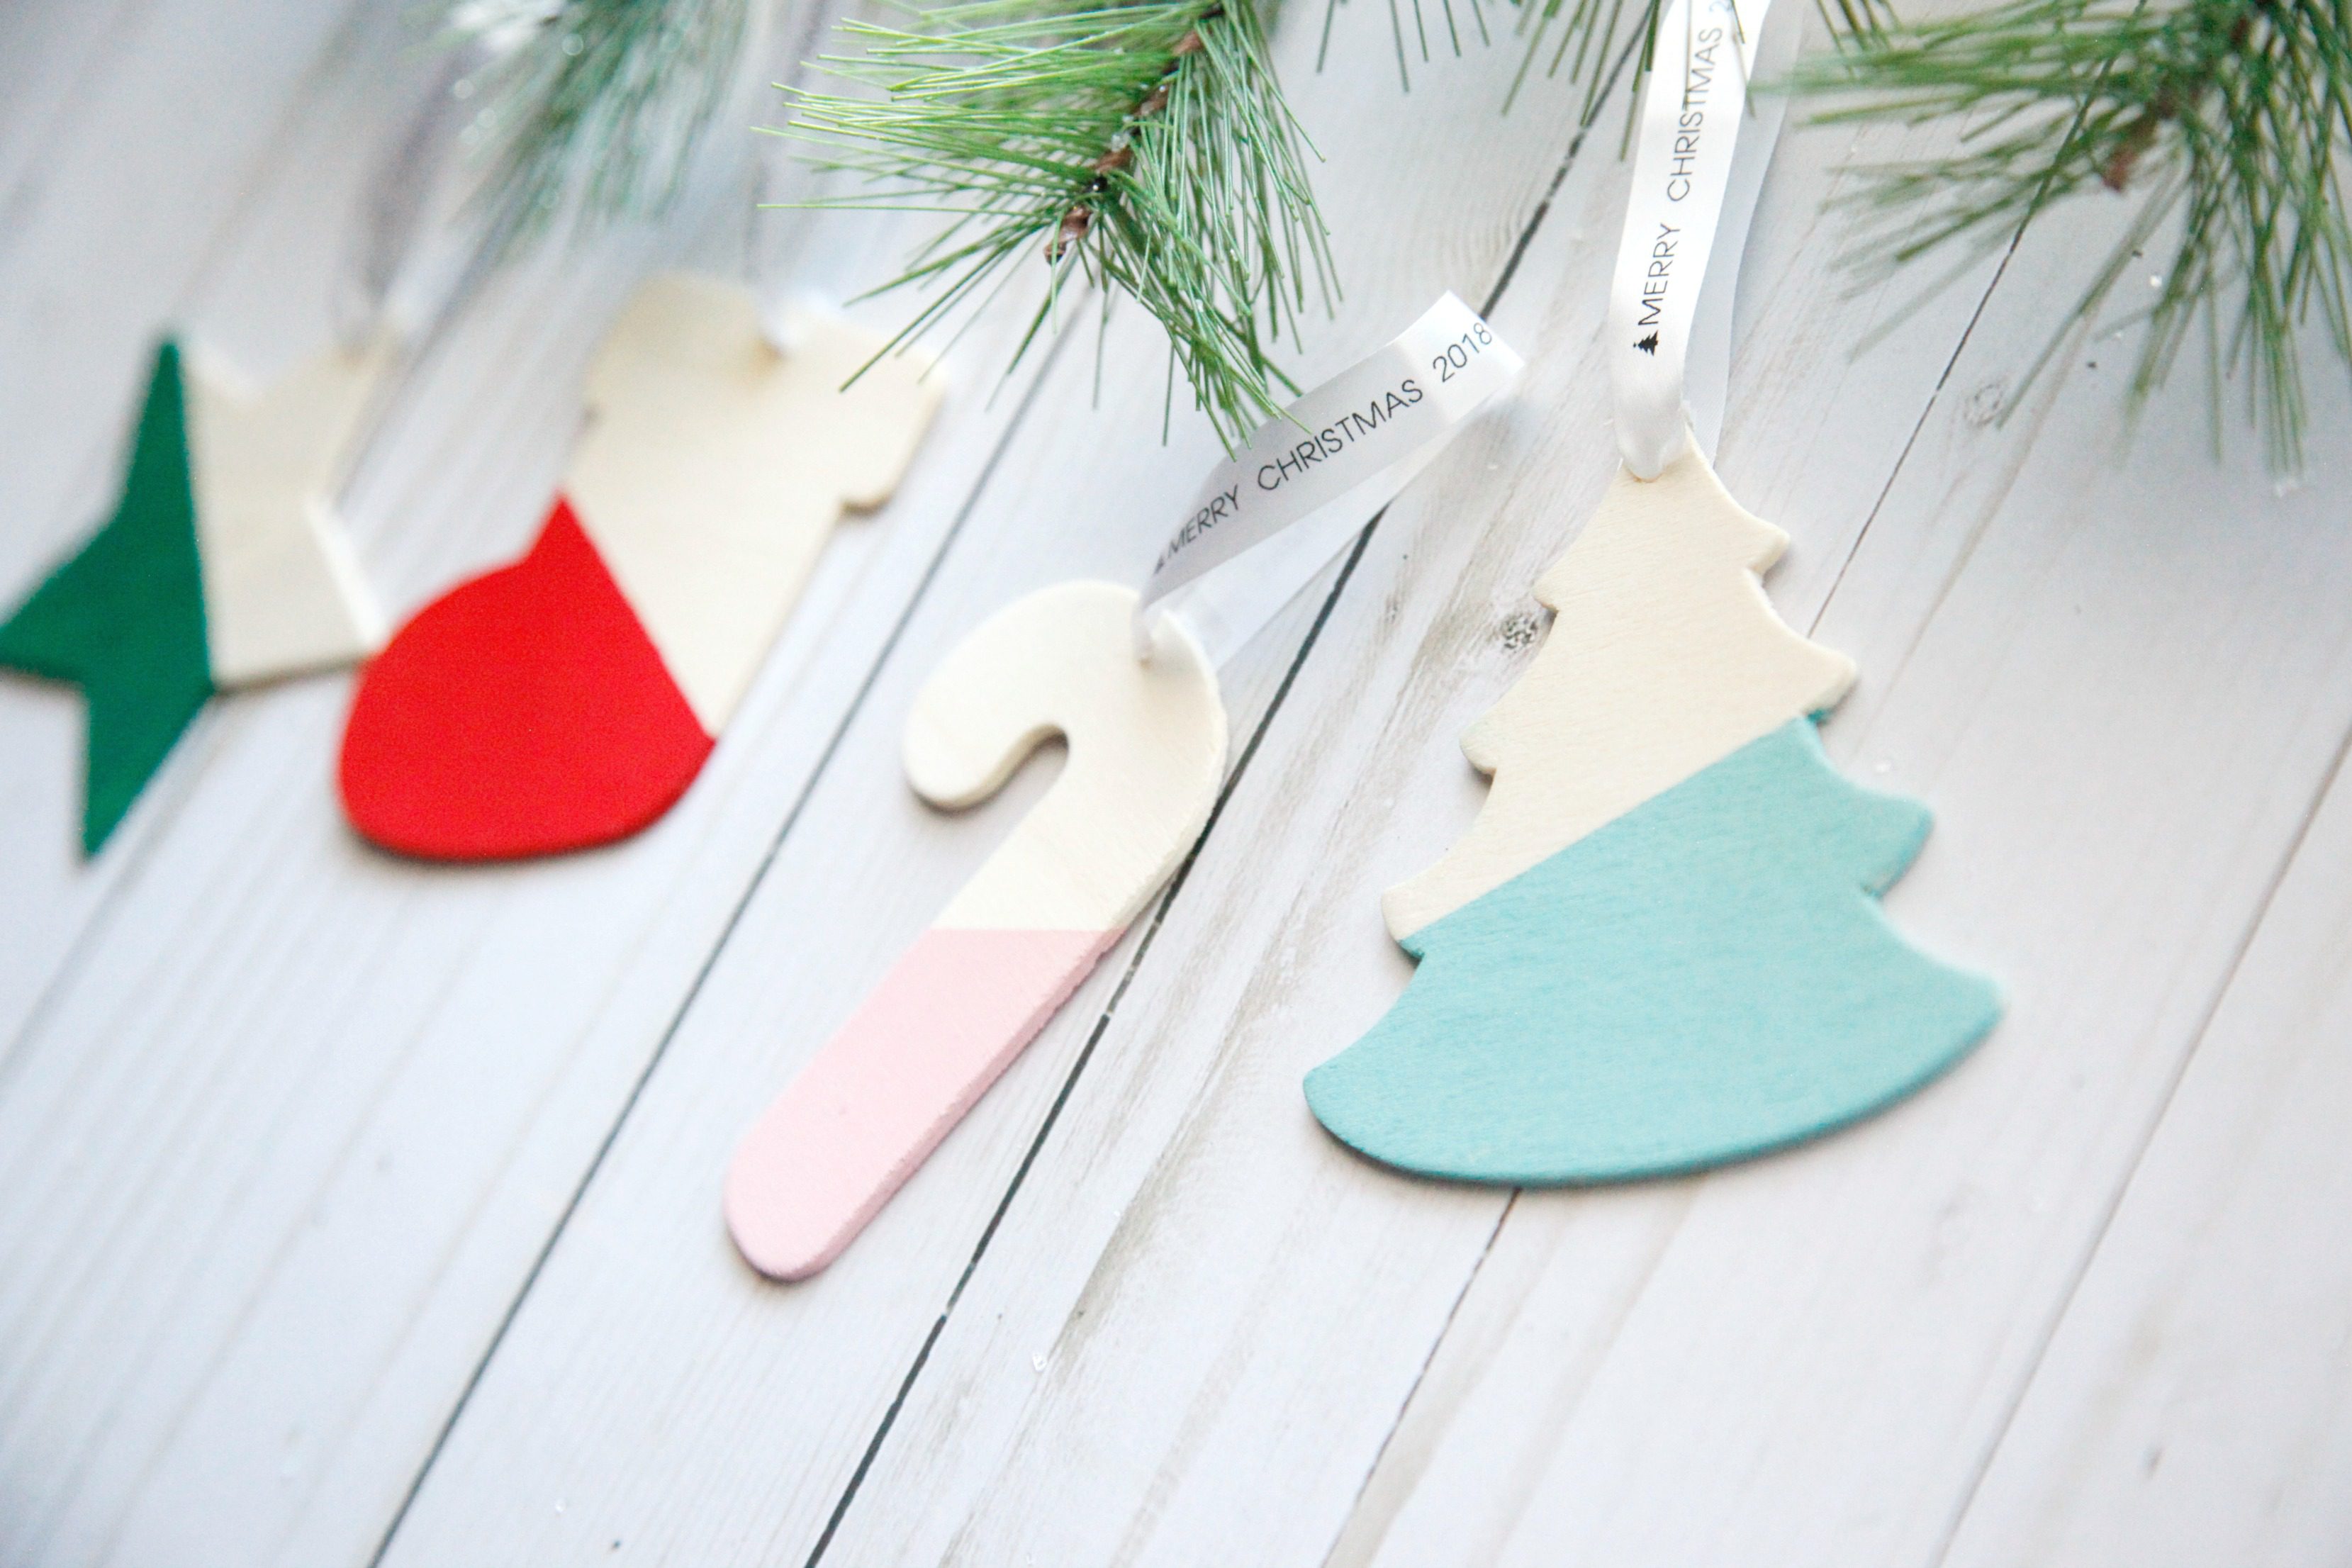
Step 1: Tape off your ornament and paint the bottom half. Let dry. 
Step 2: When dry, remove the tape, and cut off the string. 
Step 3: Make your card by folding your patterned paper in half, or if the patterned paper is too small to fold (like mine), make a card out of white cardstock and attach the pattered paper to the front. 
Step 4: Now for the best part! Using the Brother P-touch Embellish, type the text you want on your ribbon. There are so many options here – choose from 14 fonts, over 90 borders, over 400 symbols and 25 patterns!

Step 5: Print your ribbon with a three copies to ensure the ribbon is long enough. I used the black on white satin ribbon, but you can choose from 5 satin ribbons, 9 pattern tapes, and 3 pastel tapes.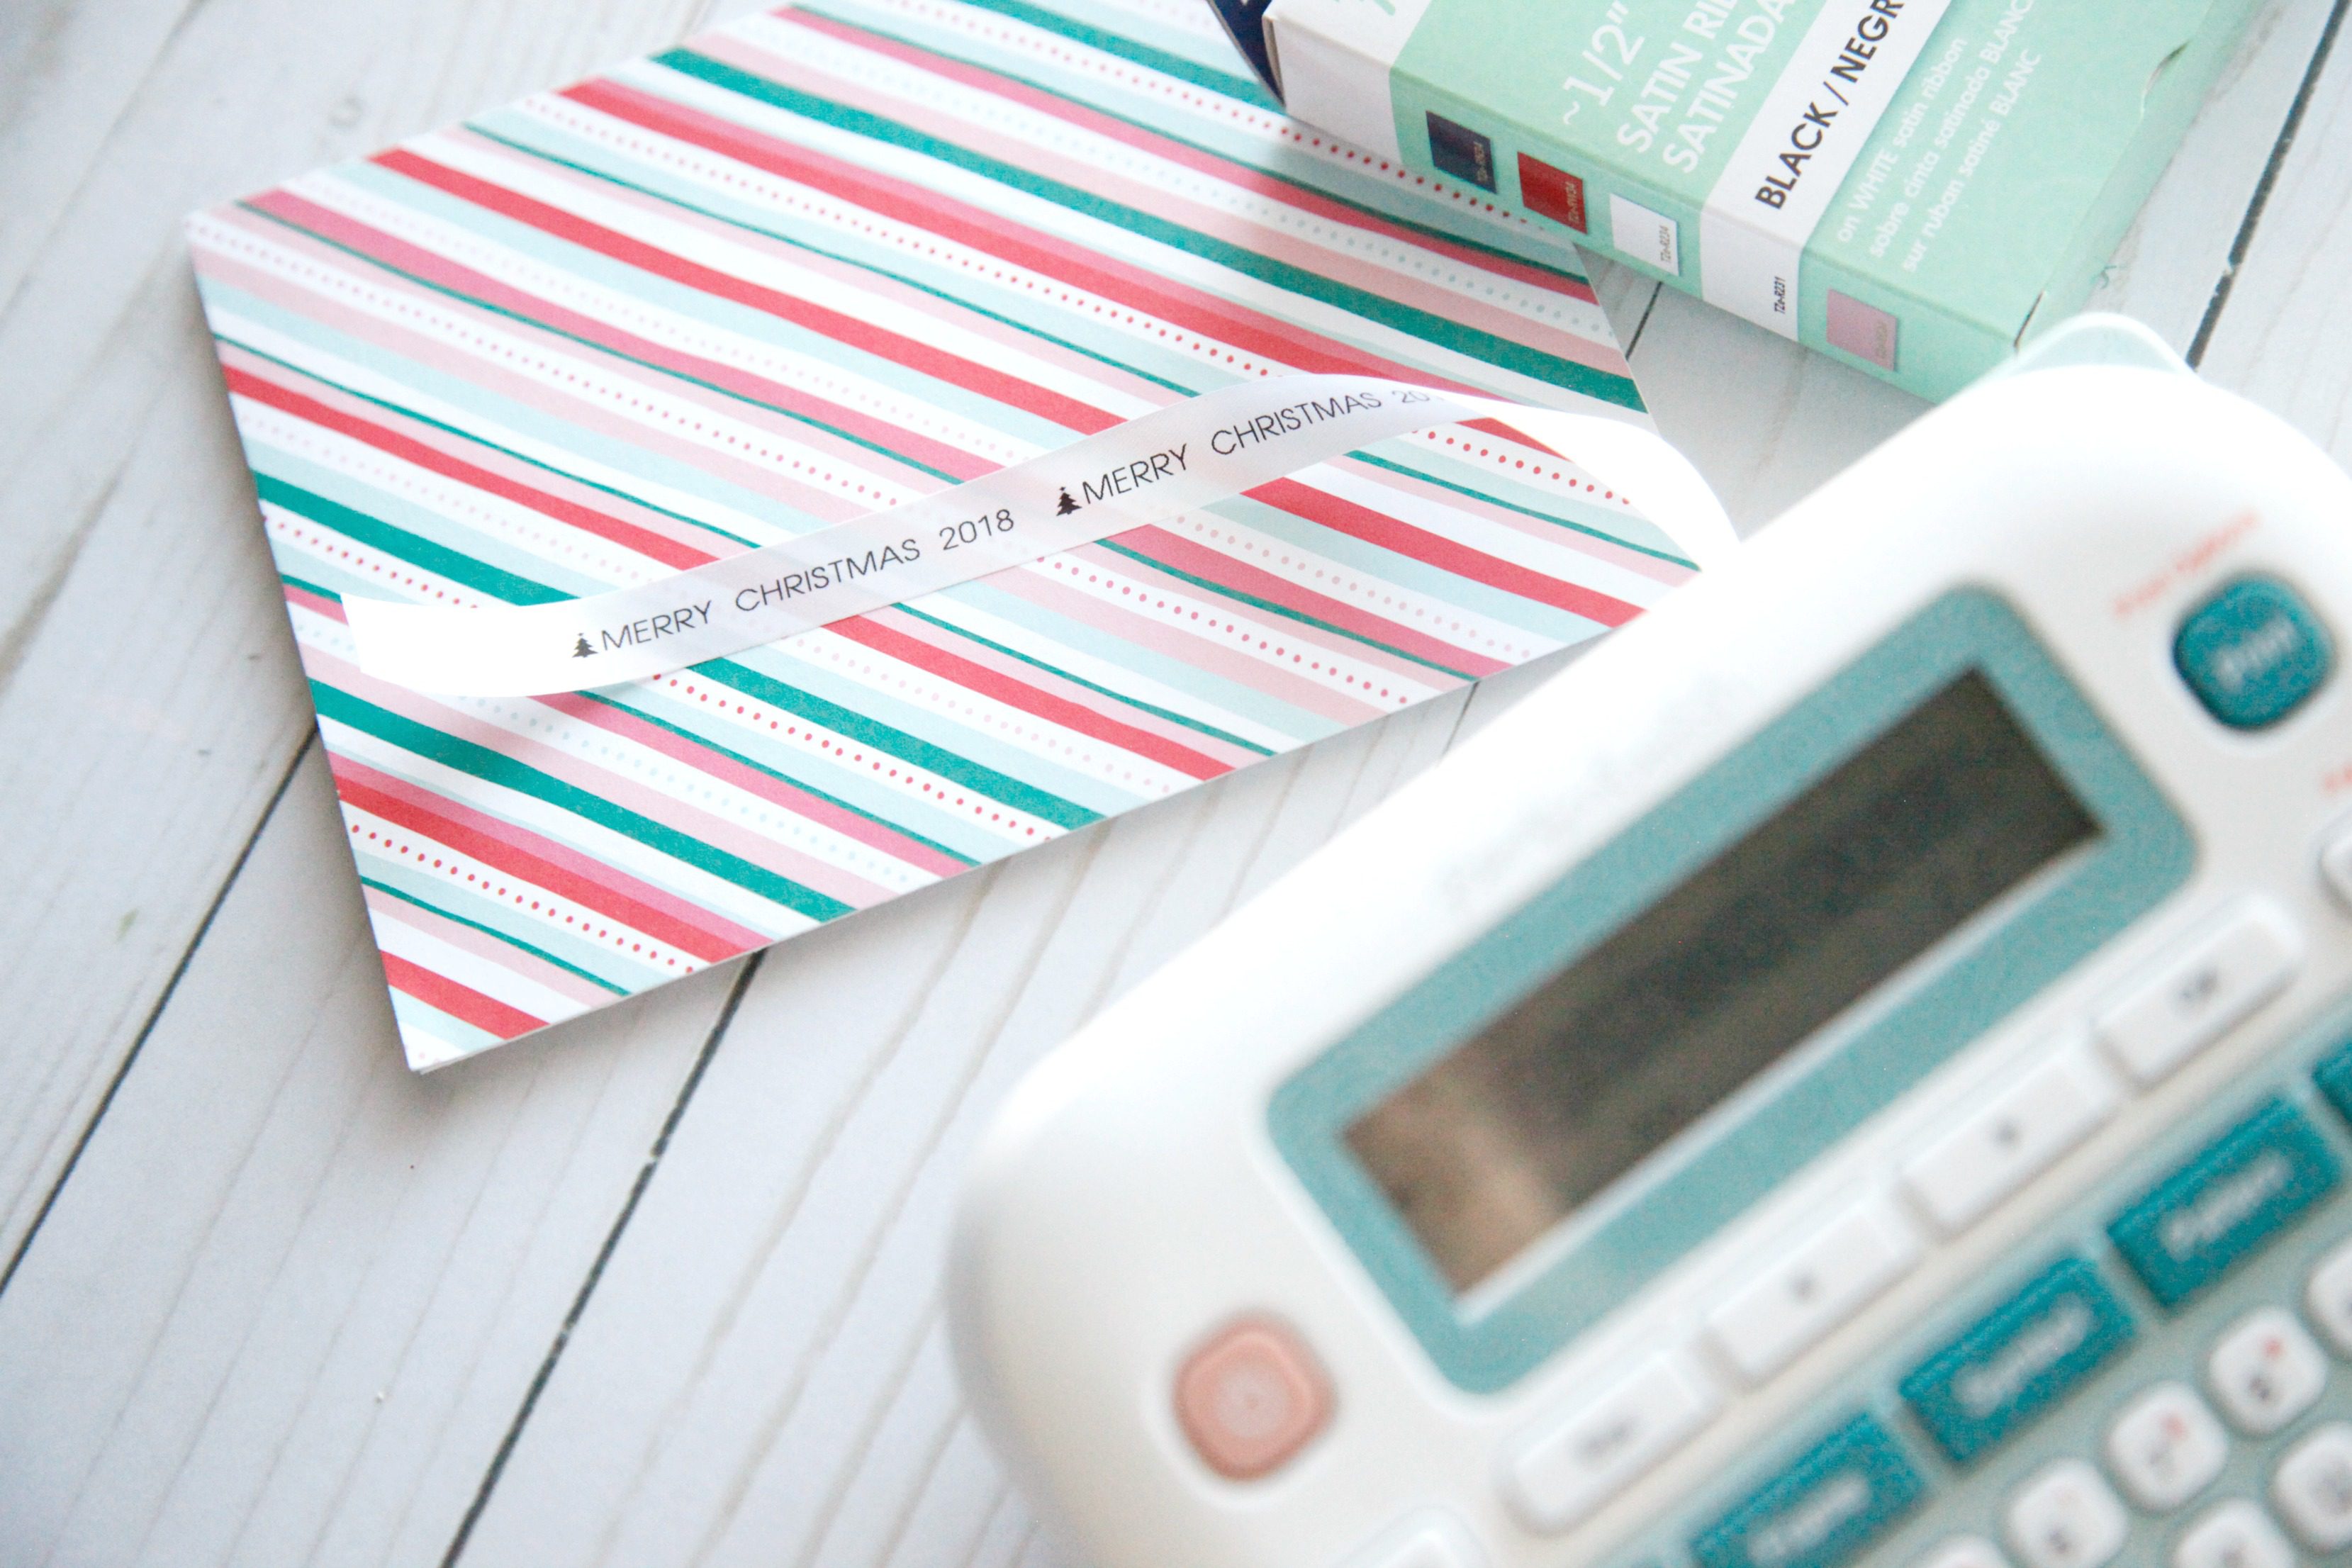
Step 6: Thread your ribbon through the hole in the ornament, pulling only about 1/4 inch through. 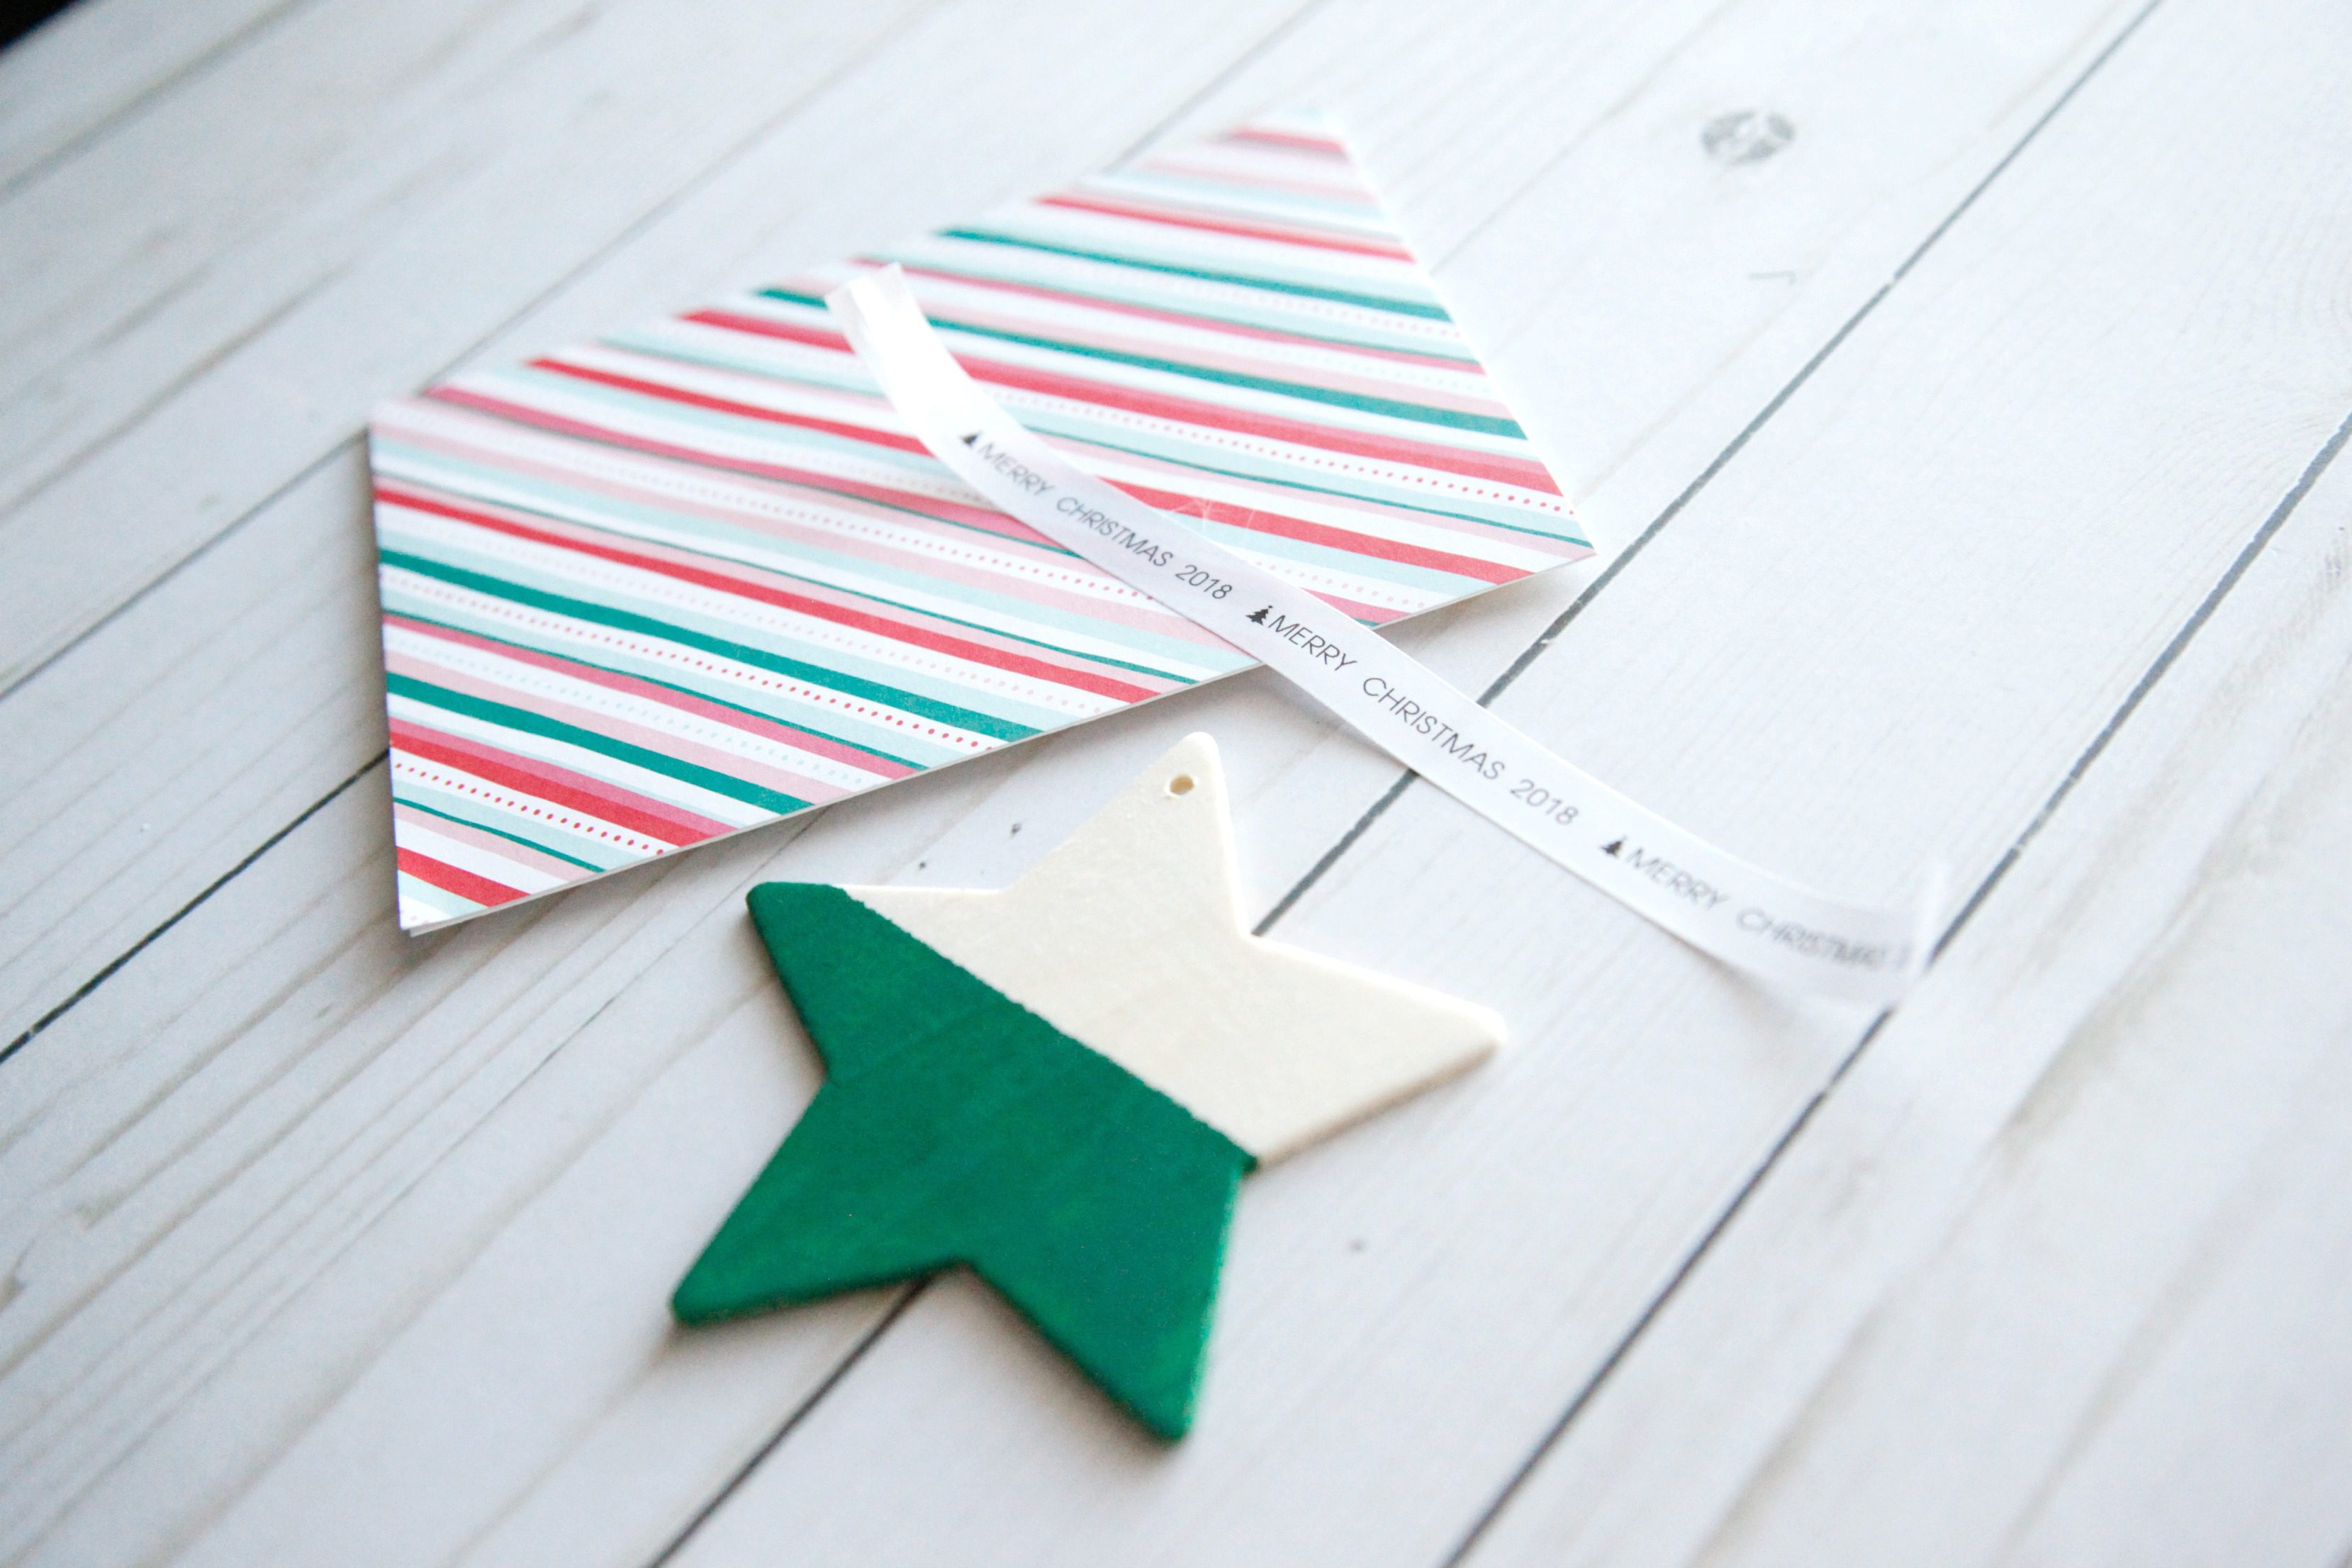
Step 7: Put a small dot of hot glue on the ornament and fold the small end of the ribbon over the glue. 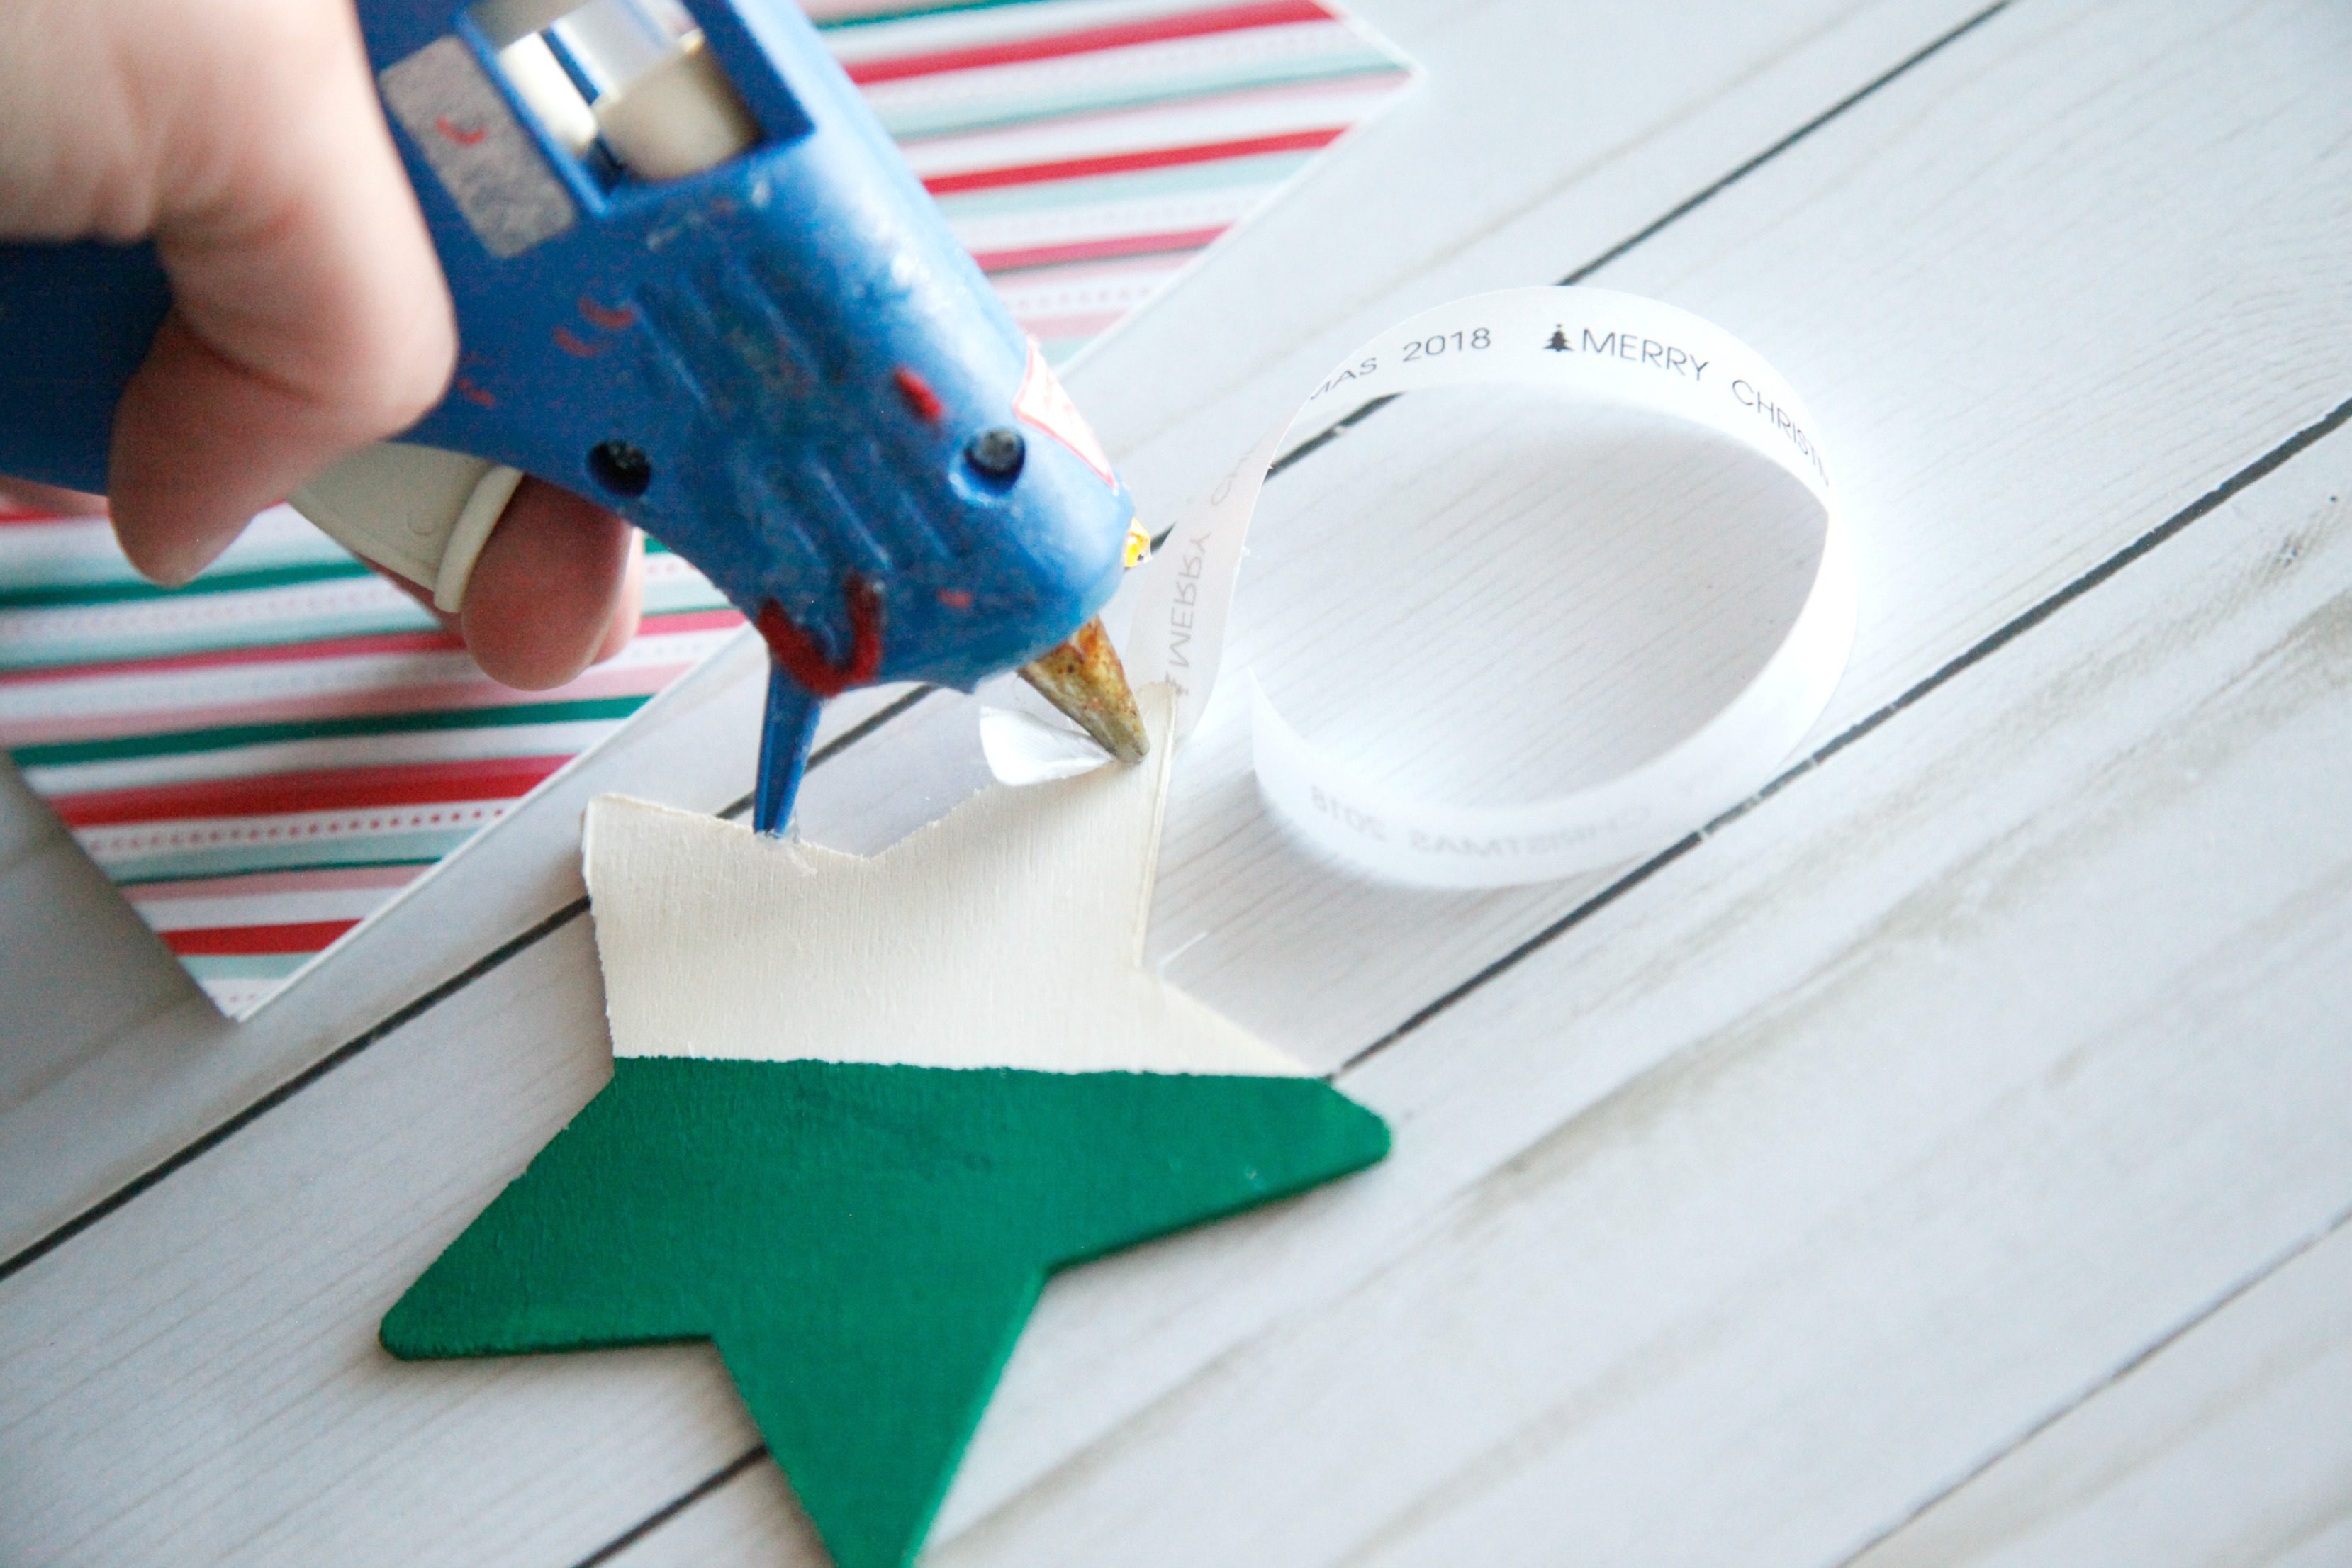
Step 8: Put one more dot of glue on top of the small part of the ribbon, and pull the long end of the ribbon up and over so that it adheres to the glue just below the message on your ribbon. Trim off any excess ribbon. 
Step 9: Attach your ribbon to the front of the card using double-sided tape, or some other adhesive that will allow you to cleanly remove the ornament from the card. 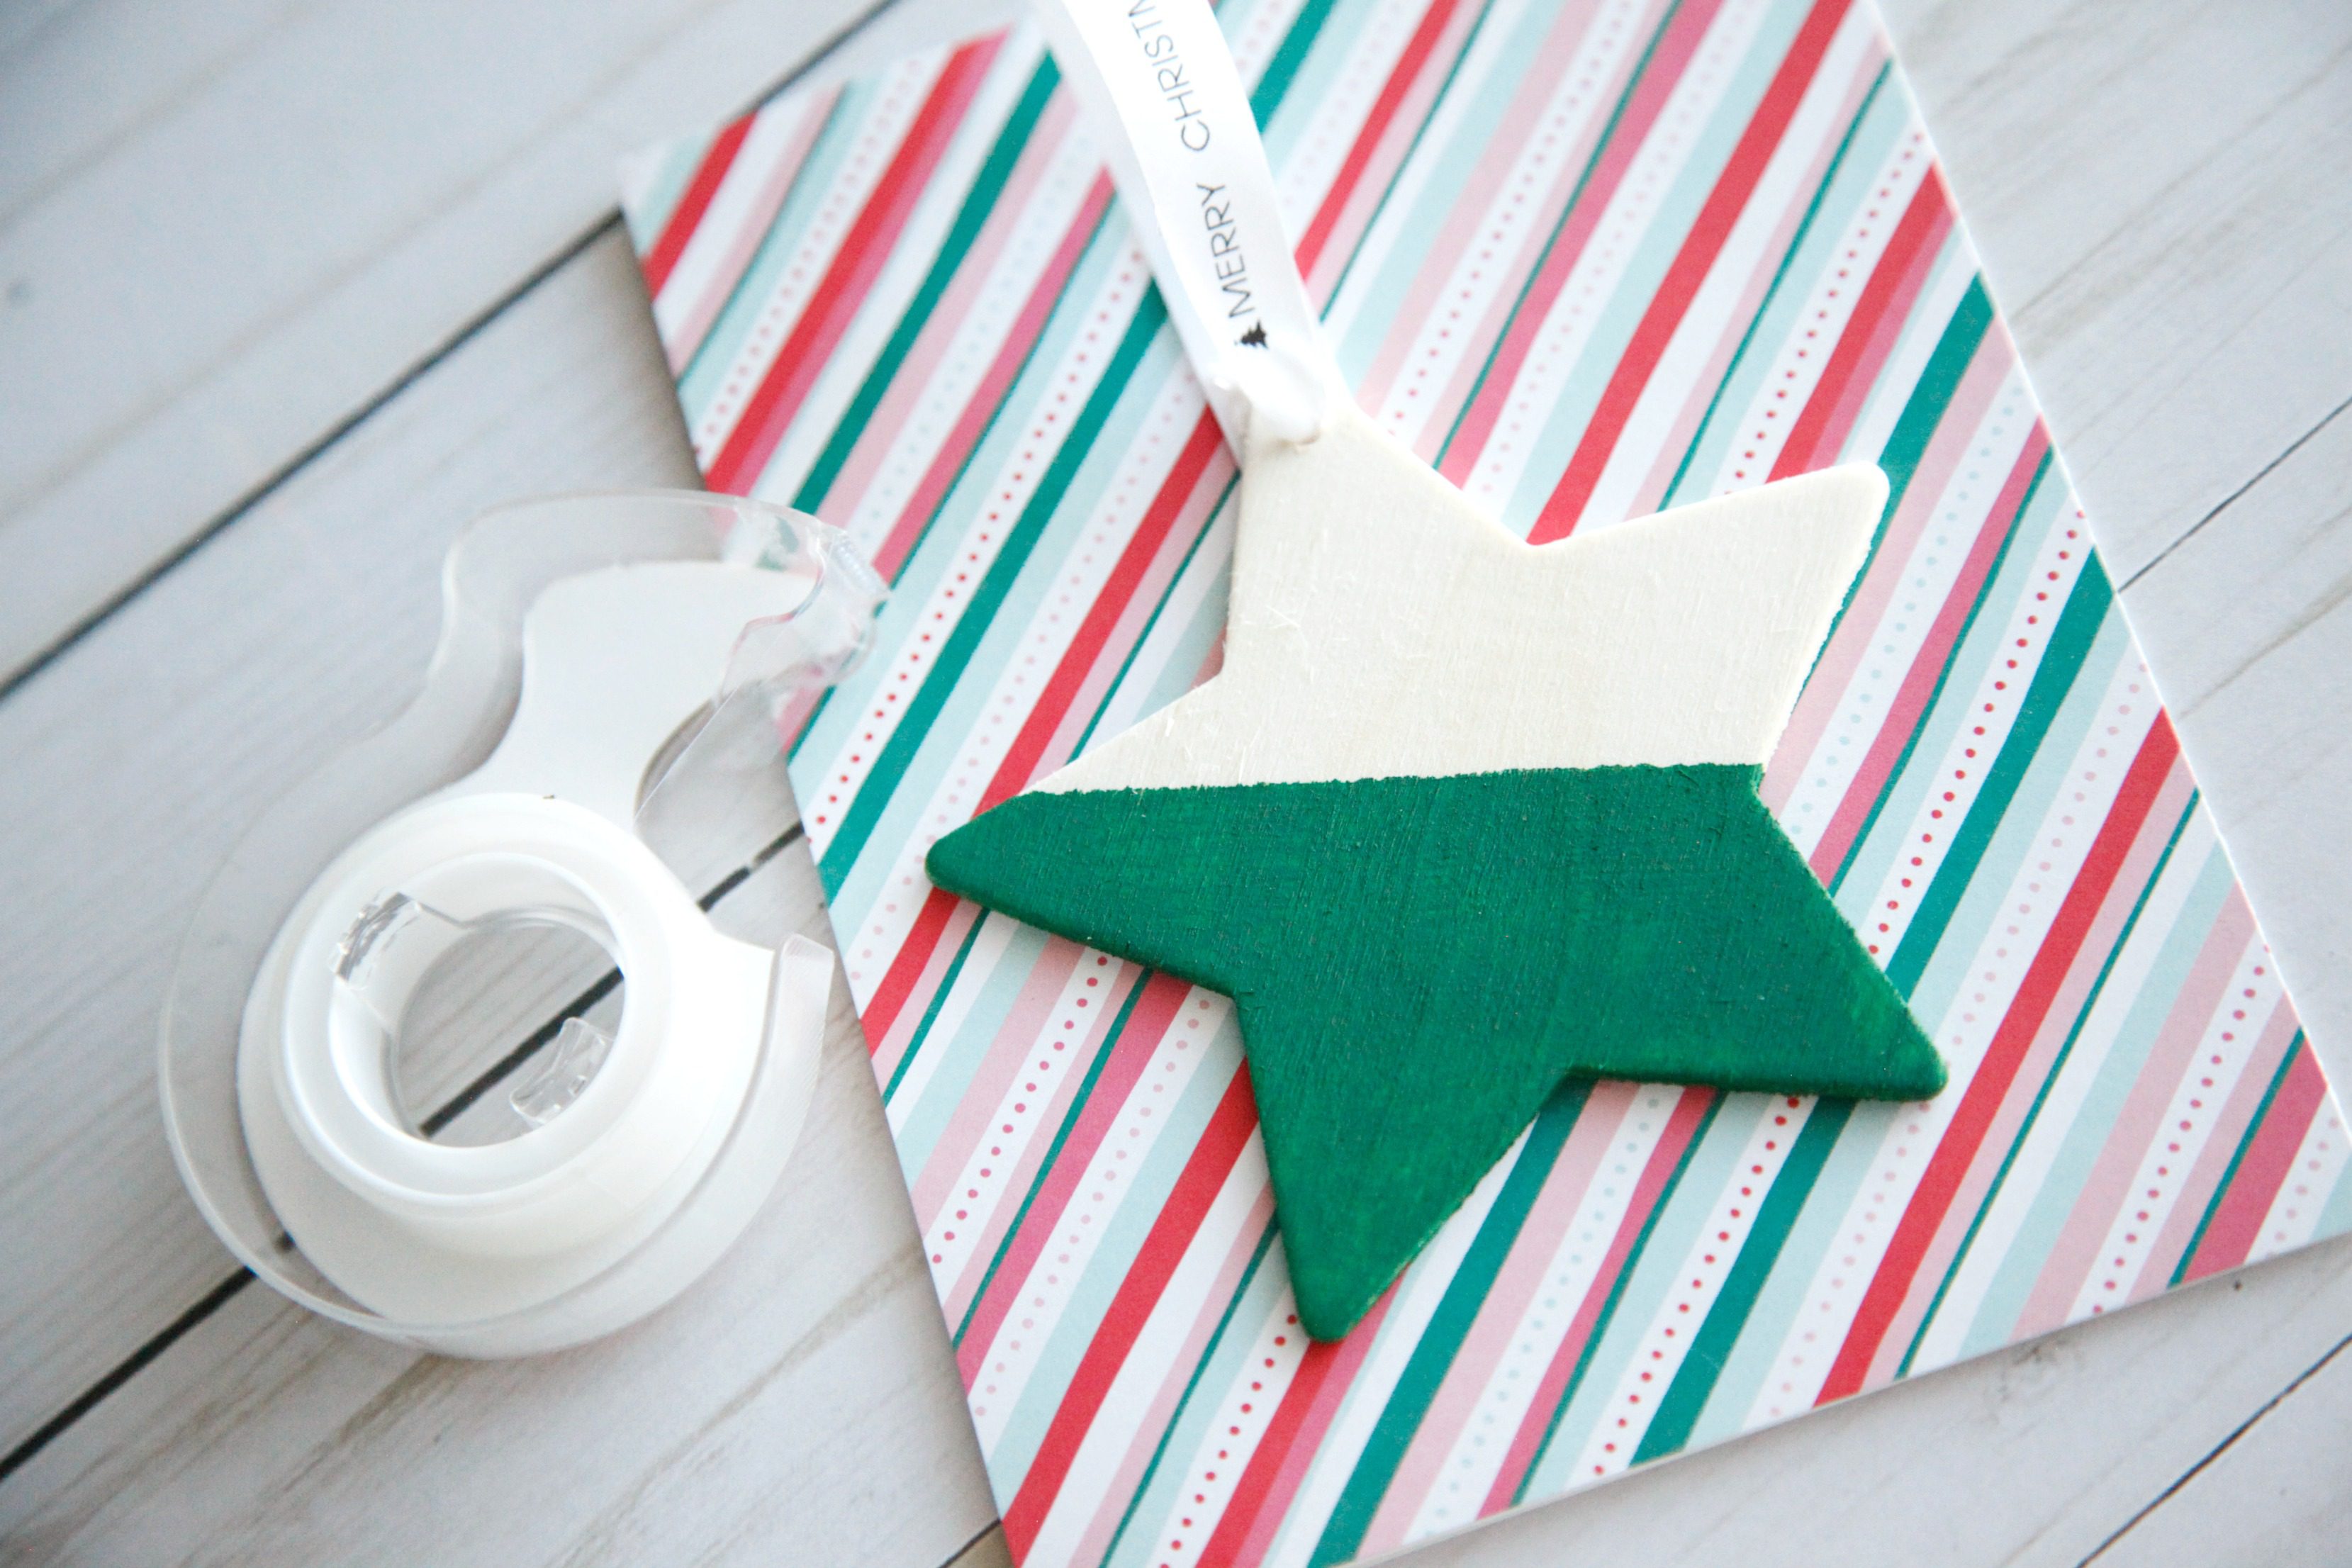
Step 10: Put another small piece of double-sided tape on the inside of the card and fold the ribbon over the top. 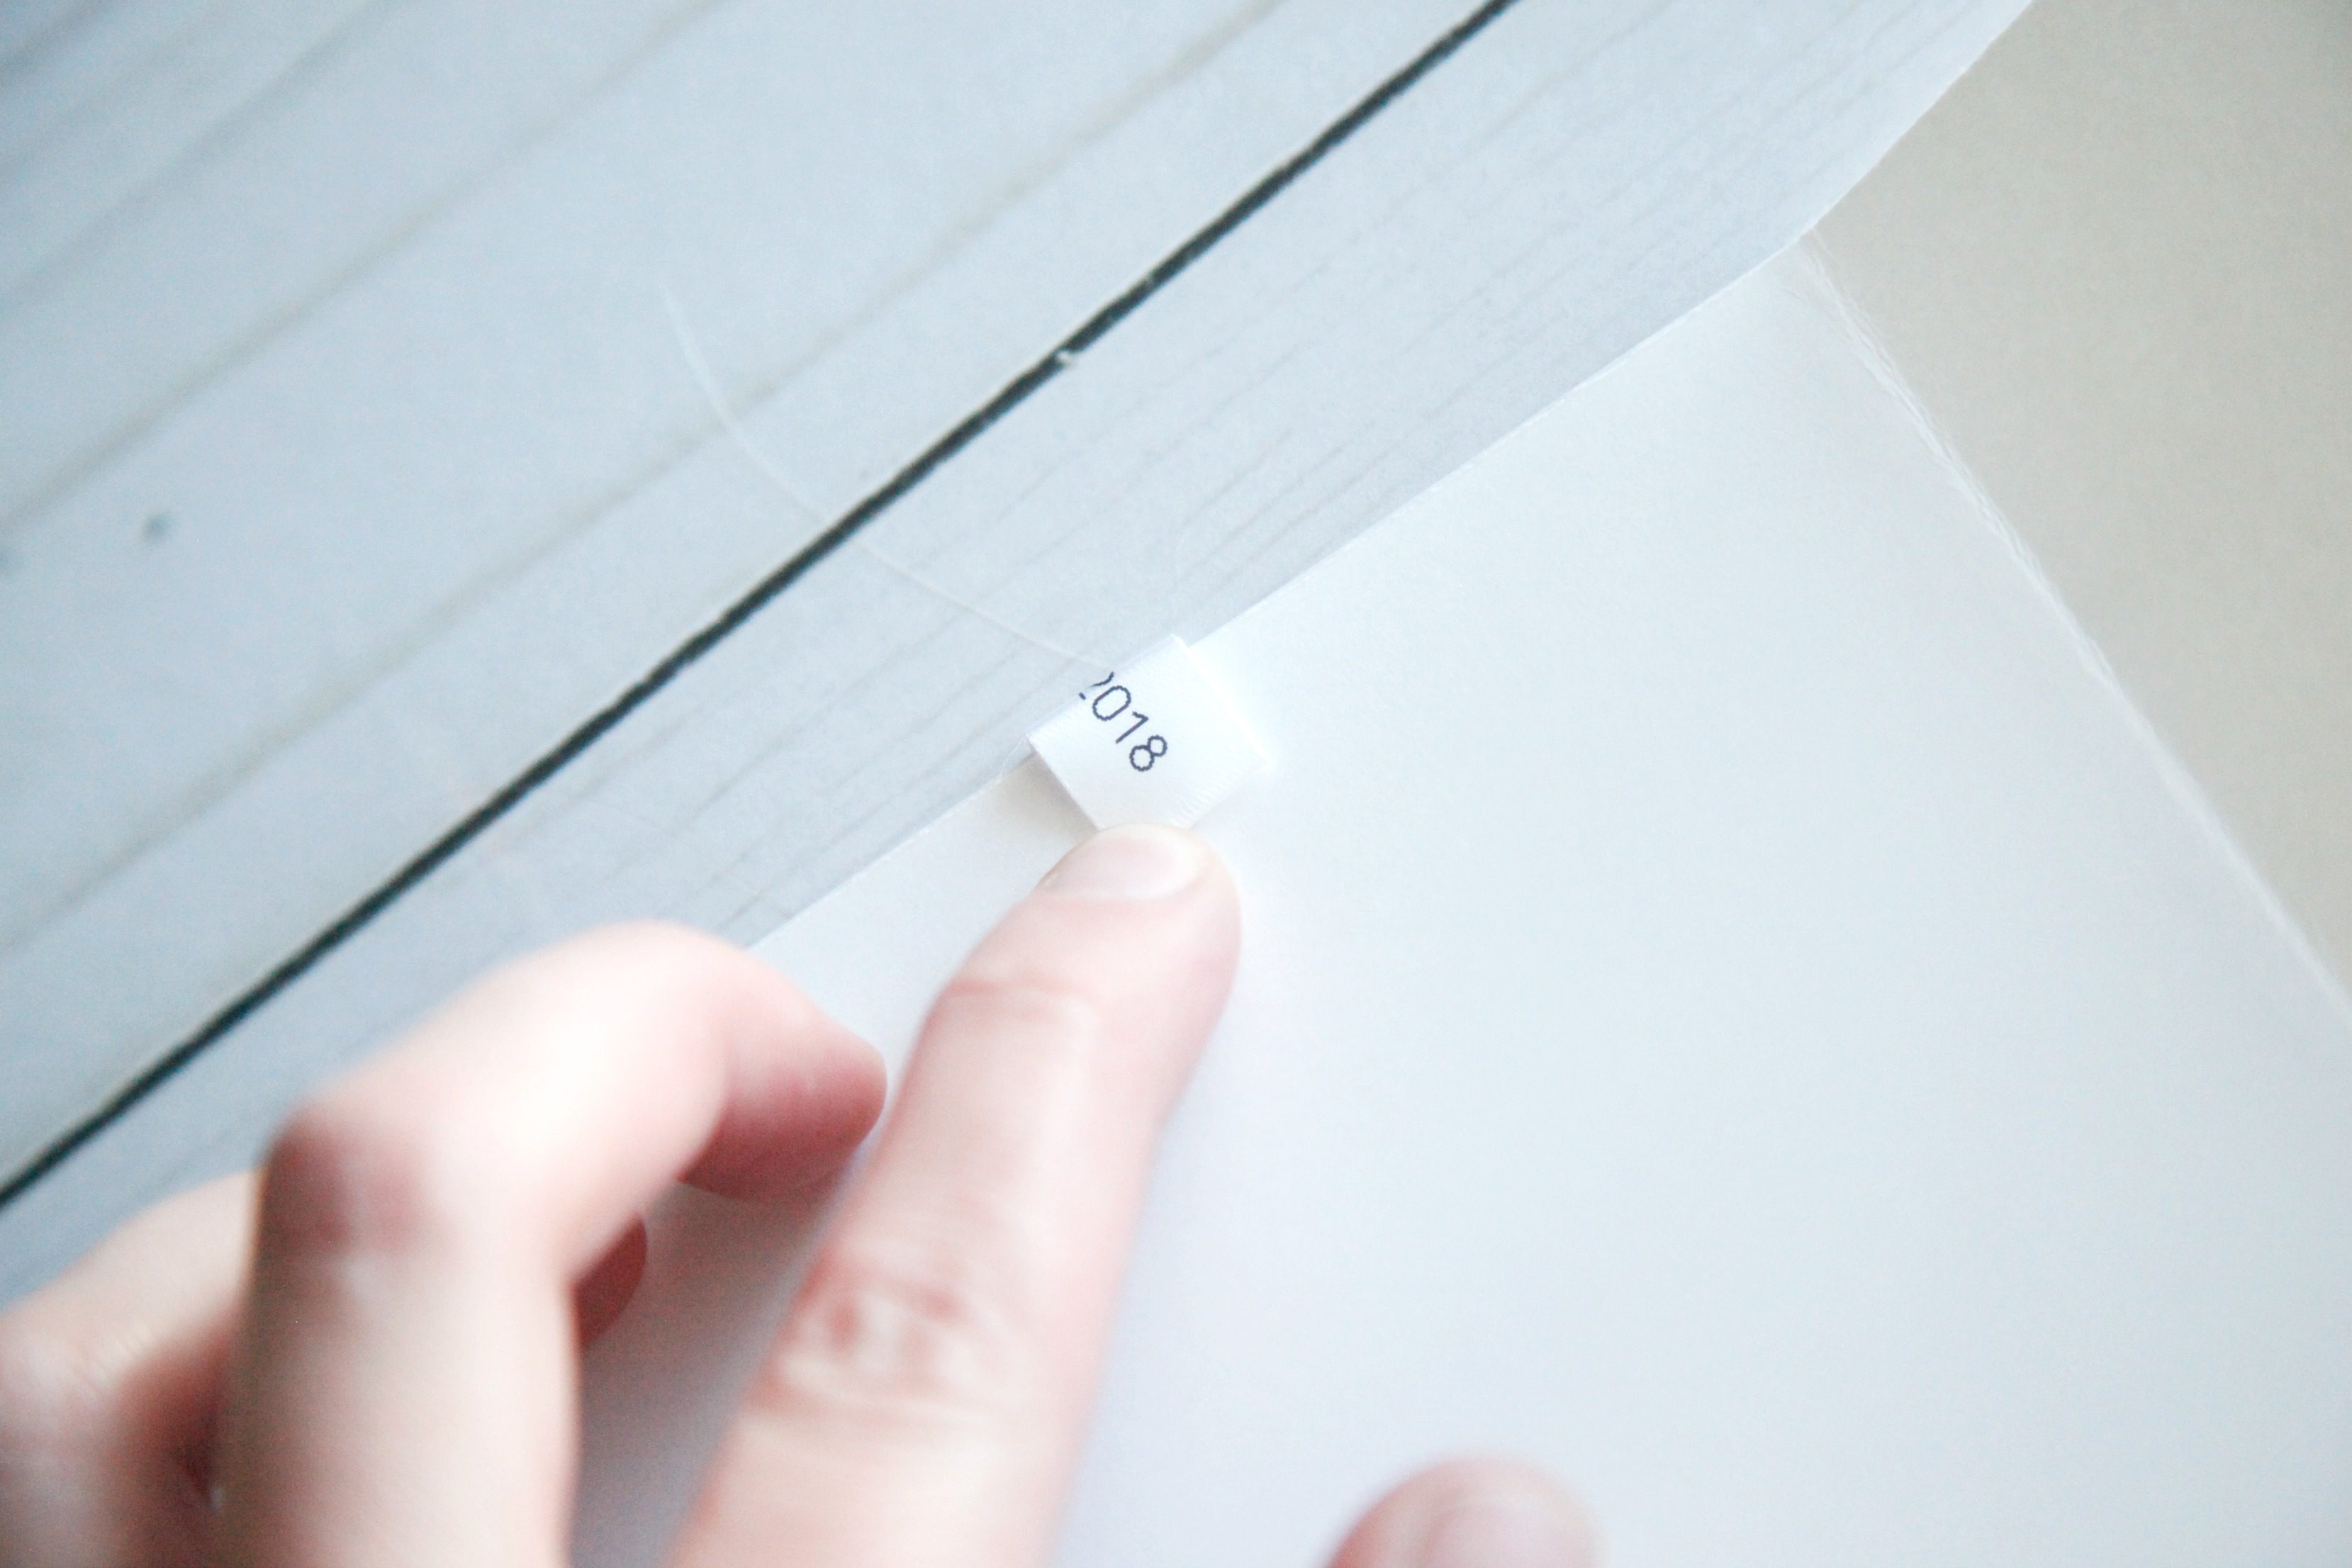
You’re done! Now your cards are ready for you to write a Christmas message and give out to all your friends and family. They can then remove the ornament and hang it on their tree, with a little Christmas message on the ribbon! 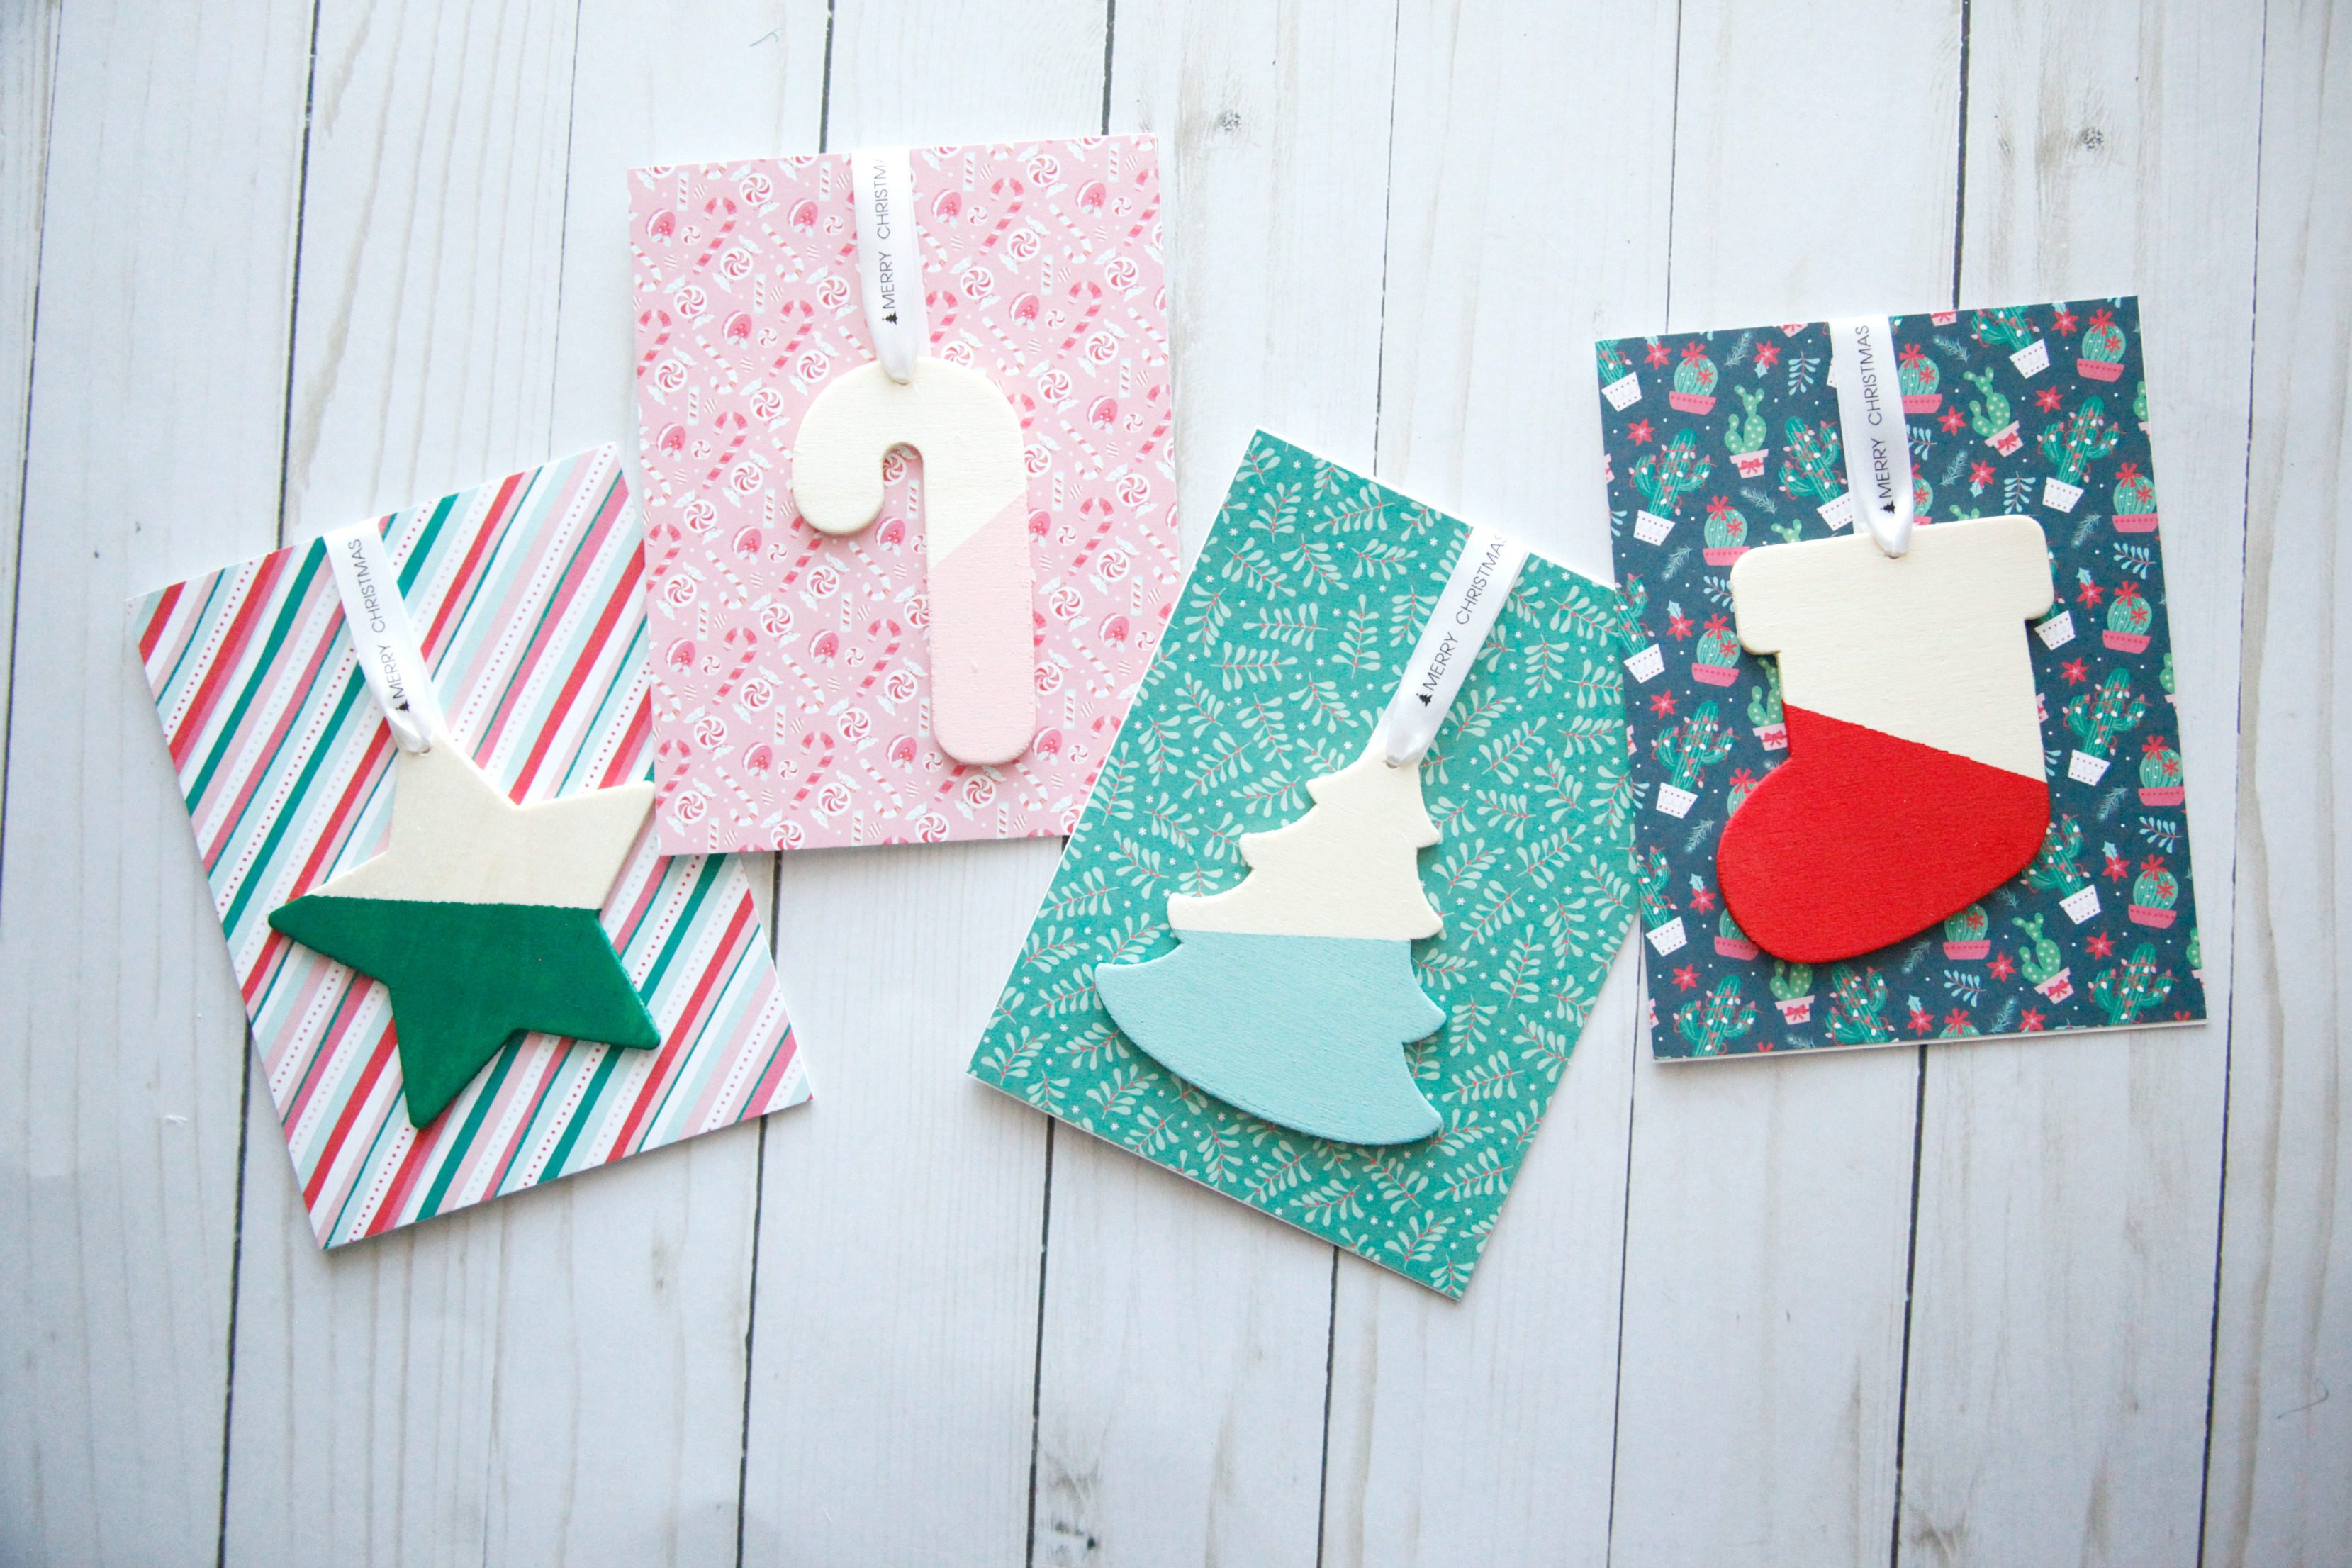

You can find the P-touch Embellish Ribbon & Tape Printer, as well as P-touch Embellish supplies at Michaels. You will love it!
Happy crafting/gifting!
xo, Sam