


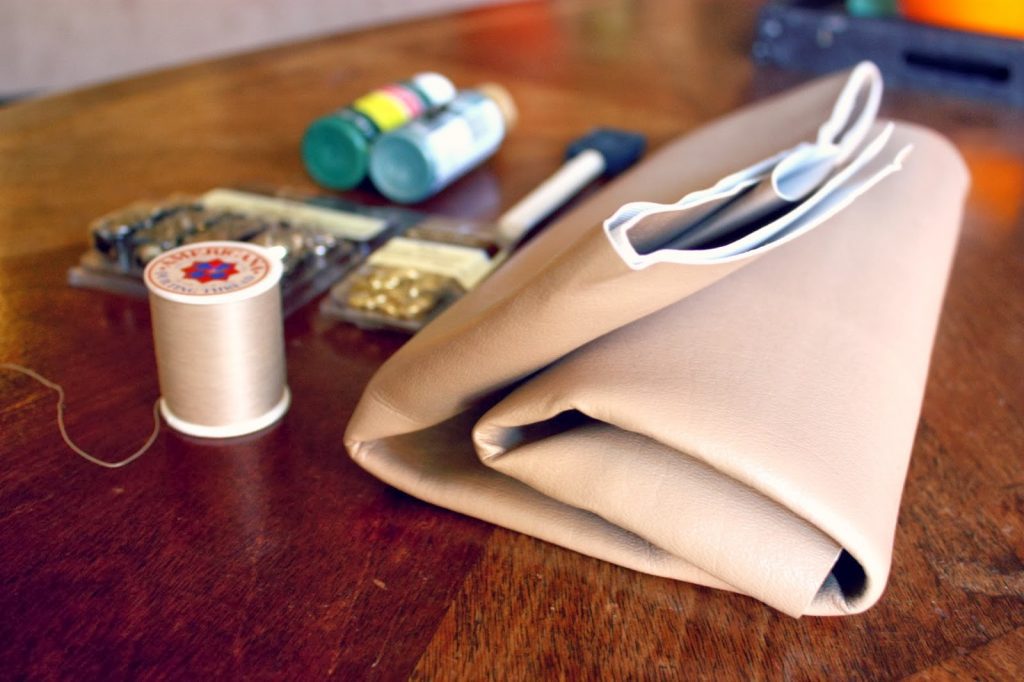
What you Need to Make your DIY Envelope Clutch:
How to Make your Own DIY Envelope Clutch:
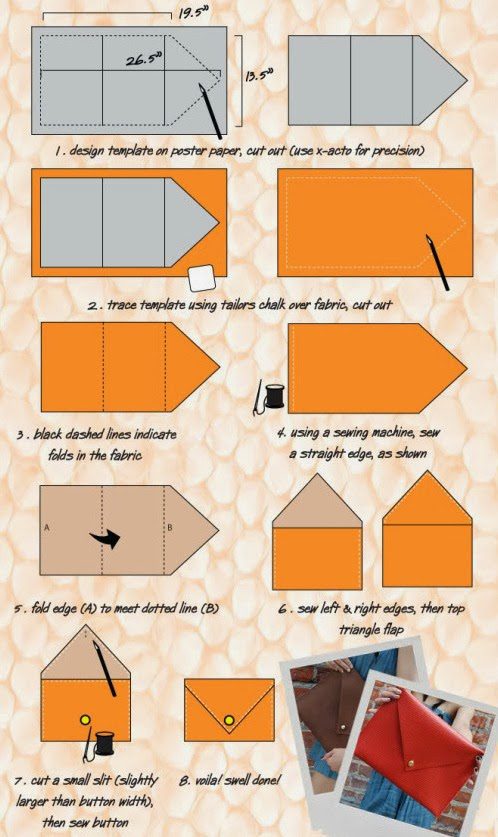
The only thing I did differently from these directions is that I didn’t make a template first, I just cut away on account of my being a lazy crafter. I also chose to leave a small seam allowance on the flap to fold under and sew to get rid of unfinished edges. However, if you leave yours unfinished with this kind of plastic it doesn’t make a huge difference because it holds its shape so well. And people. I cannot tell a lie. These are SO easy. Seriously an under 20 minute situation to cut and sew together. You can make them during an episode of Friends and still have time to get up for a snack before it is over.
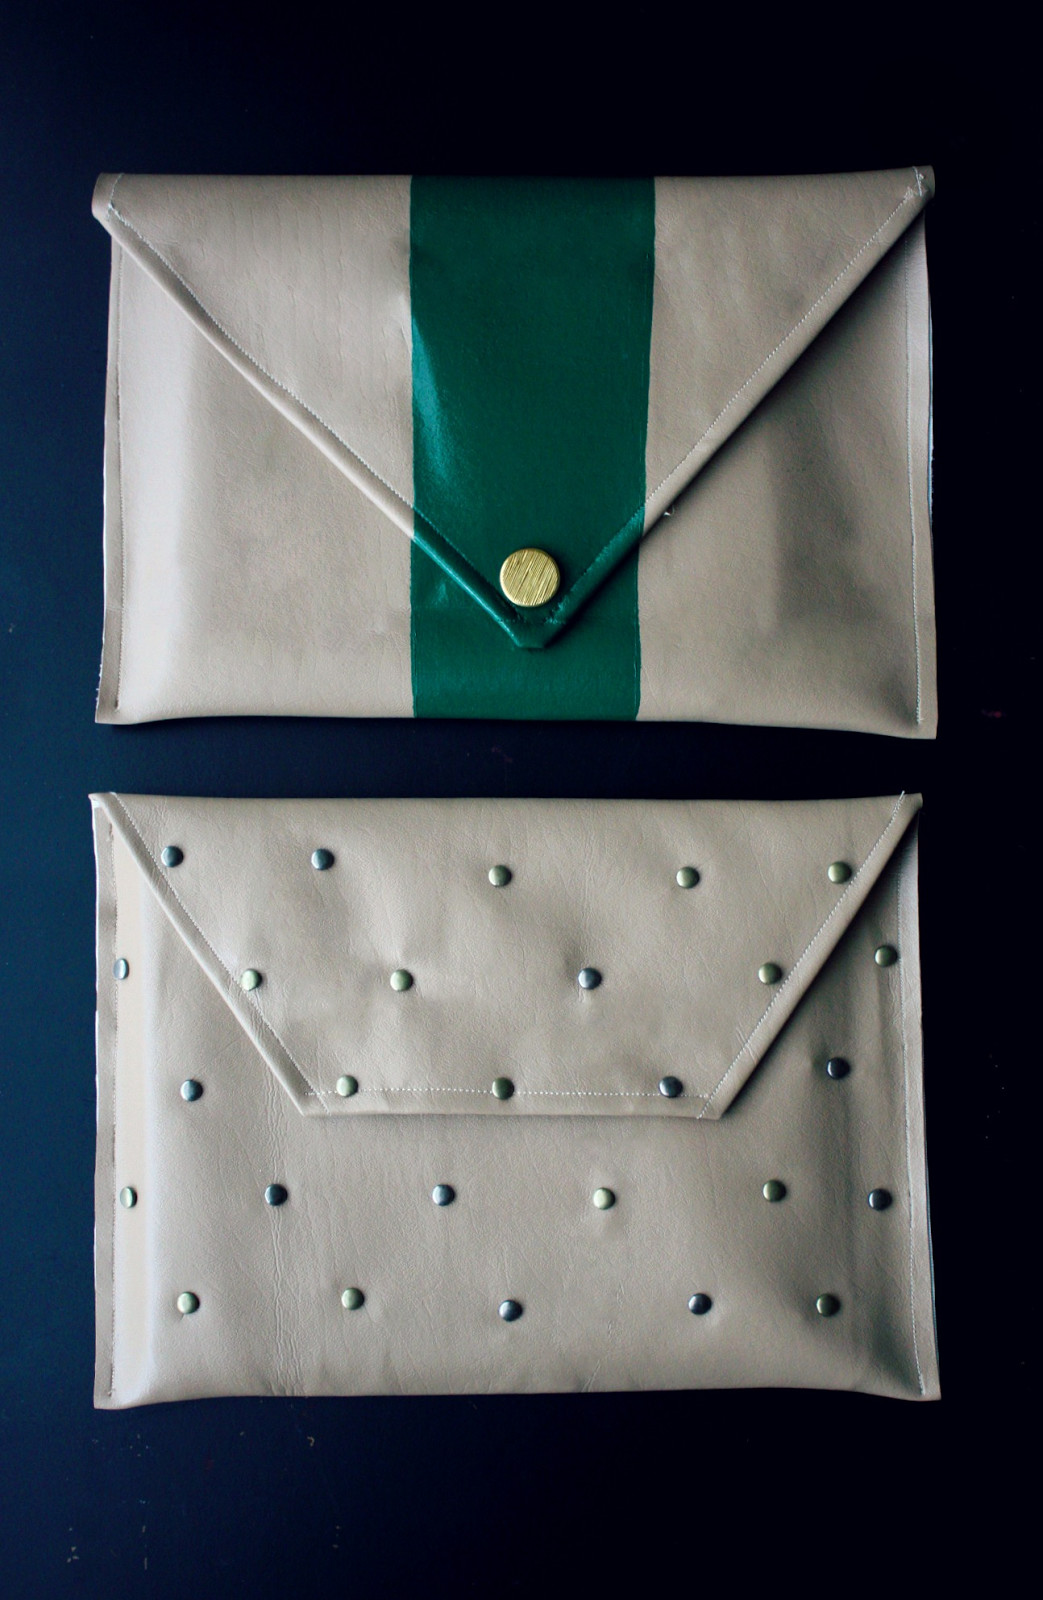

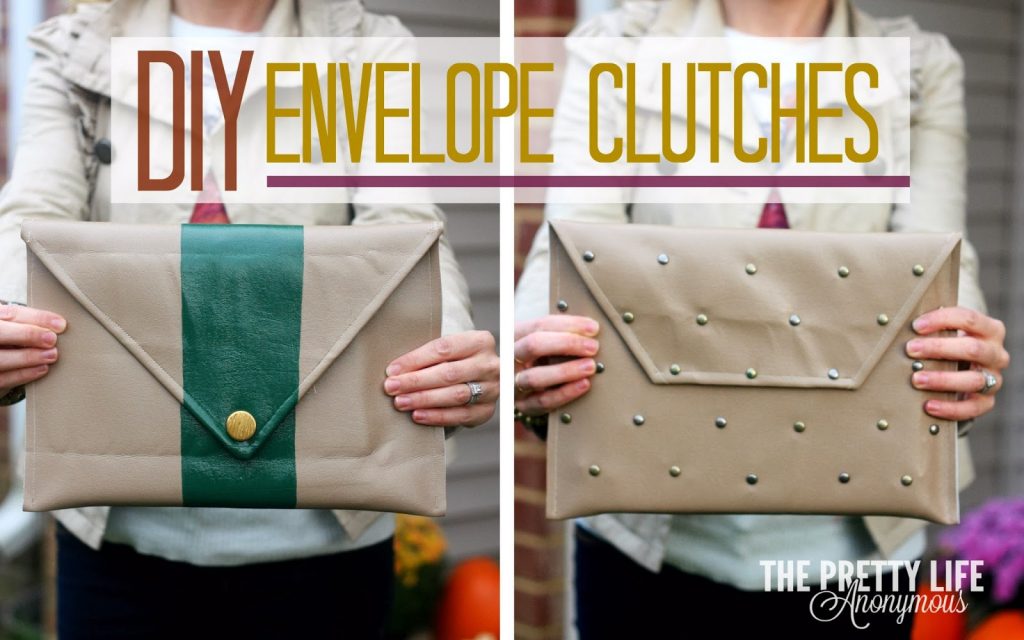
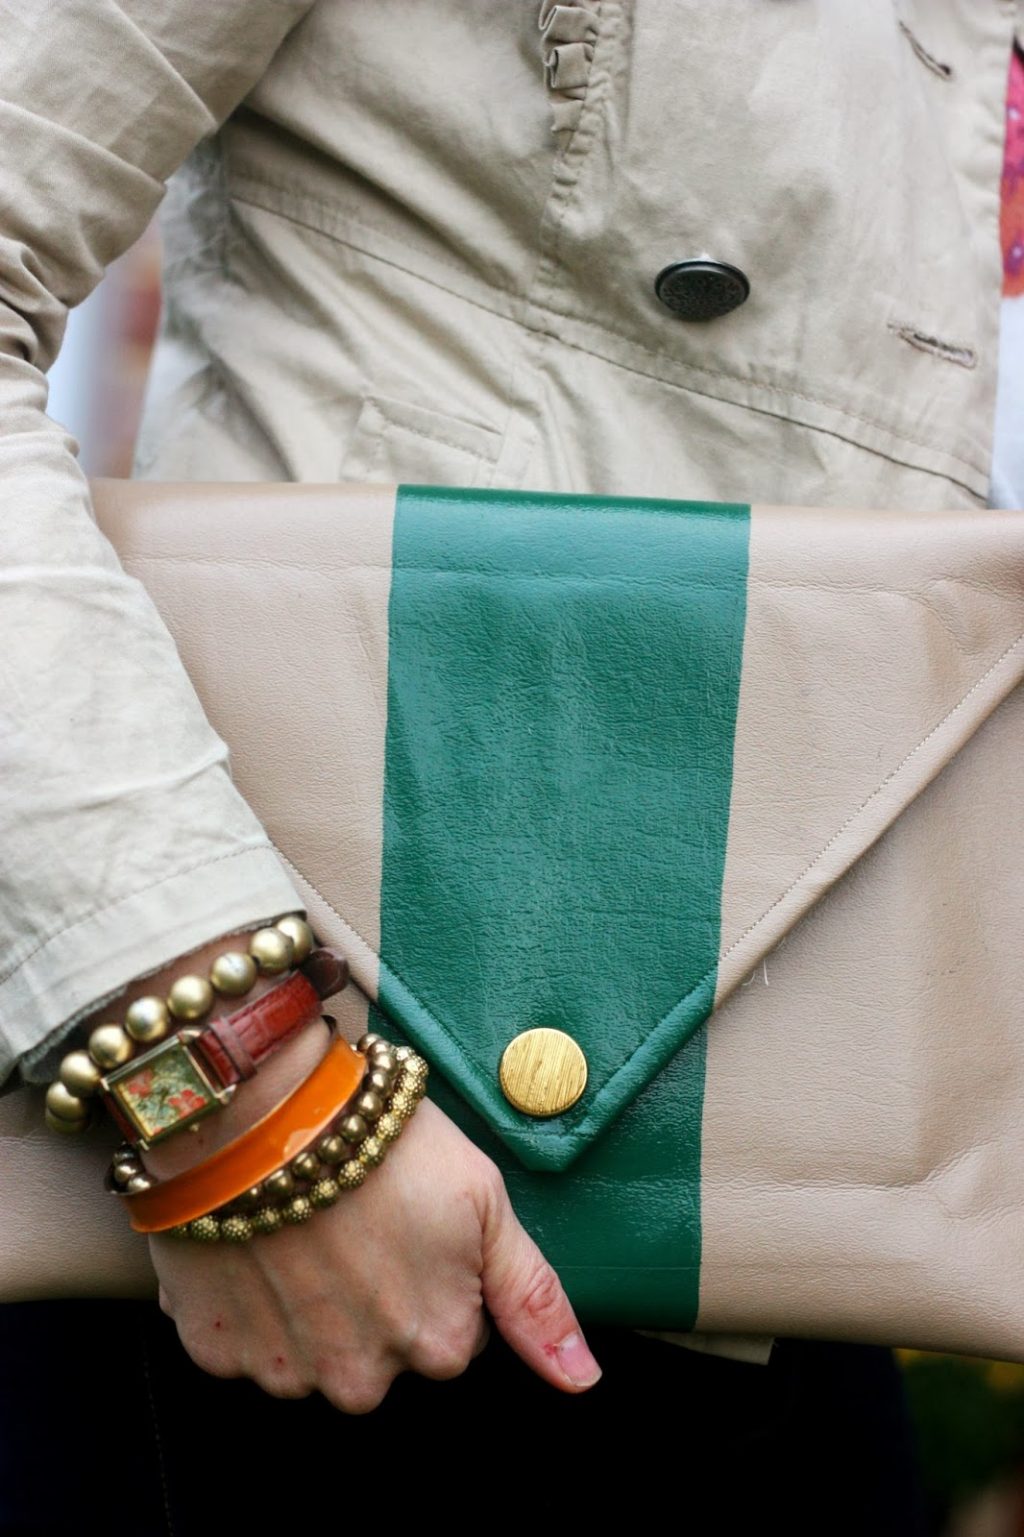
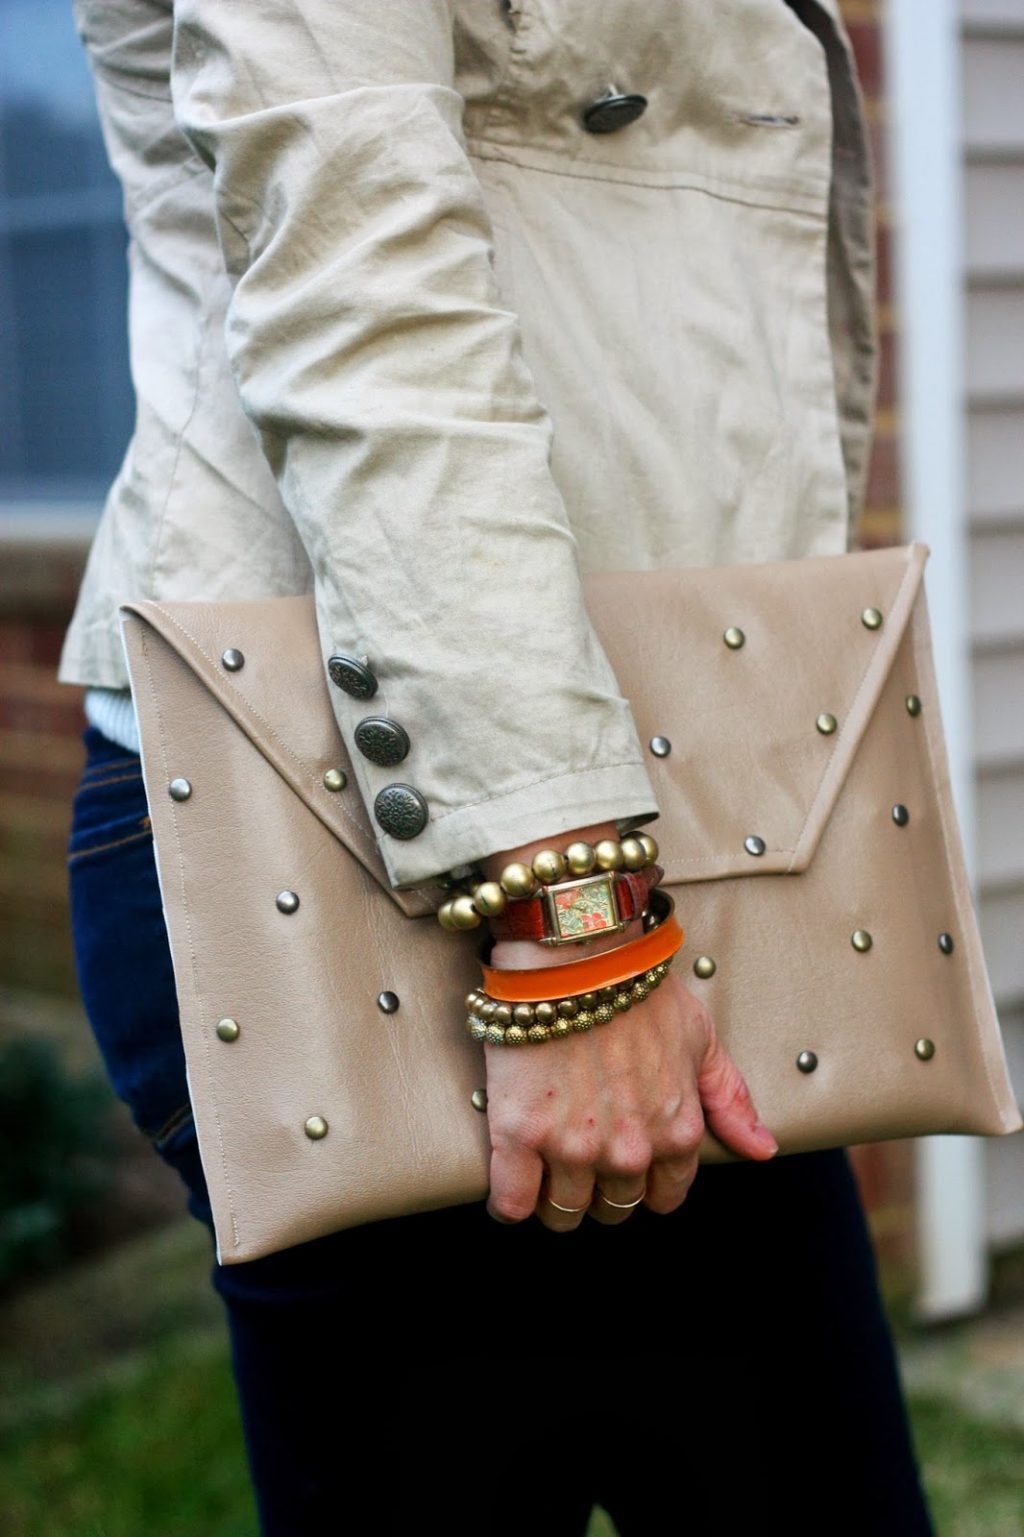
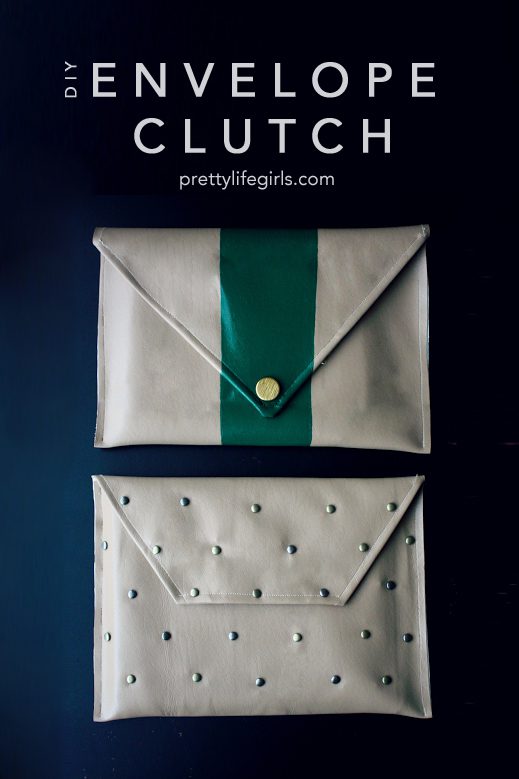
Once you have put the clutches together it is time to embellish! All I did was slap some painter’s tape on one, painted the green stripe, then added a gold button. On the other I used a tack to poke holes and add the scrapbook brads. SO easy and so cute. These suckers are sturdy and fashionable and sooo simple to put together. I love! Here they are in action:
Are you “clutching” your chest with excitement?? I thought so.
Make this DIY envelope clutch! You’ll love it.
ox. Liz


I like this envelope style. I wonder if you’ve ever done a composition book cover in this style with a velcro close rather than a button or snap. If you have a pattern, please let me know.
hey there! love this aesthetic. it looks like swell mayde took down their post with this pattern/measurements. any chance you can post them here? looking forward to doing this project!
[…] you need: -Plain clutch (You can buy one or I made my own using our tutorial here) -Metal house letters with screws and nuts (you can find these at your hardware store) -Screw […]
[…] DIY Instructions and Project Credit – ThePrettyLifeGirls […]
[…] I’ll admit this one is a little more involved, but makes for a great gift for the working woman in your life. Via the Pretty Life Girls. […]
[…] I’ll admit this one is a little more involved, but makes for a great gift for the working woman in your life. Via the Pretty Life Girls. […]
[…] Check out the full DIY tutorial HERE […]