


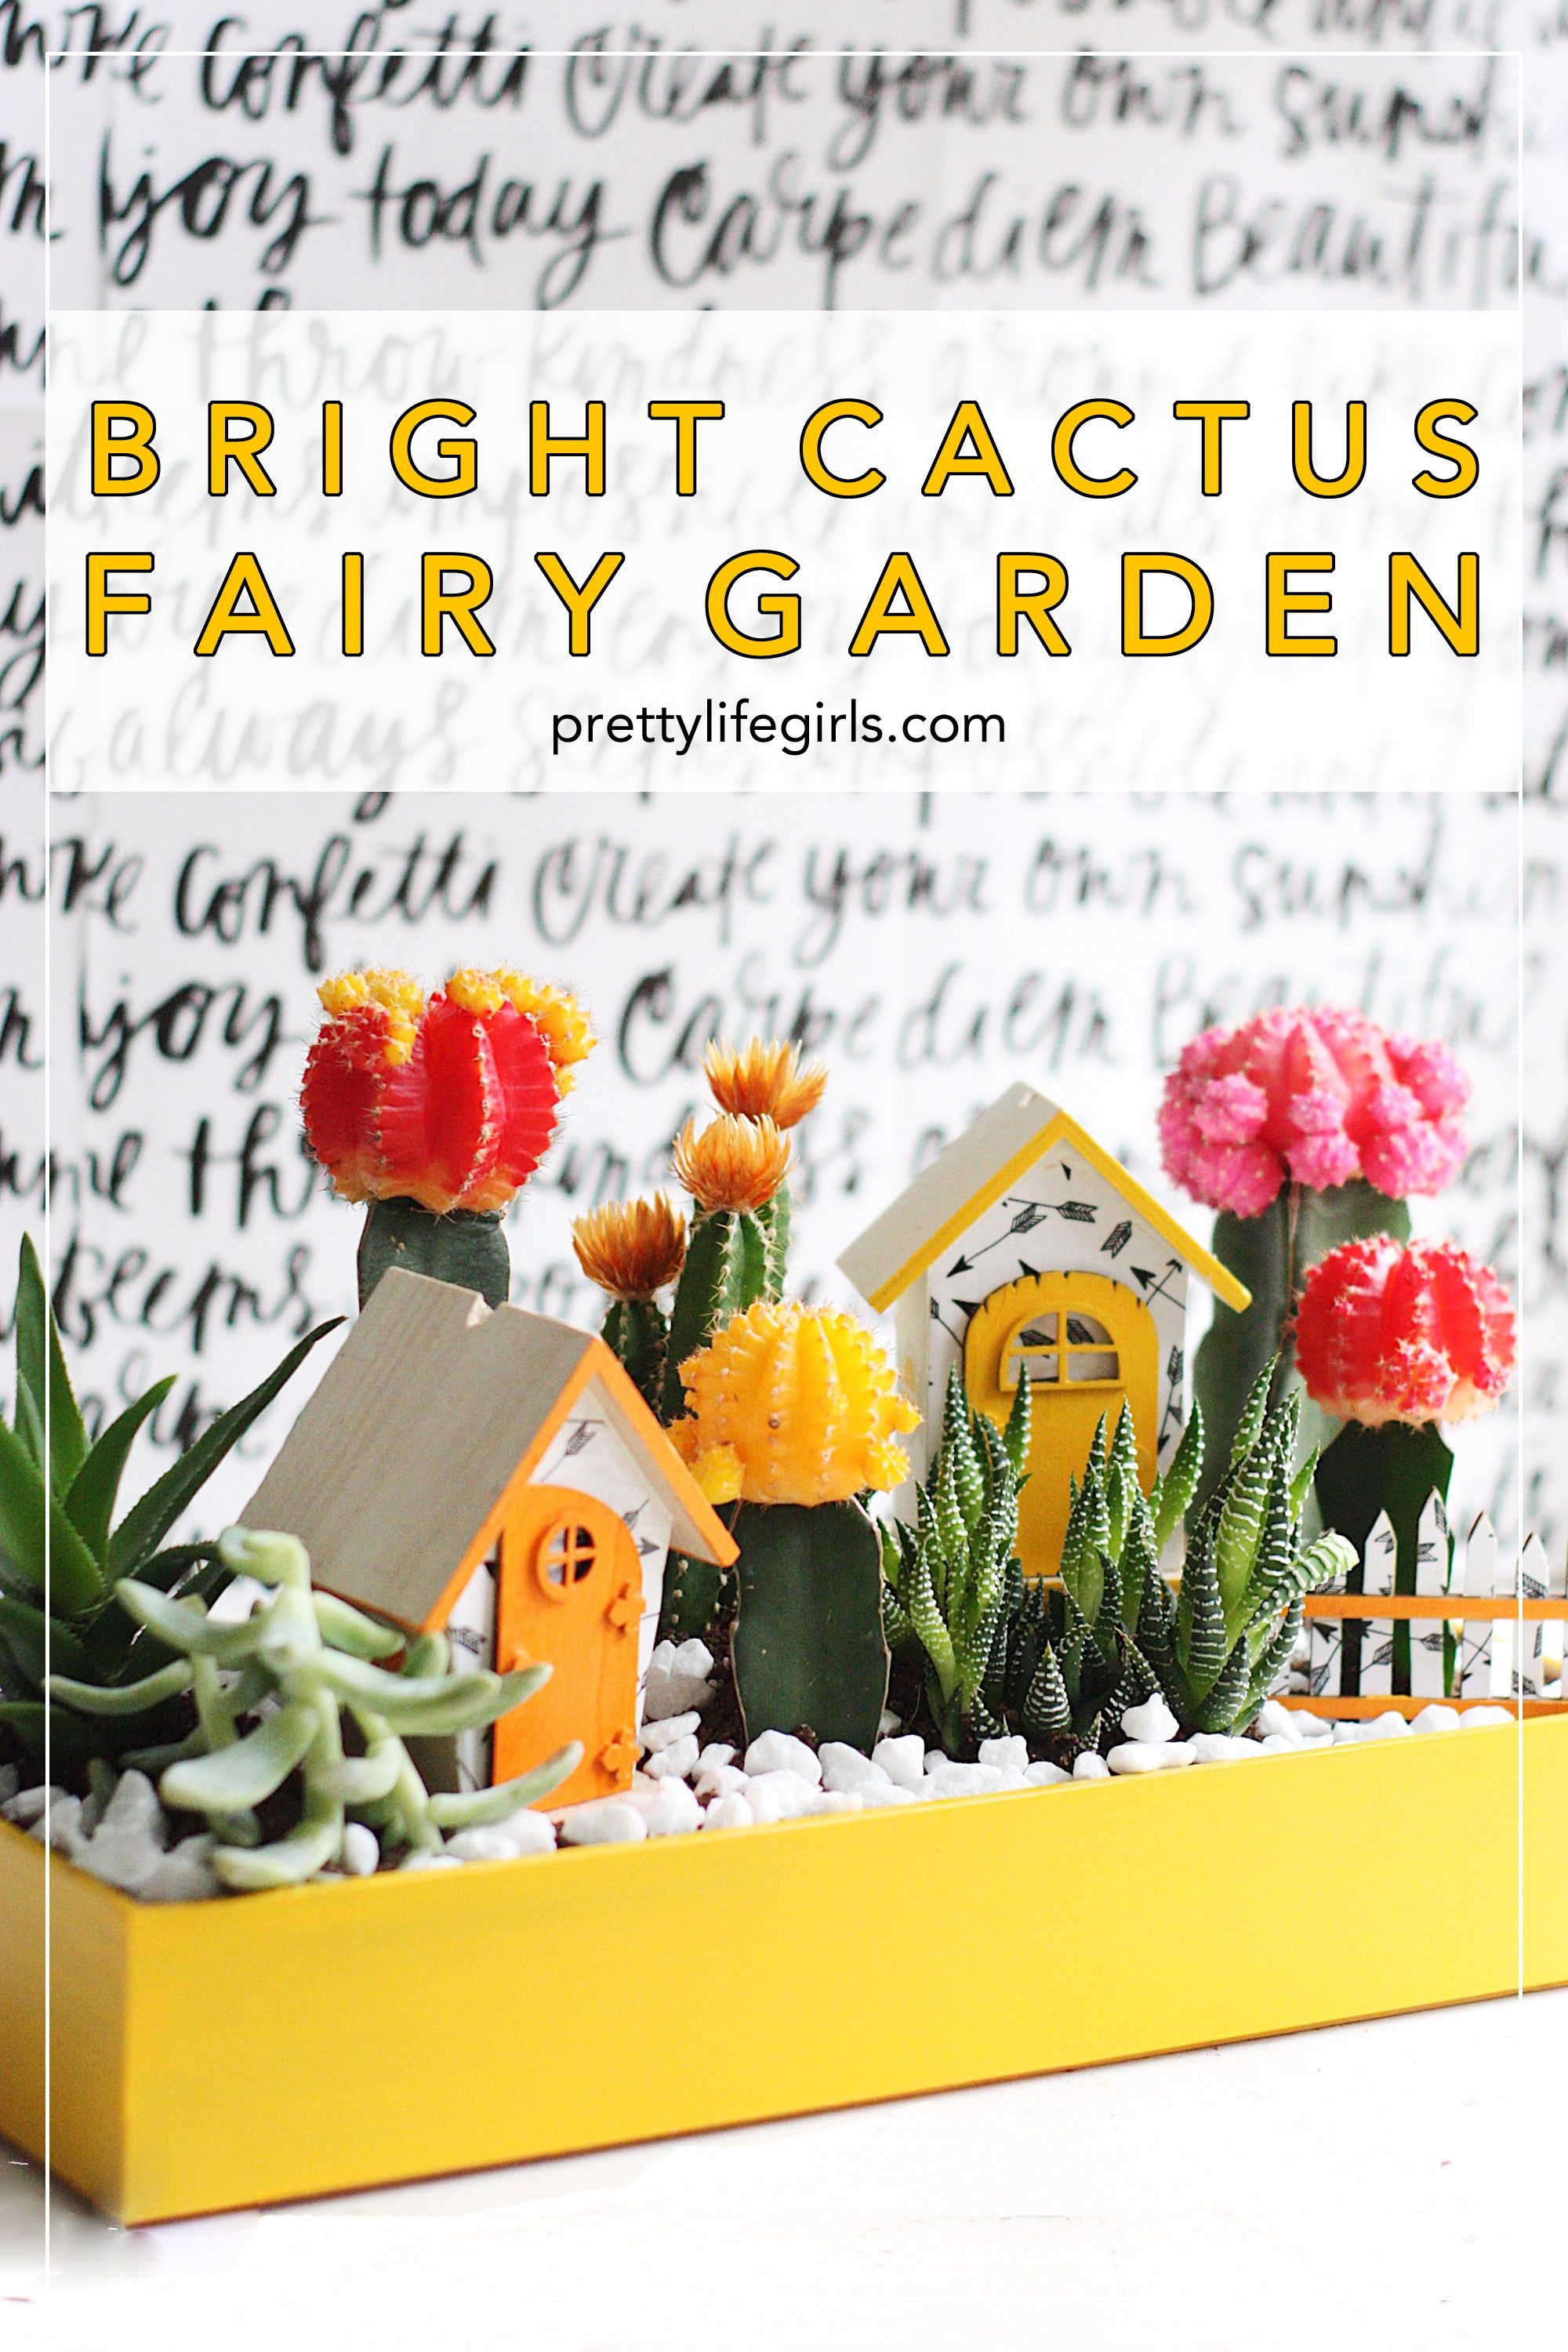
If you follow this blog closely then you know that this is our second year as Plaid Creators with our friends at Plaid Crafts. Getting the chance to work with Plaid, use their amazing products and stretch ourselves creatively has been so much fun, and this month’s project with Plaid was no exception. If you have been in any craft store lately, you may have noticed an aisle completely packed with tiny chairs and houses, mushrooms, gnomes, and of course, fairies, all for the fairy garden trend! The idea of this trend is that if you build this kind of miniature garden with tiny structures, actual living plants, and tend it with love, you can lure fairies to them and with those fairies come good luck!
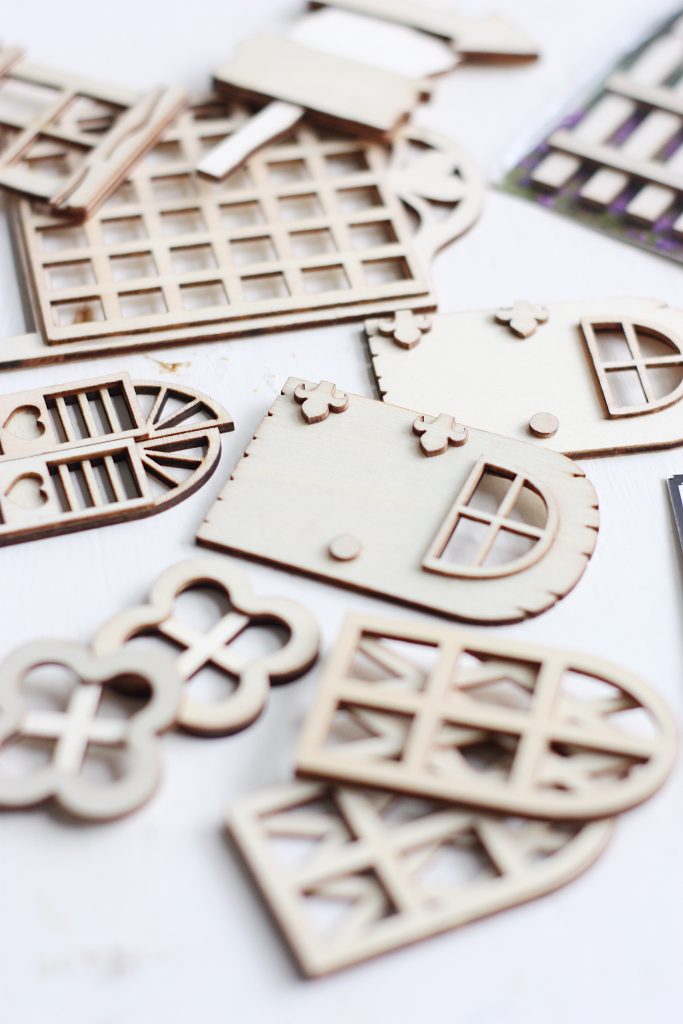
Now, if I’m being honest, before I started on this project, I knew very little about the trend and thought it might only be for grandmas who had a thing for lawn ornaments, but the more I researched the more I found beautiful, detailed, incredibly creative fairy gardens that were totally inspiring and got my wheels turning! Plus, Plaid Crafts has the most adorable line of FolkArt® 3×3 Mini Stencils and wooden surfaces like windows, doors and fences that are full of character and perfect for building your own fairy garden! So, I decided to use these awesome products to create my own modern spin on a fairy garden with this Bright Cactus Fairy Garden! I’m so excited to show you how to make your own. Let’s get to it!
Supplies Needed:
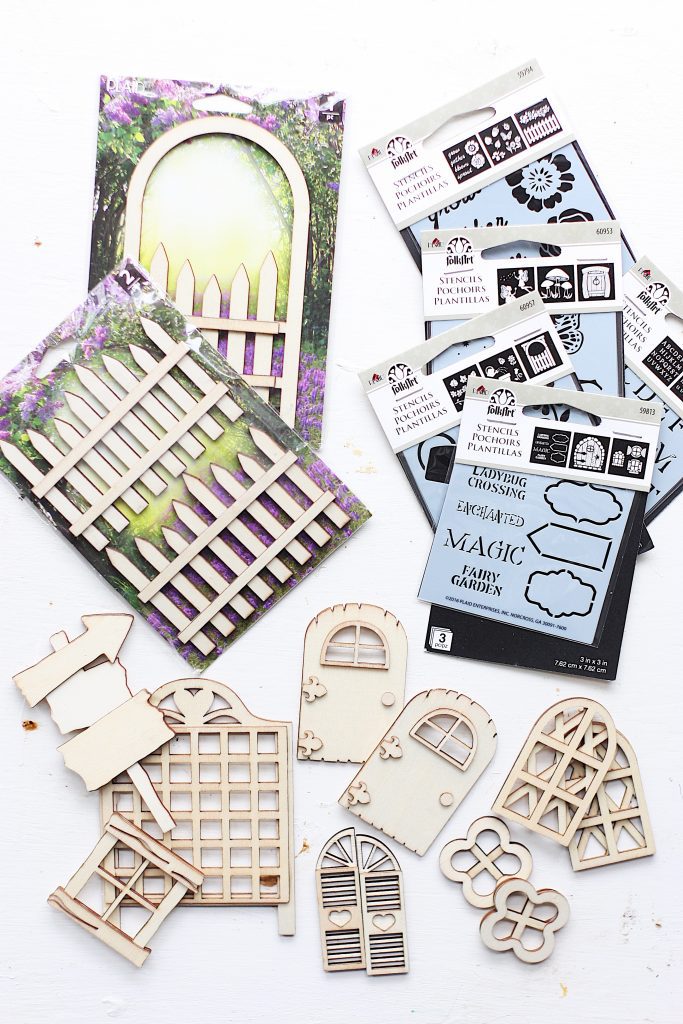
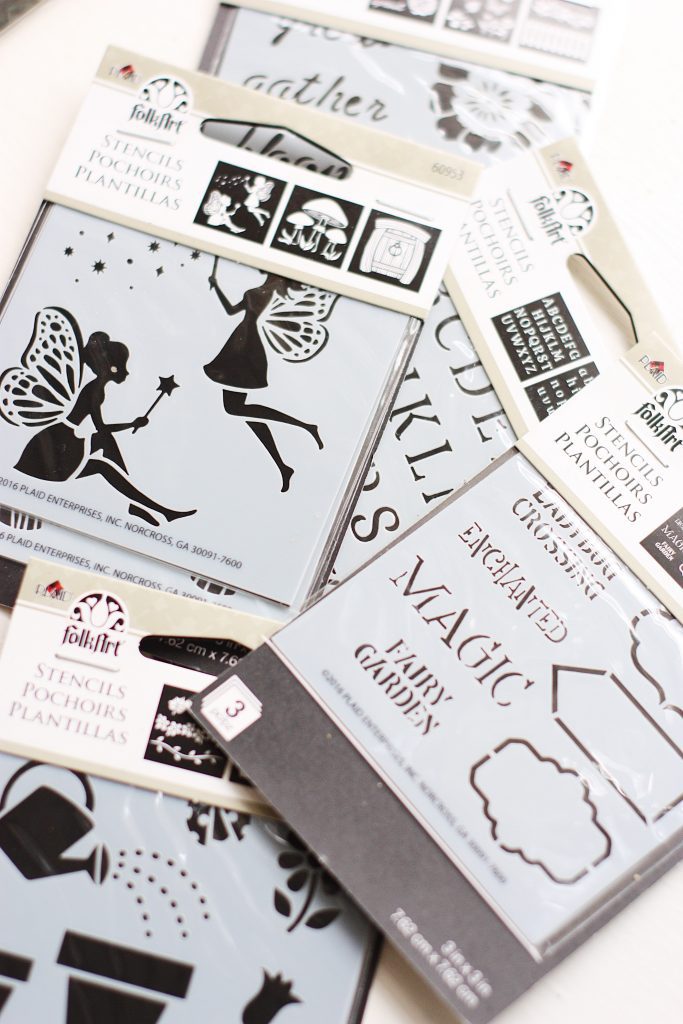
FolkArt ® 3×3 Mini Stencils
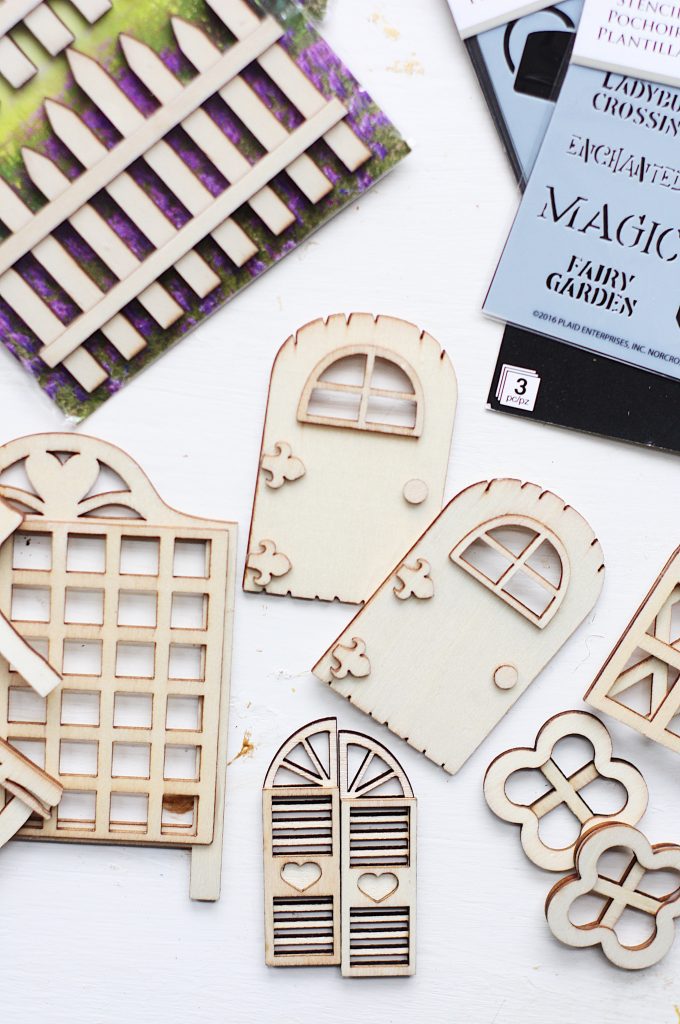
FolkArt ® Wooden Surfaces
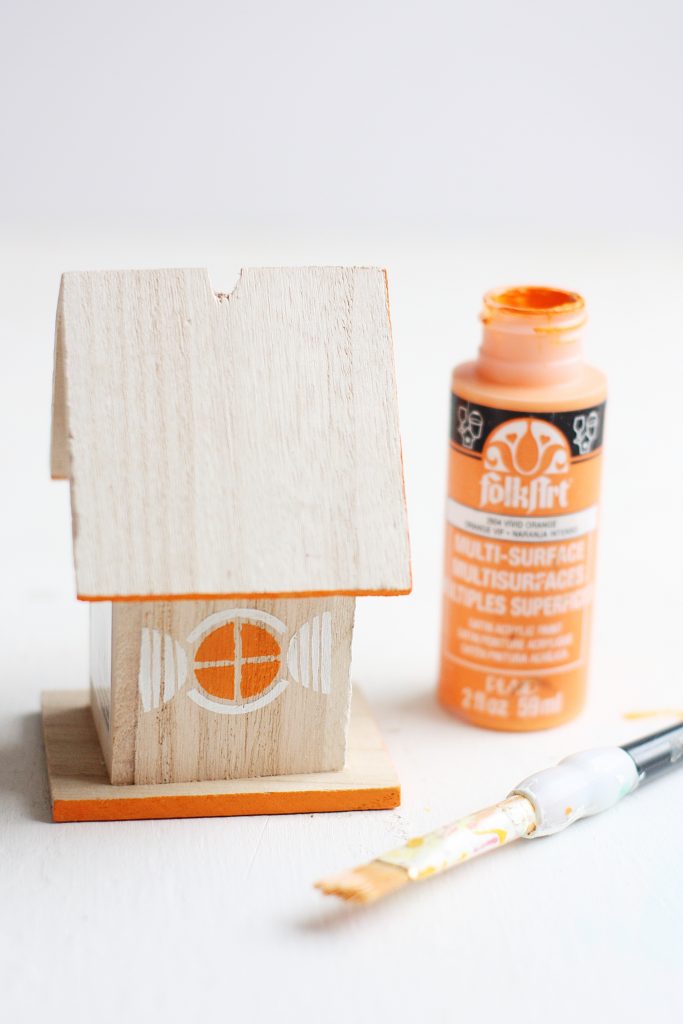
FolkArt ® Multi-Surface Paint (or if you are building a fairy garden for outside, FolkArt ® Outdoor™)
FolkArt ® Paint Brushes
Wooden Planter Box
Unfinished mini birdhouses
Patterned Paper
Mod Podge Gloss
Glue gun + sticks
Variety of cacti + succulents
Indoor planting soil
Decorative pebbles

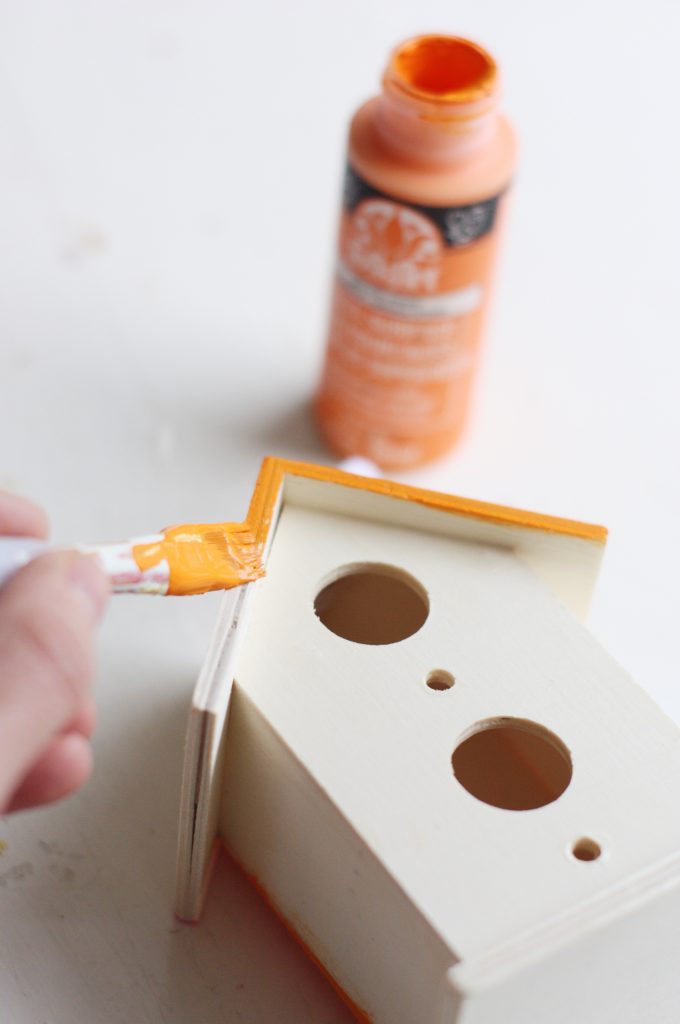
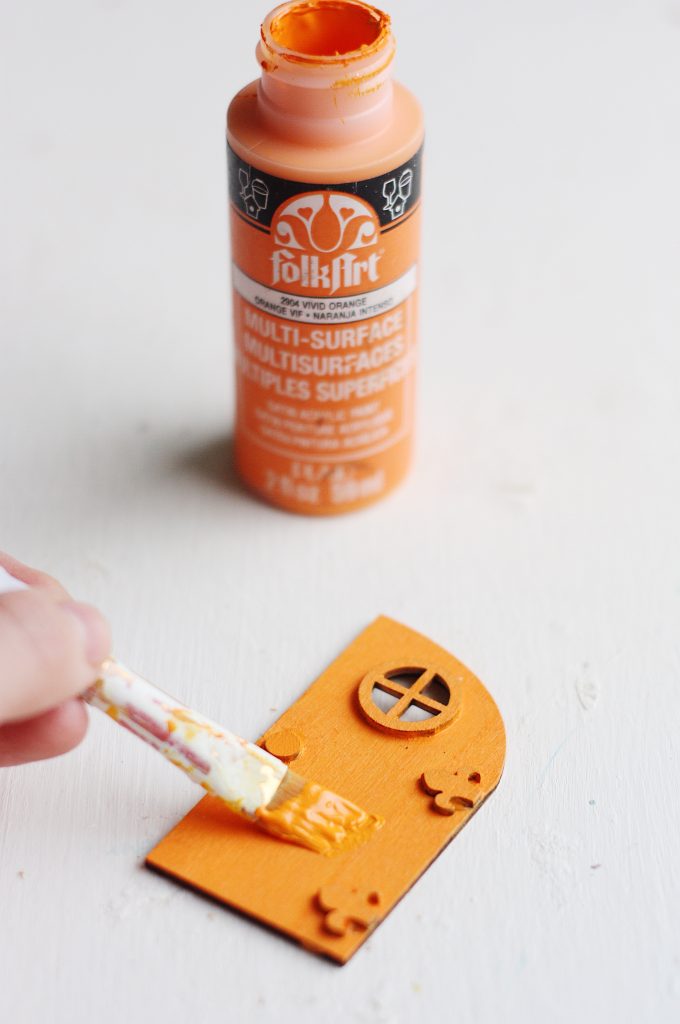
- Paint your house and each of the FolkArt wooden surfaces you will be using. I used FolkArt Multi-Surface since my fairy garden is going to stay inside. Let dry completely.
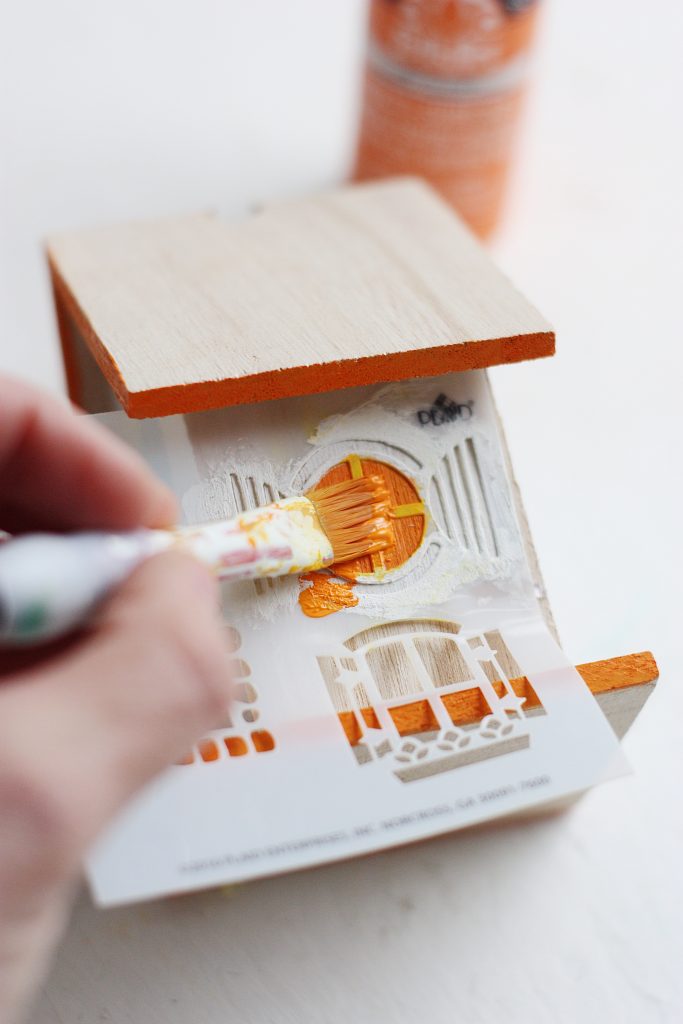
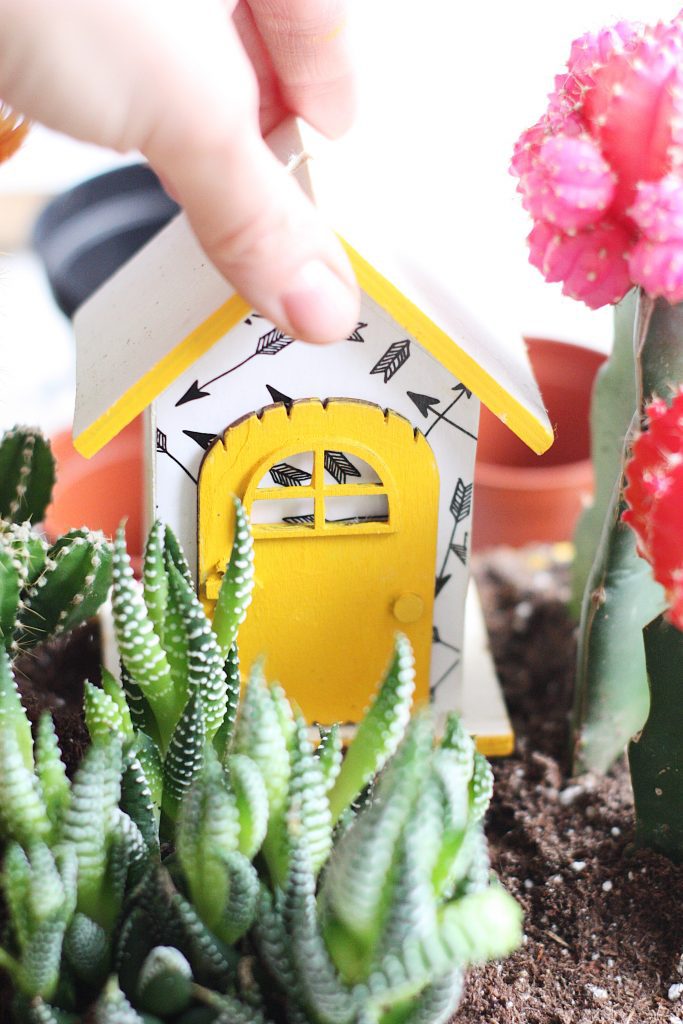
 2. Using FolkArt 3×3 Mini Stencils, apply some details to your house! These stencils come in every design you can imagine with so many darling fairy garden designs to make your project one of a kind. I loved adding these cute windows to my houses!
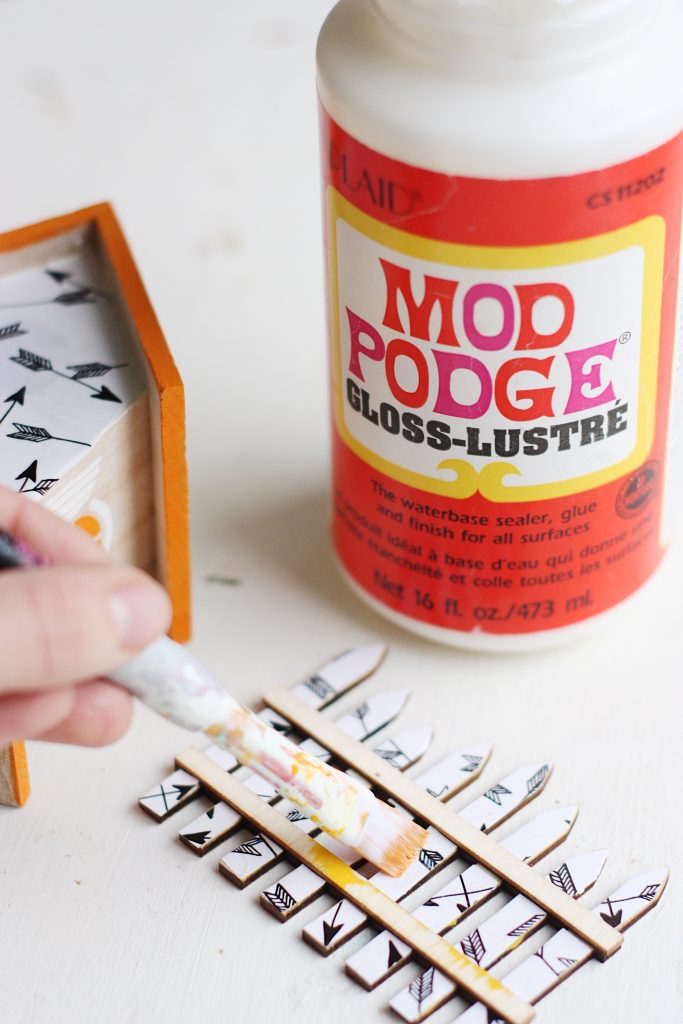
3. Measure and cut your patterned paper to match the size of wherever you’d like to add paper. I applied mine to the front of my houses and to one of the FolkArt wooden fences. Using Mod Podge, apply and seal the paper to the houses and fence. Let dry completely.

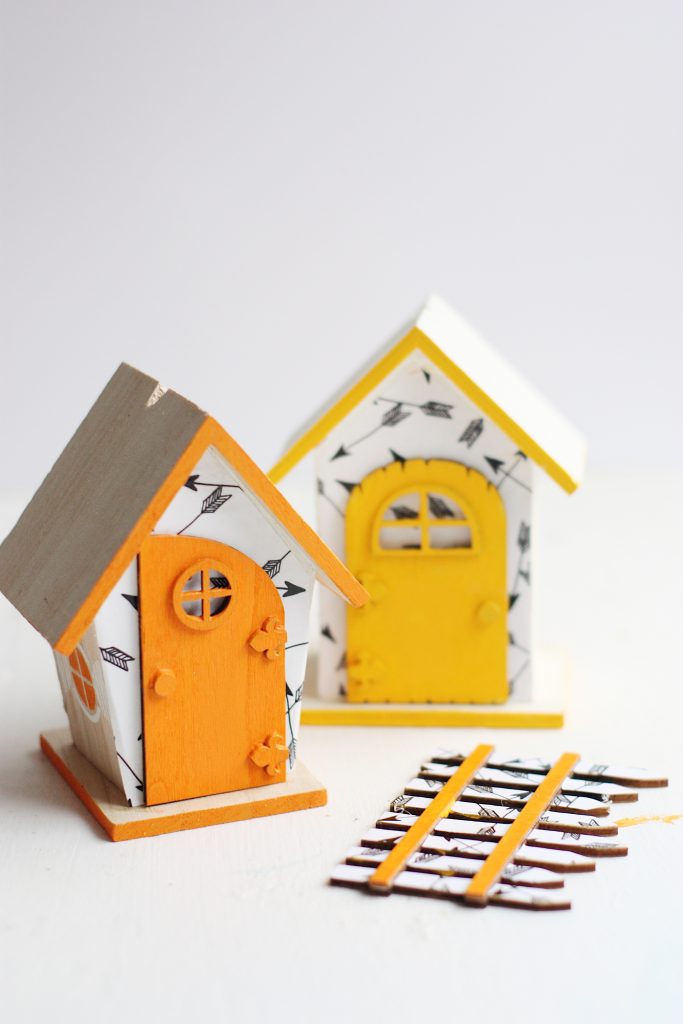
4. Once the house and fence are dry, attach the wooden surfaces you are using to your houses using hot glue.
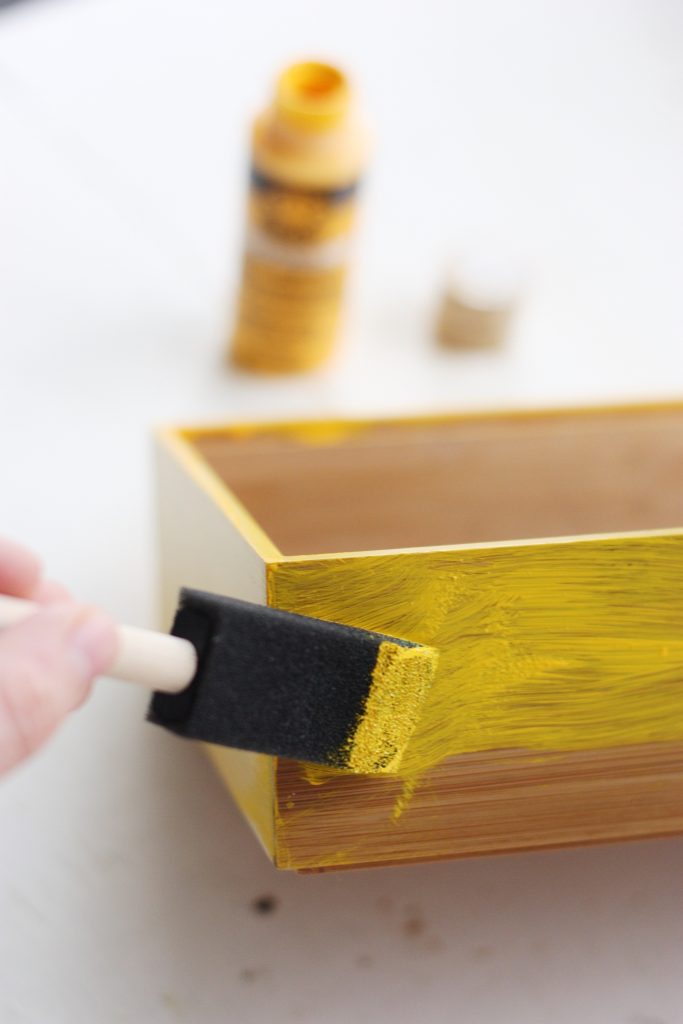
5. If your planter is unfinished like mine was, paint it using FolkArt Multi-Surface or FolkArt Outdoor™. Apply two coats and let dry completely.
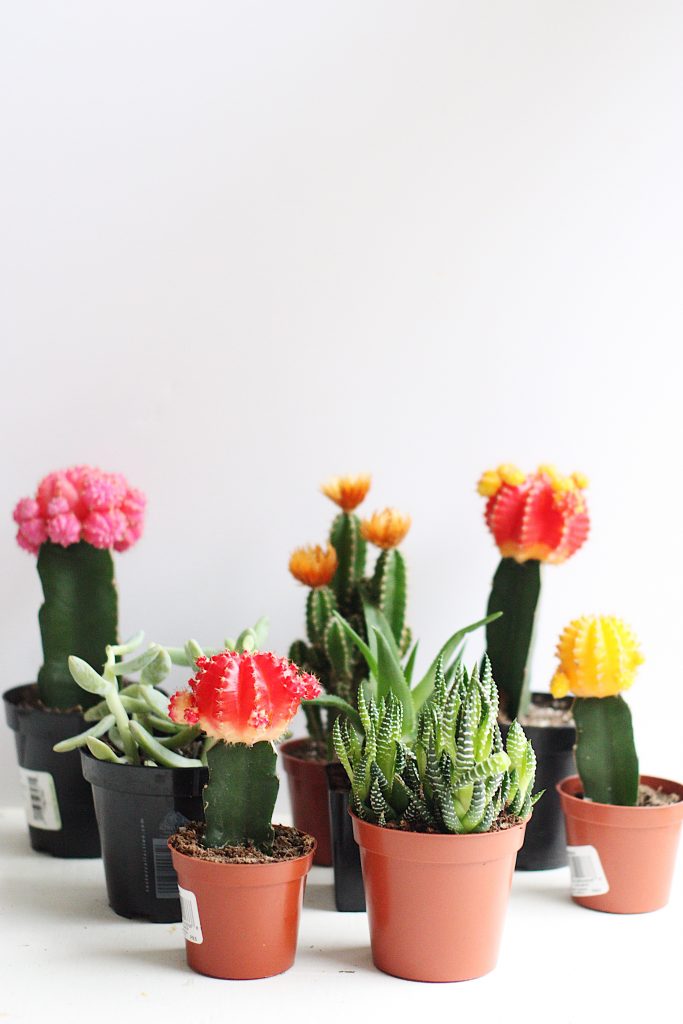
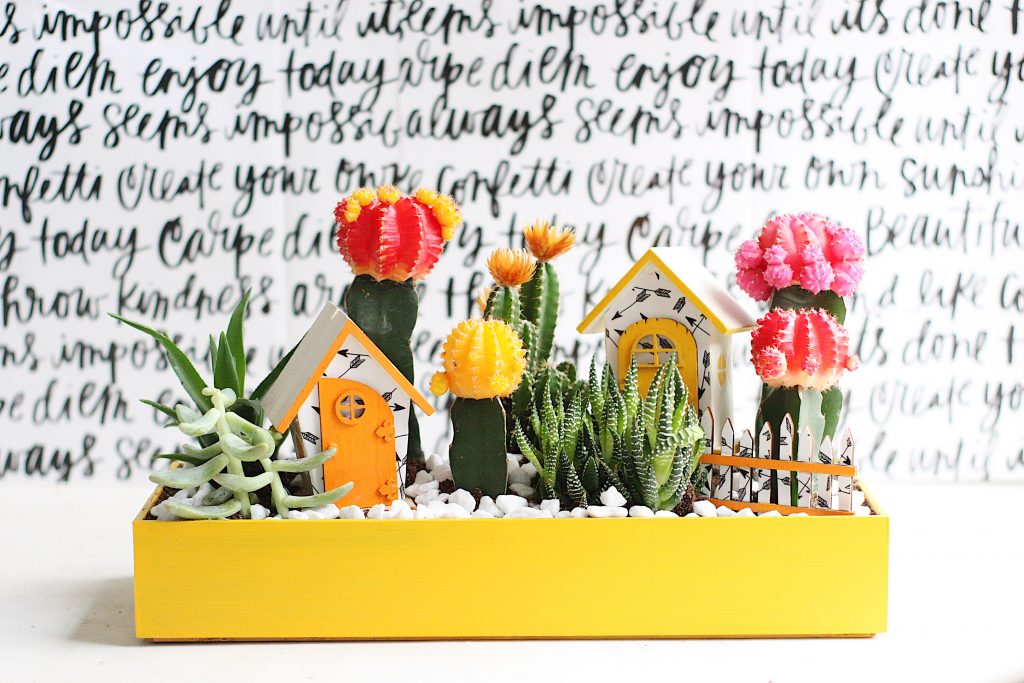
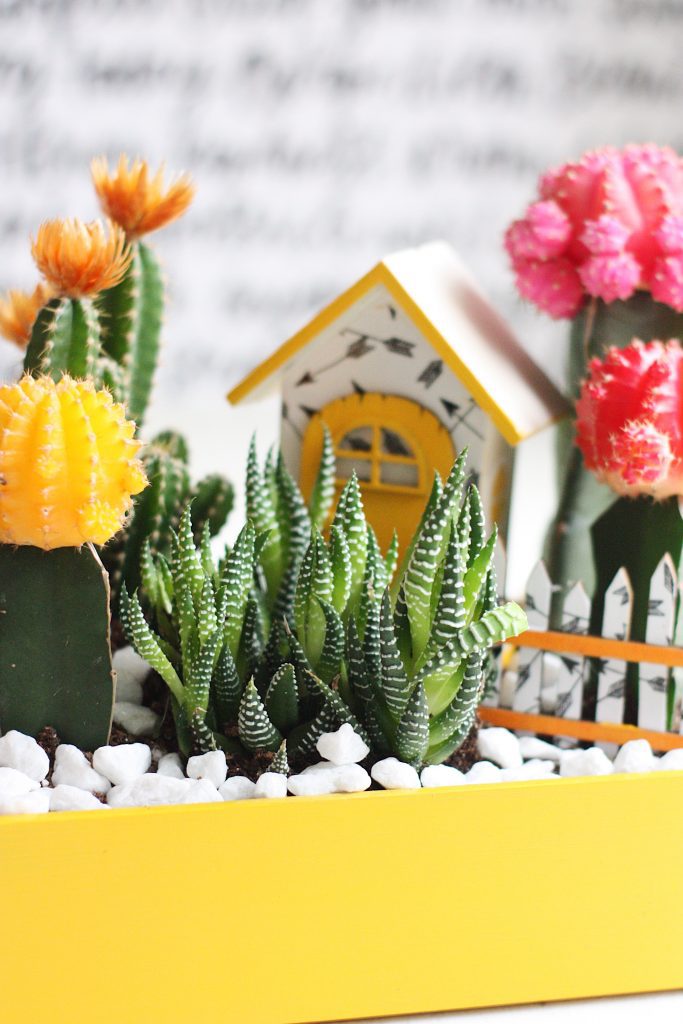
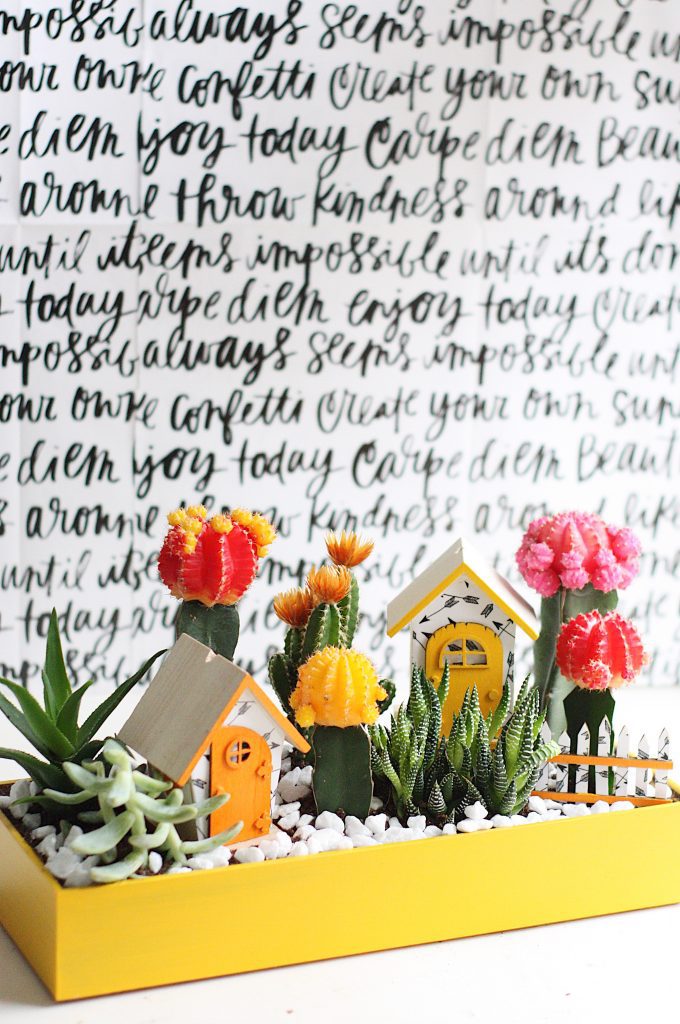
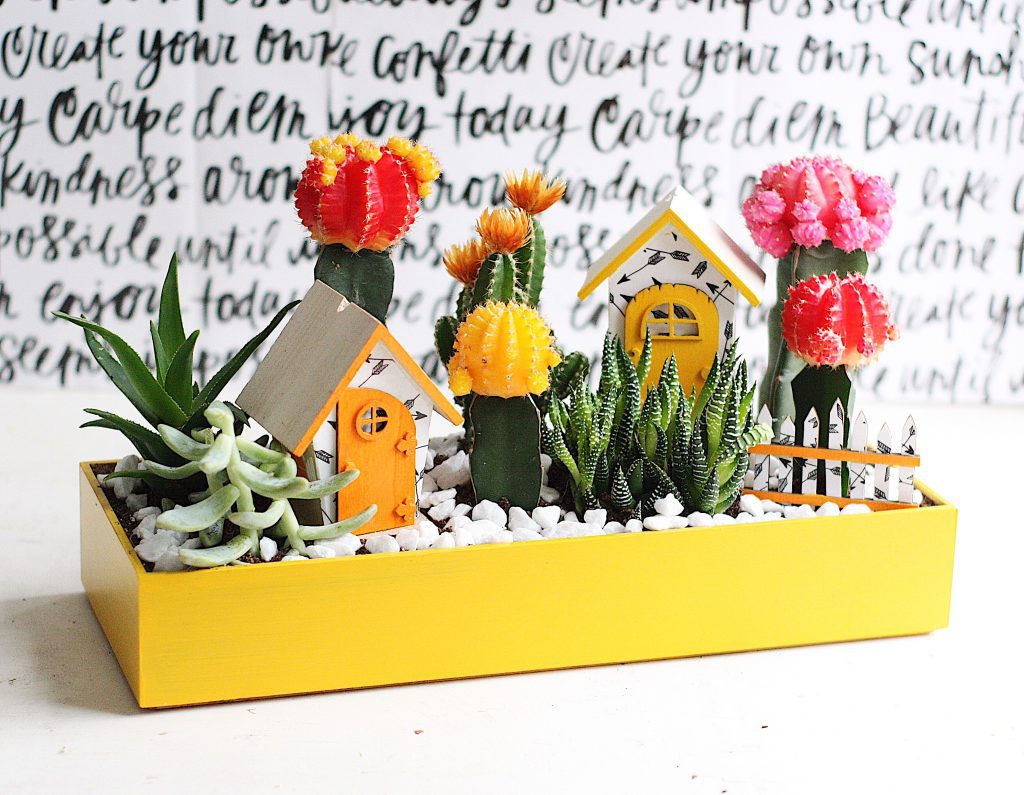
6. Once your planter is dry, it’s time to build your garden! I loved picking out plants that were a variety of sizes and colors to make it look really magical. (Plus, cacti and succulents are the hardest to kill, and since I’m going to need A LOT of fairy magic to keep a garden alive, using these kinds of plants are right up my alley.) Using your potting soil arrange and plant all of your plants.

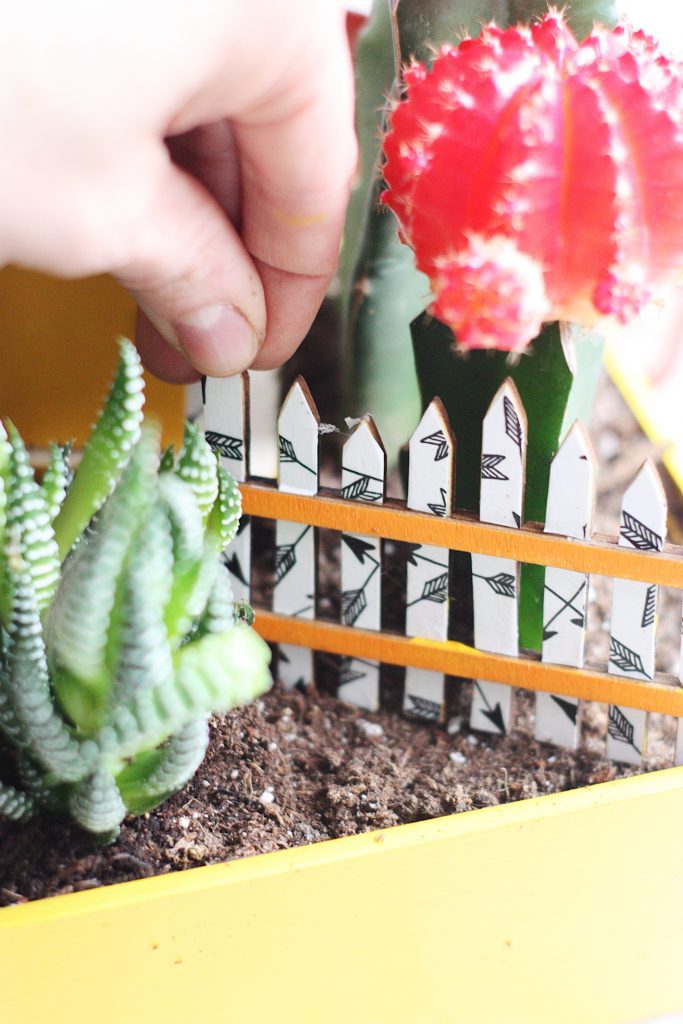
7. After you have planted all of your plants, add your fairy garden elements, sprinkle with pebbles and that’s it!
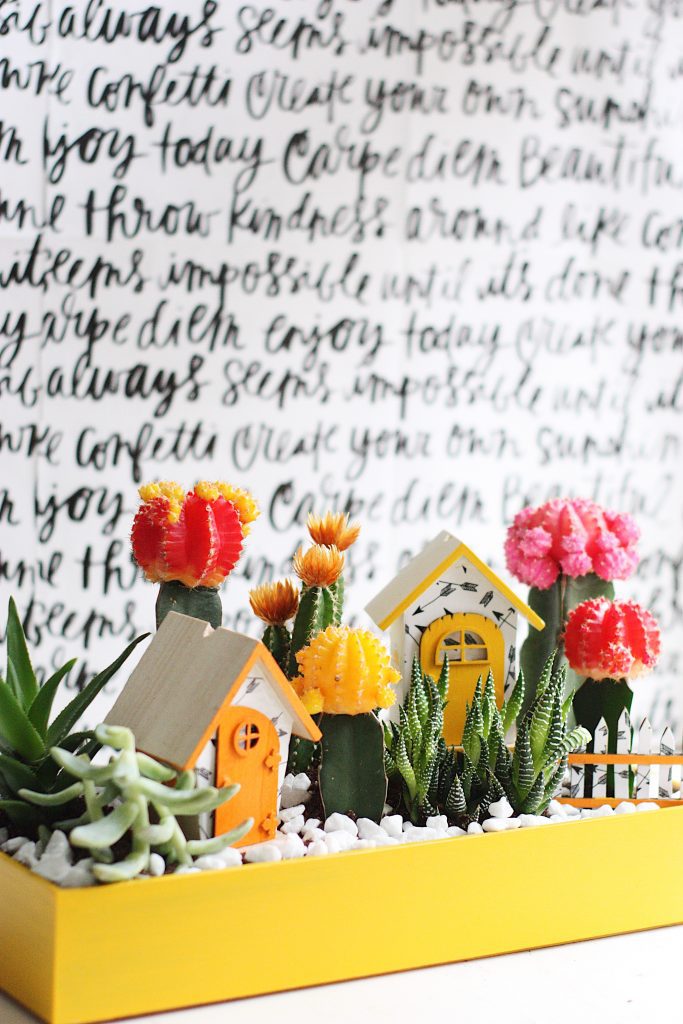
Isn’t it adorable? The bright colors and all of the different plant textures are so stunning and I love the addition of the patterned paper to give it even more visual interest. I mean, if I were a fairy looking for a garden, I’d move in ASAP.

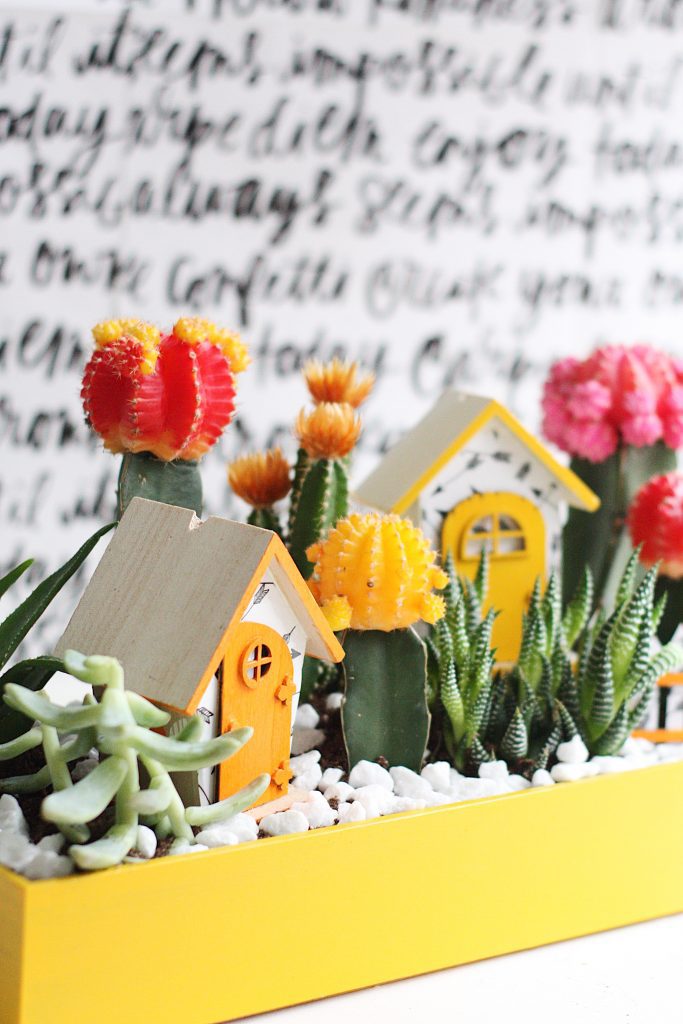
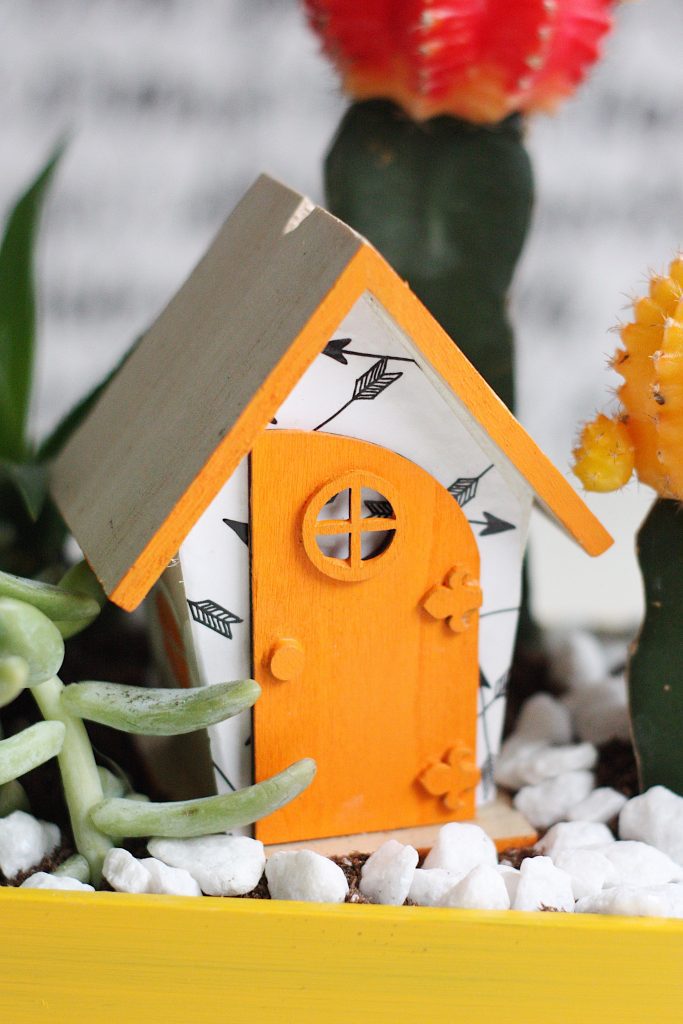
Aren’t the houses the cutest? With all of the FolkArt stencils, surfaces, and of course, hundreds of colors of paint, the possibilities for creating a fairy garden are endless and SO much fun. I didn’t think I’d say it at first, but I’m onboard with this trend. It’s pretty magical.


What do you think? Are you ready to build your own? I’d love to hear what ideas you have! And for more inspiration from Plaid Crafts, be sure to keep up with them on Facebook, Instagram, Pinterest, and via Email!
Happy gardening!
ox. Liz


[…] Pretty Life Girls – Cactus Fafiry Garden […]